Easy Pumpkin Pull-Apart Bread

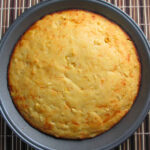
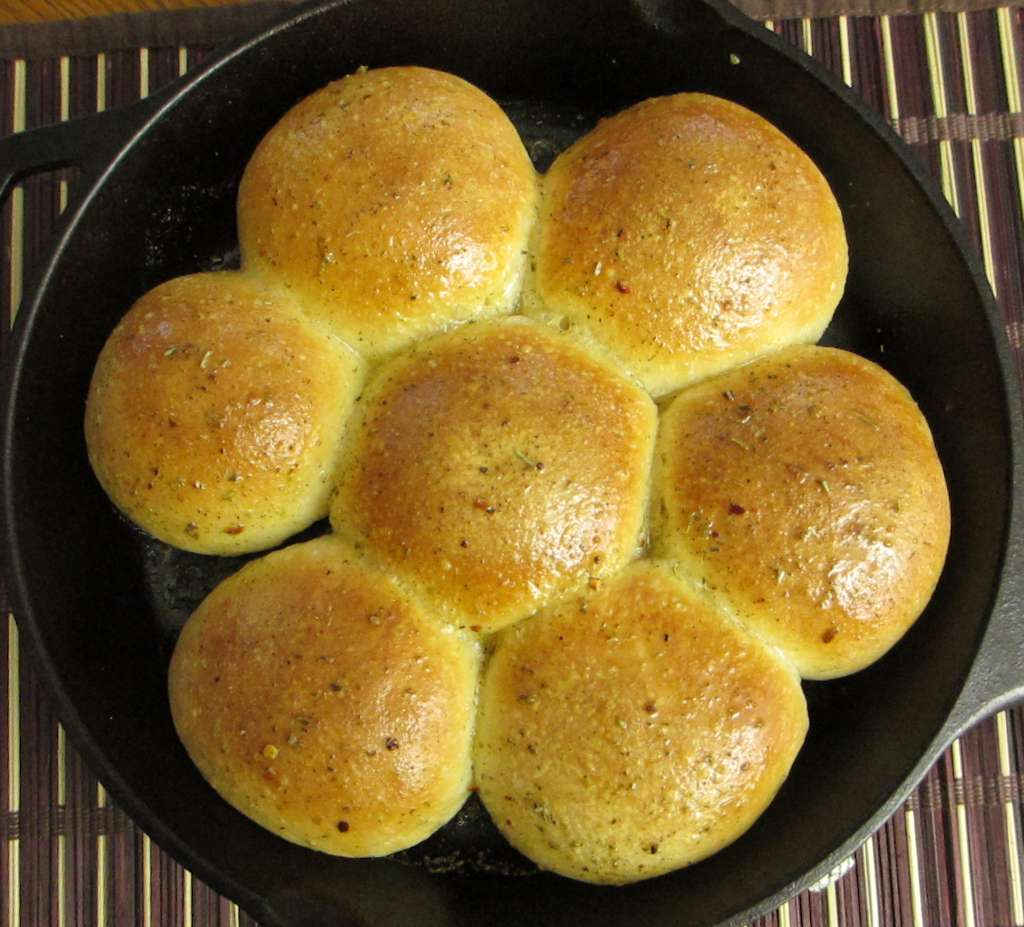
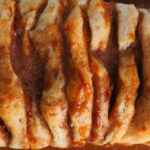
It’s pumpkin time! And that means quick, easy pumpkin pull-apart bread. Moist, pumpkin-y, cinnamon-y, and guaranteed to disappear very, very quickly. I made a ‘loaf’ for my wife to take to work (you don’t have to reheat it and it doesn’t require refrigeration if you devour it within two days, which you will) and share. It was gone in no time at all!

Easy Pumpkin Pull-Apart Bread

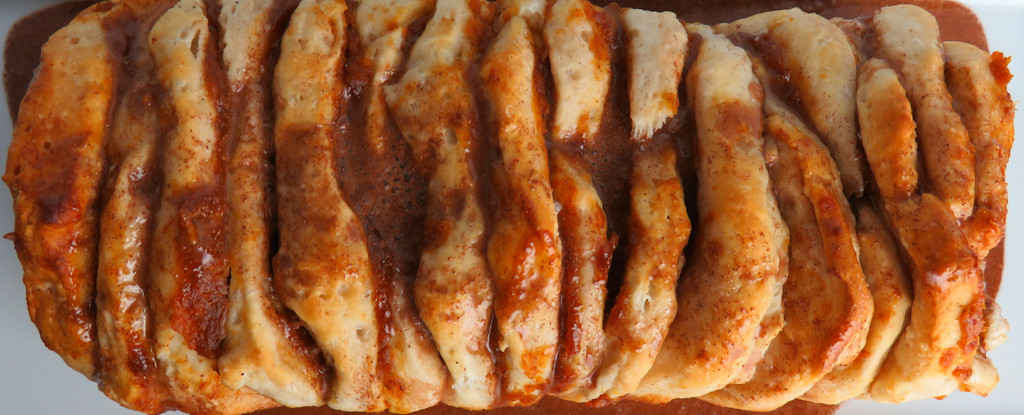
The only tricky part when making this pumpkin pull-apart bread is if your bread pan is bigger than the bread. Like mine was. Your bread will fall and you’ll end up with a loaf of sadness if you let it. The solution for me was to grab a piece of foil, wad it up into a ball, and place it in the space between the end of the ‘loaf’ and the end of the bread pan. No bread sadness here, just great fall-flavor yumminess!

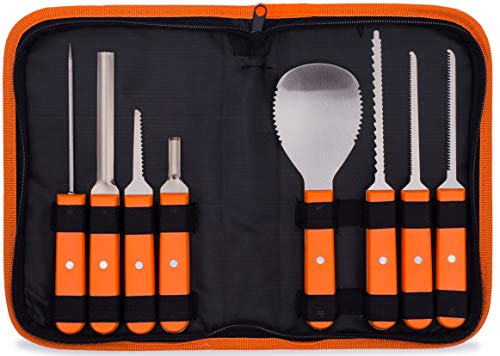
Halloween is my favorite day of the year! I love carving pumpkins! I admit I usually buy too many pumpkins and end up on a carving marathon the day of Halloween. By trick-or-treat time I’m worn out but it’s worth it!

Love pumpkin? Me too. And I love my triple-layer pumpkin spice pie too!

Easy Pumpkin Pull-Apart Bread
Print Pin
4 from 1 vote

Easy Pumpkin Pull-Apart Bread

It’s pumpkin time! And that means quick, easy pumpkin pull-apart bread. Moist, pumpkiny, cinnamony, and guaranteed to disappear very, very quickly. 
Course Side
Cuisine American
Keyword bread, pumpkin
Prep Time 15 minutes
Cook Time 45 minutes
Total Time 1 hour
Servings 16 servings
Calories 164kcal

Equipment

Ingredients

For the pull-apart bread

For the glaze

Instructions

For the pull-apart bread

  • Preheat your oven to 350 F.
  • Spray a bread pan with non-stick spray. Note: I used a non-stick bread pan and did not have to spray it.
  • In a bowl, stir together the pumpkin puree, 1/4 cup of the sugar, vanilla, pumpkin pie spice and egg.
  • In a small bowl, combine the remaining 1/4 cup of sugar and the cinnamon.
  • Open the can of biscuits and separate them. Cut each one in half, horizontally.
  • Sprinkle each side of each biscuit half with the sugar and cinnamon mixture.
  • Take a biscuit and liberally brush one side with the pumpkin mixture. Place into the bread pan on edge, with the non-pumpkin side towards the end.
  • Keep adding brushed biscuits into the pan, packing them in on end. They’ll look like a row of hockey pucks when you are done. When you are done, if there is extra space in your pan wad up a piece of foil and add it to keep the ‘loaf’ from falling.
  • Place into the oven and bake 20-25 minutes or until the outside is done. The internal temperature should be 190 F or more, but the insides will be gooey and soft, thanks to the pumpkin puree.
  • Let the bread cool completely before drizzling with the glaze.

For the glaze

  • Whisk together all ingredients until smooth.

Nutrition

Calories: 164kcal | Carbohydrates: 25g | Protein: 2g | Fat: 6g | Saturated Fat: 1g | Trans Fat: 1g | Cholesterol: 16mg | Sodium: 278mg | Potassium: 97mg | Fiber: 1g | Sugar: 11g | Vitamin A: 1847IU | Vitamin C: 1mg | Calcium: 24mg | Iron: 1mg

Nutritional values are approximate.

Jalapeno Popper Cheesy Garlic Bread

I love jalapeno poppers. Jalapenos stuffed with cream cheese are a great thing. The peppers mellow a bit. The creamy cheese cools the heat a bit. So, why not put those same great tastes together and make a jalapeno popper cheesy garlic bread? Yes, why not! Because we’re all tired of the standard garlic cheese bread. I mean hey, it’s good, but it needs some kick!

Jalapeno Popper Cheesy Garlic Bread

I made two ‘versions’ of this Jalapeno Popper Cheesy Garlic Bread. The top one was a little lighter on the jalapenos in case they would scare people off. The bottom one was loaded and loaded good. They were both fantastic and disappeared in no time at all.

Substitute Asiago or Swiss cheese for the mozzarella for a totally different taste. No matter what you use, you’re going to end up enjoying some great cheesy hot (and I do mean spicy hot) bread. This isn’t some fru-fru French restaurant bread.

I highly recommend that you shred or grate your own cheese at home. Don’t buy the pre-shredded or pre-grated stuff. It has stuff added to it to keep it from sticking together. That ‘stuff’ affects how the cheese melts. Shred it yourself and use the good stuff.

Also try my olive cheese bread.

Jalapeno Popper Cheesy Garlic Bread
Print Pin
4 from 1 vote

Jalapeno Popper Cheesy Garlic Bread

I love jalapeno poppers. Jalapenos stuffed with cream cheese are a great thing. The peppers mellow a bit. The creamy cheese cools the heat. So, why not put those same great tastes together and make a jalapeno popper cheesy garlic bread? Yes, why not!
Course Bread
Cuisine American
Keyword cheesy, garlic bread, jalapeno popper, spicy
Prep Time 5 minutes
Cook Time 15 minutes
Total Time 20 minutes
Servings 8
Calories 561kcal

Ingredients

Instructions

  • Preheat your oven to 400 F.
  • Cut bread in half lengthwise.
  • Brush the insides with the melted butter and sprinkle with the garlic powder.
  • Bake for 5 minutes to get the bread a little crispy.
  • Meanwhile, combine the cream cheese, sour cream, chopped jalapenos, salt and pepper.
  • When the bread has cooked spread both sides with the cream cheese mixture.
  • Sprinkle with cheese and add the jalapeno slices.
  • Bake for another 4-5 minutes or until the cheese has melted.
  • Slice and serve.

Nutrition

Calories: 561kcal | Carbohydrates: 32g | Protein: 11g | Fat: 44g | Saturated Fat: 25g | Trans Fat: 1g | Cholesterol: 70mg | Sodium: 474mg | Potassium: 205mg | Fiber: 2g | Sugar: 19g | Vitamin A: 837IU | Vitamin C: 7mg | Calcium: 141mg | Iron: 1mg

Nutritional values are approximate.

Fat Johnny’s Cheesy Cornbread

Chez John (aka Fat Johnny) turns out some mighty darned good grub (check out his awesome food blog at Fat Johnny’s Front Porch). Like his Fat Johnny’s cheesy cornbread, one of our all-time favorites. We absolutely love the addition of sweet corn to cornbread. It not only adds a little ‘pop’ to every bite, it adds a sweetness and it helps keep the cornbread moist. The cornbread cooks up perfectly. Soft and moist with an incredible cheesy flavor, this is nothing but fantastic.

Fat Johnny's Cheesy Cornbread

Just about anything can be added to Fat Johnny’s cheesy cornbread. Try finely chopped cooked Mexican chorizo. Or ham or bacon. Or broccoli. Really, anything. But at least the first time, you have to make it the way Chef makes it because it’s out-of-this-world fantastic. You won’t want to make cornbread any other way again.

We cooked the cornbread in round pans, but of course you can use muffin tins instead. You can also use a cast iron skillet. The cornbread might cook quicker in tins, so keep an eye on it after about 15 minutes of cooking. Just slide a toothpick into the centers. If it comes out clean, the cornbread is ready to take out and serve!

Fat Johnny's Cheesy Cornbread
Print Pin
5 from 1 vote

Fat Johnny’s Cheesy Cornbread

We absolutely love the addition of sweet corn to cornbread. The cornbread cooks up perfectly. Soft and moist with an incredible cheesy flavor.
Course Side
Cuisine American
Keyword cheesy, cornbread
Prep Time 10 minutes
Cook Time 20 minutes
Total Time 30 minutes
Servings 8
Calories 284kcal
Author Chez John

Ingredients

Instructions

  • Preheat your oven to 375 F.
  • Set out two medium bowls.
  • In one bowl, gently stir together all of the wet ingredients.
  • In the other bowl stir together the dry ingredients.
  • Fold the wet ingredients into the dry, forming a batter. If it’s too clumpy add more buttermilk, a little at a time, and stir.
  • Pour batter into a muffin tin or pie pan.
  • Bake 15-20 minutes or until a toothpick inserted into the middle comes out clean.

Nutrition

Calories: 284kcal | Carbohydrates: 36g | Protein: 9g | Fat: 12g | Saturated Fat: 7g | Trans Fat: 1g | Cholesterol: 50mg | Sodium: 617mg | Potassium: 179mg | Fiber: 3g | Sugar: 6g | Vitamin A: 361IU | Vitamin C: 1mg | Calcium: 234mg | Iron: 2mg

Nutritional values are approximate.

Buttery Garlic Herb Knots

Yummy, buttery, garlicky, herby bread. All good things. And very easy to make since I used pre-made pizza dough. I’m not that great at tying knots into raw dough strips, it would seem. But that didn’t matter a bit. These buttery garlic herb knots came out tasting perfect.

Buttery Garlic Herb Knots

For the marinara I used my absolutely go-to homemade pizza sauce. It has the perfect pizza sauce flavor. I make it by the gallon (well, it seems that way at least) and freeze it in small portions so I always have it on hand. It’s perfect for dipping a few buttery garlic herb knots.

Serve a little warmed pizza sauce or marinara on the side for dipping the bread. I use these little sauce dipping cups. They’re the perfect single-serve size!

Also try my easy cheesy breadsticks.

Buttery Garlic Herb Knots
Print Pin
5 from 1 vote

Buttery Garlic Herb Knots

Yummy, buttery, garlicky, herby bread. All good things. And very easy to make since I used pre-made pizza dough.
Course Bread
Cuisine American
Keyword bread, garlic, rolls
Prep Time 15 minutes
Cook Time 20 minutes
Total Time 35 minutes
Servings 16 knots
Calories 59kcal

Ingredients

Instructions

  • Preheat oven to 425 F.
  • In a small saucepan, melt the butter.
  • Stir in the thyme, rosemary, 1 tablespoon of the Parmesan, and the garlic powder.
  • Lightly dust a work surface with flour.
  • Remove pizza crusts from tubes and unroll onto the surface. Roll out into rectangles.
  • Brush tops of dough with butter mixture. Fold dough over on top of itself.
  • Using a pizza cutter, cut each dough in half, then repeat until you have 8 strips about an inch wide. You don’t have to get too particular in how wide they are on how straight they are cut.
  • Grab ends of each strip and ‘tie’ them into a knot. Gently, don’t pull on the ends real hard or the dough will break.
  • Lay knots onto a baking sheet (you’ll need two pans) sprayed with non-stick spray. Fold the tips of the dough under the knots so they don’t cook too fast.
  • Bake 18-20 minutes or longer depending on how golden brown you want your knots.
  • Remove from oven and let cool slightly. Brush with remaining butter and sprinkle with remaining cheese and serve hot with warmed marinara sauce for dipping if desired.

Nutrition

Calories: 59kcal | Carbohydrates: 1g | Protein: 1g | Fat: 6g | Saturated Fat: 4g | Trans Fat: 1g | Cholesterol: 16mg | Sodium: 26mg | Potassium: 14mg | Fiber: 1g | Sugar: 1g | Vitamin A: 236IU | Vitamin C: 2mg | Calcium: 25mg | Iron: 1mg

Nutritional values are approximate.

Easy Cheesy Breadsticks

Well, it doesn’t get much easier than these easy cheesy breadsticks. In about 15 minutes you’ll have a nice big batch of crunchy, tasty breadsticks. This recipe makes enough breadsticks for a small crowd, perfect for a large family meal. Or it makes enough for a very small number of people that really enjoy great breadsticks!

Easy Cheesy Breadsticks

The pre-made dough is what makes this so simple to make. You can also use fresh pizza dough, but you might have to adjust the amounts of the other ingredients. I served these easy cheesy breadsticks with our homemade pizza sauce, but you can use jarred if you want. They’d also be great served with marinara sauce, warmed. You can also serve them with warmed cheese sauce. Or both now that I think about it!

For a spicy version, use shredded pepper jack or habanero jack cheese in place of the Italian cheese blend.

I highly recommend that you shred or grate your own cheese at home. Don’t buy the pre-shredded or pre-grated stuff. It has stuff added to it to keep it from sticking together. That ‘stuff’ affects how the cheese melts. Shred it yourself and use the good stuff.

Also try my chipotle garlic cheese bread.

Easy Cheesy Breadsticks
Print Pin
5 from 1 vote

Easy Cheesy Breadsticks

Well, it doesn’t get much easier than these easy cheesy breadsticks. In about 15 minutes you’ll have a nice batch of crunchy, tasty breadsticks.
Course Side
Cuisine American
Keyword breadsticks, cheesy
Prep Time 3 minutes
Cook Time 12 minutes
Total Time 15 minutes
Servings 8
Calories 28kcal
Author Mike

Ingredients

Instructions

  • Preheat oven to 425 F.
  • Unroll pizza dough onto a greased cookie sheet and press out until thin.
  • Combine garlic salt and butter and brush over top of the dough.
  • Sprinkle cheeses and basil over the top of the dough.
  • Using a pizza cutter, cut the dough into 12 strips, and then cut them in half. Do not pull the strips apart.
  • Bake for 10-12 minutes or until light golden brown.
  • Re-cut the strips and pull them apart.
  • Serve sticks warm with warmed pizza or marinara sauce.

Nutrition

Calories: 28kcal | Carbohydrates: 1g | Protein: 2g | Fat: 2g | Saturated Fat: 1g | Cholesterol: 2mg | Sodium: 99mg | Potassium: 16mg | Fiber: 1g | Sugar: 1g | Vitamin A: 12IU | Vitamin C: 1mg | Calcium: 34mg | Iron: 1mg

Nutritional values are approximate.

Bread Machine Burger Buns

These bread machine burger buns are about as easy as you can possibly get. That’s why I have a bread machine. I can’t bake anything from scratch. Believe me, I’ve tried and tried. So without shame, I use my bread machine any chance I get, for anything from pizza dough (absolutely incredible) to these fantastic buns.

These buns have a nice little crunch with a soft interior. They’re a little sweet and moist. Perfect for burgers. Or sliders.

Bread Machine Burger Buns

Shown above are my awesome Louisiana burgers, served on homemade buns. These bread machine burger buns are a bit easier to make than my bun dough made using a mixer, but just as great.

Bread Machine Burger Buns
Print Pin
5 from 1 vote

Bread Machine Burger Buns

These bread machine burger buns are about as easy as you can possibly get. That’s why I have a bread machine. I can’t bake anything from scratch. Believe me, I’ve tried and tried. 
Course Bread
Cuisine American
Keyword bread machine, buns
Prep Time 5 minutes
Cook Time 2 hours 30 minutes
Total Time 2 hours 35 minutes
Servings 12 buns
Calories 190kcal
Author Mike

Ingredients

Instructions

  • Add ingredients EXCEPT for the butter to bread machine in the order listed.
  • Select the dough cycle.
  • When completed, turn the dough out onto a lightly floured surface. Roll into a 1″ thick large circle.
  • Using a 3 1/2″ round cookie cutter (or a similarly-sized glass), cut the dough into 6 rounds. (For slider buns, use a 1 1/2″ cutter)
  • Transfer to a greased cookie sheet. Brush the tops with the butter.
  • Cover and let rise in a warm place for 1 hour or until doubled in size.
  • Transfer to an oven preheated to 350 F and bake until golden brown, 10-15 minutes.
  • Let cool before slicing.

Nutrition

Calories: 190kcal | Carbohydrates: 34g | Protein: 6g | Fat: 3g | Saturated Fat: 1g | Trans Fat: 1g | Cholesterol: 19mg | Sodium: 163mg | Potassium: 89mg | Fiber: 1g | Sugar: 6g | Vitamin A: 90IU | Vitamin C: 1mg | Calcium: 37mg | Iron: 1mg

Nutritional values are approximate.

Bread Machine Pizza Dough

I flat-out absolutely cannot bake. I’ve tried and tried. I am missing whatever gene is required to make perfect bread, dough, rolls or biscuits from scratch. So that’s why I have a bread machine. I’ve been using mine more and more lately, and one of the recipes I love to make in it is this bread machine pizza dough.

Bread Machine Pizza Dough

This bread machine pizza dough is soft and a bit sweet, but with a little heat too. The bottom gets nice and crunchy while the top stays as soft as you can imagine.

This recipe makes a large pizza. I usually cut the dough in half and make two medium sized pizzas, cooking them on my Weber Performer grill using a pizza stone. If you are cooking your pizza on a stone, make sure to lightly dust the stone with corn flour before placing the dough onto it. It prevents sticking and helps you get a nice crunchy crust.

Bread Machine Pizza Dough
Print Pin
5 from 1 vote

Bread Machine Pizza Dough

This dough is soft and a bit sweet, but with a little heat too. The bottom gets nice and crunchy while the top stays as soft as you can imagine.
Course Main
Cuisine American
Keyword bread machine, dough, pizza
Prep Time 5 minutes
Cook Time 2 hours
Total Time 2 hours 5 minutes
Servings 1 pizza
Calories 1570kcal

Ingredients

Instructions

  • Place the ingredients into your bread machine in the order listed.
  • Select the dough cycle on your machine.
  • When done, let the dough rest 5-30 minutes then remove.
  • Roll out to the desired shape and size.
  • Add toppings.
  • Bake in an oven at 425 F or on a pizza stone on a grill for 10-12 minutes or until done.

Nutrition

Calories: 1570kcal | Carbohydrates: 319g | Protein: 50g | Fat: 10g | Saturated Fat: 1g | Sodium: 2746mg | Potassium: 735mg | Fiber: 19g | Sugar: 19g | Vitamin A: 592IU | Vitamin C: 3mg | Calcium: 105mg | Iron: 19mg

Nutritional values are approximate.

Copycat Subway Bread

I made a copycat version of Subway’s Italian BMT sandwich early last year. And it was good, mighty good… But, I used a loaf of French bread I picked up at my local grocery store. Not that there’s anything wrong with that, it just has been nagging at me ever since. It just wasn’t quite like the real Subway bread. But this copycat Subway bread is. And it makes all the difference in the world. Every sandwich I made with this bread was to die for. Perfect.

Copycat Subway Bread

I should add that I can’t bake. I’ve had numerous failures. Many more failures than successes. But, I don’t give up. This recipe for a copycat Subway bread is actually very easy, though not quite fool-proof. Even if you’re a bad baker like I am you can pull it off.

If you’ve even been to Schlotsky’s, try my copycat of their bread and signature sandwich too. If you’re jonesin’ for a Subway classic, make my copycat Subway chipotle southwest sauce.

Copycat Subway Bread
Print Pin
4.60 from 5 votes

Copycat Subway Bread

Every sandwich I made with this bread was to die for. Perfect.
Course Bread
Cuisine American
Keyword bread, copycat
Prep Time 10 minutes
Cook Time 2 hours 30 minutes
Total Time 2 hours 40 minutes
Servings 3 loaves
Calories 492kcal
Author Mike

Ingredients

Instructions

  • Place warm water, yeast, sugar, salt and olive oil into the bowl of a mixer with a dough hook and let stand for 5 minutes until well bloomed.
  • Add 1 cup of all-purpose flour and mix for 3-5 minutes until combined.
  • Add 1 more cup of flour and mix until combined.
  • Continue adding flour 1/4 cup at a time until the dough is nice and soft, about 8 minutes. It should not stick to the sides of the bowl, but will stick a bit to the bottom. If it crumbles and falls apart, it is too dry, so add water (a teaspoon at a time) with the mixer running until the consistency is correct.
  • Lightly flour a work surface. Knead the dough until it is smooth and soft. This took me 5 or so minutes. It’s a workout, too, but worth it. Don’t give up!
  • Wipe out the mixer bowl and wipe with a paper towel that has been very lightly oiled.
  • Shape the dough into a ball and return to the mixer bowl. Cover with wrap and let rise in a warm place for one half to one hour or until it has doubled in size.
  • Line a baking sheet pan (or two) with parchment paper.
  • Dump the dough onto your lightly floured surface and divide into 4 equally sized pieces.
  • Shape (roll) each dough piece until it is a 9″ long loaf that is roughly the same thickness all over. Mine came out about 1 1/2″ – 2″ thick.
  • Transfer dough to the baking sheet, keeping them 2″ apart. I needed two pans.
  • Cover with plastic wrap that has been sprayed lightly with non-stick spray.
  • Place in a warm place and let rise until doubled, about an hour.
  • Meanwhile, preheat your oven to 350 F.
  • When loaves have doubled, remove plastic wrap and bake for 25 minutes.
  • When loaves are done, remove from the oven and immediately rub the tops with the stick of butter. You don’t need much, but you do want to rub the entire top of the loaf. This will give the loaves the perfect crust and texture.
  • Cover with a clean towel and let cool for 30 minutes.
  • Slice as desired and enjoy!

Nutrition

Calories: 492kcal | Carbohydrates: 101g | Protein: 14g | Fat: 3g | Saturated Fat: 1g | Sodium: 1332mg | Potassium: 158mg | Fiber: 4g | Sugar: 4g | Vitamin A: 42IU | Vitamin C: 1mg | Calcium: 26mg | Iron: 6mg

Nutritional values are approximate.

Gotta-Have-It Garlic Bread

Normally, when I run across a recipe that I want to make, I add my own twist to it. That’s not the case with this gotta-have-it garlic bread recipe from Aaron McCargo Jr. I wish he’d do more shows for the Food Network. This is truly a fantastic garlic bread recipe. It has lots of great flavor, including a hint of heat.

Gotta-Have-It Garlic Bread

This is the only garlic bread I’ll make from now on, although my traditional cheesy garlic bread is pretty normal. The search is over. Gotta-have-it garlic bread is the winner, plain and simple!

PS: The spread on this bread is incredibly yummy. I’m now trying to find a way to incorporate it into a po boy, in some way…

Gotta-Have-It Garlic Bread
Print Pin
5 from 1 vote

Gotta-Have-It Garlic Bread

 This is truly a fantastic garlic bread recipe. It has lots of great flavor, including a hint of heat.
Course Side
Cuisine American
Keyword garlic bread
Prep Time 5 minutes
Cook Time 5 minutes
Total Time 10 minutes
Servings 6
Calories 402kcal

Ingredients

Instructions

  • Whisk together all ingredients except the bread.
  • Preheat the broiler on your oven.
  • Spread the mixture over the cut side of each piece of bread. Do not be shy, load up the bread with the yumminess.
  • Place bread on a baking sheet and place under the broiler until it is golden browned and crispy.
  • Slice and serve.

Nutrition

Calories: 402kcal | Carbohydrates: 39g | Protein: 9g | Fat: 24g | Saturated Fat: 11g | Trans Fat: 1g | Cholesterol: 46mg | Sodium: 431mg | Potassium: 112mg | Fiber: 2g | Sugar: 2g | Vitamin A: 712IU | Vitamin C: 1mg | Calcium: 59mg | Iron: 3mg

Nutritional values are approximate.

Italian Herb Skillet Bread

Rhodes dinner rolls make for a great, easy accompaniment to any meal. This Italian herb skillet bread version kicks them up a bit by topping them with savory herbs.

Italian Herb Skillet Bread

You can substitute any seasonings you prefer on your Italian herb skillet bread. I found these rolls to be quite yummy with a honey-flavored BBQ rub too. If you don’t have an 8″ skillet, you can make these in a high-rimmed metal baking pan (such as a cake pan). Just make sure the roll dough balls are about 2″ apart.

Also try my garlic Parmesan skillet bread and my rapid rolls, also made in the skillet.

Italian Herb Skillet Bread
Print Pin
5 from 1 vote

Italian Herb Skillet Bread

Rhodes dinner rolls make for a great, easy accompaniment to any meal. This Italian herb skillet bread version kicks them up a bit by topping them with savory herbs.
Course Bread
Cuisine American
Keyword bread, herbs, Italian, skillet
Prep Time 5 minutes
Cook Time 4 hours 15 minutes
Total Time 5 hours 20 minutes
Servings 7
Calories 847kcal

Ingredients

Instructions

  • Lightly grease an 8″ cast iron skillet with shortening (or butter).
  • Place rolls in skillet, starting with one in the middle and the rest around it in a circle. The rolls should be about 2″ apart.
  • Cover the skillet with a towel and place in a warm place. Let rolls rise until touching, 4-5 hours.
  • Preheat oven to 350 F.
  • Combine the herbs with the butter. Gently brush the mixture onto the tops of the rolls.
  • Bake 15-20 minutes or until golden brown.

Nutrition

Calories: 847kcal | Carbohydrates: 141g | Protein: 27g | Fat: 20g | Saturated Fat: 5g | Cholesterol: 3mg | Sodium: 1614mg | Potassium: 420mg | Fiber: 12g | Sugar: 6g | Vitamin A: 138IU | Vitamin C: 1mg | Calcium: 582mg | Iron: 11mg

Nutritional values are approximate.