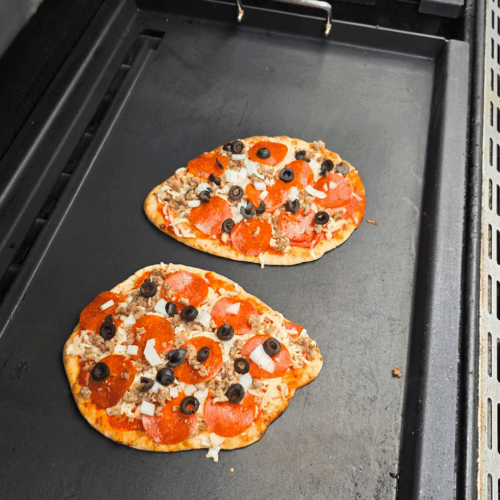
Italian Sub Quesadillas using an Outdoor Griddle

I’m not going to lie to you. I had a hankerin’ for an Italian sub for dinner. You know the kind. Warm French bread, tons of Italian-style cold cuts. Cheese. A little Italian salad dressing. Well, the bread gods weren’t smiling down on me. I had to come up with a Plan B and quickly. Well, turns out, Plan B was better than Plan A because these Italian sub quesadillas using an outdoor griddle were fantastic! Same great taste, served on a warm, slightly crispy tortilla! Heck, I might give up the bread version now!
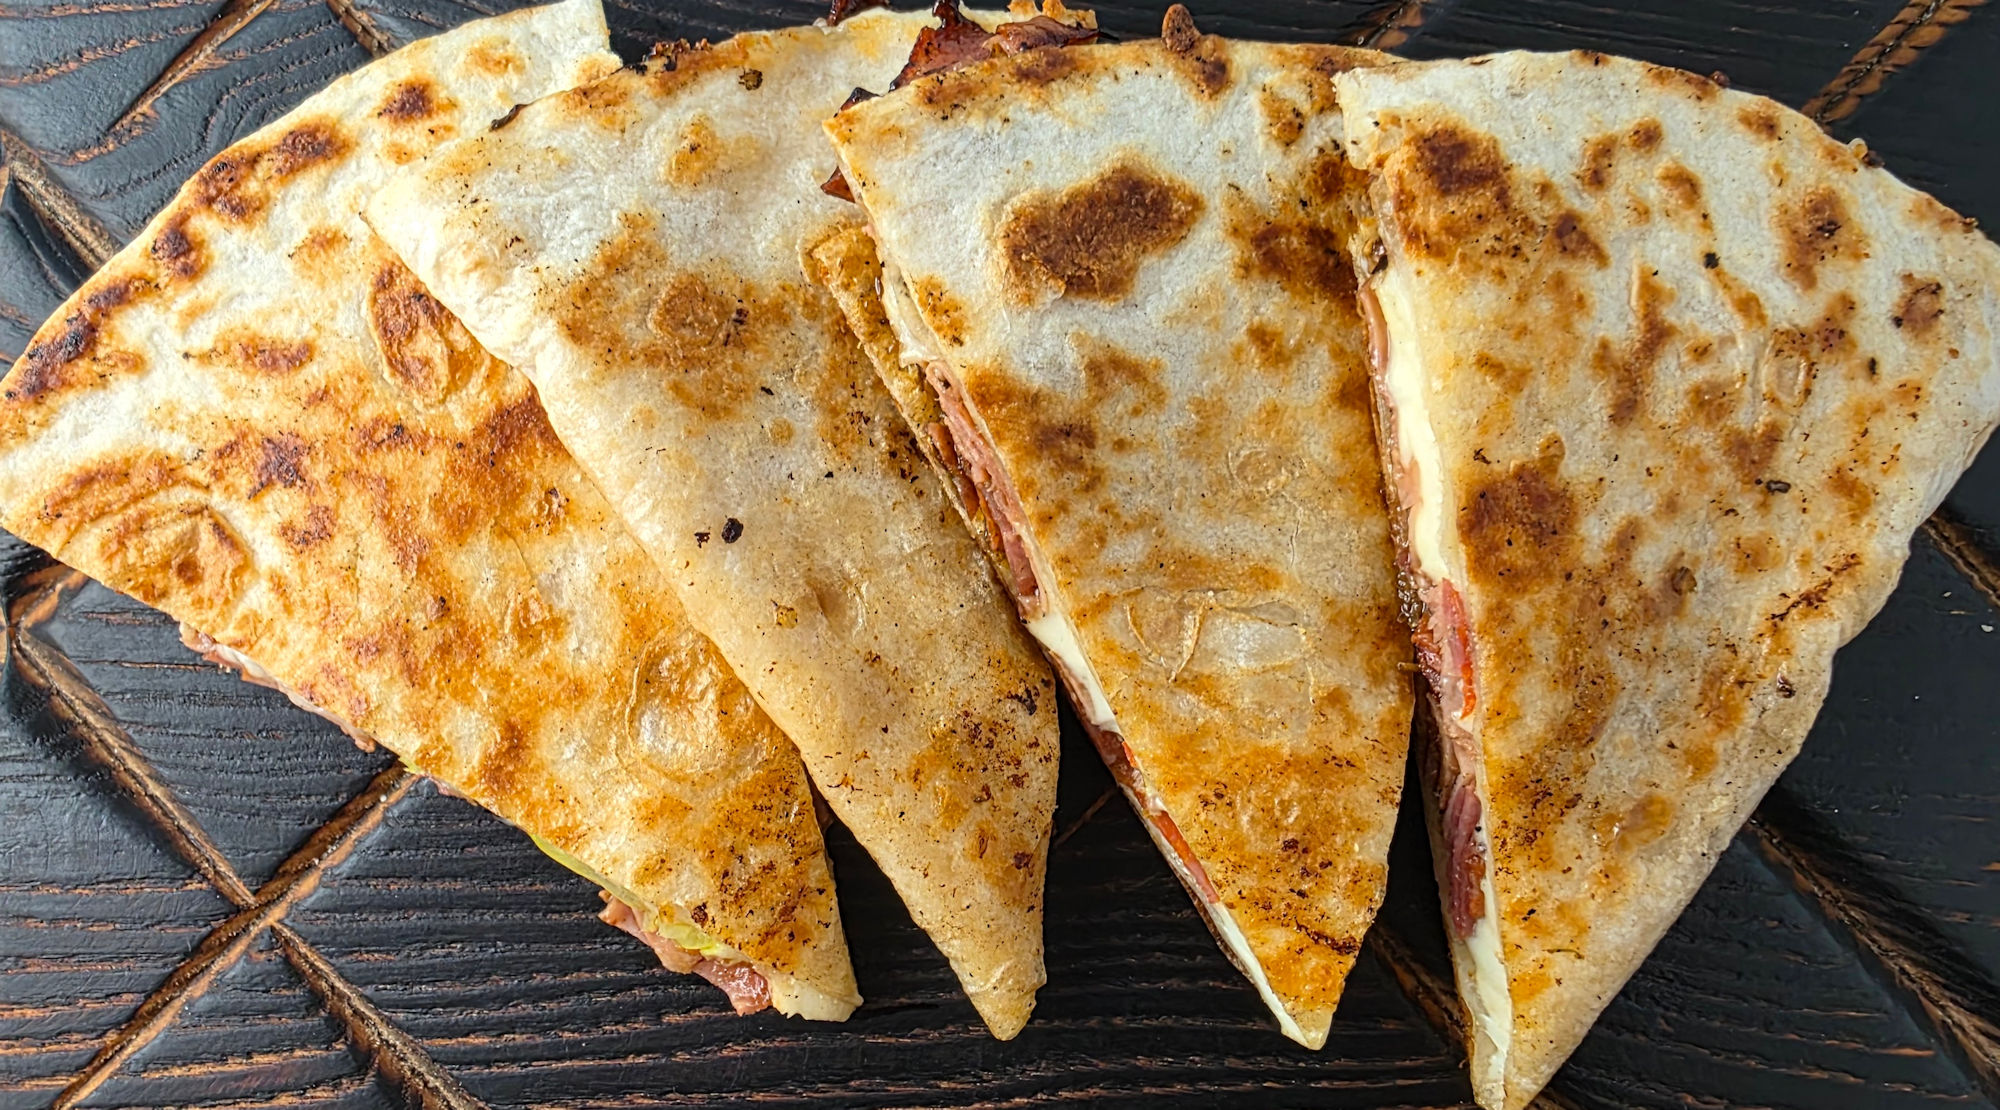
Italian Sub Quesadillas using an Outdoor Griddle

Easier On A Griddle

You could make these Italian sub quesadillas indoors, in a saucepan. Me, I prefer to cook on my outdoor griddle whenever possible. It’s huge, giving me lots of room to move things around. And plenty of room to toast up some large tortillas. It’s perfect for making these ‘sandwiches’ and pretty much anything else.

I grabbed the Italian sandwich meats from our Aldi store. They have great cold-cuts. My favorite is the Italian trio, which comes with salami, pepperoni and provolone. Yeah, I know the recipe states to use mozzarella. And I did. But I also slid a few pieces of provolone in for good measure, too. Use whatever you want. I’m a big fan of these with smoked ham, too. It doesn’t really have to be really Italian, you know?

My first rule of subs is that you can’t have too much meat or cheese. Not coincidentally, that’s also my second rule of subs!

Sale
Weber® Griddle Essential Tool Set, 5‑Piece…
  • Here’s your 5-piece set for griddle success…
  • Get creative with the right tools to make your own…

Also try my baked Italian grinder sandwich.
Italian Sub Quesadillas using an Outdoor Griddle

Italian Sub Quesadillas using an Outdoor Griddle

A great substitute for the bread version.
5 from 1 vote
Prep Time 15 minutes
Cook Time 15 minutes
Course Main
Cuisine American
Servings 2
Calories 710 kcal

Ingredients
  

Instructions
 

  • Preheat your griddle on medium-low heat.
  • Add a splash or two of oil and let it get hot.
  • Add the diced meats. Cook for 2 minutes, mixing the meats around to get a little char on them and release some of the juices.
  • Add the garlic and Italian dressing and seasoning. Stir and cook another 4-5 minutes until the garlic is cooked and the dressing is mostly cooked off.
  • Slide the meats off to the side of your griddle and keep warm. If you don't have room, you can remove them to a plate.
  • Add a splash or two more of the oil to the griddle.
  • Add the tortillas. Sprinkle half of the cheese and peppers on one half of each tortilla.
  • Top the cheese with the deli meat, putting half on each tortilla.
  • Fold over the non-topped, empty side of the tortilla to form a half-moon quesadilla.
  • Cook for 3 minutes then flip carefully (a long spatula helps) and cook another 3 minutes or until the cheese is melted and the tortilla is cooked until nice and golden brown.
  • Remove and let cool slightly before slicing and serving.

Notes

Serve with ranch dressing or warmed marinara sauce for dipping, if desired.
For a spicier version, use pepper jack cheese and pickled jalapenos for the mozzarella and peppers.

Nutrition

Calories: 710kcalCarbohydrates: 34gProtein: 64gFat: 35gSaturated Fat: 17gPolyunsaturated Fat: 5gMonounsaturated Fat: 10gTrans Fat: 0.02gCholesterol: 164mgSodium: 4038mgPotassium: 696mgFiber: 2gSugar: 10gVitamin A: 821IUVitamin C: 15mgCalcium: 652mgIron: 4mg
Keyword griddle, quesadilla
Tried this recipe?Let us know how it was!
Sale
Weber® Griddle Essential Tool Set, 5‑Piece…
  • Here’s your 5-piece set for griddle success…
  • Get creative with the right tools to make your own…
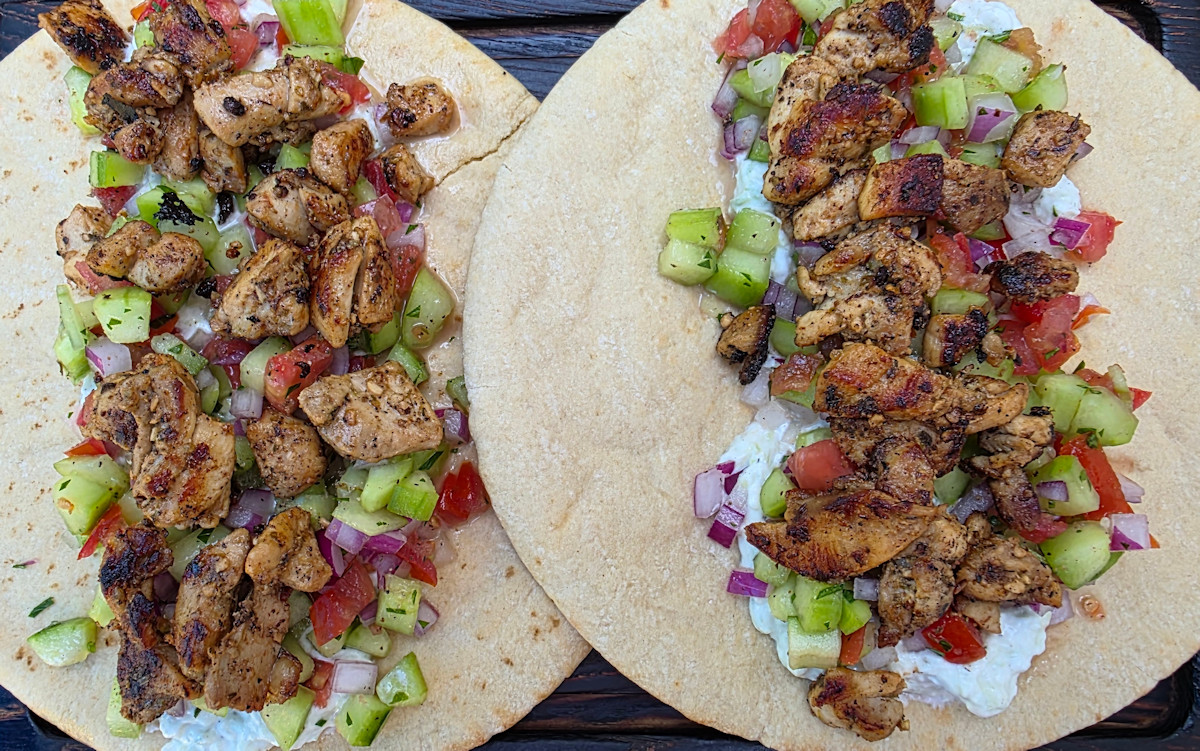
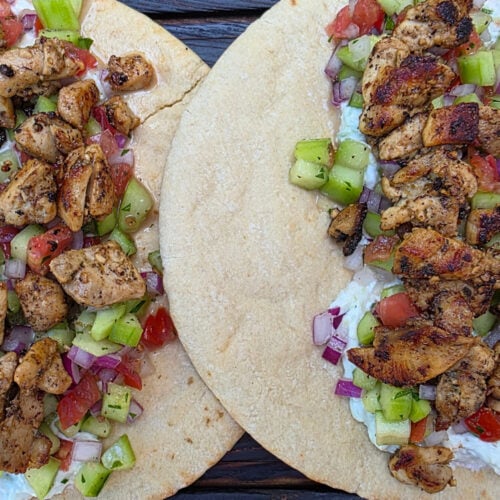
Grilled Chicken Gyros using an Outdoor Griddle

These grilled chicken gyros are exactly why I love my outdoor griddle. Fantastic, tender, flavor-packed, juicy chicken. Warm, toasted pitas. A quick-and-easy Greek-inspired salad. And of course, tzatziki sauce. This was one great dish and one we’ll make again and again.

Grilled Chicken Gyros using an Outdoor Griddle

Happy And Happier

The chicken for these grilled chicken gyros using an outdoor griddle needs a bit of time to marinate. Go for 2 hours minimum. Twelve is even better. At most, go 24 hours. I used boneless skinless chicken thighs because they have the most flavor thanks to all that fat. If you’re leaning towards the healthier side you can certainly use boneless skinless chicken breasts instead. If they are particularly thick you may want to slice or butterfly them before marinating so they absorb maximum flavor.

The recipe for the tzatziki makes a lot. A big batch. So when it comes time to make your gyros, load up. Or serve some on the side for dipping pita chips! You can cut in half if you want. Personally, I love tzatziki and I admit to using far to much on my gyros. To the point where they become super-messy.

Sale
Weber® Griddle Essential Tool Set, 5‑Piece…
  • Here’s your 5-piece set for griddle success…
  • Get creative with the right tools to make your own…

I use this countertop shredder/grater to grate the cucumber. It does a fantastic job and boy, is it ever easy to clean. I won’t miss my old box grater after using this fun tool!

Geedel Rotary Cheese Grater, Kitchen Mandoline…
  • Makes Everything Simple : Just forget your bagged…
  • Premium Material : All parts of the rotary cheese…

Da Griddle

I actually use a griddle insert for my large gas grill. I like it because I can remove it and use my grill like a…. grill. A Blackstone griddle or Weber Slate would work just fine too. And you can make these indoors, too, using a griddle such as the Cusinart Griddler. You may have to cook the chicken in batches if your griddle is on the small side. No harm in that. Just keep the cooked chicken warm while the rest cooks. I like to put it into a bowl and put a plate on top of it to keep the heat inside.

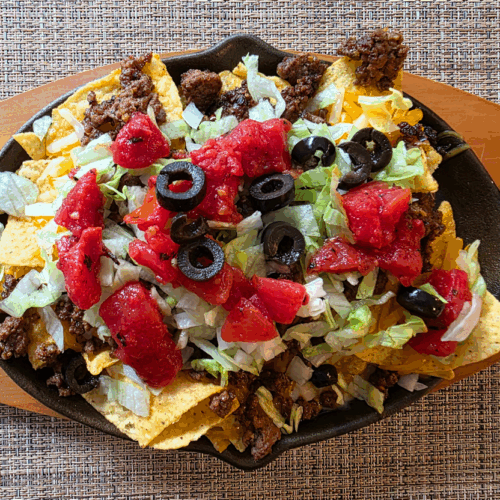
Also try my ground beef nachos, also made on the outdoor griddle!

Grilled Chicken Gyros

Grilled Chicken Gyros using an Outdoor Griddle

Inspired by a recipe from Recipe tin Eats
Tremendous flavor in every bite!
5 from 1 vote
Prep Time 30 minutes
Cook Time 2 hours 15 minutes
Course Main
Cuisine Greek
Servings 6
Calories 611 kcal

Ingredients
  

For the chicken

For the tzatziki

For the salad

  • 3 tomatoes seeds removed, diced
  • 3 cucumbers peeled, seeds removed, diced
  • ½ red onion chopped fine
  • ¼ cup fresh parsley leaves chopped
  • 1 pinch kosher salt
  • 1 pinch fresh ground black pepper

For the gyros

  • 6 pita breads warmed

Instructions
 

For the chicken

  • Place the chicken into a large resealable bag or container.
  • Whisk together the remaining chicken ingredients and add to the chicken.
  • Toss to coat and seal. Refrigerate for 2-12 hours, turning occasionally.

For the tzatziki

  • Grate the cucumber using a box grater or hand grater.
  • Place the grated cucumber into a paper towel or cheese cloth and squeeze out as much of the liquid as possible.
  • Transfer the cucumber to a bowl and add the remaining tzatziki ingredients. Stir and let rest for 20 minutes.

For the salad

  • Combine all of the salad ingredients in a bowl.

For serving

  • Preheat your outdoor griddle on medium high.
  • Drizzle a little oil onto the griddle.
  • Remove the chicken from the marinade and shake off any excess. Place onto the griddle.
  • Grill for 2-3 minutes per side until done. Thicker pieces may take longer.
  • Remove to a plate and cover with foil and let rest for 5 minutes.
  • Remove the chicken from the grill / fry pan onto a plate. Cover loosely with foil and allow to rest for 5 minutes before serving.
  • Chop or slice the chicken as desired.
  • If your chicken thighs are large, you may need to cut them. Mine were small.
  • Lay the pita breads on parchment paper squares that are slightly larger than the pitas.
  • Add some salad to each of the pita breads. Add the chicken and tzatziki (there'll be plenty, so load up)!.
  • Gently roll the pitas up, enclosing them in the parchment paper.

Nutrition

Calories: 611kcalCarbohydrates: 44gProtein: 37gFat: 31gSaturated Fat: 8gPolyunsaturated Fat: 6gMonounsaturated Fat: 14gTrans Fat: 0.1gCholesterol: 151mgSodium: 936mgPotassium: 997mgFiber: 5gSugar: 7gVitamin A: 1046IUVitamin C: 25mgCalcium: 187mgIron: 3mg
Keyword griddle, gyro
Tried this recipe?Let us know how it was!
Sale
Weber® 3-Piece BBQ Tool Set, Stainless Steel…
  • Set of 3 includes Spatula, Locking Tongs, and Cold…
  • Durable, stainless-steel construction holds up to…
Weber® Grill Grate Scrubber, Grill Cleaning…
  • Designed for heavy-duty grill cleaning
  • Contoured handle offers a firm, comfortable grip
Weber® Outdoor Grill Spray Cleaner & Degreaser…
  • This 16 oz spray bottle of Weber Grill Grate…
  • Gentle on Your Grates: Grill cleaner spray is…

Spicy Chex Mix using an Outdoor Griddle

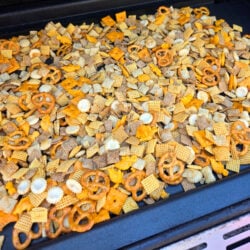
You bet I’ve made a spicy version of Chex Mix in the oven. Quite a few times. But, this was my first time making it on my outdoor griddle. And it was a fantastic treat. Spicy Chex Mix using an outdoor griddle is a bit different. And that difference is the wonderful crunchy caramelization you get on each and every little tasty morsel. I found it to be noticeably better than the baked version! And hey, it’s fun cooking outside on a griddle too!

Spicy Chex Mix using an Outdoor Griddle

Big Fun on the Griddle

This recipe for Spicy Chex Mix using an outdoor griddle makes a big batch. You’ll need a big griddle (30″ or more) to make the entire recipe at one time. If you have to, do it in batches. And as a note, if you go crazy stirring it (like I did) you might lose a few pieces over the side of the griddle don’t fret it. It happens.

You gotta move fast once you get this started on the hot griddle. You can’t be wandering off around the patio. Don’t be playing on your phone. Keep it moving. If you don’t, it’ll burn and quick, too.

You are the master of your Chex Mix. Add other things to it if you want. Take things out. Whatever you want to do. Just keep it moving.

It’s Not Picky

Don’t get hung up on the quantities in the recipe. Just get about 12 total cups of ‘whatever’. Want more Chex? Do it, just use less of something else. Ditto the Cheez-Its. Or whatever. Just get to that 12 cups magic number.

Sale
Weber® Griddle Essential Tool Set, 5‑Piece…
  • Here’s your 5-piece set for griddle success…
  • Get creative with the right tools to make your own…
Go Big

You’ll need a fairly large griddle to cook an entire batch of mix at once. Like a Blackstone or Weber Slate. The big models. Or you can use a smaller one and cook it in batches.

Also try my Everything Bagel Seasoning Chex Mix using an outdoor griddle.

Spicy Chex Mix using an Outdoor Griddle

Spicy Chex Mix using an Outdoor Griddle

This recipe makes a big batch, plenty for a crowd!
5 from 1 vote
Prep Time 15 minutes
Cook Time 15 minutes
Course Appetizer
Cuisine American
Servings 16
Calories 206 kcal

Ingredients
  

For the wet mix

Instructions
 

  • Pre-heat your griddle over low heat. Make sure that it's clean. Depending on the size of your griddle, you might have to make the mix in batches. The easiest way to do that is to halve the mix and butter mixture first.
  • In a large bowl, combine all of the Chex Mix ingredients.
  • Melt the butter in a small bowl or pot. This can be done directly on the griddle.
  • Stir in the Worcestershire sauce and hot sauce.
  • Add seasoning salt to the butter mixture and stir to dissolve and combine.
  • Drizzle the butter mixture over the Chex mix and stir well to combine. Take your time, get it all well-coated.
  • Add the Chex Mix ingredients to the griddle. Immediately spread it out.
  • You want to toast the mixture for 2 minutes. Keep it moving constantly or it will brown. You want it to get a little color to it. A little char here and there is fine too.
  • Keep the mixture moving as you continue to toast it. You'll need 5-10 minutes to get it to the desired color and crispiness.
  • Immediately remove the mix to a large baking sheet (or two) and spread out to cool slightly.
  • Serve warm or cold.

Notes

Store leftovers in an air-tight container.

Nutrition

Calories: 206kcalCarbohydrates: 33gProtein: 4gFat: 7gSaturated Fat: 3gPolyunsaturated Fat: 1gMonounsaturated Fat: 1gTrans Fat: 0.2gCholesterol: 13mgSodium: 549mgPotassium: 83mgFiber: 2gSugar: 3gVitamin A: 496IUVitamin C: 4mgCalcium: 90mgIron: 7mg
Keyword Chex mix, griddle
Tried this recipe?Let us know how it was!
Sale
Mueller Pro-Series All-in-One, 12 Blade Mandoline…
  • Meal Prep MVP – A practical and innovative way to…
  • 12 Diverse Blades – With nine interchangeable…
OXO Good Grips 4 Piece Stainless Steel Measuring…
  • Set includes: 1/4 cup, 1/3 cup, 1/2 cup and 1 cup
  • Magnetic handles keep Cups together for storage…

Easy Cheesy Cauliflower using an Outdoor Griddle

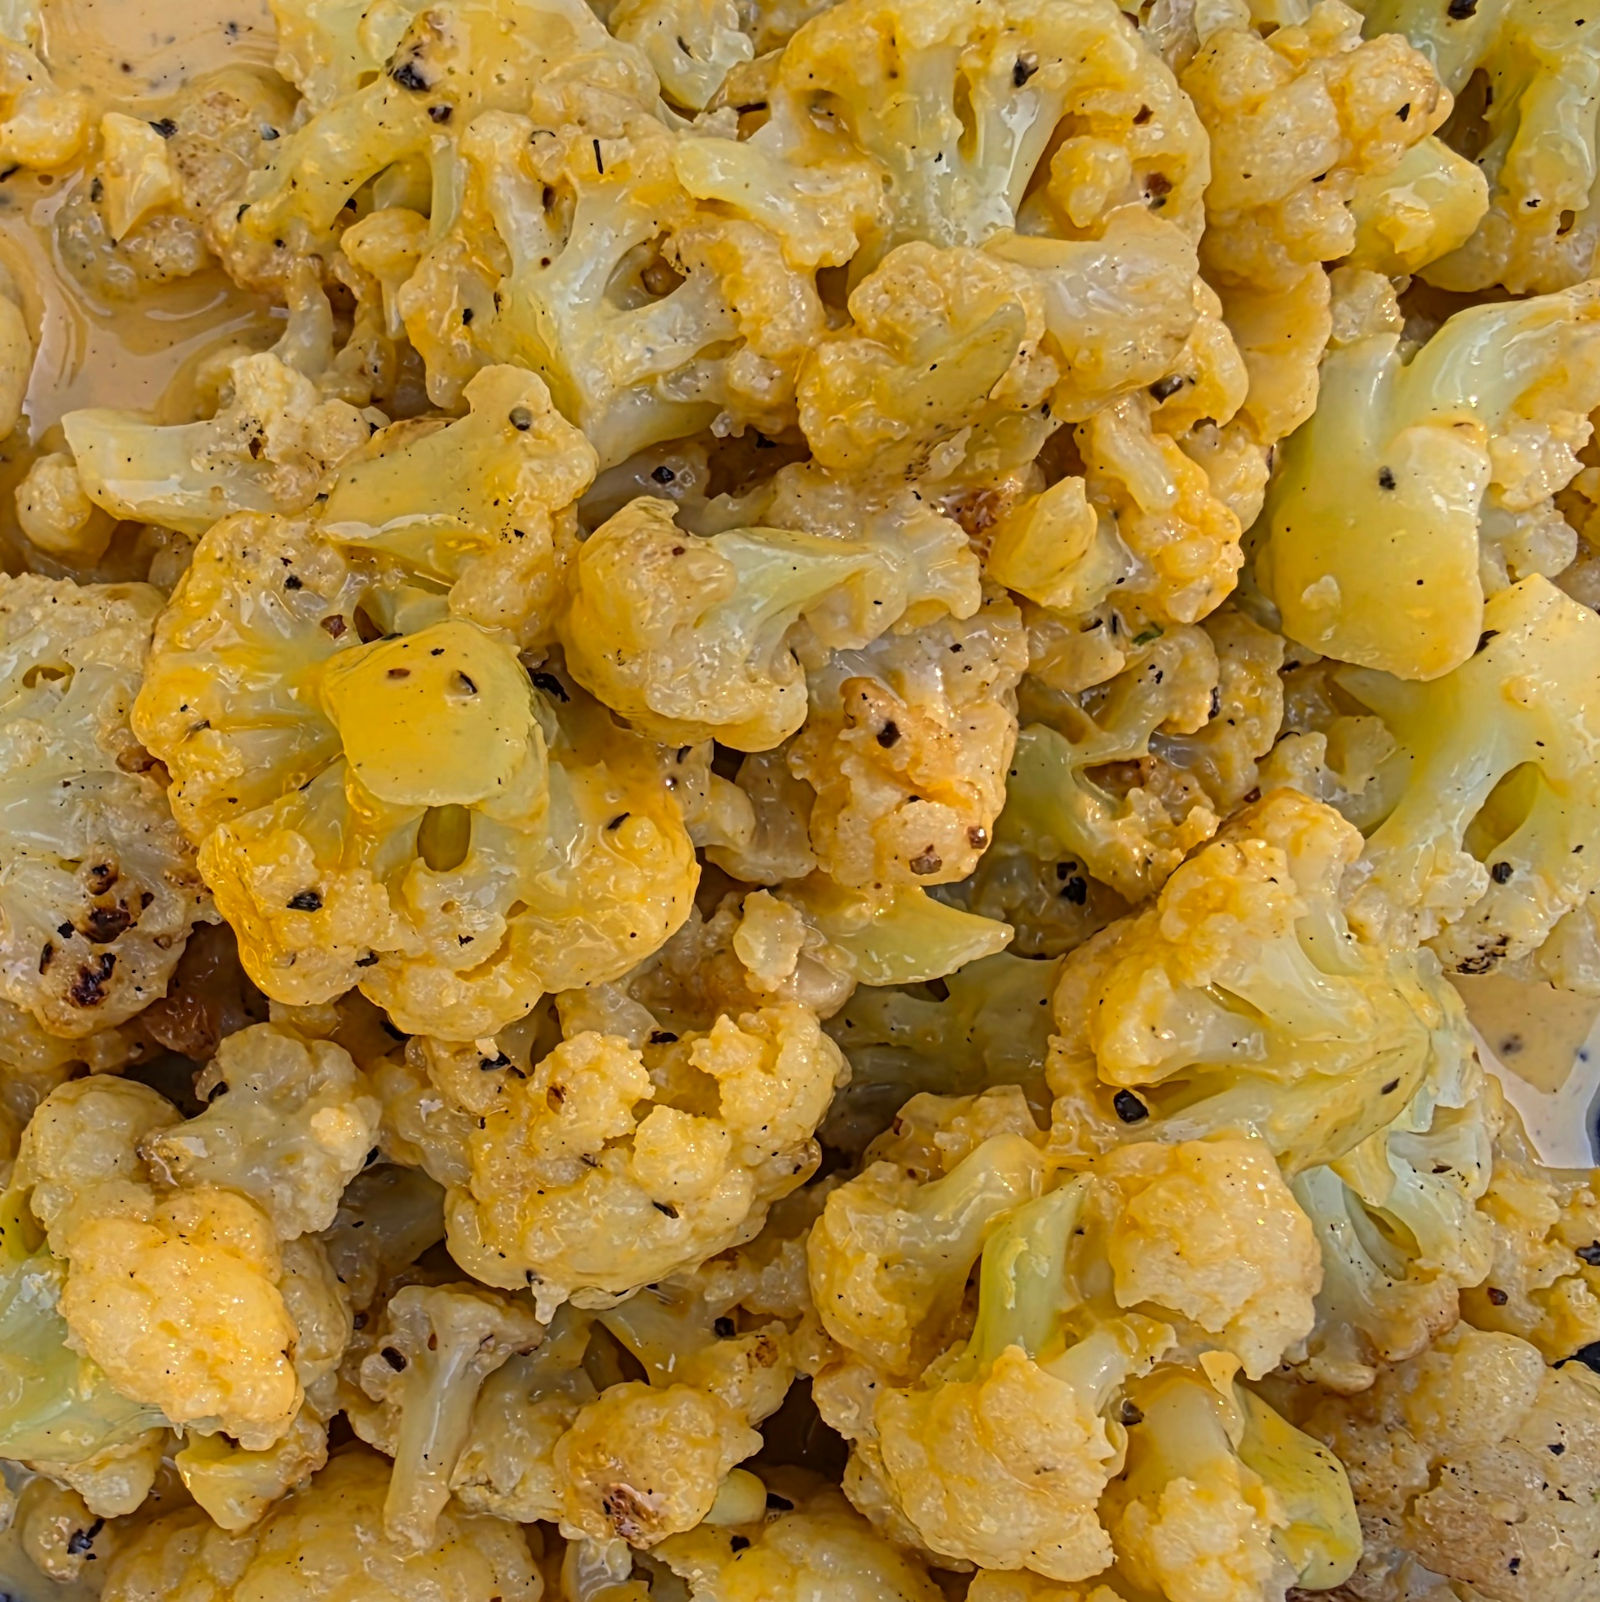
My griddle isn’t just for smash burgers, quesadillas and pizzas. I even use it for side dishes such as this easy cheesy cauliflower using an outdoor griddle. Now, this might not be the healthiest side dish I’ve ever made outside. But it sure was one of the tastiest! And it’s definitely one of the easiest! This is the perfect thing to serve alongside my griddled smash burger!

Easy Cheesy Cauliflower using an Outdoor Griddle

Is Cheese Ever Optional?

You can actually make this easy cheesy cauliflower using an outdoor griddle without the cheese sauce. I guess. If you had to. Add a little salt and pepper. Serve it up. And it’d be good. But for me, to get to ‘great’ you gotta add the cheese sauce.

Easy Cheesy Cauliflower using an Outdoor Griddle

Kraft makes this crazy easy crazy good Velveeta sauce that comes in a little foil packet. You just pour the sauce into a bowl and microwave it for 30 seconds and boom! Instant cheese sauce perfect for something like cauliflower!

Sale
Velveeta Cheese Sauce, 1 Box of 3 Pouches…
  • VELVEETA CHEESE SAUCE: One 12 oz box containing…
  • NACHO AVERAGE DRIP: Our delicious creamy cheese…

Da Dome

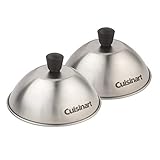
The key to cooking cauliflower on a griddle is to steam it until it’s perfectly tender. To do that you need two things. Well, three if you count the cauliflower. First, you need water. A few good squirts. Maybe more. A squirt bottle comes in really handy here. Second, you need a dome or some sort of heat-proof cover. I have a few, in different sizes. For cauliflower, when I’m not making a huge batch, I go with the smaller dome. And of course I break out the big one for bigger tasks.

Cuisinart CMD-108 Melting Dome, 9″,Stainless steel
  • EVEN MELTING: Traps heat under the dome to quickly…
  • ENHANCED FLAVOR: Griddle dome retains moisture to…
Cuisinart CMD-388 Melting Dome, 6″, 2-Pack
  • 2 Pack of 6″ diameter domes
  • Concentrates heat to cook evenly

Da Scoop

I used to use my griddle scraper to scoop up my cauliflower when it was done. Or my potatoes. Or whatever. It was kind of a pain. About half would fall off. Then I discovered a griddle scoop. I didn’t think I needed one. Now I couldn’t live without it. One easy simple movement and every single piece of cauliflower is scooped up! Amazing!

Stanbroil Large Griddle Scoop Spatula Food Mover…
  • The stainless steel material with high corrosion…
  • Easy to remove the cooked food, is a must-have…

Also try my easy cheesy bacon broccoli made on the outdoor griddle!

Easy Cheesy Cauliflower using an Outdoor Griddle

Easy Cheesy Cauliflower using an Outdoor Griddle

You could leave out the cheese sauce and still have a great cauliflower side dish.
5 from 1 vote
Prep Time 5 minutes
Cook Time 15 minutes
Course Side
Cuisine American
Servings 4
Calories 84 kcal

Equipment

Ingredients
  

Instructions
 

  • Pre-heat your griddle over medium heat.
  • Open the bag of cauliflower and place on the griddle. Use your spatula to mound the cauliflower in a small circle.
  • Give the cauliflower a few good squirts of water and season well with salt and pepper.
  • Cover and let the cauliflower cook for 5 minutes.
  • Take a quick peek inside. I like to give the lid a good shake first or you can stir the broccoli with the lid off. If the cauliflower is drying out add more water. Feel free to add more salt and pepper too.
  • Keep cooking for up to 12 minutes total. Check it one more time after 10 minutes to make sure more water and/or seasoning isn't needed.
  • Remove the cauliflower to a medium bowl.
  • Empty the contents of the cheese sauce packet into a microwavable bowl and heat per package instructions, 30 seconds. Stir.
  • Spook the cheese sauce over the cauliflower .
  • Stir to combine.
  • Serve immediately.

Notes

This recipe can be made using fresh cauliflower instead. Bring a pot of lightly-salted water to a boil. Add the cauliflower and boil for 3-4 minutes until bright green and just starting to soften. Remove to an ice bath to cool completely. Drain well before placing onto the hot griddle.

Nutrition

Calories: 84kcalCarbohydrates: 8gProtein: 7gFat: 3gSaturated Fat: 2gPolyunsaturated Fat: 0.03gMonounsaturated Fat: 0.03gCholesterol: 12mgSodium: 475mgPotassium: 352mgFiber: 2gSugar: 4gVitamin A: 278IUVitamin C: 41mgCalcium: 181mgIron: 0.4mg
Keyword broccoli, griddle
Tried this recipe?Let us know how it was!
Sale
Mueller Pro-Series All-in-One, 12 Blade Mandoline…
  • Meal Prep MVP – A practical and innovative way to…
  • 12 Diverse Blades – With nine interchangeable…
OXO Good Grips 4 Piece Stainless Steel Measuring…
  • Set includes: 1/4 cup, 1/3 cup, 1/2 cup and 1 cup
  • Magnetic handles keep Cups together for storage…

Ground Beef Nachos using an Outdoor Griddle

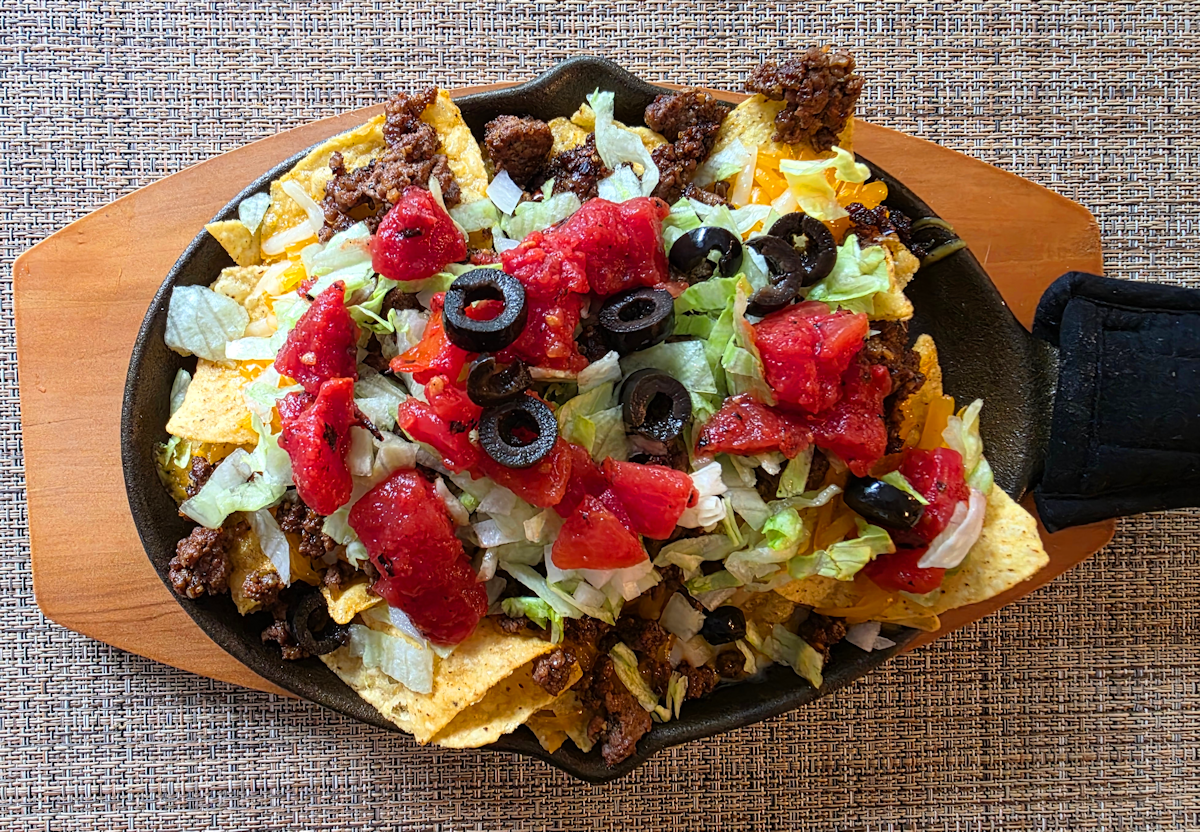
I love my outdoor griddle. It’s huge and cooks evenly, perfect for everything I want to make on it. Today I made ground beef nachos using an outdoor griddle. Now, usually, I’ll make this on the stovetop and in the oven. But, I love cooking outside so that’s where I went. I could’ve also made it on my indoor griddle, though it’s quite a bit smaller. No matter what griddle you use, this is a great easy way to have a delicious dish in really not much time at all.

I have a griddle insert for my gas grill and my charcoal grill. It’s perfect for dishes like this. You can use whatever you have, from a Blackstone or Weber Slate to even a cast iron skillet.

Ground Beef Nachos using an Outdoor Griddle

That Crunch

A really well-seasoned beef is key to these ground beef nachos using an outdoor griddle. And cooking it over high heat to get that great browned, slightly crunchy, texture. The beef smells amazing as it cooks. You know you’re in for something good as soon as it hits the griddle.

4 Sets Cast Iron Fajita Skillet Set Sizzling Plate…
  • Authentic Restaurant Experience: Enjoy…
  • Complete Safety System: The wooden base combined…

I use a few cast iron fajita skillets for serving my nachos. First, they’re kinda neat. Second, I can top them with the tortilla chips and place them over a low-heat area of my griddle to heat. If I’m cooking inside I just slide them into the oven over 225 F for 5-10 minutes. The chips get nice and crunchy and warm. Just remember, the skillets are hot. And that means the handles on them are hot. Don’t accidentally grab them with your bare hands, and always serve them with their little oven mitts covering the handles.

The Toppings

Beyond the delicious beef, chips, and cheese, everything is up to you. I like to have a combination of flavors and textures. I also like to have a few cold toppings, such as lettuce or sour cream. If I’m serving these with taco sauce I usually put it on the side because you never know how much you might want.

Sale
Weber® Griddle Essential Tool Set, 5‑Piece…
  • Here’s your 5-piece set for griddle success…
  • Get creative with the right tools to make your own…

I love making smash burgers on my griddle, too! Check out my list of my favorite smash burger recipes.

Ground Beef Nachos using a Griddle

Ground Beef Nachos using an Outdoor Griddle

Beyond the delicious beef, chips, and cheese, everything is up to you.
5 from 1 vote
Prep Time 15 minutes
Cook Time 15 minutes
Course Main
Cuisine American
Servings 4
Calories 1575 kcal

Equipment

Ingredients
  

For the nachos

  • 1 pound ground beef
  • 2 tablespoons taco seasoning from below, or your favorite
  • 8 cups tortilla chips more, or less
  • 4 ounces sharp cheddar cheese shredded
  • Your favorite nacho toppings salsa, shredded iceberg lettuce, jalapenos, black olives, etc

For the taco seasoning (store leftover in an air-tight container)

Instructions
 

For the nachos

  • Preheat your griddle over medium-high heat.
  • Crumble the ground beef onto the griddle and begin to brown. Break up the meat as it cooks using a spatula.
  • When the beef is about halfway cooked add the seasoning and stir. Continue cooking until done.
  • Meanwhile, divide the chips between the skillets and place them on a part of the griddle over low heat. Sprinkle with the cheese.
  • Once the meat is done and the cheese is melted, divide the ground beef between the skillets.
  • Using a pot holder, remove the skillets from the griddle and place into their heat-proof holders.
  • Add remaining desired nacho toppings and serve. Make sure you remind everyone that the skillet handles are hot!

For the taco seasoning (store leftover in an air-tight container)

  • Combine all ingredients in a bowl and mix well. I prefer to then transfer it to a spice grinder and give it a little grind so the resulting mix is a little finer.
  • To use, add 2-3 tablespoons to every 1 pound of ground beef.

Notes

Feel free to add onions or tomatoes to the beef as it cooks.

Nutrition

Calories: 1575kcalCarbohydrates: 173gProtein: 46gFat: 83gSaturated Fat: 21gPolyunsaturated Fat: 27gMonounsaturated Fat: 26gTrans Fat: 2gCholesterol: 109mgSodium: 3381mgPotassium: 1195mgFiber: 19gSugar: 5gVitamin A: 5418IUVitamin C: 3mgCalcium: 558mgIron: 10mg
Keyword griddle, nachos
Tried this recipe?Let us know how it was!
Sale
Mueller Pro-Series All-in-One, 12 Blade Mandoline…
  • Meal Prep MVP – A practical and innovative way to…
  • 12 Diverse Blades – With nine interchangeable…
OXO Good Grips 4 Piece Stainless Steel Measuring…
  • Set includes: 1/4 cup, 1/3 cup, 1/2 cup and 1 cup
  • Magnetic handles keep Cups together for storage…

Everything Bagel Seasoning Chex Mix using an Outdoor Griddle

This was my second time making a Chex Mix treat on my outdoor griddle. It has become my go-to snack when I’m outside grilling. I like to change things up, use different seasonings from time-to-time. Like this time. This Everything Bagel Seasoning Chex Mix using an outdoor griddle has a wonderful flavor. The seasoning really cranks up the taste from what is already a great treat. And the wonderful crunchy caramelization you get on each and every little tasty morsel, thanks to the griddle, is fantastic. Well, that and hey, it’s fun cooking outside on a griddle!

Everything Bagel Seasoning Chex Mix using an Outdoor Griddle

Make It Your Way

I admit it, I didn’t use the exact ingredients listed for this Everything Bagel seasoning Chex Mix using an outdoor griddle. Not the dry ones at least. The key is just get to around 13 or so cups of ‘stuff’. Chex cereal. Goldfish crackers. Whatever. It’s entirely up to you. Just keep the butter mix the way it is. Don’t mess with that. But go nuts with the snack part all you want. I’m a whatever-I-have-on-hand kind of guy so that’s what I used. Stuff I found in the pantry!

Whoa That’s Batch!

This recipe makes a HUGE amount of Chex Mix. You won’t run out at your next party, that’s for sure. I figured about a cup per person in the serving calculation. That might be a bit much for some. And a bit not-enough for others.

McCormick Culinary Everything Bagel Seasoning…
  • BURST OF FLAVOR: McCormick Culinary Everything…
  • SOURCED FOR CHEFS: Blended especially for chefs…

You might have to cook the mix in batches. If I hadn’t had a super-crazy-large griddle I would’ve had to divvy it up. If you have to that’s ok. Just do a little at a time. You will want to do a quick wipe-down of your griddle in-between batches. Little small chunks that break off the cereal and what-not will burn if left on there too long. I use these griddle pads. They attach to a long handle that makes it easy to scrub my griddle clean!

3M Scotch-Brite Griddle Cleaning, 4 in x 5.25 in…
  • TOUGH CLEANING POWER: Very tough, non-rusting…
  • LONG-LASTING: High quality bonding resin system…

You can also make awesome popcorn on your griddle!

Everything Bagel Seasoning Chex Mix using a Griddle

Everything Bagel Seasoning Chex Mix using an Outdoor Griddle

Inspired by a recipe from Simple Comfort Food
A super-tasty snack that feeds a small crowd!
5 from 1 vote
Prep Time 15 minutes
Cook Time 15 minutes
Course Appetizer
Cuisine American
Servings 12
Calories 495 kcal

Ingredients
  

For the dry

For the wet

Instructions
 

  • Pre-heat your griddle over low heat. Make sure that it’s clean. Depending on the size of your griddle, you might have to do make the mix in batches. The easiest way to do that is to halve the mix and butter mixture first.
  • In a large bowl, combine all of the dry ingredients.
  • Melt the butter in a small bowl or pot. Whisk in the remaining ingredients.
  • Add the butter mixture to the dry mixture and stir to coat and combine.
  • Add the Chex Mix ingredients to the griddle. Immediately spread it out.
  • You want to toast the mixture for 2 minutes. Keep it moving constantly or it will brown. You want it to get a little color to it. A little char here and there is fine too.
  • Keep the mixture moving as you continue to toast it. You’ll need 5-10 minutes to get it to the desired color and crispiness.
  • Immediately remove the mix to a large baking sheet (or two) and spread out to cool slightly.
  • Serve warm or cold. Store leftovers in an air-tight container.

Notes

The dry ingredients can be any of your favorites, just try to get to a total of 13 cups. 
Cover any leftover mix.

Nutrition

Calories: 495kcalCarbohydrates: 64gProtein: 12gFat: 25gSaturated Fat: 8gPolyunsaturated Fat: 5gMonounsaturated Fat: 7gTrans Fat: 0.5gCholesterol: 25mgSodium: 1496mgPotassium: 316mgFiber: 8gSugar: 6gVitamin A: 735IUVitamin C: 6mgCalcium: 131mgIron: 15mg
Keyword Chex mix, griddle
Tried this recipe?Let us know how it was!
Sale
Weber® Griddle Essential Tool Set, 5‑Piece…
  • Here’s your 5-piece set for griddle success…
  • Get creative with the right tools to make your own…

Nashville Hot Chicken Cheesesteaks using an Outdoor Griddle

I need to start a new food category here on Life’s A Tomato. It’ll be called the ‘so crazy good that I ate this 3 days in a row’ blog. The first dish I’ll add to this new category will be this Nashville Hot Chicken cheesesteaks using an outdoor griddle. This was good. Crazy good. A little spicy. Tender, juicy chicken that is packed with flavor. A little ooey-gooey cheese action. Crispy vegetables. And of course, a few pickles. This is one great sandwich!

Nashville Hot Chicken Cheesesteaks using an Outdoor Griddle

Easy Griddle Action

I haven’t had my large outdoor griddle for that long. I’ve used smaller griddles for burgers and the like for years. But the big one has made dishes like these Nashville Hot Chicken cheesesteaks using an outdoor griddle a delight. There’s lots of room to cook up the onions and peppers then move them off to the side while my attention turns to the chicken. Room to toast the rolls, too.

Nashville Hot Chicken Cheesesteaks using an Outdoor Griddle

Spicy Like I Love It

These sandwiches have a nice kick to them. The seasoning and cheese bring it, but without being crazy spicy. I went a little heavy on both because I love a good spicy sandwich. If you’re into even more heat, add some jalapeno slices, either to the vegetables as they cook or the sandwich before serving. Or both!

McCormick Grill Mates Nashville Hot Chicken…
  • Sizzlin’ hot grilling seasoning blend of…
  • Inspired by the spicy-sweet flavor of…

Any decent-sized griddle will work for this dish. Like a Blackstone or Weber Slate. But you can get by with a griddle insert for your gas or charcoal grill, too. I did. I didn’t have room for a separate standalone griddle. Being able to use my existing grills for griddle dishes was a major plus! In a pinch, you can also use a large cast iron skillet. Just remember to never grab the handle of your skillet once it’s on your grill! It’s hot as the dickens!

These cheesesteaks are tasty and easy. Looking for something even easier, though? Try my garlic naan pizzas using an outdoor griddle.

Nashville Hot Chicken Cheesesteaks using an Outdoor Griddle

Nashville Hot Chicken Cheesesteaks using an Outdoor Griddle

Inspired by a recipe from McCormick
So good that you'll never miss the real things!
5 from 1 vote
Prep Time 15 minutes
Cook Time 15 minutes
Course Main
Cuisine American
Servings 6
Calories 527 kcal

Ingredients
  

For the sauce

For the meat filling

  • 1 ½ pounds boneless skinless chicken thighs cut into bite-sized pieces
  • 1 tablespoon vegetable oil
  • 1 medium green bell pepper chopped
  • 1 medium yellow onion chopped
  • 6 slices pepper Jack cheese

For the sandwiches

Instructions
 

For the sauce

  • In a small bowl combine the mayonnaise, lemon juice, and 1 tablespoon of the hot chicken seasoning.
  • Cover and refrigerate until ready to use.

For the meat filling

  • Place the chicken pieces into a large bowl.
  • Drizzle with the oil and sprinkle with the remaining hot chicken seasoning. Mix until all of the chicken is coated evenly.
  • Cover and set aside until ready to serve. Toss chicken with oil and remaining 2 tablespoons
  • Preheat your outdoor griddle on high.
  • Add a splash or two of oil. Add the peppers and onions and cook, stirring often, until they are just starting to soften. Do not over cook them. You want a little bit of a crunch.
  • Move the pepper and onion mix to a cooler part of the grill to keep warm.
  • Add another splash or two of oil to the griddle and add the chicken.
  • Cook the chicken, stirring often, 5-7 minutes or until done.
  • Add the pepper and onion mixture and stir.
  • Spread the filling out evenly onto the griddle and top with the cheese slices.
  • As soon as the cheese starts to melt, assemble the sandwiches (below).

For the sandwiches

  • Slather the cut sides of the rolls with the sauce.
  • Use a long spatula to scoop up the chicken mixture and divide between the rolls.
  • Add a few pickle slices to each sandwich and serve.

Notes

For even spicier sandwiches, substitute pickled (or fresh) jalapeno slices for the pickles!

Nutrition

Calories: 527kcalCarbohydrates: 36gProtein: 33gFat: 27gSaturated Fat: 7gPolyunsaturated Fat: 10gMonounsaturated Fat: 7gTrans Fat: 0.1gCholesterol: 134mgSodium: 639mgPotassium: 372mgFiber: 2gSugar: 6gVitamin A: 277IUVitamin C: 22mgCalcium: 183mgIron: 12mg
Keyword cheesesteak, chicken
Tried this recipe?Let us know how it was!
Sale
Weber® Griddle Essential Tool Set, 5‑Piece…
  • Here’s your 5-piece set for griddle success…
  • Get creative with the right tools to make your own…
Easy Cheesy Bacon Broccoli using an Outdoor Griddle

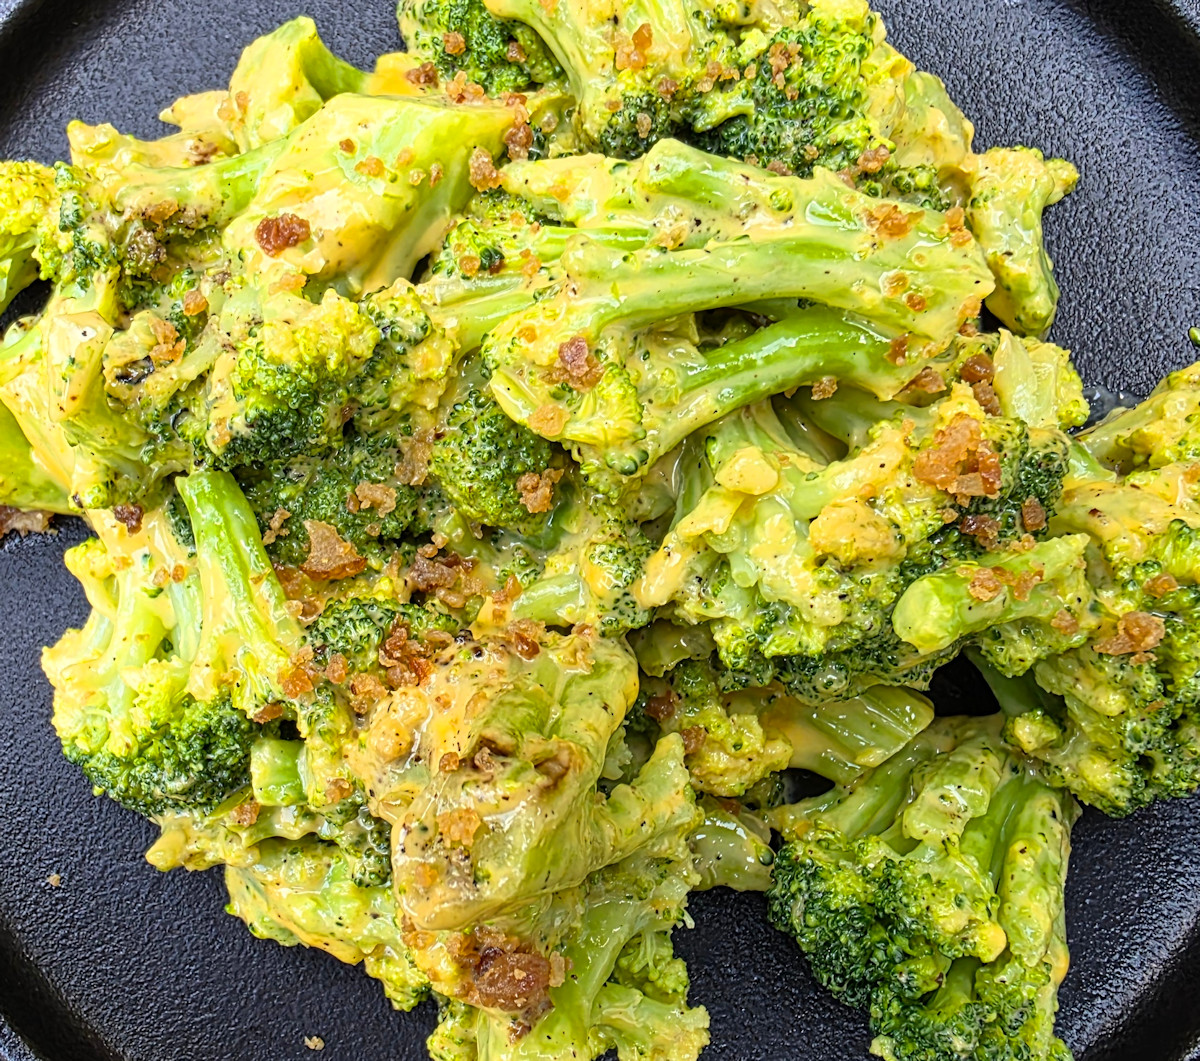
My outdoor griddle isn’t just for smash burgers, quesadillas and pizzas. I even use it for side dishes such as this easy cheesy bacon broccoli using an outdoor griddle. Now, this might not be the healthiest side dish I’ve ever made outside. But it sure was one of the tastiest! And it’s definitely one of the easiest! This is the perfect thing to serve alongside my griddled smash burger!

Easy Cheesy Bacon Broccoli using an Outdoor Griddle

Are Cheese and Bacon Ever Optional?

You could leave out the cheese sauce. And even the bacon. And just make easy broccoli using an outdoor griddle. A little salt and pepper. Serve it up. And it’d be good. But for me, to get to ‘great’ you gotta add the cheese sauce and bacon bits. Kraft makes this crazy easy crazy good Velveeta sauce that comes in a little foil packet. You just pour the sauce into a bowl and microwave it for 30 seconds and boom! Instant cheese sauce perfect for something like broccoli!

BLACKSTONE 5071 32 oz Plastic Squeeze Bottle Set…
  • Included Features: This set includes two 32 oz…
  • Add Flavor: Always keep a Blackstone 32 oz…

Steaming the broccoli on the griddle is easy. Just squirt it with a bit of water and let it cook a bit under a dome. It comes out perfectly every time!

Cuisinart CMD-108 Melting Dome, 9″,Stainless steel
  • EVEN MELTING: Traps heat under the dome to quickly…
  • ENHANCED FLAVOR: Griddle dome retains moisture to…
Cuisinart CMD-388 Melting Dome, 6″, 2-Pack
  • 2 Pack of 6″ diameter domes
  • Concentrates heat to cook evenly

Da Scoop

I used to use my griddle scraper to scoop up my cauliflower when it was done. Or my potatoes. Or whatever. It was kind of a pain. About half would fall off. Then I discovered a griddle scoop. I didn’t think I needed one. Now I couldn’t live without it. One easy simple movement and every single piece of cauliflower is scooped up! Amazing!

Stanbroil Large Griddle Scoop Spatula Food Mover…
  • The stainless steel material with high corrosion…
  • Easy to remove the cooked food, is a must-have…

This broccoli is an excellent served alongside my Oklahoma onion smash burgers!

Also try my delicious cheesy cauliflower made using an outdoor griddle.

Easy Cheesy Bacon Broccoli using a Griddle

Easy Cheesy Bacon Broccoli using an Outdoor Griddle

You could leave out the cheese sauce. And even the bacon.
5 from 1 vote
Prep Time 5 minutes
Cook Time 15 minutes
Course Side
Cuisine American
Servings 4
Calories 92 kcal

Equipment

Ingredients
  

Instructions
 

  • Pre-heat your griddle over medium heat.
  • Open the bag of broccoli and place on the griddle. Use your spatula to mound the broccoli in a small circle.
  • Give the broccoli a few good squirts of water and season well with salt and pepper.
  • Cover and let the broccoli cook for 5 minutes.
  • Take a quick peek inside. I like to give the lid a good shake first or you can stir the broccoli with the lid off. If the broccoli is drying out add more water. Feel free to add more salt and pepper too.
  • Keep cooking for up to 12 minutes total. Check it one more time after 10 minutes to make sure more water and/or seasoning isn't needed.
  • Remove the broccoli to a medium bowl.
  • Empty the contents of the cheese sauce packet into a microwavable bowl and heat per package instructions, 30 seconds. Stir.
  • Spoon the cheese sauce over the broccoli.
  • Add a few good pinches of bacon.
  • Stir to combine.
  • Serve immediately.

Notes

This recipe can be made using fresh broccoli instead. Bring a pot of lightly-salted water to a boil. Add the broccoli and boil for 3-4 minutes until bright green and just starting to soften. Remove to an ice bath to cool completely. Drain well before placing onto the hot griddle.

Nutrition

Calories: 92kcalCarbohydrates: 9gProtein: 8gFat: 3gSaturated Fat: 2gPolyunsaturated Fat: 0.1gMonounsaturated Fat: 0.03gCholesterol: 12mgSodium: 478mgPotassium: 367mgFiber: 2gSugar: 4gVitamin A: 808IUVitamin C: 76mgCalcium: 203mgIron: 1mg
Keyword broccoli, griddle
Tried this recipe?Let us know how it was!
Sale
Weber® Griddle Essential Tool Set, 5‑Piece…
  • Here’s your 5-piece set for griddle success…
  • Get creative with the right tools to make your own…

Garlic Naan Pizzas using a Griddle

I love cooking outside on a griddle. Or inside on one. They’re very versatile and one of my favorite cooking ‘toys’. In the nicer months, you’ll find me out manning a griddle on a gas or charcoal grill. When it gets cooler, you’re likely to find me inside cooking on my countertop griddle. There’s just something fun about cooking on them. Like when I made garlic naan pizzas using a griddle. I enjoyed the entire process, from planning the pizzas to finishing off that last bite.

Garlic Naan Pizzas using a Griddle

Learn As You Go

I found that I had a little bit of a learning curve when I made these garlic naan pizzas using a griddle on my outdoor griddle. It fits over a large gas grill and gets super hot. So my first pizza was a bit… crunchy shall we say. I learned my lesson. On that griddle I keep the heat a little lower and keep on eye on the bottom of the crust after about 4 minutes to make sure I don’t burn it.

Garlic Naan Pizzas using an Outdoor Griddle

Outdoors Or Indoors

My indoor griddle of choice is my Cusinart Griddler. I can easily fit two naan on it at once. It does take a bit longer to get the bottom of the naan crunchy like I like. But it can’t get any easier and I don’t have to heat up an oven to get a delicious dinner or lunch meal.

Garlic Naan Pizzas using an Indoor Griddle

Less Is More

You want your naan pizza crust to be crunchy. Or at least I do. So that means use as little wet ingredients as possible. Don’t go nuts brushing them with oil. And don’t use a lot of sauce. If your toppings are ‘wet’, pat them dry with a paper towel first before adding them.

Sale
Weber® Griddle Essential Tool Set, 5‑Piece…
  • Here’s your 5-piece set for griddle success…
  • Get creative with the right tools to make your own…
Also try my copycat of Pizza Hut’s meaty marinara pasta!

Garlic Naan Pizzas using a Griddle

Garlic Naan Pizzas using a Griddle

Easy and delicious and ready in minutes!
5 from 1 vote
Prep Time 15 minutes
Cook Time 8 minutes
Course Main
Cuisine American
Servings 4
Calories 3 kcal

Ingredients
  

  • 2 garlic naan
  • 1 tablespoon olive oil or less, use as little as possible
  • Your favorite pizza sauce
  • Your favorite pizza toppings

Instructions
 

  • Turn on your griddle for medium high heat cooking.
  • Brush both sides of the naan lightly with the oil.
  • Place the naan on the griddle and toast for 1 minute per side. Remove to a wire rack.
  • Add the pizza sauce and swirl around with the back of a spoon. Less is more here. Use as little sauce as you can. The more you add the more your naan might end up soggy instead of crunchy.
  • Add cheese, if using. Make sure you get it edge-to-edge. All the way.
  • Add the remaining toppings. Like with the sauce my advice is to not go crazy with it. Less is more.
  • Return the naan to the griddle and toast 5-8 minutes. Check the bottoms every minute or so after 4 minutes to make sure they aren't getting too dark. If so, reduce the heat and/or move the naan to a cooler part of the griddle. You're not cooking anything here, just melting the cheese and getting the toppings hot so you don't have to toast them very long.
  • Remove from the griddle to the wire rack and let cool 5 minutes before slicing and serving.

Notes

I like to add a small sprinkling of pizza seasoning to make naans after adding the sauce for extra flavor.

Nutrition

Calories: 3kcalCarbohydrates: 0.1gProtein: 0.02gFat: 0.3gSaturated Fat: 0.04gPolyunsaturated Fat: 0.03gMonounsaturated Fat: 0.2gSodium: 31mgPotassium: 1mgFiber: 0.1gSugar: 0.01gVitamin A: 8IUCalcium: 1mgIron: 0.01mg
Keyword griddle, pizza
Tried this recipe?Let us know how it was!
OXO Good Grips Electric Indoor Grill and Panini…
  • Ideal for cleaning air fryers, electric indoor…
  • Soft, flexible bristles are safe for non-stick…

Chex Mix using an Outdoor Griddle

Sure I’ve made Chex Mix in the oven. Quite a few times. And I’ve made quite a few variations on the classic, too. This was my first time making it on my outdoor griddle. And wow, was this ever a fantastic treat. Chex Mix using an Outdoor griddle is a bit different. And that difference is the wonderful crunchy caramelization you get on each and every little tasty morsel. Well, that and hey, it’s fun cooking outside on a griddle!

Chex Mix using an Outdoor Griddle

Big Griddle and Big Fun

This recipe for Chex Mix using an Outdoor griddle makes a pretty decent-sized batch. You’ll need a big griddle (30″ or more) to make the entire recipe at once. You can always divide it and do it in batches. If you go crazy stirring it (like I did) you might lose a few pieces over the side of the griddle, that’s ok. That’s just part of the fun.

Things move fast once you get this started on the hot griddle. You can’t be wandering off. You can’t be slackin’. Keep the mix moving. If you don’t, it’ll burn. And quick too. But it’s fun. You are the master of your Chex Mix. Add other things to it if you want. Take things out. Whatever you want to do. Just keep it moving.

Chex Mix using an Outdoor Griddle

Everyone Into The Pool

The original recipe for this mix required that it be cooked in three phases. The butter and seasoning were added at different times. I found this to be a little extra work and added to the stress of keeping the mix moving at all times! So I dissolved the seasoning into the butter. That way I just had to add it and stir. No add-butter-stir then add-seasoning-stir. Same end result, just a bit easier.

I also have a spicy version of this mix!

Sale
Weber® Griddle Essential Tool Set, 5‑Piece…
  • Here’s your 5-piece set for griddle success…
  • Get creative with the right tools to make your own…

Also try my Everything Bagel seasoning Chex mix made on your griddle!

Spicy Chex Mix using an Outdoor Griddle

Chex Mix using an Outdoor Griddle

Fantastic flavor and crunch. Much better than an oven-baked mix!
5 from 1 vote
Prep Time 15 minutes
Cook Time 15 minutes
Course Appetizer
Cuisine American
Servings 16
Calories 440 kcal

Ingredients
  

For the wet mix

For the dry mix

For the 4-2-1 SPG Seasoning (Enhanced)

Instructions
 

For the SPG Seasoning (makes more than you need)

  • If you're making the homemade seasoning, just combine all the ingredients.
  • Store in an air-tight container until ready to use. If clumps form, just shake the container to knock them lose.

For the Chex Mix

  • Pre-heat your griddle over low heat. Make sure that it's clean. Depending on the size of your griddle, you might have to do make the mix in batches. The easiest way to do that is to halve the mix and butter mixture first.
  • In a large bowl, combine all of the Chex Mix ingredients.
  • Melt the butter in a small bowl or pot. This can be done directly on the griddle.
  • Stir in the Worcestershire sauce.
  • Combine the dry mix ingredients. Add to the butter mixture and stir to dissolve and combine.
  • Drizzle the butter mixture over the Chex mix and stir well to combine. Take your time, get it all well-coated.
  • Add the Chex Mix ingredients to the griddle. Immediately spread it out.
  • You want to toast the mixture for 2 minutes. Keep it moving constantly or it will brown. You want it to get a little color to it. A little char here and there is fine too.
  • Keep the mixture moving as you continue to toast it. You'll need 5-10 minutes to get it to the desired color and crispiness.
  • Immediately remove the mix to a large baking sheet (or two) and spread out to cool slightly.
  • Serve warm or cold. Store leftovers in an air-tight container.

Notes

Save the extra SPG seasoning and use it anywhere you want extra flavor. It’s great on hamburgers, wings, chicken, vegetables, you name it!
The amount of mix in this recipe will easily fill a 36″ griddle. Depending on the size of your griddle, you might have to do make the mix in batches. The easiest way to do that is to halve the Chex Mix and wet/dry mix ingredients and place into separate bowls.

Nutrition

Calories: 440kcalCarbohydrates: 60gProtein: 12gFat: 18gSaturated Fat: 3gPolyunsaturated Fat: 5gMonounsaturated Fat: 5gTrans Fat: 0.2gCholesterol: 10mgSodium: 2567mgPotassium: 271mgFiber: 4gSugar: 6gVitamin A: 380IUVitamin C: 2mgCalcium: 122mgIron: 5mg
Keyword Chex mix, griddle
Tried this recipe?Let us know how it was!
Sale
Weber® Griddle Essential Tool Set, 5‑Piece…
  • Here’s your 5-piece set for griddle success…
  • Get creative with the right tools to make your own…