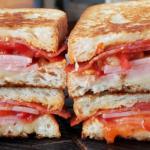
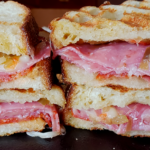
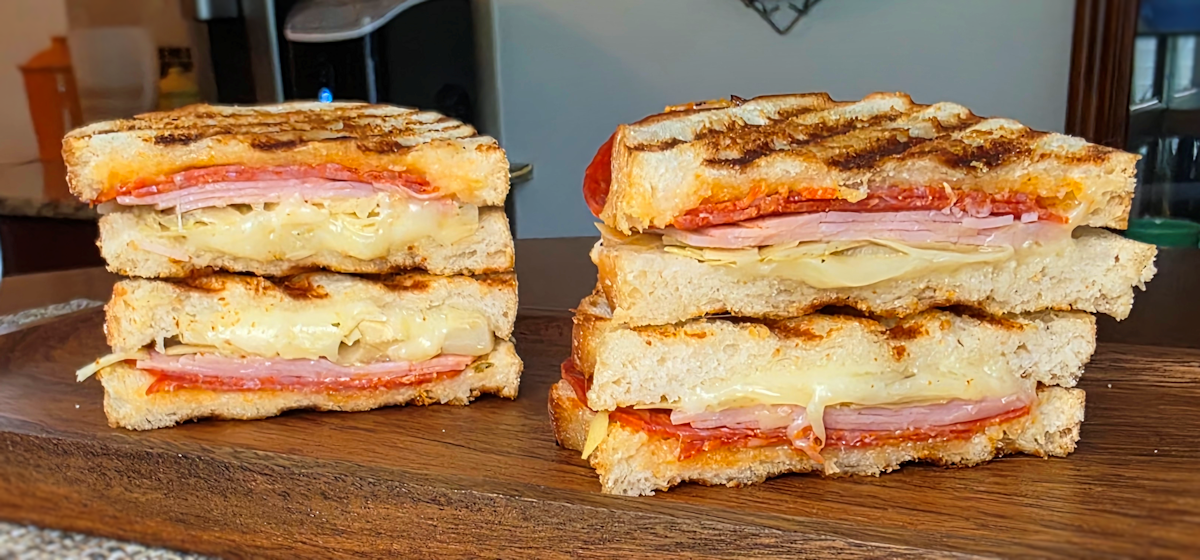
Oh you delicious, crunchy, dripping, yummy sandwich you! This Italian artichoke panini using the Cuisinart Griddler is just another reason my Griddler can be found on my countertop just about every day of the week. I use it that much that rarely does it find its way back into the pantry. Because in just minutes I can have a restaurant-quality sandwich for a fraction of the cost. Hot off the press and perfect.
One Tasty Panini
I tend to put Italian-style meats on my paninis, though it’s not required. You can use your favorites. But I have found that Aldi makes this wonderful pack of Italian meats that also includes provolone cheese. It’s priced right and makes for fantastic sandwiches like this Italian artichoke panini using the Cuisinart Griddler. This isn’t rocket science, as they say. Just use good ingredients and you’ll have a great sandwich.
Just Leave It Be
After you place your sandwich on the hot griddle just leave it alone. Don’t go playing with it. Don’t turn it. Or flip it. Don’t open it to see what’s going on between the slices of bread. Just wait until the outsides get toasty crunchy brown. Then remove it. Then enjoy.

- SUPERIOR PERFORMANCE: The Cuisinart Griddler…
- 5-IN-1 COOKING: This Cuisinart panini press and…
Also try my easy spicy relish paninis using the Cuisinart Griddler.
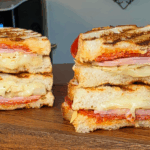
Italian Artichoke Panini using the Cuisinart Griddler
Equipment
Ingredients
- 4 slices Italian bread thicker is better
- 4 slices Genoa salami
- 6 slices hot salami or sandwich pepperoni
- 2 slices provolone cheese
- artichoke hearts to taste, chopped, patted dry
- 2 teaspoons vegetable oil olive oil
- mayonnaise to taste, optional
Instructions
- Pre-heat your Griddler with the dials set for high-heat panini griddles.
- Set out the bread slices on a cutting board or counter top.
- Top with the meats and cheese.
- Top the sandwiches with the chopped artichoke hearts.
- Add the top slices of bread to form the sandwiches.
- Brush the outsides of the bread slices with the oil.
- Transfer to the Griddler and close the lid. Cook until the bread is golden brown and crunchy.
- Remove and let cool slightly before opening to add mayonnaise to inside of top pieces of bread.
- Slice and serve.
Notes
Nutrition
Nutritional values are approximate.

- Ideal for cleaning air fryers, electric indoor…
- Soft, flexible bristles are safe for non-stick…