Grilled Bell Pepper Pizza

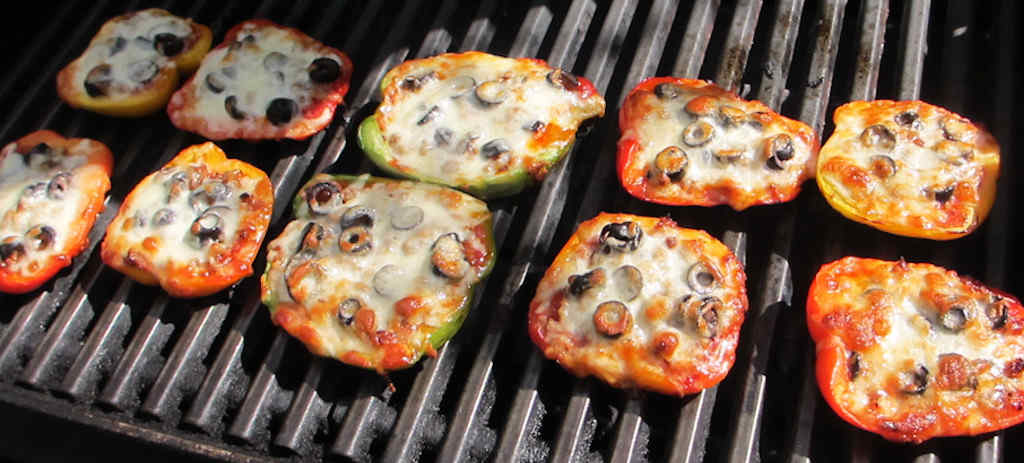
My wife and I love pizza, but we are also watching our carbohydrates. These grilled bell pepper pizzas solve that problem and then some! All of our favorite pizza toppings served on a wonderful bell pepper ‘crust’. I grilled the pizzas until the peppers were just starting to soften so they still had a bit of crunch to them. They were fantastic!
Grilled Bell Pepper Pizza

Low Carb And Still Delicious!

Grilled bell pepper pizzas will definitely become a staple in our house. They aren’t exactly zero carbs (the peppers and sauce have a few grams of carbs), but they are mighty low in carbs and that’s good enough for us! I don’t have to feel guilty about carbs when I eat too many of these. That’s not to say they’re healthy but they’re good!

I recommend that you use a grill basket when making these ‘pizzas’. It makes cooking easier and you don’t have to worry about anything falling through the grates. And cleanup is easier too!

You don’t have to grill these ‘pizzas’, either. Just pop them in a 425 F oven instead.

Also try my sausage-stuffed grilled sweet peppers and my grilled French bread pizzas.

Grilled Bell Pepper Pizza
Print Pin
4 from 1 vote

Grilled Bell Pepper Pizza

Course Main
Cuisine American
Prep Time 15 minutes
Cook Time 15 minutes
Total Time 30 minutes

Ingredients

  • Bell peppers various colors
  • Olive oil
  • Pizza sauce
  • Your favorite toppings black olives, crumbled cooked sausage, pepperoni, red pepper flake, etc
  • Shredded mozzarella cheese

Instructions

  • Fire up your grill for direct cooking over medium-high heat.
  • Cut the peppers so that they form little bowls. I found that cutting them in half made for deeper bowls than I wanted (too much bell pepper!) so I trimmed them down so that there was a 1/4″ – 1/2″ deep bowl.
  • Remove any seeds.
  • Brush the outsides of the peppers with the oil.
  • Add your favorite toppings up to the top of the pepper ‘bowls’.
  • Add cheese and place onto the grill.
  • Grill for 10-15 minutes or until the peppers have started to soften and the cheese is melted.

Nutritional values are approximate.

Bell Pepper Powder on the Nesco Snackmaster Pro

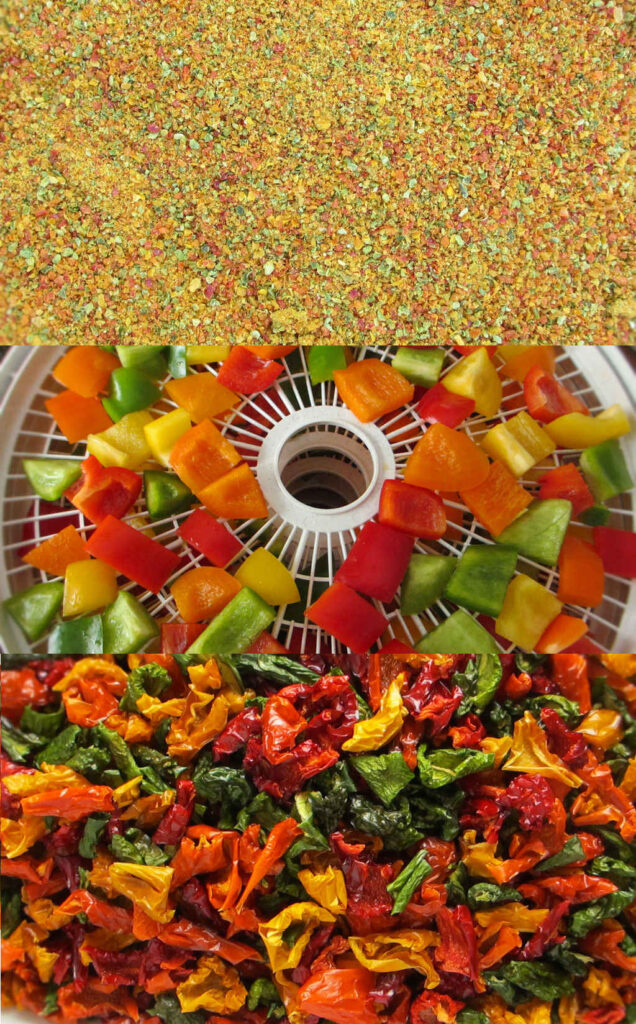
Although I truly do love making jerky on my dehydrator. it’s actually not the main reason I bought it. I got it to dry herbs and vegetables to make my own spice mixes. This bell pepper powder made on my Nesco Snackmaster Pro dehydrator was my first attempt, and boy, is it ever amazing.

Bell Pepper Powder on the Nesco Snackmaster Pro

Great Pepper Flavor

I cannot wait to use this bell pepper powder on the Nesco Snackmaster Pro in everything from omelets to chili. It has a great peppery sweetness to it. You could easily substitute it for black pepper in a lot of cases.

Grind Until Perfect

After drying the chopped peppers for 24 hours I ground them using a blade coffee grinder (not the burr grinder). Not all of the peppers would go thru the grinder (they were still a bit moist) so I returned them to the dehydrator for just a bit.

Storing Your Pepper Powder

The final product went into Mason jars with lids and then vacuum-sealed using a jar attachment for a vacuum sealer. You just have to remember that after you open the jar to remove some of the powder you’ll need to re-seal it. No big deal and well worth the effort.

Also try making poblano pepper powder and onion powder on your Nesco Snackmaster Pro. They’re as easy as easy gets!

Bell Pepper Powder on the Nesco Snackmaster Pro
Print Pin
5 from 1 vote

Bell Pepper Powder on the Nesco Snackmaster Pro

This bell pepper powder was my first attempt, and boy, is it ever amazing.
Course Seasoning
Cuisine American
Keyword bell pepper, dehydrator, nesco snackmaster pro
Prep Time 15 minutes
Cook Time 1 day
Total Time 1 day 15 minutes
Servings 1 cup
Calories 148kcal

Ingredients

  • 4 bell peppers I was able to fit approximately 2 peppers per Nesco Snackmaster Pro tray

Instructions

  • Set your dehydrator to 135 F.
  • Rinse the peppers. Remove the stems and seeds and cut into chunks. If you are not using screen trays you’ll want to cut fairly large pieces so they do not fall between the trays.
  • Dehydrate for 18-24 hours. Rotate the trays every 2 hours if possible.
  • Once all the peppers are dry and a bit crisp remove and let cool.
  • Process the peppers in the grinder until they form a fine powder. If some pieces of pepper do not grind return them to the dehydrator for another hour or so until crisp.
  • Keep the powder in an air-tight container. I place mine in a Mason jar, cover it, then use a vacuum-sealer attachment specifically for jars to remove all of the air.

Notes

You’ll need the following. A dehydrator with screen trays (I use a Nesco Snackmaster Pro), a blade coffee grinder (not a burr grinder) air-right containers or vacuum-sealed jars (I use a canning jar attachment on my vacuum sealer) additional trays, if required (my Nesco Snackmaster Pro came with 5, I purchased more so I can have 8 or more trays going at once).

Nutrition

Calories: 148kcal | Carbohydrates: 29g | Protein: 5g | Fat: 1g | Saturated Fat: 1g | Sodium: 19mg | Potassium: 1004mg | Fiber: 10g | Sugar: 20g | Vitamin A: 14904IU | Vitamin C: 608mg | Calcium: 33mg | Iron: 2mg

Nutritional values are approximate.