Jalapeno Beer Mustard

It’s rare that I make my own mustard. There are so many amazing varieties available in the store that I have a hard time convincing myself to make one from scratch. Jalapeno beer mustard is not something I can find in my grocery store. So I made some. And wow, what an amazing mustard this is. I found it to be smooth, without that sometimes-overwhelming vinegar-mustard flavor you find. It has just a hint of spiciness. This was the perfect mustard for grill sausage sandwiches. Perfect.

Jalapeno Beer Mustard

The Perfect Kick

The key to this jalapeno beer mustard is using a quality coarse ground mustard. As you can see, I used one that was full of pop-in-your-mouth mustard seeds. It looked amazing and it tasted fantastic. So don’t skimp on that part.

This is nothing but one great mustard. Spread it on sandwiches, too! Any place you want a great mustard, this is the one you need to reach for!

This mustard is great on my kraut-stuffed sausages.

Jalapeno Beer Mustard
Print Pin
4 from 1 vote

Jalapeno Beer Mustard

This jalapeno beer mustard is the perfect mustard for grill sausage sandwiches. Smooth, with just a hint of spiciness, it's a real winner.
Course Sauce
Cuisine American
Keyword jalapeno, mustard, spicy
Prep Time 12 hours 30 minutes
1 hour
Total Time 13 hours 30 minutes
Servings 2 cups
Calories 144kcal

Equipment

Ingredients

Instructions

  • The night before you are going to make the mustard, place the beer, mustard seeds, mustard powder, vinegar and pepper flakes in a sauce pan.
  • Whisk and refrigerate overnight.
  • Remove the pan from the fridge and place on the stovetop over high heat.
  • Bring to a boil then reduce the heat to a simmer.
  • Continue simmering until reduced by half.
  • Remove from heat and let cool slightly.
  • Stir in the remaining ingredients.
  • Cover and refrigerate until ready to use.

Notes

Stir before using.

Nutrition

Calories: 144kcal | Carbohydrates: 12g | Protein: 7g | Fat: 7g | Saturated Fat: 1g | Trans Fat: 1g | Sodium: 1425mg | Potassium: 283mg | Fiber: 5g | Sugar: 2g | Vitamin A: 419IU | Vitamin C: 19mg | Calcium: 95mg | Iron: 3mg

Nutritional values are approximate.

Alabama White Sauce Fried Chicken using the Vortex

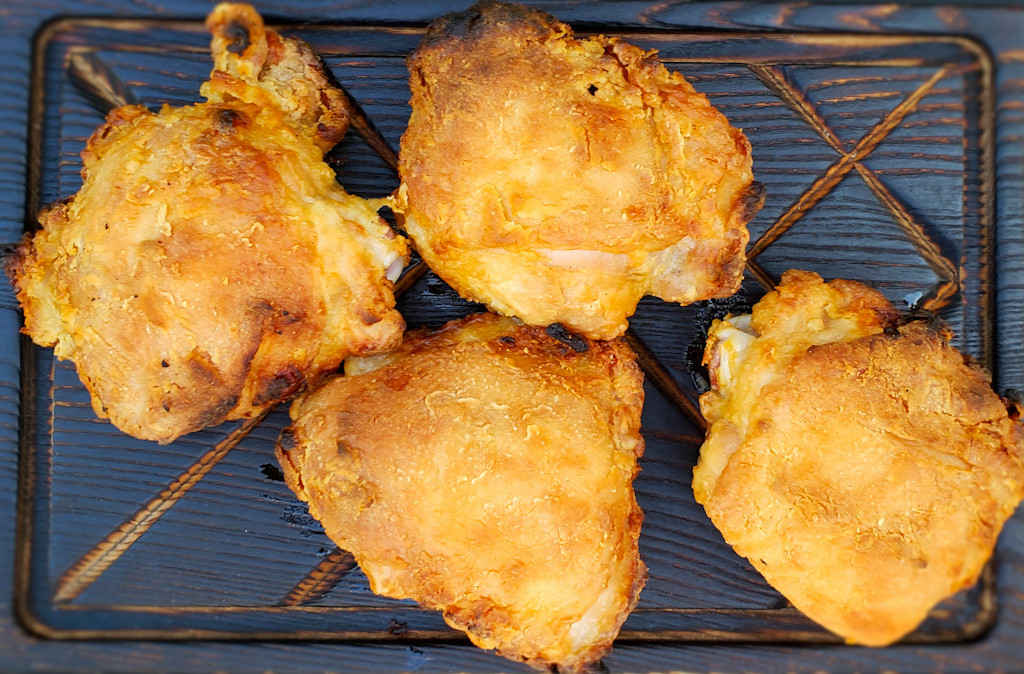
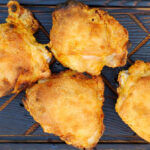
Give me a grill, a Vortex full of lit charcoal, and a few pieces of chicken and I’m one happy guy. One of my all-time favorite things to make on my grill is ‘fried’ chicken using the Vortex. I’ve made countless variations, all fantastic. Like this Alabama White Sauce fried chicken using the Vortex. Just like all my others, it tastes and looks just like chicken fried in oil. The tangy Alabama white BBQ sauce is different. If you’ve never had it, I highly recommend it. It’s great on any chicken, fried, grilled, roasted, you name it.

Alabama White Sauce Fried Chicken using the Vortex

Some of the best Fried Chicken You’ll Ever Have

The Vortex always produces the most tender, juicy chicken you can find. This is a great, easy way to prepare delicious chicken. The addition of the Alabama White Sauce makes it different than ‘normal’ fried or traditional tomato-based BBQ chicken. Try it and you’ll find that you love this Alabama white sauce fried chicken using the Vortex just as much as I do.

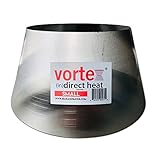
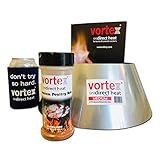
I have a few Vortex inserts because, well, I have a few grills. By far my favorite setup is the Vortex in my Weber Performer grill. I can easily fit 8 large bone-in, skin-on chicken breasts around the grill without crowding them. They have never come out anything but fantastic. It’s as easy as you can get.

Also try my Vortex hot stuff fried chicken.

Alabama White Sauce Fried Chicken using the Vortex
Print Pin
5 from 1 vote

Alabama White Sauce Fried Chicken using the Vortex

The tangy Alabama white BBQ sauce is different. If you've never had it, I highly recommend it. It's great on any chicken, fried, grilled, roasted, you name it.
Course Main
Cuisine American
Keyword fried chicken, Vortex
Prep Time 15 minutes
Cook Time 45 minutes
Servings 4
Calories 249kcal

Ingredients

Instructions

  • Load up your Vortex full of charcoal and light. Meanwhile, get the chicken ready.
  • Rinse chicken and pat dry.
  • Place chicken in a large resealable container or bag.
  • Once the charcoal is fully lit, remove the chicken from the bag and shake off any excess.
  • Transfer chicken to around the Vortex and close the lid, keeping the top vent open.
  • Cook for 45 minutes or until the chicken reaches 165 F. Turn the lid 90 degrees every 15 minutes of cook time if desired.
  • Lightly brush the chicken with some of the white sauce and continue cooking another 5-10 minutes.
  • Serve with more white sauce for dipping if desired.

Notes

If you can’t find Duke’s, any good Alabama white sauce will do!

Nutrition

Calories: 249kcal | Protein: 22g | Fat: 17g | Saturated Fat: 5g | Polyunsaturated Fat: 4g | Monounsaturated Fat: 7g | Trans Fat: 1g | Cholesterol: 87mg | Sodium: 81mg | Potassium: 218mg | Vitamin A: 162IU | Vitamin C: 2mg | Calcium: 13mg | Iron: 1mg

Nutritional values are approximate.

Prime Rib Chili

Prime rib chili is one of those things that just sort of happened. With the end of winter in sight I decided to start rummaging around in the freezer for anything I needed to use up. I came across a nice rib roast that I’d forgotten about. I’d picked up a few of them last time they were on sale. They were so cheap in fact that I didn’t mind using a slightly more expensive cut of meat in a chili. And boy, does prime rib ever make for a fantastic chili. Great beefy flavor and of course tender as you can get.

Prime Rib Chili

It’s About The Prime Rib

Other than the prime rib, this chili is pretty much your standard fantastic chili. I really love poblanos in a chili. To make them extra special I roast them on the grill or under the broiler first. For the same reason, I prefer fire-roasted tomatoes in my chili. That char adds a lot of flavor.

This chili is crazy good on cheese fries.

Also try my over the top smoked chili and some of Fat Johnny’s goulash.

Prime Rib Chili
Print Pin
3.50 from 2 votes

Prime Rib Chili

Prime rib chili is one of those things that just sort of happened. And boy, does prime rib ever make for a fantastic chili. Great beefy flavor and of course tender as you can get.
Course Main
Cuisine American
Keyword chili, prime rib
Prep Time 15 minutes
Cook Time 1 hour 30 minutes
Total Time 1 hour 45 minutes
Servings 8
Calories 376kcal

Equipment

Ingredients

Instructions

  • Season the beef well with the salt and pepper.
  • Working in batches, heat some of the oil in a large Dutch oven or pot over medium-high heat and add the beef. Brown on all sides, 4-5 minutes, and remove to a plate.
  • Add the onion to the Dutch oven and cook 5 minutes.
  • Add the poblano and cook another 3 minutes.
  • Add the garlic and cook another minute.
  • Stir in the chili powder, cumin and coriander and cook another 3 minutes.
  • Add the broth, tomatoes and cooked beef.
  • Bring to a boil then reduce heat to a simmer and simmer uncovered for 45 minutes.
  • Add the beans and simmer another 15 minutes.
  • Remove from heat and stir in the lime juice.
  • Serve topped with cheese and garnished with cilantro.

Notes

Also great with some hot cornbread.

Nutrition

Calories: 376kcal | Carbohydrates: 5g | Protein: 18g | Fat: 32g | Saturated Fat: 13g | Cholesterol: 69mg | Sodium: 709mg | Potassium: 458mg | Fiber: 2g | Sugar: 2g | Vitamin A: 724IU | Vitamin C: 27mg | Calcium: 37mg | Iron: 2mg

Nutritional values are approximate.

Italian Barbecue Shrimp

Note: This recipe was developed using the Char-Broil Big Easy Oil-Less Fryer. If you are cooking using the Char-Broil Smoker-Roaster Grill you should cook with the lid open and the temperature set to High. You might also need to adjust the cooking time.

I have a major addiction to shrimp cooked in stainless steel oyster shells with a sauce. Any kind of sauce. Lots of sauce. The kind of sauce that I can dip grilled garlic bread in. Shrimp and soppin’, that’s my style. These Italian barbecue shrimp combine super yummy shrimp with a wonderful sauce. A soppin worthy sauce of butter, Worcestershire sauce, garlic and seasonings.

Italian Barbecue Shrimp

What’s This Italian Barbecue Thing?

Maybe, like me, you’re wondering what makes these Italian barbecue shrimp? There aren’t any tomatoes, or basil or things I might think of when I think Italian (ok, there is garlic). Well, thanks to the fine folks at Louisiana Kitchen and Culture, I found the answer:

The original version is said to have originated in New Orleans’ Italian community nearly a century ago, to be added to a very long list of the city’s Italian-Creole classics. So in honor of the history we called ours Italian Barbecue Shrimp. There are many variations on the original recipe, but any authentic barbecue shrimp dish worth its name has great flavor, spices and needs bread for sopping up the juices.

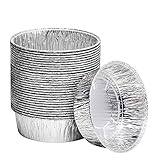
It’s always a good idea to keep a few spare grease trays on hand for your Char-Broil Big Easy.

Also try my restaurant-style peel and eat shrimp.

Italian Barbecue Shrimp
Print Pin
4 from 1 vote

Italian Barbecue Shrimp

These Italian barbecue shrimp combine super yummy shrimp with a wonderful sauce. A worthy bread-soppin' sauce.
Course Appetizer
Cuisine American
Keyword grilled, oyster shells, shrimp
Prep Time 15 minutes
Cook Time 15 minutes
Servings 4
Calories 255kcal

Ingredients

Instructions

  • Fire up your grill for indirect cooking at 350 F. Or pre-heat your Big Easy. You can also prepare these in a pre-heated oven at 350 F.
  • Divide the shrimp between 12 stainless steel oyster shells.
  • Melt the butter in a small saucepan over medium heat. S
  • Stir in the Worcestershire sauce, pepper, Creole seasoning, garlic and lemon juice.
  • Divide the butter mixture between the oyster shells. It's ok (very ok!) to have extra. Just put it in a small bowl for serving alongside the shrimp.
  • Transfer the shells to the grill, Big Easy or oven and cook for 15 minutes or until the shrimp have turned pink and translucent and the butter is good and hot and bubbly.
  • Serve hot but be careful of the hot shells!

Notes

Serve with crunchy French bread for dipping into the buttery sauce.

Nutrition

Calories: 255kcal | Carbohydrates: 4g | Protein: 8g | Fat: 24g | Saturated Fat: 15g | Trans Fat: 1g | Cholesterol: 151mg | Sodium: 367mg | Potassium: 152mg | Fiber: 1g | Sugar: 1g | Vitamin A: 1135IU | Vitamin C: 11mg | Calcium: 77mg | Iron: 1mg

Nutritional values are approximate.

Quick Fix Messy Meatball Sandwich

I always keep frozen cooked meatballs on hand. They might be homemade. Or they might be store-bought. Either way, they’re always around because I never know when I might need a really quick lunch. You can’t get much simpler than this quick fix messy meatball sandwich. Remember my motto: the messier the better and this is definitely better!

Quick Fix Messy Meatball Sandwich

Aim For Messiness

Quick fix messy meatball sandwiches aren’t meant to be fussy. If you’re in a super-duper hurry you can skip the baking part of the recipe and just place the sandwiches under a hot broiler for a minute or two. Keep an eye on them, though. They’ll get mighty crusty mighty quick! You want a bit of a crunch to them. I admit, I don’t follow this recipe that closely. I don’t measure the marinara sauce. Or the cheeses. Just eyeball it. But get enough of each so that it ends up being messy.

Although I used marinara sauce the last time I made these, you can also substitute pizza sauce. Jarred or canned, it doesn’t matter. I do recommend that you hand-shred the mozzarella, though. It might violate my keep-it-simple rule, but it’s worth the extra 15 seconds (if you use a good shredder).

Quick Fix Messy Meatball Sandwich
Print Pin
5 from 1 vote

Quick Fix Messy Meatball Sandwich

You can’t get much simpler than this quick fix messy meatball sandwich. Remember my motto: the messier the better and this is definitely better!
Course Main
Cuisine American
Keyword meatballs, quick fix, sandwich
Prep Time 5 minutes
Cook Time 35 minutes
Servings 4
Calories 479kcal

Equipment

Ingredients

  • 16 meatballs frozen
  • 1 â…“ cup marinara sauce pizza sauce is great too!
  • 4 hoagie rolls sub rolls or baguettes also work great!
  • ¼ cup Parmesan cheese
  • 1 â…“ cup Mozzarella cheese shredded
  • 2 teaspoons dried oregano

Instructions

  • Preheat oven to 350 F.
  • Place meatballs and sauce into a medium saucepan over medium heat. Cover and bring to a simmer. Simmer for 20 minutes or until the meatballs are heated through, stirring often.
  • Turn rolls on their sides, sliced side up. If they aren't pre-sliced cut them about 3/4ths of the way through but not all the way.
  • Divide meatballs and sauce between the rolls, gently pushing the meatballs down.
  • Sprinkle cheeses over top along with the oregano.
  • Bake for 10-15 minutes or until the cheese is melted and the buns have started to brown.

Notes

Serve with plenty of napkins!

Nutrition

Calories: 479kcal | Carbohydrates: 39g | Protein: 27g | Fat: 24g | Saturated Fat: 10g | Cholesterol: 74mg | Sodium: 1086mg | Potassium: 478mg | Fiber: 3g | Sugar: 8g | Vitamin A: 676IU | Vitamin C: 6mg | Calcium: 303mg | Iron: 13mg

Nutritional values are approximate.

French Toast using the Cuisinart Griddler

I don’t need an excuse like it being morning to have breakfast. I’ll have it for lunch or dinner, too. And one of my long-time favorites to have is French toast. And this here is my go-to recipe for making perfect French toast using my Cuisinart Griddler. My Griddler gets a lot of use. For everything from paninis to French toast, it’s a real workhorse.

French Toast using the Cuisinart Griddler

I Like It Simple

I like my French toast to have just a bit of a crunchiness along the edges so I cook mine longer than the time I have in the recipe. It’s up to you. And I admit, I’m not too fancy when it comes to topping it either. Warm maple syrup and maybe some butter, that’s it. I always think about sprinkling on some powdered sugar. Or adding some fruit. But in the end, I end up with the simple approach.

As an aside, the Griddler is the perfect cooker for travel. I always take mine with me if we are renting a place on the beach or a cabin in the woods. You never know what there’ll be available to cook on where you’re going. When I take the Griddler I know I can make breakfast, lunch and dinner without any worries.

The Griddler makes some great breakfast dishes! Also try some hash browns made up quick and easy on my favorite kitchen appliance!

French Toast using the Cuisinart Griddler
Print Pin
5 from 1 vote

French Toast using the Cuisinart Griddler

This is my go-to recipe for making perfect French toast using my Cuisinart Griddler.
Course Breakfast
Cuisine American
Keyword Cuisinart, French toast, Griddler
Prep Time 4 hours
Cook Time 15 minutes
Servings 2
Calories 455kcal

Ingredients

  • 4 large eggs beaten
  • ½ cup whole milk
  • 1 tablespoon Turbinado sugar
  • 1 pinch Kosher salt
  • 1 pinch cinnamon
  • 4 slices bread thick is best
  • 2 tablespoons unsalted butter divided
  • Your favorite toppings for serving

Instructions

  • Whisk together the egg, milk, sugar, salt and cinnamon. Pour into a shallow pan (I used an 9" x 11" baking dish).
  • Add the bread slices. Refrigerate for 4 hours. Optionally, flip after 2 hours (carefully! the bread may be very soft and want to fall apart).
  • Heat up your Griddler using the griddle plates. Set the Griddle dial to 425 F and the Selector to Griddle. Open the Griddler with the plates flat, side-by-side.
  • Once the griddles are hot place 1 tablespoon of butter on each griddle plate. Using a nylon brush or heat proof spatula, spread the butter out evenly. You don't want the bread to stick.
  • Add 2 slices of the bread to each griddle plate.
  • Cook for 5-10 minutes per side. Cook time is going to depend on how thick your bread is and how you like your bread done. This recipe produces a moist, soft French toast. If you like yours to have a bit of a crust you will have to cook the bread longer. Be careful flipping the bread
  • When the bread is done to your liking remove and serve with your favorite toppings.

Notes

I prefer Brioche bread for making French toast. Texas toast is great too. Any nice thick bread makes for the best results.

Nutrition

Calories: 455kcal | Carbohydrates: 37g | Protein: 20g | Fat: 25g | Saturated Fat: 12g | Trans Fat: 1g | Cholesterol: 408mg | Sodium: 479mg | Potassium: 324mg | Fiber: 2g | Sugar: 13g | Vitamin A: 987IU | Vitamin C: 1mg | Calcium: 205mg | Iron: 4mg

Nutritional values are approximate.

Poor Man’s Copycat McDonald’s Lobster Roll

Our McDonald’s doesn’t have lobster rolls on its menu. Heck, I didn’t know that any McDonald’s did. Apparently they are (or at least were) a thing far up the east coast, which makes sense when you think about it. So I had to make one at home. For me, that usually means a ‘poor man’s’ version, which uses imitation lobster instead of the real (expensive) stuff. Sure, I’d love to use real lobster, and I’ve had my share of real lobster rolls, but sometimes you gotta do what you gotta do. So, here it is, my delicious poor man’s copycat of McDonald’s lobster roll.

Poor Man's Copycat McDonald's Lobster Roll

I’d Go To McDonald’s For This

This is not my first time making a poor man’s lobster roll. Heck, I’ve had a standard go-to recipe for one for years and I enjoy it on occasion. The McDonald’s version is a tad different in that there’s no butter to be found, anywhere. It’s a very ‘clean’ tasting roll, and I rather enjoyed it. Fake lobster or not, I’d order it if our McDonald’s sold them!

I almost always use Blue Plate mayonnaise in the dishes I make. I think it is the best around. If you can’t find it locally you can pick it up online for a fair price.

Also try my copycat McDonald’s Big Xtra burger.

Poor Man's Copycat McDonald's Lobster Roll
Print Pin
5 from 1 vote

Poor Man’s Copycat McDonald’s Lobster Roll

Here it is, my delicious poor man's copycat of McDonald's lobster roll.
Course Main
Cuisine American
Keyword copycat, McDonald’s
Prep Time 10 minutes
Total Time 10 minutes
Servings 1
Calories 140kcal

Equipment

Ingredients

  • ½ cup imitation lobster lump-style, broken into pieces
  • ½ tablespoon mayonnaise
  • pinch kosher salt
  • 1 lettuce leaf
  • dog bun split-top if available

Instructions

  • If desired, lightly toast or warm to the bun before starting.
  • Gently combine the imitation lobster, mayonnaise and salt.
  • Carefully open the bun as wide as you can.
  • Add the lettuce leaf and top with the lobster mixture.
  • Serve.

Notes

You can brush the buns with a little melted butter if you like!

Nutrition

Calories: 140kcal | Carbohydrates: 17g | Protein: 5g | Fat: 5g | Saturated Fat: 1g | Polyunsaturated Fat: 3g | Monounsaturated Fat: 1g | Trans Fat: 1g | Cholesterol: 13mg | Sodium: 557mg | Potassium: 48mg | Fiber: 1g | Sugar: 3g | Vitamin A: 1782IU | Vitamin C: 4mg | Calcium: 9mg | Iron: 1mg

Nutritional values are approximate.
Quick Fix Gumbo

I love gumbo. It’s my number one go-to Cajun dish. And to really make a great gumbo you need to devote some time for it to really be something special. Give me a cold winter’s day and I won’t hesitate to take that time. But sometimes, I just don’t have the luxury. That’s where my quick fix gumbo comes in. All the flavors of a full-blown gumbo, but it takes a lot less time.

Quick Fix Gumbo

Skimp On Time, Not Flavor

The two major timesavers for this quick fix gumbo are using rotisserie chicken instead of cooking your own, and using a pre-made roux from the store. Making a roux takes a little time to do right, and it is worth the time… when you have the time. When you don’t, grab a jar of almost-as-good roux from the store. Our local grocery store has a (sadly, small) southern foods section. That’s where I found ready-to-use roux.

Also try my low-carb gumbo.

Quick Fix Gumbo
Print Pin
5 from 1 vote

Quick Fix Gumbo

All the flavors of a full-blown gumbo, but in a lot less time.
Course Main
Cuisine Cajun
Keyword gumbo, quick fix
Prep Time 15 minutes
Cook Time 2 hours
Total Time 2 hours 15 minutes
Servings 12
Calories 426kcal
Author Mike

Equipment

Ingredients

Instructions

  • Add oil to a large Dutch oven or stock pot over medium-high heat.
  • Add half each of the onion, celery, peppers and the bay leaves. Saute until just tender.
  • Add the remaining onion, celery and peppers and saute another 3 minutes.
  • Add all of the seasonings, the sausage, stock and chicken.
  • Bring to a boil and reduce to a simmer. Cover and simmer for 1 hour.
  • Stir in the roux in small amounts. Make sure it dissolves completely. Taste to see if you need to add more roux.
  • Cover and simmer another 30 minutes.
  • Add cooked rice and warm thoroughly.
  • Serve.

Notes

Serve with warmed, crunchy French bread for soppin’.

Nutrition

Calories: 426kcal | Carbohydrates: 62g | Protein: 25g | Fat: 8g | Saturated Fat: 2g | Cholesterol: 55mg | Sodium: 1322mg | Potassium: 442mg | Fiber: 2g | Sugar: 6g | Vitamin A: 595IU | Vitamin C: 40mg | Calcium: 38mg | Iron: 1mg

Nutritional values are approximate.
Fried Mozzarella Sticks

Oh boy. Fried mozzarella sticks. Another food that I cannot be trusted with. I have no self-control around them. Someone has to be the adult, and it’s not me. Ooey gooey cheese sticks covered in breadcrumbs, cheese and a little seasoning. All ready to be dunked into some warmed marinara sauce right before the journey into my mouth.

Fried Mozzarella Sticks

Let ‘Em Cool. Please.

As difficult as it is to do, you’ll need to wait a minute or two to let these fried mozzarella sticks cool before devouring them. I try to think about something else, like yard work, to distract me during the painful waiting period. If you don’t wait the cheese is like molten lava. So… wait.

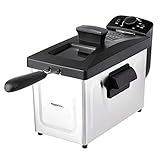
I use my Fry Daddy fryer for most of my frying ‘tasks’.

I get out my big deep fryer when it’s time to fry a large batch of food. It comes to temperature quickly and it maintains that temperature perfectly. It has a built-in oil filter and storage unit so I can re-use the oil several times.

Also try my Italian breadsticks and my mozzarella pepper sticks.

Fried Mozzarella Sticks
Print Pin
5 from 1 vote

Fried Mozzarella Sticks

Oh boy. Fried mozzarella sticks. Another food that I cannot be trusted with. I have no self control around them.
Course Appetizer
Cuisine American
Keyword cheese, deep-fried
Prep Time 15 minutes
Cook Time 1 hour 5 minutes
Total Time 1 hour 20 minutes
Servings 16 sticks
Calories 569kcal

Ingredients

Instructions

  • Place the flour into a pie pan.
  • In a separate pie pan beat the eggs with the milk.
  • In a third pie pan combine the breadcrumbs, Parmesan cheese, parsley, garlic salt and seasoning salt.
  • Line a baking sheet with wax paper.
  • Dredge the cheese sticks in the flour, followed by the egg wash and lastly the breadcrumbs.
  • Place cheese sticks into the egg wash and then the breadcrumbs on more time then transfer to the baking sheet.
  • Freeze for 1 hour to overnight (longer is better).
  • Heat oil to 350 F.
  • Working in batches, fry the cheese sticks for 30 seconds-1 minute per side until golden brown then flip and fry another 30 seconds-1 minute.
  • Transfer to a paper towel-lined plate to drain.
  • Serve with warmed marinara sauce.

Notes

Also great dipped in Ranch dressing.

Nutrition

Calories: 569kcal | Carbohydrates: 7g | Protein: 3g | Fat: 61g | Saturated Fat: 49g | Trans Fat: 1g | Cholesterol: 26mg | Sodium: 238mg | Potassium: 33mg | Fiber: 1g | Sugar: 1g | Vitamin A: 67IU | Vitamin C: 1mg | Calcium: 54mg | Iron: 1mg

Nutritional values are approximate.
Jalapeno Popper Wontons

Oh my. It’s probably best that I didn’t count how many of these jalapeno popper wontons I devoured. They just disappear like that. They’re crazy good crunchy, for starters. The filling is creamy and cheesy with just a hint of heat. For dipping I had some sweet chili sauce. Cool Ranch dressing would be great too.

Jalapeno Popper Wontons

Crunchy Flavorful Treats

You can make a whole bunch of jalapeno popper wontons in almost no time at all. You can assemble them hours before, even the day before. Then all you have to do is fry them. Frying doesn’t take long, and fortunately, they don’t tend to stick together in the fryer so you can get quite a few in at once. Just get them good and golden brown and let them drain well before serving.

The Presto Fry Daddy is perfect for making smaller batches of food. It only uses a few cups of oil and comes to temperature quickly. Clean-up is easy too!

Also try my cheesy jalapeno poppers.

Jalapeno Popper Wontons
Print Pin
5 from 1 vote

Jalapeno Popper Wontons

You can make a whole bunch of jalapeno popper wontons in almost no time at all. You can assemble them hours before, even the day before.
Course Appetizer
Cuisine American
Keyword jalapeno popper, spicy, wontons
Prep Time 30 minutes
Cook Time 30 minutes
Servings 12
Calories 293kcal

Ingredients

Instructions

  • Combine all but the wrappers and oil in a large bowl.
  • Working in batches, place a wonton wrapper in front of with one corner pointing towards you (in other words, diamond shaped).
  • Spoon a heaping teaspoon of the filling onto the center of the wrapper.
  • Dip a finger in water and run it along all 4 edges of the wonton then fold the bottom corner over the filling and to the top corner.
  • Gently press down on the wrapper to remove any air then press along the edges to seal.
  • Heat a deep fryer filled with oil to 350 F.
  • Working in batches, fry the wonton for 2-3 minutes, flipping once, until golden brown.
  • Remove to a wire rack to drain and cool.
  • Serve immediately with sauces for dipping.

Notes

You can assemble the wontons well in advance and refrigerate until ready to fry. Leftovers (lol, if there are any) can be reheated in the oven and will retain most of their crunchiness.

Nutrition

Calories: 293kcal | Carbohydrates: 20g | Protein: 9g | Fat: 20g | Saturated Fat: 11g | Polyunsaturated Fat: 1g | Monounsaturated Fat: 5g | Cholesterol: 61mg | Sodium: 465mg | Potassium: 136mg | Fiber: 1g | Sugar: 2g | Vitamin A: 732IU | Vitamin C: 6mg | Calcium: 190mg | Iron: 1mg

Nutritional values are approximate.