Copycat Popeye’s Delta Dipping Sauce

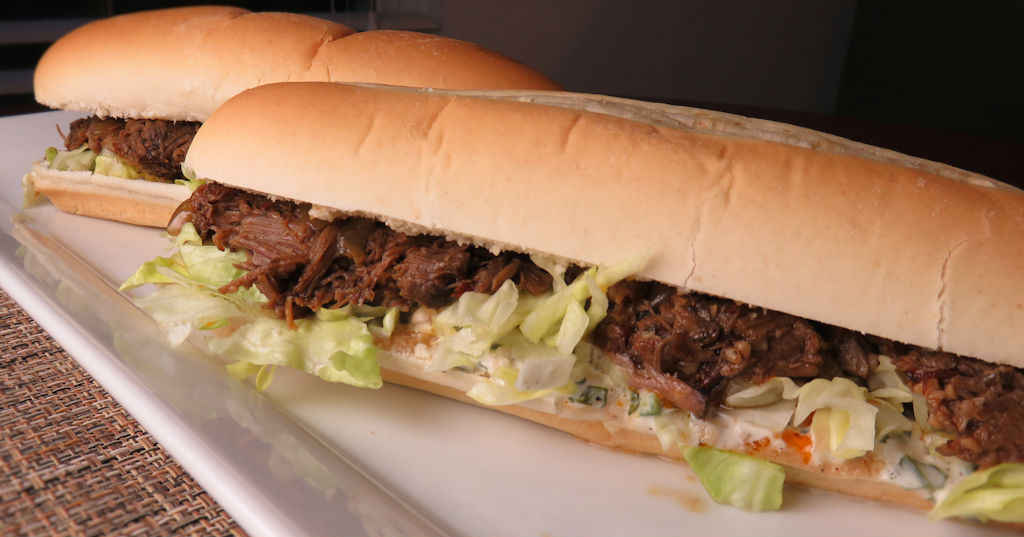
Happiness is making a sauce for dipping chicken nuggets or fingers that can also be used in many, many other ways. This copycat Popeye’s Delta dipping sauce is exactly that. It’s very similar to some of the comeback sauces I’ve made or had. This Cajun-inspired dipping sauce really steps up your dipping game and them some. It also is great on po boy sandwiches. Or any sandwiches for that matter. And even hot dogs. And chicken sandwiches, too!

Copycat Popeye's Delta Dipping Sauce

Creole Mustard Makes This Sauce Great

I really think that a good, strong Creole mustard makes this copycat Popeye’s Delta dipping sauce something amazing. You can use any mustard you want, you don’t have to stick to the original idea at all, but in my mind there’s only one Creole mustard and it’s made by Zatarain’s. The extra kick of the Creole mustard really made for a fantastic spread on a fried shrimp po boy sandwich. Which reminds me. This sauce is also great for dipping fried shrimp or oysters!

I almost always use Blue Plate mayonnaise in the dishes I make. I think it is the best around. If you can’t find it locally you can pick it up online for a fair price.

Also try my copycat Popeye’s blackened Ranch dipping sauce.

Copycat Popeye's Delta Dipping Sauce
Print Pin
4 from 1 vote

Copycat Popeye’s Delta Dipping Sauce

Happiness is making a sauce for dipping chicken nuggets or fingers that can also be used in many, many other ways. This copycat Popeye’s Delta dipping sauce is exactly that.
Course Dipping Sauce
Cuisine American
Keyword copycat, dipping sauce
Prep Time 5 minutes
Cook Time 1 hour
Servings 1 cup
Calories 1394kcal

Ingredients

Instructions

  • Whisk together all ingredients in a small bowl.
  • Cover and refrigerate for one hour.

Notes

Stir before using.

Nutrition

Calories: 1394kcal | Carbohydrates: 36g | Protein: 4g | Fat: 139g | Saturated Fat: 58g | Trans Fat: 1g | Cholesterol: 47mg | Sodium: 2258mg | Potassium: 581mg | Fiber: 5g | Sugar: 24g | Vitamin A: 935IU | Vitamin C: 25mg | Calcium: 59mg | Iron: 2mg

Nutritional values are approximate.

Italian Breadsticks

We’ve been trying to perfect our breadsticks approach for years. It’s sad to admit that. But something always went weird. No flavor. Over-baked. Whatever, something always just didn’t quite work out right. Ugh. Heck, they’re just breadsticks, I know! Well, no more. These Italian breadsticks are absolutely fantastic. We made them on our wood pizza oven, but you can make them just as easily and just as good in your oven. They’re light and fluffy, very tasty and perfect for dipping in warmed marinara sauce.

Italian Breadsticks

Store-Bought Dough For The Win

You can certainly go through the steps of making your own pizza dough when you make Italian breadsticks. We’ve discovered a frozen dough, Tiseo’s, at our local grocery store that is perfect for breadsticks. And pizza. You can’t beat the final product. It’s just great! Any decent store-bought dough will do. Just make sure you give it ample time to defrost if it is frozen.

Also try my fried Mozzarella sticks.

Italian Breadsticks
Print Pin
5 from 1 vote

Italian Breadsticks

You can certainly go through the steps of making your own pizza dough when you make Italian breadsticks.
Course Bread
Cuisine American
Keyword breadsticks, Italian
Prep Time 13 hours 15 minutes
Cook Time 15 minutes
Servings 8
Calories 240kcal

Ingredients

Instructions

  • Remove the dough from the freezer and place in the fridge overnight to thaw.
  • One hour before you plan on making the breadsticks remove the dough from the fridge and place on your countertop to come to room temperature.
  • Preheat your oven to 425 F.
  • Lightly flour a flat work surface, such as a countertop.
  • Lightly oil your pizza pan.
  • Sprinkle with cornmeal.
  • Remove the dough from its packaging and, using your palms or a rolling pin, form into a round that is roughly the size of your pizza pan. Try to not overwork the dough.
  • Transfer dough to the pan.
  • In a small pan over low heat, melt the butter.
  • Stir in the garlic powder and Italian seasoning.
  • Brush over the dough. Remember, edge-to-edge is our pledge so get it all around!
  • Cover the dough with the cheese, again getting it everywhere!
  • Bake the dough for 12-15 minutes or until golden brown and lightly crispy. If desired, turn the broiler on for 1 minute to further brown the top.
  • Remove from oven. Transfer to a cutting board and cut into sticks.
  • Serve with warmed marinara sauce for dipping.

Notes

Also great dunked in Ranch salad dressing!

Nutrition

Calories: 240kcal | Carbohydrates: 28g | Protein: 10g | Fat: 10g | Saturated Fat: 5g | Polyunsaturated Fat: 1g | Monounsaturated Fat: 2g | Trans Fat: 1g | Cholesterol: 27mg | Sodium: 564mg | Potassium: 27mg | Fiber: 1g | Sugar: 4g | Vitamin A: 257IU | Vitamin C: 1mg | Calcium: 129mg | Iron: 2mg

Nutritional values are approximate.

Buffalo Shrimp

I have what can easily be described as an addiction to Buffalo wings and anything with Buffalo wing sauce in the ingredients. So it came as no surprise that I devoured these Buffalo shrimp. I made them on the grill, which was about as easy to do as possible, but you can also make them in the oven. The shrimp soak up the fantastic sauce in no time. I loved them, and definitely should’ve made more!

Buffalo Shrimp

Who Needs Wings?

I used a nice medium Buffalo wing sauce when I made these shrimp. I love the flavor of shrimp. And I didn’t want some mouth-blisteringly-hot sauce burying that great taste. I could easily see making a mix of medium and mild for appetizers for a get-together. The shrimp only take a few minutes to cook so you can satisfy a crowd in no time at all. Serving them with blue cheese or ranch dressing is optional, in my opinion. They’re great by themselves!

Oh, don’t forget that the oyster shells are super hot when taken off the grill. You might want to let your guests know to not handle them for at least a few minutes. They do cool off relatively quickly.

Also try my spicy bacon-wrapped shrimp.

Buffalo Shrimp
Print Pin
4 from 1 vote

Buffalo Shrimp

These spicy shrimp are sure to disappear in no time!
Course Appetizer
Cuisine American
Keyword grilled, oyster shells, shrimp
Prep Time 10 minutes
Cook Time 10 minutes
Servings 4
Calories 5kcal

Ingredients

Instructions

  • Place the shrimp in a bowl.
  • Combine the spices and sprinkle over the shrimp. Toss to coat.
  • Place shrimp in the oyster shells. Add enough Buffalo sauce to almost fill the shells.
  • Cook the shrimp (see below). Warning: The sauce will be very hot as will the shells, so be careful handing them after they are cooked.
  • Serve with blue cheese dressing for dipping if desired.

In the oven

  • Bake at 350 F for 10 minutes or until the shrimp are no longer translucent and the sauce is hot and bubbly.

On the grill

  • Cook over medium heat for 10 minutes or until the shrimp are no longer translucent and the sauce is hot and bubbly.

Notes

Of course these shrimp are also great served with a little Ranch dressing!

Nutrition

Calories: 5kcal | Carbohydrates: 1g | Protein: 1g | Fat: 1g | Saturated Fat: 1g | Polyunsaturated Fat: 1g | Monounsaturated Fat: 1g | Sodium: 1mg | Potassium: 20mg | Fiber: 1g | Sugar: 1g | Vitamin A: 53IU | Vitamin C: 1mg | Calcium: 4mg | Iron: 1mg

Nutritional values are approximate.

Chili Cheese Fries

I had bar food on my brain. Not sure how it got there but I was dreaming of potato skins, nachos, sliders… and chili cheese fries. Nothing beats a bowl on a cold day, sure… but put it over crispy potatoes and top it with a creamy, ooey-gooey cheese sauce, and well… Hey, it’s bar food time!

Chili Cheese Fries

Load ‘Em Up

You could keep going with the toppings on chili cheese fries. Yeah, throw some sliced jalapenos on there, sure. Some sour cream? Yeah. Whatever you want, it can go on there because there aren’t any rules when it comes to bar food. I know because I’ve eaten my share of bar food. Bar food is meant to be decadent, over-the-top good.

You could make this same dish with crispy, hot baked (or fried) tater tots. In fact, now that I thought of that, I’ll be doing that next. There’s nothing better than hot loaded fries or tots.

I cooked and served these fries on my cast iron fajita skillet. It’s easy to clean up (even with the melted cheese) and it looks great.

To really kick these up, top them with my prime rib chili!

This recipe is based on a recipe from Small Town Woman.

Chili Cheese Fries
Print Pin
5 from 1 vote

Chili Cheese Fries

Nothing beats chili on a cold day
Course Appetizer or Main
Cuisine American
Keyword chili, fries
Prep Time 5 minutes
Cook Time 25 minutes
Servings 6
Calories 199kcal

Equipment

Ingredients

For the fries

  • 26 ounce frozen French fries
  • 4 cups chili I made a batch of Carrol Shelby's chili, but you can use your own recipe or even canned chili, whichever you prefer
  • other toppings optional, consider adding sliced jalapenos, sour cream, whatever you like!

For the cheese sauce

Instructions

For the fries

  • Prepare the fries per package instructions. Meanwhile make the cheese sauce (below).
  • Serve fries topped with chili, cheese sauce and whatever favorite toppings you prefer.

For the cheese sauce

  • Melt the butter in a medium skillet over medium-low heat.
  • Whisk in the flour and cook for 2 minutes, whisking constantly.
  • Add the garlic powder, onion powder and chili powder and whisk to combine.
  • While whisking, slowly add in the milk. Let the sauce come to a simmer and stir to thicken.
  • Reduce heat to low and stir in the cheese until smooth, creamy and melted. If the sauce gets too thick stir in a bit more milk.

Notes

For a good kick, use pepper jack cheese instead of cheddar.

Nutrition

Calories: 199kcal | Carbohydrates: 14g | Protein: 11g | Fat: 12g | Saturated Fat: 7g | Polyunsaturated Fat: 1g | Monounsaturated Fat: 3g | Cholesterol: 35mg | Sodium: 220mg | Potassium: 433mg | Fiber: 2g | Sugar: 8g | Vitamin A: 1350IU | Vitamin C: 144mg | Calcium: 283mg | Iron: 1mg

Nutritional values are approximate.

Kickin’ Cajun Potato Wedges using the Vortex

It only took me one time making potato wedges using my Vortex BBQ on my Weber charcoal grill to turn me into a full-blown addict. I use my Vortex a lot, to say the least. Wings, fried chicken, mostly but now also for a fantastic side dish. These Kickin’ Cajun potato wedges using the Vortex bring a nice kick, crispy skin, and cream potato-y insides. Get the ketchup out, if you want, or eat them straight-up. You can’t go wrong with them, that’s for sure!

Kickin' Cajun Potato Wedges using the Vortex

Flavor-Packed Potatoes

The key to these Kickin’ Cajun potato wedges using the Vortex is the Kickin’ Cajun seasoning from Kosmos Q. Normally used as a wing dust, I’ve found that it’s much, much more than that. Like on these potatoes. It brings a bit of heat. Actually, quite a bit the more you use. So give it a (small) taste first to see how much kick you want.

Try and make sure you cut your potato wedges the same size as much as possible. You want them to cook evenly. And definitely don’t cut them too thin, like potato straws or French fries. Nice thick wedges are what you are after. If you end up with lil ole pieces at the edges of the potato, don’t use them for this.

Also try my garlic Parmesan potato wedges using the Vortex.

Kickin' Cajun Potato Wedges using the Vortex
Print Pin
5 from 1 vote

Kickin’ Cajun Potato Wedges using the Vortex

These Kickin' Cajun potato wedges bring a nice kick, crispy skin, and cream potato-y insides. You'll eat them like popcorn.
Course Side
Cuisine American
Keyword potatoes, Vortex
Prep Time 45 minutes
Cook Time 20 minutes
Servings 2
Calories 344kcal

Ingredients

Instructions

  • Fill your Vortex BBQ with charcoal and light it up while preparing the potatoes.
  • Slice potatoes in half lengthwise, then half again lengthwise, and finally one more time lengthwise (i.e. you're cutting them into 1/8ths). You don't want them super thin, so for smaller potatoes you might only have to cut them 1/4ths.
  • Transfer to a bowl.
  • Drizzle the potatoes with the oil and toss to coat.
  • Sprinkle the potatoes with the seasoning and baking powder and toss to coat. I've found that stirring them with your hands works best.
  • Once the charcoal is just ashed over place the potato wedges in a circle around the edges of your grill. Don't let the potatoes touch. It's ok if you need to put them in two or three rows. If some pieces are thicker than others try to locate those nearer the fire.
  • Place the cover on the grill with the top and bottom vents wide open.
  • Cook for 20-30 minutes, rotating the lid 90 degrees every 5 or so minutes. Start checking the potatoes after 15 minutes. Sometimes one side off the grill needs more heat as the wedges there aren't cooking quite as quickly as others. Just rotate the lid so the vent is near that side and let cook a bit longer.
  • Remove and serve immediately.

Notes

For best results use wedges that are all about the same size.

Nutrition

Calories: 344kcal | Carbohydrates: 77g | Protein: 9g | Fat: 1g | Saturated Fat: 1g | Polyunsaturated Fat: 1g | Monounsaturated Fat: 1g | Sodium: 204mg | Potassium: 1779mg | Fiber: 6g | Sugar: 3g | Vitamin A: 24IU | Vitamin C: 24mg | Calcium: 117mg | Iron: 4mg

Nutritional values are approximate.

Quick Fix Salt and Vinegar Potato Chips

It seems like any time I pick up a bag of salt and vinegar potato chips at the store I end up unhappy. Some are way, way, way too salt and vinegar-y. You know, open the bag, breathe in, pass out. Others, I swear the bag was mis-labelled because I don’t get even a hint of salt and vinegar. The solution? Quick fix chips that have just the right amount of salt, and just the right amount of vinegar! Score!

Quick Fix Salt and Vinegar Potato Chips

Use Ruffled Chips For Maximum Yumminess

I prefer wavy ruffled chips for my quick fix salt and vinegar potato chips. First, they’re thick, so they hold up to any tossing required to get the seasoning evenly spread on each and every chip. Second, they have ridges that hold more seasoning than plain old flat chips. That means great flavor in each and every bite!

Of course, you can make homemade potato chips in a deep-fryer and then toss them in the seasoning too! Just don’t over-drain the chips as they come out of the hot oil or the flavors won’t have anything to adhere to. Make sure you get them good and coated.

Also try my quick fix lemon pepper, Nashville hot chicken, and garlic Parmesan potato chips.

Quick Fix Salt and Vinegar Potato Chips
Print Pin
5 from 1 vote

Quick Fix Salt and Vinegar Potato Chips

I prefer wavy ruffled chips for my quick fix salt and vinegar potato chips.
Course Snack
Cuisine American
Keyword potato chips, quick fix
Prep Time 15 minutes
Cook Time 5 minutes
Servings 4
Calories 452kcal

Ingredients

Instructions

  • Preheat your oven to 275 F.
  • Spread chips out onto a baking sheet. Bake for 5 minutes. You should see that the oils in the chips have come to the surface.
  • Gently transfer chips to a large bowl and sprinkle with the seasoning. Use a spatula to carefully stir to coat.
  • Serve immediately.

Notes

Be gentle when stirring to avoid breaking the chips.

Nutrition

Calories: 452kcal | Carbohydrates: 46g | Protein: 5g | Fat: 29g | Saturated Fat: 3g | Polyunsaturated Fat: 7g | Monounsaturated Fat: 16g | Trans Fat: 1g | Sodium: 448mg | Potassium: 1020mg | Fiber: 3g | Sugar: 1g | Vitamin C: 18mg | Calcium: 18mg | Iron: 1mg

Nutritional values are approximate.

Quick Fix Franch Dressing

Franch dressing is more proof that sometimes easy is best. Sure, I could’ve made some French dressing from scratch. And I could’ve made some Ranch dressing from scratch. But hey, it was a busy weeknight and I wanted something a little different. So out came the bottled dressings. Boom, done. And what a delicious combination the two make! Quick fix Franch dressing is way better than just French and just Ranch dressings.

Quick Fix Franch Dressing

The Perfect Combination

I used a creamy French dressing and a buttermilk Ranch dressing when I made quick fix Franch dressing. You could also use a sweet French dressing, but to offset the sweetness you might want to then use a spicy Ranch or even Buffalo Ranch.

Check out my new site, Dress My Salad, for more great salad dressing ideas!

Also try my quick fix BBQ Ranch dressing.

Quick Fix Franch Dressing
Print Pin
5 from 1 vote

Quick Fix Franch Dressing

Franch dressing is more proof that sometimes easy is best.
Course Salad Dressing
Cuisine American
Keyword French, homemade salad dressing, Ranch
Prep Time 5 minutes
Total Time 5 minutes
Servings 1 cup
Calories 1152kcal
Author Mike

Ingredients

Instructions

  • Whisk together all ingredients in a medium bowl.
  • Refrigerate until ready to use.

Notes

Stir before serving.

Nutrition

Calories: 1152kcal | Carbohydrates: 28g | Protein: 2g | Fat: 118g | Saturated Fat: 17g | Cholesterol: 40mg | Sodium: 2358mg | Potassium: 158mg | Fiber: 1g | Sugar: 23g | Vitamin A: 626IU | Vitamin C: 9mg | Calcium: 67mg | Iron: 2mg

Nutritional values are approximate.

Quick Fix Herbed Fries

Who doesn’t keep a bag or two (or more) of frozen fries on hand at all times? Yep, easiest side dish in the world, ready in no time. But no reason for them to be boring. That’s where these quick fix herbed fries come in handy. Same fries, just amped up a bit with a few always-on-hand seasonings. Nothing fru-fru, nothing fancy. Just a nice different flavor.

Quick Fix Herbed Fries

For The Best Results, Deep-Fry Them!

I actually prefer to deep fry my frozen fries, when I can. They definitely crisp up better when fried. I can still make quick fix herbed fries. Instead of seasoning the fries before cooking, just toss them in the spice mixture right out of the deep fryer.

The Presto Fry Daddy is perfect for making smaller batches of food. It only uses a few cups of oil and comes to temperature quickly. Clean-up is easy too!

Also try my crispy Cajun fries.

Quick Fix Herbed Fries
Print Pin
5 from 1 vote

Quick Fix Herbed Fries

Who doesn’t keep a bag or two (or more) of frozen fries on hand at all times? Yep, easiest side dish in the world, ready in no time. But no reason for them to be boring.
Course Side
Cuisine American
Keyword fries, herbs, quick fix
Prep Time 5 minutes
Cook Time 25 minutes
Servings 6
Calories 187kcal

Ingredients

Instructions

  • Fire up your oven for the temperature listed on the bag of fries.
  • Place a large baking sheet into the oven while it's heating up.
  • Transfer the fries to a large bowl and drizzle with the oil. Gently toss to coat.
  • Sprinkle the fries with onion powder, garlic salt and black pepper. Gently toss to coat.
  • Remove the baking sheet from the oven (with oven mitts).
  • Spread the fries out evenly onto the pan. Return to the oven and bake per package instructions.
  • Remove fries and transfer to a bowl.
  • Sprinkle with the parsley and salt and toss gently.
  • Transfer to a platter and serve.

Notes

Serve immediately.

Nutrition

Calories: 187kcal | Carbohydrates: 22g | Protein: 2g | Fat: 11g | Saturated Fat: 3g | Sodium: 471mg | Potassium: 314mg | Fiber: 3g | Sugar: 1g | Vitamin A: 119IU | Vitamin C: 6mg | Calcium: 9mg | Iron: 1mg

Nutritional values are approximate.

Perfect Grilled Baked Potatoes

I love baked potatoes. As a side dish or as a main, there’s a million ways to top them. But for me, there’s only one way to cook them: baked to a perfect 210 F internal temperature. These perfect grilled baked potatoes are guaranteed to be fluffy and delicious. Sometimes I make them in the oven. And sometimes I make them on my grill. Gas or charcoal, it doesn’t matter, you can make great potatoes on either one.

Perfect Grilled Baked Potatoes

Do You Need Potato Nails?

You might notice a little something poking out of the middle of my perfect grilled baked potatoes. Those are potato nails. Yes. Potato nails. They direct heat into the center of the potatoes so that they cook more evenly. They’re available from Weber on Amazon. They’re not required, but they work and they’re cool. And they come with a little tool for removing them because trust me, you don’t want to forget and grab them with your hands!

Perfect Grilled Baked Potatoes Temperature

If you have an oil-less fryer from Char-Broil, you can also make great baked potatoes using it.

Perfect Grilled Baked Potatoes
Print Pin
5 from 1 vote

Perfect Grilled Baked Potatoes

Sometimes I make baked potatoes in the oven. And sometimes I make them on my grill. Gas or charcoal, it doesn’t matter, you can make great potatoes on either one.
Course Side Dish
Cuisine American
Keyword baked, grilled, potatoes
Prep Time 15 minutes
Cook Time 1 hour 15 minutes
Servings 4
Calories 292kcal

Ingredients

Instructions

  • Fire up your grill for indirect cooking. You want the temperature at the grates to be 350-400 F.
  • Rinse off the potatoes and pat dry.
  • Use a knife to poke 3-4 holes in the tops of the potatoes, going about 1/2 of the way into the potato.
  • If you're using potato nails insert them now.
  • Drizzle the potatoes with just a bit of oil. Use your hand to rub the oil all over the potato. If you don't want to get your hands oily just use a brush.
  • Sprinkle the potatoes with salt. Don't be shy with it and make sure you get all sides.
  • Transfer the potatoes to the grill and cook for 1 hour to 1 hour 15 minutes. If you're not sure how consistent or high your grill temperature is, I recommend checking them after 45 minutes.
  • Once the potatoes have reached an internal temperature around 210 F they are done. If the potatoes are different sizes you'll want to check the temperature in more than one place.
  • Remove and let cool slightly before serving.

Notes

At 210 F the potatoes are done. A degree or two isn’t going to make a big difference so don’t fret if you’re just ‘close’.

Nutrition

Calories: 292kcal | Carbohydrates: 67g | Protein: 8g | Fat: 1g | Saturated Fat: 1g | Sodium: 18mg | Potassium: 1539mg | Fiber: 5g | Sugar: 2g | Vitamin A: 4IU | Vitamin C: 21mg | Calcium: 48mg | Iron: 3mg

Nutritional values are approximate.

Hot Stuff Chicken using the Vortex

To say I’m a huge fan of ‘fried’ chicken using a Vortex BBQ insert would be the understatement of the decade. I have several Vortexes (Vortices?), using them for everything from wings to potato wedges to this hot stuff chicken. This hot stuff chicken using the Vortex is easily some of the most flavor-packed, crunchy skin, moist chicken I’ve ever had. You just cannot beat the Vortex and chicken (and other things!). You’ll be amazed that this dish was cooked on a grill using charcoal and not done in a deep-fryer.

Hot Stuff Chicken using the Vortex

Nice ‘N Crispy

Whenever I cook this hot stuff chicken using the Vortex I always give it a quick, light brushing of oil just at the end. This helps crisp up the skin. Some folks also recommend using spray duck fat or oil. Or butter. Whichever you use, it’s a good thing to do since it really makes great chicken into superb fried-like chicken. I brushed it on about 5 minutes before my hot stuff chicken was completely done and let it finish cooking. That’s all!

PS: If you have duck fat spray, I highly recommend using it any time you make chicken on the Vortex. It’s a real game changer.

Also try my Vortex Alabama white sauce fried chicken.

Hot Stuff Chicken using the Vortex
Print Pin
5 from 1 vote

Hot Stuff Chicken using the Vortex

Whenever I cook chicken on my Vortex I always give it a quick, light brushing of oil just at the end.
Course Main
Cuisine American
Keyword fried chicken, spicy, Vortex
Prep Time 1 hour
Cook Time 45 minutes
Servings 4
Calories 365kcal

Ingredients

For the chicken

For the marinade

Instructions

  • Place chicken into a large resealable container or bag.
  • Combine all of the marinade ingredients and add to the chicken.
  • Seal and marinate at room temperature for one hour.
  • While the chicken is marinating (about 15 minutes) fill your Vortex with charcoal and light.
  • Place flour in a bowl or bag.
  • Remove chicken from marinade and shake off excess.
  • Transfer to flour and coat well. If using a bag just add, seal, and toss to coat. In a bowl turn the pieces in the flour to coat.
  • Shake off any excess.
  • Place chicken pieces around your grill with the bottom and top vents wide open.
  • Close the lid and cook for 45 minutes or until the chicken reaches 160 F. Turn the lid 90 degrees every 15 minutes to ensure even cooking.
  • Lightly brush the tops of the chicken with oil.
  • Cover and cook another 5 minutes. The chicken should be at least 165 F.
  • Remove and serve.

Notes

I think bone-in, skin-on thighs produce the best results but you can substitute your favorite cuts.

Nutrition

Calories: 365kcal | Carbohydrates: 19g | Protein: 21g | Fat: 23g | Saturated Fat: 8g | Polyunsaturated Fat: 4g | Monounsaturated Fat: 8g | Trans Fat: 1g | Cholesterol: 111mg | Sodium: 420mg | Potassium: 350mg | Fiber: 1g | Sugar: 4g | Vitamin A: 389IU | Vitamin C: 3mg | Calcium: 25mg | Iron: 2mg

Nutritional values are approximate.