Smash Burger Patty Melts

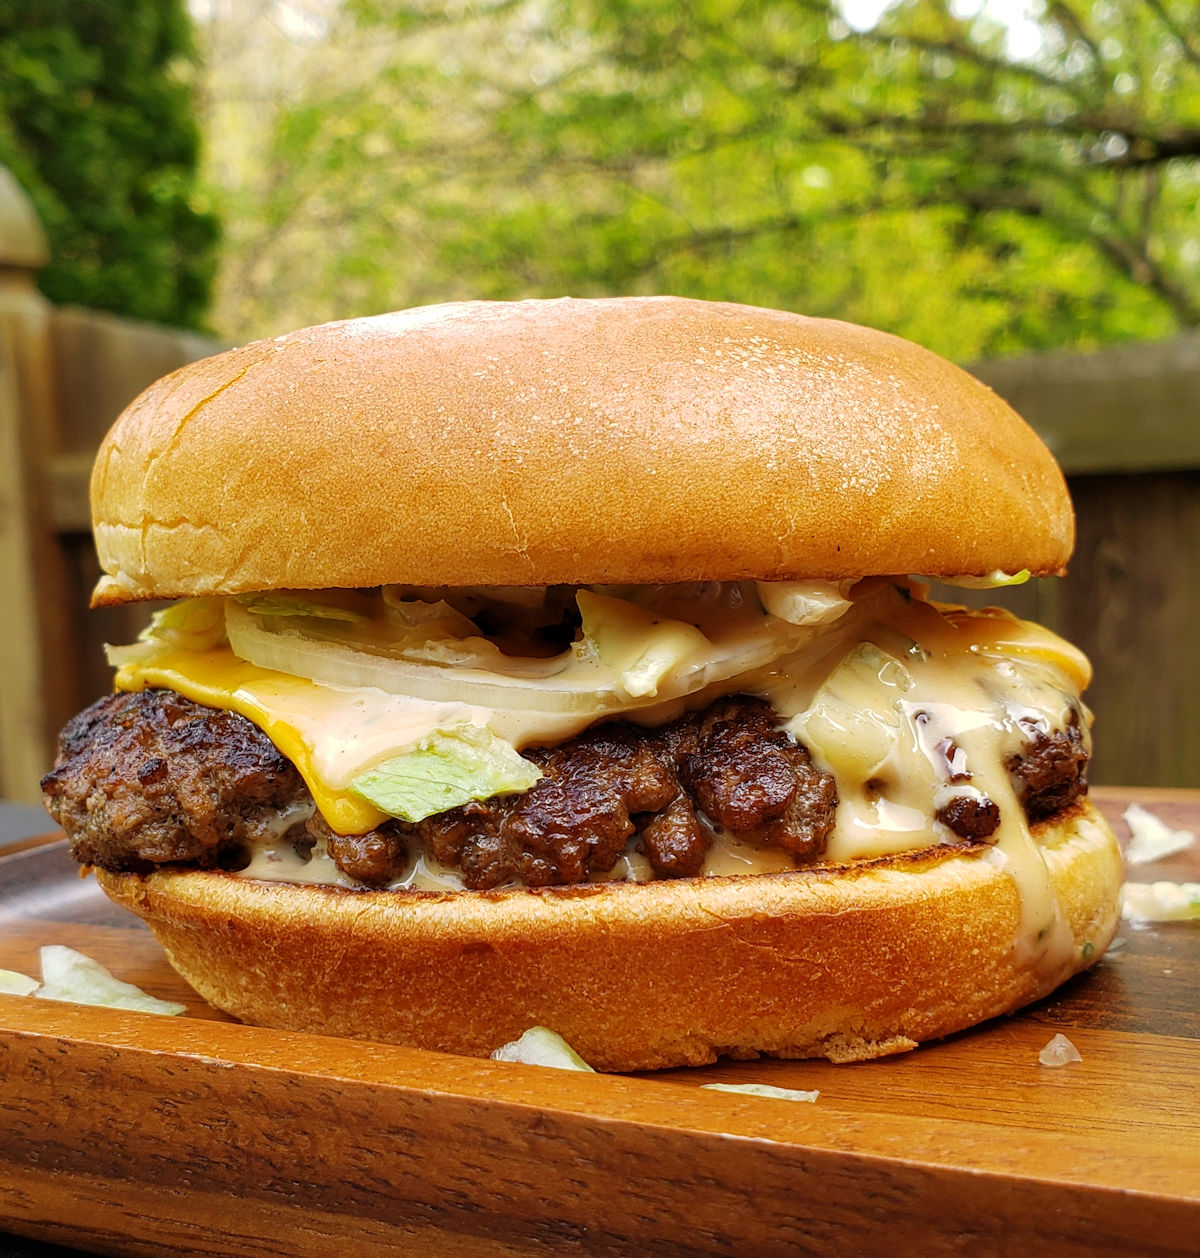
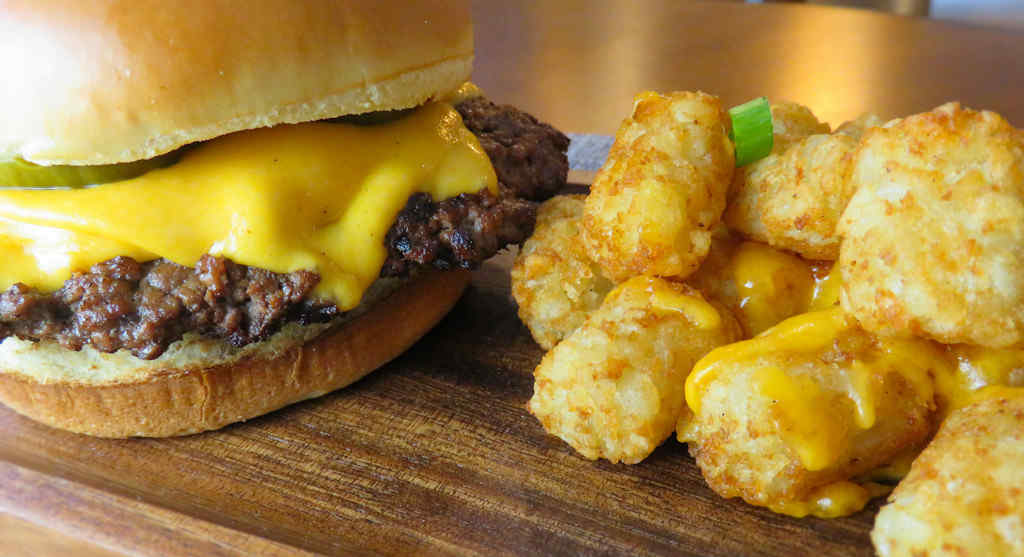
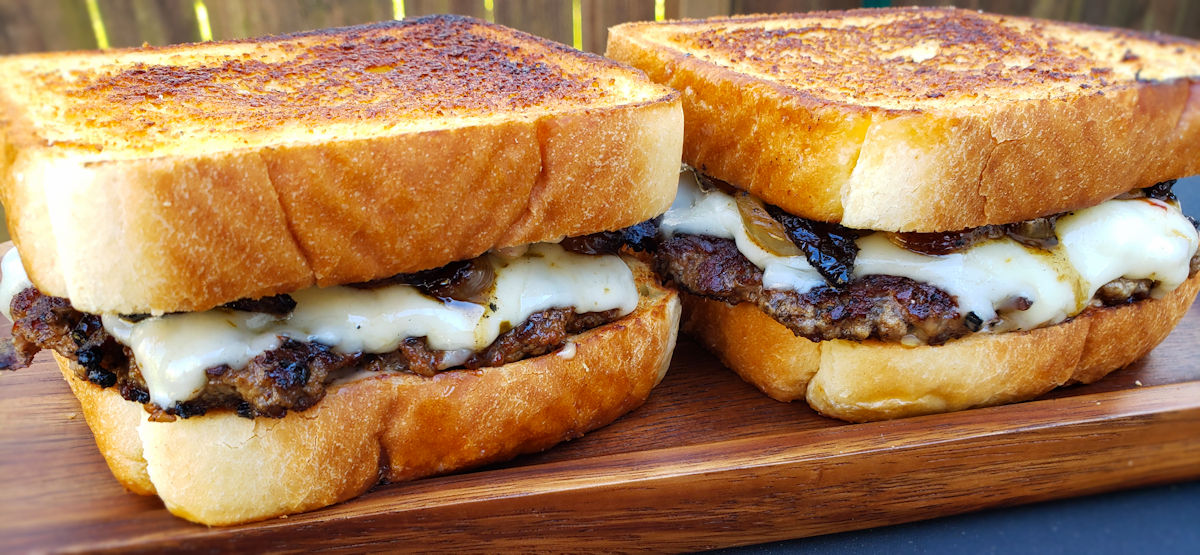
My wife and I had lunch at a local burger pub the other day. She ordered their patty melt. It looked (and was) delicious. Great bread. Juicy patty. Cooked perfectly. Melted cheese. Perfectly cooked onions. The ‘usual’ but done right. She said it was the best patty melt she’d ever had. “A challenge!” I thought (after thinking hey, I’ve made her patty melts… hmmmm). Time for me to get to making something even better. At home. And I did. These smash burger patty melts are now the best patty melts she’s ever had. They’re tastier. Juicier. And less messy. And made with our favorite, smash burgers instead of overly-thick patties. I accepted the challenge. And I won!
Smash Burger Patty Melts

Griddled To Perfection

To make smash burger patty melts, you’ll need some sort of griddle or grill pan or even cast iron skillet for your grill. I use a big ole cast iron griddle. Yes, I have one for most of my grills because they’re great for more than just burgers. I find myself using them all of the time. They don’t take up the entire grill surface so I can still cook on the grates too if I need.

Lodge Pro-Grid Reversible Grill/Griddle…
  • Dual-Sided Plate: The Lodge Pro-Grid Reversible…
  • Time-Tested Even Heat Distribution: This durable…

I don’t go crazy nuts obsessing about it, but I like to keep my griddle pretty clean. Especially if I’m toasting bread. No one wants yesterday’s chicken on today’s Texas toast. I use these scrubby pads attached to a long handle holder that prevents me from burning myself.

3M Scotch-Brite Griddle Cleaning, 4 in x 5.25 in…
  • TOUGH CLEANING POWER: Very tough, non-rusting…
  • LONG-LASTING: High quality bonding resin system…

Last, I gotta get my patties thin and spread out. I use a burger press. I wrap the bottom in foil for easy clean up. This press makes for fantastic smash burgers with the right thickness so I get that little crunch around the edges. Perfect!

Sale
Whaleme Blackstone Burger Press Set – 7″ Round…
  • Food-Grade Cast Iron Burger Press : Our barbeque…
  • Grooved Bottom Design&Non-Stick Surfaces : Our…

Also try my not-so-plain plain ole smash burgers and my pub sauce smash burgers!
Smash Burger Patty Melts
Print Pin
5 from 1 vote

Smash Burger Patty Melts

Flavor-packed patty melts that never disappoint!
Course Main
Cuisine American
Keyword burgers
Prep Time 15 minutes
Cook Time 30 minutes
Servings 4
Calories 787kcal

Equipment

Ingredients

For the sauce

For the burgers

  • mayonnaise
  • 8 pieces Texas Toast
  • 4 tablespoons unsalted butter cut into squares, divided
  • 1 large sweet onion sliced thin
  • 2 tablespoons Worcestershire sauce
  • 20 ounces ground beef I prefer 5 ounce patties for this. You don't have to be super accurate with the weight.
  • your favorite burger seasoning to taste. Salt and pepper works great too
  • 4 slices Swiss cheese
  • 4 slices pepper jack cheese

Instructions

For the sauce

  • Whisk together all ingredients in a small bowl.
  • Cover and refrigerate until ready to use.

For the burgers

  • Fire up your grill with a griddle or grill pan over direct medium-high heat.
  • Clean your griddle well. I use a brush and water, it works better than a scraper. Just be careful adding water to a hot griddle. DO NOT have any body parts near the griddle when you add the water as it will instantly create a cloud of very hot steam. Then scrub, scrub, scrub. Repeat as necessary. You want the griddle clean to toast the bread.
  • Lightly spread a thin layer of mayonnaise on one side of each slice of bread. Working in batches if necessary, lay the bread mayo-side down on the hot griddle and toast for 2-3 minutes or until lightly brown and crunchy.
  • Flip and lightly brown the non-mayo sides too. Remove to a plate for the final assembly step.
  • Once the griddle is hot add 2 tablespoons of butter. Once melted add the onion and cook for 20 minutes or longer, until they are golden brown and caramelized. Stir and flip often with a spatula or tongs. If they start to burn reduce the heat. If they get too dry add a bit more butter.
  • Stir in the Worcestershire sauce and cook for 1 more minute. Remove to a bowl and cover with foil or a plate to keep warm.
  • Form burger into 4 5-ounce patties. Don't pack them tightly, just get them lightly shaped.
  • Season beef on both sides. Don't be shy with it.
  • Add remaining 2 tablespoons of butter to the griddle. Add the burgers. Let them cook for 3 minutes then smash out as thinly as possible using a burger press.
  • Continue cooking burgers until you see a bit of a crunchy edge. Flip.
  • Cook burgers another 3 minutes. Add 1 slice of Swiss and 1 slice of pepper jack to each patty.
  • Divide the onion between the patties. Grill another minute or two to melt the cheese.
  • Divide sauce between the non-mayonnaise sides of the bread. Use a little or a lot, it's up to you.
  • Add the cooked patties and top bread slices and serve!

Notes

This recipe is best made using a griddle on a gas or charcoal grill. You can also use a griddle grill. If you don’t have a griddle you can use a large cast iron skillet, but you’ll have to cook the burgers in batches.

Nutrition

Calories: 787kcal | Carbohydrates: 12g | Protein: 35g | Fat: 66g | Saturated Fat: 27g | Polyunsaturated Fat: 10g | Monounsaturated Fat: 22g | Trans Fat: 2g | Cholesterol: 173mg | Sodium: 621mg | Potassium: 620mg | Fiber: 1g | Sugar: 8g | Vitamin A: 742IU | Vitamin C: 9mg | Calcium: 369mg | Iron: 4mg

Nutritional values are approximate.

Sale
Weber® 3-Piece BBQ Tool Set, Stainless Steel…
  • Set of 3 includes Spatula, Locking Tongs, and Cold…
  • Durable, stainless-steel construction holds up to…
Weber® Grill Grate Scrubber, Grill Cleaning…
  • Designed for heavy-duty grill cleaning
  • Contoured handle offers a firm, comfortable grip
Weber® Outdoor Grill Spray Cleaner & Degreaser…
  • This 16 oz spray bottle of Weber Grill Grate…
  • Gentle on Your Grates: Grill cleaner spray is…
Easy Spicy Grilled Potatoes

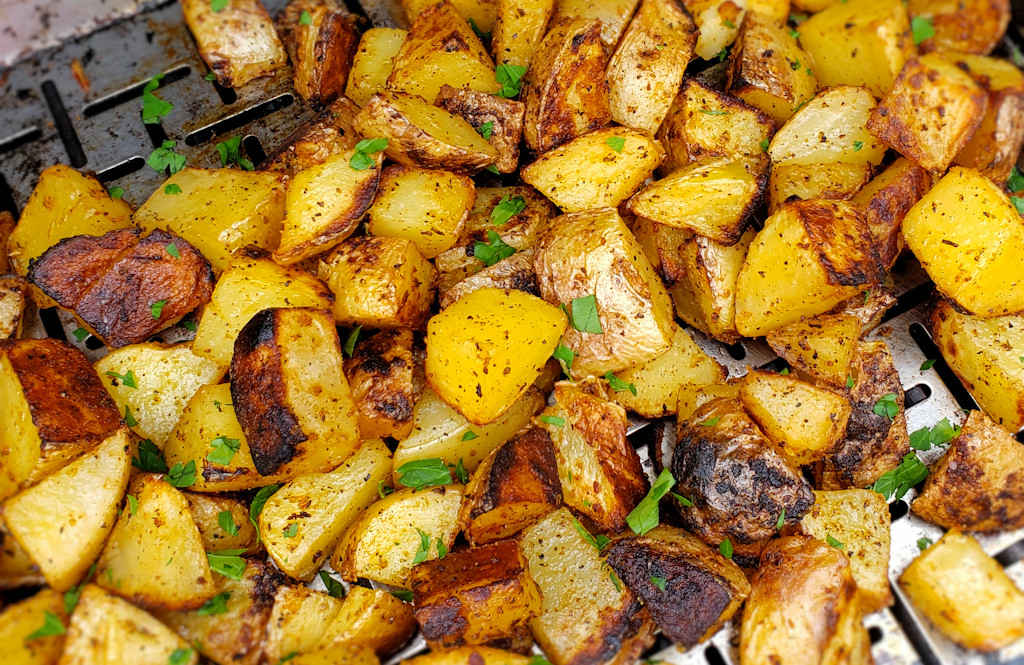
This is my go-to dish when I am looking for a quick side for whatever I’m grilling (I love my Weber grills!) for dinner. These easy spicy grilled potatoes are packed with flavor. Yeah, they have a kick, but I control how much of a kick I’m in the mood for that day. The potatoes come out cooked perfectly. Creamy inside, with a light crunchy grilled exterior. Pre-cooking the potato ensures they all get cooked evenly. There’s nothing worse than biting into a pile of potatoes and finding one that is under-cooked. That’s potato sadness there. No one wants potato sadness!

Easy Spicy Grilled Potatoes

Pre-Cooked Potatoes Are Easier

Since I’m already grilling I prefer to pre-bake the potatoes for these easy grilled spicy potatoes on the grill. They can also be done ahead of time in the oven at 400 F. For bigger potatoes I like to use potato nails to make sure the insides get done perfectly.

Weber Original Potato Nails , Silver
  • Heat conducted goes deep into potato
  • Stainless steel provides quick, even heat

You can’t make these potatoes without a grill basket. The stainless steel ones from Weber have lasted me forever and the large-sized ones hold a ton of potatoes (or whatever I’m grilling).

Weber Crafted® Roasting Basket, Stainless‑Steel…
  • Create food never thought possible in a grill with…
  • Designed to perfectly roast small, delicate food…

The potatoes haven’t done anything to you so be gentle when you flip them. Just one time is all you need.

Also try some grilled green beans!

Easy Spicy Grilled Potatoes
Print Pin
5 from 1 vote

Easy Spicy Grilled Potatoes

This is one of those to-taste recipes.
Course Side
Cuisine American
Keyword grilled, potatoes
Prep Time 10 minutes
Cook Time 1 hour 15 minutes
Servings 4
Calories 146kcal

Ingredients

Instructions

  • Fire up your grill for indirect cooking. You want the temperature at the grates to be 350-400 F.
  • Rinse off the potatoes and pat dry.
  • Use a knife to poke 3-4 holes in the tops of the potatoes, going about 1/2 of the way into the potato.
  • If you’re using potato nails insert them now.
  • Drizzle the potatoes with just a bit of oil.
  • Use your hand to rub the oil all over the potato. If you don't want to get your hands oily just use a brush.
  • Sprinkle the potatoes with salt. Don’t be shy with it and make sure you get all sides.
  • Transfer the potatoes to the grill and cook for about 30-45 minutes. If you're not sure how consistent or high your grill temperature is, I recommend checking them after 30 minutes.
  • The potatoes are done when you can insert a knife or skewer and it enters the flesh but still meets with some resistance. You aren't fully cooking them, just getting them just soft. You don't want them to fall apart later when you cut them.
  • Remove and let cool slightly.
  • Meanwhile, crank up your grill for direct cooking over medium-high heat.
  • Cut the potatoes in 1/4" – 1/2" cubes and transfer to a large bowl.
  • Add a little splash of oil to the potatoes and stir gently to coat.
  • Sprinkle with salt, pepper, cayenne and garlic powder. My suggestion is don't be shy with any of them, but add them all to taste.
  • Stir gently to coat.
  • Transfer the potatoes to a grill basket and place on a hot grill over direct heat.
  • Grill the potatoes until they start to get golden brown with a light char on the bottoms.
  • Flip gently and cook until golden brown on the other side.
  • Remove from grill and transfer the potatoes to a platter.
  • Sprinkle with chopped parsley and serve.

Notes

If you want a less-spicy version, substitute paprika for the cayenne.
This is a great recipe for using up those odd-shaped potatoes at the bottom of a bag of potatoes.

Nutrition

Calories: 146kcal | Carbohydrates: 33g | Protein: 4g | Fat: 0.1g | Saturated Fat: 0.05g | Polyunsaturated Fat: 0.1g | Monounsaturated Fat: 0.003g | Sodium: 9mg | Potassium: 769mg | Fiber: 2g | Sugar: 1g | Vitamin A: 2IU | Vitamin C: 11mg | Calcium: 24mg | Iron: 2mg

Nutritional values are approximate.

Grillaholics Vegetable Grill Basket for Outdoor…
  • EASY TO USE – Say goodbye to tricky rolling grill…
  • HEAVY-DUTY DESIGN – Built to outlast the…

Pub Sauce Smash Burgers

Oh man did these Pub Sauce smash burgers ever hit the spot. Juicy patties. Crisp fresh toppings. All with a wonderful sauce that is a combination of just about every good burger sauce you can think of. It’s reminiscent of a creamy steak sauce but it’s not too thick. It’s got a hint of sweetness. A bit salty. A little Asian-inspired flavor. And my favorite, garlic. Every bite is an umami-festival. These burgers are proof that even the simplest sauce can make a ‘plain’ burger something special. Sure, there are a few ingredients, but nothing fancy and nothing complicated.

Pub Sauce Smash Burgers

Amazing Burgers

Making Pub Sauce smash burgers isn’t difficult. You don’t need a bunch of fancy equipment or a lot of time. Just a hot griddle and a burger press. Any griddle will do, whether it’s on a grill, cooktop, stove or even a standalone outdoor flattop. Just get those patties nice and thin and use quality fresh toppings. And a great sauce.

Sale
Whaleme Blackstone Burger Press Set – 7″ Round…
  • Food-Grade Cast Iron Burger Press : Our barbeque…
  • Grooved Bottom Design&Non-Stick Surfaces : Our…

Also try my smash burger patty melts.

Pub Sauce Smash Burgers
Print Pin
5 from 1 vote

Pub Sauce Smash Burgers

Get those patties nice and thin and use quality fresh toppings.
Course Main
Cuisine American
Keyword smash burgers
Prep Time 15 minutes
Cook Time 20 minutes
Servings 4
Calories 831kcal

Ingredients

For the sauce

For the burgers

  • 1 pound ground beef formed into four 4-ounce patties
  • kosher salt to taste
  • ground black pepper to taste
  • 4 hamburger buns
  • 4 slices cheddar cheese or American cheese
  • 4 pieces iceberg lettuce torn or chopped
  • 4 slices tomato
  • 4 slices onion
  • 6 slices dill pickle chips

Instructions

For the sauce

  • Combine all ingredients. Refrigerate until ready to use.

For the burgers

  • Fire up your grill for direct medium-high heat cooking. You can also use an outdoor or indoor griddle or a large skillet on a stove.
  • Season the burger patties with salt and pepper on both sides. Don’t be shy with the seasoning.
  • Place the patties on grill. Smash down with a spatula or grill press.
  • Grill the burgers for 2-3 minutes per side.
  • Top the patties with cheese and grill until they’ve reached your desired doneness and the cheese is melted. Remove from the grill.
  • Toast the buns as desired.
  • Make the burgers by first spreading some of the sauce on the bun bottoms.
  • Add a burger patty.
  • Add onion, lettuce, tomato and pickle slices.
  • Slather the top bun with more of the sauce and serve.

Notes

Patties 4-5 ounces in weight work best.

Nutrition

Calories: 831kcal | Carbohydrates: 35g | Protein: 31g | Fat: 63g | Saturated Fat: 17g | Polyunsaturated Fat: 21g | Monounsaturated Fat: 19g | Trans Fat: 1g | Cholesterol: 115mg | Sodium: 3111mg | Potassium: 868mg | Fiber: 4g | Sugar: 12g | Vitamin A: 1171IU | Vitamin C: 13mg | Calcium: 358mg | Iron: 5mg

Nutritional values are approximate.

Meykers Hamburger Press Patty Maker 150 Paper…
  • Saving Storage Space : The detachable solid…
  • Making Hamburger Elegantly – Perfectly…
Gandeer 3 Pcs Cast Iron Grill Press 8 x 4 Inch…
  • Quality Material: the bacon press is made of food…
  • Practical Wood Handle Design:Featuring a…
Sale
Katbite 300Pcs 6×6 Inches Patty Paper, Burger…
  • Perfect Size: 6×6 inches of 300 count patty paper…
  • Non-Stick & Easy to Clean: Patty paper use the…

St Louis-Style Ribs using a Rotisserie

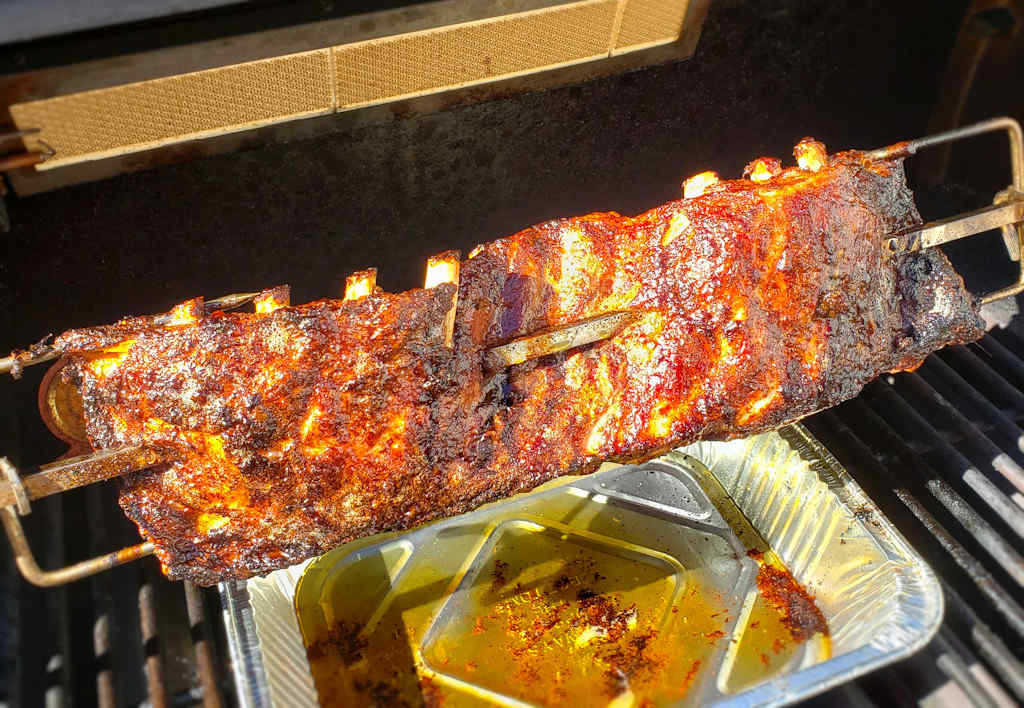
Rotisserie St Louis-style ribs are something I’ve been wanting to make for some time. I usually smoke my ribs, low-and-slow or high-and-fast on my smoker. This time I decided to give ribs on my gas grill a shot to see if I would like them as much as my ‘traditional’ method of cooking ribs. Well, by golly, I did and then some! I really enjoyed these ribs. They had great flavor. They were still moist and were as tender as could be. And they had this slight charred crunchiness to the skin that was just fantastic. Oh, and they were easy to make to boot! These were winner-winner ribs for sure!

You can make these ribs no matter what kind of grill you have, as long as you’ve got a rotisserie. Make sure it’s long enough to hold your ribs. If not, you may have to trim a rib or two off the end.

St Louis-Style Ribs using a Rotisserie

Indirect Cooking

When you put your ribs on your grill it’s important that they do not sit (well, spin) over direct heat. If you look at the very far right of my picture above you’ll see that the very end of my rack got a little dark. That’s because there’s a burner right below that part of the ribs. I didn’t realize that until it was too late. I learned from my experience. The rest of the ribs were fantastic and I’d make them again and again (but I’d make sure that they were 100% in indirect heat!). St Louis-Style ribs using a rotisserie were a big-time winner and are now on the regular menu rotation in my house!

Weber 3 Piece Stainless Steel Premium Tool Set…
  • Includes spatula, fork, and locking tongs
  • Soft-touch handles offer comfortable, non-slip…

I put the apple juice into a cheap spray bottle and then spritz the ribs every 30 minutes or so. Spraying them is easier than using a brush and it makes sure I’m not brushing off any of the seasoning.

St Louis-Style Ribs using a Rotisserie
Print Pin
5 from 1 vote

St Louis-Style Ribs using a Rotisserie

These were winner-winner ribs for sure!
Course Main
Cuisine American
Keyword grilled, ribs, rotisserie
Prep Time 15 minutes
Cook Time 3 hours 30 minutes
Servings 4
Calories 630kcal

Ingredients

Instructions

  • Spread the mustard on all sides of the ribs. Just a light coating will do.
  • Sprinkle the rub over the ribs and pat gently to adhere. Don't forget to get the back and sides of the ribs.
  • Fire up your grill for rotisserie cooking over medium-low heat, around 300 F.
  • Place a large drip pan under the rotisserie.
  • Skew the ribs onto the rotisserie. Be careful doing this. Never put your hands where the sharp end can skewer you and not the ribs! Run the spit thru the first and second bone on one end. Bend the ribs slightly (like an 'S') and skewer between the next set of bones where you can skewer without breaking the ribs. Finally run the spit thru the last two bones. Secure with the rotisserie forks. It's ok if you have to remove the spit and try again to get the ribs nice and skewered down the middle. An extra hole or two isn't going to hurt anything!
  • Place the spit onto the grill and start the motor. Close the grill lid and cook for 2 – 3 hours or until the meat on the bones has pulled back from the ends by about 1/2". I like to spray my ribs with apple juice every 30 minutes while they spin. You can also brush them with the apple juice but do so carefully as you don't want to brush off your seasoning.
  • Brush the ribs with BBQ sauce and let cook another 10 minutes for the sauce to set.
  • Carefully remove the spit from the grill using thick grill gloves and remove the ribs.
  • Cover with foil and let rest 15 minutes before slicing and serving.

Notes

I like to use a smoky BBQ sauce to give these even more of a ‘hot off the smoker’ taste.

Nutrition

Calories: 630kcal | Protein: 35g | Fat: 53g | Saturated Fat: 17g | Polyunsaturated Fat: 9g | Monounsaturated Fat: 19g | Trans Fat: 1g | Cholesterol: 182mg | Sodium: 184mg | Potassium: 551mg | Calcium: 34mg | Iron: 2mg

Nutritional values are approximate.

Sale
Weber® 3-Piece BBQ Tool Set, Stainless Steel…
  • Set of 3 includes Spatula, Locking Tongs, and Cold…
  • Durable, stainless-steel construction holds up to…
Weber® Grill Grate Scrubber, Grill Cleaning…
  • Designed for heavy-duty grill cleaning
  • Contoured handle offers a firm, comfortable grip
Weber® Outdoor Grill Spray Cleaner & Degreaser…
  • This 16 oz spray bottle of Weber Grill Grate…
  • Gentle on Your Grates: Grill cleaner spray is…
Spice-Brined Grilled Chicken Breasts

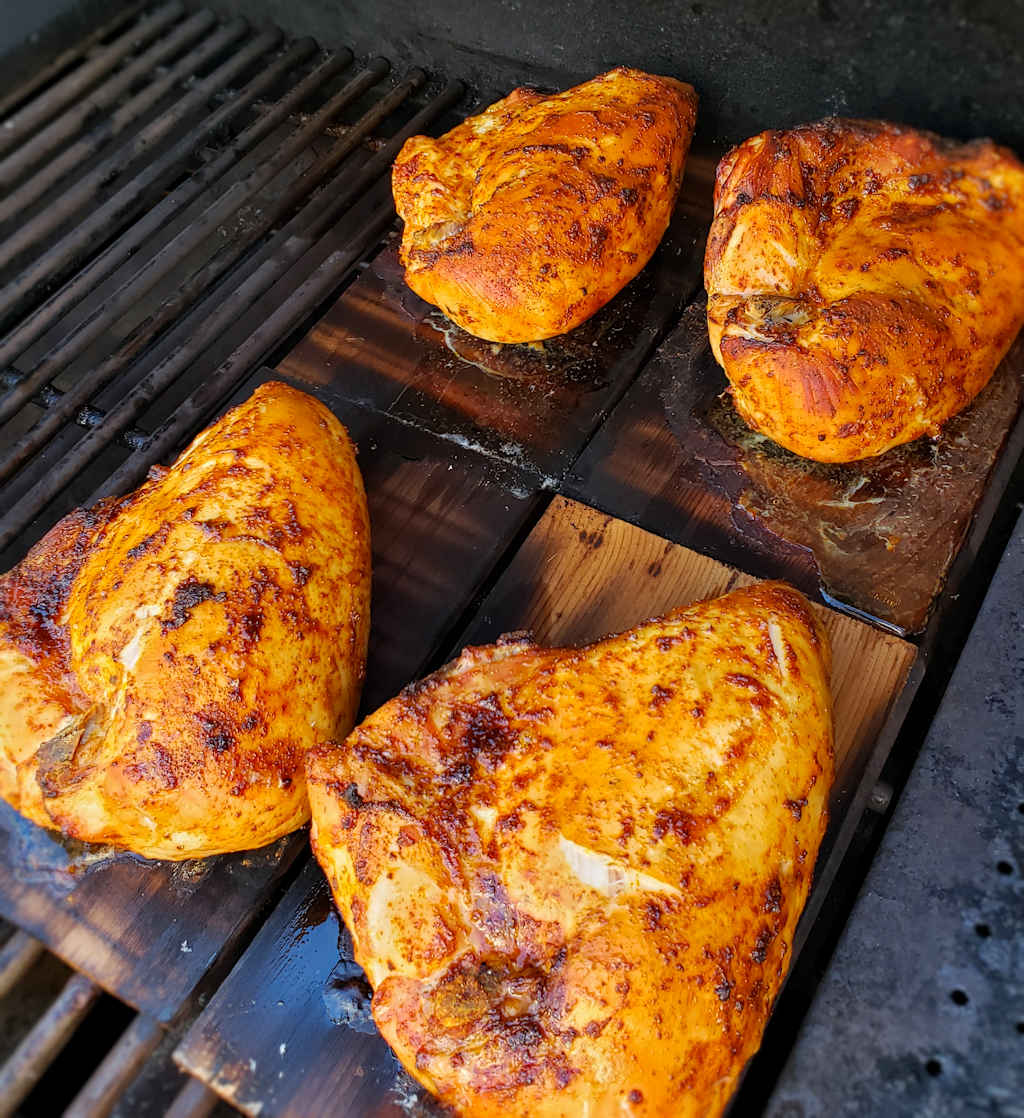
I could not have been happier with how these spice-brined grilled chicken breasts turned out. I was looking for tender, flavor-packed, juicy chicken to use in a big batch of chicken salad. And that’s exactly what I got. I grilled my chicken (in this case, split chicken breasts, but boneless skinless will work just fine too) on cedar planks for a little extra flavor and aroma, but you can skip that and do them directly on your grill grates too.

Spice-Brined Grilled Chicken Breasts

For The Best Results, Go Skinless

I am not a fan of skin-on chicken when it comes to brining although you can certainly use it if you want. Leaving the skin on normally does help keep the meat from drying out, but that’s not really needed here. And no way is it going to get crispy enough to enjoy. So, skip it if you want. I did. This spice-brined grilled chicken breasts recipe doesn’t need any tinkering with. It’s great just as it is.

Weber 3 Piece Stainless Steel Premium Tool Set…
  • Includes spatula, fork, and locking tongs
  • Soft-touch handles offer comfortable, non-slip…

You can use any seasoning on the chicken you want, but I would shy away from anything heavy on salt (you already brined it it) and sugar (it’ll burn over the high grill heat).

Also try my grilled Dijon chicken and my outrageously-good butterflied chicken legs.

Spice-Brined Grilled Chicken Breasts
Print Pin
5 from 1 vote

Spice-Brined Grilled Chicken Breasts

You can use any seasoning on the chicken you want, but I would shy away from anything heavy on salt (you already brined it) and sugar (it'll burn over the high grill heat).
Course Main
Cuisine American
Keyword brined, poultry
Prep Time 2 hours 15 minutes
Cook Time 2 hours 15 minutes
Servings 8
Calories 701kcal

Equipment

Ingredients

For the brine

For the chicken

Instructions

For the brine

  • Place water in a large pot over medium-high heat.
  • Stir in the salt, sugar, garlic, sage, basil, peppercorns and the bay leaf. Bring to a simmer and continue simmering, stirring often, for about 20 minutes. Make sure that the salt and sugar are completely dissolved.
  • Remove pot from heat, cover and let cool completely, at least 2 hours.

For the chicken

  • Add the chicken to the brine and transfer the pot to the fridge for 2 hours and up to 4 hours maximum.
  • If cooking the chicken on cedar planks, begin soaking them in water 30 minutes before using.
  • Fire up your grill for direct and indirect cooking.
  • If using planks, char the planks over direct heat on both sides first. Add the chicken and move the planks to indirect heat and continue cooking, 30-45 minutes or until the chicken measures 165 F with a thermometer.
  • Place chicken directly on the grates over high heat and sear on both sides, 2-3 minutes per side. Move the planks to indirect heat and continue cooking, 30-45 minutes or until the chicken measures 165 F with a thermometer.
  • Let chicken rest 10 minutes before serving.

Notes

Great sliced thin for sandwiches or in chicken salad!

Nutrition

Calories: 701kcal | Carbohydrates: 172g | Protein: 15g | Fat: 4g | Saturated Fat: 2g | Polyunsaturated Fat: 1g | Monounsaturated Fat: 1g | Sodium: 85118mg | Potassium: 1794mg | Fiber: 28g | Sugar: 134g | Vitamin A: 967IU | Vitamin C: 3mg | Calcium: 1669mg | Iron: 57mg

Nutritional values are approximate.

Sale
Weber® 3-Piece BBQ Tool Set, Stainless Steel…
  • Set of 3 includes Spatula, Locking Tongs, and Cold…
  • Durable, stainless-steel construction holds up to…
Weber® Grill Grate Scrubber, Grill Cleaning…
  • Designed for heavy-duty grill cleaning
  • Contoured handle offers a firm, comfortable grip
Weber® Outdoor Grill Spray Cleaner & Degreaser…
  • This 16 oz spray bottle of Weber Grill Grate…
  • Gentle on Your Grates: Grill cleaner spray is…

Smoked Cheez-Its

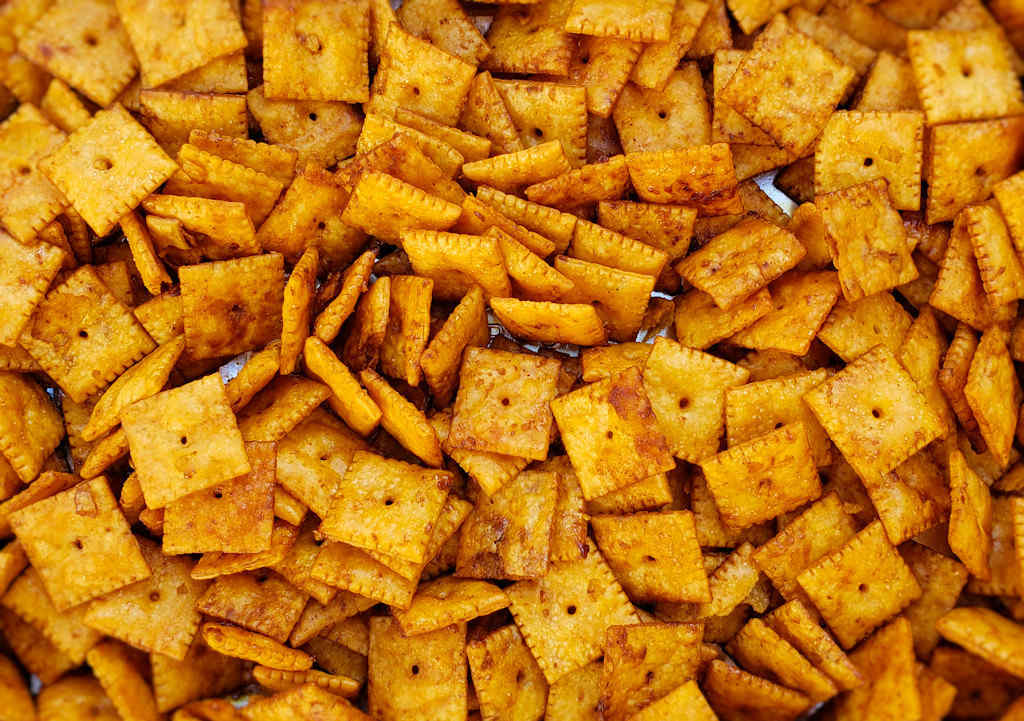
Smoked Cheez-Its are the perfect game-time snack. They’re addictingly good. They’ll disappear unexpectedly quickly, so make sure you make extra. And make all sorts of different flavors. Since I had all sorts of different flavors of Kosmos Q seasonings on hand I was able to make all sorts of variations, from the mild and sweet to the hot and spicy.

Smoked Cheez-Its

You Can Smoke Any Snack Cracker!

Truth be told, the method for making smoked Cheez-Its can be used for pretty much any snack cracker. You’ll want to use a fairly mild-flavored cracker, or use one that compliments the seasoning you want to use. You don’t want the cracker flavor to fight the seasoning.

Sale
Weber® Pecan Wood Chunks, Outdoor Cooking Fuel…
  • Pecan wood chunks
  • Provides a rich & Sweet flavor

Don’t crowd the crackers in the pan. Make sure they get spread out to get some of the smoke flavor, too.

Also try some smoked Cheetos.

Smoked Cheez-Its
Print Pin
5 from 1 vote

Smoked Cheez-Its

Don't crowd the crackers in the pan. Make sure they get spread out to get some of the smoke flavor, too.
Course Appetizer
Cuisine American
Keyword crackers, smoked
Prep Time 10 minutes
Cook Time 1 hour 30 minutes
15 minutes
Servings 12
Calories 157kcal

Ingredients

Instructions

  • Fire up your smoker for 225 F. Use a lighter wood. You want a bit of smoke but don't overdo it.
  • Place the crackers in a large bowl.
  • In a separate small bowl, whisk together the oil, Worcestershire sauce and seasoning. Drizzle over the crackers and gently stir to coat the crackers. Take your time, you want them all covered well.
  • Transfer the coated crackers to a large disposable pan, spread out evenly, and place onto the smoker.
  • Smoke the crackers for 90 minutes, stirring every 30 minutes. The crackers will turn a golden brown. They'll be a little soft, but don't worry, they'll get crunchier when they cool.
  • Remove from the smoker and let cool before serving. Optionally, spread out onto a wire rack to cool quicker.

Notes

You can also use other flavors of Cheez-It or even try a mix of different ones.

Nutrition

Calories: 157kcal | Carbohydrates: 20g | Protein: 2g | Fat: 8g | Saturated Fat: 2g | Polyunsaturated Fat: 3g | Monounsaturated Fat: 2g | Trans Fat: 1g | Sodium: 402mg | Potassium: 83mg | Fiber: 1g | Sugar: 3g | Vitamin A: 27IU | Vitamin C: 1mg | Calcium: 54mg | Iron: 2mg

Nutritional values are approximate.

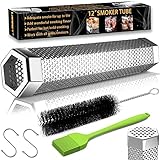
Smoke Tube for Pellet Smoker, 12” Smoker Tube for…
  • 【BILLOWING SMOKE AND BIG CAPACITY】 The pellet…
  • 【UNFORGETTABLE FLAVORS FOR HOT AND COLD…

Cowboy Big Mac Smash Burgers

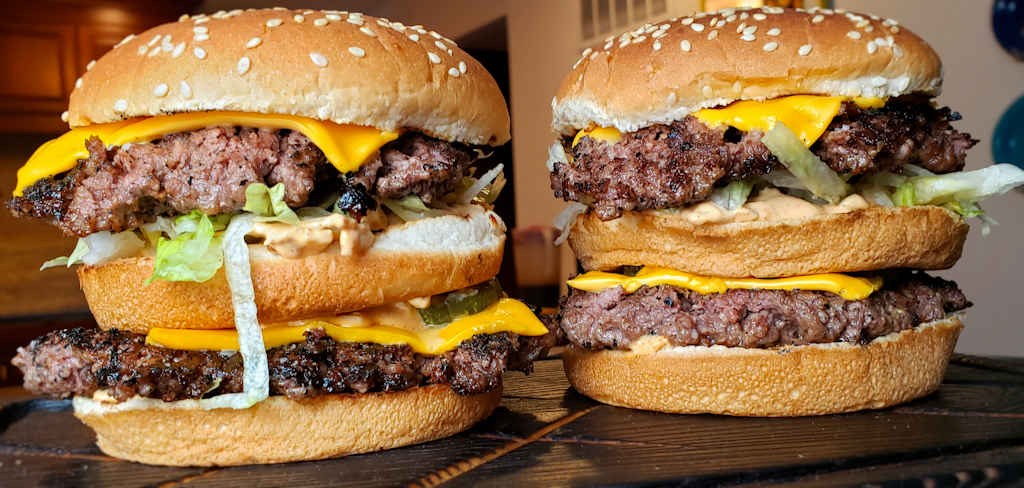
Now THIS is a burger! This isn’t some dainty, fit-in-the-palm-of-your-hand two-bites-and-its-gone burger. This is an elbows-out, juice-running-down-your-forearms, do-the-burger-hunch burger. Two all beef patties. Very special sauce. Lettuce. Cheese. Onions. Pickle. Sesame seed buns. These Cowboy Big Mac Smash Burgers (based on a recipe from Kent Rollins) are the kind of burger I find in my dreams. Roll up your sleeves, it’s time to eat!

Cowboy Big Mac Smash Burgers

The Best Burgers Are Smashed

Nine times out of ten, when I make burgers, I make smash burgers. I love the crispy edges, the thin patties, the fresh toppings… Cowboy Big Mac Smash Burgers aren’t messing around. Now, that being said, if you want to make these as single burgers you can and they’re just as delicious! Trust me! Sometimes I just can’t handle those monster-sized patties. Yeah, I know. But, it happens. I don’t feel great about it. So I do single patties instead, and I’ll even use 4.5 ounce patties instead of 8. I used to use 4 ounces, but I’ve found that 4.5 ounces ‘smash’ out to a size that covers the burger buns perfectly. Last thing I want is to have to pick up the bun top to find my patty.

Need A Little Heat?

If you like a little kick to your burgers, you’ve come to the right place. A few little tweaks here and there and you’ll have a nicely-spicy burger. Swap out the cheese for pepper jack or habanero jack. Add a few (good) splashed of hot sauce to the special sauce. Leave out the smoked paprika and use chipotle chili powder instead. It adds a little heat while still adding the smoke you want. You can also just add a few good pinches of cayenne pepper.

Sale
Whaleme Blackstone Burger Press Set – 7″ Round…
  • Food-Grade Cast Iron Burger Press : Our barbeque…
  • Grooved Bottom Design&Non-Stick Surfaces : Our…

Also try my classic smash burgers and my delicious Thousand Island BBQ smash burgers.

Cowboy Big Mac Smash Burgers
Print Pin
5 from 1 vote

Cowboy Big Mac Smash Burgers

You can use smaller patties if you wish.
Course Main
Cuisine American
Keyword burger sauce, burgers
Prep Time 2 hours 15 minutes
Cook Time 20 minutes
Servings 2
Calories 2008kcal

Ingredients

For the burgers

For the special sauce

Instructions

For the special sauce

  • In a small bowl, whisk together the mayonnaise, pickle relish, mustard, adobo sauce, vinegar, sugar, garlic powder, onion powder and smoked paprika.
  • Fold in the onion. Cover and refrigerate for 2 hours before you're ready to make the burgers.

For the burgers

  • Fire up your grill for direct medium-high heat cooking.
  • Season the burger patties with salt and pepper on both sides. Don't be shy with the seasoning.
  • Place the patties on the grill. Smash down with a spatula or grill press.
  • Grill the burgers for 2-3 minutes per side.
  • Top the patties with cheese and grill until they've reached your desired doneness and the cheese is melted. Remove from the grill.
  • Take 2 of the bun tops and cut off the tops. These will be the two middle buns for the Big Macs. Discard the bun bottoms or use them for something else (like making bread crumbs, feeding the birds, etc).
  • Toast the buns and two bun slices on the grill as desired.
  • Make the burgers by first spreading some of the sauce on the bun bottoms.
  • Add some of the lettuce and a burger patty. Top with the sliced bun.
  • Slather the top of the sliced bun with more of the sauce. Add lettuce, the remaining patties, pickles and top bun.

Notes

Don’t be afraid to add some cooked bacon too!

Nutrition

Calories: 2008kcal | Carbohydrates: 62g | Protein: 97g | Fat: 150g | Saturated Fat: 49g | Polyunsaturated Fat: 30g | Monounsaturated Fat: 54g | Trans Fat: 6g | Cholesterol: 380mg | Sodium: 3268mg | Potassium: 1579mg | Fiber: 4g | Sugar: 18g | Vitamin A: 1301IU | Vitamin C: 6mg | Calcium: 501mg | Iron: 13mg

Nutritional values are approximate.

Sale
Weber® 3-Piece BBQ Tool Set, Stainless Steel…
  • Set of 3 includes Spatula, Locking Tongs, and Cold…
  • Durable, stainless-steel construction holds up to…
Weber® Grill Grate Scrubber, Grill Cleaning…
  • Designed for heavy-duty grill cleaning
  • Contoured handle offers a firm, comfortable grip
Weber® Outdoor Grill Spray Cleaner & Degreaser…
  • This 16 oz spray bottle of Weber Grill Grate…
  • Gentle on Your Grates: Grill cleaner spray is…
Smash Burger

Smash burgers are a popular meal in our house. They’re easy to make, cook up in no time, and most important, they remind me of the classic diner burgers of my youth. I will go out of my way for a good griddled burger no matter where I am. Fortunately, I can make them quite easily on my backyard grill with just a few tools. Thin patties, seasoned simply with just salt and pepper, cooked over onion until the perfect lightly crunchy edges are obtained. Served on toasted buns with traditional toppings, such as pickles, tomato, lettuce. A little ketchup, sure. Maybe a little mustard. And even a little mayonnaise. Whatever you prefer, no matter what you add, you’ll enjoy a great burger.

Smash Burger

The Right Tools For The Job

Here’s the equipment I use. You can get by using two cast iron skillets. Use a larger skillet for cooking the burgers, and a smaller one to smash the burgers and keep them flat. Since I’m a cooking gadget collector, I prefer to use a few more tools.

A Griddle

First, a griddle. You can buy griddles that sit on top of your grill grates or ones that replace them. Just about every grill I have has a griddle on it. I use them for a lot of things, not just smash burgers. You want one that can be placed over the hottest part of your grill so it gets screaming hot.

Lodge Pro-Grid Reversible Grill/Griddle…
  • Dual-Sided Plate: The Lodge Pro-Grid Reversible…
  • Time-Tested Even Heat Distribution: This durable…

A Burger Press

Next, you need a burger press. You can use a heavy cast iron skillet, like I mentioned. Or get a burger press. For easy cleanup I wrap mine in foil first. When I’m done, just peel off the foil and toss. Super easy. Get a press that’s at least big enough to cover two burgers. You only smash one at a time, but if you want to keep them flat, you want to rest the press on top so bigger (and heavier) is better. Plus I’ve found that a bigger, heavier press tends to stay on the burgers whereas a smaller, lighter one is hard to keep centered on the burgers, specially if you have a bunch of them cooking at once.

Sale
Whaleme Blackstone Burger Press Set – 7″ Round…
  • Food-Grade Cast Iron Burger Press : Our barbeque…
  • Grooved Bottom Design&Non-Stick Surfaces : Our…

A Dome (Sorta)

Next up, a dome. While not 100% required, it does speed the time it takes to melt the cheese and it does it in a nice even fashion. In my opinion you don’t really need one if you’re using a super melty cheese, such as American, but for thicker slices like say a deli pepper jack, you want the cheese to melt before you over-cook the burger and that’s where a dome comes in handy.

Cuisinart CMD-108 Melting Dome, 9″,Stainless steel
  • EVEN MELTING: Traps heat under the dome to quickly…
  • ENHANCED FLAVOR: Griddle dome retains moisture to…
Cuisinart CMD-388 Melting Dome, 6″, 2-Pack
  • 2 Pack of 6″ diameter domes
  • Concentrates heat to cook evenly

The Clean-Up

Lastly, you need something to clean your griddle. I like to clean mine when I’m done cooking, but you can do it at the start instead. I use one of these pad holders with a griddle cleaning pad. Then I add a bit of water to my griddle then use the pad (connected to the holder) to scrub off any big chunks and get up some of the grease. I don’t go crazy with it, I always heat the heck out of my griddle before cooking, but I get the worst. The long arm on the pad holder makes it perfect for scrubbing a hot griddle, too.

3M Scotch-Brite Griddle Cleaning, 4 in x 5.25 in…
  • TOUGH CLEANING POWER: Very tough, non-rusting…
  • LONG-LASTING: High quality bonding resin system…

Also try my Cowboy Big Mac Smash burgers.

Smash Burger
Print Pin
5 from 1 vote

Smash Burger

Smash burgers are a popular meal in our house. They're easy to make, cook up in no time, and most important, they remind me of the classic diner burgers of my youth.
Course Main
Cuisine American
Keyword burgers
Prep Time 15 minutes
Cook Time 15 minutes
Servings 4
Calories 1986kcal

Ingredients

  • 1 pound ground beef
  • kosher salt to taste
  • ground black pepper to taste
  • 1 onion sliced thin, optional
  • 4 slices American cheese
  • 4 hamburger buns
  • additional toppings dill pickle slices, ketchup, etc, optional

Instructions

  • Fire up your grill for high heat.
  • Place a griddle or a large cast iron pan over the highest heat.
  • Season the ground beef and form into four 4 ounce balls (not patties!).
  • Place on the onion slices on the griddle and divide into four equal piles. You want the piles to be about the size of your buns.
  • Place the balls of beef on top of the onion piles and let cook for one minute. Just let them cook, don't mess with them.
  • Take your press and flatten out the patties. I like to use the point of the press and work my way around the ball first, doing a little section at a time and then finally I press down on the entire patty to flatten it out. You can also just flatten out the ball all at once. At this point I also like to season the patties some more.
  • Let the patties cook until you start to notice a little char along the edges. Flip, season again if desired, and continue cooking another minute or so until the other side is charred. The burgers are thin so they will cook very quickly so watch out.
  • Add the cheese slices. If desired, cover in a dome to help the cheese melt.
  • Toast the buns.
  • Remove, add the patties and serve with desired toppings.
  • Devour immediately.

Notes

After you make a few smash burgers the process becomes very easy and always delivers great results.

Nutrition

Calories: 1986kcal | Carbohydrates: 100g | Protein: 111g | Fat: 124g | Saturated Fat: 52g | Trans Fat: 7g | Cholesterol: 406mg | Sodium: 2572mg | Potassium: 1715mg | Fiber: 5g | Sugar: 18g | Vitamin A: 798IU | Vitamin C: 10mg | Calcium: 1282mg | Iron: 15mg

Nutritional values are approximate.

Sale
Weber® 3-Piece BBQ Tool Set, Stainless Steel…
  • Set of 3 includes Spatula, Locking Tongs, and Cold…
  • Durable, stainless-steel construction holds up to…
Weber® Grill Grate Scrubber, Grill Cleaning…
  • Designed for heavy-duty grill cleaning
  • Contoured handle offers a firm, comfortable grip
Weber® Outdoor Grill Spray Cleaner & Degreaser…
  • This 16 oz spray bottle of Weber Grill Grate…
  • Gentle on Your Grates: Grill cleaner spray is…

Planked Lemon Pepper Asparagus

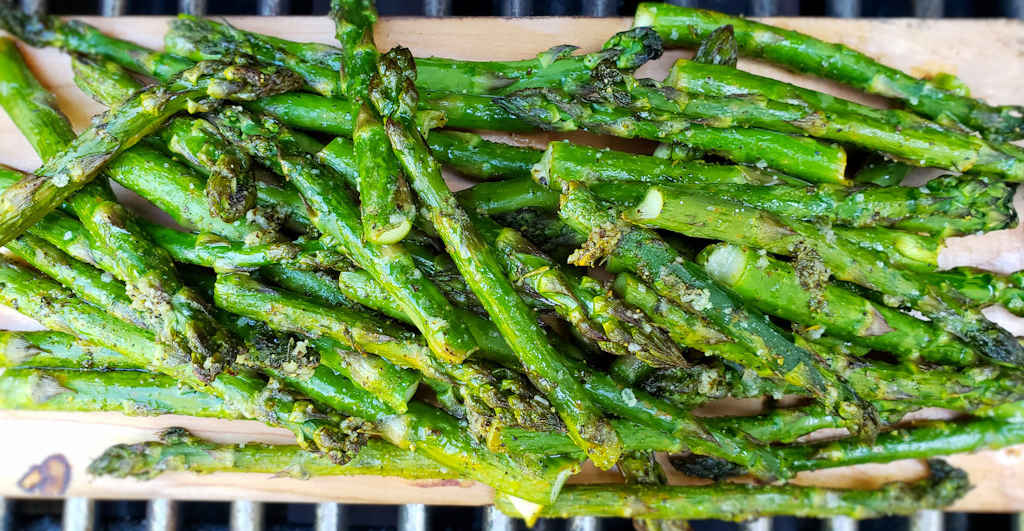
I should’ve bought more lemon pepper wing dust from Kosmo’s Q. Sure, I put it on wings. But I’ve found myself using it more and more on grilled vegetables. Like these planked lemon pepper asparagus. You can’t get much easier and you can’t get much more flavorful than this grilled side dish. The plank adds just a slight hint of cedar.

Planked Lemon Pepper Asparagus

Asparagus Elevated

The seasoning adds a serious lemony peppery kick to anything including these planked lemon pepper asparagus. I’m not shy with it because I love it. You might want to start with less and see what you think. You can always add more. The asparagus will take on a great citrusy flavor with a hint of cedar and just the right amount of pepper. Perfect.

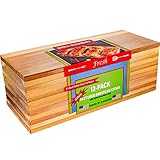
Cedar Grilling Planks – 12 Pack – Made In USA
  • Textured Grilling Planks for More Smoke and More…
  • 5.5″. x 11.00″ x 1/3″ – Upgraded Thickness!

Also try my planked lemon pepper Brussels sprouts.

Planked Lemon Pepper Asparagus
Print Pin
4 from 1 vote

Planked Lemon Pepper Asparagus

The seasoning adds a serious lemony peppery kick to anything.
Course Side
Cuisine American
Keyword asparagus, cedar plank, lemon pepper
Prep Time 15 minutes
Cook Time 20 minutes
Servings 8
Calories 23kcal

Ingredients

Instructions

  • Place a cedar plank in water while preparing the asparagus.
  • Trim the asparagus. I've found the easiest way to do this is to just bend them until they break. They break right at the point where one piece is the woodsy stem part you discard and the other is the yummy edible part.
  • Fire up your grill for direct cooking, around 400 F.
  • Gently toss the sprouts with the oil. Just use enough to lightly coat them.
  • Sprinkle with the Kosmos Q Lemon Pepper wing dust. How much you add is up to you, but my opinion is more is better.
  • Transfer the asparagus to the plank.
  • Transfer to the grill and grill for 20-25 minutes or until the plank is charred and the asparagus is as tender as you prefer and has a little char on them too. I find myself taking the smaller pieces off and sampling them as they cook. Not only are they delicious it also helps me determine when they are done.

Notes

Kosmos Q wing dust contains enough salt so you won’t need to add any to the sprouts. You can add freshly ground black pepper if you like.
Nutritional values do not include the wing dust.

Nutrition

Calories: 23kcal | Carbohydrates: 4g | Protein: 2g | Fat: 1g | Saturated Fat: 1g | Polyunsaturated Fat: 1g | Sodium: 2mg | Potassium: 229mg | Fiber: 2g | Sugar: 2g | Vitamin A: 857IU | Vitamin C: 6mg | Calcium: 27mg | Iron: 2mg

Nutritional values are approximate.

Cedar Grilling Planks – 12 Pack – Made In USA
  • Textured Grilling Planks for More Smoke and More…
  • 5.5″. x 11.00″ x 1/3″ – Upgraded Thickness!

Rotisserie Roasted Potatoes

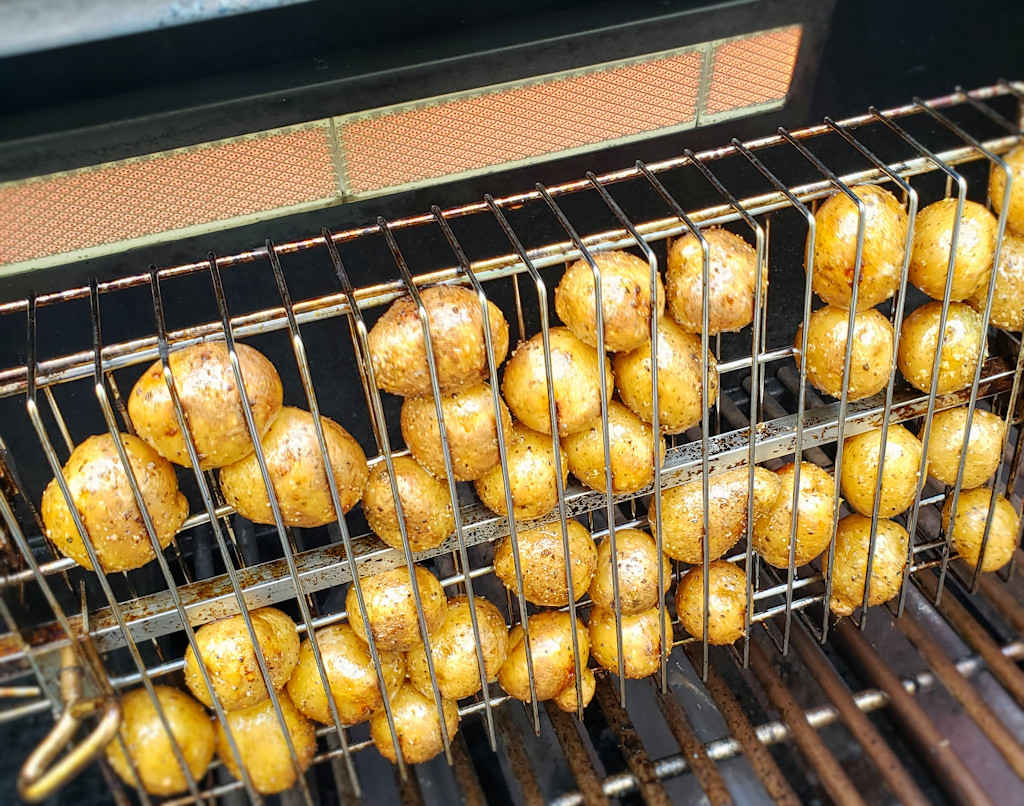
Oh how I do love roasted potatoes. I love the creamy insides. I love the crispy, golden skin. Baby potatoes are my favorites, but I’ll take a good roasted fingerling any day of the week, too! My ‘weapon of choice’ this time for making roasted potatoes was my gas grill rotisserie. It’s something I’ve been wanting to do for a while. Sure, I can roast potatoes directly on the grill or in a grill basket, but without paying attention to them, I can end up with an un-even roasting. Or worse, burning some while not cooking others. Not with the rotisserie. I get perfect potatoes, all around! Each and every one is fantastic!

Rotisserie Roasted Potatoes

No Bouncing Around, Please

I think one of the reasons my rotisserie roasted potatoes are so fantastic is the type of basket that I use. I could’ve used one of my bigger baskets. Like the one I use for peanuts or chicken wings. But I didn’t want my potatoes bouncing around like a bunch of bingo balls. Nothing good could come from all that potato violence.

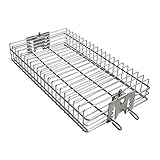
So instead I used my only Fire flat rotisserie basket. This lovely toy locks the potatoes in (you want to use ones that are all about the same size) and keeps them from banging into each other. You don’t want scarred, bashed-in potatoes. And you want as much of the oil and seasoning to stay on as possible. This basket performs perfectly.

Clean Up

I have to say, after using my rotisserie basket a few times I gave up on keeping it looking like it was new. You can try, for sure. Spray it with a bit of non-stick spray first. Scrub it well after use. Or you could do like I eventually did: just hit it with a sponge to get the hard stuff then put it into the dishwasher. Will it look new forever? Nope. Does it matter? Also nope.

onlyfire 6042 Chrome Plated Steel Flat Rotisserie…
  • 【Dimentions】13.9″L X 7.48″W X 2.2″H. Length…
  • 【Compatible Models】Fits for 1/2″ hexagon…

Also try my rotisserie French fries.

Rotisserie Roasted Potatoes
Print Pin
5 from 1 vote

Rotisserie Roasted Potatoes

Oh how I do love roasted potatoes. I love the creamy insides. I love the crispy, golden skin. Baby potatoes are my favorites, but I'll take a good roasted fingerling any day of the week,
Course Side
Cuisine American
Keyword roasted potatoes, rotisserie
Prep Time 20 minutes
Cook Time 10 minutes
Servings 8
Calories 175kcal

Equipment

Ingredients

Instructions

  • Fill a pot fitted with a steamer rack with 1"-2" of water and bring to a boil.
  • Scrub the potatoes clean and add to the basket. Cover and let steam for 10 minutes or until just tender when poked with a toothpick. Transfer the potatoes to a colander to drain.
  • Fire up your grill for high heat cooking. You want direct heat below (and around) where your rotisserie basket will be.
  • Place the potatoes in a bowl and toss with a few splashes of oil and season well with salt and pepper.
  • Transfer the potatoes to the rotisserie, close and place on the grill.
  • Turn on the rotisserie, close the grill and let the potatoes roast for 10 minutes. Check for color. If the skin has a bit of a char to it remove and serve, otherwise keep grilling, checking every 5 minutes for doneness.

Notes

I prefer to steam, or partially cook, the potatoes before placing into the rotisserie. I like to grill them over very high heat so that the skin gets a slight crunch to it. If you cook the raw potatoes over very high heat without pre-cooking them the outsides may burn before the potatoes are tender inside.

Nutrition

Calories: 175kcal | Carbohydrates: 40g | Protein: 5g | Fat: 1g | Saturated Fat: 1g | Polyunsaturated Fat: 1g | Monounsaturated Fat: 1g | Sodium: 14mg | Potassium: 955mg | Fiber: 5g | Sugar: 2g | Vitamin A: 5IU | Vitamin C: 45mg | Calcium: 27mg | Iron: 2mg

Nutritional values are approximate.

onlyfire 6042 Stainless Steel Flat Spit Rotisserie…
  • Made of great durable stainless steel…
  • Dimentions: 13.9″X 7.48″ X 2.2″, Length With…