Grilled Radishes with Gorgonzola Butter

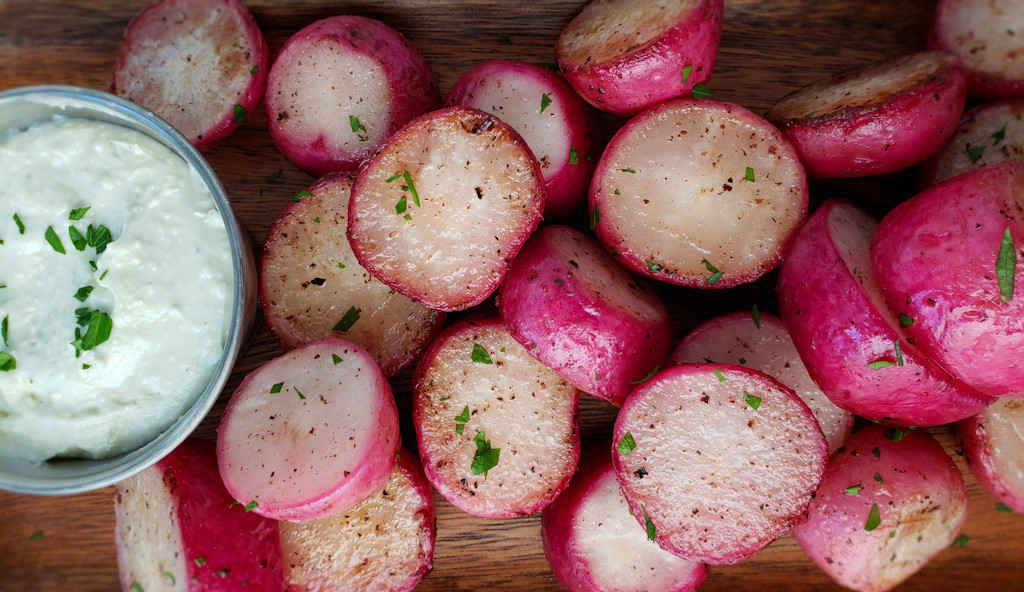
This is not my first time grilling radishes. I’ve even grilled black radishes before. And golden ones too. But this is my first time serving them grilled as an appetizer. A wonderful creamy gorgonzola butter tames the heat from the radishes, which take on a slightly soft exterior but still crunchy insides. These grilled radishes with gorgonzola butter are a little different and quite good. Never would I thought that radishes would make for a great appetizer. I’m happy that I made them. Very happy.
Grilled Radishes with Gorgonzola Butter

Cheese And Radishes? Yes. Oh Yes.

You don’t want to overcook your grilled radishes with gorgonzola butter. It’s easier if you select ones that are all roughly the same size so that they all cook in about the same amount of time. You want them to still have just a bit of crunch to them. You don’t want them all soft and mushy. They don’t take long to cook. Feel free to test them as you go with a fork or a skewer.

Got leftover gorgonzola butter? It’s great on burgers or grilled steaks.

Weber Crafted® Roasting Basket, Stainless‑Steel…
  • Create food never thought possible in a grill with…
  • Designed to perfectly roast small, delicate food…

I always use a grill basket when I make dishes like this one.
Grilled Radishes with Gorgonzola Butter
Print Pin
4 from 1 vote

Grilled Radishes with Gorgonzola Butter

Select radishes that are all roughly the same size so that they all cook in about the same amount of time.
Course Side
Cuisine American
Keyword gorgonzola butter, grilled, radishes
Prep Time 15 minutes
Cook Time 15 minutes
Servings 6
Calories 102kcal

Ingredients

For the Gorgonzola butter

  • 2 ounces Gorgonzola cheese crumbled
  • 4 tablespoons unsalted butter softened

For the grilled radishes

Instructions

For the Gorgonzola butter

  • Place the Gorgonzola and butter in a blender.
  • Pulse a few times until creamy smooth.

For the grilled radishes

  • Fire up your grill for direct cooking, 400 – 450 F.
  • Cut radishes in half.
  • Place in a bowl.
  • Drizzle with a little oil and season well with salt and pepper.
  • Stir to coat.
  • Transfer to a grill basket or skewer if desired. You can also cook the radishes directly on the grill if they are large enough to not fall between the grates.
  • Place the radishes on the grill and cook over high heat 4-5 minutes per side or until lightly browned.
  • Serve immediately with the gorgonzola butter for dipping.

Notes

Also great served with Ranch or blue cheese dressing for dunking!

Nutrition

Calories: 102kcal | Carbohydrates: 1g | Protein: 2g | Fat: 10g | Saturated Fat: 7g | Polyunsaturated Fat: 1g | Monounsaturated Fat: 3g | Trans Fat: 1g | Cholesterol: 27mg | Sodium: 136mg | Potassium: 46mg | Fiber: 1g | Sugar: 1g | Vitamin A: 306IU | Vitamin C: 1mg | Calcium: 54mg | Iron: 1mg

Nutritional values are approximate.

Sale
Weber® 3-Piece BBQ Tool Set, Stainless Steel…
  • Set of 3 includes Spatula, Locking Tongs, and Cold…
  • Durable, stainless-steel construction holds up to…
Weber® Grill Grate Scrubber, Grill Cleaning…
  • Designed for heavy-duty grill cleaning
  • Contoured handle offers a firm, comfortable grip
Weber® Outdoor Grill Spray Cleaner & Degreaser…
  • This 16 oz spray bottle of Weber Grill Grate…
  • Gentle on Your Grates: Grill cleaner spray is…
Grilled Shotgun Shells (Stuffed Manicotti Shells)

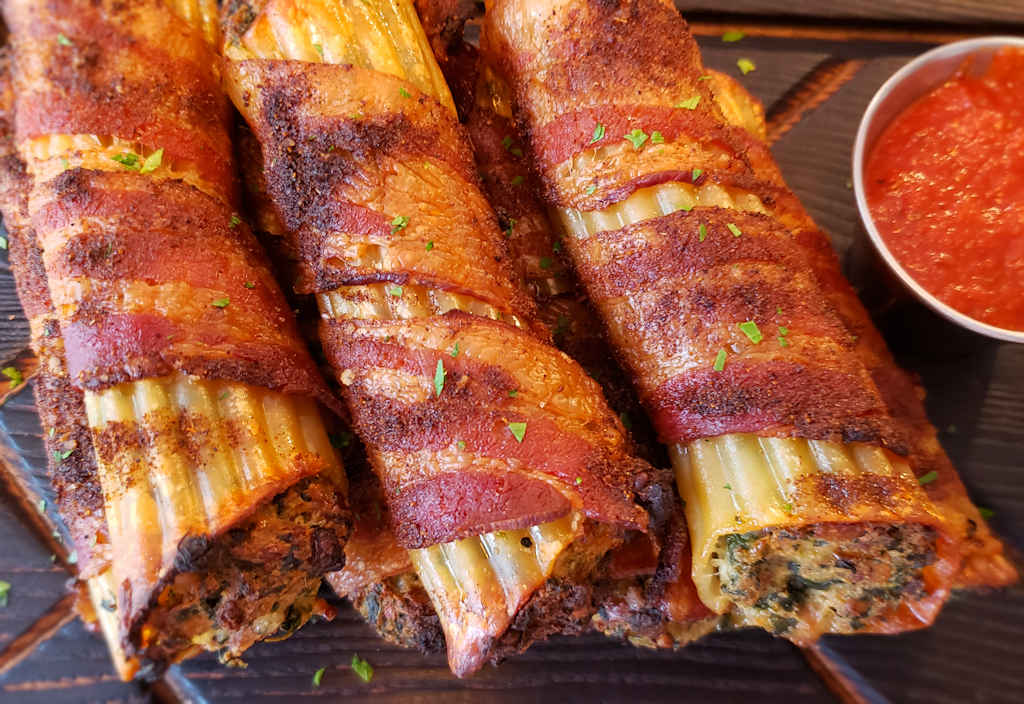
My wife and I have been noticing recipes for shotgun shells around the internet for a bit now. Manicotti shells stuffed with a meat and cheese mixture and wrapped in bacon. Most folks are smoking them for a few hours, then finishing them over high heat to get the bacon cooked. We decided to use just a gas grill (although you can just as easily use a charcoal grill!) to make grilled shotgun shells. For a little smoke we added a small smoke box or pellet tube full of hickory pellets. The end result was out-of-this-world fantastic. Crispy bacon, cheesy spinach and sausage stuffing, all with a slight hint of smoke. It’s impossible to stop eating them!

Grilled Shotgun Shells

Easy On Any Grill

There are a hundred ways of making shotgun shells. But, we really liked the simplicity of using a gas grill. No need to go from low-and-slow to high-and-fast to get the bacon done, it cooked to perfection in 45 minutes. No turning, flipping, nothing. Just put the stuffed shells on the grill and wait for the magic to happen.

Go Spicy. Or Don’t.

Because we like a little kick to our dishes, we ended up using a spicy BBQ seasoning on top of the shells. You can use any seasoning you like. We recommend that you stay away from anything that contains a lot of sugar since the high grill temperature might burn the seasoning.

Barilla Manicotti Pasta, Non-GMO Kosher Pasta…
  • MANICOTTI PASTA: Manicotti pasta is one of the…
  • BARILLA PASTA: Made with 100% durum wheat and…

A Note About Heat And Smoke

If you’re using a charcoal grill, just make sure you keep the temperature 350 F, or even a touch lower. You’ll want to light your charcoal 30-45 minutes or so before you plan on starting to cook the shells. If you want a bit of smoky flavor, add a chunk or two of hickory once the coals are lit.

Stay in the Italian mode and also make some grilled French bread pizzas.

Grilled Shotgun Shells
Print Pin
5 from 1 vote

Grilled Shotgun Shells

Be careful to not over-grill the shells as they'll get very crispy.
Course Appetizer or Main
Cuisine American
Keyword grilled, Shotgun shells, stuffed pasta shells
Prep Time 4 hours 30 minutes
Cook Time 45 minutes
Servings 6
Calories 704kcal

Ingredients

For the stuffing

For the shells

For serving

Instructions

For the stuffing

  • Heat the oil in a large skillet over medium heat.
  • Add onion and cook until just starting to soften.
  • Add the garlic and cook, stirring, another minute.
  • Remove from heat and let cool.
  • Break the egg into a large bowl and beat with a whisk or fork.
  • Stir in the Ricotta, spinach, Parmesan, basil, breadcrumbs, salt and pepper.
  • Add the cooked sausage mixture and stir until well combined.

For the shells

  • Bring a large pot of water to a boil.
  • Add the shells and cook, stirring occasionally, for 5 minutes. You don't want to fully cook the shells.
  • Remove the shells to a strainer to drain the water then transfer to a baking sheet to cool slightly.
  • Carefully stuff each shell with the sausage mixture. Don't press too hard or you'll tear the shells. You want to fill them right up to the ends.
  • Wrap each shell in a piece of bacon then return to the baking sheet.
  • Sprinkle the bacon all around with the BBQ seasoning.
  • Place baking sheet in the fridge for 4-6 hours for everything to set before cooking.

Cooking the shells

  • Fire up your grill for indirect cooking at 350 F.
  • Transfer the shells to the grill and cook for 45 minutes or until the bacon is done and just starting to crisp. I start checking them every 5 minutes after 30 minutes to make sure the shells don't get too crispy and the bacon isn't over-cooked.

For serving

  • Serve shells garnished with parsley along with warm marinara for dipping or drizzling.

Notes

Also make a batch using spicy sausage for your heat-loving friends!

Nutrition

Calories: 704kcal | Carbohydrates: 13g | Protein: 33g | Fat: 58g | Saturated Fat: 23g | Polyunsaturated Fat: 7g | Monounsaturated Fat: 24g | Trans Fat: 0.1g | Cholesterol: 167mg | Sodium: 1482mg | Potassium: 676mg | Fiber: 3g | Sugar: 3g | Vitamin A: 6102IU | Vitamin C: 8mg | Calcium: 362mg | Iron: 3mg

Nutritional values are approximate.

Sale
Weber® 3-Piece BBQ Tool Set, Stainless Steel…
  • Set of 3 includes Spatula, Locking Tongs, and Cold…
  • Durable, stainless-steel construction holds up to…
Weber® Grill Grate Scrubber, Grill Cleaning…
  • Designed for heavy-duty grill cleaning
  • Contoured handle offers a firm, comfortable grip
Weber® Outdoor Grill Spray Cleaner & Degreaser…
  • This 16 oz spray bottle of Weber Grill Grate…
  • Gentle on Your Grates: Grill cleaner spray is…

Buffalo Shrimp

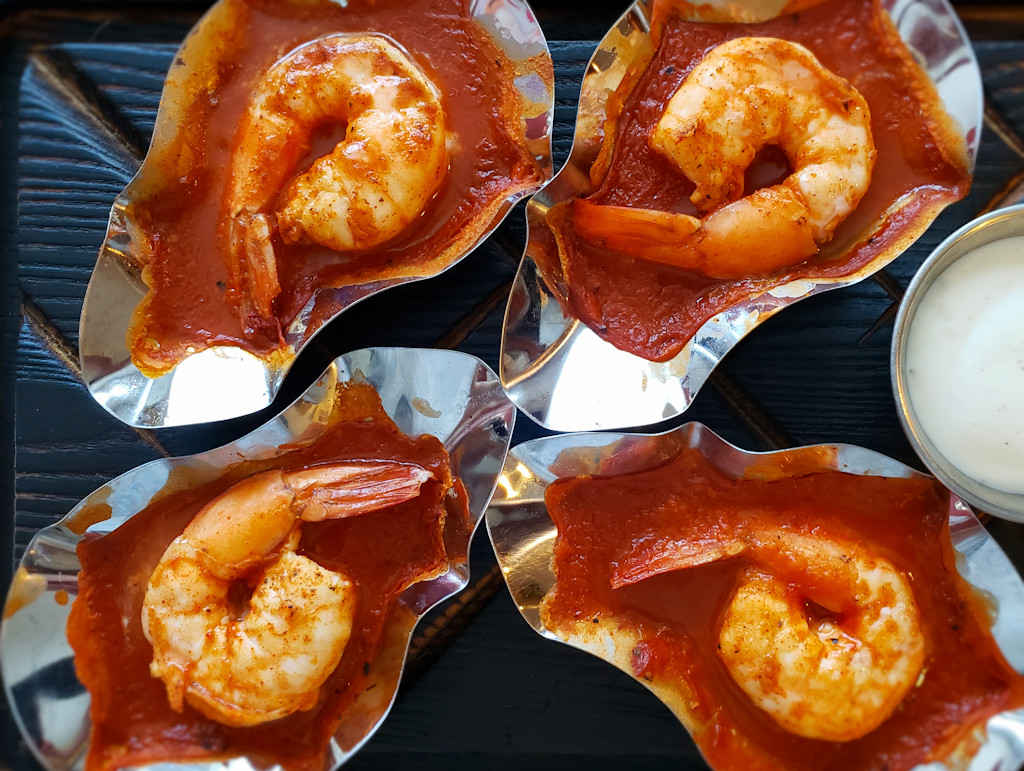
I have what can easily be described as an addiction to Buffalo wings and anything with Buffalo wing sauce in the ingredients. So it came as no surprise that I devoured these Buffalo shrimp. I made them on the grill, which was about as easy to do as possible, but you can also make them in the oven. The shrimp soak up the fantastic sauce in no time. I loved them, and definitely should’ve made more!

Buffalo Shrimp

Who Needs Wings?

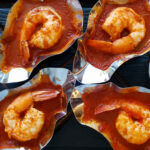
I used a nice medium Buffalo wing sauce when I made these shrimp. I love the flavor of shrimp. And I didn’t want some mouth-blisteringly-hot sauce burying that great taste. I could easily see making a mix of medium and mild for appetizers for a get-together. The shrimp only take a few minutes to cook so you can satisfy a crowd in no time at all. Serving them with blue cheese or ranch dressing is optional, in my opinion. They’re great by themselves!

Oh, don’t forget that the oyster shells are super hot when taken off the grill. You might want to let your guests know to not handle them for at least a few minutes. They do cool off relatively quickly.

Outset Grillable Shells, Stainless Steel Grillable…
  • STURDY STAINLESS STEEL: Stainless steel…
  • GET CREATIVE: This vessel is perfect for not just…

Also try my spicy bacon-wrapped shrimp.

Buffalo Shrimp
Print Pin
4 from 1 vote

Buffalo Shrimp

These spicy shrimp are sure to disappear in no time!
Course Appetizer
Cuisine American
Keyword grilled, oyster shells, shrimp
Prep Time 10 minutes
Cook Time 10 minutes
Servings 4
Calories 5kcal

Ingredients

Instructions

  • Place the shrimp in a bowl.
  • Combine the spices and sprinkle over the shrimp. Toss to coat.
  • Place shrimp in the oyster shells. Add enough Buffalo sauce to almost fill the shells.
  • Cook the shrimp (see below). Warning: The sauce will be very hot as will the shells, so be careful handing them after they are cooked.
  • Serve with blue cheese dressing for dipping if desired.

In the oven

  • Bake at 350 F for 10 minutes or until the shrimp are no longer translucent and the sauce is hot and bubbly.

On the grill

  • Cook over medium heat for 10 minutes or until the shrimp are no longer translucent and the sauce is hot and bubbly.

Notes

Of course these shrimp are also great served with a little Ranch dressing!

Nutrition

Calories: 5kcal | Carbohydrates: 1g | Protein: 1g | Fat: 1g | Saturated Fat: 1g | Polyunsaturated Fat: 1g | Monounsaturated Fat: 1g | Sodium: 1mg | Potassium: 20mg | Fiber: 1g | Sugar: 1g | Vitamin A: 53IU | Vitamin C: 1mg | Calcium: 4mg | Iron: 1mg

Nutritional values are approximate.

Sale
Mueller Pro-Series All-in-One, 12 Blade Mandoline…
  • Meal Prep MVP – A practical and innovative way to…
  • 12 Diverse Blades – With nine interchangeable…
OXO Good Grips 4 Piece Stainless Steel Measuring…
  • Set includes: 1/4 cup, 1/3 cup, 1/2 cup and 1 cup
  • Magnetic handles keep Cups together for storage…

Perfect Grilled Baked Potatoes

I love baked potatoes. As a side dish or as a main, there’s a million ways to top them. But for me, there’s only one way to cook them: baked to a perfect 210 F internal temperature. These perfect grilled baked potatoes are guaranteed to be fluffy and delicious. Sometimes I make them in the oven. And sometimes I make them on my grill. Gas or charcoal, it doesn’t matter, you can make great potatoes on either one.

Perfect Grilled Baked Potatoes

Do You Need Potato Nails?

You might notice a little something poking out of the middle of my perfect grilled baked potatoes. Those are potato nails. Yes. Potato nails. They direct heat into the center of the potatoes so that they cook more evenly. They’re available from Weber on Amazon. They’re not required, but they work and they’re cool. And they come with a little tool for removing them because trust me, you don’t want to forget and grab them with your hands!

Perfect Grilled Baked Potatoes Temperature

Weber Original Potato Nails , Silver
  • Heat conducted goes deep into potato
  • Stainless steel provides quick, even heat

If you have an oil-less fryer from Char-Broil, you can also make great baked potatoes using it.

Perfect Grilled Baked Potatoes
Print Pin
5 from 1 vote

Perfect Grilled Baked Potatoes

Sometimes I make baked potatoes in the oven. And sometimes I make them on my grill. Gas or charcoal, it doesn’t matter, you can make great potatoes on either one.
Course Side Dish
Cuisine American
Keyword baked, grilled, potatoes
Prep Time 15 minutes
Cook Time 1 hour 15 minutes
Servings 4
Calories 292kcal

Ingredients

Instructions

  • Fire up your grill for indirect cooking. You want the temperature at the grates to be 350-400 F.
  • Rinse off the potatoes and pat dry.
  • Use a knife to poke 3-4 holes in the tops of the potatoes, going about 1/2 of the way into the potato.
  • If you're using potato nails insert them now.
  • Drizzle the potatoes with just a bit of oil. Use your hand to rub the oil all over the potato. If you don't want to get your hands oily just use a brush.
  • Sprinkle the potatoes with salt. Don't be shy with it and make sure you get all sides.
  • Transfer the potatoes to the grill and cook for 1 hour to 1 hour 15 minutes. If you're not sure how consistent or high your grill temperature is, I recommend checking them after 45 minutes.
  • Once the potatoes have reached an internal temperature around 210 F they are done. If the potatoes are different sizes you'll want to check the temperature in more than one place.
  • Remove and let cool slightly before serving.

Notes

At 210 F the potatoes are done. A degree or two isn’t going to make a big difference so don’t fret if you’re just ‘close’.

Nutrition

Calories: 292kcal | Carbohydrates: 67g | Protein: 8g | Fat: 1g | Saturated Fat: 1g | Sodium: 18mg | Potassium: 1539mg | Fiber: 5g | Sugar: 2g | Vitamin A: 4IU | Vitamin C: 21mg | Calcium: 48mg | Iron: 3mg

Nutritional values are approximate.

Sale
Weber® 3-Piece BBQ Tool Set, Stainless Steel…
  • Set of 3 includes Spatula, Locking Tongs, and Cold…
  • Durable, stainless-steel construction holds up to…
Weber® Grill Grate Scrubber, Grill Cleaning…
  • Designed for heavy-duty grill cleaning
  • Contoured handle offers a firm, comfortable grip
Weber® Outdoor Grill Spray Cleaner & Degreaser…
  • This 16 oz spray bottle of Weber Grill Grate…
  • Gentle on Your Grates: Grill cleaner spray is…
Grilled Potatoes with Onion and Garlic

Oftentimes, it’s the simple recipes that taste the best. These grilled potatoes with onion and garlic are proof of that. You can throw this together for two people, six people or even twenty people in no time. It’s the perfect side dish for anything grilled, from burgers to hot dogs to chicken, you name it. No need to mess with this recipe, just make it and enjoy.

Grilled Potatoes with Onion and Garlic

Simply Fantastic

These grilled potatoes with onion and garlic remind me of the days when I would go camping. I’d be lakeside, somewhere, trying to catch fish, and often without any luck. I didn’t worry, though, because I always had some hot dogs or burgers in the cooler, waiting for a hot grill. Back then it was park grill, today it’d be my portable Weber. I’d pre-make packets of these potatoes and toss them on too. In no time, I was enjoying a great meal in the great outdoors. You can’t beat that. It didn’t matter whether I caught any fish or not.

Weber Crafted® Roasting Basket, Stainless‑Steel…
  • Create food never thought possible in a grill with…
  • Designed to perfectly roast small, delicate food…

A grill basket makes grilling these potatoes much easier. And clean-up is much easier, too!

Grilled Potatoes with Onion and Garlic
Print Pin
5 from 1 vote

Grilled Potatoes with Onion and Garlic

You can assemble the packets ahead of time to make cooking fuss-free.
Course Side
Cuisine American
Keyword garlicky, grilled, onion, potatoes
Prep Time 15 minutes
Cook Time 20 minutes
Servings 4
Calories 110kcal

Equipment

Ingredients

Instructions

  • Fire up your grill for medium-high heat.
  • Transfer the potatoes, onion and garlic to a large bowl.
  • Drizzle with the oil and season with salt and pepper.
  • Toss to combine and coat.
  • Tear off a large piece of aluminum foil.
  • Place the potato mixture in the center of the foil and fold up the edges to seal.
  • Transfer to a grill and cook 15-20 minutes or until tender. To test, you can poke the potatoes with a thin skewer.
  • Once the potatoes are as tender as you like, remove the packets from the grill.
  • Carefully open the packets and serve.

Notes

Use caution opening the hot packets as there is steam released that can burn you.

Nutrition

Calories: 110kcal | Carbohydrates: 25g | Protein: 3g | Fat: 1g | Saturated Fat: 1g | Polyunsaturated Fat: 1g | Monounsaturated Fat: 1g | Sodium: 58mg | Potassium: 618mg | Fiber: 3g | Sugar: 6g | Vitamin A: 17IU | Vitamin C: 14mg | Calcium: 30mg | Iron: 1mg

Nutritional values are approximate.

Sale
Weber® 3-Piece BBQ Tool Set, Stainless Steel…
  • Set of 3 includes Spatula, Locking Tongs, and Cold…
  • Durable, stainless-steel construction holds up to…
Weber® Grill Grate Scrubber, Grill Cleaning…
  • Designed for heavy-duty grill cleaning
  • Contoured handle offers a firm, comfortable grip
Weber® Outdoor Grill Spray Cleaner & Degreaser…
  • This 16 oz spray bottle of Weber Grill Grate…
  • Gentle on Your Grates: Grill cleaner spray is…
Grilled Shrimp with Spicy Lime Butter using Sous Vide

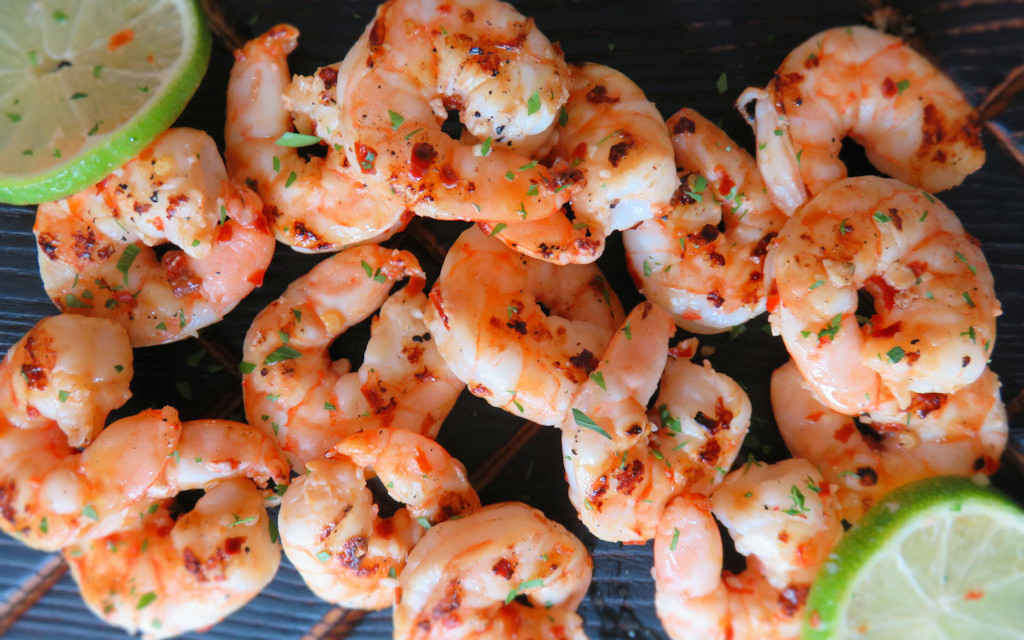
My wife proclaimed these sous vide then grilled shrimp with spicy lime butter to be the best shrimp I’ve ever made. I was shocked. No, not because these aren’t fantastic shrimp. They are fantastic shrimp. No, I was shocked because I have made literally 100s of shrimp variations. Almost all were great. So it’s saying something when these rocketed to the top of her list. And I have to agree. The perfect combination of citrus and garlic and a touch of heat, these truly are great shrimp! And easy to make to boot!

Grilled Shrimp with Spicy Lime Butter using Sous Vide

Grilling Is Preferred, But Not Required

You don’t have to have a grill to finish off these sous vide spicy lime butter shrimp. Just get a skillet (cast iron works best) nice and hot and toss the shrimp in. Cook for 30 seconds per side and remove immediately. No, you won’t get that wonderful grill flavor, but you’ll get that nice little crust on the shrimp, and that’s still great stuff!

I use an Anova sous vide cooker. It’s my immersion circulator workhorse!
Sale
Anova Culinary Sous Vide Precision Cooker…
  • Pros have been doing it for years, and now you can…

A grill basket makes grilling these shrimp much easier. And clean-up is much easier, too! I use a heavy-duty basket that has lasted me for years. I have a big one for jobs like this, and a smaller version for when it’s just the two of us.

Weber Crafted® Roasting Basket, Stainless‑Steel…
  • Create food never thought possible in a grill with…
  • Designed to perfectly roast small, delicate food…

Also try my sous vide grilled chicken breast and my peppered shrimp using sous vide.

Grilled Shrimp with Spicy Lime Butter using Sous Vide
Print Pin
5 from 1 vote

Grilled Shrimp with Spicy Lime Butter using Sous Vide

You don't have to have a grill to finish off these sous vide spicy lime butter shrimp. Just get a skillet nice and hot and toss the shrimp in.
Course Appetizer or Main
Cuisine American
Keyword grilled, shrimp, sous vide
Prep Time 10 minutes
Cook Time 20 minutes
Servings 4
Calories 8kcal

Ingredients

  • 1 pound shrimp large, peeled, deveined
  • 2 cloves garlic
  • ½ medium jalapeno pepper sliced (optional)
  • ½ teaspoon dried red pepper flake use 1 teaspoon if skipping the jalapeno
  • ¼ teaspoon kosher salt
  • 1 tablespoon butter cut into 1/4ths
  • ½ lime sliced
  • fresh parsley chopped, for garnish

Instructions

  • Heat your sous vide water to 130 F.
  • Combine the garlic, jalapeno, dried red pepper and salt in a medium bowl.
  • Add the shrimp and toss to coat.
  • Transfer the shrimp to a vacuum sealable bag and spread out evenly so they don't overlap.
  • Add the butter and lime and seal the bag.
  • Transfer bag to immersion circulator and cook for 15 minutes.
  • Meanwhile, fire up your grill for medium-high direct heat cooking.
  • Remove the bag from the water.
  • Empty contents into a bowl.
  • Remove the shrimp to a plate.
  • Reserve the lime slices and jalapeno (if using).
  • Transfer the shrimp to the grill over direct heat.
  • Cook for 30 seconds per side then remove to a serving platter.
  • Serve garnished with the parsley and reserved lime and jalapeno slices.

Notes

Serve with a little cocktail sauce for dipping, too!

Nutrition

Calories: 8kcal | Carbohydrates: 2g | Protein: 1g | Fat: 1g | Saturated Fat: 1g | Polyunsaturated Fat: 1g | Monounsaturated Fat: 1g | Cholesterol: 1mg | Sodium: 154mg | Potassium: 29mg | Fiber: 1g | Sugar: 1g | Vitamin A: 104IU | Vitamin C: 5mg | Calcium: 11mg | Iron: 1mg

Nutritional values are approximate.

Sale
Anova Culinary Sous Vide Precision Cooker…
  • Pros have been doing it for years, and now you can…

Easy French Onion Burgers

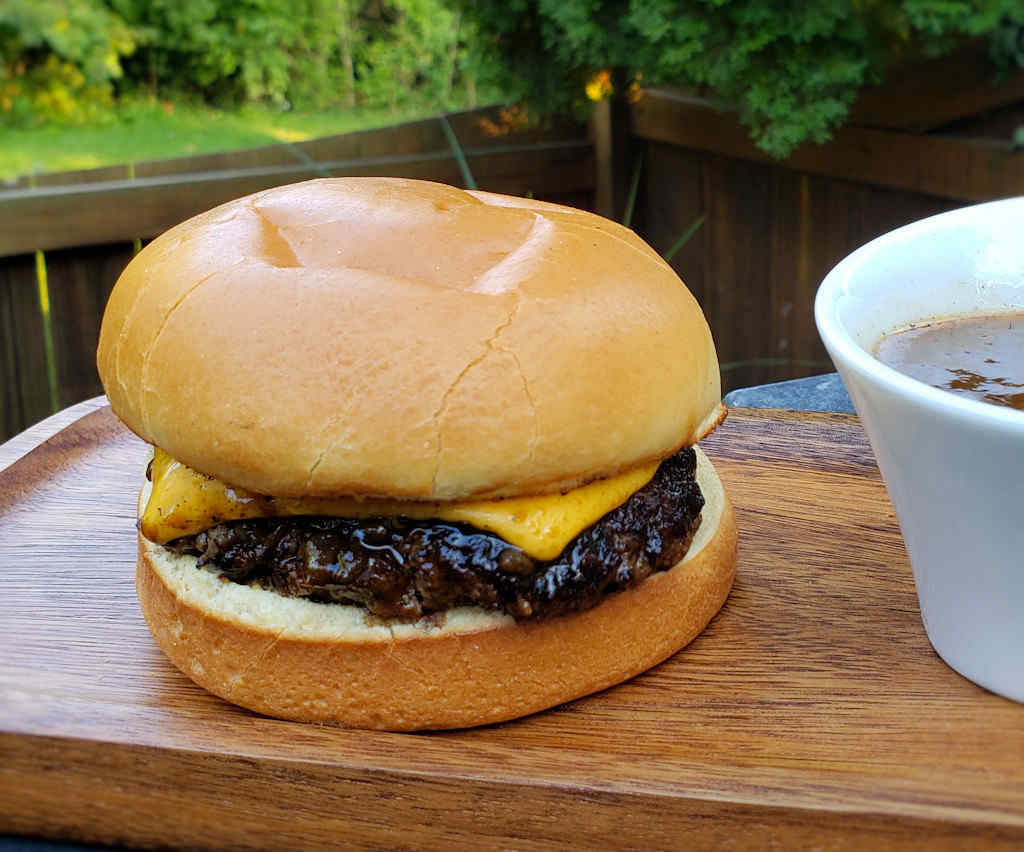
They’re not anything fancy. Heck, you might even consider them to be ‘kids’ food. But for some reason I really, really enjoyed these easy French onion burgers. I made mine on the grill, but you can just as easily make them on the stovetop. Think of them as French dip burgers in a way. The patties soak up some of that French onion yumminess. And just in case you want more, there’s a little bowl of more French onion on the side for dippin’. And I did a lot of dippin’, I tell ya!

Easy French Onion Burgers

The Key To These Burgers Is…

The key to these easy French onion burgers is to not overcook the patties before they go into the soup to ‘finish’. Get them close to done, then remove them and let them go for a soupy swim to soak up all that great oniony flavor. The patties will come out juicy, dripping good stuff, ready to devour!

Burger Press Hamburger Patty Maker with Patty…
  • 3 in 1 Hamburger Press: The Burger press has…
  • Premium Durable Material: Our hamburger patty…

This recipe is based on a recipe from Campbell’s.

Easy French Onion Burgers
Print Pin
4 from 1 vote

Easy French Onion Burgers

The key to these easy French onion burgers is to not overcook the patties before they go into the soup to 'finish'.
Course Main
Cuisine American
Keyword burgers, onion
Prep Time 5 minutes
Cook Time 15 minutes
Servings 4
Calories 512kcal

Ingredients

Instructions

  • Shape the beef into 4 patties.
  • Season well with pepper.

On the grill

  • Fire up your grill for direct cooking 400 – 450 F.
  • Pour the soup into a pan and place on the grill near the direct heat so it begins to warm.
  • Grill burgers as desired but do not cook completely. When they reach around 140 F remove from the direct heat and transfer to the hot French onion soup.
  • Continue cooking the burgers in the soup until they reach 165 F.
  • Remove the patties and place on the bun bottoms.
  • Top with cheese and bun tops.
  • Serve with soup on the side for dipping, if desired.

On the stovetop

  • Heat a large skillet over medium-high heat.
  • Add the burgers and cook on both sides until medium rare, around 140 F.
  • Spoon out any fat from the skillet and stir in the soup.
  • Continue to cook the burgers in the hot soup until they reach 165 F, another 5-10 minutes.
  • Remove the patties and place on the bun bottoms.
  • Top with cheese and bun tops.
  • Serve with soup on the side for dipping, if desired.

Notes

Like like to serve these like French dip sandwiches. Just dip in the soup and get to eatin’!

Nutrition

Calories: 512kcal | Carbohydrates: 26g | Protein: 29g | Fat: 32g | Saturated Fat: 13g | Polyunsaturated Fat: 2g | Monounsaturated Fat: 12g | Trans Fat: 2g | Cholesterol: 104mg | Sodium: 1026mg | Potassium: 719mg | Fiber: 1g | Sugar: 6g | Vitamin A: 199IU | Vitamin C: 1mg | Calcium: 326mg | Iron: 4mg

Nutritional values are approximate.

Sale
Mueller Pro-Series All-in-One, 12 Blade Mandoline…
  • Meal Prep MVP – A practical and innovative way to…
  • 12 Diverse Blades – With nine interchangeable…
OXO Good Grips 4 Piece Stainless Steel Measuring…
  • Set includes: 1/4 cup, 1/3 cup, 1/2 cup and 1 cup
  • Magnetic handles keep Cups together for storage…

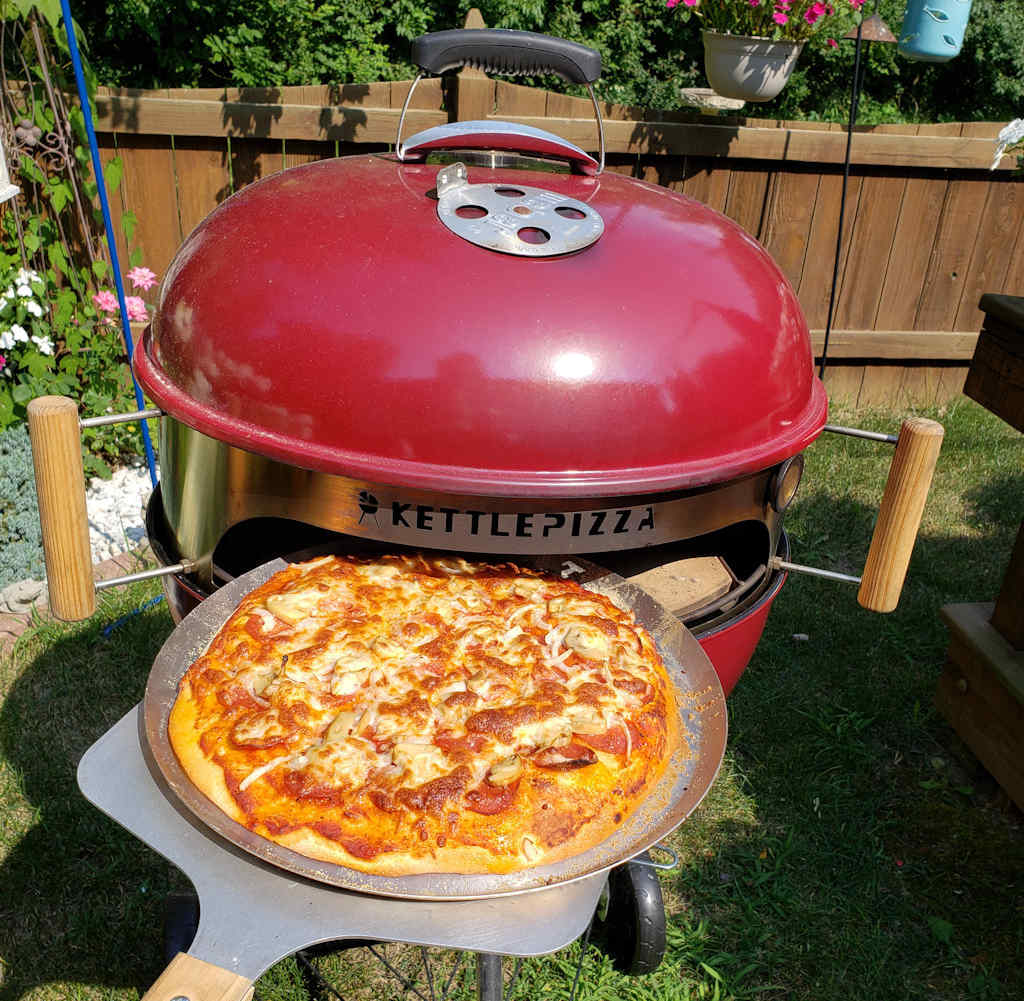
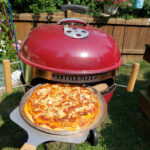
Easy Pizza using the Kettle Pizza

I love my Kettle Pizza grill attachment. But I am by no means an expert at using it. I have, however, come up with a simple technique for using it that produces great pizza each and every time. Some day I aspire to be a pizza aficionado, baking completely scratch-made pizza after pizza without a single mistake. Until then, I prefer my easier method that still produces absolutely fantastic pizza with a crunchy crust and hot, bubbly, melted cheese.

Easy Pizza using the Kettle Pizza

I Was Dough-Challenged

When I first started making pizzas using the KettlePizza I ran into two obstacles. First, my homemade dough had too much moisture in it and it liked to stick to my pan or stone. A lot. Second, my heat was not even or didn’t last long enough for more than a few pizzas.

There are plenty of great dough recipes out there (Matt Frampton’s for instance) if you want to make your own. I prefer to use store-bought frozen (Tiseo’s brand), for now at least. I’ve never had anything but success with it. I can make a big batch of pizzas at once with no fuss at all. Each and every one comes out as good as the last. The dough is also great for making bread sticks.

Pizza Pans

I’ve tried pizza screens and cooking directly on the pizza stone, with some success but I’ve found the most success using pizza pans. I have 5 pans so I can pre-make several pizzas. I oil the pans very lightly by pouring olive oil onto a paper towel then wiping it around the pan. And I also sprinkle the pan with a light coating of cornmeal, as if I was cooking directly on a stone. I’ve never had a pizza stick with this technique. Well, the dough doesn’t stick. Cheese that melts and runs over the sides will stick to the pan. It’s going to happen, but it’s not the end of the world.

Arranging The Coals

My fire arrangement now is simple: make a horseshoe-shaped pile of unlit coals around the grill, but not underneath the tombstone-shaped stone. I then add lit charcoal on top of that, and then wood chunks. If the temperature drops too far I’ll add more fist-sized wood chunks around the edges and in the basket that comes with the Kettle Pizza. I use long tongs to add the wood so that it doesn’t fall beneath the stone. I press it lightly into the piles of charcoal to make sure it doesn’t roll off.

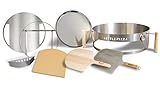
Kettle Pizza Serious Eats Kit
  • Insert fits 22.5” charcoal grill only
  • Includes pan, wood peel, metal peel, Prograte with…

If you’re serious about making pizza on your 22″ charcoal grill, get the “Serious Eats” kit from Kettle Pizza. You can also make calzones on a Kettle Pizza in no time!

Easy Pizza using the Kettle Pizza
Print Pin
5 from 1 vote

Easy Pizza using the Kettle Pizza

There are plenty of great dough recipes out there (Matt Frampton's for instance) if you want to make your own.
Course Main
Cuisine American
Keyword easy, Kettle Pizza
Prep Time 15 minutes
Cook Time 10 minutes
Dough defrost time 12 hours
Servings 4
Calories 283kcal

Equipment

Ingredients

Instructions

  • Place the dough in the fridge and let defrost overnight.
  • Two hours before cook time, remove the dough from the fridge and place on the countertop to come to room temperature.
  • I prefer to assemble my pizzas while the charcoal is getting hot. You can also make them ahead of time and keep at room temperature until ready to cook.
  • Place 1/2 chimney of unlit charcoal around the back of your grill in the shape of a horseshoe, with the open part towards the front of the grill.
  • Light another 1/2 chimney of charcoal. This is when I assemble my pizzas as it can take 20-30 minutes for the charcoal to get hot.
  • To make the pizza, lightly dust a flat surface with flour. Using your hands, shape the dough as desired. Try to not overwork the dough, and do not use a rolling pin.
  • Add sauce and toppings as desired.
  • Lightly oil a pizza pan. Yes, you can make the pizza directly on the stone but I've had more luck with a pan. You can read more about that in the recipe text in my post.
  • Lightly sprinkle the pan with cornmeal.
  • Slide the pizza onto the pan.
  • Once the charcoal is ashed over pour it over the unlit coals. Add 3-4 fist-sized wood chunks around the edges (I use tongs to keep them from falling beneath the stone) and a few good chunks in the charcoal basket. Add the KettlePizza grate and stone. Add the grill cover.
  • Let the stone get good and hot. Usually I let it go to around 600 F.
  • Transfer the pan to the grill. Bake for 5 minutes then spin the pan 90 degrees. Keep baking/spinning every minute or so until the pizza is done to your liking.
  • You can cook 3-4 pizzas without adding more wood or charcoal. If you do add fuel let it burn a while before adding more pizzas.
  • Let the pizza rest a few minutes before slicing.

Notes

These instructions are for the Kettle Pizza Tombstone-shaped baking stone. The same approach should apply when just using a round stone, but I have not tried it.

Nutrition

Calories: 283kcal | Carbohydrates: 55g | Protein: 9g | Fat: 4g | Saturated Fat: 1g | Polyunsaturated Fat: 1g | Monounsaturated Fat: 1g | Sodium: 900mg | Potassium: 51mg | Fiber: 2g | Sugar: 8g | Vitamin A: 66IU | Vitamin C: 1mg | Calcium: 2mg | Iron: 3mg

Nutritional values are approximate.

Lodge Cast Iron 15-Inch Pizza Pan with Silicone…
  • Allows you to bake to the edge while providing…
  • Seasoned with 100% natural vegetable oil

Planked Lemon Pepper Brussels Sprouts

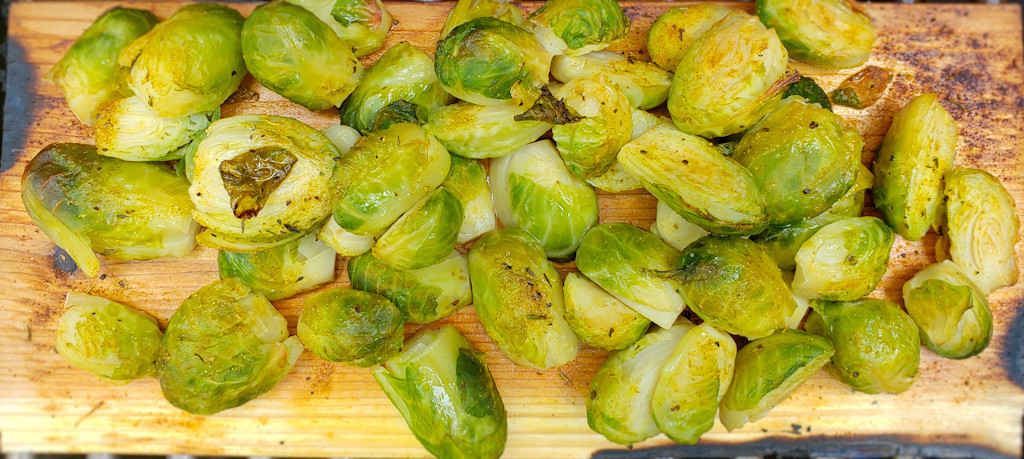
I’m always on the lookout for a simple, quick and easy grilled side dish. It doesn’t have to be fru-fru, but it does have to be tasty, like these planked lemon pepper Brussels Sprouts. I recently purchased a big lot of Kosmo’s Q wing seasonings. The lemon pepper seasoning is off-the-charts yummy on wings, and it got me thinking… how great would it be on grilled Brussels sprouts? Well the answer, of course, is fantastic! Nothing goes together better than lemon, pepper and sprouts!

Planked Lemon Pepper Brussels Sprouts

Something Different, Something Tasty

You could roast these planked lemon pepper Brussels sprouts in the oven, or grill them directly on your grill or in a vegetable basket. But I love cooking on cedar planks. They add just a hint of cedar, something different, something good.

Don’t be shy with the Kosmo’s Q lemon pepper seasoning. It’s quite lemony, it’s quite peppery, and more is better.

Cedar Grilling Planks – 12 Pack – Made In USA
  • Textured Grilling Planks for More Smoke and More…
  • 5.5″. x 11.00″ x 1/3″ – Upgraded Thickness!

If you decide to use a grill basket instead of a cedar plank, an investment in a good, quality basket is well worth it. I use mine a lot. It makes dishes like this easier to make. And it’s super easy to clean up. I have a large one and a small one.

Weber Crafted® Roasting Basket, Stainless‑Steel…
  • Create food never thought possible in a grill with…
  • Designed to perfectly roast small, delicate food…

Also try my planked lemon pepper asparagus.

Refrigerator Cucumber Salad
Print Pin
4 from 1 vote

Planked Lemon Pepper Brussels Sprouts

I'm always on the lookout for a simple, quick and easy grilled side dish.
Course Side
Cuisine American
Keyword Brussels sprouts, cedar plank, lemon pepper
Prep Time 15 minutes
Cook Time 25 minutes
Servings 8
Calories 49kcal

Ingredients

Instructions

  • Place a cedar plank in water while preparing the sprouts.
  • Bring a medium pot of water to a slow boil.
  • Trim the ends off the sprouts and remove any loose leaves. Cut each sprout in half lengthwise.
  • Add the sprouts to the water. Let simmer for 10 or so minutes, until the largest ones can be poked with a toothpick with just a little resistance.
  • Remove the sprouts from the water and rinse with cold water. Drain very well.
  • Fire up your grill for direct cooking, around 400 F.
  • Gently toss the sprouts with the oil. Just use enough to lightly coat them.
  • Sprinkle with the Kosmos Q Lemon Pepper wing dust. How much you add is up to you, but my opinion is more is better.
  • Transfer the sprouts to the plank. If you place them cut-side down you won't have to worry as much about them rolling off as you move the plank.
  • Transfer to the grill and grill for 20-25 minutes or until the plank is charred and the Brussels sprout leaves have a little char on them too.

Notes

Kosmos Q wing dust contains enough salt so you won’t need to add any to the sprouts. You can add freshly ground black pepper if you like.
Nutritional values do not include the wing dust.

Nutrition

Calories: 49kcal | Carbohydrates: 10g | Protein: 4g | Fat: 1g | Saturated Fat: 1g | Polyunsaturated Fat: 1g | Monounsaturated Fat: 1g | Sodium: 28mg | Potassium: 441mg | Fiber: 4g | Sugar: 2g | Vitamin A: 855IU | Vitamin C: 96mg | Calcium: 48mg | Iron: 2mg

Nutritional values are approximate.

Cedar Grilling Planks – 12 Pack – Made In USA
  • Textured Grilling Planks for More Smoke and More…
  • 5.5″. x 11.00″ x 1/3″ – Upgraded Thickness!

Easy Calzones using the Kettle Pizza

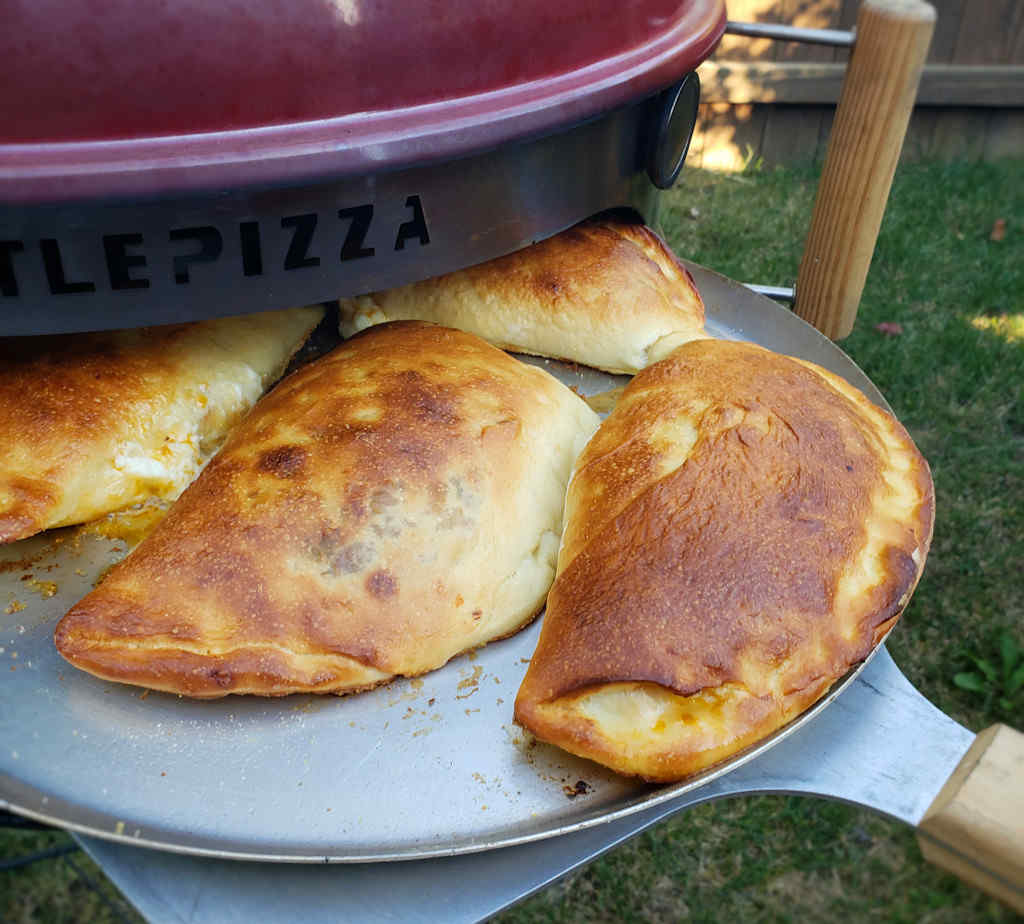
This was our second attempt at making calzones using the Kettle Pizza attachment on our 22″ Weber grill. We were so happy with how easy they were to make. We learned a few things our first time out. Our second attempt was fantastic. These calzones are one of the reasons we really, really love our Kettle Pizza. Delicious food, each and every time. And it’s kinda fun too!

The crust on these calzones was perfect. We have not mastered making our own dough (at least not consistently) so we use a pre-made frozen store-bought dough instead. The sausage filling is crazy good. It’d be great on a sub roll served as a sandwich too. Or use it on a pizza.

Easy Calzones using the Kettle Pizza

Fire Setup

My fire arrangement now is simple: make a horseshoe-shaped pile of unlit coals around the grill, but not underneath the tombstone-shaped stone. I then add lit charcoal on top of that, and then wood chunks. If the temperature drops too far I’ll add more fist-sized wood chunks around the edges and in the basket that comes with the Kettle Pizza. I use long tongs to add the wood so that it doesn’t fall beneath the stone. I press it lightly into the piles of charcoal to make sure it doesn’t roll off.

Kettle Pizza Serious Eats Kit
  • Insert fits 22.5” charcoal grill only
  • Includes pan, wood peel, metal peel, Prograte with…

If you’re serious about making pizza on your 22″ charcoal grill, get the “Serious Eats” kit from Kettle Pizza.

Also try my easy pizza recipe.

Easy Calzones using the Kettle Pizza
Print Pin
5 from 1 vote

Easy Calzones using the Kettle Pizza

These calzones are very good and addicting!
Course Main
Cuisine American
Keyword calzones, Kettle Pizza
Prep Time 12 hours
Cook Time 30 minutes
Servings 8
Calories 823kcal

Ingredients

For the dough

  • 2 pounds pizza dough pre-made, from the frozen section of your grocery store. I use Tiseo's dough.

For the stuffing

  • 1 pound hot Italian sausage if using sausages, remove from casings first
  • 1 medium red bell pepper sliced thin
  • 1 medium green bell pepper sliced thin
  • 1 large sweet onion sliced thin
  • 6 cloves garlic minced
  • 1 teaspoon Creole seasoning
  • 1 teaspoon kosher salt optional depending on how salty your Creole seasoning is

For the calzones

Instructions

For the dough

  • Place the dough in the fridge and let defrost overnight.
  • Two hours before cook time, remove the dough from the fridge and place on the countertop to come to room temperature.

For the stuffing

  • Crumble the sausage into a large skillet over medium-high heat.
  • Add the peppers and onion and cook until the sausage just starts to brown, about 5 minutes.
  • Add the garlic. Stir and cook another 2 minutes.
  • Stir in the Creole seasoning and salt, if using. Remove from heat and let cool 5 minutes.

For the calzones

  • I prefer to assemble my calzones while the charcoal is getting hot. You can also make them ahead of time and keep at room temperature until ready to cook.
  • Place 1/2 chimney of unlit charcoal around the back of your grill in the shape of a horseshoe, with the open part towards the front of the grill.
  • Light another 1/2 chimney of charcoal. This is when I assemble my pizzas as it can take 20-30 minutes for the charcoal to get hot.
  • To make the calzones, divide each dough into 4 equal pieces. Lightly flour a work surface. Using your hands or a rolling pin, stretch each piece of dough into a 6" round.
  • Divide the ricotta between each round, placing on one half, leaving around 1/2" around the edges.
  • Divide the sausage mixture between each round and top with the mozzarella.
  • Fold the dough half over the topped half. Crimp the edges with your fingers, making sure to seal it well.
  • In a small glass or bowl, whisk together the egg and water. Brush over the top of the calzones. Sprinkle with salt.
  • Lightly oil a pizza pan. Yes, you can make the calzones directly on the stone but I've had more luck with a pan. You can read more about that in the recipe text in my post.
  • Lightly sprinkle the pan with cornmeal.
  • Slide 4 calzones onto the pan. Try to not let them touch or overlap.
  • Once the charcoal is ashed over pour it over the unlit coals. Add 3-4 fist-sized wood chunks around the edges (I use tongs to keep them from falling beneath the stone) and a few good chunks in the charcoal basket. Add the KettlePizza grate and stone. Add the grill cover.
  • Let the stone get good and hot. Usually I let it go to around 600 F.
  • Transfer the pan to the grill. Bake for 5 minutes then spin the pan 90 degrees. Keep baking/spinning every minute or so until the calzones are done to your liking.
  • Let the calzones rest a few minutes before slicing.

Notes

You can make extras and freeze them for later.

Nutrition

Calories: 823kcal | Carbohydrates: 63g | Protein: 41g | Fat: 45g | Saturated Fat: 21g | Polyunsaturated Fat: 4g | Monounsaturated Fat: 15g | Trans Fat: 1g | Cholesterol: 172mg | Sodium: 2100mg | Potassium: 378mg | Fiber: 3g | Sugar: 11g | Vitamin A: 1398IU | Vitamin C: 35mg | Calcium: 521mg | Iron: 5mg

Nutritional values are approximate.

Lodge Cast Iron 15-Inch Pizza Pan with Silicone…
  • Allows you to bake to the edge while providing…
  • Seasoned with 100% natural vegetable oil