Easy Strawberry Creamsicle Pie

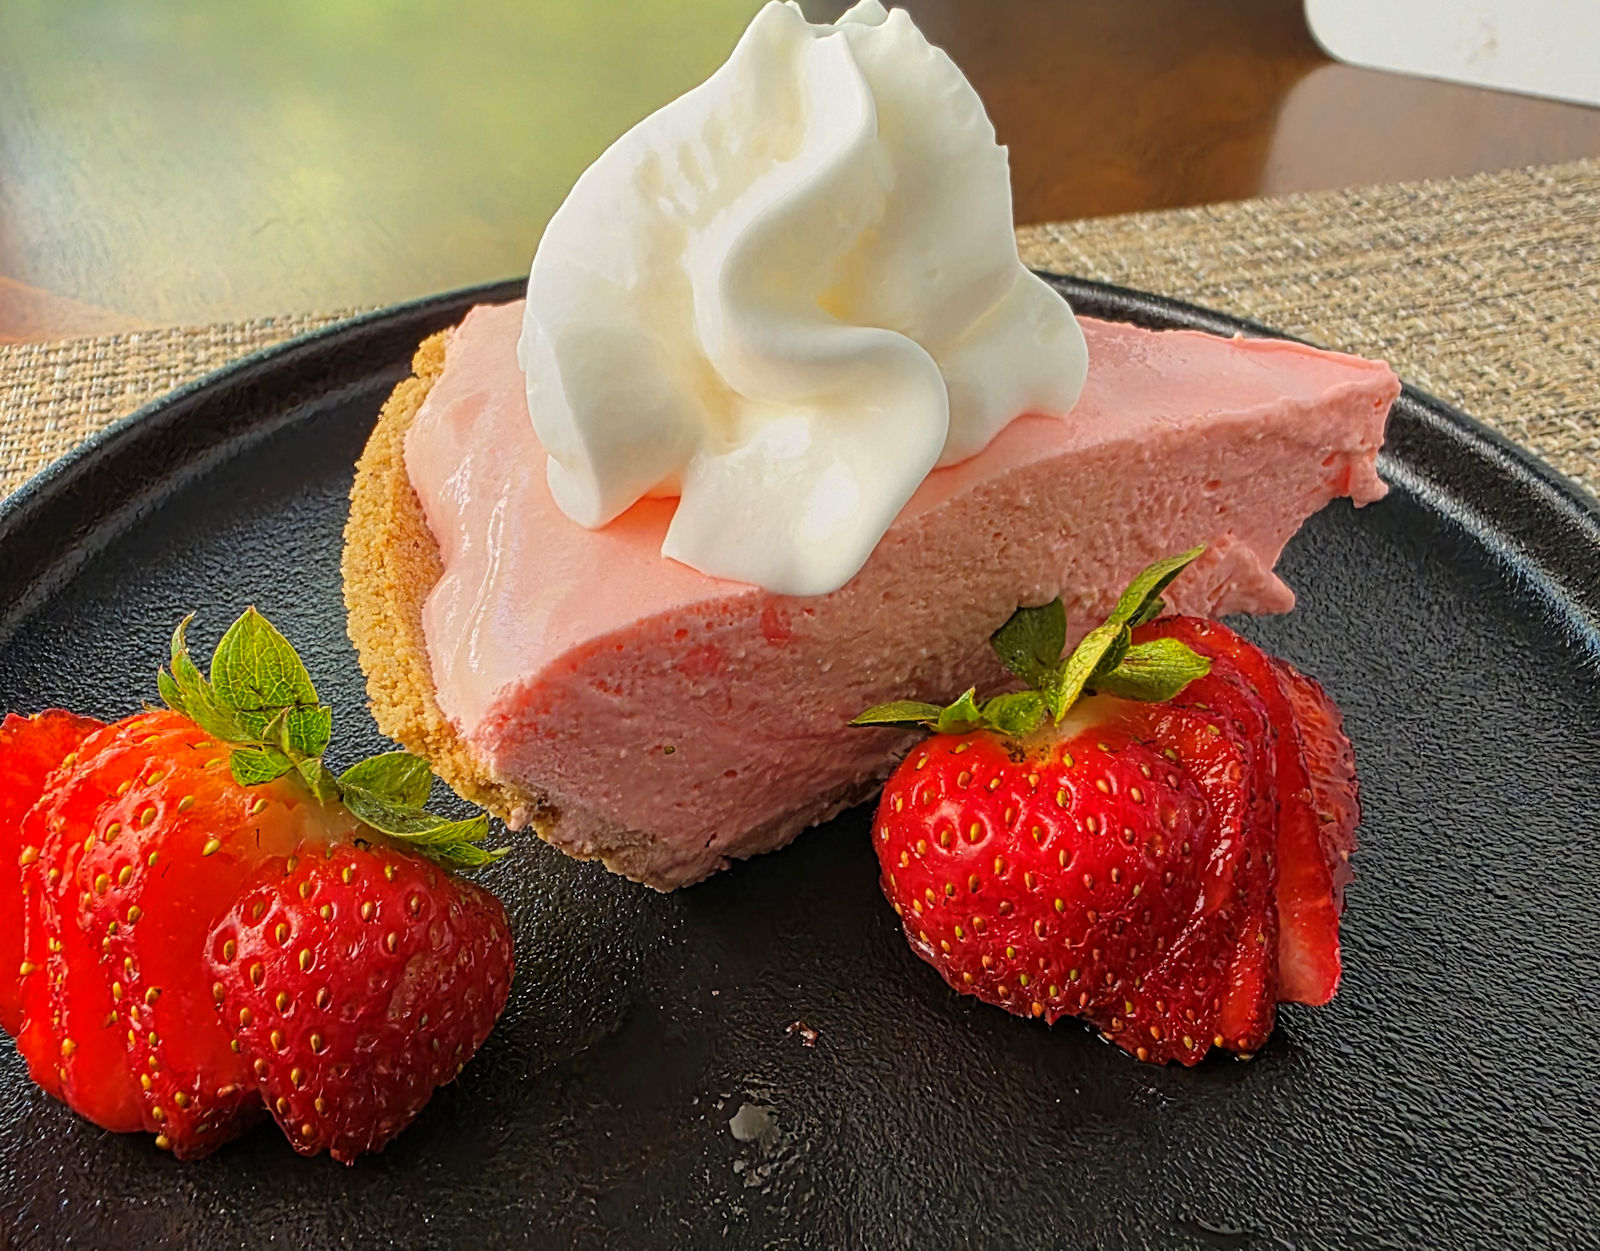
I hardly ever make desserts. And for good reason, too. My track record with doing anything even remotely picture-worthy for dessert is poor to say the least. Fortunately, though, this isn’t a bigtime fancy food blog. So I can get by posting a pic of my easy strawberry creamsicle pie and not worry about it not being perfect. But I will say, it hit the spot. I loved this pie. I could eat this pie every day. It’s creamy smooth. It has fantastic strawberry flavor. And it’s way, way easy to make.

Easy Strawberry Creamsicle Pie

Sugar Or Sugar-Free

I watch my carb intake, so I went the mostly sugar-free route when I made this easy strawberry creamsicle pie. I used sugar-free Jell-o and Cool Whip. There are still carbs in the crust and the strawberries. You can go with using fully loaded Jell-O and Cool Whip instead. Whichever way you prefer. Either is perfectly fine.

Easy Strawberry Creamsicle Pie

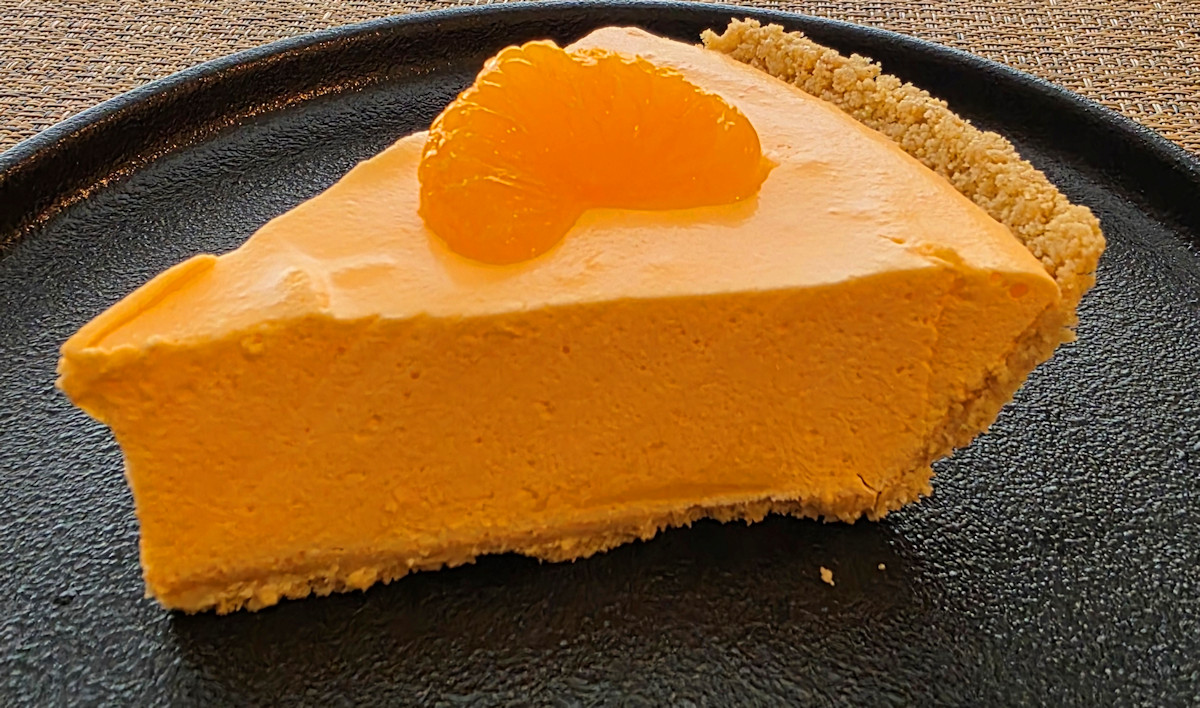
Also try my delicious orange creamsicle pie! Just as easy but orange-y!

Easy Strawberry Creamsicle Pie
Print Pin
5 from 2 votes

Easy Strawberry Creamsicle Pie

One of the tastiest, easiest desserts I've made!
Course Dessert
Cuisine American
Keyword creamsicle, pie
Prep Time 15 minutes
Cook Time 4 hours 30 minutes
Servings 8
Calories 1147kcal

Ingredients

  • 3 ounces strawberry Jell-o gelatin you can also use a small box of sugar-free
  • â…” cup water boiling
  • 1 cup water ice cold
  • 8 ounces Cool Whip thawed. You can use sugar-free or diet.
  • 10 inch graham cracker pie crust baked per package instructions (optional)
  • strawberries Slices, for garnish. Optional.

Instructions

  • Pour the gelatin in a large bowl.
  • Pour in the hot water. Whisk for 2 minutes or until the gelatin is completely dissolved.
  • Pour in the cold water. Whisk until frothy.
  • Using a spatula, slowly stir in the Cool Whip. Keep stirring until blended. The mixture will turn a consistent light orange in color.
  • Place the bowl in the fridge for 30 minutes. The mixture should thicken slightly.
  • Spoon the mixture into the crust. Smooth out the top with a spatula so it is nice and even.
  • Refrigerate for 4-12 (recommended) hours before serving.
  • Garnish pie with strawberries (if using), slice, and serve.

Nutrition

Calories: 1147kcal | Carbohydrates: 153g | Protein: 13g | Fat: 54g | Saturated Fat: 11g | Polyunsaturated Fat: 4g | Monounsaturated Fat: 36g | Cholesterol: 5mg | Sodium: 1073mg | Potassium: 271mg | Fiber: 4g | Sugar: 52g | Vitamin A: 52IU | Calcium: 94mg | Iron: 6mg

Nutritional values are approximate.

Easy Orange Creamsicle Pie

I hardly ever make desserts. My track record with doing anything even remotely picture-worthy for dessert is really bad. Fortunately, though, this isn’t some high-falutin’ fancy food blog. So I can get by posting a pic of my easy orange creamsicle pie and still sleep just fine at night. Nope, it’s not really pretty. But boy, did it ever hit the spot. I loved this pie. I could eat this pie every day. It’s creamy smooth. And orange-y. And way, way easy. Which I need.

Easy Orange Creamsicle Pie

Sugar. Or Sugar-Free. Great Either Way.

I have to watch my carb intake, so I went the mostly sugar-free route when I made this easy orange creamsicle pie. For me that meant using sugar-free Jell-o and Cool Whip. Of course, there are still carbs in the crust and the mandarin orange slices. You can go with using fully loaded Jell-O and Cool Whip instead. Whichever you prefer.

Variations

My first thought when I bit into this was ‘yummy’. My second was ‘strawberry’. Yes, next time I’m making a strawberry version of this pie. Or blueberry. There are lots of great Jell-O flavors that would make for great creamsicle pies!

Easy Orange Creamsicle Pie

Also try my (easy) baked hot apple hand pies!

Easy Orange Creamsicle Pie
Print Pin
5 from 1 vote

Easy Orange Creamsicle Pie

One of the tastiest, easiest desserts I've made!
Course Dessert
Cuisine American
Keyword creamsicle, pie
Prep Time 15 minutes
Cook Time 4 hours 30 minutes
Servings 8
Calories 1147kcal

Ingredients

Instructions

  • Pour the gelatin in a large bowl.
  • Pour in the hot water. Whisk for 2 minutes or until the gelatin is completely dissolved.
  • Pour in the cold water. Whisk until frothy.
  • Using a spatula, slowly stir in the Cool Whip. Keep stirring until blended. The mixture will turn a consistent light orange in color.
  • Place the bowl in the fridge for 30 minutes. The mixture should thicken slightly.
  • Spoon the mixture into the crust. Smooth out the top with a spatula so it is nice and even.
  • Refrigerate for 4-12 (recommended) hours before serving.
  • Garnish pie with mandarin orange slices (if using), slice, and serve.

Nutrition

Calories: 1147kcal | Carbohydrates: 153g | Protein: 13g | Fat: 54g | Saturated Fat: 11g | Polyunsaturated Fat: 4g | Monounsaturated Fat: 36g | Cholesterol: 5mg | Sodium: 1073mg | Potassium: 271mg | Fiber: 4g | Sugar: 52g | Vitamin A: 52IU | Calcium: 94mg | Iron: 6mg

Nutritional values are approximate.

Baked Hot Apple Hand Pies

If we baked something sweet and it even remotely comes out looking good we’re happy. More than happy. Especially if it involves dough. Homemade dough. Packaged dough. Doesn’t matter. We’re dough cursed. That’s why we were doing the happy dance when these baked hot apple hand pies came out of the oven looking great. Well great to us, at least. And we’ll take that any day of the week! They smelled great too. And oh, were they ever tasty! Just sweet enough with a light crunchy dough crust. Yummy!

Baked Hot Apple Hand Pies

An Apple A Day

You can make these baked hot apple hand pies with fillings other than apple, too. Try a little blueberry. Cherry. Even raspberry or peach will work. Any pie filling you can find will work. As long as it’s not too runny. You don’t want to use anything that will keep the seams from sealing along the edges. If you do have a thinner filling, just drop it into a sieve for a few minutes to drain off some of the liquid.

And yes, these pies are very similar to the super-mega-hot ones you can get at McDonald’s!

It’s always okay to sneak in a treat here and there. I also love my glazed baked mini-donuts!

Baked Hot Apple Hand Pies
Print Pin
5 from 1 vote

Baked Hot Apple Hand Pies

Perfect served warm with ice cream!
Course Dessert
Cuisine American
Keyword apple pie
Prep Time 15 minutes
Cook Time 15 minutes
Servings 8
Calories 426kcal

Equipment

Ingredients

  • 2 tablespoons sugar you can use a sugar substitute
  • ½ teaspoon ground cinnamon
  • 2 puff pastry sheets thawed if frozen. Pepperidge Farm is best
  • 21 ounces apple pie filling you can use low sugar
  • 1 egg white
  • 1 tablespoon water

Instructions

  • Preheat oven to 400 F.
  • Combine the sugar and cinnamon in a small bowl.
  • Roll out the two puff pastry sheets into 12" x 12" squares.
  • Cut each sheet into 4 3" wide strips.
  • Cut each of the strips in half. You will now have 12 rectangles that are 3" x 6".
  • Divide the apple pie filling among 8 of the rectangles. Just mound it up a bit down the center but don't get it too close to the edges. You need to keep a little bit 'clean' so that the edges will seal.
  • Using a sharp knife, cut 4 diagonal slits in the remaining 8 rectangles. Don't get them too close to the edges as you don't want the dough to split.
  • Place the rectangles with the slits in them on top of the apple pie-topped ones.
  • Using a fork, press down along the seams to seal the pastries.
  • Combine the egg white and water in a small bowl or glass using a fork. Brush over the tops of the pastries.
  • Sprinkle the pastries with the cinnamon sugar mix.
  • Transfer to a baking sheet lined with parchment paper or with a silicone mat. I used a large spatula to move them. It can seem a bit daunting but if you're careful they'll make the trip just fine. You might have to nudge them around a bit to get them back to perfect looking rectangles.
  • Bake for 15-20 minutes or until golden brown.
  • Remove to a wire rack to cool slightly before serving.

Nutrition

Calories: 426kcal | Carbohydrates: 50g | Protein: 5g | Fat: 23g | Saturated Fat: 6g | Polyunsaturated Fat: 3g | Monounsaturated Fat: 13g | Sodium: 194mg | Potassium: 78mg | Fiber: 2g | Sugar: 14g | Vitamin A: 19IU | Vitamin C: 1mg | Calcium: 11mg | Iron: 2mg

Nutritional values are approximate.

Woodfired Garlic Oyster Crackers

My oh me oh goodness. It’s hard to put into words how much I loved these woodfired garlic oyster crackers. The seasoning is just perfect. It helps that I’m a total garlic addict. But this isn’t no ordinary garlic flavor, nope. It’s garlic that has been roasted over a fire. Who does that? Great people do that! And they put it in a shaker bottle so I can have the best crackers ever!

Woodfired Garlic Oyster Crackers

Crazy Fantastically Good And A Big Favorite Of Mine.

I went big when I seasoned my crackers. Woodfired garlic oyster crackers can handle lots of seasoning. The fine folks over at Kinder’s did this seasoning up right. The flavor is so good I can’t get enough. Up next, I’m sprinkling some on a whole roasted chicken. This stuff is going to replace my traditional rotisserie chicken for sure. I love it (in case you couldn’t tell)!

Also try my spicy oyster crackers.

Woodfired Garlic Oyster Crackers
Print Pin
5 from 1 vote

Woodfired Garlic Oyster Crackers

Don't be afraid to add more seasoning!
Course Appetizer
Cuisine American
Keyword garlic, oyster crackers
Cook Time 25 minutes
Total Time 25 minutes
Servings 5 cups
Calories 11kcal
Author Mike

Ingredients

Instructions

  • Preheat oven to 350 F.
  • Place crackers in a large bowl.
  • Drizzle with oil.
  • Add seasoning and toss to coat evenly.
  • Place crackers on a large baking sheet and bake 15 minutes.
  • Turn crackers over and bake another 10 minutes.
  • Serve warm or cooled.

Notes

Store any leftovers in an air-tight container.

Nutrition

Calories: 11kcal | Carbohydrates: 1g | Protein: 1g | Fat: 1g | Saturated Fat: 1g | Sodium: 107mg | Potassium: 3mg | Fiber: 1g | Sugar: 1g | Vitamin A: 27IU | Calcium: 4mg | Iron: 1mg

Nutritional values are approximate.

Easy Delicious Salsa

Oh wow. Now I know how our local favorite Mexican restaurant makes such great salsa. This easy delicious salsa is the same recipe, or darned close to it. This is the best way I’ve found to make a big ole batch of salsa with just a few ingredients in no time. The key to this salsa is the El Pato hot tomato sauce. That stuff is fantastic. Great heat, great tomato flavor. It’s perfect in a salsa.

Easy Delicious Salsa

It’s Ok To Play With Your Salsa

I made this easy delicious salsa just like the recipe is written below. And I loved it. Now, I do like a good bit of cilantro I ended up adding almost an entire bunch. If you’re not quite the cilantro fan, add less.

Add white onion and jalapeno too, if you want. Just chop them up a bit and add them to the blender. The salsa already includes green onion, which adds a great flavor. I could see wanting a bit of crunch that white onion would add. The salsa is already a tad spicy, but not overwhelmingly so. A little jalapeno would add a bit more kick of course.

Guess what? Salsa is fantastic on hot dogs.

Easy Delicious Salsa
Print Pin
5 from 2 votes

Easy Delicious Salsa

Now I know how our local favorite Mexican restaurant makes such great salsa.
Course Appetizer
Cuisine Mexican
Keyword salsa
Prep Time 15 minutes
Cook Time 15 minutes
Servings 12
Calories 20kcal

Ingredients

  • 1 bunch cilantro see note. leafy parts only
  • 1 bunch green onions sliced
  • 2 cloves garlic minced
  • 8 ounces El Pato hot tomato sauce
  • 28 ounces tomatoes canned, whole or diced. divided
  • 1 teaspoon garlic salt
  • 1 lime juiced

Instructions

  • Place the cilantro, green onions, garlic, hot tomato sauce and 1/2 of the tomatoes into a blender or food processor.
  • Pulse until the cilantro and green onions are the desired size. You don't want to liquefy the mixture.
  • Add the remaining tomatoes and pulse just a few times. You want them to still be somewhat chunky.
  • Transfer mixture to a bowl.
  • Add the garlic salt and lime and stir.
  • Refrigerate until ready to serve. Give it a good stir before serving.

Notes

I really like cilantro, so I used almost an entire bunch. Unless you’re a total cilantro-aholic, I recommend using 1/2 a bunch. You can always add more but it’s really hard to take it back out!
If you’d like a little white onion and/or jalapeno in your salsa, just chop and add to the blender before processing.

Nutrition

Calories: 20kcal | Carbohydrates: 4g | Protein: 1g | Fat: 0.2g | Saturated Fat: 0.03g | Polyunsaturated Fat: 0.1g | Monounsaturated Fat: 0.03g | Sodium: 288mg | Potassium: 230mg | Fiber: 1g | Sugar: 3g | Vitamin A: 701IU | Vitamin C: 13mg | Calcium: 14mg | Iron: 0.4mg

Nutritional values are approximate.

La Camaronera Fried Shrimp

La Camaronera is a seafood restaurant in Miami, Florida. I’ve never been there. But I took a gander at the menu and could only draw one conclusion: I need to be there. Everything looks amazing. Fortunately for me, before I can make it back to Miami, the chef from the restaurant gave the recipe for La Camaronera fried shrimp to the Food Network! These shrimp are different. They are not your ‘normal’ battered and fried shrimp. The wet batter contains ketchup. Yep. You read that correctly. And that’s what makes these shrimp amazing.

La Camaronera Fried Shrimp

Perfect Crunch. Perfect Flavor.

The flavor in each and every bite of La Camaronera fried shrimp makes you want more and more. They have just the right crunch and texture. These are not your 1980s steak house butterflied crazy crunchy over-fried shrimp. They are special.

The Presto Fry Daddy is perfect for making smaller batches of food. It only uses a few cups of oil and comes to temperature quickly. Clean-up is easy too!

Also try my Old Bay southern fried shrimp.

La Camaronera Fried Shrimp
Print Pin
5 from 1 vote

La Camaronera Fried Shrimp

These shrimp are special.
Course Appetizer or Main
Cuisine American
Keyword deep-fried, shrimp
Prep Time 15 minutes
Cook Time 15 minutes
Servings 4
Calories 432kcal

Ingredients

Instructions

  • Butterfly the shrimp if desired.
  • Heat 3" of oil to 350 F in a deep fryer or Dutch oven.
  • Whisk together the ketchup, black pepper, cumin, garlic, salt, lime juice and water in a large bowl.
  • Place the flour into another large bowl.
  • Working in batches, place the shrimp into the ketchup mixture and coat on all sides.
  • Shake off any excess and transfer to the flour.
  • Roll to coat.
  • Fry the shrimp 2-3 minutes until cooked and golden brown.
  • Transfer to a wire rack-lined baking sheet or paper towel-lined plate to drain.
  • Serve immediately.

Notes

Great served with fries and cocktail sauce!

Nutrition

Calories: 432kcal | Carbohydrates: 104g | Protein: 9g | Fat: 1g | Saturated Fat: 0.1g | Polyunsaturated Fat: 0.4g | Monounsaturated Fat: 0.1g | Sodium: 3384mg | Potassium: 670mg | Fiber: 3g | Sugar: 40g | Vitamin A: 955IU | Vitamin C: 26mg | Calcium: 50mg | Iron: 4mg

Nutritional values are approximate.

No Penalty Party Shrimp

These No Penalty Party Shrimp were spot-on fantastic. I love a good cocktail shrimp and these up’d the game big time. The shrimp have the perfect bite-thru texture. And they’re nice and spicy, too. Great for dipping in ice-cold cocktail sauce. These shrimp are like popcorn. You can’t eat one or two, you have to eat a handful!

No Penalty Party Shrimp

Bring On The Big Game

If you always head to the grocery store and grab a shrimp ring for that big game party, skip it. Just make a batch or two of these No Penalty Party Shrimp. They’re crazy easy to make and they’re 10 times tastier than that weird ring thing. And grab a good bottle of cocktail sauce unless you’re planning on making your own. My new favorite cocktail sauce is from the fine folks that bring us Old Bay. You know with a name like ‘Old Bay’ on the label that it’s gonna be good (and it is!)!

Warm. Or Cold.

You can serve these shrimp warm or cold. I had them both ways and loved them both ways. Being more of a shrimp cocktail guy, I think ‘cold’ when I think shrimp cocktail so I leaned a bit towards liking the cold version more.

Tailgating. Improved.

I got this (and a bunch of other) recipes from a great cookbook, Tailgating Done Right. If you’re sitting around want to up your party game, grab a copy of this cookbook and get to making great stuff!

Also try my sous vide shrimp cocktail.

No Penalty Party Shrimp
Print Pin
5 from 1 vote

No Penalty Party Shrimp

Fantastic spicy shrimp, perfect warm or cold for the big game!
Course Appetizer
Cuisine American
Keyword shrimp
Prep Time 4 hours
Cook Time 10 minutes
Cool time 15 minutes
Servings 8
Calories 480kcal

Ingredients

Instructions

  • In a large bowl combine all but the shrimp and cocktail sauce.
  • Add the shrimp. Toss to coat well. The best way to get them good and covered is to use your hands.
  • Cover the bowl and refrigerate 1-4 hours.
  • Preheat your broiler.
  • Shake off any excess seasoning and place the shrimp onto a large baking sheet. Do not overlap the shrimp.
  • Place 4" under the broiler for 4-7 minutes, turning once, until pink and opaque.
  • Let cool slightly.
  • Serve warm with cocktail sauce.

Notes

You can also refrigerate the cooked shrimp overnight and serve cold the next day.

Nutrition

Calories: 480kcal | Carbohydrates: 96g | Protein: 0.3g | Fat: 0.1g | Saturated Fat: 0.02g | Polyunsaturated Fat: 0.04g | Monounsaturated Fat: 0.01g | Sodium: 20829mg | Potassium: 33mg | Fiber: 0.3g | Sugar: 0.2g | Vitamin A: 285IU | Vitamin C: 4mg | Calcium: 2mg | Iron: 0.1mg

Nutritional values are approximate.

Super Cheesy Cracker Treats

Everyone loves cheese. Even if they don’t admit it in public. And everyone loves these super cheesy cracker treats. I have proof. I made a big double batch for my wife to take to work (minus the red pepper flake) and it disappeared like that. It delivers on the super cheesy promise, that’s for sure!

Super Cheesy Cracker Treats

Spice It Up A Bit

Now, when I make some super cheesy cracker treats for enjoying at home, I add the heat. A little kick to offset the creamy cheesiness. No harm in that. You can leave it out, or make half with it, and the other half without.

Cheese powder isn’t cheap, but it goes a long ways and there are tons of other things to use it on, like popcorn or chips!

Also try my smoked Cheez Its.

Super Cheesy Cracker Treats
Print Pin
4 from 1 vote

Super Cheesy Cracker Treats

Everyone loves cheese. Even if they don’t admit it in public. And everyone loves these super cheesy cracker treats. I have proof.
Course Appetizer
Cuisine American
Keyword cheesy, crackers
Cook Time 20 minutes
Total Time 20 minutes
Servings 16
Calories 68kcal

Ingredients

Instructions

  • Preheat oven to 250 F.
  • Place crackers in a large bowl. Drizzle with the oil and stir gently to coat.
  • Sprinkle the crackers with the Ranch dressing mix and cheddar and red pepper flake, if using. Stir gently.
  • Pour mixture out onto a large baking sheet. Spread out evenly.
  • Bake for 15-20 minutes, stirring halfway through. Let cool before serving.

Notes

Nutritional values do not include the crackers or cheese powder.

Nutrition

Calories: 68kcal | Carbohydrates: 1g | Protein: 1g | Fat: 7g | Saturated Fat: 1g | Trans Fat: 1g | Sodium: 141mg | Potassium: 10mg | Fiber: 1g | Sugar: 1g | Vitamin A: 148IU | Vitamin C: 1mg | Calcium: 2mg | Iron: 1mg

Nutritional values are approximate.

Cedar Planked Spicy Nacho Cheese Doritos

It’s great to be in control. It seems sometimes a rare thing in our lives. Well, when you make some cedar planked spicy nacho cheese Doritos you’re in control. You decide how much of that cedar aroma you want. And how much flavor the cedar is going to bring. You even get to decide how roasted crunchy the chips end up. You’ll love the results of your efforts, believe me. Control never tasted or felt so good!

Cedar Planked Spicy Nacho Cheese Doritos

Best Easiest Snack Ever

There’s nothing complicated going on here. You do have to be careful you don’t go crazy nuts and leave the chips on the grill too long. The process for making cedar planked spicy nacho cheese Doritos is simple. These are great snacks for your next grill party. You can make a lot of them, and quick. Do like I do and make some cool ranch Doritos too. And some regular nacho cheese for sure!

Doritos Rock. So Do Other Chips.

I bet you’re thinking… Can I do this with other chips, too? Why sure! You can place any chip onto planks and grill them. But, watch out! Thinner chips, such as potato chips, will cook a lot faster! You might want to do a ‘test run’ with a few chips first to get a feel for the amount of time you want to grill them.

Also try some cedar planked nacho cheese Doritos. Same great idea, but not spicy!

Cedar Planked Spicy Nacho Cheese Doritos
Print Pin
5 from 1 vote

Cedar Planked Spicy Nacho Cheese Doritos

Nice and crispy, with a hint of cedar smoke.
Course Snack
Cuisine Main
Keyword cedar plank, tortilla chips
Prep Time 1 hour
Cook Time 5 minutes
Servings 4
Calories 147kcal

Ingredients

Instructions

  • Soak plank (or planks if you need more than one) in water for at least 1 hour.
  • Fire up your grill to medium-high heat, around 400 F.
  • Place the plank over indirect heat. Add the chips. Close the lid.
  • Let the chips grill for 2-5 minutes. Check them at least once. If they start to turn dark brown or char on the edges, remove them.
  • Let cool slightly before serving.

Notes

Note: If you prefer a stronger cedar flavor and aroma, place your soaked plank over direct heat for a few minutes first. Get a nice char on the plank. Then move it to indirect heat and add the chips.

Nutrition

Calories: 147kcal | Carbohydrates: 17g | Protein: 2g | Fat: 8g | Saturated Fat: 1g | Polyunsaturated Fat: 3g | Monounsaturated Fat: 3g | Trans Fat: 0.1g | Sodium: 196mg | Potassium: 63mg | Fiber: 1g | Sugar: 1g | Vitamin C: 0.1mg | Calcium: 39mg | Iron: 0.3mg

Nutritional values are approximate.

Easy Irresistible Mozzarella Cheese Sticks

I was going to call these easy irresistible mozzarella cheese sticks just ‘easy mozzarella cheese sticks’. But no, that’s just not enough. It doesn’t tell you just how good they are. Eat two? Three. Yeah right. Not me at least. I’m not that strong. They have a power. The power of a crunchy, flavorful coating. Ooey gooey melty cheese. Perfect. Irresistible!

Easy Irresistible Mozzarella Cheese Sticks

The Keys To Cheese Stick Success

These easy irresistible mozzarella cheese sticks are easy. But there are two things to remember while you’re making them. First is get the cheese well coated in the flour. Don’t forget the ends, either. Our goal here is the perfect breading, everywhere. Every inch of the cheese stick.

Second, is to make sure you get the cheese stick nice and coated in the egg. Beating the eggs well will help with this. And again, make sure you get the ends too.

After that it’s a walk in the park. Just get the breadcrumbs all over. And yep, get the ends again. Then fry until golden brown. Oh and resist eating them hot out of the fryer. Trust me on that. Let them cool a bit regardless of how tempted you might be!

I get out my big deep fryer when it’s time to fry a large batch of food. It comes to temperature quickly and it maintains that temperature perfectly. It has a built-in oil filter and storage unit so I can re-use the oil several times.

Also try my fried mozzarella pepperoni sticks.

Easy Irresistible Mozzarella Cheese Sticks
Print Pin
5 from 1 vote

Easy Irresistible Mozzarella Cheese Sticks

Flavorful ooey gooey deliciousness!
Course Appetizer
Cuisine American
Keyword cheese, deep-fried
Prep Time 10 minutes
Cook Time 10 minutes
Servings 6
Calories 173kcal

Ingredients

Instructions

  • Cut the mozzarella cheese sticks in half in the middle to make 24 shorter pieces.
  • Heat 2-3" of oil to 350 F in a Dutch oven or deep fryer.
  • While the oil is heating, make the cheese sticks.
  • Place the breadcrumbs into a shallow bowl or small pie plate.
  • Stir in the Italian seasoning, garlic powder, paprika, salt, and pepper.
  • Dredge each mozzarella stick in flour.
  • Get each side of stick, including the ends, coated well.
  • Shake off any excess flour.
  • Beat the two eggs and place in a small bowl.
  • Dip the sticks into the eggs and coat well. Get the ends of the cheese sticks, too. All of it. Don't miss a spot!
  • Transfer the sticks to the breadcrumb mixture.
  • Roll them to coat, pressing down on them as you go. Also get the ends. Don't rush this. You want the breadcrumbs to coat them completely and evenly.
  • Working in batches if needed, fry the sticks for 3-4 minutes or until golden brown.
  • Remove to a wire rack over a baking sheet or a paper towel-lined plate.
  • Serve with warmed marinara for dipping.

Notes

Also great dipped in pizza sauce and Ranch dressing!

Nutrition

Calories: 173kcal | Carbohydrates: 29g | Protein: 7g | Fat: 3g | Saturated Fat: 1g | Polyunsaturated Fat: 1g | Monounsaturated Fat: 1g | Trans Fat: 0.01g | Cholesterol: 62mg | Sodium: 163mg | Potassium: 89mg | Fiber: 2g | Sugar: 1g | Vitamin A: 109IU | Vitamin C: 1mg | Calcium: 51mg | Iron: 2mg

Nutritional values are approximate.