Jalapeno Cheddar Meatloaf

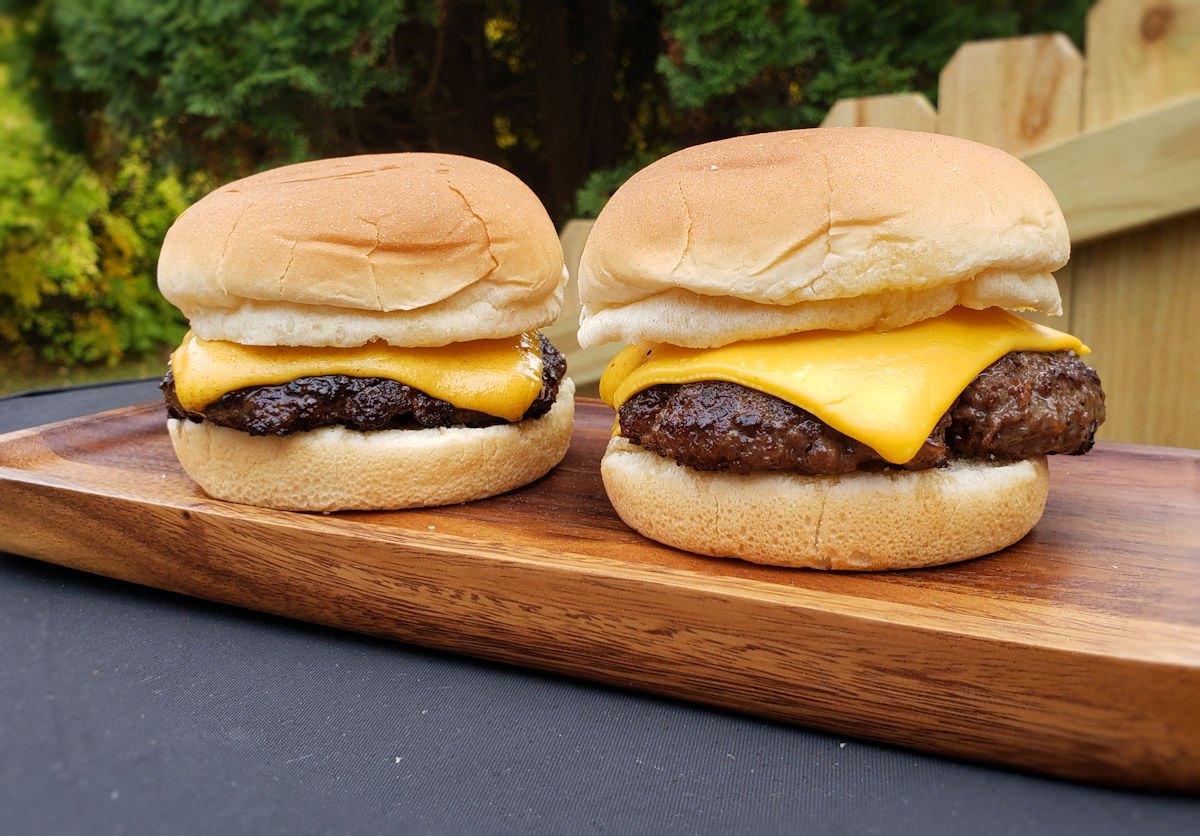
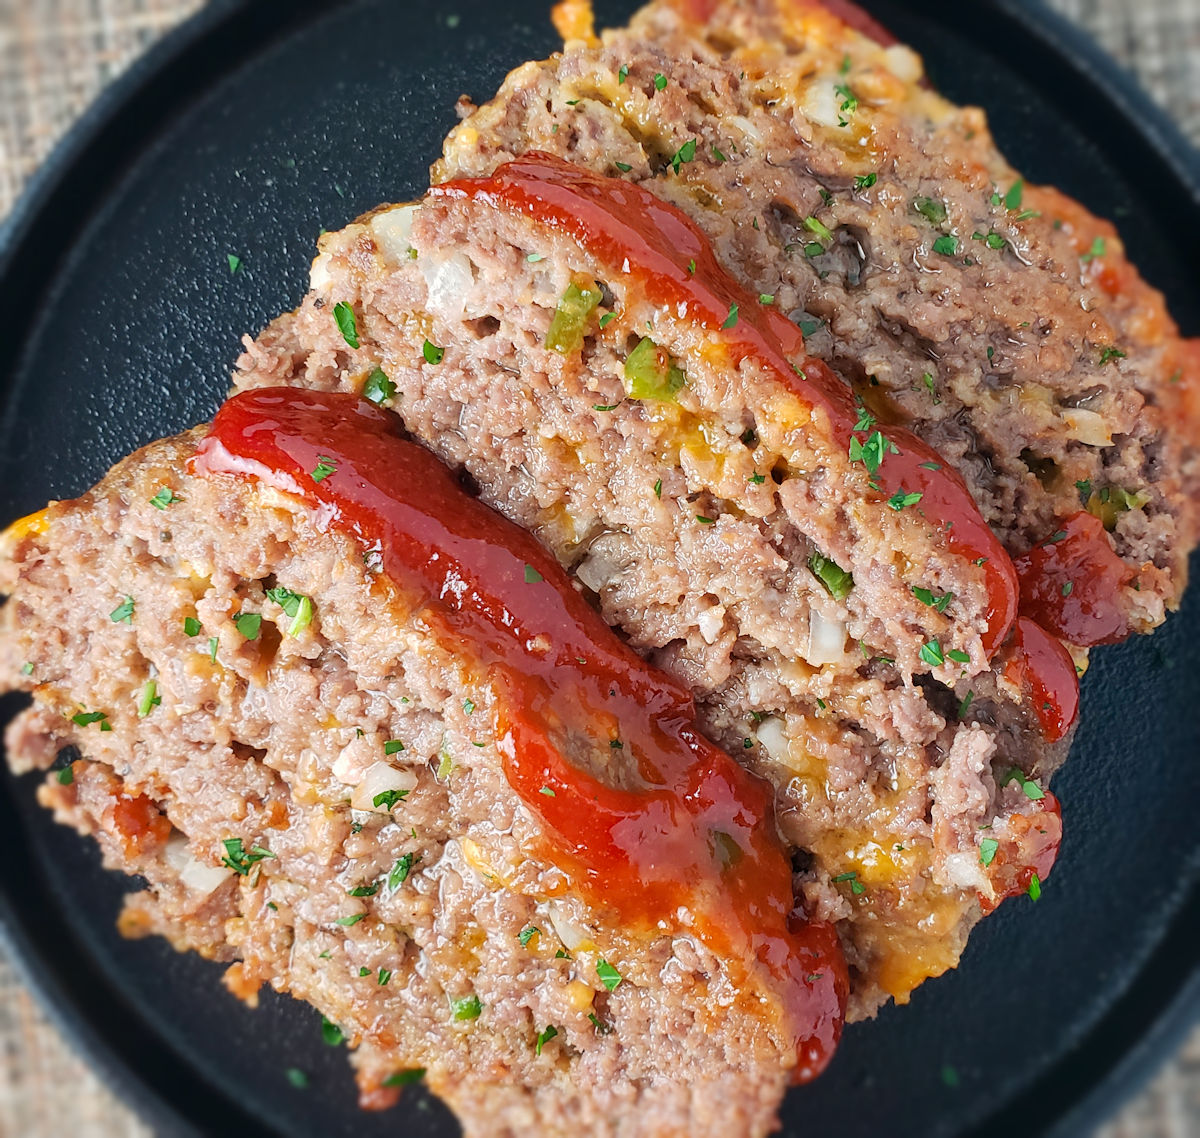
Nothing beats meatloaf when it comes to a quick, easy, delicious dinner dish. Perfect on a cold night. And who doesn’t love the leftovers? Meatloaf sandwiches are one of my all-time favorites! But, no need to have boring meatloaf. Chewy? Ew. Dry? Ew-ier. Boring? No! This jalapeno cheddar meatloaf is what meatloaf is supposed to be. Crazy moist. Lightly spicy. And oh, so tender. I’ll take two slices (but don’t tell anyone)!

Jalapeno Cheddar Meatloaf

Cheesy Greatness

I used cheddar in my jalapeno cheddar meatloaf. I know, Mr. Obvious, right? But you don’t have to go with cheddar. Pepper jack is fantastic, too. Or use a Mexican blend. Any good melting cheese will work.

Want more heat? Use a habanero or serrano pepper instead. Want less? Bell pepper or poblano peppers are a great substitute.

I highly recommend that you shred or grate your cheese at home. Don’t buy the pre-shredded or pre-grated stuff. It has stuff added to it to keep it from sticking together. That ‘stuff’ affects how the cheese melts. Shred it yourself and use the good stuff.

Also try my copycat Cracker Barrel meatloaf.

Jalapeno Cheddar Meatloaf
Print Pin
3.50 from 2 votes

Jalapeno Cheddar Meatloaf

Deliciously moist with a nice spicy kick!
Course Main
Cuisine American
Keyword meatloaf, spicy
Prep Time 15 minutes
Cook Time 1 hour 25 minutes
Servings 8
Calories 312kcal

Ingredients

For the meatloaf

For the topping

Instructions

For the topping

  • In a small bowl, combine ketchup, brown sugar, and mustard.

For the meatloaf

  • Preheat oven to 350 F.
  • Spray a loaf pan or baking dish with non-stick spray.
  • Place the ground beef in a large bowl.
  • Add the remaining meatloaf ingredients.
  • Using your hands, combine all ingredients but don't over-work the mixture.
  • Transfer to the loaf pan and form into a loaf.
  • Pour the topping over the loaf and spread out evenly.
  • Bake for 1 hour and 10 minutes. Check the internal temperature. The loaf is done once it reaches 160 F. Bake longer if needed.
  • Remove from the oven and let rest for 15 minutes.
  • Drain any excess fat.
  • Using a spoon, spread sauce mixture over top of meatloaf.
  • Slice and serve.

Notes

Great as sandwiches, too!

Nutrition

Calories: 312kcal | Carbohydrates: 11g | Protein: 19g | Fat: 21g | Saturated Fat: 8g | Polyunsaturated Fat: 1g | Monounsaturated Fat: 9g | Trans Fat: 1g | Cholesterol: 114mg | Sodium: 534mg | Potassium: 308mg | Fiber: 1g | Sugar: 5g | Vitamin A: 199IU | Vitamin C: 3mg | Calcium: 94mg | Iron: 2mg

Nutritional values are approximate.

Hot Honey Fried Chicken Sandwiches

These hot honey fried chicken sandwiches are why I have a deep fryer. No, I don’t load it up and fry every day. I might want to but I have to pace myself. When I do use it, though, I don’t mess around. I’m not deep frying kale. I could. Nothing wrong with that. But I’d rather go big. These sandwiches are the kind you’re still talking about the next day. Crazy crunchy well-seasoned batter. A spicy sweet sauce. Served loaded up with all my favorite toppings. These sandwiches are not messing around.

Hot Honey Fried Chicken Sandwiches

Chicken Perfection

The chicken in these hot honey fried chicken sandwiches is lacking in nothing. They’re double-battered for that extra crunch. The coating is seasoned and seasoned well. I’m not shy with the seasoning. Oh and then there’s the hot honey sauce. The perfect combination of sweet and heat. Forget those wimpy fast-food chicken sandwiches.

Hot Honey Fried Chicken Sandwiches

Moaning Is Allowed

You’re going to want to do the ‘sandwich hunch’ when you bite into these hot honey fried chicken sandwiches. You know the process. Pick up the sandwich. Lean over the plate. Bite. Drip. Drip some more. See stuff fall out a bit. Repeat. But before taking that last bite, swirl the bread and chicken around on the plate. Sop up all that flavorful goodness. And enjoy.

I get out my big deep fryer when it’s time to fry a large batch of food. It comes to temperature quickly and it maintains that temperature perfectly. It has a built-in oil filter and storage unit so I can re-use the oil several times.

Also try my Cajun fried chicken sandwich.

Hot Honey Fried Chicken Sandwiches
Print Pin
5 from 1 vote

Hot Honey Fried Chicken Sandwiches

Forget those wimpy fast-food chicken sandwiches.
Course Main
Cuisine American
Keyword chicken sandwiches
Prep Time 45 minutes
Cook Time 20 minutes
Servings 4
Calories 533kcal

Ingredients

For the Chicken

For the Hot Honey Sauce

For the Sandwiches

Instructions

For the Chicken

  • Butterfly each chicken breast by slicing it in half horizontally.
  • Cut each butterflied breast in half, forming two equally-sized chicken breast cutlets.
  • Pound the chicken breasts out until they are the desired thickness. Make sure they have the same thickness throughout, whether you like them thick or thin.
  • Heat 3″ oil in a Dutch oven or deep fryer to 350 F.
  • In a large bowl combine the flour, Old Bay, seasoning salt and pepper.
  • In another bowl beat the eggs with a tablespoon of water.
  • Dredge the chicken breasts in the flour.
  • Shake off excess and dip in the egg mixture.
  • Shake off excess and coat in flour again.
  • Fry 8-10 minutes until golden brown and they measure 165 F.
  • Meanwhile make the hot honey sauce (or make it ahead of time and keep it warm).
  • Transfer to a paper towel-lined plate or wire rack to drain.
  • Brush on both sides with the sauce.

For the Hot Honey Sauce

  • In a small saucepan melt the butter over medium low heat.
  • Add the hot sauce, honey and sesame oil.
  • Bring to a simmer and let simmer until thickened.
  • Reduce heat to low and keep warm until ready to use.

For the Sandwiches

  • Toast buns as desired.
  • Add the cooked chicken.
  • Add pickles, tomato, onion and lettuce.
  • Slather top bun with mayonnaise. Place on the sandwiches and serve!

Notes

Use hot honey for even more of a spicy flavorful kick!

Nutrition

Calories: 533kcal | Carbohydrates: 56g | Protein: 35g | Fat: 18g | Saturated Fat: 7g | Polyunsaturated Fat: 3g | Monounsaturated Fat: 5g | Trans Fat: 0.4g | Cholesterol: 177mg | Sodium: 2412mg | Potassium: 773mg | Fiber: 3g | Sugar: 11g | Vitamin A: 1021IU | Vitamin C: 17mg | Calcium: 124mg | Iron: 5mg

Nutritional values are approximate.

Steak Fingers with Easy White Gravy

I seriously don’t know what came over me. I think it’s been at least 20 years since I’ve had steak fingers. And I’ve never made them at home. But for some reason, I needed them and now. So I made them. These steak fingers with easy white gravy weren’t like the ones I recall from decades ago. Those were kinda tough. Kinda tasteless. These hit the spot. Nothing tough about them. And very tasty. I certainly had no problem devouring a good number of them!

Steak Fingers with Easy White Gravy

I’m A Huge Fan Of These

If I’d had more time, I would’ve made gravy using the grease left over from frying the steak in a pan. But I didn’t. I had to get on with it so I deep-fried the beef and made a simple gravy on the side. These steak fingers with easy white gravy weren’t about recreating the classic step-by-step. They’re more about just getting the flavor and consistency right. And I did. I liked them. A lot.

If I’m cooking for a crowd, I’ll break out my big deep fryer. But, if it’s just the two of us or I’m cooking things that don’t take too long, I’ll fire up my Fry Daddy fryer. It fries everything perfectly. And as an added bonus, it doesn’t use a lot of oil, which saves me money.

The Presto Fry Daddy is perfect for making smaller batches of food. It only uses a few cups of oil and comes to temperature quickly. Clean-up is easy too!

Also try my blackened chicken fingers.

Steak Fingers with Easy White Gravy
Print Pin
5 from 1 vote

Steak Fingers with Easy White Gravy

An easy version of the classic.
Course Appetizer or Main
Cuisine American
Keyword deep-fried, steak fingers
Prep Time 15 minutes
Cook Time 30 minutes
Servings 8
Calories 367kcal

Ingredients

For the steak fingers

For the white gravy

Instructions

For the steak fingers

  • Heat 2" of oil to 350 F in a deep fryer or Dutch oven.
  • In a shallow bowl (or pie plate), mix together the flour, Cajun seasoning and baking powder.
  • In another shallow bowl (or pie plate), whisk together the milk, eggs, and Worcestershire sauce.
  • Working in batches, dip the steak strips in the flour mixture. Make sure to coat them well, then shake off any excess.
  • Next, roll the strips in the milk mixture. Shake off any excess.
  • Return the strips to the flour and again coat well.
  • Add strips to the hot oil and fry 1-2 minutes per side, turning once, until golden brown. Remove to a paper towel-lined plate or wire rack while cooking the remaining strips.
  • Serve the steak fingers with the white gravy for dipping.

For the white gravy

  • Place all ingredients in a medium saucepan over medium heat.
  • Whisk while heating, bringing to a slow boil.
  • Reduce heat to a simmer and let simmer until the desired thickness is achieved.

Notes

I like my gravy peppery so I always add a pinch or two of pepper and stir it in before serving.

Nutrition

Calories: 367kcal | Carbohydrates: 23g | Protein: 30g | Fat: 16g | Saturated Fat: 7g | Polyunsaturated Fat: 1g | Monounsaturated Fat: 6g | Trans Fat: 0.01g | Cholesterol: 158mg | Sodium: 280mg | Potassium: 605mg | Fiber: 2g | Sugar: 3g | Vitamin A: 1484IU | Vitamin C: 1mg | Calcium: 176mg | Iron: 4mg

Nutritional values are approximate.

Cheesy Chicken Fajita Melt

This cheesy chicken fajita melt was a huge hit in our house. Huge. The chicken, vegetable and cheese filling is incredibly tasty. The chicken is tender and juicy and packed with classic fajita flavor. Oh, yes, there’s cheese. And lots of it. This is one fantastic sandwich. We made it on the griddle on our grill, but you can use a countertop griddle, an outdoor griddle such as ones from Blackstone or Weber, or even a large skillet. No matter what you use, you’ll love the end result for sure!

Cheesy Chicken Fajita Melt

More Seasoning Makes These More Better

Don’t be shy with the fajita seasoning when you make this cheesy chicken fajita melt. Get to shaking that bottle. You’ll be happy you did. You want the chicken to have that fajita flavor. You want the vegetables to have that fajita flavor. And yep, get some on top of the cheese too. Last thing you want to have happen is that you take a big ole bit of sandwich only to ask yourself “Where’s the fajita?”.

These are not light fare. You’re not going to the leave the table hungry after devouring these sandwiches. That’s for sure!

Cheesy Chicken Fajita Melt
Print Pin
5 from 1 vote

Cheesy Chicken Fajita Melt

A favorite in our household!
Course Main
Cuisine American
Keyword chicken sandwiches, fajita
Prep Time 30 minutes
Cook Time 20 minutes
Servings 8
Calories 402kcal

Equipment

Ingredients

  • 6 chicken thighs boneless, skinless, trimmed of any excess fat
  • ¼ cup fajita seasoning divided, you might use more or less
  • 4 tablespoons unsalted butter divided
  • ½ medium sweet onion sliced
  • 1 poblano pepper sliced
  • 1 medium red bell pepper sliced
  • 2 loaves French bread
  • 1 pound Oaxaca cheese shredded, divided
  • cilantro chopped, to taste
  • crema to taste

Instructions

  • Season the thighs with the fajita seasoning. Don't be shy with the seasoning. Let the chicken set for 15 minutes or up to 2 hours.
  • Preheat a griddle or large cast iron skillet over high heat. I used a large griddle on my gas grill, but a flat top griddle, Griddler or the like will work just fine. You'll want a large surface as this recipe makes a large batch.
  • Also preheat your oven to 400 F. Note: Since I was using a griddle on a gas grill, I used the grill as my oven instead.
  • Add 2 tablespoons of butter to the griddle. Add the thighs and cook for 4 minutes per side until lightly charred and cooked to 165 F.
  • Remove the chicken to a platter to cool slightly then cut into small cubes.
  • Add remaining butter to the griddle and add the onions and peppers. Cook until lightly softened and charred, stirring often.
  • Add the chicken to the vegetables. Season with more fajita seasoning and stir to combine.
  • Add half of the cheese and mix until melted. Remove to a plate or bowl.
  • Slice off the top of the bread loaves and remove most of the contents. You want a completely hollowed loaves, but be careful to not poke any holes in the sides or bottoms!
  • Top with the remaining cheese and sprinkle with more fajita seasoning. Transfer to the oven (or a hot grill over indirect heat) and toast for 10 minutes or until the bread is lightly toasted and the cheese is melted. If you want a little color to your cheese, place the loaves under the broiler for a minute or two.
  • Top with chopped fresh cilantro and Mexican crema and serve!

Notes

You can substitute shredded Monterey Jack or pepper jack for the cheese.

Nutrition

Calories: 402kcal | Carbohydrates: 6g | Protein: 26g | Fat: 30g | Saturated Fat: 16g | Polyunsaturated Fat: 3g | Monounsaturated Fat: 6g | Trans Fat: 0.1g | Cholesterol: 103mg | Sodium: 576mg | Potassium: 256mg | Fiber: 1g | Sugar: 2g | Vitamin A: 599IU | Vitamin C: 32mg | Calcium: 44mg | Iron: 1mg

Nutritional values are approximate.

Sour Cream Sloppy Joes

Wow. Just wow. Someone went and messed with my beloved Sloppy Joes and to my shock, they made them better. I didn’t think that was possible. And they’re not just a bit better, but a WHOLE LOT better! These sour cream Sloppy Joes are different. Totally different. It’s a cross between a traditional version with a creamy sauce and Asian-inspired flavors. It might sound weird, but it works and it works great!

Sour Cream Sloppy Joes

A Crazy Good Variation On The Classic

I’m not sure I would’ve eaten sour cream Sloppy Joes as a kid. I was pretty much stuck on the usual old-school way of making them. Now, I’d jump on these like a bull dog on a pork chop. I loved them. My wife loved them. They were a big hit here. If I could back in time, I’d tell little kid me to ask mom if she would make these instead. She’d probably leave out the hot sauce, though.

I like to use my good ole trusty Dutch oven to make this soup and pretty much darned near anything like it on my stovetop. It’s nice and big and sturdy. That extra weight helps it maintain and distribute heat perfectly. As an added bonus, it’s actually pretty easy to clean up too!

Also try my delicious copycat Manwich sloppy joes.

Sour Cream Sloppy Joes
Print Pin
5 from 1 vote

Sour Cream Sloppy Joes

I'm not sure I would've eaten sour cream Sloppy Joes as a kid. Now, I'd jump on these like a bulldog on a pork chop.
Course Main
Cuisine American
Keyword beef, sandwich
Prep Time 5 minutes
Cook Time 20 minutes
Servings 8
Calories 435kcal

Equipment

Ingredients

Instructions

  • Heat oil in a large skillet or Dutch oven. Add the onion and sauté until just starting to soften.
  • Add in the ground beef. Brown, breaking into small pieces as it cooks.
  • Reduce heat to medium. Stir in the basil, sour cream, chili sauce, soy sauce, hot sauce and salt and pepper to taste. Stir.
  • Toast the buns if desired.
  • Serve beef mixture on buns. Don't be shy with it and make sure to keep it sloppy!

Notes

Serve along with plenty of napkins.

Nutrition

Calories: 435kcal | Carbohydrates: 28g | Protein: 20g | Fat: 26g | Saturated Fat: 12g | Trans Fat: 1g | Cholesterol: 75mg | Sodium: 620mg | Potassium: 429mg | Fiber: 2g | Sugar: 7g | Vitamin A: 260IU | Vitamin C: 5mg | Calcium: 137mg | Iron: 4mg

Nutritional values are approximate.

Juicy Smash Burgers

Oh me. Make me drool. These juicy smash burgers were packed with flavor. And oh, so juicy good! Smashed to perfection and cooked on a hot griddle, the patties get that nice little char around the edges. That crunch. That’s the sign of a good smash burger right there!

Juicy Smash Burgers

Keep It Simple

I tend to keep the toppings on my juicy smash burgers (and all my smash burgers for that matter) pretty simple. The patties are the real star of the show here. So for me, it’s a not-too-strong-of-a-cheese (Swiss), chopped iceberg, a little onion and some ketchup, mayonnaise, and mustard. There’s nothing fancy going on here. The patties have a great texture to them thanks to the bread crumbs. The flavor comes from beef-flavored onion soup mix. And the juiciness comes from adding mayonnaise into the patties. This recipe makes 8 patties, which is a good thing because I could easily eat two!

The equipment

Here’s the equipment I use. You can get by using two cast iron skillets. Use a larger skillet for cooking the burgers, and a smaller one to smash the burgers and keep them flat. Since I’m a cooking gadget collector, I prefer to use a few more tools.

The griddle

First, a griddle. You can buy griddles that sit on top of your grill grates or ones that replace them. Just about every grill I have has a griddle on it. I use them for a lot of things, not just smash burgers. You want one that can be placed over the hottest part of your grill so it gets screaming hot.

A burger press

Next, you need a burger press. You can use a heavy cast iron skillet, like I mentioned. Or get a burger press. For easy cleanup I wrap mine in foil first. When I’m done, just peel off the foil and toss. Super easy. Get a press that’s at least big enough to cover two burgers. You only smash one at a time, but if you want to keep them flat, you want to rest the press on top so bigger (and heavier) is better. Plus I’ve found that a bigger, heavier press tends to stay on the burgers whereas a smaller, lighter one is hard to keep centered on the burgers, specially if you have a bunch of them cooking at once.

A dome

Next up, a dome. While not 100% required, it does speed the time it takes to melt the cheese and it does it in a nice even fashion. In my opinion you don’t really need one if you’re using a super melty cheese, such as American, but for thicker slices like say a deli pepper jack, you want the cheese to melt before you over-cook the burger and that’s where a dome comes in handy.

Cleaning time!

Lastly, you need something to clean your griddle. I like to clean mine when I’m done cooking, but you can do it at the start instead. I use one of these pad holders with a griddle cleaning pad. Then I add a bit of water to my griddle then use the pad (connected to the holder) to scrub off any big chunks and get up some of the grease. I don’t go crazy with it, I always heat the heck out of my griddle before cooking, but I get the worst. The long arm on the pad holder makes it perfect for scrubbing a hot griddle, too.

Also try my Ultimate Smash Burger with Secret Spicy Sauce!

Juicy Smash Burgers
Print Pin
5 from 1 vote

Juicy Smash Burgers

The patties are the real star of the show.
Course Main
Cuisine American
Keyword smash burger
Prep Time 15 minutes
Cook Time 15 minutes
Servings 8
Calories 545kcal

Ingredients

Instructions

  • Place mayonnaise, bread crumbs, onion soup mix and ground beef into a large bowl.
  • Using your hands, combine all the ingredients.
  • Form into 8 equally-sized patties (they'll be just over 5 ounces each).
  • Fire up your grill for direct medium-high heat cooking. You can also use an outdoor or indoor griddle or a large skillet on a stove.
  • Place the patties on grill. Smash down with a spatula or grill press.
  • Grill the burgers for 3-5 minutes per side or until done as desired.
  • Toast the buns as desired.
  • Serve burgers on buns with desired toppings.

Notes

This is not the time for light mayonnaise. Use the real stuff.

Nutrition

Calories: 545kcal | Carbohydrates: 30g | Protein: 25g | Fat: 35g | Saturated Fat: 11g | Polyunsaturated Fat: 8g | Monounsaturated Fat: 13g | Trans Fat: 1g | Cholesterol: 86mg | Sodium: 828mg | Potassium: 411mg | Fiber: 1g | Sugar: 4g | Vitamin A: 10IU | Vitamin C: 1mg | Calcium: 103mg | Iron: 4mg

Nutritional values are approximate.

Bratwurst Stir-Fry

This bratwurst stir-fry was different. And very tasty. I never thought about cooking bratwurst in a wok ala stir-fry. I’m usually a grill-my-brats kinda guy. This dish is like having a bratwurst dinner, including potatoes and vegetables, all in one! And of course there’s mustard! You can’t have bratwurst without mustard.

Bratwurst Stir-Fry

Get Some Texture

Make sure to get the bratwurst ‘bites’ in this bratwurst stir-fry nicely browned and slightly crispy around the edges. You want a little contrast with the rest of the dish of tender potatoes, squash, peppers and onions. Plus, it gives the bratwurst that almost-grilled texture. If you want a little more crunch, feel free to add a little peeled and diced apple.

Go Mustardy

I wanted a fairly strong mustard flavor so I used a good, grainy mustard when I made this. I also used a bit more than the recipe calls for.

Also try my bratwurst-stuffed mushrooms.

Bratwurst Stir-Fry
Print Pin
4 from 1 vote

Bratwurst Stir-Fry

Not your normal stir-fry!
Course Main
Cuisine American
Keyword stir fry
Prep Time 15 minutes
Cook Time 25 minutes
Servings 6
Calories 2641kcal

Ingredients

  • 1 tablespoon vegetable oil
  • 1 pound bratwurst cut into 1" pieces
  • 3 large red potatoes cut into bite-sized chunks
  • 2 yellow summer squash sliced
  • 1 red bell pepper cored, seeded, sliced thin
  • 1 green bell pepper cored, seeded, sliced thin
  • 2 small white onions sliced
  • 2 cloves garlic minced
  • 3 tablespoons honey mustard or use a grainy mustard
  • 6 ounces light beer
  • 2 tablespoons Worcestershire sauce
  • kosher salt to taste
  • ground black pepper to taste
  • 2 green onions chopped, for topping

Instructions

  • Heat the oil in a large skillet over wok over medium-high heat.
  • Add the bratwurst pieces and cook, stirring often, until lightly browned and getting crispy around the edges, 5 or so minutes. Remove with a slotted spoon to a plate or small bowl.
  • Add the potato chunks and cook for 5 minutes or until just starting to soften. Remove to the plate with the bratwurst.
  • Add the squash and cook until just tender, 2-3 minutes. Remove to the plate with the bratwurst.
  • Add the bell peppers and onions and cook until tender, stirring, 3-4 minutes.
  • Add the bratwurst, potatoes and squash back to the skillet.
  • Stir in the garlic and cook 3 minutes.
  • In a small bowl, whisk together the mustard, beer and Worcestershire sauce. Add to the meat mixture.
  • Reduce heat to medium-low. Simmer slowly, stirring occasionally, until the sauce reduces slightly. Taste and add salt and pepper to taste. You may also want to add more mustard.
  • Serve garnished with the green onions.

Notes

You can use any combination of vegetables you want. Always start cooking the thicker, harder vegetables (such as carrots) first since they take longer to cook.

Nutrition

Calories: 2641kcal | Carbohydrates: 259g | Protein: 93g | Fat: 135g | Saturated Fat: 46g | Polyunsaturated Fat: 13g | Monounsaturated Fat: 67g | Cholesterol: 336mg | Sodium: 4737mg | Potassium: 8704mg | Fiber: 31g | Sugar: 50g | Vitamin A: 5324IU | Vitamin C: 431mg | Calcium: 420mg | Iron: 15mg

Nutritional values are approximate.

Southern Pimento Cheese

In my opinion, just about every recipe needs Old Bay seasoning. It’s what makes this southern pimento cheese something different, something special. I knew exactly where this yummy mixture was heading the moment I spied the recipe. I was going to pile it up high on a slice of grilled bologna. The perfect topping for the perfect sandwich. I could’ve used it as a dip. Or inside an omelet. Or really, I could just sit down with a spoon and a bowl of southern pimento cheese (ok, that might be a stretch, but not much of one).

Southern Pimento Cheese

Shred Your Own Cheese

Whenever making a dish like this southern pimento cheese I always shred the cheese by hand. I buy a big ole block of cheese and put some muscle into a shredder. The pre-shredded stuff has things added to it to keep it from sticking together. You don’t want that in your pimento cheese. So do it by hand like I do.

Update: Oh my goodness! No more hard work shredding my cheese! I love this shredder! It’s one of the best kitchen gadgets I’ve ever purchased.

This cheese mix is great on southern bologna burgers.

Southern Pimento Cheese
Print Pin
5 from 1 vote

Southern Pimento Cheese

I knew exactly where this yummy mixture was heading the moment I spied the recipe: piled up high on a slice of grilled bologna, toping off the perfect sandwich. 
Course Main or Side
Cuisine American
Keyword pimento cheese, pimiento cheese
Prep Time 15 minutes
Total Time 15 minutes
Servings 8
Calories 262kcal

Equipment

Ingredients

Instructions

  • Combine all ingredients and mix thoroughly.

Notes

Great on bologna sandwiches, crackers, and celery sticks!

Nutrition

Calories: 262kcal | Carbohydrates: 2g | Protein: 8g | Fat: 25g | Saturated Fat: 10g | Trans Fat: 1g | Cholesterol: 51mg | Sodium: 312mg | Potassium: 78mg | Fiber: 1g | Sugar: 1g | Vitamin A: 892IU | Vitamin C: 12mg | Calcium: 221mg | Iron: 1mg

Nutritional values are approximate.

Pepperoni Pizza Hamburger Helper

I was in a major comfort-food craving mood. Something that’d stick to my ribs and warm my belly! No salads here, nope. Ok, maybe one on the side. But the star of the show had to be this pepperoni pizza hamburger helper. Imagine each and every bite being just like taking a bite of a loaded pepperoni pizza. But no delivery required here. Just a pot and a few ingredients and a little time.

Pepperoni Pizza Hamburger Helper

This Is The Real Deal

You can substitute crumbled bulk Italian sausage for the hamburger if you desire for a bit more pizza flavor. But you don’t need to. This pepperoni pizza hamburger helper is great just as it is. And it reheats great too. You might have to add a bit of water if it gets a little thick the second day, though. This is like the real deal from Eagle Foods.

I like to use my good ole trusty Dutch oven to make this soup and pretty much darned near anything like it on my stovetop. It’s nice and big and sturdy. That extra weight helps it maintain and distribute heat perfectly. As an added bonus, it’s actually pretty easy to clean up too!

Also try some cheeseburger hamburger helper.

Pepperoni Pizza Hamburger Helper
Print Pin
5 from 1 vote

Pepperoni Pizza Hamburger Helper

Imagine each and every bite being just like taking a bite of a loaded pepperoni pizza. But no delivery required here. Just a pot and a few ingredients and a little time.
Course Main
Cuisine American
Keyword Hamburger helper, pepperoni, pizza
Prep Time 10 minutes
Cook Time 25 minutes
Servings 8
Calories 591kcal

Ingredients

Instructions

  • Cook the pasta per the package instructions, draining but not rinsing the pasta when cooked.
  • Heat a large skillet over high heat and crumble in the ground beef.
  • Cook until browned and lightly crusty on the edges, breaking up the meat as it cooks.
  • Remove the beef to a paper towel lined plate with a slotted spoon.
  • Reduce heat to medium and add the butter.
  • Once melted stir in the onion and bell pepper. Saute until just starting to soften.
  • Add the beef back, along with the marinara sauce, pepperoni, Italian seasoning, salt and pepper. Stir.
  • Add the pasta back to the pan. Stir. If too dry add more marinara or a splash of water.
  • Remove from heat.
  • Stir in the mozzarella.
  • Serve with grated Parmesan for topping if desired.

Notes

Add sliced mushrooms in with the pepper and onion for a nice twist.

Nutrition

Calories: 591kcal | Carbohydrates: 48g | Protein: 29g | Fat: 31g | Saturated Fat: 13g | Trans Fat: 1g | Cholesterol: 93mg | Sodium: 1061mg | Potassium: 601mg | Fiber: 3g | Sugar: 5g | Vitamin A: 588IU | Vitamin C: 13mg | Calcium: 190mg | Iron: 3mg

Nutritional values are approximate.

Garlic Cheeseburgers

If you’re going to make garlic cheeseburgers, don’t do it halfway. Don’t just sprinkle a bit of garlic salt on a patty and call it done. No. Get some garlic in there. Everywhere. In the patties. On the patties. On the buns. And then add some more. These aren’t sorta-garlic burgers. Nope. Your goal is to make sure no vampires would dare come within 500 feet of you. Get ready for it. Here comes the garlic!

Garlic Cheeseburgers

Nothing Fancy. Just Delicious.

You’re not going to find a much easier burger to make than these garlic cheeseburgers. We’re not making some fru-fru $22 brew pub burger here. And we’re not making some burger that you’re going to make for that first date, either. These are gonna hang with you for a while, so to speak. So share them with close friends and loved ones. The ones that won’t mind the garlic. A lot of garlic.

Still craving more garlic flavor? Sprinkle some Holy Garlic! seasoning on top of your burgers just before serving.

Garlic Cheeseburgers
Print Pin
5 from 1 vote

Garlic Cheeseburgers

Plenty of garlic flavor in every bite!
Course Main
Cuisine American
Keyword burgers, garlic
Prep Time 15 minutes
Cook Time 15 minutes
Servings 6
Calories 566kcal

Ingredients

For the burger seasoning

For the garlic butter

  • ½ cup butter
  • 2 teaspoons garlic minced

For the burgers

  • 8 hamburger buns
  • 1 ½ pounds ground beef
  • garlic salt to taste
  • 8 slices American cheese

Instructions

For the burger seasoning

  • Combine all ingredients in a small bowl.

For the garlic butter

  • Melt the butter over medium-low heat in a small skillet.
  • Add the garlic and stir.
  • Keep warm until ready to use, stirring often.

For the burgers

  • Fire up your grill for direct cooking.
  • Brush some of the garlic butter mixture onto the sliced sides of the buns and toast on the grill.
  • Place the ground beef in a large bowl.
  • Sprinkle with the seasoning.
  • Using your hands combine the seasoning and meat.
  • Form into 8 small equally-sized balls.
  • Add meat to the grill. Push down with a spatula to flatten into patties.
  • Season the tops of the burgers with a small pinch of garlic salt.
  • Cook 4-5 minutes per side, flipping once, or until the desired doneness is achieved.
  • Brush burger patties with any additional garlic butter and top with cheese.
  • Let melt slightly.
  • Serve patties on toasted buns and enjoy!

Notes

Keep the seasoning on hand for all your burgers.

Nutrition

Calories: 566kcal | Carbohydrates: 31g | Protein: 31g | Fat: 34g | Saturated Fat: 15g | Polyunsaturated Fat: 2g | Monounsaturated Fat: 13g | Trans Fat: 2g | Cholesterol: 111mg | Sodium: 1623mg | Potassium: 444mg | Fiber: 1g | Sugar: 6g | Vitamin A: 298IU | Vitamin C: 1mg | Calcium: 421mg | Iron: 4mg

Nutritional values are approximate.