Dried Rosemary on the Nesco Snackmaster Pro

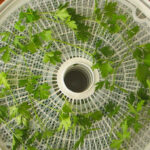
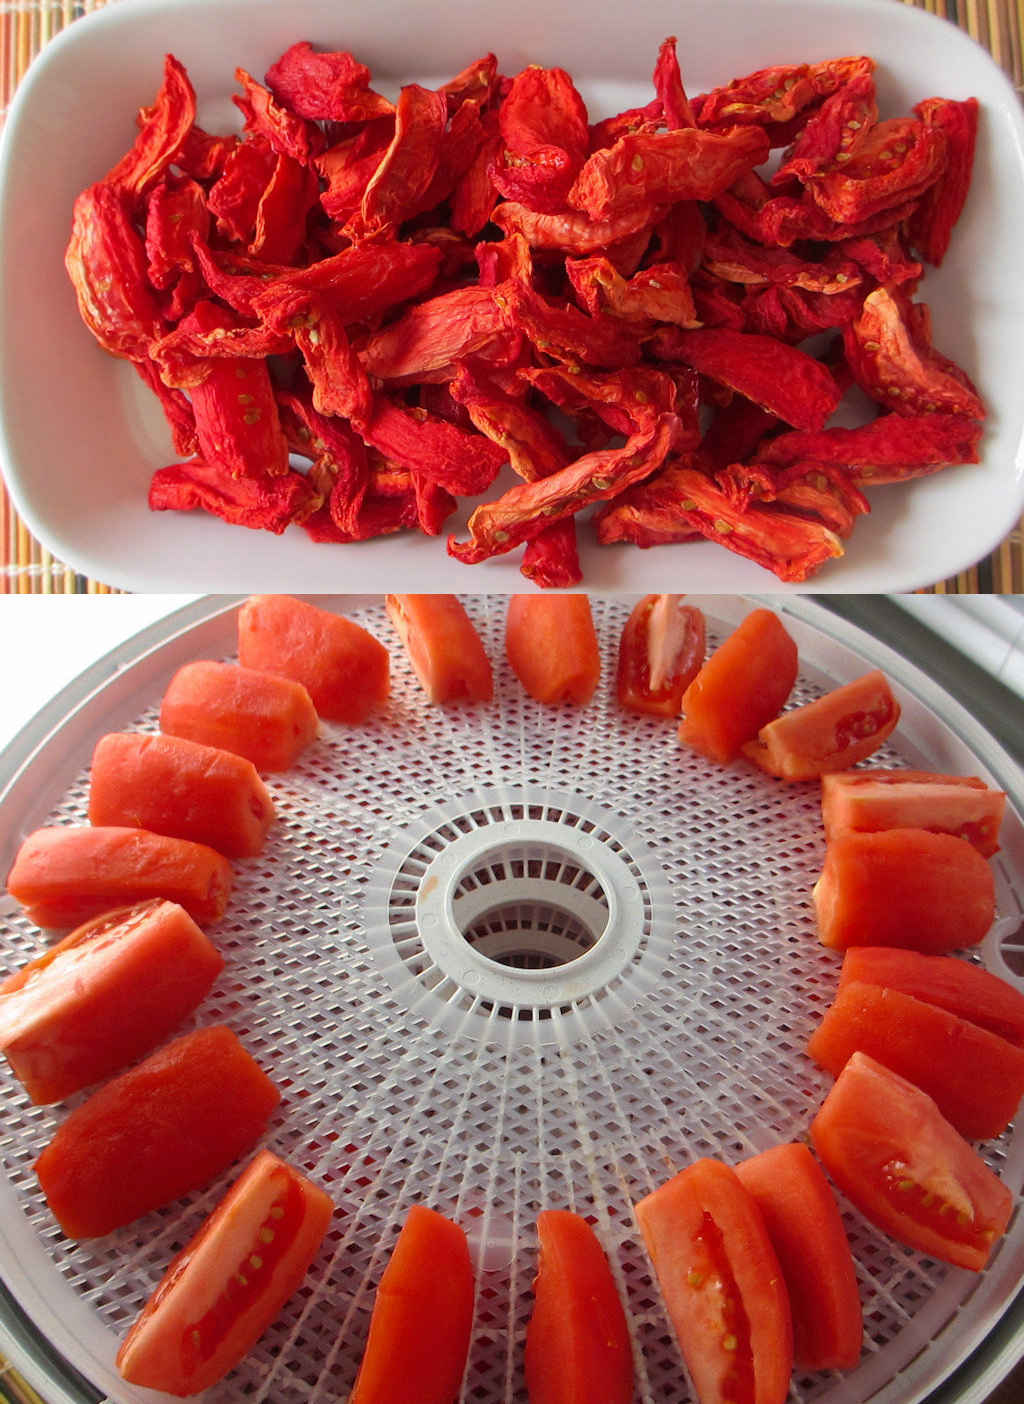
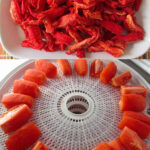
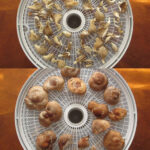
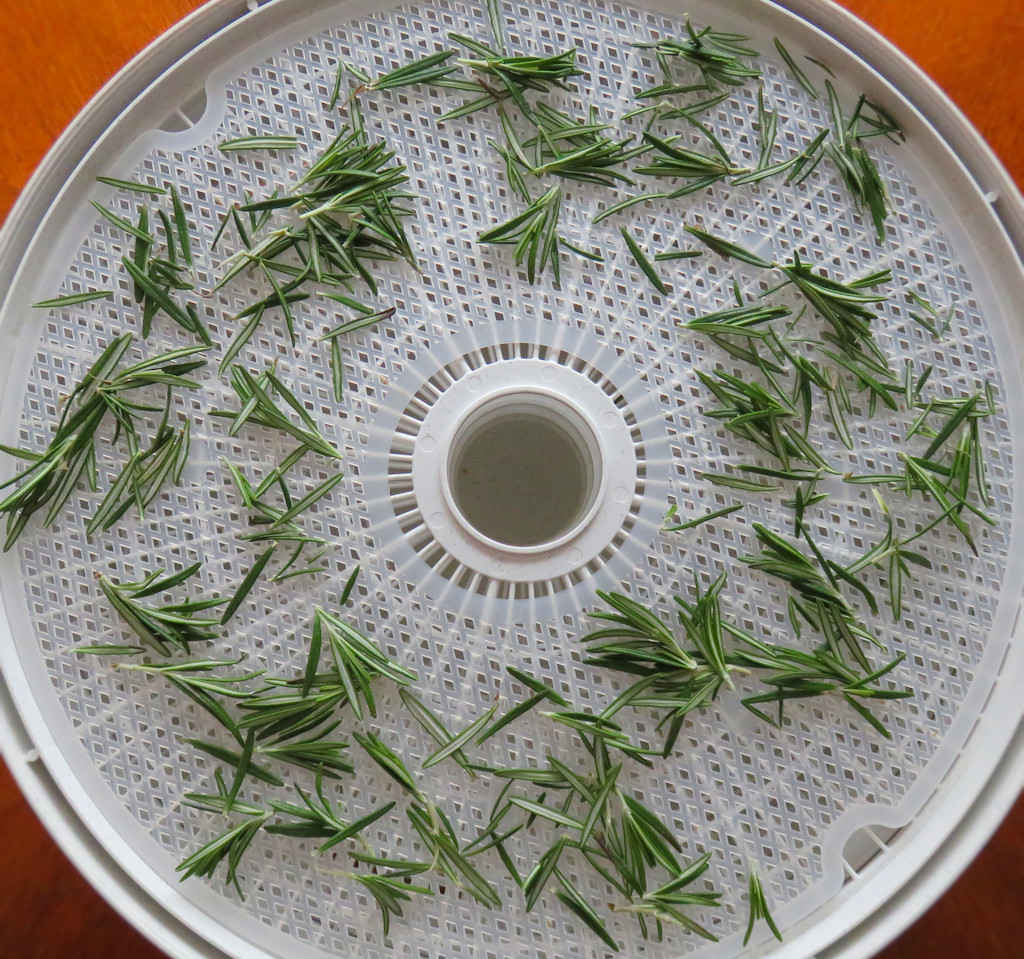
I tend to be a dry-herb kind of guy, but sometimes a recipe needs fresh instead. To keep from wasting any unused fresh herbs I just toss them onto my Nesco Snackmaster Pro dehydrator and let them dry for later use. I needed rosemary for a dish I was making (rosemary grilled potatoes, using the rosemary as a skewer!), and had a few sprigs left. I could’ve kept the rosemary intact, but I opted to remove it from the sprigs instead. You can do it either way, there’s no way to really screw up dried rosemary on the Nesco Snackmaster Pro.

Dried Rosemary on the Nesco Snackmaster Pro

I keep the dried rosemary made on the Nesco Snackmaster Pro in air-tight containers. So I remember what is what, I write the contents on a small piece of blue painter’s masking tape. The tape is great for marking items, dry or in the freezer or wherever. It peels off so easily, you never have to worry about fussing with it. I use the same tape to keep track of the trays in my dehydrator. Often you have to rotate them, and numbering them makes sure I do it correctly.

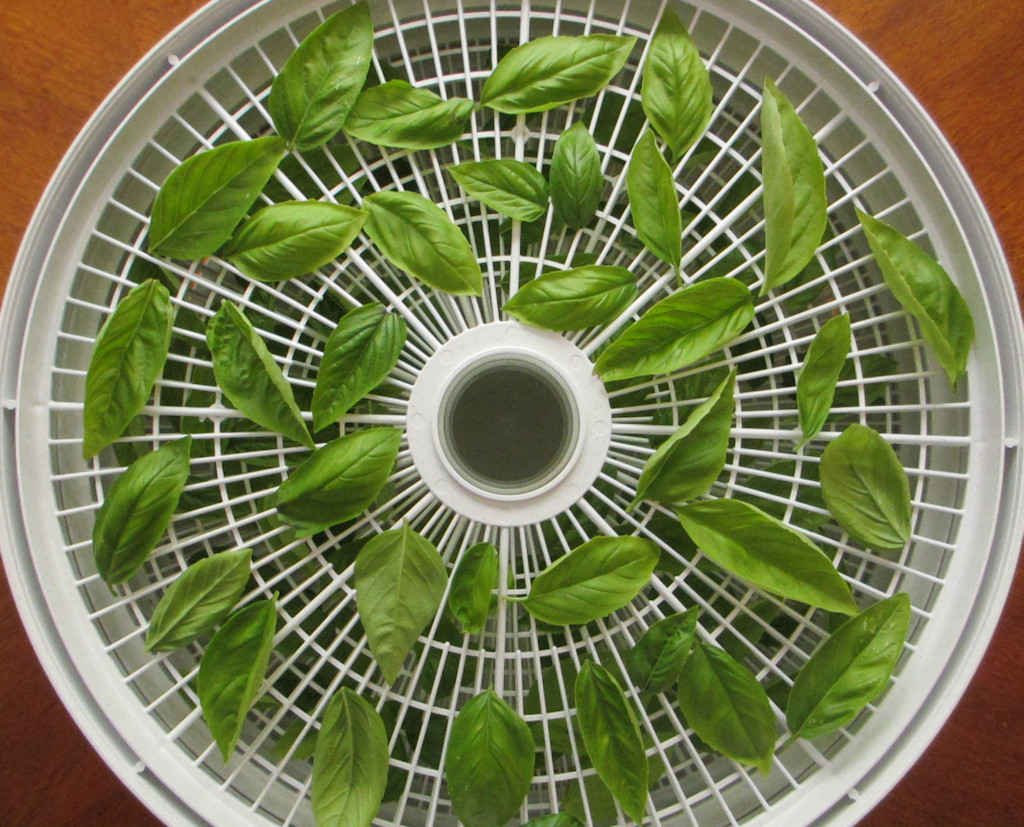
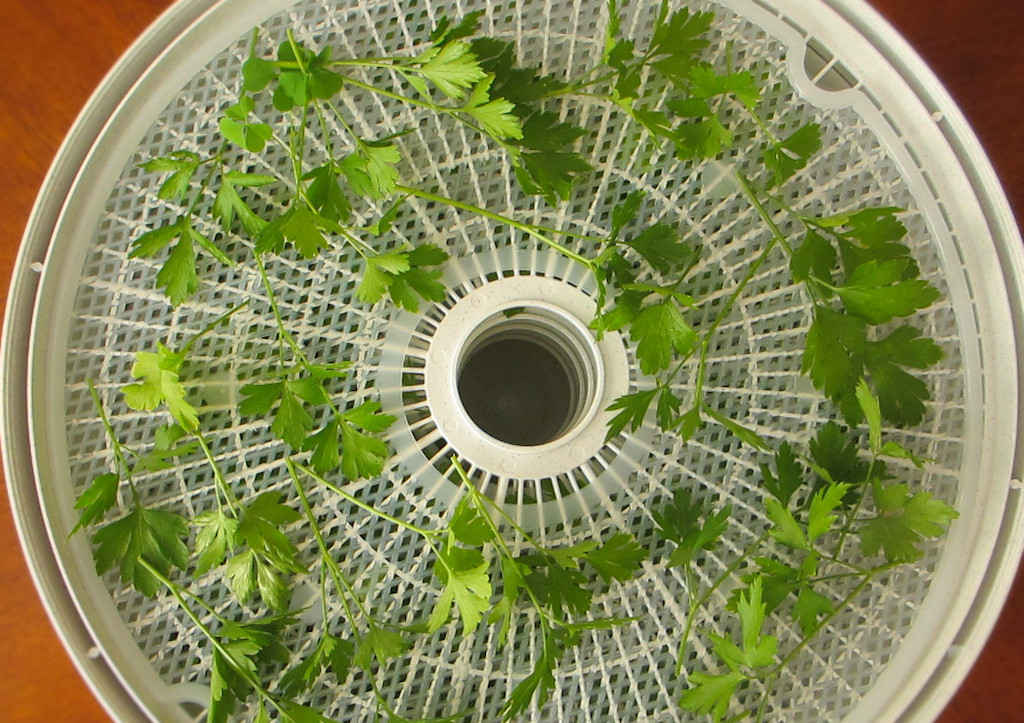
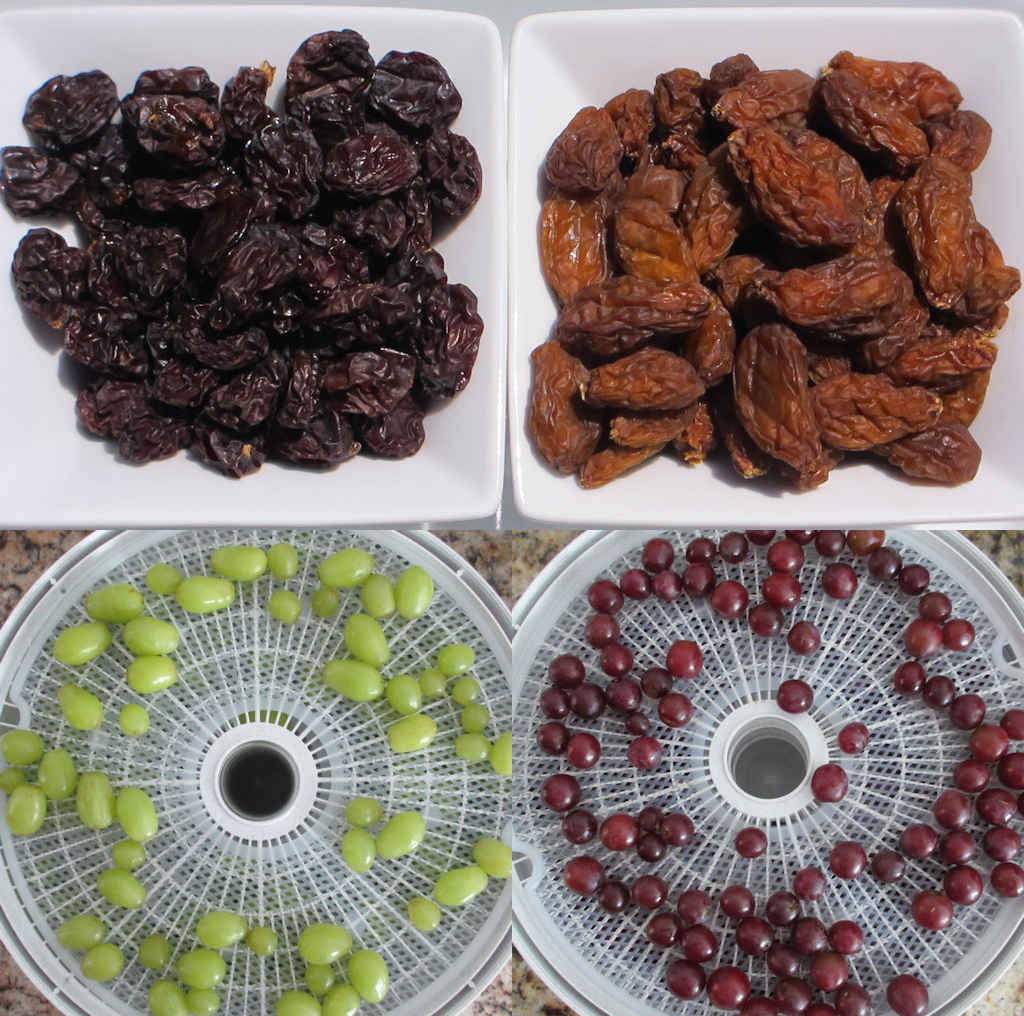
You can dry any fresh herbs in the Nesco Snackmaster Pro. Like cilantro, dill and basil.

Dried Rosemary on the Nesco Snackmaster Pro
Print Pin
5 from 1 vote

Dried Rosemary on the Nesco Snackmaster Pro

Course Dehydrator
Cuisine American
Prep Time 5 minutes
Cook Time 8 hours
Total Time 8 hours 5 minutes
Author Mike

Ingredients

  • Fresh rosemary

Instructions

  • Rinse the rosemary to remove any foreign material.
  • Dry well with kitchen towels.
  • Optionally: remove the rosemary from the sprigs
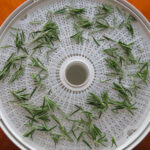
  • Place onto the Nesco Snackmaster Pro trays. Do not let the sprigs overlap.
  • Dry at 95 F for 6-8 hours. Rotate the trays every hour or so.
  • If drying whole sprigs, remove the rosemary from them.
  • Store in an air-right container.

Dried Basil on the Nesco Snackmaster Pro

I plant a (small) garden of herbs every year. This year it didn’t do so well, but I was able to get just enough to make dried basil on the Nesco Snackmaster Pro. I will be rewarded for my efforts (which granted, weren’t much) this fall and winter with fantastically aromatic and flavorful crumbled basil.

Dried Basil on the Nesco Snackmaster Pro

Basil turns almost black in color when you dry it, but don’t despair. It’s normal for it to do that. I keep the herbs that I’ve dried using my Nesco Snackmaster Pro in mason jars. I seal the jars with the optional jar sealer on my vacuum sealer. Whew, I said ‘seal’ three times in one sentence! Dried Basil on the Nesco Snackmaster Pro is a great way to use up those herbs that all seem ready to pick at once.

I like to load up my dehydrator. To do that I picked up a handful of extra trays. They really add a whole lot more drying space! Since I have to rotate my trays, I write a number on each one on a piece of blue painter’s tape so I can keep track of them.

You can dry any fresh herbs in the Nesco Snackmaster Pro. Like cilantro and rosemary.

Dried Basil on the Nesco Snackmaster Pro
Print Pin
5 from 1 vote

Dried Basil on the Nesco Snackmaster Pro

I plant a (small) garden of herbs every year. This year it didn’t do so well, but I was able to get just enough to make dried basil
Course Seasoning
Cuisine American
Keyword basil, dehydrator, nesco snackmaster pro
Cook Time 12 hours
Total Time 12 hours
Servings 1 cup
Calories 104kcal
Author Mike

Ingredients

  • 1 pound fresh basil rinsed and patted dry. Remove leaves from stems.

Instructions

  • Place leaves onto the dehydrator trays.
  • Set the dehydrator to 95 F and let dry for 12-24 hours or until the leaves are dry and crispy, rotating the trays every 2 hours.
  • Let leaves cool slightly then crumble (by hand) into a resealable air-tight container.

Nutrition

Calories: 104kcal | Carbohydrates: 12g | Protein: 14g | Fat: 3g | Saturated Fat: 1g | Sodium: 18mg | Potassium: 1338mg | Fiber: 7g | Sugar: 1g | Vitamin A: 23927IU | Vitamin C: 82mg | Calcium: 803mg | Iron: 14mg

Nutritional values are approximate.

Cauliflower Popcorn

I loved the flavor of this cauliflower popcorn, made using a Nesco Snackmaster Pro dehydrator. The cumin and chili powder add a nice southwestern, earthly flavor. The nutritional yeast (which I’d never used before) made me think of cheddar cheese flavoring. I was pleasantly surprised by it.

Cauliflower Popcorn

Now, let’s talk ‘popcorn’. That makes you think crunchy, and if you eat this cauliflower raw that’s just what you’ll get. You can also pop (sorry) them into a dehydrator for 12 or so hours. Right out of the dehydrator they have a nice crunch to them, but I found that that crunch doesn’t last. The seems get a bit soft…. and not popcorn-y. But the flavor was still great!

I’m looking forward to other ways to use nutritional yeast. For us, I’d recommend this cauliflower popcorn, but honestly I’d enjoy them more raw and save the dehydrator time. That’s up to you. I’m a big texture guy, and for me, the texture of the raw cauliflower was better.

I like to load up my dehydrator. To do that I picked up a handful of extra trays. They really add a whole lot more drying space! Since I have to rotate my trays, I write a number on each one on a piece of blue painter’s tape so I can keep track of them.

Also try crispy green beans from the Nesco Snackmaster Pro.

Cauliflower Popcorn
Print Pin
4 from 1 vote

Cauliflower Popcorn

I loved the flavor of this cauliflower ‘popcorn’. The cumin and chili powder add a nice southwestern, earthly flavor. The nutritional yeast (which I’d never used before) made me think of cheddar cheese flavoring. I was pleasantly surprised by it.
Course Appetizer
Cuisine American
Keyword cauliflower, popcorn
Prep Time 5 minutes
Cook Time 12 hours
Total Time 12 hours 5 minutes
Servings 8 servings
Calories 26kcal

Ingredients

Instructions

  • Place the cauliflower into a large bowl.
  • Add the olive oil, yeast, cumin, chili powder and salt and toss to coat.
  • Serve raw, or if desired, place into a dehydrator and dry for 12 hours. Serve immediately.

Nutrition

Calories: 26kcal | Carbohydrates: 4g | Protein: 2g | Fat: 1g | Saturated Fat: 1g | Sodium: 46mg | Potassium: 249mg | Fiber: 2g | Sugar: 1g | Vitamin A: 159IU | Vitamin C: 35mg | Calcium: 23mg | Iron: 1mg

Nutritional values are approximate.

Dried Cilantro on the Nesco Snackmaster Pro

Making jerky with my Nesco Snackmaster Pro is something I really enjoy. But the other reason I bought a dehydrator is to dry fresh herbs from my garden. Fresh herbs don’t last long, so I dry as many as I can and keep them in air-right containers in the pantry like this dried cilantro on the Nesco Snackmaster Pro.

Dried Cilantro on the Nesco Snackmaster Pro

Easy as anything to dry, dried cilantro crumbles up and stores easily for use in the winter. It’s not a substitute for fresh cilantro in recipes like salsa, but it’s great for flavoring stews and soups.

I did not remove the cilantro from the stems until after I dried it. It’s a lot easier to remove the leaves once they are dried. I then lightly crumbled them just a bit and put them in containers for use later.

I like to load up my dehydrator. To do that I picked up a handful of extra trays. They really add a whole lot more drying space! Since I have to rotate my trays, I write a number on each one on a piece of blue painter’s tape so I can keep track of them.

I love drying fresh herbs with my Nesco Snackmaster Pro, such as basil. I also freeze them for later use.

Dried Cilantro on the Nesco Snackmaster Pro
Print Pin
5 from 1 vote

Dried Cilantro on the Nesco Snackmaster Pro

Easy as anything to dry, dried cilantro crumbles up and stores easily for use in the winter. It’s great for flavoring stews and soups.
Course Side
Cuisine American
Keyword dehydrator, herbs, nesco snackmaster pro
Cook Time 12 hours
Total Time 12 hours
Servings 2 cups
Calories 104kcal
Author Mike

Ingredients

  • 2 pounds fresh cilantro rinsed, patted dry. Do not remove leaves from stems.

Instructions

  • Place cilantro onto the dehydrator trays.
  • Set the dehydrator to 95 F and let dry for 12-24 hours or until the leaves are dry and crispy, rotating the trays every 2 hours.
  • Let cilantro cool slightly then remove leaves from stems and crumble (by hand) into a resealable air-tight container.

Nutrition

Calories: 104kcal | Carbohydrates: 17g | Protein: 10g | Fat: 2g | Saturated Fat: 1g | Sodium: 209mg | Potassium: 2363mg | Fiber: 13g | Sugar: 4g | Vitamin A: 30608IU | Vitamin C: 122mg | Calcium: 304mg | Iron: 8mg

Nutritional values are approximate.

Sun-Dried Tomatoes on the Nesco Snackmaster Pro

Wow! I was so happy with sun-dried tomatoes on the Nesco Snackmaster Pro. The process was about as easy as you can possibly get. You end up with pliable but not leathery tomatoes that can be used anywhere jarred sun-dried tomatoes are called for. Like sun-dried tomato hummus, which I made immediately after the tomatoes were ready. I used Roma tomatoes because they are cheap and don’t require me to remove the seeds. If you use bigger tomatoes you’ll have to seed them after removing the skins.

Sun-Dried Tomatoes on the Nesco Snackmaster Pro

These sun-dried tomatoes on the Nesco Snackmaster Pro aren’t packed in oil like those in jars. And I opted to not season them at all, though you can surely add basil or thyme or whatever flavors you want. It takes a lot of tomatoes to make a batch of sun-dried tomatoes. I made a big batch, and froze the leftovers in vacuum-sealed bags in the freezer.

I like to load up my dehydrator. To do that I picked up a handful of extra trays. They really add a whole lot more drying space! Since I have to rotate my trays, I write a number on each one on a piece of blue painter’s tape so I can keep track of them.

Also try my mushroom jerky using the Nesco Snackmaster Pro.

Sun-Dried Tomatoes on the Nesco Snackmaster Pro
Print Pin
5 from 1 vote

Sun-Dried Tomatoes on the Nesco Snackmaster Pro

Wow! I was so happy with sun-dried tomatoes on the Nesco Snackmaster Pro. The process was about as easy as you can possibly get. 
Course Side
Cuisine American
Keyword dehydrator, nesco snackmaster pro, sun-dried tomato
Prep Time 15 minutes
Cook Time 12 hours
Total Time 12 hours 15 minutes
Servings 2 cups
Calories 204kcal

Ingredients

  • 5 pounds Roma tomatoes ripe

Instructions

  • Fill a large bowl with ice and add water to create an ice bath.
  • Bring a large pot of water to a boil.
  • Working in small batches (4-5 tomatoes at a time), add tomatoes to boiling water and boil for 45 second to 1 minute at the most. If your tomatoes are small, 45 seconds should be enough. You aren’t trying to cook the tomatoes, only loosening the skin.
  • Remove tomatoes to ice bath and let cool for 5 minutes before removing and peeling the skin. Most of my tomatoes peeled easily, but for some I had to use (gently) a vegetable peeler.
  • Cut the tomatoes into quarters lengthwise and remove and tough green parts along with any stems.
  • Add tomatoes to the dehydrator. I used screens, but you don’t need them.
  • Turn dehydrator to 145 F and dry until the tomatoes are leathery, but not crispy. There should be no visible signs of water and no water should escape when you squeeze the tomatoes. Rotate the trays every hour to ensure consistent drying. Larger pieces may require longer drying times.
  • Let tomatoes cool before using, or freeze and vacuum pack for later use.

Nutrition

Calories: 204kcal | Carbohydrates: 44g | Protein: 10g | Fat: 2g | Saturated Fat: 1g | Sodium: 57mg | Potassium: 2688mg | Fiber: 14g | Sugar: 30g | Vitamin A: 9446IU | Vitamin C: 155mg | Calcium: 113mg | Iron: 3mg

Nutritional values are approximate.

Fig Newtons on the Nesco Snackmaster Pro

Oh my goodness! It worked! Fig newtons on the Nesco Snackmaster Pro came out absolutely fantastically! Moist, tender, and packed with fig flavor. I could not have been happier. I haven’t had a fig newton in what seems like a hundred years. Now I can make them at home, and easily.

Fig Newtons on the Nesco Snackmaster Pro

The steps for making your own fig newtons using your Nesco Snackmaster Pro are pretty straightforward. You form a dough, first, and then roll it out so that’s 6″ deep and it-doesn’t-matter how long.

fig-newtons-on-the-nesco-snackmaster-pro-1

Then you form a paste of the figs and just a bit of water using your food processor. Spread the paste down the center 2″ of the dough rectangle. Try not to eat all of the figs while you’re doing this.

fig-newtons-on-the-nesco-snackmaster-pro-2

Fold the sides over to form a big log of figgy goodness. Cut into 2″ (or so) sections and transfer to the dehydrator. Dry at 115 F for about 48 hours then devour!

fig-newtons-on-the-nesco-snackmaster-pro-3

I like to load up my dehydrator. To do that I picked up a handful of extra trays. They really add a whole lot more drying space! Since I have to rotate my trays, I write a number on each one on a piece of blue painter’s tape so I can keep track of them.

You can also dehydrate grapes to make delicious raisins!

Fig Newtons on the Nesco Snackmaster Pro
Print Pin
5 from 1 vote

Fig Newtons on the Nesco Snackmaster Pro

Oh my goodness! It worked! These fig newtons came out absolutely fantastica! Moist, tender, and packed with figgy flavor. I could not have been happier.
Course Dessert
Cuisine American
Keyword dehydrator, nesco snackmaster pro, snacks
Prep Time 20 minutes
Cook Time 2 days
Total Time 2 days 20 minutes
Servings 24 servings
Calories 114kcal

Ingredients

Instructions

  • Place the flour, milk and vanilla extract in a large bowl. Mix with your hands until it forms a dough. The dough will be slightly dry but will still hold its form when pressed.
  • Place the figs into a food process.
  • Add 1/4 cup of water and pulse a few times. If the figs form a paste you are done. If not, add a bit more water and pulse again. Continue until you get a firm paste, but do not add too much water that it becomes runny.
  • Roll the dough out on a flat surface. Form a rectangle that is 6″ deep and about 1/4″ thick. Don’t worry about the width of the dough.
  • Spread the fig paste down the center 2″ of the dough, leaving 2″ above and below to the edges of the dough.
  • Fold the edges over the fig filling. The dough might split a bit along the edges. Use your fingers to pinch it back together.
  • Use a pastry or pizza cutter or sharp knife to cut the dough into 2″ pieces.
  • Transfer cookies to the Nesco Snackmaster Pro trays. Note: Our fig newtons were pretty thick so they they did like to stick to the tray above them. Don’t fret that, they’ll come out fine. I do recommend that you do not place any cookies on the top rack, the one closest to the dehydrator motor as they may stick to it.
  • Set the temperature to 115 F and dry for up to 48 hours or until the dough is soft but dry.

Nutrition

Calories: 114kcal | Carbohydrates: 6g | Protein: 4g | Fat: 9g | Saturated Fat: 1g | Sodium: 7mg | Potassium: 22mg | Fiber: 2g | Sugar: 2g | Vitamin A: 13IU | Vitamin C: 1mg | Calcium: 49mg | Iron: 1mg

Nutritional values are approximate.

Red Pepper Flake on the Nesco Snackmaster Pro

Ever since I bought my dehydrator I have been looking forward to drying chile peppers. I wanted to make my own red pepper flake on the Nesco Snackmaster Pro. I use a ton of red pepper flake in the many dishes I cook, and I thought it’d be awesome to grown my own peppers and dry them. So, that’s what I did. My pepper harvest wasn’t very bountiful, but fortunately it doesn’t take a lot of peppers to make a good-sized batch of red pepper flake.

Red Pepper Flake on the Nesco Snackmaster Pro

Packed with heat and great flavor, I couldn’t have been happier with the end result. I hand-crushed the dried peppers with a mortar and pestle. You could use a blade coffee grinder or even blender, but I think you’ll end up with chile powder (my next project) instead of coarse flake. You get much better control over the end product using the mortar and pestle.

I like to load up my dehydrator. To do that I picked up a handful of extra trays from Nesco. They really add a whole lot more drying space! Since I have to rotate my trays, I write a number on each one on a piece of blue painter’s tape so I can keep track of them.

Also try my smoked habanero flake.

Red Pepper Flake on the Nesco Snackmaster Pro
Print Pin
5 from 1 vote

Red Pepper Flake on the Nesco Snackmaster Pro

I use a ton of red pepper flake in the many dishes I cook, and I thought it’d be awesome to grown my own peppers and dry them.
Course Spice Mix
Cuisine American
Keyword Big Easy, Char-Broil, peppers
Prep Time 15 minutes
Cook Time 8 hours
Total Time 8 hours 15 minutes
Servings 1 cup
Calories 576kcal
Author Mike

Ingredients

  • 32 chile peppers ripe

Instructions

  • Cut the stems off of the peppers. Do not remove the seeds.
  • Place peppers on the dehydrator trays. Set the dehydrator temperature to 165 F.
  • Dry for 8 hours or until the peppers are crispy and brittle.
  • Working in batches, place the peppers into a mortar and grind with the pestle until the desired consistency is achieved.
  • Store in an airtight container.

Nutrition

Calories: 576kcal | Carbohydrates: 127g | Protein: 27g | Fat: 6g | Saturated Fat: 1g | Sodium: 130mg | Potassium: 4637mg | Fiber: 22g | Sugar: 76g | Vitamin A: 13709IU | Vitamin C: 2069mg | Calcium: 202mg | Iron: 15mg

Nutritional values are approximate.

Raisins on the Nesco Snackmaster Pro

I’ve been having a blast with my new dehydrator from Nesco. I’ve been making a lot of jerky, so I figured I’d take a break and make something different. And that different is raisins on the Nesco Snackmaster Pro. They take a few days to dehydrate, but boy are they fantastic! Tender and sweet. Soooooo much better than store-bought.

Raisins on the Nesco Snackmaster Pro

Raisins on the Nesco Snackmaster Pro are fun to make and eat! You can fit about a pound of grapes per tray (outfitted with screens). You should rotate the trays every few hours to guarantee even drying, but be careful rotating the trays when you first start out. Them lil grapes like to roll around!

After 2 days the smaller grapes may be dried completely, so check through the trays for any that are done.

Did you know that you can also make Fig Newtons on your Nesco Snackmaster Pro? They take a while, but boy are they ever great!

Raisins on the Nesco Snackmaster Pro
Print Pin
5 from 1 vote

Raisins on the Nesco Snackmaster Pro

They take a few days to dehydrate, but boy are they fantastic! Tender and sweet. Soooooo much better than store-bought.
Course Appetizer
Cuisine American
Keyword dehydrator, grapes, nesco snackmaster pro, raisins
Prep Time 15 minutes
Cook Time 3 days
Total Time 3 days 15 minutes
Servings 1 cup
Calories 313kcal
Author Mike

Ingredients

  • 1 pound ripe grapes

Instructions

  • Remove the stems from the grapes.
  • Rinse under cold water.
  • Pat the grapes dry. The drier, the better.
  • Place grapes onto the dehydrator screens. Try to not let them touch.
  • Close the dehydrator and turn onto high.
  • Dehydrate on high for 24 hours, rotating the trays every 2 hours or so. Don’t fret if you don’t rotate the trays at night while you’re sleeping!
  • Turn the dehydrator down to 135 F and continue drying for a total of 3 days, rotating the trays every 2 hours or so. I like to move the grapes around a bit as they are drying to keep them from sticking to the screens.

Notes

You can fit about a pound of grapes per tray in the Nesco Snackmaster Pro. Do not overcrowd the grapes.

Nutrition

Calories: 313kcal | Carbohydrates: 82g | Protein: 3g | Fat: 1g | Saturated Fat: 1g | Sodium: 9mg | Potassium: 866mg | Fiber: 4g | Sugar: 70g | Vitamin A: 299IU | Vitamin C: 15mg | Calcium: 45mg | Iron: 2mg

Nutritional values are approximate.

Onion Powder on the Nesco Snackmaster Pro

Onions were on sale here last week. I hate passing up on a deal, so I bought a few nice big onions, and proceeded to make homemade onion powder using my Nesco Snackmaster Pro. The end result has a slightly different texture than store-bought onion powder, but a much more onion-packed flavor.

My first use of my onion powder was in a rub for rotisserie-style chicken. You can definitely tell the difference between onion powder made on the Nesco Snackmaster Pro and the stuff in a jar. Wow!

Onion Powder on the Nesco Snackmaster Pro

After drying the onions for 24 hours I ground them using a blade coffee grinder (not the burr grinder). Not all of the onion pieces would go thru the grinder (they were still a bit moist) so I returned them to the dehydrator for just a bit.

The final product went into Mason jars with lids and then vacuum-sealed using a jar attachment for a vacuum sealer. You just have to remember that after you open the jar to remove some of the powder you’ll need to re-seal it. No big deal and well worth the effort.

I like to load up my dehydrator. To do that I picked up a handful of extra trays. They really add a whole lot more drying space! Since I have to rotate my trays, I write a number on each one on a piece of blue painter’s tape so I can keep track of them.

Bell pepper powder is also great when made on your Nesco Snackmaster Pro.

Onion Powder on the Nesco Snackmaster Pro
Print Pin
No ratings yet

Onion Powder on the Nesco Snackmaster Pro

Onions were on sale here last week. I hate passing up on a deal, so bought a few nice big onions, and proceeded to make homemade onion powder using my Nesco Snackmaster Pro. 
Course Spice Mix
Cuisine American
Prep Time 15 minutes
Cook Time 1 day
Total Time 1 day 15 minutes
Author Mike

Ingredients

  • Onions sliced or chopped thin (try to make the pieces consistent in size)

Instructions

  • Place the onions into the dehydrator. Make sure they do not touch or overlap.
  • Dry at 165 F for 18-24 hours, or until the onions are crispy. Smaller pieces will take less time. I cut mine big, so they took the full 24 hours.
  • Let cool completely then grind using a blender or blade coffee grinder (not a burr grinder).
  • Keep in an air-right container. I place mine in a Mason jar, cover it, then use a vacuum-sealer attachment specifically for jars to remove all of the air.

Nutritional values are approximate.

Dehydrated Mushrooms on the Nesco Snackmaster Pro

I’ve really been enjoying my dehydrator. I’m always looking for more things to dry, taking advantage of anything in season or fresh. I recently grabbed a few pounds of oyster and shiitake mushrooms with the goal of drying them for later use in stir-fries or soups. I found that drying them is incredibly easy. Rinse, dry, slice (if you want) and dry. Done. Dehydrated mushrooms on the Nesco Snackmaster Pro are amazing.

Dehydrated Mushrooms on the Nesco Snackmaster Pro

I store the dehydrated mushrooms on the Nesco Snackmaster Pro in resealable baggies or Mason jars. Whenever I need them I just grab them and toss them into the dish. If the recipe I’m using them in doesn’t contain a lot of liquid that can be used to re-hydrate the mushrooms I’ll first toss them into some warm water for a few minutes.

If you decide to slice your mushrooms don’t cut them too small. They shrink a lot as they dry, and if you cut them too small they will crumble too easily and can fall thru the holes in the trays on the Nesco Snackmaster Pro. I prefer to keep the mushrooms as whole as possible since you never know how you might use the mushrooms in the end. You can always cut the larger pieces later, but you can’t make the smaller pieces bigger!

I like to load up my dehydrator. To do that I picked up a handful of extra trays. They really add a whole lot more drying space! Since I have to rotate my trays, I write a number on each one on a piece of blue painter’s tape so I can keep track of them.

You can dehydrate darn near anything on a Nesco Snackmaster Pro. Even marshmallows.

Dehydrated Mushrooms on the Nesco Snackmaster Pro
Print Pin
5 from 1 vote

Dehydrated Mushrooms on the Nesco Snackmaster Pro

I recently grabbed a few pounds of oyster and shiitake mushrooms with the goal of drying them for later use in stir-fries or soups. I found that drying them is incredibly easy. 
Course Side
Cuisine American
Keyword dehydrator, mushroom, nesco snackmaster pro
Prep Time 15 minutes
Cook Time 8 hours
Total Time 8 hours 15 minutes
Servings 1 pound
Calories 200kcal
Author Mike

Ingredients

  • 2 pounds mushrooms

Instructions

  • Rinse the mushrooms.
  • Trim any hard stems. Slice if desired.
  • Pat mushrooms dry and place on screens on the Nesco trays. Do not overlap.
  • Set the dehydrator to 100 F and dry for 8 hours, checking on the mushrooms after 6 hours. Thinner smaller mushrooms will dry sooner.
  • Remove when mushrooms are as dry as you want. Store in an air-tight container, such as a jar with a lid.

Nutrition

Calories: 200kcal | Carbohydrates: 30g | Protein: 28g | Fat: 3g | Saturated Fat: 1g | Sodium: 45mg | Potassium: 2885mg | Fiber: 9g | Sugar: 18g | Vitamin C: 19mg | Calcium: 27mg | Iron: 5mg

Nutritional values are approximate.