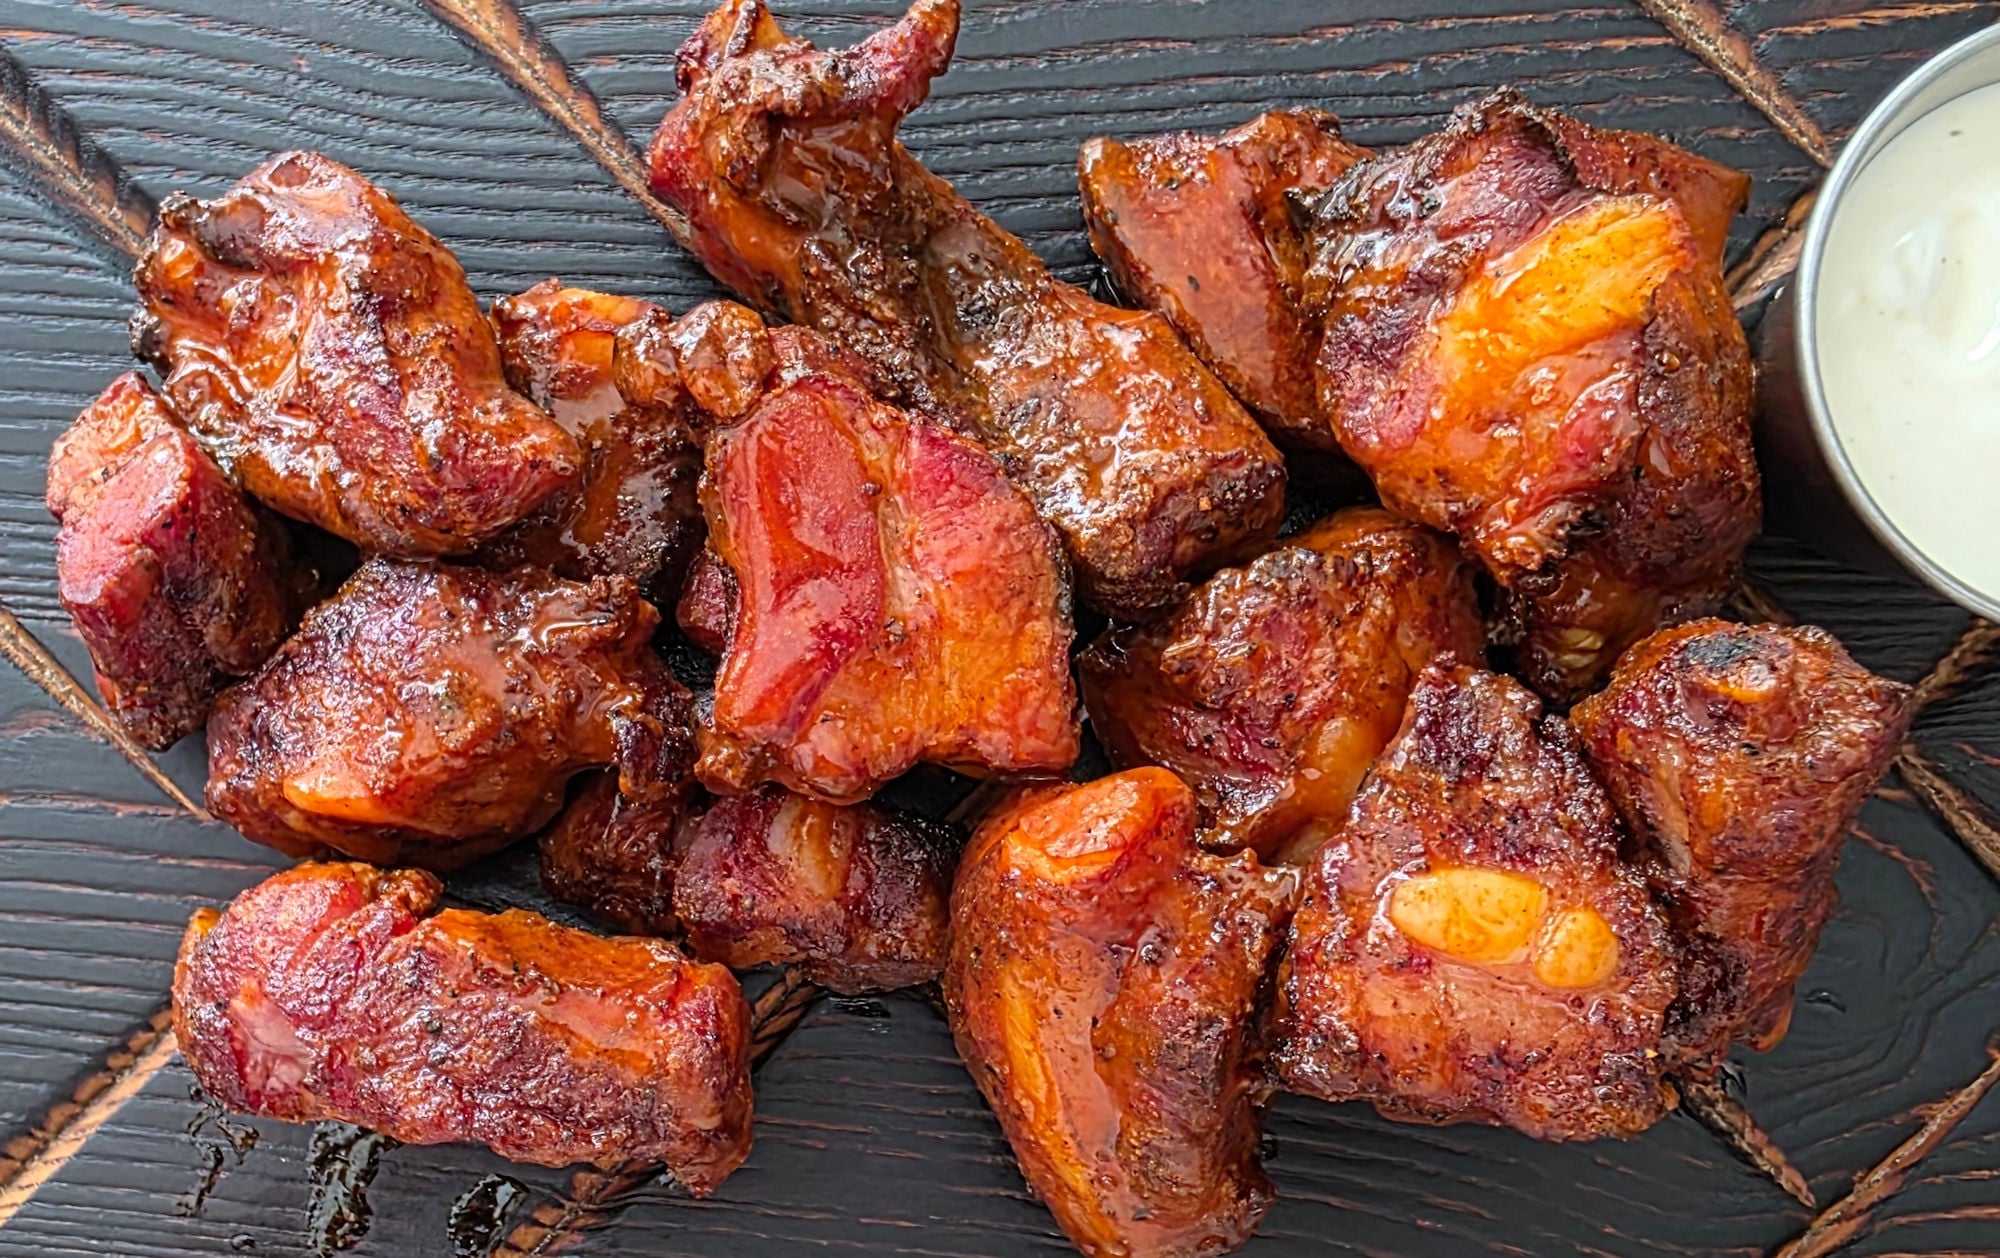
Homemade Cajun Spice Bacon

You browse the bacon section of your local grocery store and you’re not going to find much variety. You got your smoked bacon. You got your even-more-smoked bacon. Maybe some maple bacon. That’s pretty much it. How about something tastier? With a little spicy kick? This homemade Cajun spice bacon is not only easy but fantastic. A little time and a smoker is all that are required. Once you make bacon a time or two you’ll find it to be fun and the results just can’t be beaten!

Homemade Cajun Spice Bacon

A Flip A Day

Once you have the pork belly seasoned to make homemade Cajun spice bacon, all you have to do is take 5 seconds a day to flip it over. You want all the good stuff that was on the bottom to get back on the top, so it can soak in good. Real good. For seven days, minimum. Go a few extra days if you can. We’re curing the bacon and flavoring it here. Don’t rush it!

Homemade Cajun Spice Bacon

A Slice Above

Slicing bacon can be a daunting task the first time or two. I don’t have a big huge meat slicer. I wish I did, it’d make this task much easier. Instead, I use a really, really, REALLY sharp knife. That’s key. Do not use a dull knife. If your belly is kind of ‘wiggly’, don’t try and slice it or you’ll end up with slices that are inconsistent in thickness. Stick it in the freezer for a bit to set up then slice it.

You’re going to end up with a few oddball pieces after you’re done slicing. Odd shapes. Trimmings. Ends. Save them. Put them in a baggie or container and freeze them. They’re fantastic for flavoring sautéed vegetables, baked beans, or even fried up as bits for your salads.

I prefer to bake my bacon versus frying it. I think it gives me more consistent cooking and more control over how crunchy (or not crunchy) that I get it!

Homemade Cajun Spice Bacon
Print Pin
5 from 1 vote

Homemade Cajun Spice Bacon

Easy homemade bacon with a nice Cajun flavor.
Course Side
Cuisine American
Keyword bacon, smoked
Prep Time 7 days
Cook Time 6 hours
Servings 20
Calories 478kcal

Ingredients

Instructions

  • Combine the curing salt, Cajun seasoning and garlic.
  • Rub half of the mix onto both sides of the belly.
  • Place in plastic bag on a pan in the refrigerator for 7 days. Flip the pork belly at least once a day..
  • After 7 days, remove pork belly from bag or pan and rinse off cure under cold water.
  • Sprinkle the remaining seasoning mix over the belly and rub into both sides.
  • To smoke, fire up your smoker for smoking at 165 F. Use a fruit wood or hickory.
  • Add the belly to the smoker and smoke for 4-6 hours or until the internal temperature reaches 155 F. Remove and let rest for 10 minutes.
  • Slice lengthwise. If the belly is too soft to slice you can freeze it for 30 minutes to get it to set a little first.
  • To cook, fry in a pan or (my preferred method) bake in the oven at 400 F on an aluminum foil-lined pan for 30 minutes or until as crispy as you like it, flipping once.
  • Leftover bacon (cooked or raw) can be frozen for later use.

Notes

For best flavor, use vacuum-sealed bags for storage.

Nutrition

Calories: 478kcal | Carbohydrates: 2g | Protein: 9g | Fat: 48g | Saturated Fat: 18g | Polyunsaturated Fat: 5g | Monounsaturated Fat: 22g | Cholesterol: 65mg | Sodium: 31mg | Potassium: 233mg | Fiber: 1g | Sugar: 0.3g | Vitamin A: 1388IU | Vitamin C: 0.4mg | Calcium: 12mg | Iron: 1mg

Nutritional values are approximate.

French Toast using an Outdoor Griddle

I love cooking outside on my griddle. The fresh air. The process. And of course, the results. One of my favorite meals to make is breakfast. I’ll eat breakfast any time of the day. I think it’s extra-special to have it for dinner. It’s like you’re cheating, being bad. And I don’t mess around either. Like my French toast using an outdoor griddle. Easy. But oh, so deliciously good.

French Toast using an Outdoor Griddle

I don’t think that French toast is an opportunity to try and ‘go healthy’. I use whole milk. Brioche bread. Butter. Real sugar. You have to commit here. You can have broccoli tomorrow. Today, it’s time for an indulgent breakfast!

French Toast using an Outdoor Griddle

Crusty Softness

For my French toast using an outdoor griddle to be perfect it has to have two things: a slightly crunchy crust around the edges and a soft, sweet middle. I don’t rush flipping the bread until that crust is forming and the bread is wonderfully golden brown.

When you remove your French toast serve it immediately for the best results. But, if you need more time and it has to ‘sit around’ a bit, I recommend putting it on a wire rack instead of a platter. The platter and the hot bread make for steam and steam makes for soggy French bread. And that makes for sadness.

Also try a garlic naan pizza made on your outdoor griddle!

French Toast using an Outdoor Griddle
Print Pin
5 from 1 vote

French Toast using an Outdoor Griddle

Deliciously sweet, flavorful French toast made on an outdoor griddle.
Course Breakfast
Cuisine American
Keyword French toast, griddle
Prep Time 15 minutes
Cook Time 15 minutes
Servings 4
Calories 110kcal

Ingredients

  • 8 slices Brioche bread you can substitute Texas toast
  • 4 eggs
  • ¾ cup whole milk
  • 1 tablespoon sugar
  • 2 teaspoons vanilla extract
  • 1 ½ teaspoons ground cinnamon
  • 2 pats butter the real stuff
  • Your favorite toppings whipped cream, fresh berries, toasted pecans, etc

Instructions

  • Preheat your griddle to medium heat, about 350 F.
  • In a small bowl, whisk together the eggs, milk, sugar, vanilla extract and cinnamon. I prefer to put the ingredients into a large Mason jar, put the lid on, and shake it.
  • Pour the egg mixture into a shallow dish such as a pie plate or 9" x 9" baking dish.
  • In a large shallow dish (I like to use a pie plate) whisk all the eggs, whole milk, sugar, vanilla extract and cinnamon until combined.
  • Place the butter onto the hot griddle and spread out a bit.
  • Dip the bread slices into the egg mixture. Get them well-coated on both sides but don't let them sit there and get soggy. Transfer to the griddle.
  • Cook until the bottoms are golden brown, 2-4 minutes. Flip and cook another 2-4 minutes until the other sides are golden brown.
  • Remove and add desired toppings and serve.

Notes

I like to make my egg mixture ahead of time. I’ve found it’s easier to do that in a Mason jar. Just add all ingredients, screw on the lid, and shake. I keep it in the fridge until I’m ready to cook. Just before I pour it into a dish to dredge the bread I give the jar another good shake or two to make sure everything is well-combined.

Nutrition

Calories: 110kcal | Carbohydrates: 6g | Protein: 7g | Fat: 6g | Saturated Fat: 2g | Polyunsaturated Fat: 1g | Monounsaturated Fat: 2g | Trans Fat: 0.02g | Cholesterol: 169mg | Sodium: 81mg | Potassium: 136mg | Fiber: 0.4g | Sugar: 6g | Vitamin A: 315IU | Vitamin C: 0.03mg | Calcium: 89mg | Iron: 1mg

Nutritional values are approximate.

Homemade Maple Bacon

It’s rare that our local grocery store has pork belly on sale. Heck, it’s rare that they even carry it. So when I was walking by the meat case the other day and eyed a 7 or so pound skin-off pork belly, I snagged it up instantly. Bacon. I had bacon on my mind. And nothing beats homemade maple bacon, either. I love the process, and I love the end result. The entire thing from start to finish makes me happy. And boy, is the bacon ever good!

Homemade Maple Bacon

It’s Easy

Making homemade maple bacon is actually quite easy. It only takes a few ingredients. That and a smoker and you’re set. Now, you’re not going to be saving money over store-bought bacon, so don’t go into this thinking you’re going to be rich when you’re done. But you will have better-tasting bacon. And a lot of joy and satisfaction from making it yourself. So don’t go into it ‘cheap’. Use a good maple syrup. And grab a good pork belly.

Homemade Maple Bacon

Time For Time

You cannot rush the curing process when making your bacon. That’s when the flavor gets infused into the pork belly. When you make it to the smoker you’re just adding that wonderful smoke flavor and (barely) cooking the pork. Most of the flavor comes from the time spent upfront, so don’t rush it. You’ll be more than rewarded.

I don’t have a big meat slicer, so I cut my bacon into slices using a knife. A very, very sharp knife. A dull knife will result in uneven pieces that won’t cook evenly. I highly recommend (always) having a sharp knife, especially for times like this.

Some of my homemade bacon was destined for my copycat Wendy’s Baconator burgers!

Homemade Maple Bacon
Print Pin
5 from 1 vote

Homemade Maple Bacon

Easy homemade bacon with a nice maple flavor.
Course Side
Cuisine American
Keyword bacon, smoked
Prep Time 7 days
Cook Time 6 hours
Servings 20
Calories 492kcal

Ingredients

  • 4 pounds pork belly skin removed

Maple Bacon Cure

Instructions

  • Combine the curing salt, maple syrup, brown sugar and pepper.
  • Rub the mix onto both sides of the belly.
  • Place in plastic bag on a pan in the refrigerator for 7 days. Flip the pork belly at least once a day..
  • After 7 days, remove pork belly from bag or pan and rinse off cure under cold water.
  • To smoke, fire up your smoker for smoking at 165 F. Use a fruit wood or hickory.
  • Add the belly to the smoker and smoke for 4-6 hours or until the internal temperature reaches 155 F. Remove and let rest for 10 minutes.
  • Slice lengthwise. If the belly is too soft to slice you can freeze it for 30 minutes to get it to set a little first.
  • To cook, fry in a pan or (my preferred method) bake in the oven at 400 F on an aluminum foil-lined pan for 30 minutes or until as crispy as you like it, flipping once.
  • Leftover bacon (cooked or raw) can be frozen for later use.

Notes

For best flavor, use vacuum-sealed bags for storage.

Nutrition

Calories: 492kcal | Carbohydrates: 6g | Protein: 9g | Fat: 48g | Saturated Fat: 18g | Polyunsaturated Fat: 5g | Monounsaturated Fat: 22g | Cholesterol: 65mg | Sodium: 30mg | Potassium: 187mg | Fiber: 0.1g | Sugar: 5g | Vitamin A: 12IU | Vitamin C: 0.3mg | Calcium: 13mg | Iron: 1mg

Nutritional values are approximate.

Stovetop Pimento Mac and Cheese

“Give me a big ole heapin’ helpin’ of thin runny mac and cheese” said no one ever, anywhere. Good thing too because my stovetop pimento mac and cheese can hold its own and then some. Thick and creamy. Easy. With a simple twist: pimentos! This is my kind of easy stick-to-your-ribs side dish. Perfect on a cold day.

Stovetop Pimento Mac and Cheese

A Heck Of A Lot Better Than The Boxed Stuff

My stovetop pimento mac and cheese is not fancy. There’s nothing here that you probably don’t already have in your pantry. Sometimes you just want something simple and comforting. This is it. If you don’t have pimentos that’s ok, it’s still a great mac and cheese recipe without them!

Or you can substitute roasted red peppers. Just drain them and give them a good chop!

And speaking of ribs, this really is great with a big ole half-rack of smoked ribs!

Stovetop Pimento Mac and Cheese
Print Pin
5 from 1 vote

Stovetop Pimento Mac and Cheese

“Give me a big ole heapin’ helpin’ of thin runny mac and cheese” said no one ever, anywhere. Good thing too because my stovetop pimento mac and cheese can hold it’s own and then some.
Course Side
Cuisine American
Keyword mac and cheese, macaroni and cheese, pimento, pimiento
Prep Time 5 minutes
Cook Time 15 minutes
Servings 8
Calories 123kcal

Equipment

Ingredients

Instructions

  • Cook the pasta until just al dente per package instructions. Drain.
  • Melt the butter in a medium saucepan over medium heat.
  • Whisk in the flour. Keep whisking and cook for 1 minute.
  • Whisk in the milk. Bring to a slow simmer, whisking often.
  • Reduce heat to low and keep whisking for 2 minutes or until the mixture is smooth.
  • Add the cheese. Stir until melted.
  • Stir in the pimentos.
  • Add pepper to taste and stir.
  • Fold in the pasta and serve.

Notes

Use Mexican Velveeta for a nice twist.

Nutrition

Calories: 123kcal | Carbohydrates: 8g | Protein: 7g | Fat: 7g | Saturated Fat: 4g | Trans Fat: 1g | Cholesterol: 22mg | Sodium: 613mg | Potassium: 256mg | Fiber: 1g | Sugar: 6g | Vitamin A: 913IU | Vitamin C: 14mg | Calcium: 202mg | Iron: 1mg

Nutritional values are approximate.

Beef Bouillon Slider Smash Burgers

If you’re looking for beefy, flavorful patties look no further. These beef bouillon slider smash burgers bring it. This is how you can turn your rather standard, everyday burgers into something new and different. Topped with a fresh mix of lettuce, tomato, onion and a sauce with a little kick, these little bites disappear in no time.

Beef Bouillon Slider Smash Burgers

On Top. Or On Bottom.

I like to put my lettuce mix for these beef bouillon slider smash burgers on the bottom bun. Not on top of the patty. Hear me out as to why. I’ve found that toppings, and especially saucy ones like the one here, stay on the buns better when they are underneath. They don’t squeeze out when you take a bite. It’s slippery up on top. You’ve got cheese. That’s slippery. Add a wet sauce and you have a recipe for ‘topping squeeze’ and that’s not a good thing. Try it and see what you think.

You can make these as ‘full sized’ burgers instead. Just form the flavored beef into 4 ounce patties instead of 2 ounces.

Also try my cedar planked beef sliders.

Beef Bouillon Slider Smash Burgers
Print Pin
5 from 1 vote

Beef Bouillon Slider Smash Burgers

Packed with beef flavor and topped with fresh greatness, these little burgers satisfy!
Course Main
Cuisine American
Keyword beef, sliders
Prep Time 15 minutes
Cook Time 15 minutes
Total Time 30 minutes
Servings 4
Calories 587kcal

Ingredients

For the burgers

For the topping

Instructions

For the topping

  • Combine all ingredients in a small bowl. Reserve until ready to use.

For the burgers

  • In medium bowl, combine the beef, beef base, and black pepper. Form into 8 2-ounce balls.
  • Heat your griddle or grill on medium-high heat.
  • While the grill is heating, melt the butter in a small saucepan over medium heat.
  • Add the garlic and saute for 2-3 minutes. Remove from heat and reserve until ready to use.
  • Place the balls onto the griddle and let cook for 30 seconds then flatten them out until then using a spatula or grill press.
  • After 3 minutes flip the patties. Continue cooking until almost done to your preference.
  • Add the cheese pieces and cook another minute until melted and the burgers are done.
  • While the burgers are cooking, slather the buns with the garlic butter and toast the buns on the grill or griddle.
  • Add the topping to the bun bottoms. Don't be shy with it.
  • Remove burgers from the griddle and place onto the buns. Add the top bun and serve.

Notes

I prefer to put my topping on the bottom bun. It tends to stay on the buns better that way. Feel free to put yours on top of the patties instead!

Nutrition

Calories: 587kcal | Carbohydrates: 35g | Protein: 27g | Fat: 37g | Saturated Fat: 15g | Polyunsaturated Fat: 3g | Monounsaturated Fat: 13g | Trans Fat: 2g | Cholesterol: 108mg | Sodium: 360mg | Potassium: 370mg | Fiber: 3g | Sugar: 6g | Vitamin A: 396IU | Vitamin C: 2mg | Calcium: 191mg | Iron: 4mg

Nutritional values are approximate.

Smoked Roasted Garlic and Herb Cream Cheese

I had the smoker going, making a big batch of homemade bacon. And there was a little bit of room left on my grates. Unused smoker space. I can’t have that. So I made some smoked roasted garlic and herb cream cheese! Easy as can be. Delicious. And it’s the perfect treat, too. Just grab some crackers and in no time you’ll be enjoying this savory, garlicky, nicely herbaceous creamy cheese too!

Smoked Roasted Garlic and Herb Cream Cheese

A Little Smoke Goes A Long Way

Cream cheese loves smoke. If this is your first time making smoked roasted garlic and herb cream cheese I suggest that you go light on the smoke. Very light. Use a small chunk of wood. See how it goes. Make note of how much smoke you use so that you (might) adjust it the next time. Because there will be a next time, believe me. This stuff is magical. And it can take on so many different flavors, too. Savory. Sweet. Spicy. You can do anything!

Smoked Roasted Garlic and Herb Cream Cheese

Easy On. Easy Off.

I’ve found that a foil-wrapped cedar plank is the perfect way to get cream cheese onto and off the smoker. The cheese gets a little melted, making it slide off easily when it’s done. Does the plank add a bit more flavor? Maybe, but probably not. We’re not smoking at a high enough temperature to get the plank smoldering. We don’t want a high temperature. Too high and we’re making a cream sauce!

As an aside, this cheese makes for the perfect ‘cook’s treat’. A little something for me to nibble on while I’m cooking something else, like bacon!

Also try some cedar planked Cool Ranch Doritos!

Smoked Roasted Garlic and Herb Cream Cheese
Print Pin
5 from 1 vote

Smoked Roasted Garlic and Herb Cream Cheese

The perfect cheese treat!
Course Appetizer
Cuisine American
Keyword cream cheese, smoked
Prep Time 15 minutes
Cook Time 2 hours
Servings 8
Calories 99kcal

Equipment

Ingredients

Instructions

  • Fire up your smoker for 225 F. Use whatever wood you prefer, but I recommend a lighter wood (such as apple) since the cheese will easily absorb the smoke.
  • Unwrap the cream cheese but leave it on the foil.
  • Place into the freezer for 10 minutes to harden slightly.
  • Use a knife to cut diagonal slits across the top of the cheese. Cut about 1/4" deep.
  • Sprinkle the cheese liberally with the seasoning. Press it down gently to get into the slits you just cut.
  • Place the cheese (on the foil) onto your smoker and smoke 1 1/2-2 hours depending on how smoky you want your cheese. The cheese should soften slightly but not melt.
  • Remove and serve with crackers.

Notes

I place my cream cheese on a foil-wrapped cedar plank. I found that it makes it easier to get the cheese on/off the smoker. As the cheese softens it slides off the foil easily onto my serving platter.
Leftover cheese can be served cold or warmed in an air fryer, oven or microwave.

Nutrition

Calories: 99kcal | Carbohydrates: 2g | Protein: 2g | Fat: 10g | Saturated Fat: 6g | Polyunsaturated Fat: 0.4g | Monounsaturated Fat: 3g | Cholesterol: 29mg | Sodium: 690mg | Potassium: 37mg | Sugar: 1g | Vitamin A: 381IU | Calcium: 27mg | Iron: 0.03mg

Nutritional values are approximate.

Easy Dill Tartar Sauce

It was not fru-fru dinner night. And I’m way ok with that. Some crunchy fish filets and fries were on the menu. I’m a fish and chips addict, whether I get them in an Irish pub or out of the freezer. But I gotta have a good tartar sauce (or sometimes, malt vinegar) to go with them. That’s right, ‘them’. Not only do I like a nice dilly sauce with my fish, I also dip my fries in it. Nothing beats it. Try it! Easy dill tartar sauce is great!

Dill Me In

I like to use fresh dill in this easy dill tartar sauce but that’s not always possible. I’ve found that dried dill works just fine. I like my tartar sauce pretty dilly, so I usually add more. And speaking of more, I’d double the recipe even for 4 servings if you’re a tartar sauce maniac like me. Really, that’s mostly because of the fry-dipping thing. Mayonnaise sauces aren’t popular in the US for fries, but they should be. People are missing out in my opinion!

Also try my malt vinegar aioli.

Easy Dill Tartar Sauce
Print Pin
5 from 1 vote

Easy Dill Tartar Sauce

You'll definitely want to double this recipe! Or even quadruple!
Course Sauce
Cuisine American
Keyword dill, tartar sauce
Prep Time 15 minutes
Get happy time 12 hours
Total Time 12 hours 15 minutes
Servings 4
Calories 208kcal

Ingredients

Instructions

  • Place all ingredients into a bowl.
  • Whisk or stir to combine.
  • Cover and refrigerate until ready to serve.

Notes

Stir again before serving.
You can serve the sauce immediately, but it’s better the next day.

Nutrition

Calories: 208kcal | Carbohydrates: 5g | Protein: 1g | Fat: 21g | Saturated Fat: 3g | Polyunsaturated Fat: 13g | Monounsaturated Fat: 5g | Trans Fat: 0.1g | Cholesterol: 12mg | Sodium: 351mg | Potassium: 26mg | Fiber: 0.3g | Sugar: 1g | Vitamin A: 64IU | Vitamin C: 1mg | Calcium: 6mg | Iron: 0.3mg

Nutritional values are approximate.

Hula Hula Baked Beans

I consider baked beans to be just about the best side dish. There’s just never anything boring about them. There are so many ways to prepare them. Smoky. Sweet. Tangy. The combinations seem endless. Today I made a nice little batch of hula hula baked beans to go with some grilled burgers. A little sweet, and a little citrusy, these beans hit the spot. And they were super-easy to make, too.

Hula Hula Baked Beans

Get Chunky

I went with pineapple rings to top my hula hula baked beans. Why? I thought they looked cool. And everyone knew that the beans had pineapple in them. Upfront. No questions. Ok, sure I could’ve gone with crushed pineapple or pineapple chunks. But why? “Hey, there’s pineapple in here!” that’s what my baked beans said.

Can you substitute canned apples like all those other recipes? Sure. But don’t call them hula hula beans any more if you do!

Also try my peach BBQ beans.

Hula Hula Baked Beans
Print Pin
5 from 1 vote

Hula Hula Baked Beans

A delicious, sweet baked beans recipe that's sure to please!
Course Side
Cuisine American
Keyword baked beans, pineapple
Prep Time 15 minutes
Cook Time 30 minutes
Servings 8
Calories 165kcal

Ingredients

Instructions

  • Preheat oven to 350 F.
  • Lightly spray a 1 1/2 quart casserole dish with non-stick spray.
  • Stir together the beans, molasses, yellow mustard, brown sugar, cinnamon and cloves in a medium bowl.
  • Pour the mixture into the casserole and spread out evenly.
  • Top the casserole with the pineapple slices and dot with the butter.
  • Bake for 30 minutes until bubbly hot.

Notes

This recipe can easily be doubled to serve a crowd!

Nutrition

Calories: 165kcal | Carbohydrates: 35g | Protein: 5g | Fat: 2g | Saturated Fat: 1g | Polyunsaturated Fat: 0.2g | Monounsaturated Fat: 1g | Cholesterol: 7mg | Sodium: 431mg | Potassium: 429mg | Fiber: 6g | Sugar: 15g | Vitamin A: 18IU | Vitamin C: 5mg | Calcium: 77mg | Iron: 2mg

Nutritional values are approximate.

Italian Artichoke Panini using the Cuisinart Griddler

Oh you delicious, crunchy, dripping, yummy sandwich you! This Italian artichoke panini using the Cuisinart Griddler is just another reason my Griddler can be found on my countertop just about every day of the week. I use it that much that rarely does it find its way back into the pantry. Because in just minutes I can have a restaurant-quality sandwich for a fraction of the cost. Hot off the press and perfect.

Italian Artichoke Panini using the Cuisinart Griddler

One Tasty Panini

I tend to put Italian-style meats on my paninis, though it’s not required. You can use your favorites. But I have found that Aldi makes this wonderful pack of Italian meats that also includes provolone cheese. It’s priced right and makes for fantastic sandwiches like this Italian artichoke panini using the Cuisinart Griddler. This isn’t rocket science, as they say. Just use good ingredients and you’ll have a great sandwich.

Just Leave It Be

After you place your sandwich on the hot griddle just leave it alone. Don’t go playing with it. Don’t turn it. Or flip it. Don’t open it to see what’s going on between the slices of bread. Just wait until the outsides get toasty crunchy brown. Then remove it. Then enjoy.

Also try my easy spicy relish paninis using the Cuisinart Griddler.

Italian Artichoke Panini using the Cuisinart Griddler
Print Pin
5 from 1 vote

Italian Artichoke Panini using the Cuisinart Griddler

A slightly nutty, crunchy sandwich that is sure to wow!
Course Main
Cuisine American
Keyword Griddler, sandwich
Prep Time 5 minutes
Cook Time 10 minutes
Servings 2
Calories 473kcal

Ingredients

  • 4 slices Italian bread thicker is better
  • 4 slices Genoa salami
  • 6 slices hot salami or sandwich pepperoni
  • 2 slices provolone cheese
  • artichoke hearts to taste, chopped, patted dry
  • 2 teaspoons vegetable oil olive oil
  • mayonnaise to taste, optional

Instructions

  • Pre-heat your Griddler with the dials set for high-heat panini griddles.
  • Set out the bread slices on a cutting board or counter top.
  • Top with the meats and cheese.
  • Top the sandwiches with the chopped artichoke hearts.
  • Add the top slices of bread to form the sandwiches.
  • Brush the outsides of the bread slices with the oil.
  • Transfer to the Griddler and close the lid. Cook until the bread is golden brown and crunchy.
  • Remove and let cool slightly before opening to add mayonnaise to inside of top pieces of bread.
  • Slice and serve.

Notes

Do not put a lot of pressure on the griddle lid while cooking as it will cause the meats and cheese to escape. Try to keep the lid level so that the tops of the sandwiches cook evenly.

Nutrition

Calories: 473kcal | Carbohydrates: 22g | Protein: 18g | Fat: 34g | Saturated Fat: 16g | Polyunsaturated Fat: 4g | Monounsaturated Fat: 12g | Trans Fat: 0.1g | Cholesterol: 49mg | Sodium: 1304mg | Potassium: 283mg | Fiber: 1g | Sugar: 12g | Vitamin A: 167IU | Calcium: 149mg | Iron: 2mg

Nutritional values are approximate.

Grilled Chicken Gyros using an Outdoor Griddle

These grilled chicken gyros are exactly why I love my outdoor griddle. Fantastic, tender, flavor-packed chicken. Warm, toasted pitas. A quick-and-easy Greek-inspired salad. And of course, tzatziki sauce. This was one great dish and one we’ll make again and again.

Grilled Chicken Gyros using an Outdoor Griddle

Happy And Happier

The chicken for these grilled chicken gyros using an outdoor griddle needs a bit of time to marinate. Go for 2 hours minimum. Twelve is even better. At most, go 24 hours. I used boneless skinless chicken thighs because they have the most flavor thanks to all that fat. If you’re leaning towards the healthier side you can certainly use boneless skinless chicken breasts instead. If they are particularly thick you may want to slice or butterfly them before marinating so they absorb maximum flavor.

The recipe for the tzatziki makes a lot. A big batch. So when it comes time to make your gyros, load up. Or serve some on the side for dipping pita chips!

I use this countertop shredder/grater to grate the cucumber. It does a fantastic job and boy, is it ever easy to clean. I won’t miss my old box grater after using this fun tool!

Also try my ground beef nachos, also made on the outdoor griddle!

Grilled Chicken Gyros
Print Pin
5 from 1 vote

Grilled Chicken Gyros using an Outdoor Griddle

Tremendous flavor in every bite!
Course Main
Cuisine Greek
Keyword griddle, gyro
Prep Time 30 minutes
Cook Time 2 hours 15 minutes
Servings 6
Calories 611kcal

Ingredients

For the chicken

For the tzatziki

For the salad

  • 3 tomatoes seeds removed, diced
  • 3 cucumbers peeled, seeds removed, diced
  • ½ red onion chopped fine
  • ¼ cup fresh parsley leaves chopped
  • 1 pinch kosher salt
  • 1 pinch fresh ground black pepper

For the gyros

  • 6 pita breads warmed

Instructions

For the chicken

  • Place the chicken into a large resealable bag or container.
  • Whisk together the remaining chicken ingredients and add to the chicken.
  • Toss to coat and seal. Refrigerate for 2-12 hours, turning occasionally.

For the tzatziki

  • Grate the cucumber using a box grater or hand grater.
  • Place the grated cucumber into a paper towel or cheese cloth and squeeze out as much of the liquid as possible.
  • Transfer the cucumber to a bowl and add the remaining tzatziki ingredients. Stir and let rest for 20 minutes.

For the salad

  • Combine all of the salad ingredients in a bowl.

For serving

  • Preheat your outdoor griddle on medium high.
  • Drizzle a little oil onto the griddle.
  • Remove the chicken from the marinade and shake off any excess. Place onto the griddle.
  • Grill for 2-3 minutes per side until done. Thicker pieces may take longer.
  • Remove to a plate and cover with foil and let rest for 5 minutes.
  • Remove the chicken from the grill / fry pan onto a plate. Cover loosely with foil and allow to rest for 5 minutes before serving.
  • Chop or slice the chicken as desired.
  • If your chicken thighs are large, you may need to cut them. Mine were small.
  • Lay the pita breads on parchment paper squares that are slightly larger than the pitas.
  • Add some salad to each of the pita breads. Add the chicken and tzatziki (there'll be plenty, so load up)!.
  • Gently roll the pitas up, enclosing them in the parchment paper.

Nutrition

Calories: 611kcal | Carbohydrates: 44g | Protein: 37g | Fat: 31g | Saturated Fat: 8g | Polyunsaturated Fat: 6g | Monounsaturated Fat: 14g | Trans Fat: 0.1g | Cholesterol: 151mg | Sodium: 936mg | Potassium: 997mg | Fiber: 5g | Sugar: 7g | Vitamin A: 1046IU | Vitamin C: 25mg | Calcium: 187mg | Iron: 3mg

Nutritional values are approximate.