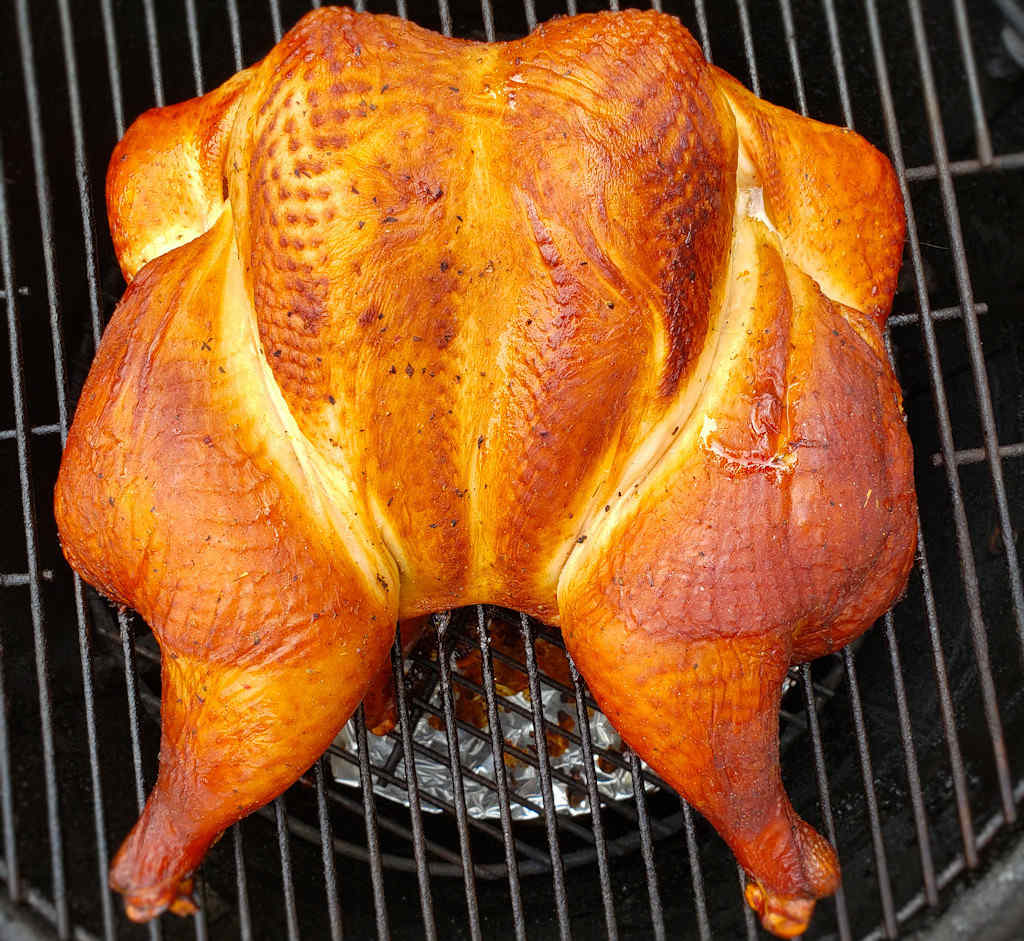
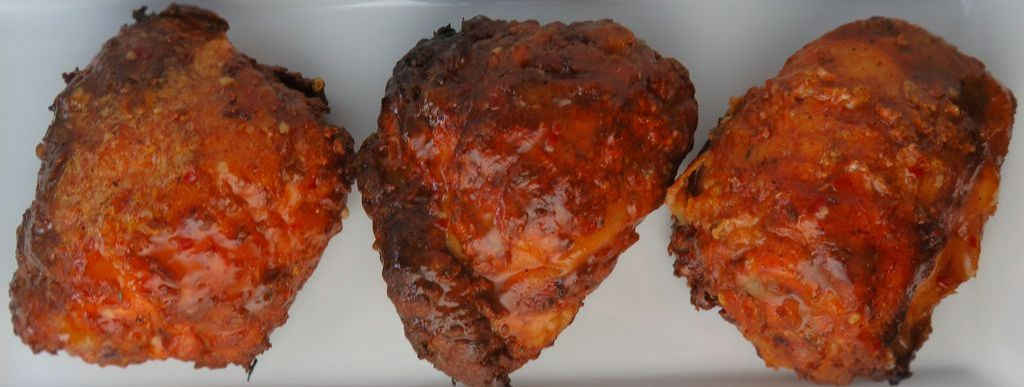
No, it’s not an illusion. It’s not Photoshopped. And I’m not fibbing. This crunchy, moist, tender, delicious chicken was not deep-fried. It was made on a charcoal grill using the Vortex. There’s no such thing as bad ‘fried’ chicken on the Vortex, and this orange chicken using the Vortex is just another example of just how great it can be. Make extra, because you’ll want more. And more. This chicken has the perfect orange-flavored sauce with plenty of fried chicken crunch!
Perfect Orange Chicken
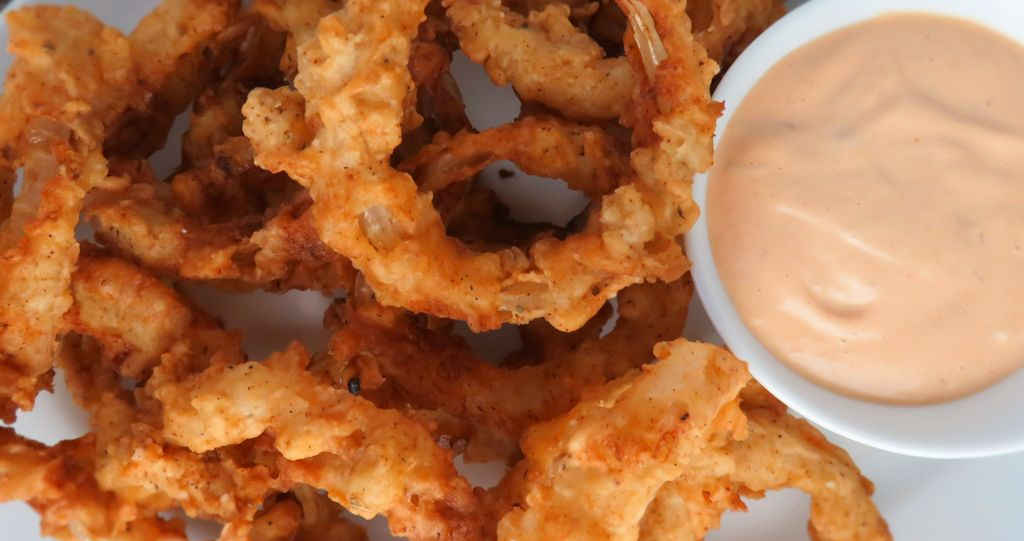
I like to brush my orange chicken using the Vortex with the orange sauce just before it is completely done. I let it cook just a bit more to set the sauce. You can stop there, or serve the chicken with extra sauce for dipping. Or drizzle the chicken with more sauce after you plate it. The sauce is great, and also makes for a fantastic wing sauce!

Also try my Korean fried chicken made with a Vortex and also my buttery garlic chicken (it’s crazy garlicky!).

Orange Chicken using the Vortex
Equipment
Ingredients
For the chicken
- 6 chicken thighs bone-in skin-on
- 1 cup all-purpose flour
- 2 teaspoons kosher salt
- 2 teaspoons ground black pepper
- 1 tablespoon ground ginger
- ½ teaspoon ground nutmeg
- 1 teaspoon dried thyme
- 1 teaspoon dried rubbed sage
- 1 tablespoon paprika
- ½ teaspoon cayenne pepper
- vegetable oil
For the egg wash
- 2 eggs
- ¼ cup water
For the orange sauce (you'll have plenty of sauce leftover for another batch)
- 3 tablespoons vegetable oil
- 3 cloves garlic minced
- 3 cups orange juice
- 1 small small orange zested
- ¾ cup honey
- ⅓ cup rice vinegar
- ½ teaspoon kosher salt
- ½ teaspoon ground black pepper
- 1 teaspoon red pepper flakes
- 2 tablespoons cornstarch
- ¼ cup water
Instructions
For the chicken
- Fire up your charcoal grill with the Vortex insert in the middle, small side up. Get the charcoal good and hot and just ashed over.
- Combine the flour, salt, black pepper, ground ginger, nutmeg, thyme, sage paprika and cayenne pepper in a resealable bag, bowl or pie pan.
- Whisk together the eggs and water.
- Season each piece of chicken with salt and pepper then dip into the flour mixture.
- Shake off the excess and dip into the egg wash.
- Shake off the excess and dip one more time into the spice mixture.
- Transfer chicken around the Vortex.
- Close the lid and cook for 45 minutes or until the chicken hits 145 F as measured in several places. Turn the grill lid 90% every 15 minutes.
- Lightly brush each piece of chicken with the orange sauce and cook another 5 minutes.
- Remove to a wire rack to cool then serve with more orange sauce for dipping. Alternatively, dip each piece of chicken into the sauce and serve.
For the orange sauce
- Heat the oil in a medium saucepan over medium heat.
- Add the garlic and saute for 2-3 minutes.
- Add the remaining ingredients except for the water and corn starch. Stir to combine.
- Bring to a simmer and let simmer for 20-30 minutes or until reduced by half.
- Mix together the corn starch and water and slowly whisk into the sauce. The sauce will thicken.
- Bring to a boil then remove from the heat.
Notes
Nutrition
Nutritional values are approximate.