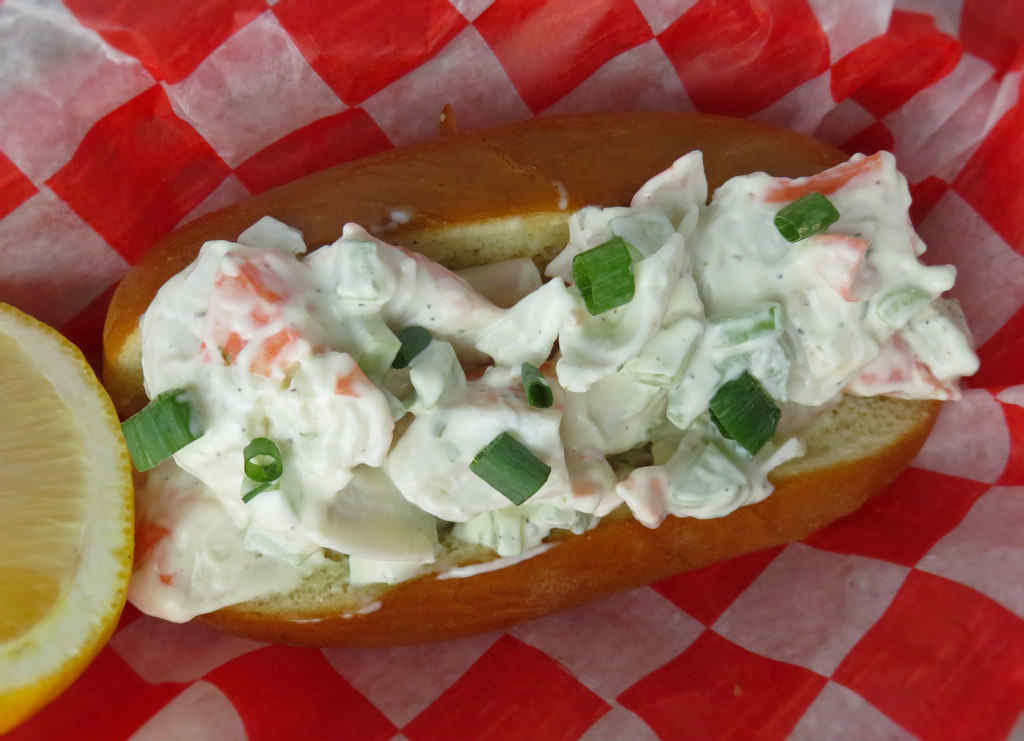
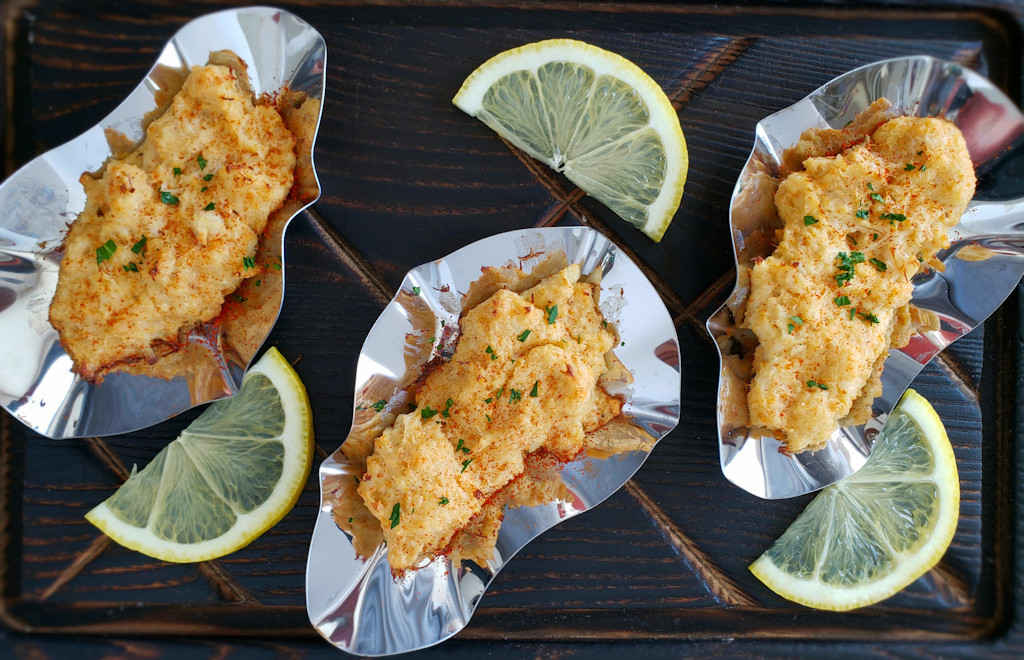
I dream about lobster rolls. Real ones. Loaded with lobster. I’ll take them with or without mayonnaise. My poor man’s lobster roll is not the real thing. It’s not supposed to be. But it is supposed to get as close to the flavor of the real thing without spending a lot of money. And for me, it works.
A Great Substitute For The Real Thing
My poor man’s lobster roll is enough to get me by until I can head to Caplinger’s Fresh Catch here in Indianapolis for a fresh lobster roll. But I can enjoy my imitation version without shame. I don’t even have to close the drapes so no one notices that I’m using imitation lobster! Heck, it’s tasty!
I almost always use Blue Plate mayonnaise in the dishes I make. I think it is the best around. If you can’t find it locally you can pick it up online for a fair price.
I dream about lobster rolls. Real ones. Loaded with lobster. I’ll take them with or without mayonnaise. My poor man’s lobster roll is not the real thing. It’s not supposed to be.
Note: This recipe was developed using the Char-Broil Big Easy Oil-Less Fryer. If you are cooking using the Char-Broil Smoker-Roaster Grill you should cook with the lid open and the temperature set to High. You might also need to adjust the cooking time.
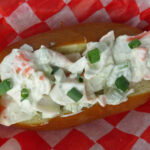
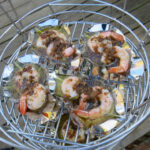
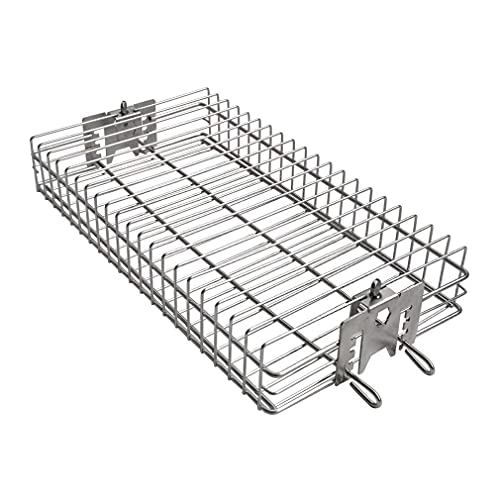
Sometimes it’s the little things. I bought 12 stainless steel oyster shells the other day and ever since I can’t stop cooking with them. I initially made these BBQ shrimp in oyster shells on my gas grill. We enjoyed them so much that I next made them on my Char-Broil Big Easy. Getting a dozen shells on the Big Easy is a bit tricky but I got it to work and the shrimp were delicious! (If you don’t have two Bunk Bed baskets, or even one, that’s ok! Just use the basket that comes with the Big Easy and cook four shells at a time!).
The broth that the BBQ shrimp cooks in the oyster shells on the Char-Broil Big Easy is what adds such tremendous flavor to the shrimp. As an added bonus, you’re left with a good bit of the broth in the bottom of the shells after you devour the shrimp. That broth is absolutely crazy good for soppin’, so grab a few slices of grilled French bread and get to dippin’!
Loading the Char-Broil Big Easy
You can fit 4 oyster shells per ‘level’ in the Big Easy. The bottom level is the bottom of the standard basket that comes with the Big Easy. You’ll want to add the shells, the shrimp and the butter mixture to that level before continuing on to the next.
Then, add a Bunk Bed Basket, latching it so it’s just above the bottom level. Add 4 shells to that level, the shrimp and butter mixture. Finally, you need to add one more Bunk Bed Basket. That’s trickier because it’s easy to knock the bottom basket lose and onto the shrimp below. I take the bunk bed basket and insert it at a bit of an angle. I turn it so that the latches on the sides fit in between the latches on the first bunk bed basket (at a 90 degree angle to them). Then I latch it, add shells, shrimp and butter.
Unloading the Char-Broil Big Easy
Removing the shells is a little tricky too. I found that they cooled pretty quickly and I was able to remove them by grabbing them along the edges with my hands without burning myself, all the while being super duper careful that I didn’t tilt them and get super hot butter on myself! You might want to grab some heat-proof gloves or long tongs (with good rubber grippy tips!) instead. PLEASE BE CAREFUL!
Peel and devein the shrimp. Leave the tail shells on if desired.
Fire up your Big Easy. You can fit 4 oyster shells in the Big Easy basket. To cook all 12 at the same time you'll need 2 Big Easy bunk bed baskets. See my notes on how to use them.
Melt butter in a small saucepan over medium-low heat. And remaining ingredients except shells. Stir.
Bring mixture to a slow simmer and let simmer until reduced by half, 3-4 minutes. Remove from heat.
Working one basket at a time, add 4 oyster shells to the Big Easy. Add two shrimp into each SOS shell and add a tablespoon of the butter mixture.
Place the shells into the Big Easy baskets grill. Cook until the shrimp begin to turn pink on the outside, 7-8 minutes.
Carefully remove the shells from the basket. I found that they cool to the touch pretty quickly (but the Big Easy baskets DO NOT!) so I just grabbed them on the sides with my hands. You might want to use grill gloves or good tongs.
Notes
You can fit two Big Easy Bunk Bed baskets into the Big Easy, but you have to be careful doing it. Adding the first one is easy, just insert it into the basket and secure the two latches to the sides of the basket. Adding the second basket is trickier. You have to insert it at a slight angle, then you can turn it flat. The latches will be at 90 degree angles to the first basket (i.e. in the gaps between the first one’s latches). I recommend that you try inserting the baskets a few times before doing it for real.
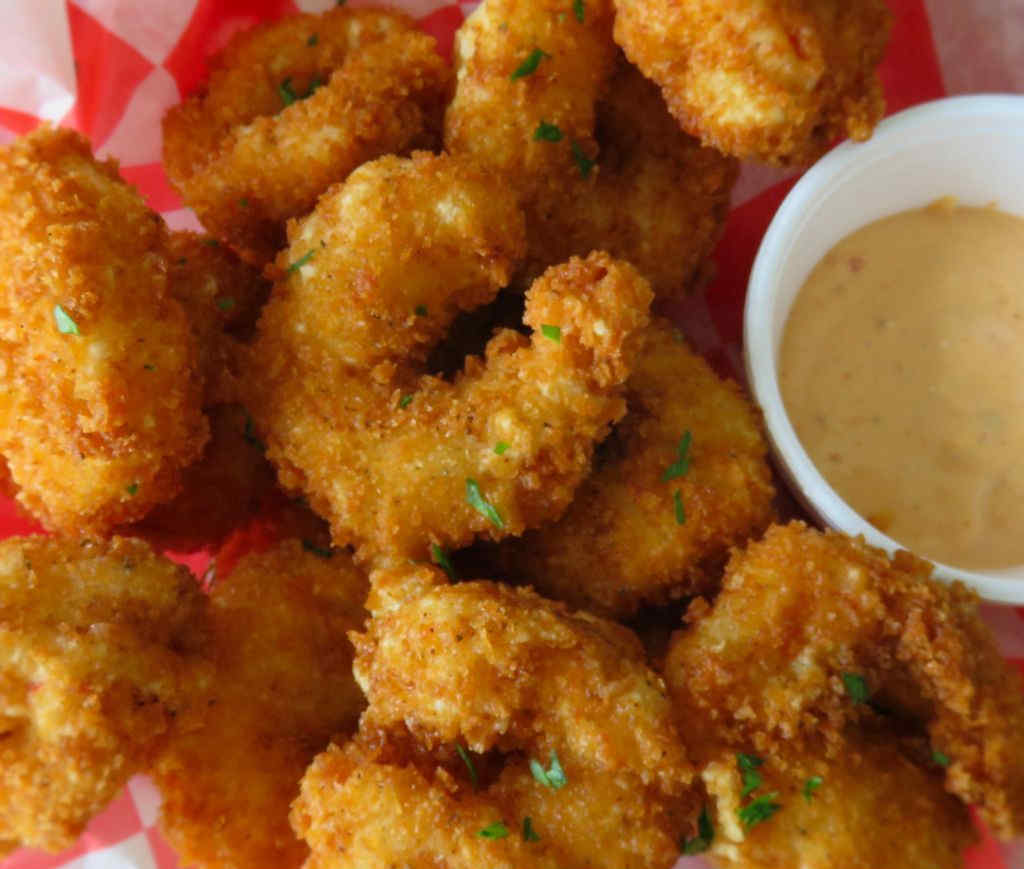
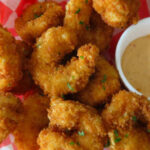
Mmmmm. Crispy panko fried shrimp. If you ordered these little bites of yumminess at a restaurant how many would you get? Five? Six? That’s just not nearly enough. Not even close. They’re just too good to only eat a handful. They’re seasoned simply, fried quickly, and ready to devour before you know it. And there’s no shortage of great crunch, that’s for sure.
Blank Shrimp Need Not Apply
For a little extra ‘something’ I often sprinkle my panko fried shrimp with just a bit of Old Bay seasoning just before I serve them. Not too much seasoning. But enough that you get that wonderful seafood spice aroma and just a little of that great flavor. You don’t want to bury them in it. Try it and you’ll find yourself doing it too.
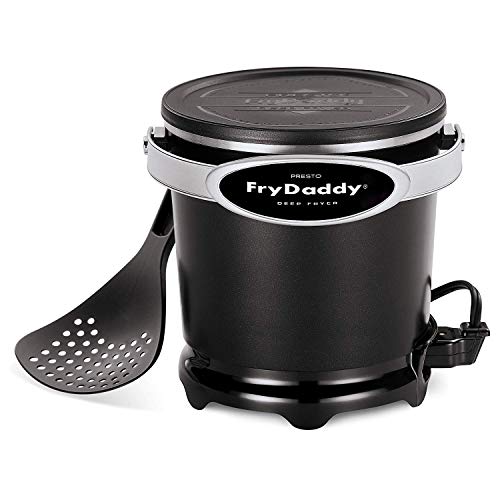
I get out my big deep fryer when it’s time to fry a large batch of food. It comes to temperature quickly and it maintains that temperature perfectly. It has a built-in oil filter and storage unit so I can re-use the oil several times.
Mmmmm. Crispy panko fried shrimp. If you ordered these little bites of yumminess at a restaurant how many would you get? Five? Six? That’s just not nearly enough.
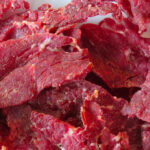
I have made a ton of beef jerky over the years. I loved every flavor, and I never got any complaints from friends and neighbors on it either. But all that time I had never tried to make jerky using sous vide. Well, folks, this Colorado spicy beef jerky using sous vide is off-the-charts crazy good. Packed with flavor, the meat is tender with just the right chew. The perfect chew. I can eat this like popcorn. And I did.
A Hint Of Heat
I used Walton’s seasoning and Sure Cure to make this Colorado Spicy Beef Jerky using Sous Vide. The end result was perfect. I’ll use this same technique for now on whenever I make beef jerky. It’s as easy as you can get and as delicious as can be. Though the name says ‘spicy’, it’s not screaming hot. It does sneak up on you a bit, so when you take that first bite, don’t expect the heat to be in the front. No, give it a second… it’ll come. Trust me.
I like to load up my dehydrator. To do that I picked up a handful of extra trays. They really add a whole lot more drying space! Since I have to rotate my trays, I write a number on each one on a piece of blue painter’s tape so I can keep track of them.
This Colorado spicy beef jerky using sous vide is off-the-charts crazy good. Packed with flavor, the meat is tender with just the right chew. The perfect chew. I can eat this like popcorn. And I did.
Course Appetizer
Cuisine American
Keyword deep-fried, dehydrator, jerky, nesco snackmaster pro
Set up your immersion circulator for 108 F sous vide.
Combine the jerky seasoning and salt cure per package instructions. Wilbur's has an excellent conversion chart if you need to adjust your quantities for the amount of beef being used. For the cure, visit this link here. For converting the sure cure quantity, visit this link.
Place the meat into a large bowl and sprinkle with the seasoning/cure mixture. DO NOT ADD WATER. Using your hands, mix the seasonings and meat well.
Transfer the meat to a sealable bag and vacuum seal. Make sure there are no leaks.
Transfer bag to sous vide setup and heat for 2 hours.
Increase temperature to 130 F and heat for an additional 4 hours.
Turn on your dehydrator and heat it to 160 F.
Remove the meat from the bag and transfer to the dehydrator. Do not overlap the pieces.
Dry for 2-3 hours. Let cool before storing.
Notes
Get extra trays so you can make more jerky at a time!
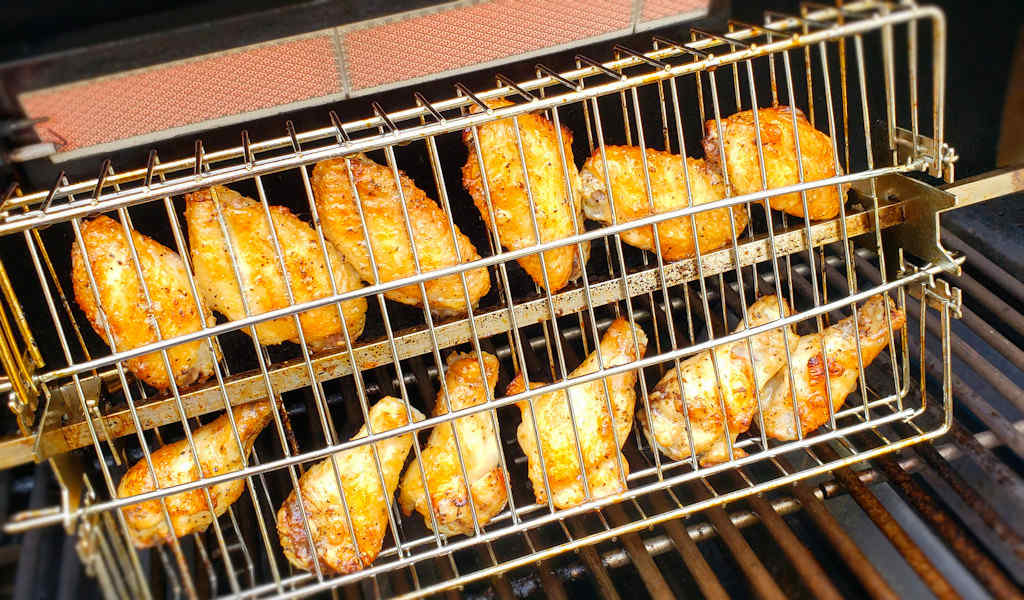
I recently posted my very successful chicken wing cookout using a Napoleon basket on my Weber S670 gas grill. I was very happy with the results. But, I did notice that I lost a little bit of my wing seasoning as the wings went around and around, bouncing from one side of the basket to the other. I thought, maybe, just maybe, there’s another way. Another way where I don’t lose all of that flavor. And here it is, my deluxe rotisserie chicken wings! Same recipe, different basket, and awesome results again, without the loss of a bit of the seasonings! Win!
The No-Bouncing-Around Zone!
The Only Fire basket clamps the wings in so they don’t roll around so much. Now, cheap, thin, skinny wings are still gonna roll a bit. I buy big, meaty wings. They definitely weren’t bouncing around. These deluxe rotisserie chicken wings deserve big, quality wings.
This basket is great for other things too, like pork chops, pork loin, chicken breasts, and fish!
The Only Fire basket clamps the wings in so they don’t roll around so much. Now, cheap, thin, skinny wings are still gonna roll a bit. I buy big, meaty wings. They definitely weren’t bouncing around.
Place wings in a large resealable baggie or container.
Add the oil and seasoning.
Seal and toss to coat.
Refrigerate for 1 hour.
Fire up your grill with a rotisserie attachment. You do not want any direct fire beneath the basket.
I put a disposable pan under the basket to catch and drippings. On a charcoal grill you'll want to keep the lit coals in front of and behind the rotisserie. For a gas grill you want any burner(s) to the left and right of the basket to be lit if your burners run from-to-back. If your burners run from left-to-right you want to have the burner(s) in front of and behind the basket to be lit. If you have an infrared burner above your basket, light it also and turn it to medium-high. All other burners should be on high.
Transfer the wings to the basket and place on your grill.
Turn on the rotisserie and close the lid. You want high heat, so no peeking.
Let the wings cook for 20 minutes before checking them. They should start to crisp and the meat will start to pull back from the bones. Mine ended up taking 25-30 minutes until they got how I liked them.
Carefully remove the wings from the basket and sauce and serve.
Notes
Use caution removing the wings from the basket as it gets quite hot!
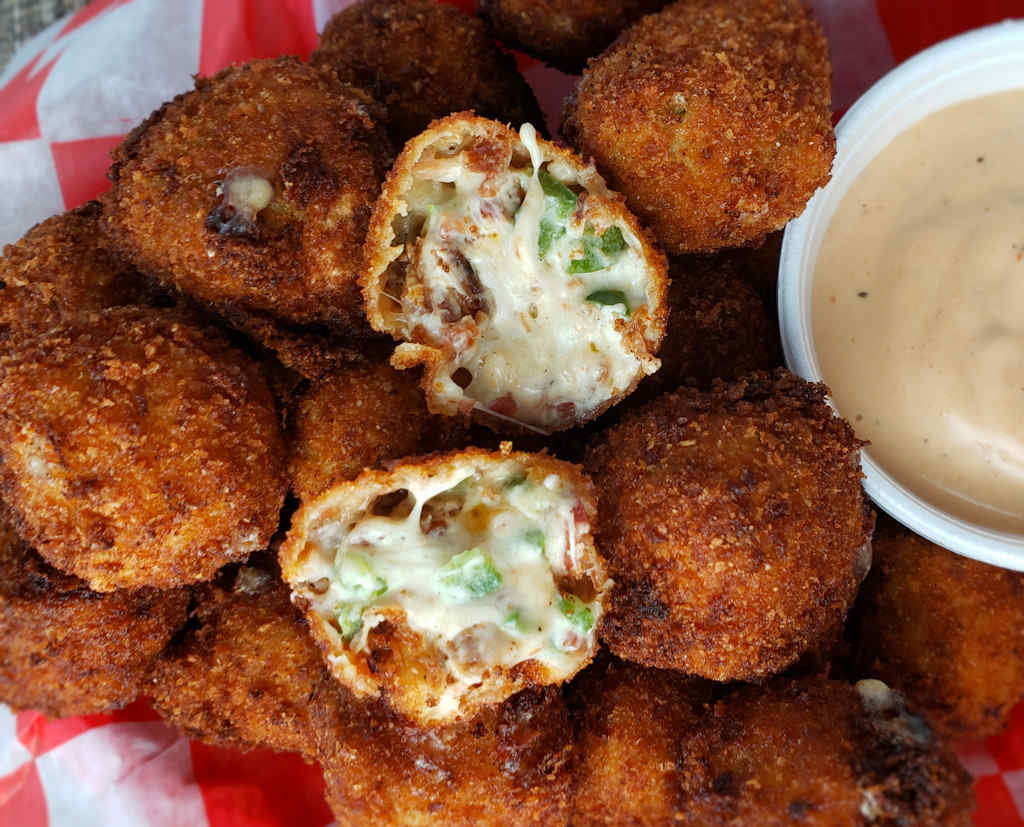
I’m a huge fan of jalapeno poppers. A little heat, a little cheese (or a lot). Every bite is packed with flavor. These jalapeno popper bites take that yummy concept and elevate it to true greatness. And they’re deep-fried. I mean seriously. I could eat an insane number of these. Don’t just double the recipe, triple it.
Reheating Any Leftovers Is Easy
On the off-chance you have leftovers (only possible if you quintuple the recipe, in my opinion), these jalapeno popper bites reheat just fine. Just pop them in a 350 F oven for 5-10 minutes and devour!
I often look back at recipes and ponder “What could I do different?”. Not now. Not for this. These are perfect. I can eat way too many of these. Actually, I did.
The Presto Fry Daddy is perfect for making smaller batches of food. It only uses a few cups of oil and comes to temperature quickly. Clean-up is easy too!
I’m a huge fan of jalapeno poppers. A little heat, a little cheese (or a lot). Every bite packed with flavor. These jalapeno popper bites take that yummy concept and elevate it to true greatness
In a large bowl combine the shredded cheese, cream cheese, jalapenos, cooked bacon, and garlic.
Scoop out about 1 tablespoon of the mixture and form it into a tight ball.
Place on a parchment-lined baking sheet.
Repeat with the remaining cheese mixture.
Transfer the baking sheet to the freezer and chill for 30 minutes.
For the assembly
Set out three wide and deep plates. Pie plates work the best!
First plate: Whisk together the flour, salt and pepper.
Second plate: Whisk together the eggs and water.
Third plate: Whisk together the bread crumbs, garlic powder, and cayenne pepper.
Remove the cheese balls from the freezer. Working in batches, and making sure you cover the balls completely at each plate, dredge the balls first in the flour mixture, then into the egg mixture, and finally the bread crumbs.
Transfer to a wire-rack.
For the frying
Heat up your deep fryer to 350 F.
Working in batches, fry the cheese balls for 3-4 minutes, until golden brown, rotating as they cook.
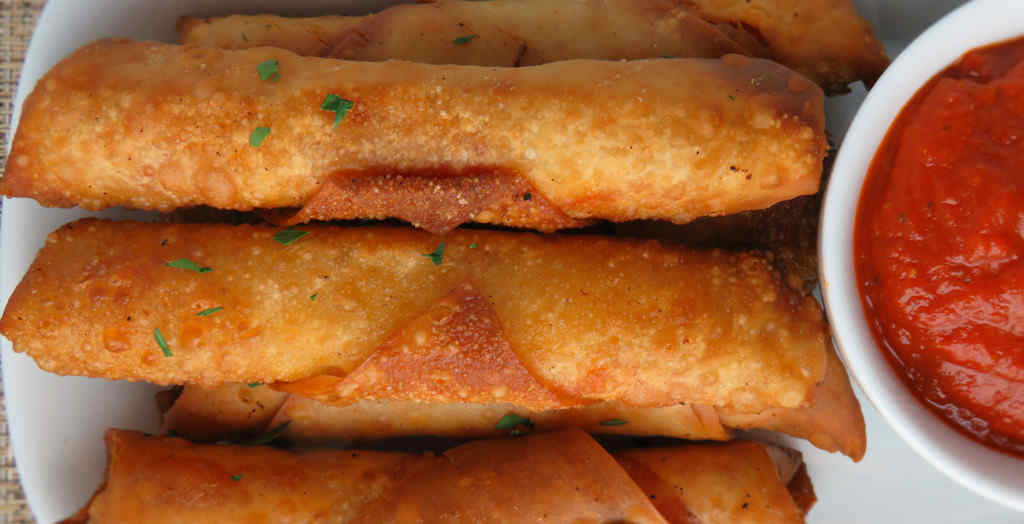
Ever bite into an appetizer, roll your eyes, make that ‘ooooooh my’ sound and smile? You turn to the person next to you and you smile ‘that’ smile? That’s what we did when we took our first memorable bite of these fried mozzarella pepperoni sticks. The egg rolls are so crunchy and yummy. The cheese gets all yummy gooey, melty, yummy. The pepperoni adds a bite of meaty spiciness. All dunked in warm marinara.
Don’t Mess With Perfection
We both agree, we’ll probably not make anything more delicious or as addicting as these fried mozzarella pepperoni sticks. Oh we could probably make some changes. Maybe use a different cheese. I think a pepperjack cheese or anything spicy would be great. Use pizza sauce for dunking. But why? There’s no point at all messing with this level of perfection. Just make them and enjoy and don’t over-think them. They’re awesome!
I get out my big deep fryer when it’s time to fry a large batch of food. It comes to temperature quickly and it maintains that temperature perfectly. It has a built-in oil filter and storage unit so I can re-use the oil several times.
Every bite into an appetizer, roll your eyes, make that ‘ooooooh my’ sound and smile? That’s what we did when we took our first memorable bite of these fried mozzarella pepperoni sticks.
Heat oil to 375 F in a deep fryer, Dutch oven or deep skillet.
Working in batches, place egg roll wrappers in front of you with one corner towards you and one pointing away from your. The others will point to your left and right, forming a diamond. The wrappers are rectangular so it won't be a perfect diamond, but close enough.
Place three pieces of pepperoni in the center of the wrapper, leaving about an inch between the pepperoni and the left and right points of the diamond.
Center a piece of cheese over the pepperoni.
Grab the bottom point of the wrapper and fold over the top of the cheese. Fold in the sides. Then roll up until you get to the top point. Just before you roll that last inch brush the inside of the wrapper with water to help hold.
Fry the sticks in oil for about 1 minute or until golden brown.
Remove to a wire rack-lined sheet pan to drain and cool slightly.
Think crab cakes. Cooked and served in oyster shells, these are easy to make and fun to eat. I have a real problem containing myself around crab cakes, and these are no exception. Simple ingredients, nothing hides that great crab flavor. I really enjoyed my crabmeat stuffed oyster shells… except that I should’ve made more! This has quickly become a favorite in our house. They’re easy to make and delicious to boot! I was already a big crab addict. These just made that worse!
Fun Shells Make For Fun Food!
I used stainless steel reusable oyster shells, which have quickly become my go-to servers for seafood and well, just about anything I can fit into them. Even though they go onto a grill or in the oven, they cool off quickly so you can handle them. Just pick them up and slurp them down, just like you were eating oysters. Fun! It also means I can devour a whole bunch of these crabmeat stuffed oyster shells in no time!
Think crab cakes. Cooked and served in oyster shells, these are easy to make and fun to eat. I have a real problem containing myself around crab cakes, and these are no exception.
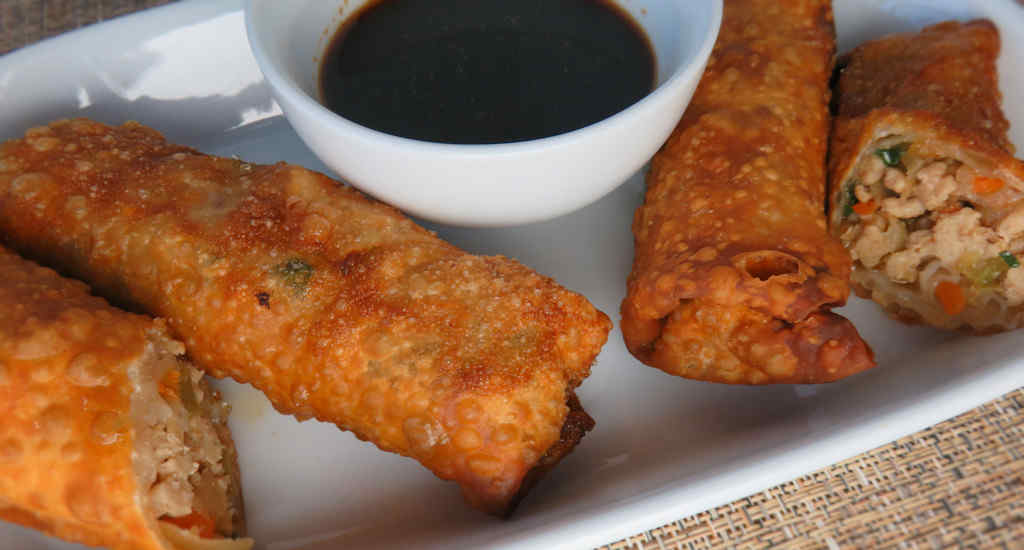
As much as we both loved the filling in these chicken or pork egg rolls, let’s face it, it’s all about that crunch. Everyone loves egg rolls for the crispy, crunchy delicious fried wrappers. If the filling was the star we’d just make that and plop it on a plate and call it dinner. Instead, we wrap it in crazy addicting ‘blanket’ of yumminess. It’s really hard not to eat too many of these.
I Like A Bit Of A Kick
If you don’t want your chicken or pork egg rolls to have a bit of a kick, simply leave out the sriracha sauce. If you like the kick, but don’t have sriracha on hand, dried red pepper flakes are a great substitute. I think they need a bit of heat. It’s just another level of flavor in great bite after great bite.
If I’m feeding a crowd I’ll use my big deep fryer for these egg rolls. But if it’s just the two of us my go-to fryer is the Fry Daddy.
I get out my big deep fryer when it’s time to fry a large batch of food. It comes to temperature quickly and it maintains that temperature perfectly. It has a built-in oil filter and storage unit so I can re-use the oil several times.
Everyone loves egg rolls for the crispy, crunchy delicious fried wrappers. If the filling was the star we’d just make that and plop it on a plate and call it dinner.
Heat 1/4 cup of oil in a large Dutch oven or pot over medium high heat.
Stir in the garlic, ginger, and celery. Saute for 2 minutes, stirring constantly. Do not let the garlic burn.
Stir in the coleslaw mix. Saute for 5-10 minutes, stirring constantly, until the cabbage is wilted.
Crumble in the ground meat, oyster sauce, soy sauce, sesame oil and sriracha.
Stir fry until the meat is done, about 5 minutes.
Turn off the heat and stir in the green onions. Let cool slightly before assembling the egg rolls.
Get your egg rolling station ready. You'll want a small cup of warm water for dipping your fingers into.
Working in batches, place an egg roll in front of you with a point towards you, like a diamond. Dip your fingers in the water and wet the edges of the roll.
Place a tablespoon of the meat mixture on the roll just below the center, towards you. Grab the bottom point and fold it over the mixture. Fold in the sides and then roll the wrapper up towards the furthest tip. Press down on the sides and seams to seal.
Heat oil in a deep fryer (3" to deep fry) or pan (about 2" to shallow fry) to 350 F.
Working in batches, deep fry the rolls until golden brown and crispy, rotating to make sure all sides get fried.
Remove to a wire rack to drain and cool slightly before serving.
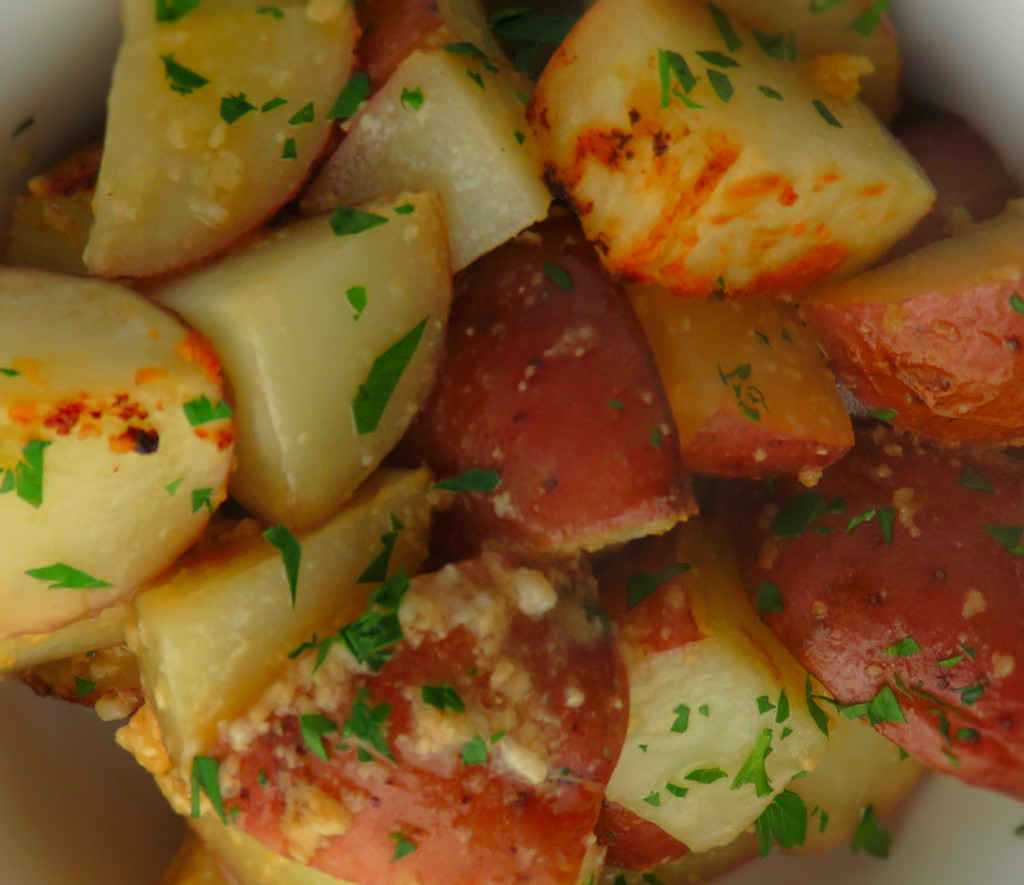
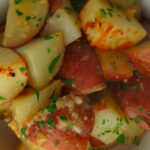
Who doesn’t love perfectly roasted red potatoes? A little garlic, a little citrus, a little cheese and a little time and you’ve got the perfect side dish. A light crunchy outside, creamy buttery inside. I used red potatoes in my garlic red potato recipe, but you could use any potato you want. Fingerlings are great made this way too. You get lightly crunchy outsides. And fluffy, tender insides. The perfect potatoes!
Garlic. Everywhere.
The addition of lemon really lightens these garlic red potatoes. I wouldn’t leave it out. If you want a bit of a kick, add a few good pinches of dried red pepper flake. To ensure your potatoes come out perfectly, select potatoes that are all approximately the same sizes when quartered. If you use smaller potatoes, such as fingerlings or baby potatoes, you can keep them whole if you wish.
I also make these potatoes on my grill. I use a grill basket to make cooking them easier. It also makes for easy cleanup.
Who doesn’t love perfectly roasted red potatoes? A little garlic, a little citrus, a little cheese and a little time and you’ve got the perfect side dish. A light crunchy outside, creamy buttery inside.