Copycat Outback Steakhouse Bloomin’ Fried Shrimp

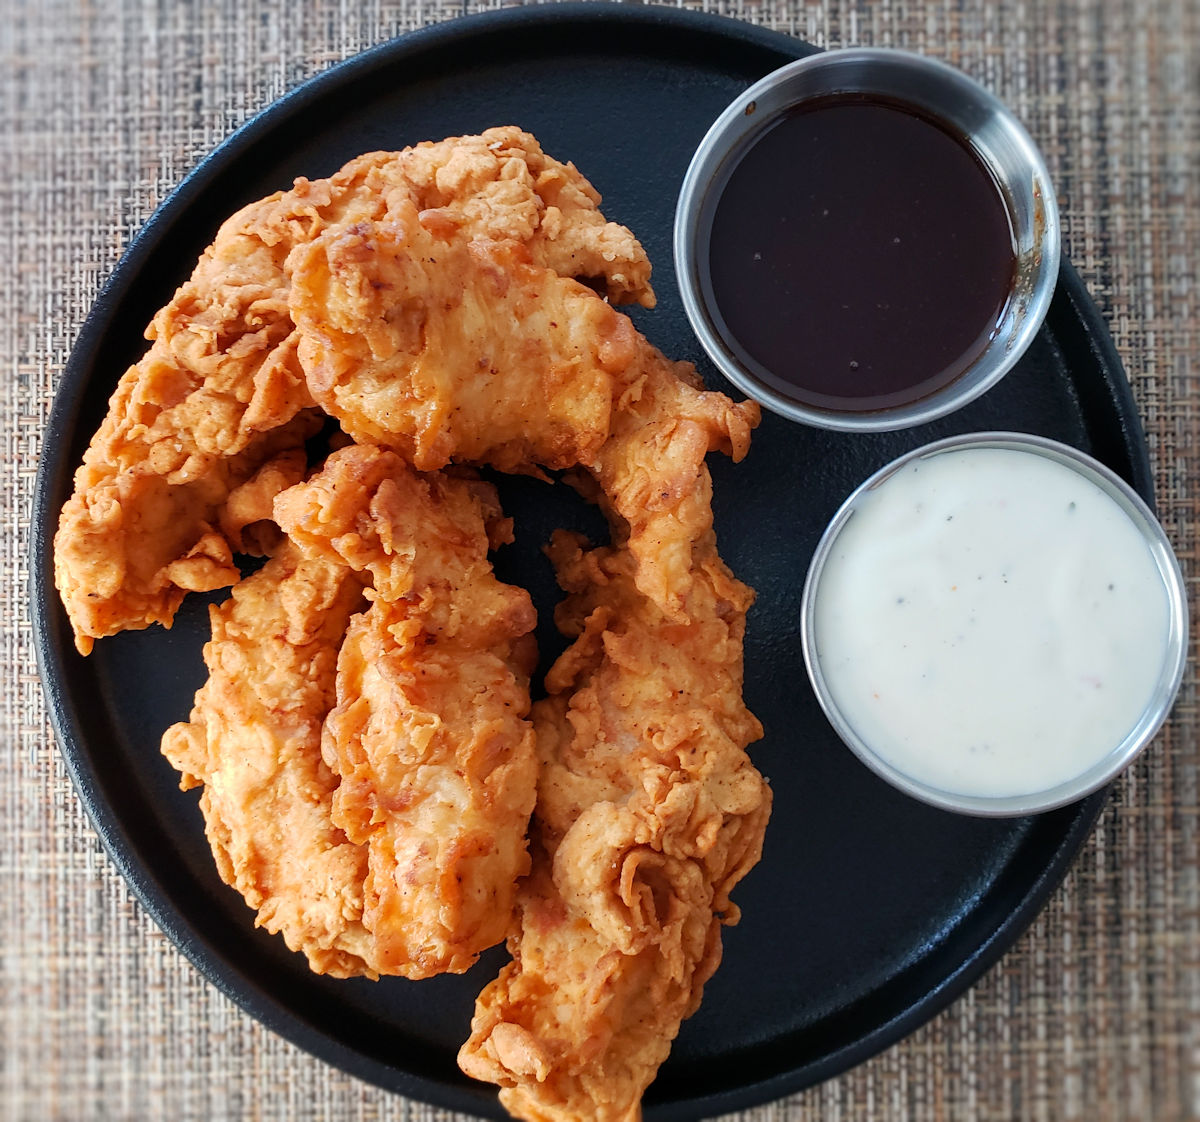
Oh, how I do love perfectly battered, perfectly fried shrimp. As soon as I took my first bite of this copycat Outback Steakhouse Bloomin’ Fried Shrimp I knew I should’ve made more. And I should’ve doubled the sauce recipe, too. The shrimp are seasoned just right. They’re tender. The batter stays on and that’s a major plus. The dipping sauce is different. Kind of cocktail sauce-like, but mayonnaise-based. It’s quite good and would be great with fried fish or even on a fish sandwich. These are great shrimp.

Copycat Outback Steakhouse Bloomin' Fried Shrimp

The Perfect Combination

The key to making these copycat Outback Steakhouse Bloomin’ fried shrimp is to not over-cook them. For me, that means about 90 seconds. I use 16-20 count (large) shrimp. If you’re new to frying shrimp, I recommend starting with just one little ole shrimp. Fry it, and keep an eye on the time. When you think it’s done pull it out and try it (after cooling of course). If it’s too done, knock 15 seconds off the cook time and try another test shrimp. Not done enough? Add 15 seconds and try again.

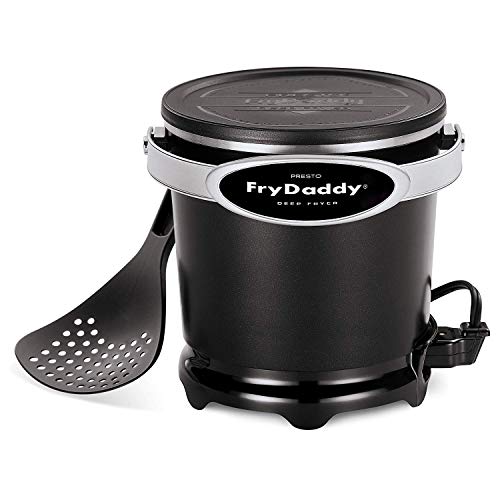
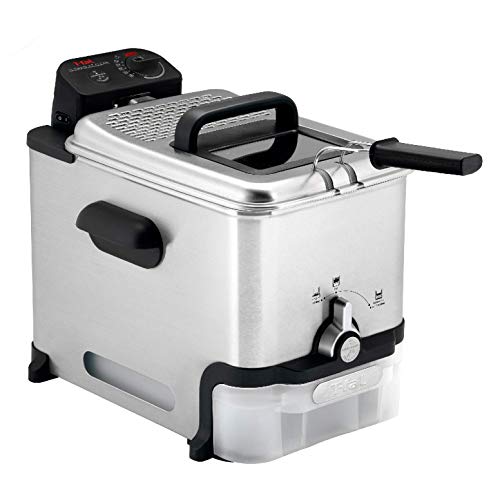
The Presto Fry Daddy is perfect for making smaller batches of food. It only uses a few cups of oil and comes to temperature quickly. Clean-up is easy too!

Also try my copycat of the Outback Steakhouse Gold Coast coconut shrimp.

Copycat Outback Steakhouse Bloomin' Fried Shrimp
Print Pin
5 from 1 vote

Copycat Outback Steakhouse Bloomin’ Fried Shrimp

Fantastic shrimp with an equally-fantastic dipping sauce.
Course Appetizer or Main
Cuisine American
Keyword deep-fried, shrimp
Prep Time 15 minutes
Cook Time 15 minutes
Servings 4
Calories 470kcal

Ingredients

For the Bloomin' Sauce

For the shrimp

Instructions

For the Bloomin' Sauce

  • Whisk together all ingredients in a small bowl.
  • Refrigerate until ready to use.

For the shrimp

  • Heat 3" of oil to 350 F in a deep fryer or Dutch oven.
  • In a pie plate or shallow bowl, combine the flour, paprika, garlic powder, salt, pepper and cayenne.
  • In another pie plate or shallow bowl, stir together the buttermilk and water.
  • Place a wire rack over a cookie sheet.
  • Coat the shrimp in the flour mixture and shake off any excess.
  • Roll the shrimp in the buttermilk and shake off any excess.
  • Return the shrimp to the flour mixture and coat again. Shake off any excess and transfer to the wire rack.
  • Working in batches if needed, fry the shrimp for 1-2 minutes (I prefer 1 minute and 30 seconds), turning once, until golden brown. Remove to another wire rack or a paper towel-lined plate.
  • Serve with the Bloomin' sauce for dipping.

Notes

Make extra sauce. It’s yummy!

Nutrition

Calories: 470kcal | Carbohydrates: 54g | Protein: 9g | Fat: 24g | Saturated Fat: 5g | Polyunsaturated Fat: 13g | Monounsaturated Fat: 5g | Trans Fat: 0.1g | Cholesterol: 18mg | Sodium: 1026mg | Potassium: 219mg | Fiber: 2g | Sugar: 5g | Vitamin A: 411IU | Vitamin C: 9mg | Calcium: 91mg | Iron: 3mg

Nutritional values are approximate.
Sour Cream Sloppy Joes

Wow. Just wow. Someone went and messed with my beloved Sloppy Joes and to my shock, they made them better. I didn’t think that was possible. And they’re not just a bit better, but a WHOLE LOT better! These sour cream Sloppy Joes are different. Totally different. It’s a cross between a traditional version with a creamy sauce and Asian-inspired flavors. It might sound weird, but it works and it works great!

Sour Cream Sloppy Joes

A Crazy Good Variation On The Classic

I’m not sure I would’ve eaten sour cream Sloppy Joes as a kid. I was pretty much stuck on the usual old-school way of making them. Now, I’d jump on these like a bull dog on a pork chop. I loved them. My wife loved them. They were a big hit here. If I could back in time, I’d tell little kid me to ask mom if she would make these instead. She’d probably leave out the hot sauce, though.

I like to use my good ole trusty Dutch oven to make this soup and pretty much darned near anything like it on my stovetop. It’s nice and big and sturdy. That extra weight helps it maintain and distribute heat perfectly. As an added bonus, it’s actually pretty easy to clean up too!

Also try my delicious copycat Manwich sloppy joes.

Sour Cream Sloppy Joes
Print Pin
5 from 1 vote

Sour Cream Sloppy Joes

I'm not sure I would've eaten sour cream Sloppy Joes as a kid. Now, I'd jump on these like a bulldog on a pork chop.
Course Main
Cuisine American
Keyword beef, sandwich
Prep Time 5 minutes
Cook Time 20 minutes
Servings 8
Calories 435kcal

Equipment

Ingredients

Instructions

  • Heat oil in a large skillet or Dutch oven. Add the onion and sauté until just starting to soften.
  • Add in the ground beef. Brown, breaking into small pieces as it cooks.
  • Reduce heat to medium. Stir in the basil, sour cream, chili sauce, soy sauce, hot sauce and salt and pepper to taste. Stir.
  • Toast the buns if desired.
  • Serve beef mixture on buns. Don't be shy with it and make sure to keep it sloppy!

Notes

Serve along with plenty of napkins.

Nutrition

Calories: 435kcal | Carbohydrates: 28g | Protein: 20g | Fat: 26g | Saturated Fat: 12g | Trans Fat: 1g | Cholesterol: 75mg | Sodium: 620mg | Potassium: 429mg | Fiber: 2g | Sugar: 7g | Vitamin A: 260IU | Vitamin C: 5mg | Calcium: 137mg | Iron: 4mg

Nutritional values are approximate.

Spicy Texas Toast Smash Burgers

Why is it that any burger served on Texas toast just tastes better? There’s just something special about it. It certainly rounds out these great spicy Texas Toast smash burgers. Thin patties, cooked perfectly, with that little crust around the edges. Ooey gooey cheese. Bacon. Roasted jalapenos and caramelized onions. Oh, and a sauce. A fantastic burger sauce. This is my kind of burger.

Spicy Texas Toast Smash Burgers

Stay Cheesy, My Friend

I prefer Colby jack cheese on my spicy Texas toast smash burgers. It’s so creamy and it melts so well. Any good melting cheese will work. But trust me on the Colby jack. If you’re lucky, you can find jalapeno Colby jack. A little more heat is a good thing.

The Right Bread for the Job

Go big with the burger sauce. Don’t just dollop a teaspoon or two on the bread. Load it up. The sauce is fantastic, lightly smoky, lightly spicy. And don’t worry, the Texas toast can more than handle it without getting soggy and leaving you with burger sadness. That isn’t going to happen here.

The equipment

Here’s the equipment I use. You can get by using two cast iron skillets. Use a larger skillet for cooking the burgers, and a smaller one to smash the burgers and keep them flat. Since I’m a cooking gadget collector, I prefer to use a few more tools.

The griddle

First, a griddle. You can buy griddles that sit on top of your grill grates or ones that replace them. Just about every grill I have has a griddle on it. I use them for a lot of things, not just smash burgers. You want one that can be placed over the hottest part of your grill so it gets screaming hot.

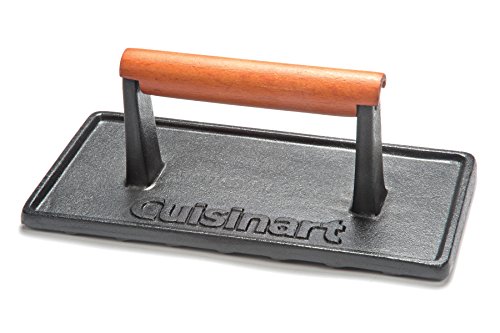
A burger press

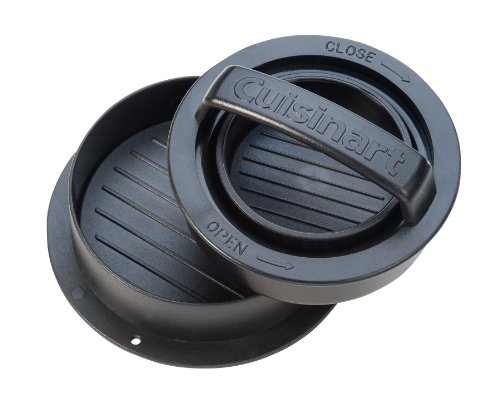
Next, you need a burger press. You can use a heavy cast iron skillet, like I mentioned. Or get a burger press. For easy cleanup I wrap mine in foil first. When I’m done, just peel off the foil and toss. Super easy. Get a press that’s at least big enough to cover two burgers. You only smash one at a time, but if you want to keep them flat, you want to rest the press on top so bigger (and heavier) is better. Plus I’ve found that a bigger, heavier press tends to stay on the burgers whereas a smaller, lighter one is hard to keep centered on the burgers, especially if you have a bunch of them cooking at once.

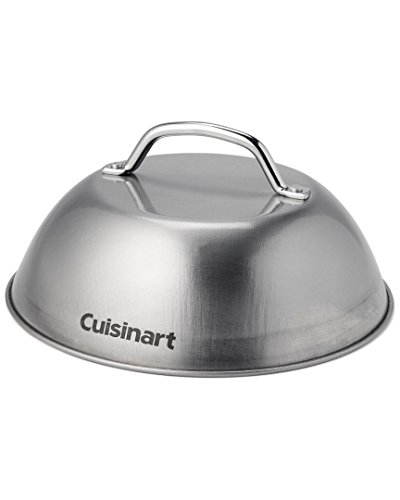
A dome

Next up, a dome. While not 100% required, it does speed the time it takes to melt the cheese and it does it in a nice even fashion. In my opinion you don’t really need one if you’re using a super melty cheese, such as American, but for thicker slices like say a deli pepper jack, you want the cheese to melt before you over-cook the burger and that’s where a dome comes in handy.

Cleaning time!

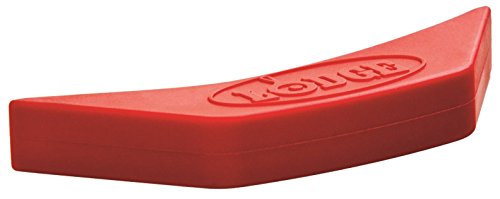
Lastly, you need something to clean your griddle. I like to clean mine when I’m done cooking, but you can do it at the start instead. I use one of these pad holders with a griddle cleaning pad. Then I add a bit of water to my griddle then use the pad (connected to the holder) to scrub off any big chunks and get up some of the grease. I don’t go crazy with it, I always heat the heck out of my griddle before cooking, but I get the worst. The long arm on the pad holder makes it perfect for scrubbing a hot griddle, too.

Also try my smash burger patty melts.

Spicy Texas Toast Smash Burgers
Print Pin
5 from 2 votes

Spicy Texas Toast Smash Burgers

Juicy, super tasty, slightly spicy smash burgers that you'll make again and again!
Course Main
Cuisine American
Keyword smash burgers, spicy
Prep Time 1 hour
Cook Time 15 minutes
Total Time 1 hour 15 minutes
Servings 4
Calories 931kcal

Ingredients

For the burger sauce

For the burger topping

  • 1 white onion diced
  • 1 large jalapeno stemmed, seeded and cut into thin rings
  • 1 tablespoon vegetable oil plus another splash or two

For the smash burgers

Instructions

For the burger sauce

  • In small bowl, stir together all ingredients until well combined.
  • Cover and refrigerate until ready to serve.

For the burger topping

  • Heat the oil in a medium skillet over medium heat. Note: You can make this on the grill, just place the skillet over a hot part of the grill. I prefer to make it on the stovetop ahead of time.
  • Add the onion and season with salt. Sauté for 40-45 minutes or until the onions are completely softened and turn golden brown, stirring often.
  • Remove the onions to a plate.
  • Add a splash or two of oil to the skillet and add the jalapeno.
  • Sauté until the jalapenos are softened and are starting to turn golden brown.
  • Remove to another plate and reserve until ready to use.

For the smash burgers

  • Fire up your grill for high heat. Place a griddle or a large cast iron pan over the highest heat.
  • Season the ground beef with salt and pepper and form into four 4 ounce balls (not patties!).
  • Place the balls of beef on the griddle and let cook for one minute. Just let them cook, don't mess with them.
  • Take your press and flatten out the patties. I like to use the point of the press and work my way around the ball first, doing a little section at a time and then finally I press down on the entire patty to flatten it out. You can also just flatten out the ball all at once. At this point I also like to season the patties some more.
  • Let the patties cook until you start to notice a little char along the edges. Flip, season again if desired, and continue cooking another minute or so until the other side is charred. The burgers are thin so they will cook very quickly so watch out.
  • Add the cheese slices. If desired, cover in a dome to help the cheese melt.
  • Toast the bread. Slather one side of each slice with the sauce.
  • Cut the bacon pieces in half and put 3 halves onto 4 of the slices of bread.
  • Remove the patties from the grill and place on top of the slices of bread with the bacon. Top with the onions and some jalapeno slices. Devour immediately.

Notes

Add a little hot sauce to the sauce mix for a little more kick.

Nutrition

Calories: 931kcal | Carbohydrates: 40g | Protein: 37g | Fat: 69g | Saturated Fat: 24g | Polyunsaturated Fat: 9g | Monounsaturated Fat: 21g | Trans Fat: 1g | Cholesterol: 135mg | Sodium: 1607mg | Potassium: 468mg | Fiber: 3g | Sugar: 7g | Vitamin A: 372IU | Vitamin C: 6mg | Calcium: 224mg | Iron: 15mg

Nutritional values are approximate.
Cedar Planked Nacho Cheese Doritos

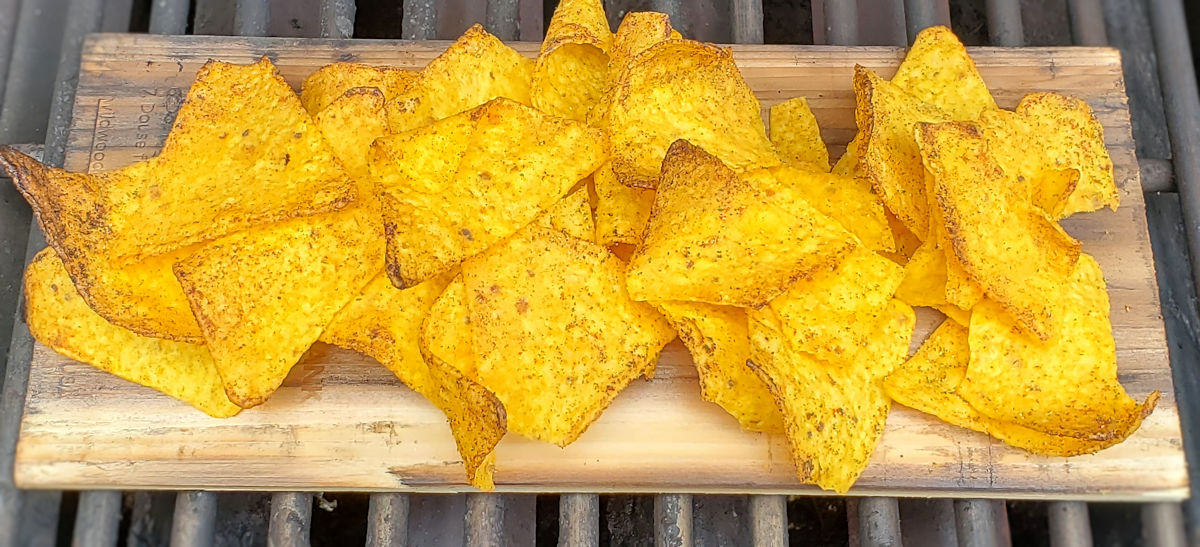
I had a big time hankerin’ for some Doritos the other day. I was craving that classic crunch and flavor. Well, sorta. I was craving a little something different too. So I made some cedar planked nacho cheese Doritos. I didn’t go crazy with the cedar. After all I’m not making salmon here. I just wanted to add a little crunch and to kick the flavors up a bit. And boy did I ever get what I was lookin’ for!

Cedar Planked Nacho Cheese Doritos

Flavors And Crunch Enhanced

Cedar planked nacho cheese Doritos get a nice little roast, and little char to them. The cedar aroma is there, but it’s light. Perfect. There’s just a slight taste of cedar to the chips. The nacho cheese flavor that we all love is still there but it’s stronger. Better. Hot off the grill, these little bites of heaven disappear in seconds.

Make Extra. You’ll Need Them.

You’ll definitely want to make several planks of these. Nice thing is that they take only minutes too make, so you can always just toss some more chips on the same plank over and over. I think you can get at least four good batches of chips on a single soaked plank before needing to soak it more.

Also try my cedar planked Twinkies.

Cedar Planked Nacho Doritos
Print Pin
5 from 1 vote

Cedar Planked Nacho Cheese Doritos

Nice and crispy, with a hint of cedar smoke.
Course Snack
Cuisine Main
Keyword cedar plank, tortilla chips
Prep Time 1 hour
Cook Time 5 minutes
Servings 4
Calories 147kcal

Ingredients

Instructions

  • Soak plank (or planks if you need more than one) in water for at least 1 hour.
  • Fire up your grill to medium-high heat, around 400 F.
  • Place the plank over indirect heat. Add the chips. Close the lid.
  • Let the chips grill for 2-5 minutes. Check them at least once. If they start to turn dark brown or char on the edges, remove them.
  • Let cool slightly before serving.

Notes

Note: If you prefer a stronger cedar flavor and aroma, place your soaked plank over direct heat for a few minutes first. Get a nice char on the plank. Then move it to indirect heat and add the chips.

Nutrition

Calories: 147kcal | Carbohydrates: 17g | Protein: 2g | Fat: 8g | Saturated Fat: 1g | Polyunsaturated Fat: 3g | Monounsaturated Fat: 3g | Trans Fat: 0.1g | Sodium: 196mg | Potassium: 63mg | Fiber: 1g | Sugar: 1g | Vitamin C: 0.1mg | Calcium: 39mg | Iron: 0.3mg

Nutritional values are approximate.

Simple Roast Chicken using the Char-Broil Big Easy

Slice it thick, and serve it with gravy and mashed potatoes. Slice it thin and pile it high for a delicious sandwich. Chop it into small chunks for a crazy good chicken salad. No matter how you serve it, this simple roast chicken using the Char-Broil Big Easy is spot-on fantastic. As with anything cooked on the oil-less fryer, you can’t get any easier. Just season and cook. The skin comes out crispy. The meat, dark and white, is juicy and flavorful. Each and every bite is perfect. This is why I love my Big Easy.

Simple Roast Chicken using the Char-Broil Big Easy

A No-Worry Cookout

I go with 20 minutes/pound as my base cooking time. Simple roast chicken using the Char-Broil Big Easy usually doesn’t take any longer than that, but it can depending on the wind and temperature. I check it after 20 minutes/pound and go from there. A little over-cooked is ok, but under-cooked isn’t, so err on the side of caution if you aren’t sure it’s done!

Better with Butter

You can baste the bird with a little melted butter right before removing it from the cooker. It adds a bit of color and helps crisp up the skin a bit. While it’s optional, I like it. But then, I’m a butter-aholic so there’s that…

It’s always a good idea to keep a few spare grease trays on hand for your Char-Broil Big Easy.

Love your Big Easy as much I love mine? Check out my Big Easy Add-Ons page and my free Big Easy eCookbook!

Simple Roast Chicken using the Char-Broil Big Easy
Print Pin
5 from 1 vote

Simple Roast Chicken using the Char-Broil Big Easy

Delicious chicken time-after-time.
Course Main
Cuisine American
Keyword Big Easy, chicken
Prep Time 14 minutes
Cook Time 1 hour
Servings 8
Calories 117kcal

Ingredients

Instructions

  • Fire up your Big Easy. Optionally, spray your Big Easy basket with non-stick spray.
  • Season the chicken cavity with salt and pepper. Do not be shy with the seasoning.
  • Season the outside of the chicken with salt and pepper. Get all sides of the chicken seasoned, don't miss anything! Do not be shy with the seasoning.
  • Transfer the chicken to the Big Easy basket and place into the hot cooker.
  • Cook for 20 minutes per pound or until the chicken breast reaches 160 F as measured in several places.
  • If using butter, gently lift the basket from the cooker and brush with the butter.
  • Return to the cooker for 5 more minutes to brown the skin with the butter.
  • If not using butter just leave the chicken in for another 5 minutes.
  • Remove the chicken from the Big Easy and let rest for 15 minutes before carving and serving.

Notes

Use caution removing the chicken from the basket as both are very hot.

Nutrition

Calories: 117kcal | Protein: 10g | Fat: 8g | Saturated Fat: 2g | Polyunsaturated Fat: 2g | Monounsaturated Fat: 3g | Trans Fat: 0.1g | Cholesterol: 41mg | Sodium: 38mg | Potassium: 103mg | Vitamin A: 76IU | Vitamin C: 1mg | Calcium: 6mg | Iron: 0.5mg

Nutritional values are approximate.

Quick and Easy Cold Cut Sub Sandwich

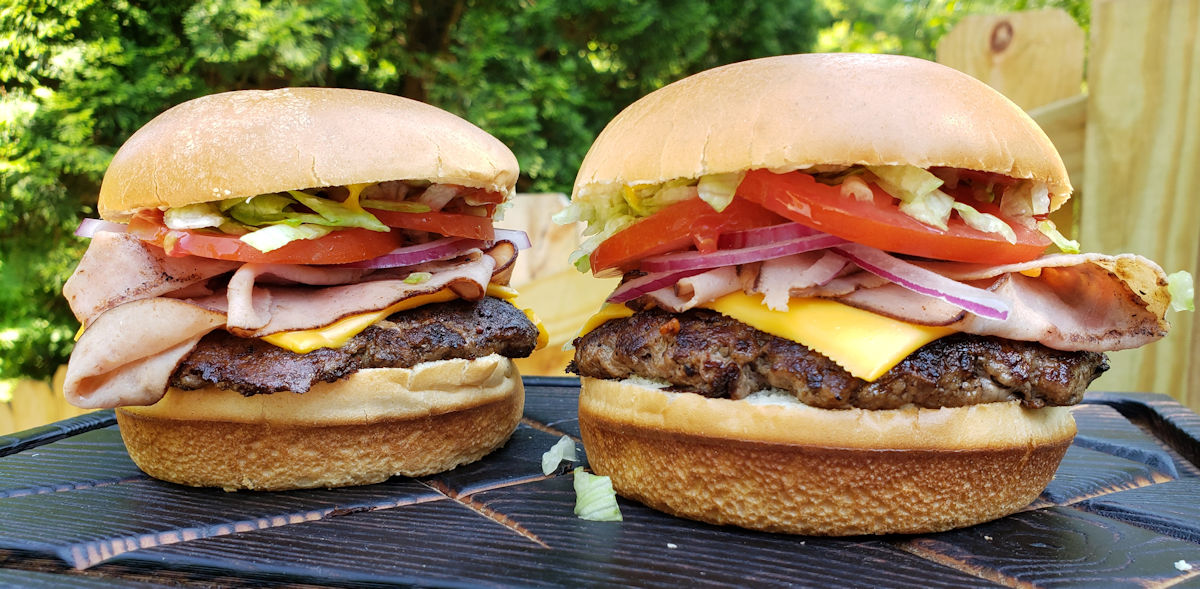
If I was going out to grab a sub, I’d be heading to Jersey Mike’s. No question about it. I’d get a sub Mike’s way, with vinegar and oil and salt and pepper and it’d disappear in no time. And if I wanted to make the same great sandwich at home, I’d make my copycat Jersey Mike’s sub. But if I’m in a big hurry and still want a great sandwich, I make my quick and easy cold cut sub sandwich. It’s not too different than what I can get at Jersey Mike’s. Main difference is that I use an off-the-shelf sub dressing that makes every sub great.

Quick and Easy Cold Cut Sub Sandwich

Don’t Forget The Salt And Pepper

It may sound odd, but I actually think the two ingredients that are essential to a tasty quick and easy cold cut sub sandwich are salt and pepper. Onions need seasoning. The tomatoes definitely need seasoning. And of course the lettuce needs it too.

No need to get fancy with the sandwich meats you use when you make your sub sandwich. Anything you like will do!

Also try a copycat of the classic K-Mart sub sandwiches.

Quick and Easy Cold Cut Sub Sandwich
Print Pin
5 from 1 vote

Quick and Easy Cold Cut Sub Sandwich

A simple but great lunch-time favorite.
Course Main
Cuisine American
Keyword cold cut, sandwich
Prep Time 15 minutes
Cook Time 5 minutes
Servings 1
Calories 607kcal

Equipment

Ingredients

  • 1 slice white onion separated into rings
  • 1 sub roll split horizontally
  • Beanos Submarine Dressing to taste
  • 2 slices cheese cut into triangles (halved diagonally). I usually use Swiss, but pepper jack or cheddar are great too!
  • 6 slices sandwich meat
  • 3 slices tomato
  • ½ cup iceberg lettuce shredded or chopped
  • Kosher salt to taste
  • freshly ground black pepper to taste

Instructions

  • Place the onion in a small bowl of cold water for 5 minutes.
  • Toast the sandwich roll as desired.
  • Add the onion slices (shaking off any excess water first).
  • Sprinkle the bottom roll with some of the dressing. Add a bit of salt and pepper.
  • Add the cheese slices, followed by the sandwich meat, tomato and lettuce.
  • Sprinkle with more of the dressing. Add a bit more salt and pepper.
  • Add top bun and serve.

Notes

And some pickle slices, too!

Nutrition

Calories: 607kcal | Carbohydrates: 38g | Protein: 43g | Fat: 31g | Saturated Fat: 10g | Polyunsaturated Fat: 3g | Monounsaturated Fat: 13g | Cholesterol: 104mg | Sodium: 2295mg | Potassium: 744mg | Fiber: 3g | Sugar: 8g | Vitamin A: 856IU | Vitamin C: 13mg | Calcium: 36mg | Iron: 13mg

Nutritional values are approximate.

Baked Bacon and Cheese Stuffed Mushrooms

These baked bacon and cheese stuffed mushrooms are the perfect baked appetizer. Tender mushrooms that still have a little ‘bite’ to them. The cheese mixture is fantastic. Three different cheeses and a little seasoning combine with bacon and bell pepper for bite after bite of deliciousness. I say ‘bite’, but if you use small mushrooms you can pop these little treats into your mouth like popcorn. Sure, I did.

Baked Bacon and Cheese Stuffed Mushrooms

Make Ahead For Easy Party Treats

You can pre-make these baked bacon and cheese stuffed mushrooms by doing steps 1-8 then refrigerating the mushrooms for later. Then, when you’re ready to finish them, remove them from the fridge and let come to room temperature for 30 minutes before transferring to a hot oven to cook and heat thoroughly. I’ve found that you can make them up to 24 hours ahead of time and they’ll be fantastic. Of course you can easily double or triple the recipe if you’re serving a larger crowd.

I highly recommend that you shred or grate your own cheese at home. Don’t buy the pre-shredded or pre-grated stuff. It has stuff added to it to keep it from sticking together. That ‘stuff’ affects how the cheese melts. Shred it yourself and use the good stuff.

Also try my garlic parmesan pub mushrooms.

Baked Bacon and Cheese Stuffed Mushrooms
Print Pin
5 from 1 vote

Baked Bacon and Cheese Stuffed Mushrooms

These are the perfect easy appetizers.
Course Appetizer
Cuisine American
Keyword mushroom, stuffed
Prep Time 15 minutes
Cook Time 45 minutes
Servings 6
Calories 159kcal

Equipment

Ingredients

  • 8 ounces mushrooms 12-16 small whole mushrooms
  • 4 tablespoons butter melted
  • kosher salt to taste
  • 4 ounces cream cheese softened
  • ½ cup Parmesan cheese shredded or grated
  • ¼ cup Mozzarella cheese shredded
  • 2 slices bacon (plus more for garnish if desired) cooked, chopped very fine
  • ¼ small green bell pepper (plus more for garnish if desired) chopped very fine
  • cayenne pepper to taste
  • paprika to taste
  • parsley chopped, for garnish, if desired

Instructions

  • Preheat your oven to 400 F. Spray a small baking dish with non-stick spray.
  • Clean the mushrooms and remove the stems.
  • Dip the mushrooms cap-side down into the butter and place onto the baking dish cap-side up.
  • Pour the remaining butter into the baking dish.
  • Sprinkle the mushrooms with salt. Bake 10 minutes. The mushrooms should just be soft and most of the water in them should be cooked out.
  • Remove from the oven. Shake any remaining liquid out of the mushrooms into the pan and place them cap-side down.
  • In a medium bowl, combine the cream cheese, Parmesan, Mozzarella, bacon, bell pepper and a pinch or so of cayenne. Add salt to taste.
  • Using a small spoon, gently fill each mushroom with the cheese mixture. Mound it up high. Return to the pan.
  • Sprinkle tops of the mushrooms with paprika.
  • Transfer the pan to the oven and cook 15-20 minutes or until the stuffing is hot.
  • Garnish with more bacon, bell pepper and parsley if desired and serve.

Notes

Substitute pepper jack cheese for the mozzarella for a little kick.

Nutrition

Calories: 159kcal | Carbohydrates: 3g | Protein: 8g | Fat: 13g | Saturated Fat: 7g | Polyunsaturated Fat: 1g | Monounsaturated Fat: 4g | Trans Fat: 0.01g | Cholesterol: 34mg | Sodium: 283mg | Potassium: 190mg | Fiber: 0.4g | Sugar: 2g | Vitamin A: 381IU | Vitamin C: 3mg | Calcium: 154mg | Iron: 0.3mg

Nutritional values are approximate.
Pico de Gallo Smash Burger

You can’t go wrong with these pico de gallo smash burgers. They’re very easy to make and come out very juicy. A simple pico de gallo topping adds flavor and freshness, without overpowering the thin, crispy delicious patty. A little cheese and you’re good-to-go. Nothing fancy here, just a fantastic easy burger.

Pico de Gallo Smash Burger

The Perfect Refreshing Burgers

I make smash burgers a lot. They’re the perfect quick dish. And there are literally an unlimited number of ways to top them. My pico de gallo smash burger is a great example. If don’t have pico in your grocery store, and don’t want to go through the trouble of making it, you can substitute a good chunky salsa.

I like for my pico de gallo to be good and cold before I top my burgers.

The equipment

Here’s the equipment I use. You can get by using two cast iron skillets. Use a larger skillet for cooking the burgers, and a smaller one to smash the burgers and keep them flat. Since I’m a cooking gadget collector, I prefer to use a few more tools.

The griddle

First, a griddle. You can buy griddles that sit on top of your grill grates or ones that replace them. Just about every grill I have has a griddle on it. I use them for a lot of things, not just smash burgers. You want one that can be placed over the hottest part of your grill so it gets screaming hot.

A burger press

Next, you need a burger press. You can use a heavy cast iron skillet, like I mentioned. Or get a burger press. For easy cleanup I wrap mine in foil first. When I’m done, just peel off the foil and toss. Super easy. Get a press that’s at least big enough to cover two burgers. You only smash one at a time, but if you want to keep them flat, you want to rest the press on top so bigger (and heavier) is better. Plus I’ve found that a bigger, heavier press tends to stay on the burgers whereas a smaller, lighter one is hard to keep centered on the burgers, specially if you have a bunch of them cooking at once.

A dome

Next up, a dome. While not 100% required, it does speed the time it takes to melt the cheese and it does it in a nice even fashion. In my opinion you don’t really need one if you’re using a super melty cheese, such as American, but for thicker slices like say a deli pepper jack, you want the cheese to melt before you over-cook the burger and that’s where a dome comes in handy.

Cleaning time!

Lastly, you need something to clean your griddle. I like to clean mine when I’m done cooking, but you can do it at the start instead. I use one of these pad holders with a griddle cleaning pad. Then I add a bit of water to my griddle then use the pad (connected to the holder) to scrub off any big chunks and get up some of the grease. I don’t go crazy with it, I always heat the heck out of my griddle before cooking, but I get the worst. The long arm on the pad holder makes it perfect for scrubbing a hot griddle, too.

Also try a deluxe nacho cheese smash burger.

Pico de Gallo Smash Burger
Print Pin
5 from 1 vote

Pico de Gallo Smash Burger

A classic burger with a spicy twist on a classic sauce.
Course Main
Cuisine American
Keyword smash burgers, spicy
Prep Time 15 minutes
Cook Time 15 minutes
Servings 4
Calories 508kcal

Ingredients

For the smash burgers

  • 1 pound ground beef
  • kosher salt to taste
  • ground black pepper to taste
  • 4 hamburger buns
  • 1 cup Mexican cheese blend shredded, divided
  • 1 cup pico de galllo divided

Instructions

For the smash burgers

  • Fire up your grill for high heat. Place a griddle or a large cast iron pan over the highest heat.
  • Season the ground beef and form into four 4 ounce balls (not patties!).
  • Place the balls of beef on the griddle and let cook for one minute. Just let them cook, don't mess with them.
  • Take your press and flatten out the patties. I like to use the point of the press and work my way around the ball first, doing a little section at a time and then finally I press down on the entire patty to flatten it out. You can also just flatten out the ball all at once. At this point I also like to season the patties some more.
  • Let the patties cook until you start to notice a little char along the edges. Flip, season again if desired, and continue cooking another minute or so until the other side is charred. The burgers are thin so they will cook very quickly so watch out.
  • Add 1/4 cup of cheese to each patty. If desired, cover in a dome to help the cheese melt.
  • Toast the buns.
  • Remove, add the patties and serve topped with 1/4 cup of pico de gallo each.

Notes

Also great with shredded cheddar or pepper jack.

Nutrition

Calories: 508kcal | Carbohydrates: 22g | Protein: 30g | Fat: 32g | Saturated Fat: 14g | Polyunsaturated Fat: 2g | Monounsaturated Fat: 12g | Trans Fat: 1g | Cholesterol: 107mg | Sodium: 458mg | Potassium: 382mg | Fiber: 1g | Sugar: 3g | Vitamin A: 185IU | Vitamin C: 1mg | Calcium: 267mg | Iron: 4mg

Nutritional values are approximate.
Easy Homemade Peanut Butter Ice Cream

If you’re a peanut butter-aholic, this easy homemade peanut butter ice cream is for you. In no time at all you can enjoy delightful spoon after spoon of this delicious, creamy, smooth peanut butter flavor-packed treat. You seriously could not find an easier recipe for a fantastic ice cream. This will satisfy the peanut butter lover in you!

Easy Homemade Peanut Butter Ice Cream

Customize Your Ice Cream

You could embellish this easy homemade peanut butter ice cream. If you wanted to, that is. You don’t have to. I thought it was fantastic made just as the recipe states. It’s creamy delicious and packed with peanut flavor. But, I can see wanting to add a little crunch or something else maybe. Perhaps a few handfuls of toasted peanuts. That’d be good, for sure. And a good drizzle of chocolate syrup? That’d take it way over the top!

I use my lil Cuisinart ice cream maker for this and all the ice creams that I make at home. It keeps me in the ‘easy’ mode because it’s easy to use and easy to clean. All I have to do is make sure that I put the freezer bowl into the freezer a good day ahead so that it gets super cold.

Also try my easy homemade blueberry ice cream.

Easy Homemade Peanut Butter Ice Cream
Print Pin
5 from 1 vote

Easy Homemade Peanut Butter Ice Cream

Creamy delicious and packed with peanut flavor.
Course Dessert
Cuisine American
Keyword homemade ice cream, peanut butter
Prep Time 15 minutes
Cook Time 25 minutes
Servings 12
Calories 223kcal

Ingredients

Instructions

  • Place all ingredients into a food processor.
  • Process until creamy smooth.
  • Add mixture to your ice cream maker and process per manufacturer's directions (usually 20-25 minutes).
  • Freeze overnight before serving.
  • Makes about 1 1/2 quarts.

Notes

My ice cream maker requires that I freeze the container overnight first before using.

Nutrition

Calories: 223kcal | Carbohydrates: 19g | Protein: 5g | Fat: 14g | Saturated Fat: 5g | Polyunsaturated Fat: 2g | Monounsaturated Fat: 6g | Cholesterol: 19mg | Sodium: 106mg | Potassium: 166mg | Fiber: 1g | Sugar: 17g | Vitamin A: 190IU | Vitamin C: 0.5mg | Calcium: 66mg | Iron: 0.3mg

Nutritional values are approximate.

Juicy Smash Burgers

Oh me. Make me drool. These juicy smash burgers were packed with flavor. And oh, so juicy good! Smashed to perfection and cooked on a hot griddle, the patties get that nice little char around the edges. That crunch. That’s the sign of a good smash burger right there!

Juicy Smash Burgers

Keep It Simple

I tend to keep the toppings on my juicy smash burgers (and all my smash burgers for that matter) pretty simple. The patties are the real star of the show here. So for me, it’s a not-too-strong-of-a-cheese (Swiss), chopped iceberg, a little onion and some ketchup, mayonnaise, and mustard. There’s nothing fancy going on here. The patties have a great texture to them thanks to the bread crumbs. The flavor comes from beef-flavored onion soup mix. And the juiciness comes from adding mayonnaise into the patties. This recipe makes 8 patties, which is a good thing because I could easily eat two!

The equipment

Here’s the equipment I use. You can get by using two cast iron skillets. Use a larger skillet for cooking the burgers, and a smaller one to smash the burgers and keep them flat. Since I’m a cooking gadget collector, I prefer to use a few more tools.

The griddle

First, a griddle. You can buy griddles that sit on top of your grill grates or ones that replace them. Just about every grill I have has a griddle on it. I use them for a lot of things, not just smash burgers. You want one that can be placed over the hottest part of your grill so it gets screaming hot.

A burger press

Next, you need a burger press. You can use a heavy cast iron skillet, like I mentioned. Or get a burger press. For easy cleanup I wrap mine in foil first. When I’m done, just peel off the foil and toss. Super easy. Get a press that’s at least big enough to cover two burgers. You only smash one at a time, but if you want to keep them flat, you want to rest the press on top so bigger (and heavier) is better. Plus I’ve found that a bigger, heavier press tends to stay on the burgers whereas a smaller, lighter one is hard to keep centered on the burgers, specially if you have a bunch of them cooking at once.

A dome

Next up, a dome. While not 100% required, it does speed the time it takes to melt the cheese and it does it in a nice even fashion. In my opinion you don’t really need one if you’re using a super melty cheese, such as American, but for thicker slices like say a deli pepper jack, you want the cheese to melt before you over-cook the burger and that’s where a dome comes in handy.

Cleaning time!

Lastly, you need something to clean your griddle. I like to clean mine when I’m done cooking, but you can do it at the start instead. I use one of these pad holders with a griddle cleaning pad. Then I add a bit of water to my griddle then use the pad (connected to the holder) to scrub off any big chunks and get up some of the grease. I don’t go crazy with it, I always heat the heck out of my griddle before cooking, but I get the worst. The long arm on the pad holder makes it perfect for scrubbing a hot griddle, too.

Also try my Ultimate Smash Burger with Secret Spicy Sauce!

Juicy Smash Burgers
Print Pin
5 from 1 vote

Juicy Smash Burgers

The patties are the real star of the show.
Course Main
Cuisine American
Keyword smash burger
Prep Time 15 minutes
Cook Time 15 minutes
Servings 8
Calories 545kcal

Ingredients

Instructions

  • Place mayonnaise, bread crumbs, onion soup mix and ground beef into a large bowl.
  • Using your hands, combine all the ingredients.
  • Form into 8 equally-sized patties (they'll be just over 5 ounces each).
  • Fire up your grill for direct medium-high heat cooking. You can also use an outdoor or indoor griddle or a large skillet on a stove.
  • Place the patties on grill. Smash down with a spatula or grill press.
  • Grill the burgers for 3-5 minutes per side or until done as desired.
  • Toast the buns as desired.
  • Serve burgers on buns with desired toppings.

Notes

This is not the time for light mayonnaise. Use the real stuff.

Nutrition

Calories: 545kcal | Carbohydrates: 30g | Protein: 25g | Fat: 35g | Saturated Fat: 11g | Polyunsaturated Fat: 8g | Monounsaturated Fat: 13g | Trans Fat: 1g | Cholesterol: 86mg | Sodium: 828mg | Potassium: 411mg | Fiber: 1g | Sugar: 4g | Vitamin A: 10IU | Vitamin C: 1mg | Calcium: 103mg | Iron: 4mg

Nutritional values are approximate.