Rotisserie French Fries

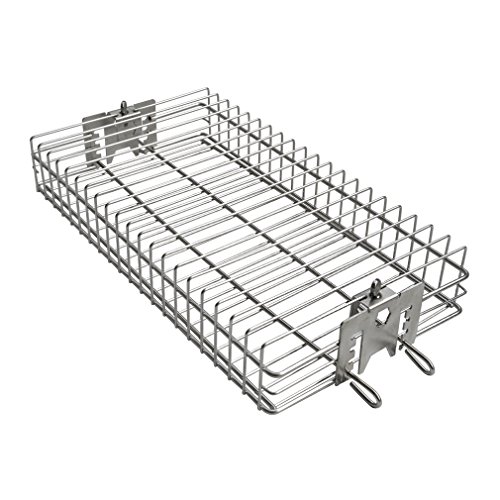
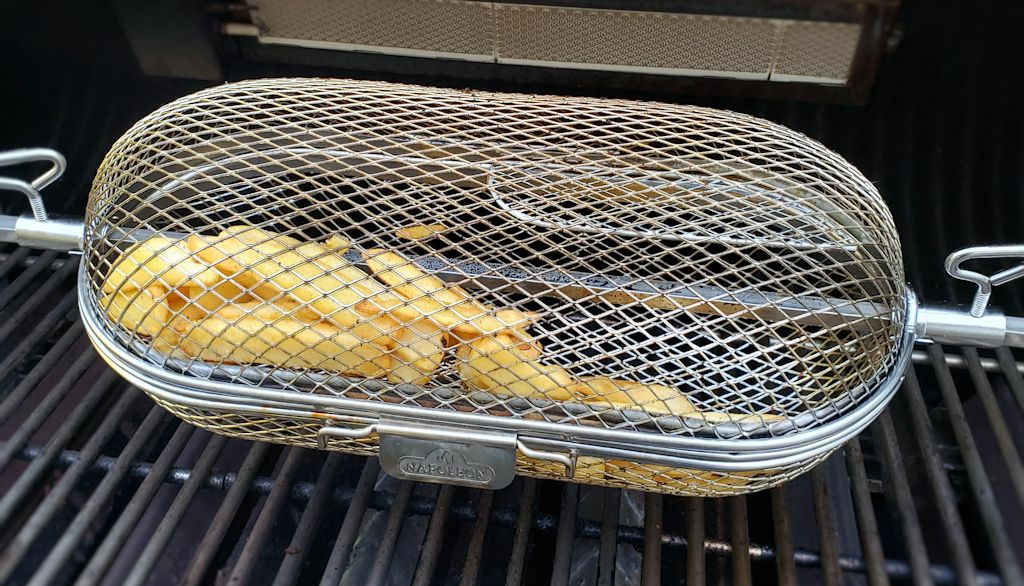
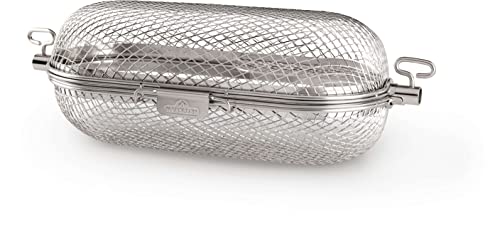
This actually started out as just a test of an idea I’d had. It was a very hot day here. I have a pet peeve about cooking anything inside when it’s so hot. And thanks to my new Weber Summit S-670, I can not only cook in pots on a side burner, I have a big rotisserie I can use. I have the perfect basket for it, made by Napoleon, that I can use to cook up all sorts of side dishes, such as rotisserie French fries!

Rotisserie French Fries

Perfect Fries With That Cooked-Outdoors Flavor

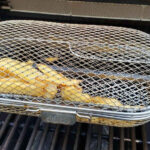
I started with frozen fries. And I went with the larger wedge fries because, this being my first time, I wasn’t sure how smaller fries might hold up to the constant tumbling. My rotisserie French fries came out fantastic, with a great crispiness and flavor. Of course, you can make them on a charcoal grill too with a rotisserie and a basket and get even more of that great ‘cooked outdoors’ flavor!

I think you can easily get away with cooking smaller fries, such as crinkles. Just keep an eye on them because the cook time will obviously depend on how hot you have your grill. I kept the temperature right around 400 F directly below my basket. I did not use my infrared burner (you can see it above the basket in the picture above).

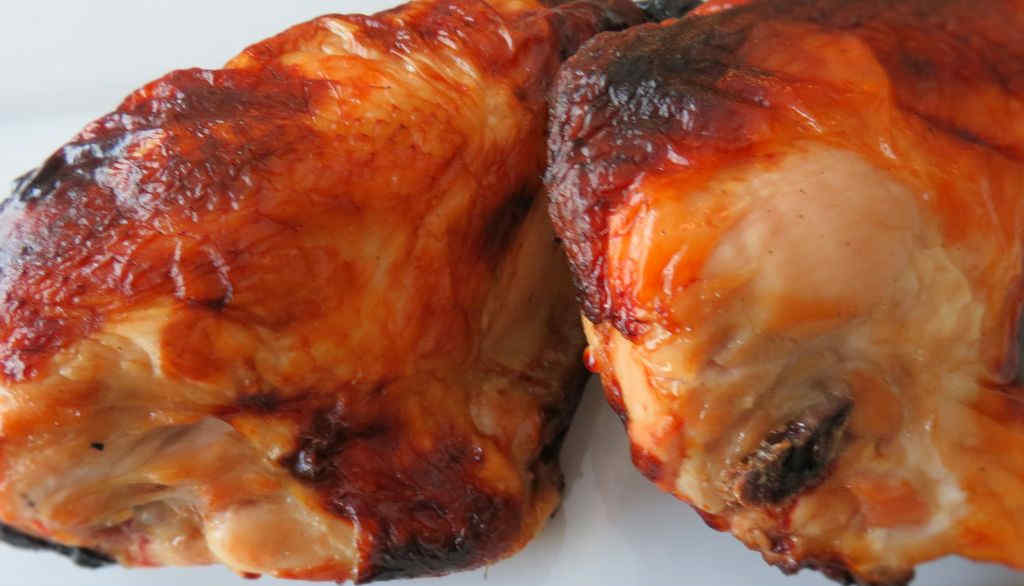
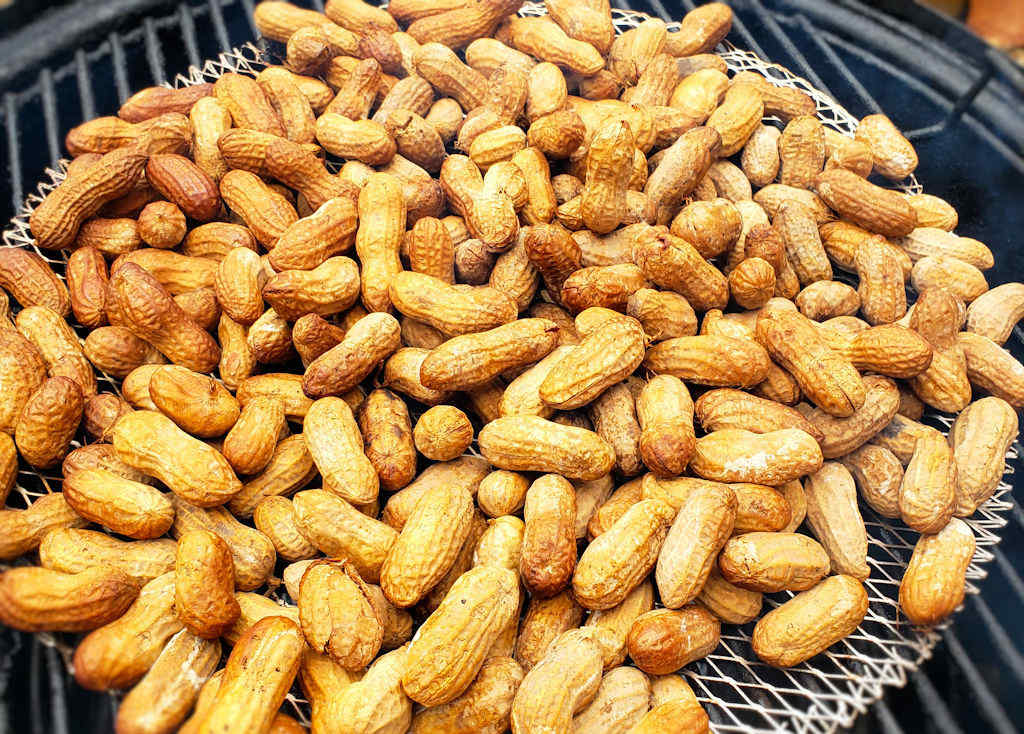
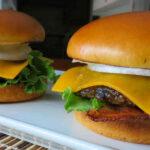
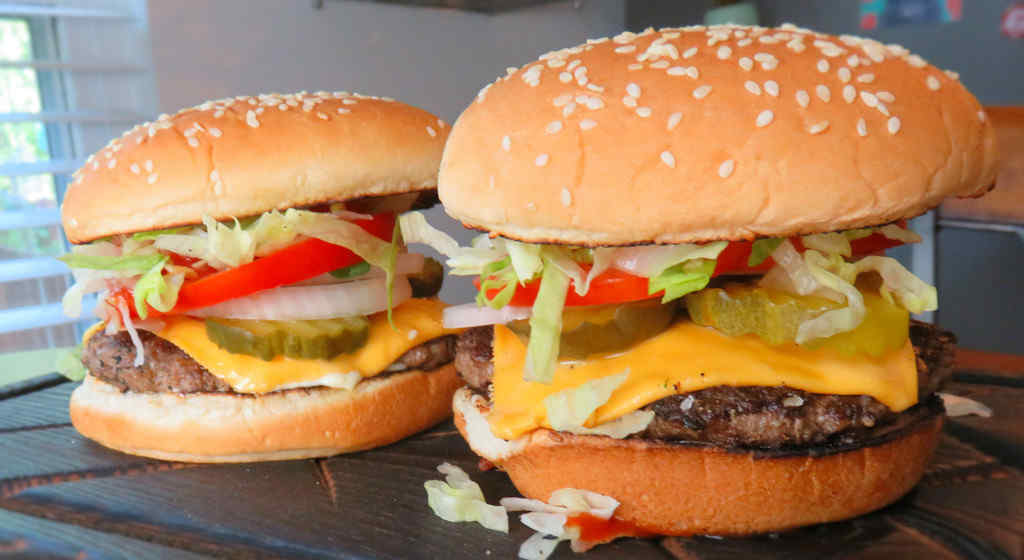
Fries on the rotisserie were perfect with the burgers I grilled at the same time! Win! For even more spinning goodness, make my chicken wings on the rotisserie and my rotisserie roasted potatoes!

Rotisserie French Fries
Print Pin
5 from 1 vote

Rotisserie French Fries

My rotisserie French fries came out fantastic, with a great crispiness and flavor. No need to heat up the kitchen, just fire up your grill!
Course Side Dish
Cuisine American
Keyword fries, rotisserie
Cook Time 45 minutes
Total Time 45 minutes
Servings 8 servings
Calories 258kcal

Ingredients

Instructions

  • Fire up your grill for medium-high cooking and prepare a rotisserie basket setup.
  • Add fries to the basket and close. Turn on the rotisserie and close the lid. Let cook for 20 minutes then check for crispness. If the fries turn golden brown with a bit of char along the edges, they're done! If not, close the lid and cook another 10-25 minutes, checking every 10 minutes or so.
  • Use heat-proof gloves to remove and open the rotisserie basket. Serve.

Notes

Use caution removing the fries from the basket as they and the basket are very hot.

Nutrition

Calories: 258kcal | Carbohydrates: 30g | Protein: 3g | Fat: 15g | Saturated Fat: 5g | Sodium: 486mg | Potassium: 427mg | Fiber: 4g | Vitamin C: 6mg | Calcium: 9mg | Iron: 1mg

Nutritional values are approximate.

Original BBQ Chicken on the Char-Broil Big Easy

Note: This recipe was developed using the Char-Broil Big Easy Oil-Less Fryer. If you are cooking using the Char-Broil Smoker-Roaster Grill you should cook with the lid open and the temperature set to High. You might also need to adjust the cooking time.

Weber has a line of marinade mixes that you add juice to that are really, really good. And they’re perfect for flavoring chicken before cooking it on the Char-Broil Big Easy. I picked up a package of each and used them to marinate my favorite, split chicken breasts. The original BBQ marinade is mixed with apple juice to produce wonderfully seasoned chicken. A hint of hickory smoke and a hint of sweetness, you’ll think you’re enjoying sauced chicken, but instead all that flavor comes from the marinade alone.

Original BBQ Chicken on the Char-Broil Big Easy

Easy. And Delicious.

Since the Big Easy cooks at a high temperature you do have to watch that your chicken doesn’t char. One way to help prevent that is to not use marinades containing substances that might burn, like sugar or honey. The other is to rinse the chicken before cooking. Now, you’re going to lose a bit of flavor doing that, but if like me you’re going to remove the skin before eating, it really doesn’t make that big of a difference.

Weber makes all sorts of great flavored Just Add Juice marinades. Collect them all!

It’s always a good idea to keep a few spare grease trays on hand for your Char-Broil Big Easy.

Also try my peach BBQ chicken, made in no time on the Big Easy!

Weber Marinades

Love your Big Easy as much I love mine? Check out my Big Easy Add-Ons page and my free Big Easy eCookbook!

Original BBQ Chicken on the Char-Broil Big Easy
Print Pin
5 from 1 vote

Original BBQ Chicken on the Char-Broil Big Easy

 A hint of hickory smoke and a hint of sweetness, you’ll think you’re enjoying sauced chicken, but instead all that flavor comes from the marinade alone.
Course Main
Cuisine American
Keyword Big Easy, Char-Broil, chicken
Prep Time 4 hours
Cook Time 1 hour 20 minutes
Total Time 5 hours 20 minutes
Servings 4
Calories 272kcal
Author Mike

Ingredients

Instructions

  • Place the chicken into a resealable bag or container.
  • Add marinade to taste. Toss to coat.
  • Seal and refrigerate for at least 4 hours, turning occasionally.
  • Fire up your Big Easy.
  • Transfer the chicken to the Big Easy basket.
  • Cook for approximately 20 minutes per pound or until it reaches 165 F as checked in several places.
  • Remove and let rest 10 minutes before serving.

Notes

You can use whatever cuts you prefer, about 2 pounds total.

Nutrition

Calories: 272kcal | Carbohydrates: 4g | Protein: 48g | Fat: 6g | Saturated Fat: 1g | Trans Fat: 1g | Cholesterol: 145mg | Sodium: 263mg | Potassium: 868mg | Fiber: 1g | Sugar: 3g | Vitamin A: 68IU | Vitamin C: 3mg | Calcium: 14mg | Iron: 1mg

Nutritional values are approximate.

Smoked Peanuts in the Shell

If you like boiled peanuts, you’re in luck. If you like smoked peanuts, you’re in luck too. These smoked peanuts in the shell will satisfy you no matter which camp you’re in. Lightly smoky and well, pea-like, you’ll want to make a big ole batch for snacking during the next big game on TV.

Smoked Peanuts in the Shell

These Aren’t Roasted Nuts

Unlike just boiled peanuts, which have a soggy shell, these smoked peanuts in the shell spend some quality time over higher heat, giving the shells an almost roasted-like texture. So when you crack one open, you might be expecting a roasted peanut. That’s not what you’ll get. The time in the brine not only softens the peanuts it lets them absorb smoke. That’s what you’re after.

Smoked Peanuts in the Shell

Grab A Basket Or Mat

I like to use my grilling basket or a grill mat for these peanuts. First, it makes putting them on the smoker and taking them back off a total breeze. No way would want to do that one at a time with grill tongues! Second, it makes for the easiest cleanup in the world. No scrubbing, no soaking. Just grab a soapy sponge and it’ll wipe clean.

Also try my smoked spicy nuts and my smoked pistachios. Peanuts roasted on a rotisserie are also a must-make!

Smoked Peanuts in the Shell
Print Pin
5 from 1 vote

Smoked Peanuts in the Shell

If you like boiled peanuts, you’re in luck. If you like smoked peanuts, you’re in luck too. These smoked peanuts in the shell will satisfy you no matter which camp you’re in.
Course Appetizer
Cuisine American
Keyword peanuts, smoked
Prep Time 40 minutes
Cook Time 1 hour
Servings 16
Calories 329kcal

Equipment

Ingredients

Instructions

  • Combine the water, salt, sugar and peanuts in a large pot over high heat. Bring to a boil and continue to boil for 20 minutes.
  • Drain the peanuts into a large colander and then spread out on a flat surface covered with towels to dry completely.
  • Fire up your smoker for 250 F. Use any wood you prefer, but the peanuts will absorb the smoke so I recommend a lighter fruit wood.
  • Add the peanuts to the smoker. If your grates are too wide, add foil sheets or pans with holes poked in them or use a grill mat like I did.
  • Cover grill and smoke for 20 minutes. Stir and smoke 20 more minutes. And then stir and smoke 20 more minutes. If the nuts aren't a bit crunchy continue smoking or transfer to a sheet pan in a 225 F oven or on a grill until golden brown and crunchy.

Notes

Store in an airtight container.

Nutrition

Calories: 329kcal | Carbohydrates: 10g | Protein: 15g | Fat: 28g | Saturated Fat: 4g | Sodium: 14164mg | Potassium: 425mg | Fiber: 5g | Sugar: 1g | Calcium: 72mg | Iron: 2mg

Nutritional values are approximate.

Mexican Macaroni Salad

I was not prepared for just how much we loved this Mexican macaroni salad. Sure, I looked at the ingredient list and thought “Hey, that’ll be good”. But I didn’t think it’d be absolutely fantastic. But it was. This is what every ole pasta salad you’ve ever had wished it was. Creamy, crunchy, savory, every bite is perfect. Oh, and it makes a HUGE batch, making it perfect for feeding a crowd!

Mexican Macaroni Salad

Get Cheesy

I made only a small change to the original recipe for this Mexican macaroni salad. I wanted the contracting texture of cheese so I cubed a block of Monterey Jack cheese and added it in. Cheddar (mild or sharp) would also be excellent. I think you’d want it cubed, versus shredded, though, so you get a nice ‘bite’.

I almost always use Blue Plate mayonnaise in the dishes I make. I think it is the best around. If you can’t find it locally you can pick it up online for a fair price.

If I wanted a spicier version of this salad (and I do), I’d use a spicy salsa and add cubed pepperjack cheese instead.

Also try my Creole macaroni salad.

Mexican Macaroni Salad
Print Pin
4 from 1 vote

Mexican Macaroni Salad

I was not prepared for just how much we loved this Mexican macaroni salad. Sure, I looked at the ingredient list and thought “Hey, that’ll be good”. But I didn’t think it’d be absolutely fantastic. But it was.
Course Side Dish
Cuisine American
Keyword pasta, salad
Prep Time 15 minutes
Cook Time 15 minutes
Servings 12
Calories 420kcal

Equipment

Ingredients

For the salad

  • 1 pound elbow macaroni or whatever pasta you prefer
  • vegetable oil
  • 2 ears sweet corn
  • 15 ounces black beans drained, rinsed
  • ½ cup black olives finely chopped
  • 6 Roma tomatoes chopped
  • 3 green onions thinly sliced (plus more for garnish, if desired)
  • ½ medium red onion finely diced
  • 1 pound Monterey Jack cheese cubed (use pepperjack for a bit of a kick!)

For the dressing

Instructions

For the salad

  • Cook the pasta per package instructions. Drain but do not rinse.
  • Meanwhile, roast the corn. Brush lightly with oil and place on a hot grill or under a broiler, rotating often until lightly browned and cooked.
  • Let the corn cool slightly before cutting the kernels off the ears.
  • Transfer to a large bowl.
  • Add the beans, olives, tomatoes, green onion, red onion and cheese, if using.
  • Toss gently to mix.
  • Add the dressing and cooking pasta and stir gently to coat.
  • Refrigerate at least 2 hours before serving.
  • Garnish with additional green onions if desired.

For the dressing

  • Whisk together all ingredients in a medium bowl.

Notes

If the salad is too thick, stir in some more salsa or mayonnaise before serving.

Nutrition

Calories: 420kcal | Carbohydrates: 41g | Protein: 19g | Fat: 20g | Saturated Fat: 10g | Trans Fat: 1g | Cholesterol: 46mg | Sodium: 493mg | Potassium: 423mg | Fiber: 5g | Sugar: 4g | Vitamin A: 831IU | Vitamin C: 6mg | Calcium: 337mg | Iron: 2mg

Nutritional values are approximate.

Pepper Crusted Bacon Cheeseburgers

In my world there’s nothing better than a burger cooked on a super hot flat top griddle. Boy do I love that nice little char you get on the patties. These pepper crusted bacon cheeseburgers amp up that great flat top (though you can certainly grill them!) flavor even more.

Pepper Crusted Bacon Cheeseburgers

Nice And Peppery

The patties are loaded with sweet onion and lots of black pepper. Lots of black pepper. Crispy bacon, lettuce, smoky cheese and a fantastically garlicky aioli top it all off. Every bite of these pepper crusted bacon cheeseburgers is loaded with flavor.

Do not be shy with the black pepper when you roll the burger patties in it. You really want a good strong pepper flavor. I used smoked pepper but any good freshly cracked pepper will do. For extra smoky flavor used smoked garlic instead of regular raw garlic.

I like to use a burger press just about any time that I am making burgers. I just weigh out the meat (usually into 4 to 5 ounce-sized balls), then place onto the press. For easy cleanup I’ll put patty papers on the bottom and top of the press. Then I just press down and boom! A perfectly shaped burger patty appears!

Also try my spicy bacon burger!

Pepper Crusted Bacon Cheeseburgers
Print Pin
5 from 1 vote

Pepper Crusted Bacon Cheeseburgers

In my world there’s nothing better than a burger cooked on a super hot flat top griddle. Boy do I love that nice little char you get on the patties. These pepper crusted bacon cheeseburgers amp up that great flat top (though you can certainly grill them!) flavor even more.
Course Main
Cuisine American
Keyword bacon, burgers
Prep Time 15 minutes
Cook Time 20 minutes
Total Time 35 minutes
Servings 8 servings
Calories 715kcal

Ingredients

For the garlic aioli

For the burgers

  • 2 pounds ground beef
  • 1 small sweet onion
  • 1 tablespoon heavy cream you can omit this if you don’t have cream on hand
  • kosher salt
  • freshly ground black pepper
  • 8 hamburger buns
  • green leaf lettuce
  • 8 slices cheddar cheese smokehouse cheddar is best!
  • 8 slices bacon cooked

Instructions

For the garlic aioli

  • Place garlic in a small bowl.
  • Add the salt and mash with a fork until it becomes a paste.
  • Add the remaining ingredients and whisk until combined.
  • Cover and refrigerate until ready to use.

For the burgers

  • Place beef into a large bowl.
  • Grate 2 tablespoons of the onion into the beef. Slice the remaining onion thin and reserve.
  • Add cream, salt and pepper and mix well.
  • Form into 8 1/4 pound patties.
  • Spread cracked black pepper out onto a plate. Lightly press each side of each patty into the pepper.
  • Cook patties as desired. I prefer them grilled on a flat-top griddle, but you can also cook them in a skillet.
  • Lightly toast the buns.
  • Assemble burgers by slathering buns with the garlic aioli.
  • Add the lettuce, cooked patties, cheese and bacon and serve.

Notes

The garlic aioli is great on sandwiches, too!

Nutrition

Calories: 715kcal | Carbohydrates: 26g | Protein: 31g | Fat: 53g | Saturated Fat: 18g | Trans Fat: 1g | Cholesterol: 121mg | Sodium: 708mg | Potassium: 480mg | Fiber: 1g | Sugar: 5g | Vitamin A: 218IU | Vitamin C: 4mg | Calcium: 231mg | Iron: 4mg

Nutritional values are approximate.

Homemade Onion Rings

I’m addicted to onion rings. And I’m picky about them. I’m picky about the coating. It has to be light and crunchy and it has to stick to every inch of the onion. And I’m picky about the onion. Each bite has to be ‘clean’. Nothing is worse than biting into a ring and having the entire onion want to come out at once. And of course, they have to taste great. These homemade onion rings pass my picky tests and then some. They are truly fantastic.

Homemade Onion Rings

The Perfect Batter

There is absolutely nothing I would change about the batter for these homemade onion rings. It has the perfect consistency and flavor. Well, ok, I might change up the seasoning just a bit depending on who I’m serving them to or whatever my mood is that day. Me, I like a bit of heat, so cayenne is my go-to seasoning. But, a little smoked paprika or even a dried herb such as Italian seasoning also makes for a pleasant change.

I get out my big deep fryer when it’s time to fry a large batch of food. It comes to temperature quickly and it maintains that temperature perfectly. It has a built-in oil filter and storage unit so I can re-use the oil several times.

The batter would also be great on fish filets, making for a big plate of fish-and-rings.

For a nice twist on traditional onion rings, try my fried onion strips with dipping sauce. For something with a kick, you gotta make my spicy red onion rings and my copycat of the delicious onion rings at A&W.

Homemade Onion Rings
Print Pin
5 from 1 vote

Homemade Onion Rings

I’m addicted to onion rings. And I’m picky about them. I’m picking about the coating. It has to be light and crunchy and it has to stick to every inch of the onion. And I’m picky about the onion. Each bite has to be ‘clean’.
Course Side
Cuisine American
Keyword onion rings
Prep Time 20 minutes
Cook Time 20 minutes
Total Time 40 minutes
Servings 6
Calories 472kcal

Ingredients

For the onion rings

For the batter

Instructions

For the onion rings

  • Place the rings into a large bowl.
  • Add the flour and salt and toss to coat.
  • Let sit for 15 minutes.

For the batter

  • Heat 3″ of oil to 365 F in a deep fryer or Dutch oven.
  • Whisk together the batter ingredients until smooth.
  • Working in batches, dip the onions into the batter and coat completely.
  • Fry until golden brown, 2-3 minutes per side, flipping once. Do not over-crowd the fryer.
  • Transfer to a wire rack and sprinkle with salt.

Notes

For a twist, use red onions.

Nutrition

Calories: 472kcal | Carbohydrates: 92g | Protein: 14g | Fat: 5g | Saturated Fat: 2g | Trans Fat: 1g | Cholesterol: 50mg | Sodium: 956mg | Potassium: 434mg | Fiber: 4g | Sugar: 13g | Vitamin A: 495IU | Vitamin C: 12mg | Calcium: 159mg | Iron: 4mg

Nutritional values are approximate.

Cedar Planked Buffalo Chicken Bites

Wow. We were both totally blown away by just how incredibly fantastic these cedar planked Buffalo chicken bites were. Yeah, they’re supposed to be appetizers. Well, that’s not how they ended up here. Eat one? Two? Yeah, right. I’m a Buffalo wing addict to begin with so I’m all over anything that involves wing sauce. Bacon? Cheese? Chicken thighs? It’s like everything yummy all in a single bite, all with a wonderful hint of cedar flavor. Crazy good. One of the best things we’ve ever made. Easily.

Cedar Planked Buffalo Chicken Bites

So Deliciously Messy

Don’t worry if you get a little cheese ‘blowout’ when you make these cedar planked Buffalo chicken bites. And don’t leave that cheese on the planks, either. Nope, scrape it up along with the chicken and just go to town on it. These are delicious, one of the best things you can imagine.

I like to serve these with more warmed Buffalo wing sauce on the side. There’s no such thing as too much Buffalo sauce in my book.

Don’t buy any el cheapo cedar planks for this or any other dish. Get the good stuff and you won’t ever look back. Cheap planks split, warm and have splinters. Good planks are thicker, stay flat and have smoother edges.

Also try my planked meatballs!

Cedar Planked Buffalo Chicken Bites
Print Pin
5 from 1 vote

Cedar Planked Buffalo Chicken Bites

Wow. We were both totally blown away by just how incredibly fantastic these cedar planked Buffalo chicken bites were.
Course Appetizer
Cuisine American
Keyword Buffalo, cedar plank, chicken
Prep Time 30 minutes
Cook Time 1 hour 30 minutes
Servings 14
Calories 205kcal

Ingredients

Instructions

  • Place the cedar planks in water for 30 minutes.
  • Fire up your grill for indirect cooking 350-400 F. You do not want flame directly below the place where you plan on placing the planks
  • Cut the thighs in half lengthwise. Place a cube of mozzarella in the center and roll the chicken around it.
  • Wrap a half piece of bacon around the chicken.
  • Sprinkle the chicken with the rub. Don't be shy with it.
  • Transfer to the planks, leaving at least 1/2" space between each chicken roll.
  • Transfer planks to grill and cook for 1 – 1 1/2 hours. As the bacon and chicken begin to render fat you may experience flare-ups. I keep a spray bottle full of fresh water nearby when this happens, being careful to spray down into the grill at the fire and not at the chicken which would rinse off the seasoning.
  • Meanwhile, place the butter and hot sauce in a small saucepan over medium heat. Bring to a simmer and let simmer for 5 minutes, stirring the help melt the butter.
  • Once the chicken hits 155 F internal temperature (make sure you measure in the meat, not the cheese!) using an instant-read thermometer, brush heavily with the Buffalo sauce.
  • Cook another 10-15 minutes or until the chicken is done (at least 165 F).
  • Brush with any remaining sauce and serve!

Notes

I like to have tons of Buffalo sauce, so I double the ingredients and serve half alongside the chicken for dipping.

Nutrition

Calories: 205kcal | Carbohydrates: 1g | Protein: 13g | Fat: 16g | Saturated Fat: 7g | Trans Fat: 1g | Cholesterol: 76mg | Sodium: 528mg | Potassium: 138mg | Fiber: 1g | Sugar: 1g | Vitamin A: 283IU | Vitamin C: 1mg | Calcium: 93mg | Iron: 1mg

Nutritional values are approximate.

Cherry Limeade

Ahhhh, the perfect drink on a hot day. This cherry limeade hit the spot and then some. A little tart and a little sweet, you can make this regular or diet. The diet version isn’t completely carbohydrate-free. For that, you can omit the lime juice and cherries and instead use diet syrups, like the ones available from Torani. They make a wide range of diet fruit (and other) flavored syrups. We love them on sno-cones too!

Cherry Limeade

Refrigerating Any Leftover Drink

I recommend not storing this cherry limeade with the lime slices if you have any leftovers. The next day it’ll get mighty darned ‘limey’. Just drop the slices in when you are ready to serve, and remove them if you need to refrigerate the remainder overnight.

Also try my homemade sno-cone syrup.

Cherry Limeade
Print Pin
4 from 1 vote

Cherry Limeade

Ahhhh, the perfect drink on a hot day. This cherry limeade hit the spot and then some. A little tart and a little sweet, you can make this regular or diet. 
Course Drink
Cuisine American
Keyword limeade
Prep Time 1 hour
Cook Time 30 minutes
Servings 2 liters
Calories 1061kcal

Ingredients

  • 2 liter Sprite diet is fine
  • 1 cup lime juice fresh squeezed
  • 10 ounces maraschino cherries not drained
  • 1 cup sugar artificial sweetener is fine
  • sliced lime for serving

Instructions

  • Place the soda, juice and cherries into the fridge for 1 hour.
  • Combine all ingredients except for the lime slices in a large pitcher. Refrigerate for at least 30 minutes.
  • Serve ladled into tall glasses, making sure to get some of the cherries. Add a few lime slices.

Notes

Substitute lemon juice and fresh lemon slices for a cherry lemonade.

Nutrition

Calories: 1061kcal | Carbohydrates: 274g | Protein: 2g | Fat: 1g | Saturated Fat: 1g | Sodium: 109mg | Potassium: 183mg | Fiber: 5g | Sugar: 259g | Vitamin A: 124IU | Vitamin C: 36mg | Calcium: 114mg | Iron: 1mg

Nutritional values are approximate.

Copycat Burger King Whopper

My fast food dining days are pretty much behind me. Oh I might stop and grab something every once in a while, especially if I’m traveling. I still crave some of my fast food favorites, but now I’m more a make-it-at-home kinda guy. So that’s how we ended up here, with a copycat of my favorite chain burger, the Burger King Whopper (although truth be told, McDonald’s Quarter Pounder and BigMac are close behind on the list!).

Copycat Burger King Whopper

Grill ‘Em For That Char-Broiled Goodness

I like to cook my copycat Burger King Whopper on a flat top griddle on my grill. I get the griddle hot, screaming hot, first. That gives me that little char, that little crunch around the edges. And of course cooking on the grill gives you that char-grilled flavor just like at the restaurant! I could eat these burgers all day long. They’re easy and fantastic.

If you don’t have a grill cook the burgers in a hot skillet!

Also try my copycat of McDonald’s Quarter Pounder with Cheese.

Copycat Burger King Whopper
Print Pin
4.50 from 2 votes

Copycat Burger King Whopper

I like to cook my copycat Burger King Whoppers on a flat top griddle on my grill. I get the griddle hot, screaming hot, first. That gives me that little char, that little crunch around the edges. 
Course Main
Cuisine American
Keyword burgers, copycat
Prep Time 15 minutes
Cook Time 6 minutes
Servings 4
Calories 640kcal

Ingredients

  • 4 hamburger buns sesame-seed
  • 1 tablespoon unsalted butter melted
  • 1 pound ground beef
  • ¼ teaspoon kosher salt I prefer a little more
  • ¼ teaspoon freshly ground black pepper I prefer a little more
  • 4 slices American cheese optional
  • 12 dill pickle chips divided
  • 2 slices white onion separated into 8 rings, divided
  • 2 small tomatoes cut into 8 slices, divided
  • 4 teaspoon ketchup divided (just eyeball it)
  • 1 cup iceberg lettuce chopped, divided
  • 8 teaspoons mayonnaise divided (just eyeball it)

Instructions

  • Heat a skillet, grill pan or flat top griddle over high heat.
  • Brush butter on buns and toast until lightly browned.
  • Season the meat with salt and pepper and form into thin patties. Cook 2-3 minutes per side, not flipping until you get a nice crust.
  • To assemble the burgers, place the patties on the bun bottoms.
  • Add the pickle, onion and tomato slices.
  • Add a good squirt of ketchup.
  • Add the shredded lettuce.
  • Spread mayonnaise on bun top.
  • Serve.

Notes

I know it’s not a copycat, but I like to cut the mayonnaise amount in half and combine it with a little spicy BBQ sauce or hot sauce!

Nutrition

Calories: 640kcal | Carbohydrates: 39g | Protein: 31g | Fat: 41g | Saturated Fat: 16g | Trans Fat: 2g | Cholesterol: 112mg | Sodium: 4957mg | Potassium: 978mg | Fiber: 7g | Sugar: 12g | Vitamin A: 1638IU | Vitamin C: 12mg | Calcium: 521mg | Iron: 6mg

Nutritional values are approximate.

Tropical Shrimp Salad

I’ve been a subscriber to Louisiana Cookin’ magazine for years. This tropical shrimp salad is a great example of why I’ve been a loyal reader for so long. This salad was incredible. A wonderful combination of fruits and shrimp, with a light creamy dressing that has a hint of vanilla. It was the perfect dish on a hot summer’s day. Make sure you chill the salad ahead of time and serve it as cold as possible.

Tropical Shrimp Salad

A Few Tips

I made this tropical shrimp salad a main dish by using large shrimp and large melon balls. You can also serve this as a side or a great pitch-in dish by using smaller shrimp and melon balls. This salad is also absolutely fantastic without the shrimp. If you do use smaller, cheaper shrimp, cut your fruits a little smaller to match. You want everything to be about the same size.

I used a Greek vanilla yogurt but regular ole plain yogurt works just fine too. There’s no way you can go wrong with this salad.

I almost always use Blue Plate mayonnaise in the dishes I make. I think it is the best around. If you can’t find it locally you can pick it up online for a fair price.

Also try my Peruvian Palta Rellena.

Tropical Shrimp Salad
Print Pin
4 from 1 vote

Tropical Shrimp Salad

This salad was incredible. A wonderful combination of fruits and shrimp, with a light creamy dressing that has a hint of vanilla. It was the perfect dish on a hot summer’s day.
Course Salad
Cuisine American
Keyword salad, shrimp
Prep Time 30 minutes
Total Time 30 minutes
Servings 6
Calories 238kcal

Equipment

Ingredients

For the salad

  • 1 ½ pounds shrimp large, cooked and peeled
  • 2 cups pineapple chopped
  • 1 ⅓ cups honeydew melon cut into balls
  • 1 ⅓ cups watermelon cut into balls
  • 1 ⅓ cups cantaloupe cut into balls
  • 1 medium cucumber peeled, seeded, sliced
  • ¼ cup green onion chopped, plus more for garnish

For the dressing

Instructions

For the salad

  • Place all salad ingredients into a large bowl and stir gently.

For the dressing

  • Whisk together all ingredients and pour over the shrimp and fruit mixture.
  • Stir gently.
  • Serve garnished with chopped green onions and dill.

Notes

Serve immediately.

Nutrition

Calories: 238kcal | Carbohydrates: 23g | Protein: 25g | Fat: 6g | Saturated Fat: 1g | Trans Fat: 1g | Cholesterol: 288mg | Sodium: 1322mg | Potassium: 470mg | Fiber: 2g | Sugar: 19g | Vitamin A: 1526IU | Vitamin C: 59mg | Calcium: 213mg | Iron: 3mg

Nutritional values are approximate.