Chili Cheese Fries

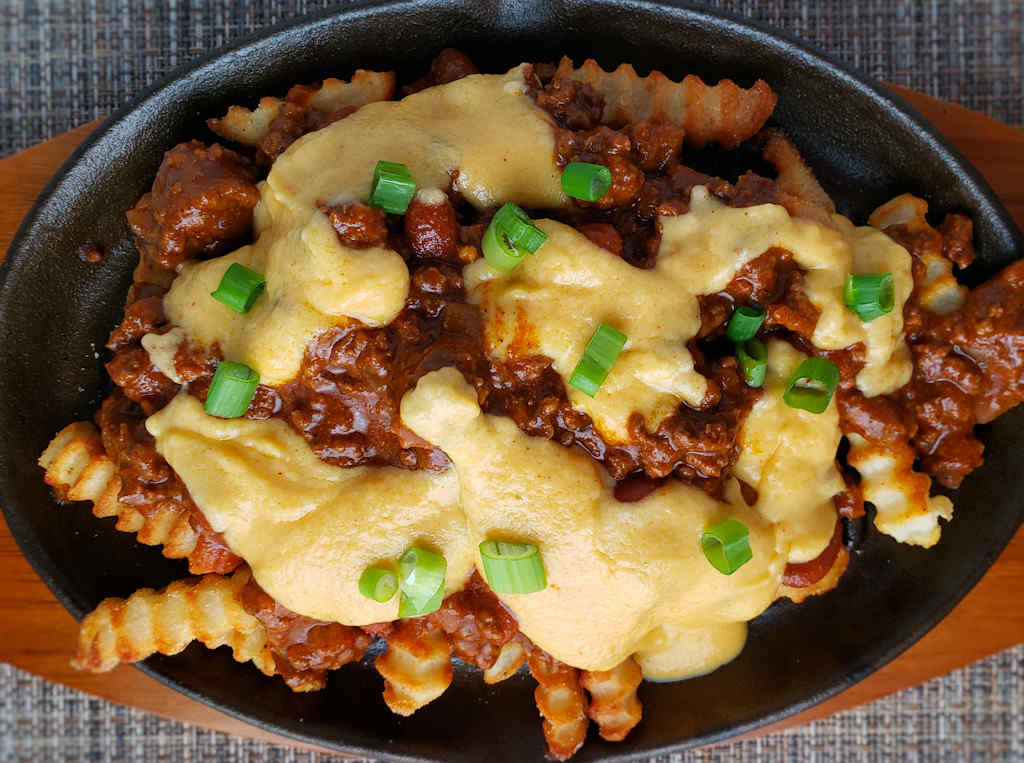
I had bar food on my brain. Not sure how it got there but I was dreaming of potato skins, nachos, sliders… and chili cheese fries. Nothing beats a bowl on a cold day, sure… but put it over crispy potatoes and top it with a creamy, ooey-gooey cheese sauce, and well… Hey, it’s bar food time!

Chili Cheese Fries

Load ‘Em Up

You could keep going with the toppings on chili cheese fries. Yeah, throw some sliced jalapenos on there, sure. Some sour cream? Yeah. Whatever you want, it can go on there because there aren’t any rules when it comes to bar food. I know because I’ve eaten my share of bar food. Bar food is meant to be decadent, over-the-top good.

You could make this same dish with crispy, hot baked (or fried) tater tots. In fact, now that I thought of that, I’ll be doing that next. There’s nothing better than hot loaded fries or tots.

I cooked and served these fries on my cast iron fajita skillet. It’s easy to clean up (even with the melted cheese) and it looks great.

To really kick these up, top them with my prime rib chili!

This recipe is based on a recipe from Small Town Woman.

Chili Cheese Fries
Print Pin
5 from 1 vote

Chili Cheese Fries

Nothing beats chili on a cold day
Course Appetizer or Main
Cuisine American
Keyword chili, fries
Prep Time 5 minutes
Cook Time 25 minutes
Servings 6
Calories 199kcal

Equipment

Ingredients

For the fries

  • 26 ounce frozen French fries
  • 4 cups chili I made a batch of Carrol Shelby's chili, but you can use your own recipe or even canned chili, whichever you prefer
  • other toppings optional, consider adding sliced jalapenos, sour cream, whatever you like!

For the cheese sauce

Instructions

For the fries

  • Prepare the fries per package instructions. Meanwhile make the cheese sauce (below).
  • Serve fries topped with chili, cheese sauce and whatever favorite toppings you prefer.

For the cheese sauce

  • Melt the butter in a medium skillet over medium-low heat.
  • Whisk in the flour and cook for 2 minutes, whisking constantly.
  • Add the garlic powder, onion powder and chili powder and whisk to combine.
  • While whisking, slowly add in the milk. Let the sauce come to a simmer and stir to thicken.
  • Reduce heat to low and stir in the cheese until smooth, creamy and melted. If the sauce gets too thick stir in a bit more milk.

Notes

For a good kick, use pepper jack cheese instead of cheddar.

Nutrition

Calories: 199kcal | Carbohydrates: 14g | Protein: 11g | Fat: 12g | Saturated Fat: 7g | Polyunsaturated Fat: 1g | Monounsaturated Fat: 3g | Cholesterol: 35mg | Sodium: 220mg | Potassium: 433mg | Fiber: 2g | Sugar: 8g | Vitamin A: 1350IU | Vitamin C: 144mg | Calcium: 283mg | Iron: 1mg

Nutritional values are approximate.

Baseball Opening Day Candied Cashews

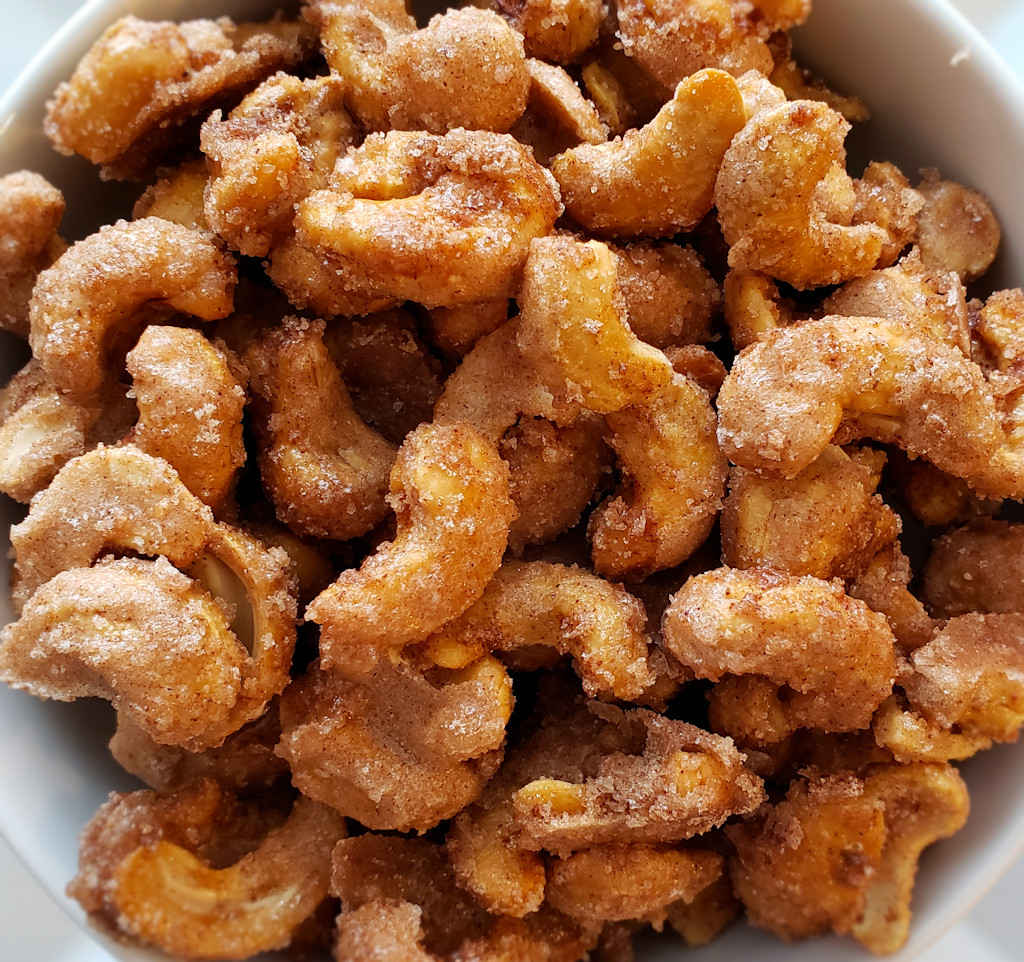
My wife and I are fans of the Cincinnati Reds. That can be tough at times. That’s why these baseball opening day candied cashews were double good. We needed a super-tasty treat to make up for what is destined to be a challenging season for our Reds. I made a big batch just to be sure we got maximum comforting. These crunchy sweet nuts were absolutely delicious and easy to make just in time for the game!

Baseball Opening Day Candied Cashews

Go Nuts With It

I used cashews to make these baseball opening day candied cashews because, well, they are what you can get at a ballpark. But pecan halves would be amazing too. Or make a mix, half cashews, half pecans. Whatever you do, these are amazing!

Go Reds!

Got a grill and a rotisserie? Roasted nuts from a grill are fantastic!

Baseball Opening Day Candied Cashews
Print Pin
5 from 1 vote

Baseball Opening Day Candied Cashews

Try this same recipe with pecans too! Or make a mix of your favorite nuts.
Course Snack
Cuisine American
Keyword cashews
Prep Time 5 minutes
Cook Time 30 minutes
Cooling 5 minutes
Servings 12
Calories 169kcal

Ingredients

Instructions

  • Preheat your oven to 250 F. Line a large baking sheet with parchment paper.
  • Place the egg white and water into a small bowl beat until the mixture is frothy. Use a whisk or fork.
  • Add the sugar, salt and cinnamon powder and stir to combine. Fold in the nuts, making sure to coat them completely.
  • Transfer to the baking sheet, spreading the nuts out evenly but still touching.
  • Bake for 30 minutes or until the mixture starts to brown and the nuts are toasted.
  • Remove from oven and let cool 5 minutes. Break up the nuts and transfer to a bowl for serving.

Notes

You can also use pecans or walnuts or even peanuts. Or a mix!

Nutrition

Calories: 169kcal | Carbohydrates: 19g | Protein: 4g | Fat: 9g | Saturated Fat: 2g | Polyunsaturated Fat: 2g | Monounsaturated Fat: 5g | Sodium: 11mg | Potassium: 147mg | Fiber: 1g | Sugar: 14g | Vitamin A: 1IU | Vitamin C: 1mg | Calcium: 9mg | Iron: 1mg

Nutritional values are approximate.

Copycat Restaurant-Style Deep-Fried Mushrooms

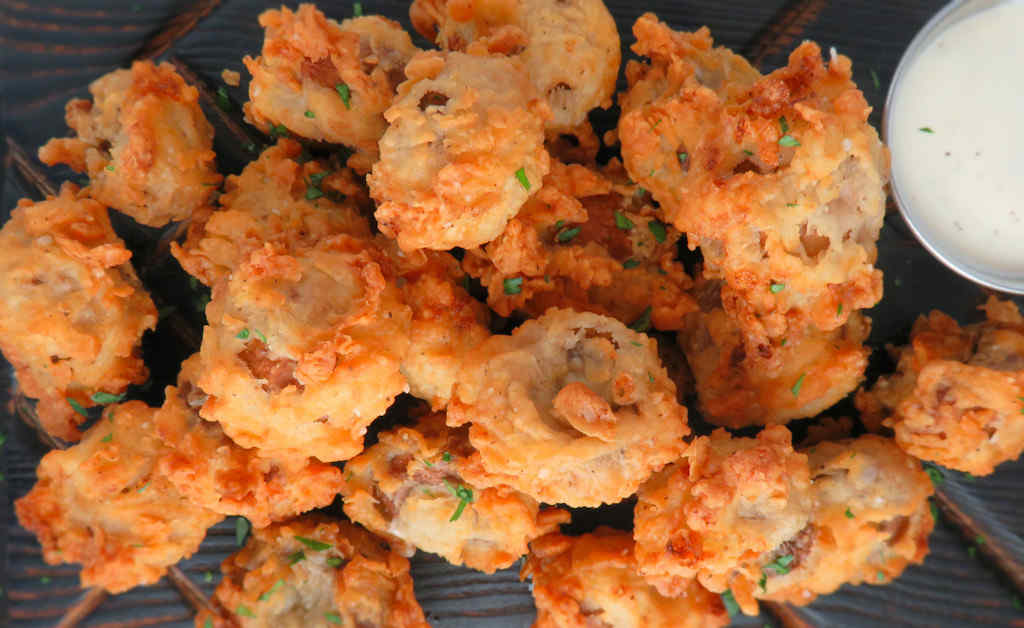
Boy, talk about something making it to the table and disappearing before I could even say ‘here are some copycat restaurant-style deep-fried mushrooms, enjoy!’. I think I got to the word ‘mushrooms’ and they were all gone! Well, ok, not quite, but these little bites are so incredibly yummy that they truly did not last any time at all. They’re so good I had to make them two nights in a row. I’d gone for three, but that’s a bit much even for me. Since there’s just the two of us, I make them in my Fry Daddy deep fryer (in no time at all)!

Copycat Restaurant-Style Deep-Fried Mushrooms

The Perfect Bites

These copycat restaurant-style deep-fried mushrooms have the perfect crunch to them. The coating is very addicting. The mushrooms keep a good bit of their texture, so they’re not mushy. They have a bit of a ‘bite’ to them and a wonderful flavor. We dipped them in a bit of Ranch dressing, but they’re great as they are.

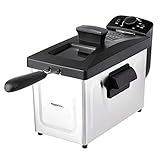
I get out my big deep fryer when it’s time to fry a large batch of food. It comes to temperature quickly and it maintains that temperature perfectly. It has a built-in oil filter and storage unit so I can re-use the oil several times.

Also try my garlic Parmesan pub mushrooms.

Copycat Restaurant-Style Deep-Fried Mushrooms
Print Pin
5 from 1 vote

Copycat Restaurant-Style Deep-Fried Mushrooms

The mushrooms keep a good bit of their texture, so they're not mushy.
Course Appetizer
Cuisine American
Keyword copycat, deep-fried, mushroom
Prep Time 10 minutes
Cook Time 10 minutes
Servings 6
Calories 186kcal

Ingredients

Instructions

  • Heat a few inches of oil to 375 F in a Dutch oven or deep fryer.
  • Combine the all-purpose flour, salt, pepper and baking powder in a medium bowl.
  • Place buttermilk into another medium bowl.
  • Working in batches, roll the mushrooms in the flour mixture. Coat well, then shake off excess.
  • Transfer mushrooms to the buttermilk and roll to coat well. Shake off the excess.
  • Return mushrooms to the flour mixture and coat again. Shake off excess then transfer to the fryer.
  • Deep fry the mushrooms 1-4 minutes or until they are golden brown. Flip the mushrooms halfway through cooking to get all sides good and done.
  • Transfer to a wire rack-lined pan to drain while you fry the remaining mushrooms.
  • Serve with your favorite dipping sauce.

Notes

Serve with Ranch or blue cheese for dipping!

Nutrition

Calories: 186kcal | Carbohydrates: 35g | Protein: 7g | Fat: 2g | Saturated Fat: 1g | Polyunsaturated Fat: 1g | Monounsaturated Fat: 1g | Cholesterol: 4mg | Sodium: 661mg | Potassium: 223mg | Fiber: 2g | Sugar: 3g | Vitamin A: 68IU | Vitamin C: 1mg | Calcium: 75mg | Iron: 2mg

Nutritional values are approximate.

Italian Barbecue Shrimp

Note: This recipe was developed using the Char-Broil Big Easy Oil-Less Fryer. If you are cooking using the Char-Broil Smoker-Roaster Grill you should cook with the lid open and the temperature set to High. You might also need to adjust the cooking time.

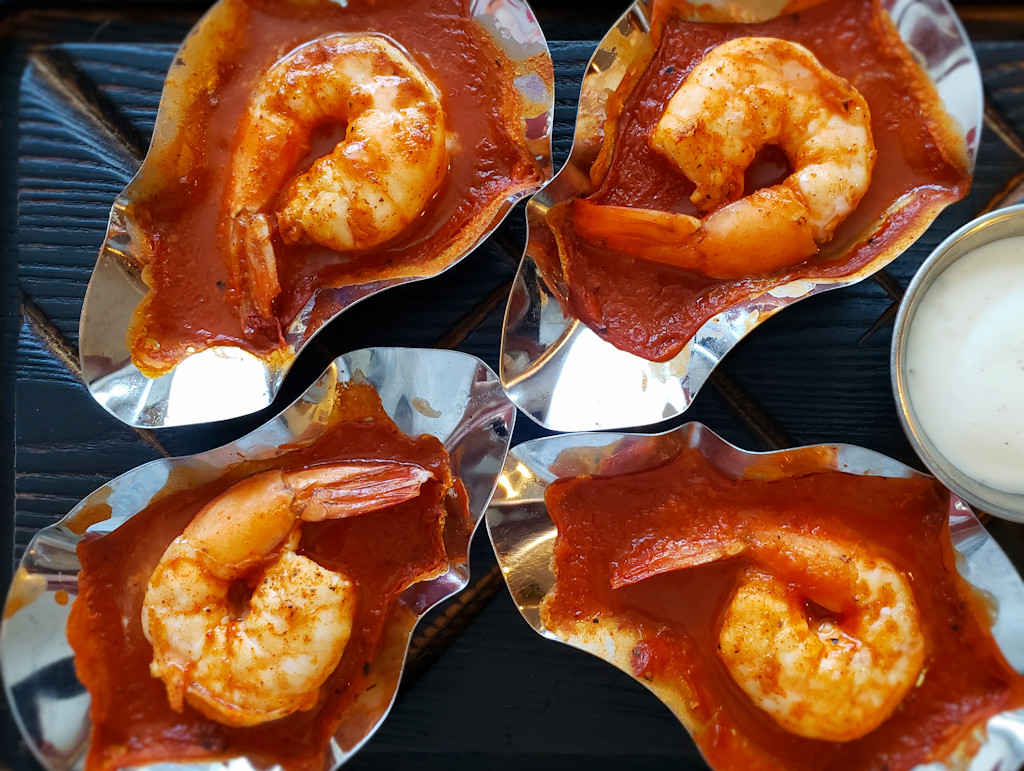
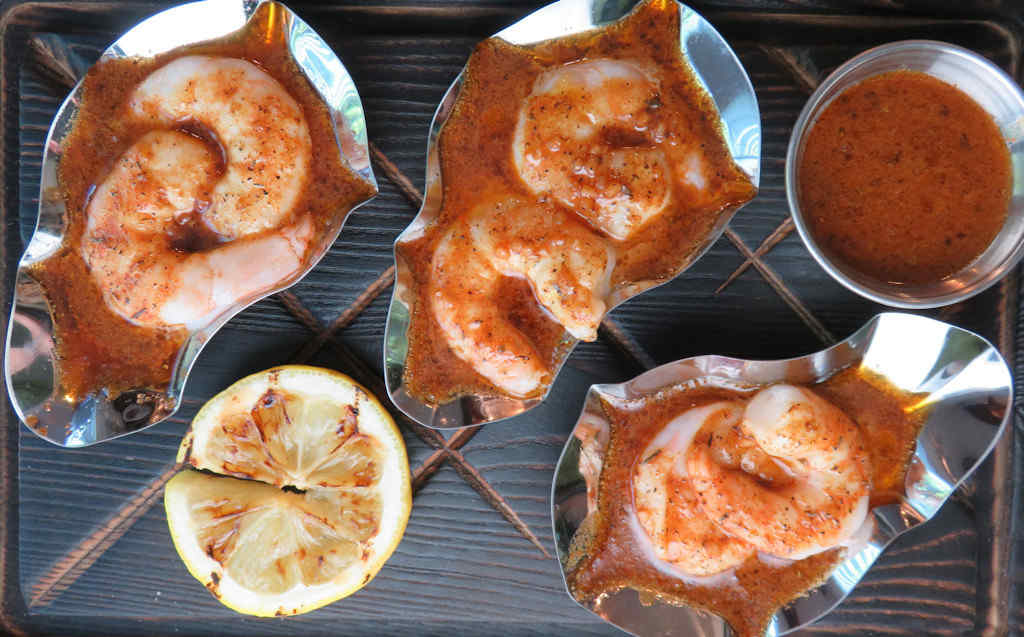
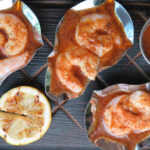
I have a major addiction to shrimp cooked in stainless steel oyster shells with a sauce. Any kind of sauce. Lots of sauce. The kind of sauce that I can dip grilled garlic bread in. Shrimp and soppin’, that’s my style. These Italian barbecue shrimp combine super yummy shrimp with a wonderful sauce. A soppin worthy sauce of butter, Worcestershire sauce, garlic and seasonings.

Italian Barbecue Shrimp

What’s This Italian Barbecue Thing?

Maybe, like me, you’re wondering what makes these Italian barbecue shrimp? There aren’t any tomatoes, or basil or things I might think of when I think Italian (ok, there is garlic). Well, thanks to the fine folks at Louisiana Kitchen and Culture, I found the answer:

The original version is said to have originated in New Orleans’ Italian community nearly a century ago, to be added to a very long list of the city’s Italian-Creole classics. So in honor of the history we called ours Italian Barbecue Shrimp. There are many variations on the original recipe, but any authentic barbecue shrimp dish worth its name has great flavor, spices and needs bread for sopping up the juices.

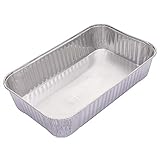
It’s always a good idea to keep a few spare grease trays on hand for your Char-Broil Big Easy.

Also try my restaurant-style peel and eat shrimp.

Italian Barbecue Shrimp
Print Pin
4 from 1 vote

Italian Barbecue Shrimp

These Italian barbecue shrimp combine super yummy shrimp with a wonderful sauce. A worthy bread-soppin' sauce.
Course Appetizer
Cuisine American
Keyword grilled, oyster shells, shrimp
Prep Time 15 minutes
Cook Time 15 minutes
Servings 4
Calories 255kcal

Ingredients

Instructions

  • Fire up your grill for indirect cooking at 350 F. Or pre-heat your Big Easy. You can also prepare these in a pre-heated oven at 350 F.
  • Divide the shrimp between 12 stainless steel oyster shells.
  • Melt the butter in a small saucepan over medium heat. S
  • Stir in the Worcestershire sauce, pepper, Creole seasoning, garlic and lemon juice.
  • Divide the butter mixture between the oyster shells. It's ok (very ok!) to have extra. Just put it in a small bowl for serving alongside the shrimp.
  • Transfer the shells to the grill, Big Easy or oven and cook for 15 minutes or until the shrimp have turned pink and translucent and the butter is good and hot and bubbly.
  • Serve hot but be careful of the hot shells!

Notes

Serve with crunchy French bread for dipping into the buttery sauce.

Nutrition

Calories: 255kcal | Carbohydrates: 4g | Protein: 8g | Fat: 24g | Saturated Fat: 15g | Trans Fat: 1g | Cholesterol: 151mg | Sodium: 367mg | Potassium: 152mg | Fiber: 1g | Sugar: 1g | Vitamin A: 1135IU | Vitamin C: 11mg | Calcium: 77mg | Iron: 1mg

Nutritional values are approximate.

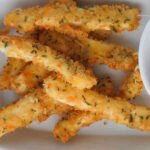
Fried Mozzarella Sticks

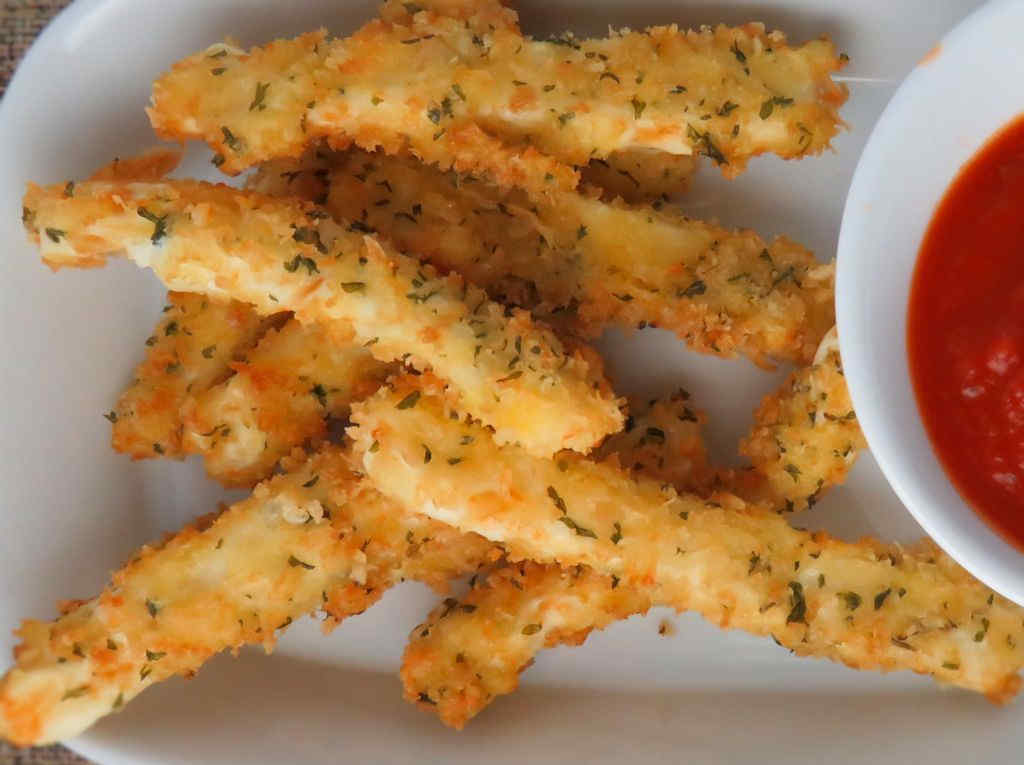
Oh boy. Fried mozzarella sticks. Another food that I cannot be trusted with. I have no self-control around them. Someone has to be the adult, and it’s not me. Ooey gooey cheese sticks covered in breadcrumbs, cheese and a little seasoning. All ready to be dunked into some warmed marinara sauce right before the journey into my mouth.

Fried Mozzarella Sticks

Let ‘Em Cool. Please.

As difficult as it is to do, you’ll need to wait a minute or two to let these fried mozzarella sticks cool before devouring them. I try to think about something else, like yard work, to distract me during the painful waiting period. If you don’t wait the cheese is like molten lava. So… wait.

I use my Fry Daddy fryer for most of my frying ‘tasks’.

I get out my big deep fryer when it’s time to fry a large batch of food. It comes to temperature quickly and it maintains that temperature perfectly. It has a built-in oil filter and storage unit so I can re-use the oil several times.

Also try my Italian breadsticks and my mozzarella pepper sticks.

Fried Mozzarella Sticks
Print Pin
5 from 1 vote

Fried Mozzarella Sticks

Oh boy. Fried mozzarella sticks. Another food that I cannot be trusted with. I have no self control around them.
Course Appetizer
Cuisine American
Keyword cheese, deep-fried
Prep Time 15 minutes
Cook Time 1 hour 5 minutes
Total Time 1 hour 20 minutes
Servings 16 sticks
Calories 569kcal

Ingredients

Instructions

  • Place the flour into a pie pan.
  • In a separate pie pan beat the eggs with the milk.
  • In a third pie pan combine the breadcrumbs, Parmesan cheese, parsley, garlic salt and seasoning salt.
  • Line a baking sheet with wax paper.
  • Dredge the cheese sticks in the flour, followed by the egg wash and lastly the breadcrumbs.
  • Place cheese sticks into the egg wash and then the breadcrumbs on more time then transfer to the baking sheet.
  • Freeze for 1 hour to overnight (longer is better).
  • Heat oil to 350 F.
  • Working in batches, fry the cheese sticks for 30 seconds-1 minute per side until golden brown then flip and fry another 30 seconds-1 minute.
  • Transfer to a paper towel-lined plate to drain.
  • Serve with warmed marinara sauce.

Notes

Also great dipped in Ranch dressing.

Nutrition

Calories: 569kcal | Carbohydrates: 7g | Protein: 3g | Fat: 61g | Saturated Fat: 49g | Trans Fat: 1g | Cholesterol: 26mg | Sodium: 238mg | Potassium: 33mg | Fiber: 1g | Sugar: 1g | Vitamin A: 67IU | Vitamin C: 1mg | Calcium: 54mg | Iron: 1mg

Nutritional values are approximate.

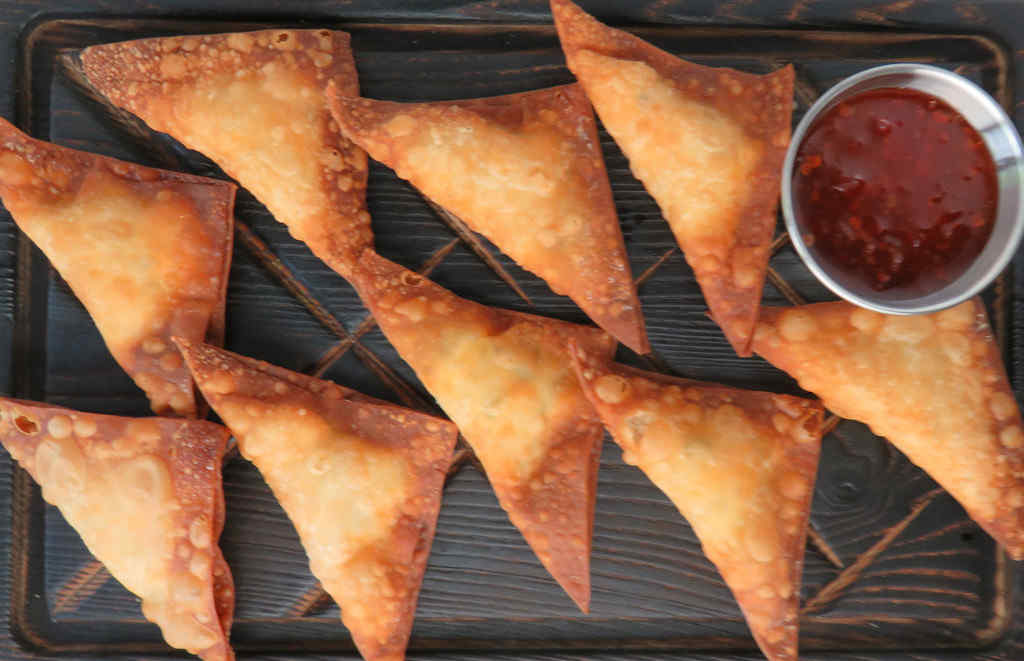
Jalapeno Popper Wontons

Oh my. It’s probably best that I didn’t count how many of these jalapeno popper wontons I devoured. They just disappear like that. They’re crazy good crunchy, for starters. The filling is creamy and cheesy with just a hint of heat. For dipping I had some sweet chili sauce. Cool Ranch dressing would be great too.

Jalapeno Popper Wontons

Crunchy Flavorful Treats

You can make a whole bunch of jalapeno popper wontons in almost no time at all. You can assemble them hours before, even the day before. Then all you have to do is fry them. Frying doesn’t take long, and fortunately, they don’t tend to stick together in the fryer so you can get quite a few in at once. Just get them good and golden brown and let them drain well before serving.

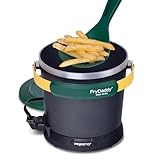
The Presto Fry Daddy is perfect for making smaller batches of food. It only uses a few cups of oil and comes to temperature quickly. Clean-up is easy too!

Also try my cheesy jalapeno poppers.

Jalapeno Popper Wontons
Print Pin
5 from 1 vote

Jalapeno Popper Wontons

You can make a whole bunch of jalapeno popper wontons in almost no time at all. You can assemble them hours before, even the day before.
Course Appetizer
Cuisine American
Keyword jalapeno popper, spicy, wontons
Prep Time 30 minutes
Cook Time 30 minutes
Servings 12
Calories 293kcal

Ingredients

Instructions

  • Combine all but the wrappers and oil in a large bowl.
  • Working in batches, place a wonton wrapper in front of with one corner pointing towards you (in other words, diamond shaped).
  • Spoon a heaping teaspoon of the filling onto the center of the wrapper.
  • Dip a finger in water and run it along all 4 edges of the wonton then fold the bottom corner over the filling and to the top corner.
  • Gently press down on the wrapper to remove any air then press along the edges to seal.
  • Heat a deep fryer filled with oil to 350 F.
  • Working in batches, fry the wonton for 2-3 minutes, flipping once, until golden brown.
  • Remove to a wire rack to drain and cool.
  • Serve immediately with sauces for dipping.

Notes

You can assemble the wontons well in advance and refrigerate until ready to fry. Leftovers (lol, if there are any) can be reheated in the oven and will retain most of their crunchiness.

Nutrition

Calories: 293kcal | Carbohydrates: 20g | Protein: 9g | Fat: 20g | Saturated Fat: 11g | Polyunsaturated Fat: 1g | Monounsaturated Fat: 5g | Cholesterol: 61mg | Sodium: 465mg | Potassium: 136mg | Fiber: 1g | Sugar: 2g | Vitamin A: 732IU | Vitamin C: 6mg | Calcium: 190mg | Iron: 1mg

Nutritional values are approximate.

Meatloaf Meatballs

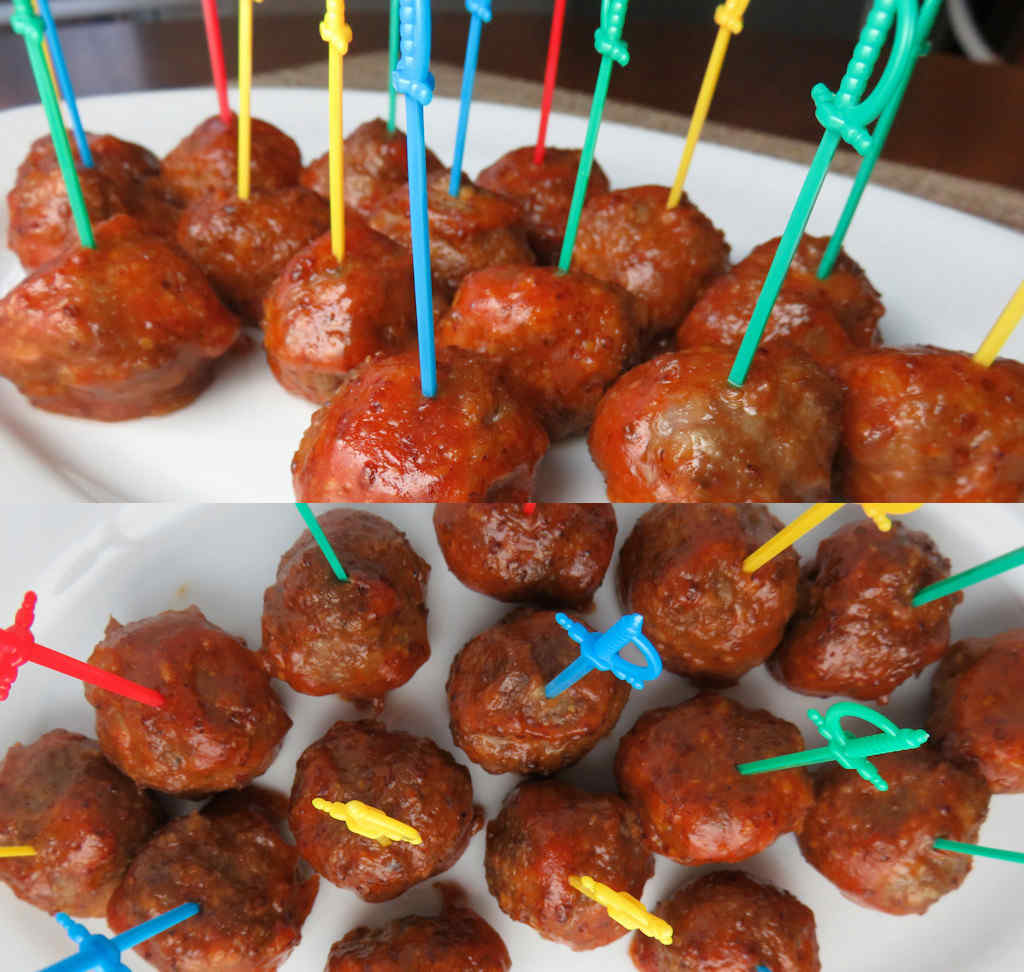
I didn’t need any help with my meatloaf addiction. I didn’t think it could get any worse. But, no, along came meatloaf meatballs and my problem got worse. A lot worse. Each one of these little lovely balls of meaty goodness tastes just like a meatloaf. Complete with a delicious glaze. I mean, come on, what’s not to love?!

Meatloaf Meatballs

Great Meatballs For Any Dish

These meatloaf meatballs aren’t just for serving as appetizers. Nope. Serve them with mashed potatoes and gravy for a crazy good change to meatloaf dinner. Put them on a sub roll with gravy and make a meatloaf po boy sandwich. Now that’s eating right there!

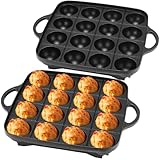
Usually I don’t link to something I don’t have, but I came across this meatball mold and just had to post it. It looks kinda cool, and would save some time making meatballs for sure!

Also try my spicy meatballs.

Meatloaf Meatballs
Print Pin
5 from 1 vote

Meatloaf Meatballs

I didn’t need any help with my meatloaf addiction. I didn’t think it could get any worse. But, no, along came meatloaf meatballs and my problem got worse. A lot worse. Each one of these little lovely balls of meaty goodness taste just like a meatloaf. Complete with a delicious glaze.
Course Appetizer
Cuisine American
Keyword meatballs, meatloaf
Prep Time 15 minutes
Cook Time 30 minutes
Servings 16
Calories 134kcal

Ingredients

For the meatballs

For the glaze

Instructions

For the meatballs

  • Preheat oven to 350 F.
  • Line a large baking sheet with parchment paper or use a silicone mat.
  • Melt the butter in a saute pan over medium heat.
  • Add the onions and cook until softened, about 5 minutes.
  • Reduce heat to low.
  • Stir in the garlic and saute for 3 minutes.
  • Remove from heat and let cool enough to handle.
  • In a large bowl, combine the beef, eggs, bread crumbs, milk, Worcestershire sauce, thyme, salt and the cooked onion mixture. Form into balls (we made 1" sized meatballs) and place onto the baking sheet. Do not let the meatballs touch.
  • Bake for 20 minutes.
  • Using tongues or a spoon, working in batches, transfer the meatballs to the bowl of glaze.
  • Dunk or roll them to get them covered in the glaze.
  • Shake off any excess and return to the baking sheet.
  • Bake another 10 minutes or until lightly browned. If you want a bit of a crunchy exterior, place the meatballs under the broiler for a minute or two.
  • Serve immediately.

For the glaze

  • Combine all ingredients in a medium bowl.

Notes

You can transfer the meatballs to a slow cooker to keep them warm.

Nutrition

Calories: 134kcal | Carbohydrates: 7g | Protein: 8g | Fat: 8g | Saturated Fat: 3g | Trans Fat: 1g | Cholesterol: 39mg | Sodium: 322mg | Potassium: 177mg | Fiber: 1g | Sugar: 4g | Vitamin A: 92IU | Vitamin C: 1mg | Calcium: 29mg | Iron: 1mg

Nutritional values are approximate.

Christmas Stocking Pizzas

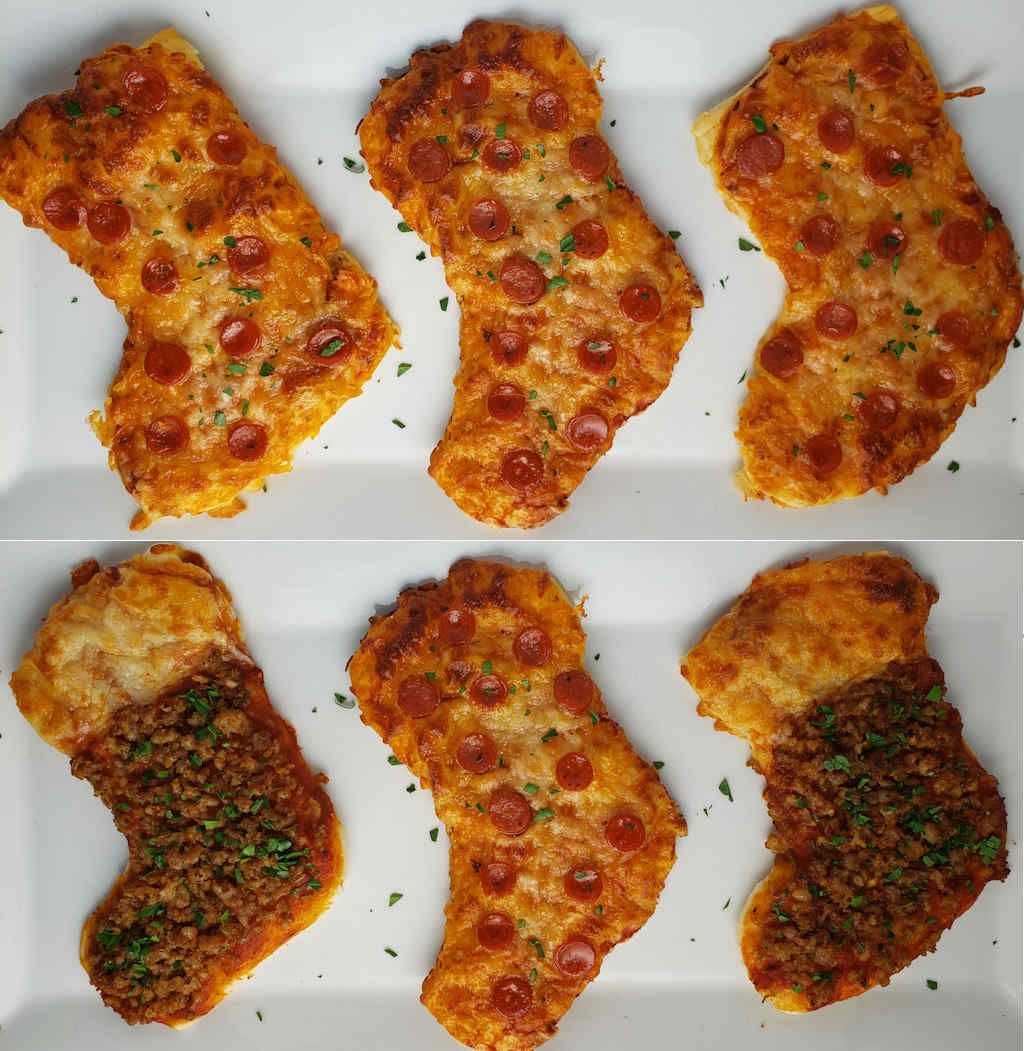
True story: If you leave out Christmas stocking pizzas for Santa Claus you’ll get two times as many presents than you would if you leave out just milk and cookies! Trust me on this! Santa will appreciate your efforts and reward you nicely. These little pizzas make for a great holiday-time project. They’re quite easy to make, and rather fun to boot. It’s an excellent treat for young and old alike!

Fun To Make… And Eat!

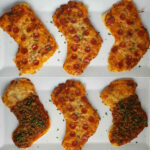
You can make your Christmas stocking pizzas with whatever toppings you like, of course. We liked how the mini pepperoni and the Italian sausage ones looked. And tasted. They didn’t last, that’s for sure. You want to use smaller-sized toppings since the pizzas aren’t that large!

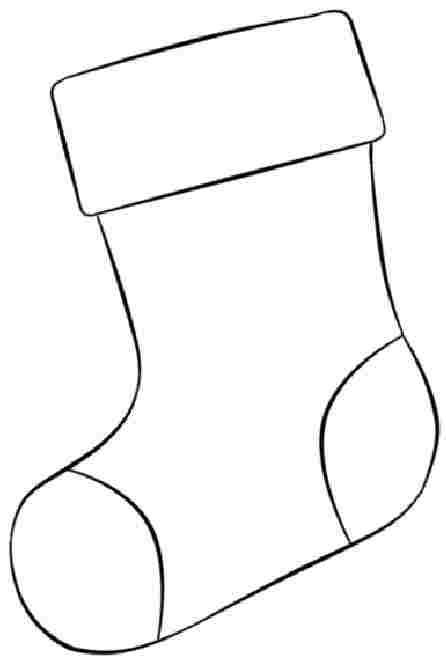
You’ll need a template to make the pizzas. Ours is just over 5″ tall when printed. Just download the picture below and print it. If you want to make smaller (or bigger) pizzas just size the graphic in your favorite editing software.

Christmas stocking

Happy Holidays!

I highly recommend that you shred or grate your own cheese at home. Don’t buy the pre-shredded or pre-grated stuff. It has stuff added to it to keep it from sticking together. That ‘stuff’ affects how the cheese melts. Get the real stuff.

Print Pin
4 from 1 vote

Christmas Stocking Pizzas

If you leave out Christmas stocking pizzas for Santa Claus you'll get two times as many presents than you would if you leave out just milk and cookies!
Course Appetizer or Main
Cuisine American
Keyword Christmas, pizza
Prep Time 30 minutes
Cook Time 15 minutes
Servings 5
Calories 223kcal

Ingredients

  • 1 pound pre-made pizza dough If frozen defrost overnight in the fridge then let come to room temperature on the countertop for 2 hours before using.
  • pizza sauce
  • mozzarella cheese shredded
  • mini pepperonis
  • Italian sausage Cooked and crumbled. If using links remove from casings before cooking. I like to pulse my cooked sausage in a food processor a few times to get it nice and finely crumbled.

Instructions

  • Preheat oven per package instructions. Prepare 2 large baking sheets, if required (some pre-made doughs require that you first grease the pans).
  • Print out the stocking template and cut around the edges.
  • Roll dough out onto a lightly floured surface.
  • Place the template onto the dough and cut around the edges. We found that a sharp-tipped knife or kitchen scissors worked best.
  • Transfer the dough to a baking pan. Keep making stockings until you're out of dough. We were able to get 5 out of a 1 pound dough but that took some thinking as we moved the pattern around. You can easily get 4 stockings without much worry.
  • Add toppings as desired. For a few we used sauce, mini pepperoni and then cheese all over. For the rest we used sauce and sausage, with cheese just at the top.
  • Bake until the dough is lightly browned and the cheese is bubbly.
  • Remove and let cool slightly before serving.

Notes

These are fun. You gotta make them at least once!

Nutrition

Calories: 223kcal | Carbohydrates: 43g | Protein: 7g | Fat: 3g | Saturated Fat: 1g | Polyunsaturated Fat: 1g | Sodium: 656mg | Fiber: 1g | Sugar: 6g | Iron: 2mg

Nutritional values are approximate.

Slow Cooker Onion Garlic Pretzels

I wasn’t expecting much from these slow cooker onion garlic pretzels but I’m not sure why not. The recipe did catch my eye, mostly because it contains onion soup/dip mix. I love that stuff. I mix with it sour cream and grab some Fritos and I’m set. So I made this and boom! I’m in love! First of course, there’s the great onion soup flavoring. You know the one, sorta beef bouillon-like. And a hint of garlic. A little butter. And the great crunch of salty pretzels. It’s like everything great in a snack in a single bite. And oh so easy to make! Warning: These bites are highly addictive!

Slow Cooker Onion Garlic Pretzels

Any Plain Pretzel Will Do!

I think you could make these slow cooker onion garlic pretzels with other than pretzel rods. Yeah, it does take a few minutes to break all of those rods into pieces and it’s a bit messy (little pretzel pieces flying everywhere!), but it’s worth it. But if you’re in a hurry, grab some pretzel nuggets or bites and they’ll work just fine. I just wouldn’t get anything that has anything but salt on it. And don’t get any that have flavorings, like cheddar or bacon or something. Get them plain and you’ll be fine!

Also try my deluxe cheddar pretzel bites.

Slow Cooker Onion Garlic Pretzels
Print Pin
5 from 1 vote

Slow Cooker Onion Garlic Pretzels

I wasn't expecting much from these slow cooker onion garlic pretzels. The recipe did catch my eye, mostly because it contains onion soup/dip mix.
Course Appetizer
Cuisine American
Keyword crockpot, garlic, onion, pretzels, slow cooker
Prep Time 5 minutes
Cook Time 30 minutes
Servings 16
Calories 275kcal

Equipment

Ingredients

Instructions

  • Break the pretzels into bite-sized (1" to 2") pieces.
  • Transfer to a slow cooker set on high.
  • Combine the butter, garlic powder and onion soup/dip mix.
  • Pour over the pretzels and stir gently until coated.
  • Cook on high, uncovered, for two hours, stirring gently every 30 minutes or so.
  • Transfer to wire racks or wax paper to cook.
  • Serve immediately.

Notes

Store any leftovers in an air-tight container.
You can also make these using pretzel nuggets.

Nutrition

Calories: 275kcal | Carbohydrates: 37g | Protein: 5g | Fat: 13g | Saturated Fat: 7g | Trans Fat: 1g | Cholesterol: 31mg | Sodium: 825mg | Potassium: 93mg | Fiber: 2g | Sugar: 1g | Vitamin A: 355IU | Vitamin C: 1mg | Calcium: 17mg | Iron: 2mg

Nutritional values are approximate.

Honey Barbecue Roasted Nuts

I bought a big bag of Kosmo’s Q Honey Barbecue wing dust for… wait for it… wings! Yep, sure did! And they were oh, so good! I love the sweetness and the barbecue flavor. It didn’t take me long to think of sprinkling some of the dust on roasted nuts. And oh, my…. talking about crazy addictingly good! I am one serious chicken wing eater. But these honey barbecue roasted nuts were so great I might just have to save the rest of the dust for more nuts!

Honey Barbecue Roasted Nuts

Great Flavor That Cannot Be Beat

I was pretty heavy-handed with the Kosmo’s Q Honey Barbecue wing dust on my roasted nuts. I wanted it everywhere, on every nut, under every nut, and specially on my fingers (hey, it’s finger-licking good!). You might not want quite as much as I added, so maybe start with half and see. You can actually add more after the nuts have roasted.

Also try my chipotle honey roasted nuts.

Honey Barbecue Roasted Nuts
Print Pin
5 from 1 vote

Honey Barbecue Roasted Nuts

You might now want quite as much honey barbecue wing dust as I added, so maybe start with half and see. You can actually add more after the nuts are roasted.
Course Snack
Cuisine American
Keyword barbecue, BBQ, honey, peanuts
Prep Time 5 minutes
Cook Time 15 minutes
Servings 8
Calories 345kcal

Equipment

Ingredients

Instructions

  • Preheat oven to 350 F.
  • Toss nuts with the oil.
  • Sprinkle the nuts with the dust and toss to coat.
  • Transfer nuts to a baking sheet and bake for 10-15 minutes, stirring once or twice.
  • Remove and let cool before serving.

Notes

Note: If you’re using nuts that are already roasted, cut the cook time to 3-5 minutes.

Nutrition

Calories: 345kcal | Carbohydrates: 14g | Protein: 10g | Fat: 30g | Saturated Fat: 5g | Sodium: 7mg | Potassium: 338mg | Fiber: 5g | Vitamin A: 9IU | Vitamin C: 1mg | Calcium: 40mg | Iron: 2mg

Nutritional values are approximate.