Copycat KFC Chicken Nuggets

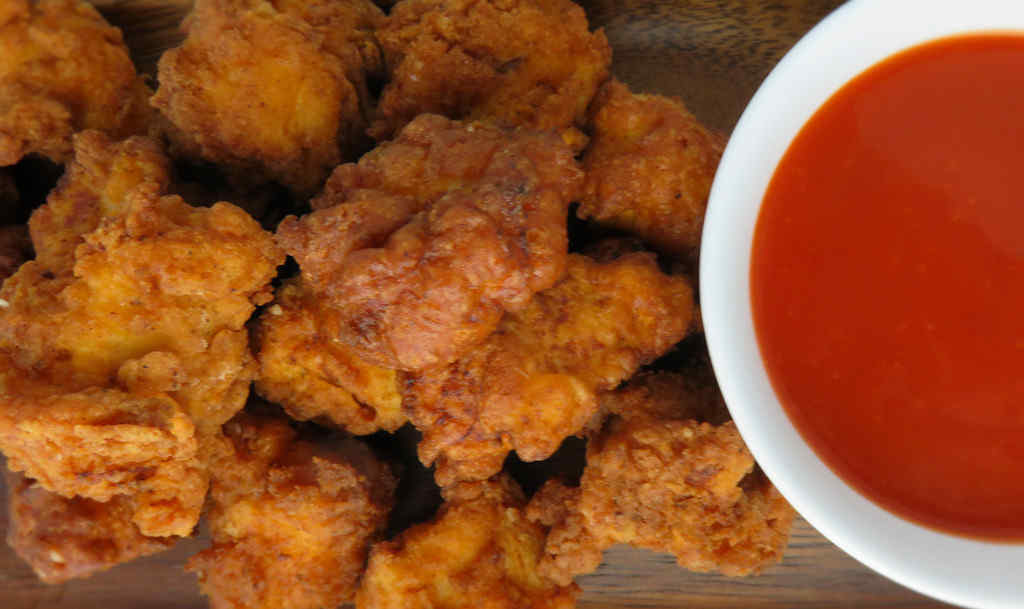
I admit, I’ve never had the chicken nuggets from Kentucky Fried Chicken. I’ve always been more of a give-me-a-bucket-of-crispy-fried-chicken kind of guy. I have been missing out all of these years if this copycat KFC chicken nuggets are even remotely the same as the original. I mean seriously, they’re great. Which begs the question: how many nuggets could you order in the drive-thru before they started to look at you in a strange way? With these little yummies over-indulging is expected.

Copycat KFC Chicken Nuggets

Great Flavor In The Perfect Size

I guess if you were making copycat KFC chicken nuggets for kids you might leave out the cayenne. I could barely detect it. It was there, enough to add flavor and maybe a hint of spiciness, but certainly not enough to burn or make my eyes water. Heck, for my tastes I’ll probably add more next time!

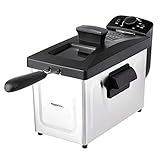
I get out my big deep fryer when it’s time to fry a large batch of food. It comes to temperature quickly and it maintains that temperature perfectly. It has a built-in oil filter and storage unit so I can re-use the oil several times.

Also try my KFC bean salad.

Copycat KFC Chicken Nuggets
Print Pin
3.20 from 5 votes

Copycat KFC Chicken Nuggets

These nuggets are seriously great. Which begs the question: how many nuggets could you order in the drive-thru before they started to look at you in a strange way?
Course Appetizer or Main
Cuisine American
Keyword chicken nuggets, copycat, KFC
Prep Time 15 minutes
Cook Time 15 minutes
Servings 2
Calories 321kcal

Ingredients

Instructions

  • Preheat oil to 350 F.
  • In a small bowl or pie plate, whisk together the flours, salt, pepper, garlic powder, paprika, cayenne and baking powder.
  • In another small bowl or pie plate, whisk together the egg, milk and hot sauce.
  • Working in batches, dip the chicken into the egg mixture, then into the flour mixture, and back into the egg mixture and again the flour mixture. Double dipping will get you that fantastic crunchy coating.
  • Fry for 4-5 minutes or until golden brown and cooked through. Transfer to a wire rack-lined baking sheet to drain and cool slightly before serving.

Notes

Serve with your favorite dipping sauce. Or sauces.

Nutrition

Calories: 321kcal | Carbohydrates: 30g | Protein: 33g | Fat: 7g | Saturated Fat: 2g | Trans Fat: 1g | Cholesterol: 169mg | Sodium: 1319mg | Potassium: 587mg | Fiber: 1g | Sugar: 2g | Vitamin A: 527IU | Vitamin C: 15mg | Calcium: 182mg | Iron: 2mg

Nutritional values are approximate.

Cedar Plank Jalapeno Popper Twice Baked Potatoes

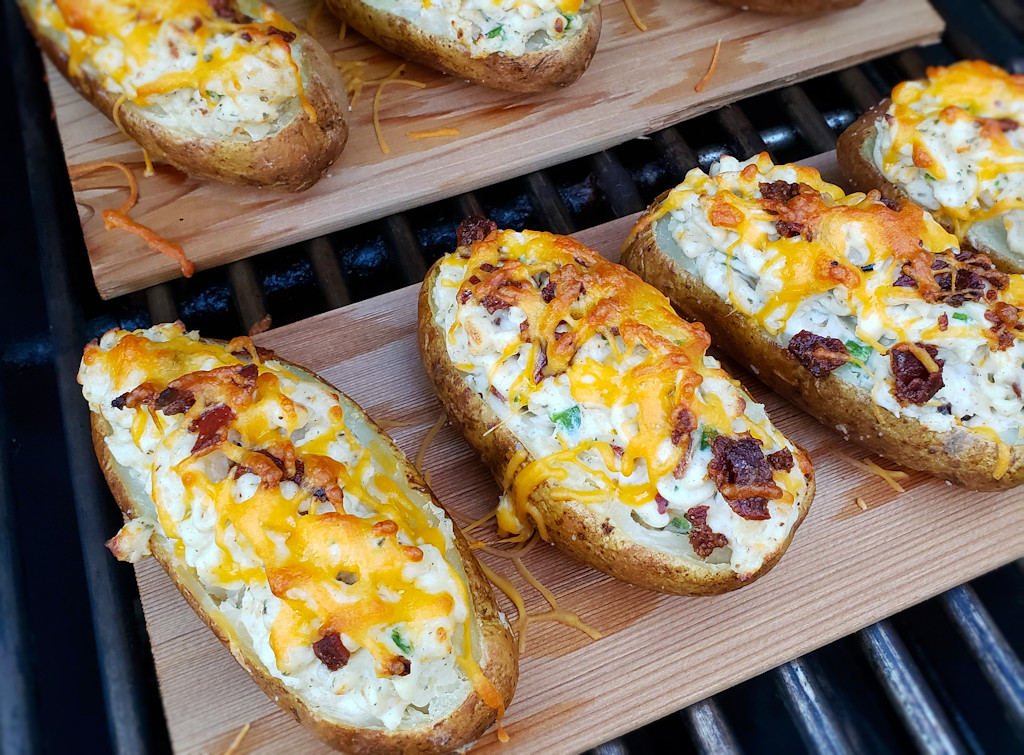
I never met a baked potato I didn’t like. It started as a kid, going to a steakhouse with my parents. Ordering a loaded baked potato was like a right of passage. As important as the steak, the potato was always something I remembered. Now, I make all sorts of variations on the classic, like these cedar plank jalapeno popper twice baked potatoes. Yep, saying them is a mouthful. And yep, I devoured mine by the mouthful too. Packed with all sorts of great flavor, a great kick, and creamy potato goodness, these potatoes give classic bakers a run for their money. The cedar planks add just a hint of cedar aroma, making these quite different than if you’d just baked them in the oven.

Cedar Plank Jalapeno Popper Twice Baked Potatoes

They’re Not Too Spicy

If you’re afraid of the spiciness from the jalapeno, you can omit them and still have fantastic potatoes. But, I have found that cooked jalapenos tend to be less spicy, adding a wonderful pepper flavor without a lot of heat to these cedar plank jalapeno popper twice baked potatoes. You can substitute poblano but you’re going to have a hard time explaining your cedar plank poblano popper twice baked potatoes!

Also try my cedar planked Hasselback potatoes.

Cedar Plank Jalapeno Popper Twice Baked Potatoes
Print Pin
4 from 1 vote

Cedar Plank Jalapeno Popper Twice Baked Potatoes

I never met a baked potato I didn’t like. It started as a kid, going to a steakhouse with my parents. Ordering a loaded baked potato was like a right of passage.
Course Appetizer
Cuisine American
Keyword cedar plank, jalapeno popper, potatoes
Prep Time 15 minutes
Cook Time 1 hour 30 minutes
Servings 6
Calories 715kcal

Ingredients

For the potatoes

For the filling

  • 1 cup sour cream
  • 8 ounces cream cheese softened
  • 1 ½ cups cheddar cheese shredded , divided
  • 1 cup Mozzarella cheese shredded
  • 3 tablespoons Ranch dressing mix or 1 ounce packet of store-bought
  • 4 medium jalapeno peppers seeded, diced, divided
  • 4 slices bacon cooked, crumbled, divided
  • 2 tablespoons green onion diced
  • 1 teaspoon kosher salt
  • ½ teaspoons ground black pepper

Instructions

  • Preheat oven to 400 F. Rinse and dry the potatoes. Poke each several times with a knife. Pour a little oil on each potato and coat on all sides. Sprinkle liberally with the salt.
  • Cook potatoes for 1 hour or until tender. Remove and let cool enough to handle.
  • Meanwhile, soak a large cedar plank in water for later use.
  • Lay the potatoes on their sides. Cut a slice off the top of the potato.
  • Using a spoon, carve out the center of the potatoes, transferring the potato insides to a large bowl. Transfer the now-hollow potatoes to a baking sheet.
  • Add the filling ingredients to the potato, reserving 1/2 cup of the cheddar and enough of the diced jalapeno and bacon for topping later. Mix well.
  • Transfer the potato filling to the hollow potatoes. Top with remaining cheddar and bacon.
  • Fire up your grill for direct and indirect cooking.
  • Remove the plank from the water and place over the direct heat. Char slightly on one side, flip and lightly char the other side.
  • Add the potatoes to the plank and move to indirect (350 – 400 F) heat.
  • Bake for 15-20 minutes or until the cheese is melted.
  • Sprinkle with reserved jalapenos and serve.

Notes

Substitute pepper jack for the cheeses for a nice kicked-up potato.

Nutrition

Calories: 715kcal | Carbohydrates: 75g | Protein: 22g | Fat: 37g | Saturated Fat: 22g | Cholesterol: 107mg | Sodium: 2190mg | Potassium: 1718mg | Fiber: 5g | Sugar: 5g | Vitamin A: 1281IU | Vitamin C: 33mg | Calcium: 429mg | Iron: 4mg

Nutritional values are approximate.

Bacon-Wrapped Mushrooms with Artichokes

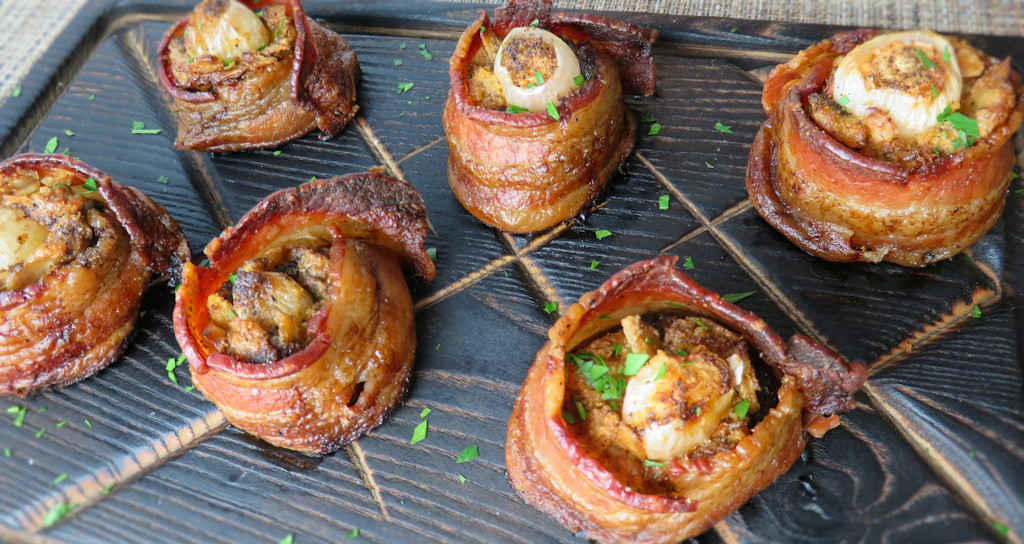
I’ve made my share of stuffed mushrooms. All sorts of different ingredients have found their way into my mushrooms. But never artichokes. These bacon-wrapped mushrooms with artichokes are divine. They’re different and they’re highly addicting. Pearl onions? In a mushroom? Brilliant! The taste is definitely not the same as using ‘regular’ onions, though you could and still have a tremendous appetizer.

Bacon-Wrapped Mushrooms with Artichokes

A Totally Different Appetizer

If you can’t find fresh pearl onions (I was surprised that I did), you can get away with frozen (thawed) ones. Or you can just add a bit of chopped white onion. The onion does add a nice contrast to the creamy artichokes and bacon. I wouldn’t skip adding some sort of onion. You’ll love bacon-wrapped mushrooms with artichokes just as much as we did!

Having a grill basket makes cooking these mushrooms a whole lot easier. You don’t have to worry about anything falling through the grill grates, and cleanup is so much easier. You can hand-wash it or just toss it into the dishwasher. Easy as pie!

Bacon-Wrapped Mushrooms with Artichokes
Print Pin
4 from 1 vote

Bacon-Wrapped Mushrooms with Artichokes

These wonderful bites will disappear in no time!
Course Appetiser
Cuisine American
Keyword artichokes, bacon, mushroom
Prep Time 30 minutes
Cook Time 1 hour
Servings 6 servings
Calories 324kcal

Ingredients

Instructions

  • Fire up your grill for indirect cooking. You're aiming for around 350 F. You can also make these in an oven preheated to 350 F.
  • Remove the stems from the mushrooms. Using a spoon, carefully scrape out the gills. Do not puncture the sides of the mushrooms. You want to create a cavity for the filling.
  • Finely dice the artichoke hearts. Place in a bowl and stir in the olive oil, chili powder and cayenne.
  • Fill each mushroom with the artichoke mix so that's it's just even with the edges of the mushroom.
  • Cut off the ends of the pearl onions and remove the skin. I found it easier to just use my fingers to do this, but a small sharp knife will work also.
  • Gently push each onion into the stuffed mushrooms, leaving about half of the onion exposed. Sprinkle with the garlic salt.
  • Wrap each mushroom in a piece of bacon. Depending on the size of your mushrooms you may want to use slightly less than an entire piece of bacon. You want just enough of the bacon to overlap that you can stick a toothpick through it to secure it to the mushroom.
  • Take a sharp knife and make 4 small slices in the bacon above each mushroom. You're going to make a '+' sign. Don't skip this step, it makes for a better presentation in the end as the bacon will better form around the mushrooms instead of pulling away from them.
  • Sprinkle each stuffed mushroom with plenty of pepper and place on the grill or in the oven.
  • Bake for 60-90 minutes or until the bacon is just starting to crisp up.
  • Put the mushrooms on an oiled broiler pan and into a preheated 350º oven. Bake for approximately 90 minutes, or until the bacon around each mushroom is just barely crisp.
  • Remove and let cool slightly before removing the toothpicks and serving.

Notes

This recipe takes time, but its worth it.

Nutrition

Calories: 324kcal | Carbohydrates: 16g | Protein: 10g | Fat: 25g | Saturated Fat: 7g | Trans Fat: 1g | Cholesterol: 29mg | Sodium: 1351mg | Potassium: 796mg | Fiber: 4g | Sugar: 7g | Vitamin A: 186IU | Vitamin C: 5mg | Calcium: 23mg | Iron: 1mg

Nutritional values are approximate.

Grilled BBQ Shrimp in Oyster Shells

It’s not that I needed any more cookware (or grillware). But I couldn’t help myself when I came across stainless steel oyster shells. I love seafood, and I figured hey, I really need to learn more seafood recipes, so why not get some shells and get to it?! Well, by golly these shells are just fun to cook in and I’ve found myself making super-awesome dishes, like these grilled BBQ shrimp in oyster shells. The shrimp cook up perfectly. And oh, the sauce. The sauce is just insane. The shrimp soak up some of that great buttery herby flavor. The rest of the soakin’ is up to you. Pick up the shell and drink it up, or dip a piece of nice crusty bread in it for a few seconds to sop it up. Man, it’s great!

Grilled BBQ Shrimp in Oyster Shells

Add Some Kick (Optional)

If you like a bit of a kick, add just a pinch (a small pinch) of red pepper flake on top of the shrimp just before grilling (I use my trusty Weber grill!). Don’t go crazy with it, the stars of the show are the perfectly cooked shrimp and fantastic sauce.

I Should’ve Bought More Shells

Don’t make the mistake I made and only purchase 12 stainless steel oyster shells. Everything I’ve made in them has been so yummy that I’ve always found myself craving more. And for more I’d need more shells. So get extra and you won’t be in the same boat.

Also try my crabmeat stuff oyster shells.

Grilled BBQ Shrimp in Oyster Shells
Print Pin
5 from 1 vote

Grilled BBQ Shrimp in Oyster Shells

Well, by golly these shells are just fun to cook in and I’ve found myself making super-awesome dishes, like these grilled BBQ shrimp. The shrimp cook up perfectly.
Course Appetizer
Cuisine American
Keyword barbecue, BBQ, grilled, oyster shells, shrimp
Prep Time 10 minutes
Cook Time 10 minutes
Servings 8
Calories 82kcal

Ingredients

Instructions

  • Note: You can make the butter mix in a small saucepan on your grill or on your indoor stovetop, whichever you prefer.
  • Peel and devein the shrimp. Leave the tail shells on if desired.
  • Fire up your outdoor grill for direct cooking over high heat.
  • Melt butter in a small saucepan over medium-low heat.
  • And remaining ingredients except shells. Stir.
  • Bring mixture to a slow simmer and let simmer until reduced by half, 3-4 minutes.
  • Remove from heat.
  • Place 2 shrimp into each SOS shell.
  • Place the shells on the grill.
  • Cook until the shrimp begin to turn pink on the outside, 4-5 minutes.
  • Baste each shell with 1 tablespoon of the seasoned butter mixture.
  • Caution: The butter will flame up when added, which gives the shrimp a smoky flavor.
  • Cook just until the shrimp are done, 3-5 minutes.
  • Serve immediately.

Notes

Make sure to keep your hands and face away from the fire when basting with the butter as flare ups can occur.

Nutrition

Calories: 82kcal | Carbohydrates: 3g | Protein: 13g | Fat: 2g | Saturated Fat: 1g | Cholesterol: 146mg | Sodium: 502mg | Potassium: 117mg | Fiber: 1g | Sugar: 2g | Vitamin A: 55IU | Vitamin C: 3mg | Calcium: 123mg | Iron: 1mg

Nutritional values are approximate.

Cajun Shrimp in Oyster Shells

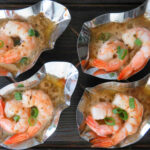
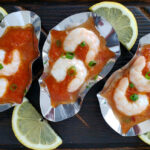
Think shrimp cocktail. Cooked and served in oyster shells, these are quite possibly the perfect grilled (or baked) appetizer. The sauce is so much better, so much more delicious that stuff you get in a bottle. You’ll want to make a lot of these Cajun shrimp in oyster shells because one or two just isn’t going to get it.

Cajun Shrimp in Oyster Shells

Make A Lot, You’ll Need Them

I used stainless steel reusable oyster shells when I made these Cajun shrimp in oyster shells, which have quickly become my go-to servers for seafood and well, just about anything I can fit into them. I can fit two (or even three) large Cajun shrimp into each shell. Even though they go onto a grill or in the oven, they cool off quickly so you can handle them. Just pick them up and slurp them down, just like you were eating oysters. Fun!

This recipe was inspired by one on SOS Shells.

Cajun Shrimp in Oyster Shells
Print Pin
4 from 1 vote

Cajun Shrimp in Oyster Shells

Think shrimp cocktail. Cooked and served in oyster shells, these are quite possibly the perfect grilled (or baked) appetizer. The sauce is so much better, so much more delicious that stuff you get in a bottle.
Course Appetizer
Cuisine American
Keyword grilled, oyster shells, shrimp
Prep Time 15 minutes
Cook Time 15 minutes
Servings 4
Calories 189kcal

Ingredients

Instructions

  • Fire up your grill for medium heat direct cooking. Or, preheat your oven to 350 F.
  • Place the tomato sauce, pepper flake, steak sauce, oil, garlic and onion into a blender and process until smooth.
  • Divide sauce between shells. You might have a bit leftover, or not, depending on how much sauce you want in each shell.
  • Add the shrimp. Transfer to the grill or oven and cook for 15 minutes or until the shrimp have turned pink and translucent.
  • Remove from heat and garnish with green onions before serving.

Notes

You can serve these with cocktail sauce if desired.

Nutrition

Calories: 189kcal | Carbohydrates: 15g | Protein: 25g | Fat: 3g | Saturated Fat: 1g | Cholesterol: 286mg | Sodium: 1482mg | Potassium: 481mg | Fiber: 3g | Sugar: 8g | Vitamin A: 660IU | Vitamin C: 17mg | Calcium: 215mg | Iron: 4mg

Nutritional values are approximate.

Cajun Cheesy Waffle Fries

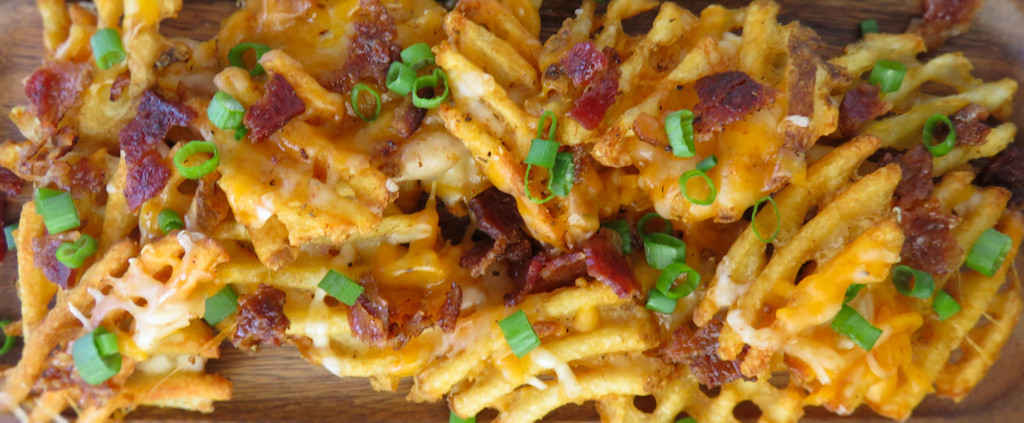
Yeah, I coulda just turned on the oven, tossed in a few waffle fries, and had a side for my burgers in less than 30 minutes. And I would’ve been fairly happy with that. But why not spend any extra minute or two and turn those fries into something special? These Cajun cheesy waffle fries prove just how easy it is to turn a simple side into something fantastic. Smoky bacon, sharp onion and creamy cheese, all on top of waffle fries seasoned well with Cajun seasoning. Just a bit of heat, just a bit of spiciness. Perfect.

Cajun Cheesy Waffle Fries

Go Crazy

Mix it up a bit. I’ve made these Cajun cheesy waffle fries with smoked cheddar, leaving out the bacon, for a wonderful twist. Don’t have green onion? Red onion, minced, works great too! Instead of Cajun seasoning, use your favorite. I like blackened seasoning. Or smoked paprika. You can’t really mess these up. Oh, and sure, if you don’t have waffle fries, good ole French fries work great too! And you don’t have to use pre-make fries, either. You can fry your own. Use a mandolin to make potatoes into those fun waffle shapes.

Also try my Texas fries.

Cajun Cheesy Waffle Fries
Print Pin
5 from 1 vote

Cajun Cheesy Waffle Fries

These Cajun cheesy waffle fries prove just how easy it is to turn a simple side into something fantastic. 
Course Side or Appetizer
Cuisine American
Keyword Cajun, cheesy, fries
Prep Time 5 minutes
Cook Time 30 minutes
Total Time 35 minutes
Servings 8
Calories 297kcal

Equipment

Ingredients

  • 22 ounce waffle fries Ore-Ida Golden Waffle Fries
  • 4 teaspoons Cajun seasoning divided
  • 6 ounces cheese finely shredded . I used a mix of 3 ounces cheddar and 3 ounces Monterrey Jack
  • 4 sliced bacon cooked, crumbled
  • 2 green onions sliced, for topping
  • Ranch dressing for serving, if desired

Instructions

  • Preheat your oven to 450 F. Line a large baking sheet with foil or use a silpat.
  • Add the fries and arrange them into one layer. Bake for 15 minutes.
  • Sprinkle the fries with half of the Cajun seasoning and flip. Return to the oven and bake another 10-15 minutes or until golden brown with crispy edges.
  • Sprinkle tops of fries with the cheese, remaining Cajun seasoning, and the bacon. Return to the oven and bake another 5 minutes to melt the cheese.
  • Sprinkle with green onion and serve with Ranch dressing.

Notes

Drizzle with the dressing right before serving!

Nutrition

Calories: 297kcal | Carbohydrates: 25g | Protein: 8g | Fat: 19g | Saturated Fat: 8g | Cholesterol: 23mg | Sodium: 516mg | Potassium: 387mg | Fiber: 4g | Sugar: 1g | Vitamin A: 735IU | Vitamin C: 5mg | Calcium: 165mg | Iron: 1mg

Nutritional values are approximate.

Panko Fried Shrimp

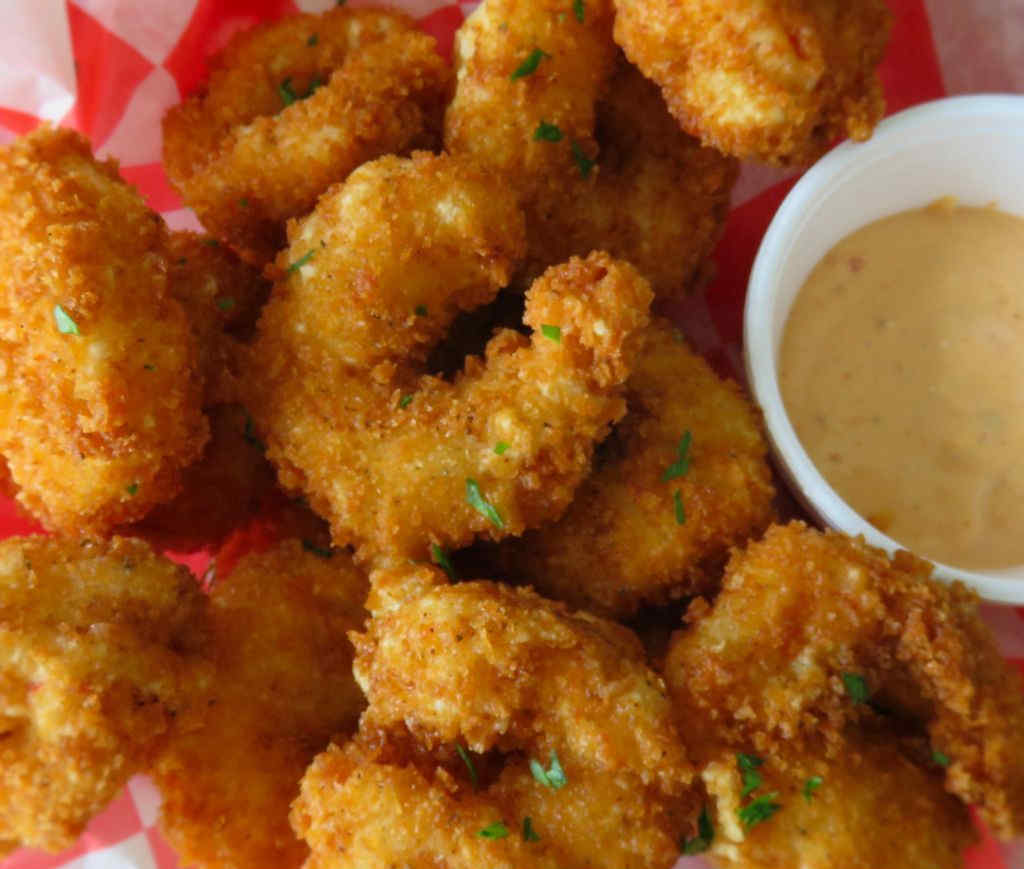
Mmmmm. Crispy panko fried shrimp. If you ordered these little bites of yumminess at a restaurant how many would you get? Five? Six? That’s just not nearly enough. Not even close. They’re just too good to only eat a handful. They’re seasoned simply, fried quickly, and ready to devour before you know it. And there’s no shortage of great crunch, that’s for sure.

Panko Fried Shrimp

Blank Shrimp Need Not Apply

For a little extra ‘something’ I often sprinkle my panko fried shrimp with just a bit of Old Bay seasoning just before I serve them. Not too much seasoning. But enough that you get that wonderful seafood spice aroma and just a little of that great flavor. You don’t want to bury them in it. Try it and you’ll find yourself doing it too.

I get out my big deep fryer when it’s time to fry a large batch of food. It comes to temperature quickly and it maintains that temperature perfectly. It has a built-in oil filter and storage unit so I can re-use the oil several times.

Also try my crispy fried shrimp.

Panko Fried Shrimp
Print Pin
5 from 1 vote

Panko Fried Shrimp

Mmmmm. Crispy panko fried shrimp. If you ordered these little bites of yumminess at a restaurant how many would you get? Five? Six? That’s just not nearly enough.
Course Appetizer
Cuisine American
Keyword crispy, deep-fried, shrimp
Prep Time 15 minutes
Cook Time 15 minutes
Total Time 30 minutes
Servings 4 servings
Calories 379kcal

Ingredients

Instructions

  • Place shrimp in a large bowl. Season well with salt, pepper and seasoning salt.
  • Heat 3-4" of oil in a Dutch oven or deep fryer to 350 F.
  • Add panko to a pie plate or shallow dish.
  • Season with salt, pepper and seasoning salt and stir.
  • In a separate pie plate or shallow dish place the flour.
  • Season with salt, pepper and seasoning salt and stir.
  • In a small bowl whisk together the egg and water.
  • Dip the shrimp in the egg and water mixture and coat. Shake off excess.
  • Add the shrimp to the flour. Toss to coat. Shake off excess.
  • Dip again in egg and water mixture. Shake off excess.
  • Toss shrimp in panko crumbs. Coat well.
  • Working in batches if necessary, add shrimp to the hot oil and fry 3-4 minutes, turning once. Remove to a paper towel-lined plate to drain.
  • Serve with lemon wedges, cocktail sauce or tartar sauce.

Notes

Best served immediately.

Nutrition

Calories: 379kcal | Carbohydrates: 35g | Protein: 43g | Fat: 6g | Saturated Fat: 1g | Trans Fat: 1g | Cholesterol: 522mg | Sodium: 1468mg | Potassium: 233mg | Fiber: 2g | Sugar: 1g | Vitamin A: 135IU | Vitamin C: 7mg | Calcium: 293mg | Iron: 6mg

Nutritional values are approximate.

Colorado Spicy Beef Jerky using Sous Vide

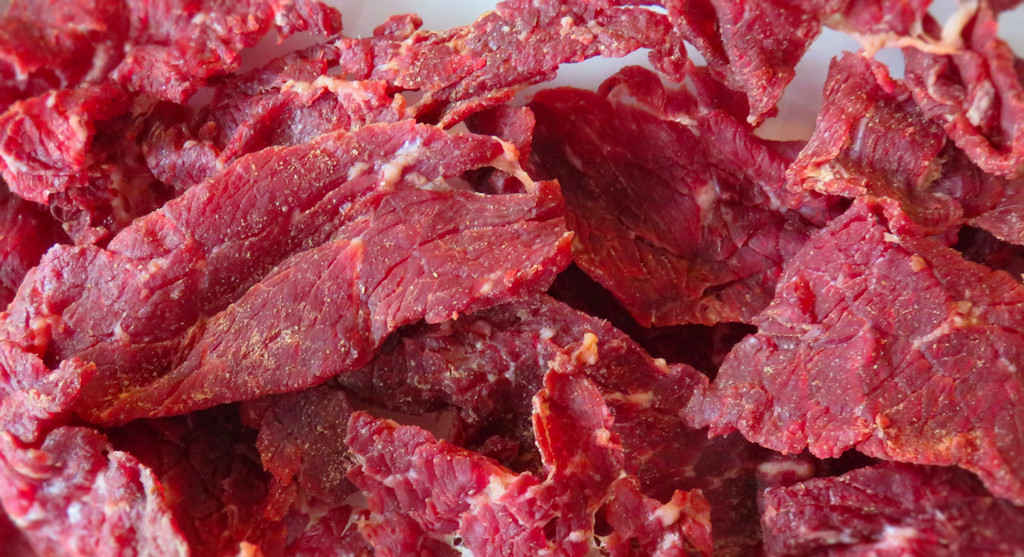
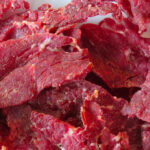
I have made a ton of beef jerky over the years. I loved every flavor, and I never got any complaints from friends and neighbors on it either. But all that time I had never tried to make jerky using sous vide. Well, folks, this Colorado spicy beef jerky using sous vide is off-the-charts crazy good. Packed with flavor, the meat is tender with just the right chew. The perfect chew. I can eat this like popcorn. And I did.

Colorado Spicy Beef Jerky using Sous Vide

A Hint Of Heat

I used Walton’s seasoning and Sure Cure to make this Colorado Spicy Beef Jerky using Sous Vide. The end result was perfect. I’ll use this same technique for now on whenever I make beef jerky. It’s as easy as you can get and as delicious as can be. Though the name says ‘spicy’, it’s not screaming hot. It does sneak up on you a bit, so when you take that first bite, don’t expect the heat to be in the front. No, give it a second… it’ll come. Trust me.

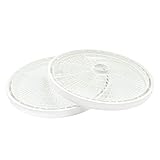
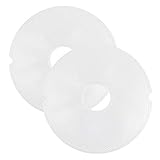
I like to load up my dehydrator. To do that I picked up a handful of extra trays. They really add a whole lot more drying space! Since I have to rotate my trays, I write a number on each one on a piece of blue painter’s tape so I can keep track of them.

Prefer a sweeter jerky? That’s easy too!

Colorado Spicy Beef Jerky using Sous Vide
Print Pin
4.50 from 2 votes

Colorado Spicy Beef Jerky using Sous Vide

This Colorado spicy beef jerky using sous vide is off-the-charts crazy good. Packed with flavor, the meat is tender with just the right chew. The perfect chew. I can eat this like popcorn. And I did.
Course Appetizer
Cuisine American
Keyword deep-fried, dehydrator, jerky, nesco snackmaster pro
Prep Time 15 minutes
Cook Time 9 hours
Servings 8
Calories 288kcal

Ingredients

Instructions

  • Set up your immersion circulator for 108 F sous vide.
  • Combine the jerky seasoning and salt cure per package instructions. Wilbur's has an excellent conversion chart if you need to adjust your quantities for the amount of beef being used. For the cure, visit this link here. For converting the sure cure quantity, visit this link.
  • Place the meat into a large bowl and sprinkle with the seasoning/cure mixture. DO NOT ADD WATER. Using your hands, mix the seasonings and meat well.
  • Transfer the meat to a sealable bag and vacuum seal. Make sure there are no leaks.
  • Transfer bag to sous vide setup and heat for 2 hours.
  • Increase temperature to 130 F and heat for an additional 4 hours.
  • Turn on your dehydrator and heat it to 160 F.
  • Remove the meat from the bag and transfer to the dehydrator. Do not overlap the pieces.
  • Dry for 2-3 hours. Let cool before storing.

Notes

Get extra trays so you can make more jerky at a time!

Nutrition

Calories: 288kcal | Protein: 19g | Fat: 23g | Saturated Fat: 9g | Polyunsaturated Fat: 1g | Monounsaturated Fat: 10g | Trans Fat: 1g | Cholesterol: 81mg | Sodium: 76mg | Potassium: 306mg | Calcium: 20mg | Iron: 2mg

Nutritional values are approximate.

Jalapeno Popper Bites

I’m a huge fan of jalapeno poppers. A little heat, a little cheese (or a lot). Every bite is packed with flavor. These jalapeno popper bites take that yummy concept and elevate it to true greatness. And they’re deep-fried. I mean seriously. I could eat an insane number of these. Don’t just double the recipe, triple it.

Jalapeno Popper Bites

Reheating Any Leftovers Is Easy

On the off-chance you have leftovers (only possible if you quintuple the recipe, in my opinion), these jalapeno popper bites reheat just fine. Just pop them in a 350 F oven for 5-10 minutes and devour!

I often look back at recipes and ponder “What could I do different?”. Not now. Not for this. These are perfect. I can eat way too many of these. Actually, I did.

The Presto Fry Daddy is perfect for making smaller batches of food. It only uses a few cups of oil and comes to temperature quickly. Clean-up is easy too!

Also try my jalapeno popper deviled eggs and my cheesy jalapeno poppers.

Jalapeno Popper Bites
Print Pin
5 from 1 vote

Jalapeno Popper Bites

I’m a huge fan of jalapeno poppers. A little heat, a little cheese (or a lot). Every bite packed with flavor. These jalapeno popper bites take that yummy concept and elevate it to true greatness
Course Appetizer
Cuisine American
Keyword jalapeno popper
Prep Time 45 minutes
Cook Time 20 minutes
Servings 4
Calories 422kcal

Ingredients

For the filling

  • 1 cup Monterey jack cheese freshly shredded
  • 4 ounces cream cheese softened
  • 3 medium jalapeños seeded, minced
  • 6 slices bacon cooked, crumbled
  • 1 teaspoon garlic minced

For the flour mixture

For the egg mixture

  • 2 large eggs room temperature
  • 2 teaspoons water

For the breading mixture

For frying

Instructions

For the filling

  • In a large bowl combine the shredded cheese, cream cheese, jalapenos, cooked bacon, and garlic.
  • Scoop out about 1 tablespoon of the mixture and form it into a tight ball.
  • Place on a parchment-lined baking sheet.
  • Repeat with the remaining cheese mixture.
  • Transfer the baking sheet to the freezer and chill for 30 minutes.

For the assembly

  • Set out three wide and deep plates. Pie plates work the best!
  • First plate: Whisk together the flour, salt and pepper.
  • Second plate: Whisk together the eggs and water.
  • Third plate: Whisk together the bread crumbs, garlic powder, and cayenne pepper.
  • Remove the cheese balls from the freezer. Working in batches, and making sure you cover the balls completely at each plate, dredge the balls first in the flour mixture, then into the egg mixture, and finally the bread crumbs.
  • Transfer to a wire-rack.

For the frying

  • Heat up your deep fryer to 350 F.
  • Working in batches, fry the cheese balls for 3-4 minutes, until golden brown, rotating as they cook.
  • Transfer to a wire-rack to drain.
  • Serve hot with your favorite dipping sauce.

Notes

Serve with your favorite dipping sauce.

Nutrition

Calories: 422kcal | Carbohydrates: 34g | Protein: 17g | Fat: 24g | Saturated Fat: 13g | Trans Fat: 1g | Cholesterol: 151mg | Sodium: 624mg | Potassium: 206mg | Fiber: 2g | Sugar: 3g | Vitamin A: 951IU | Vitamin C: 13mg | Calcium: 308mg | Iron: 3mg

Nutritional values are approximate.

Fried Mozzarella Pepperoni Sticks

Ever bite into an appetizer, roll your eyes, make that ‘ooooooh my’ sound and smile? You turn to the person next to you and you smile ‘that’ smile? That’s what we did when we took our first memorable bite of these fried mozzarella pepperoni sticks. The egg rolls are so crunchy and yummy. The cheese gets all yummy gooey, melty, yummy. The pepperoni adds a bite of meaty spiciness. All dunked in warm marinara.

Fried Mozzarella Pepperoni Sticks

Don’t Mess With Perfection

We both agree, we’ll probably not make anything more delicious or as addicting as these fried mozzarella pepperoni sticks. Oh we could probably make some changes. Maybe use a different cheese. I think a pepperjack cheese or anything spicy would be great. Use pizza sauce for dunking. But why? There’s no point at all messing with this level of perfection. Just make them and enjoy and don’t over-think them. They’re awesome!

I get out my big deep fryer when it’s time to fry a large batch of food. It comes to temperature quickly and it maintains that temperature perfectly. It has a built-in oil filter and storage unit so I can re-use the oil several times.

Fried Mozzarella Pepperoni Sticks
Print Pin
5 from 1 vote

Fried Mozzarella Pepperoni Sticks

Every bite into an appetizer, roll your eyes, make that ‘ooooooh my’ sound and smile? That’s what we did when we took our first memorable bite of these fried mozzarella pepperoni sticks.
Course Appetizer
Cuisine American
Keyword deep-fried, mozzarella, pepperoni
Prep Time 15 minutes
Cook Time 15 minutes
Servings 6
Calories 141kcal

Equipment

Ingredients

Instructions

  • Heat oil to 375 F in a deep fryer, Dutch oven or deep skillet.
  • Working in batches, place egg roll wrappers in front of you with one corner towards you and one pointing away from your. The others will point to your left and right, forming a diamond. The wrappers are rectangular so it won't be a perfect diamond, but close enough.
  • Place three pieces of pepperoni in the center of the wrapper, leaving about an inch between the pepperoni and the left and right points of the diamond.
  • Center a piece of cheese over the pepperoni.
  • Grab the bottom point of the wrapper and fold over the top of the cheese. Fold in the sides. Then roll up until you get to the top point. Just before you roll that last inch brush the inside of the wrapper with water to help hold.
  • Fry the sticks in oil for about 1 minute or until golden brown.
  • Remove to a wire rack-lined sheet pan to drain and cool slightly.
  • Serve with warmed marinara sauce for dipping.

Notes

Also great dipped in Ranch dressing!

Nutrition

Calories: 141kcal | Carbohydrates: 15g | Protein: 6g | Fat: 6g | Saturated Fat: 2g | Trans Fat: 1g | Cholesterol: 16mg | Sodium: 376mg | Potassium: 55mg | Fiber: 1g | Vitamin A: 4IU | Vitamin C: 1mg | Calcium: 16mg | Iron: 1mg

Nutritional values are approximate.