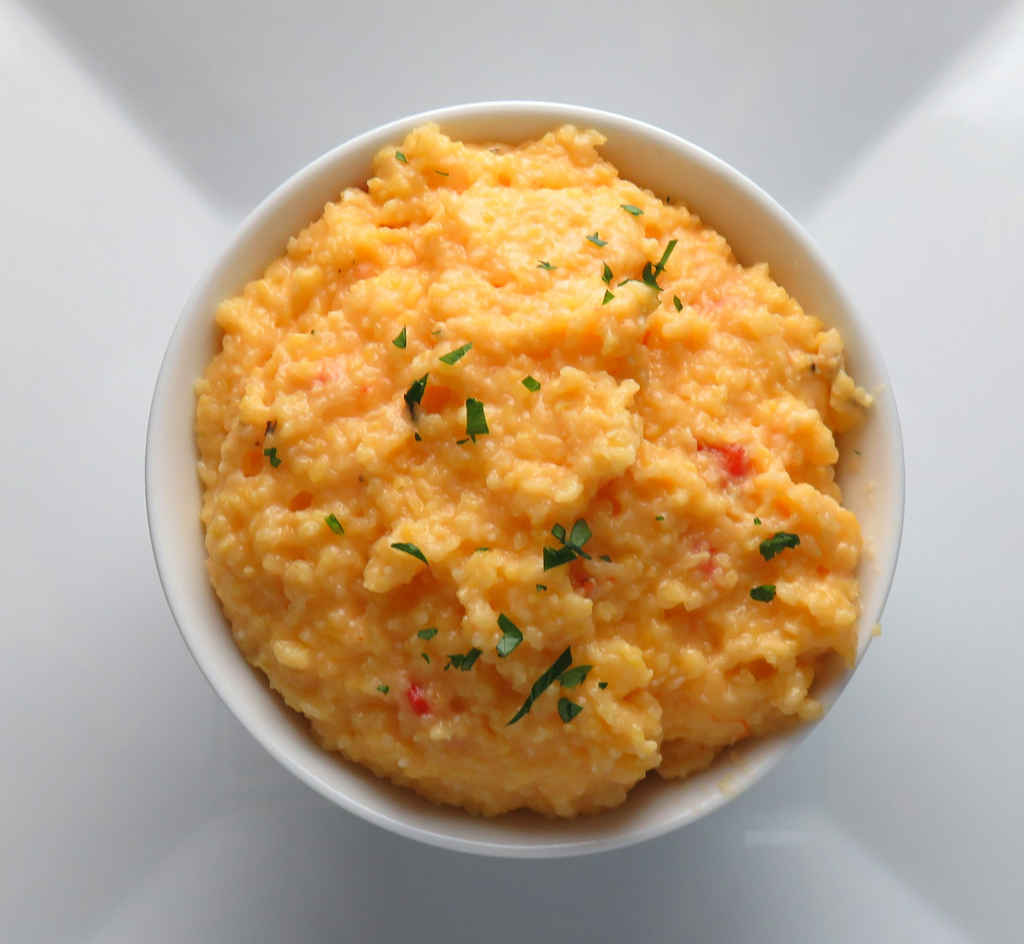
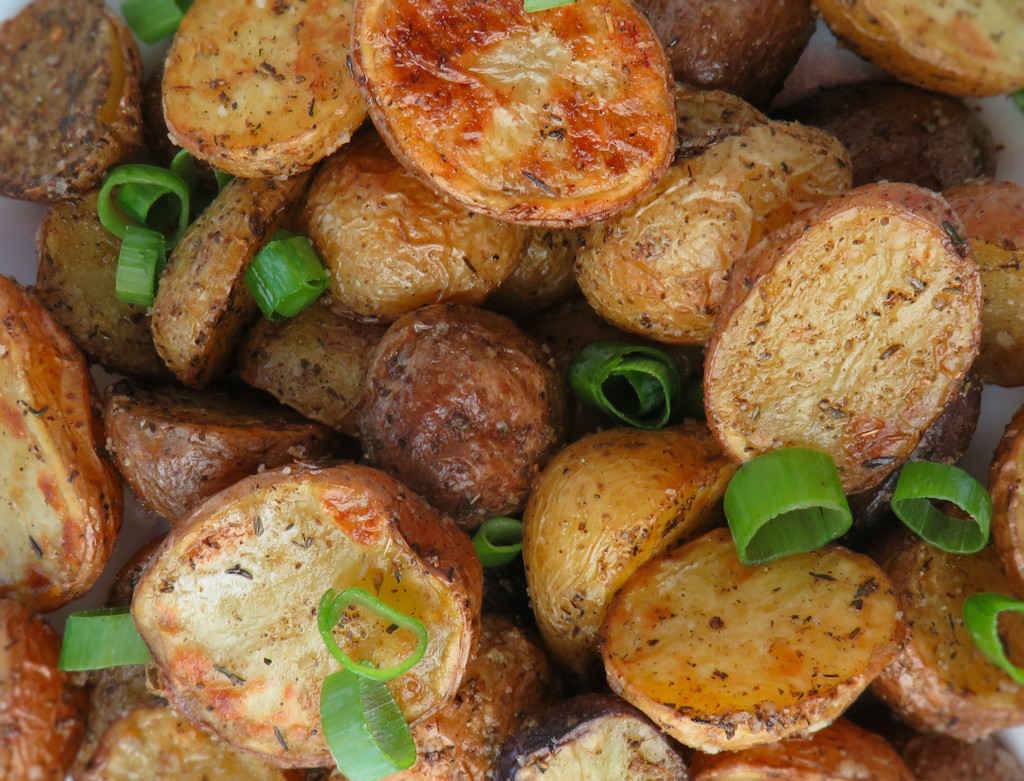
Crispy Fries using a Fry Daddy Fryer

This is my go-to method for making a small batch of the best-tasting, crispiest French fries. Making delicious crispy fries using a Fry Daddy Fryer takes just a little bit of time and just a handful of ingredients. The end result is mouth-wateringly good and hard to resist. Most double-fried recipes require two different cooking temperatures. But, you can’t adjust the temperature on a Fry Daddy. Don’t let that worry you. These will be the best fries you’ve made. Or had.

Crispy Fries using a Fry Daddy Fryer

The Keys To Perfect Fries Every Time

There are two key steps to making sure these crispy fries using the Fry Daddy Fryer come out perfectly. First, make sure you rinse the raw potatoes in cold water and keep rinsing until the water is clear. You want all that starch gone, as if you’re making rice. Second, let the fries come to room temperature (or near it) before the second frying.

The fries will crisp up just a bit more after they come out of the fryer so it’s ok to remove them just before you think they’re like you want them. It’s not critical, but after doing these a time or two you’ll get the timing for what’s best for you. Don’t worry, they’ll be great no matter what!

The Presto Fry Daddy is perfect for making smaller batches of food. It only uses a few cups of oil and comes to temperature quickly. Clean-up is easy too!

You’ll want to dip your fries in my copycat Freddy’s fry sauce, for sure!

Crispy Fries using a Fry Daddy Fryer
Print Pin
5 from 1 vote

Crispy Fries using a Fry Daddy Fryer

This is my go-to method for making a small batch of the best-tasting, crispiest French fries.
Course Side
Cuisine American
Keyword deep-fried, fries
Prep Time 15 minutes
Cook Time 30 minutes
Servings 4
Calories 2148kcal

Ingredients

  • 4 medium Russet potatoes cleaned, peeled if desired
  • 4 cups vegetable oil for frying
  • kosher salt or your favorite fry seasoning, to taste

Instructions

  • Fill a large bowl with cold water.
  • Slice the potatoes into thin, 1/8"-1/4" sticks. Try to keep them the same thickness.
  • Place fries into the water. Add more water if needed to keep them fully submerged.
  • Add the oil to the fryer and plug it in according to the manufacturer's instructions.
  • Drain the fries. Refill with more cold water. Stir the potatoes. Repeat this step (draining, refilling) until the water is no longer cloudy. This usually just takes me two times.
  • Drain the potatoes well and transfer to a large kitchen towel. Pat dry. Make sure you get them dry or they will splatter when you add them to the hot oil.
  • Working in batches if needed, fry the potatoes until just starting to turn a light brown. You are not cooking them fully, you do not want them to be golden brown yet. Do not over-crowd the fryer.
  • Remove the fries from the fryer using the slotted spoon that comes with the unit. Place on a wire rack over a baking pan to drain. Spread them out evenly.
  • Let the fries cool to room temperature, about 10 minutes.
  • Working in batches if necessary, return the fries to the fryer and finish cooking them. You want them nice and lightly golden brown. I've found that you can actually crowd the fryer a little more than usual for this step. The fries are mostly cooked, you're just crisping them up and giving them some color so a little extra potatoes in there isn't going to hurt. Just don't over-fill the fryer.
  • Remove the fries to the wire rack again to drain. Season well with salt. I prefer to transfer the fries from the rack to a large bowl, sprinkle them with the salt, and toss to season evenly.
  • Serve immediately.

Notes

If you haven’t tried your fries dipped in mayonnaise, now’s a great time to give it a whirl! 

Nutrition

Calories: 2148kcal | Carbohydrates: 38g | Protein: 5g | Fat: 224g | Saturated Fat: 17g | Polyunsaturated Fat: 63g | Monounsaturated Fat: 142g | Trans Fat: 1g | Sodium: 11mg | Potassium: 888mg | Fiber: 3g | Sugar: 1g | Vitamin A: 2IU | Vitamin C: 12mg | Calcium: 28mg | Iron: 2mg

Nutritional values are approximate.

Sweet and Sassy Red Potato Salad

If you put a paper plate loaded with fried chicken and this sweet and sassy red potato salad in front of me I’d honestly go for the potato salad first. And that’s saying a lot, because I love fried chicken almost more than anything. This salad is different, mostly thanks to the addition of pickle juice in the dressing. That pickle edge takes this dish from great to amazing.

Sweet and Sassy Red Potato Salad

The Perfect Side Dish

This sweet and sassy red potato salad would be the perfect side dish for a family get-together. Or a potluck. Or just a good old fashioned picnic. It travels well and tastes amazing. It’s perfect cold, and just as good (if not a tad better) served warm. You can’t go wrong with it.

I almost always use Blue Plate mayonnaise in the dishes I make. I think it is the best around. If you can’t find it locally you can pick it up online for a fair price.

I don’t like to boil my potatoes when making potato salad. I don’t like them little taters rolling around in the hot water, bumping each other, scraping each other’s skin off (yikes, that sounds even worse than I thought). Instead, I prefer to steam them. So I load up a steam basket, put it above a pot of slowly boiling water, and let it steam until the potatoes are just tender. The skins are left perfectly intact.

Sweet and Sassy Red Potato Salad
Print Pin
5 from 1 vote

Sweet and Sassy Red Potato Salad

If you put a paper plate loaded with fried chicken and this sweet and sassy potato salad in front of me I'd honestly go for the potato salad first.
Course Side
Cuisine American
Keyword potato salad, spicy, sweet
Prep Time 20 minutes
Cook Time 15 minutes
Servings 8
Calories 177kcal

Ingredients

For the salad

  • 2 pounds small red potatoes
  • 2 large eggs
  • ½ cup sweet pickles chopped fine
  • ½ cup sweet onions chopped fine
  • ¼ cup celery chopped fine
  • ¼ cup fresh chives chopped fine, divided

For the dressing

Instructions

For the salad

  • Steam or boil the potatoes until done. I prefer steaming them because it keeps the skins intact. Do not peel. Let the potatoes cool and cut into quarters.
  • Meanwhile, hard-boil and peel the eggs. Chop fine.
  • In a large bowl, gently combine the potato quarters, pickles, eggs, onion, celery and most of the chives (reserving some for garnish later).
  • Prepare the dressing (see below) and pour over the potato mixture. Gently stir with a spatula.
  • Serve warm or refrigerate for at least an hour if serving cold. Serve garnished with remaining chives.

For the dressing

  • In a medium bowl, whisk together the mayo, Dijon, pickle juice, and vinegar.
  • Add salt and pepper to taste and stir.
  • If the dressing is too thick add a bit more pickle juice and stir.

Nutrition

Calories: 177kcal | Carbohydrates: 4g | Protein: 2g | Fat: 17g | Saturated Fat: 3g | Polyunsaturated Fat: 10g | Monounsaturated Fat: 4g | Trans Fat: 0.04g | Cholesterol: 55mg | Sodium: 413mg | Potassium: 64mg | Fiber: 0.5g | Sugar: 3g | Vitamin A: 227IU | Vitamin C: 1mg | Calcium: 23mg | Iron: 0.4mg

Nutritional values are approximate.

Roasted Hatch Chile Slaw

I picked up a case of Hatch chiles once they were in season last summer. I ended up roasting most of them. They freeze really well. That’s great because I can then use them throughout the rest of the year, in everything from sauces to slaws. Roasted Hatch chile slaw is a sweeter, more mellow version of my roasted poblano slaw. The Hatch chiles add such a great mild chile pepper flavor without a spicy kick. Now, if you prefer spiciness, add a minced jalapeno or two or three.

Roasted Hatch Chile Slaw

No Hatch Chiles? Use Green Chiles Instead.

Not everyone has access to fresh Hatch chiles (which is kind of sad, really, because I’ve really fallen in love with cooking with them). You can substitute canned chopped green chiles, or green bell pepper if prefer. Of course you can’t call it roasted Hatch chile slaw if you !

I almost always use Blue Plate mayonnaise in the dishes I make. I think it is the best around. If you can’t find it locally you can pick it up online for a fair price.

To roast the pepper a grill is best, but you can also throw them on a pan under the broiler, turning often, until the skin is nice and charred. Place in a bowl, covered, for 15 minutes then remove the charred skin. Don’t place the roasted peppers under running water, that’ll wash away some of that great roasted flavor.

Also try my roasted poblano slaw.

Roasted Hatch Chile Slaw
Print Pin
4 from 1 vote

Roasted Hatch Chile Slaw

Roasted Hatch chile slaw is a sweeter, more mellow version of my roasted poblano slaw. The Hatch chiles add such a great mild chile pepper flavor without a spicy kick. Now, if you prefer spiciness, add a minced jalapeno or two or three.
Course Side
Cuisine American
Keyword cole slaw, coleslaw, slaw
Prep Time 15 minutes
Cook Time 5 minutes
Total Time 20 minutes
Servings 6 servings
Calories 69kcal
Author Mike

Equipment

Ingredients

  • 2 Hatch chiles if you can’t find any, substitute a 4 ounce can of roasted green chiles and skip the roasting step
  • ½ medium green cabbage shredded
  • ¼ cup cilantro chopped
  • 2 cloves garlic minced
  • ½ teaspoon ground cumin
  • 2 teaspoons hot sauce
  • 2 tablespoons lime juice you might want a bit more
  • 2 tablespoons seasoned rice vinegar
  • 2 tablespoons mayonnaise
  • 2 tablespoons sour cream
  • kosher salt to taste
  • freshly ground black pepper to taste
  • Cotija cheese crumbled, or topping (or substitute crumbled Feta), optional

Instructions

  • Roast the chiles on your grill or under your broiler until the skin is blackened. Let cool slightly then remove the burnt skin. Remove the seeds and stem and chop.
  • Place the chiles, cabbage and cilantro into a large bowl. Combine.
  • In a small bowl, whisk the remaining ingredients not including the cheese.
  • Pour over the slaw mixture.
  • Serve topped with the cheese if using.

Notes

Stir before serving.

Nutrition

Calories: 69kcal | Carbohydrates: 7g | Protein: 1g | Fat: 4g | Saturated Fat: 1g | Trans Fat: 1g | Cholesterol: 4mg | Sodium: 145mg | Potassium: 158mg | Fiber: 3g | Sugar: 3g | Vitamin A: 157IU | Vitamin C: 33mg | Calcium: 42mg | Iron: 1mg

Nutritional values are approximate.

Pimento Cheese Grits

I find myself making more and more dishes from Chef Vivian Howard’s book, Deep Run Roots. Her southern-inspired recipes are packed with flavor and tradition. I made a big batch of Chef Howard’s pimento cheese, which by itself is insanely good. Half went for sandwiches while the other half ended up in these delicious pimento cheese grits. Creamy and yummy. I love grits. Adding pimento cheese to them makes me love them even more. I didn’t think that was possible.

Pimento Cheese Grits

Quality Grits Make For… Great Grits!

I use corn grits polenta from Bob’s Mill. They cook up in about 30 minutes and always have the perfect texture and flavor, great for pimento cheese grits. You can substitute quick-cooking grits in a pinch. They only take about 5 minutes.

Also try my cheddar Ranch grits.

Pimento Cheese Grits
Print Pin
5 from 1 vote

Pimento Cheese Grits

Creamy and yummy. I love grits. Adding pimento cheese to them makes me love them even more. I didn’t think that was possible.
Course Main or Side
Cuisine American
Keyword grits, pimento cheese
Prep Time 10 minutes
Cook Time 45 minutes
Total Time 55 minutes
Servings 8
Calories 674kcal

Ingredients

For the pimento cheese grits

  • 1 cup grits
  • 2 teaspoons unsalted butter
  • 1 ½ cups pimento cheese from below

For the pimento cheese (makes enough for 3 batches of grits)

  • 2 cups extra sharp cheddar cheese shredded
  • 2 cups white cheddar cheese shredded
  • ½ cup pimentos drained
  • â…“ cup crushed tomatoes canned, drained (I used fire-roasted tomatoes)
  • ¼ cup mayonnaise
  • 2 tablespoons sour cream
  • ¼ teaspoon hot sauce or more
  • ½ teaspoon Kosher salt

Instructions

For the pimento cheese grits

  • Cook the grits per package instructions.
  • Add butter and melt.
  • Fold in the pimento cheese and heat until melted. Serve.

For the pimento cheese

  • Place all but the salt into a mixer with the blade attachment. Process for 30 seconds.
  • Add salt to taste and process 10 more seconds.

Notes

Also great made with pepper jack cheese.

Nutrition

Calories: 674kcal | Carbohydrates: 31g | Protein: 22g | Fat: 48g | Saturated Fat: 24g | Trans Fat: 1g | Cholesterol: 121mg | Sodium: 1362mg | Potassium: 182mg | Fiber: 1g | Sugar: 7g | Vitamin A: 1875IU | Vitamin C: 19mg | Calcium: 770mg | Iron: 1mg

Nutritional values are approximate.

Copycat Taco Bell Nacho Fries

Who wants boring frozen fries? Not me! Not you! In just minutes you can transform that bag of sadness into something great with this copycat Taco Bell Nacho fries. Spicy (as spicy as you want) seasoning that’ll wake you up and make you forget those tasteless fries of yesterday. And the cheese sauce! Oh my! Double the recipe and you’ll thank me, because you seriously cannot get too much of the sauce on your fries!

Copycat Taco Bell Nacho Fries

Crinkles Hold More Of The Good Stuff

For my copycat Taco Bell nacho fries I used crinkle fries. That’s not what you’ll get at the fast food joint. Why did I commit such a heinous crime? Well, those crinkles hold more cheese sauce and the cheese sauce is yummy! Old-school skinny fries aren’t going to give the glorious sauce as much to cling to. Go crinkle and get happy, I say!

I admit that at first, I was pretty sure I didn’t want or need an air fryer. Heck, I can bake my fries in my oven. I can cook my wings on my grill. Yes, I made a lot of excuses for not getting one. Well, the neighbor gave me one of her old ones and I’ve never looked back! I used to cook these copycat Taco Bell nacho fries!

I use a pretty straight-forward air fryer, that doesn’t have a lot of bells (ok, it has a bell for when the timer goes off!) and whistles. It gets the job done.

Also try my spicy bacon cheese fries.

Copycat Taco Bell Nacho Fries
Print Pin
5 from 1 vote

Copycat Taco Bell Nacho Fries

The most addicting fries around.
Course Side Dish or Appetizer
Cuisine American
Keyword copycat, fries, Taco Bell
Prep Time 10 minutes
Cook Time 10 minutes
Servings 6
Calories 125kcal

Ingredients

For the seasoning

For the cheese sauce

For the fries

  • 2 pounds Ore-Ida Golden Fries frozen French fries or your favorite kind

Instructions

For the fries

  • Prepare the fries according to the bag. I recommend making them in an air fryer or deep fryer to get them good and crunchy. While the fries are cooking, making the seasoning and sauce.
  • Transfer the cooked fries to a large bowl and sprinkle with the seasoning blend (using however much or little as you want, you might have leftover seasoning). Toss lightly to coat. Serve with the warm cheese sauce on the side.

For the seasoning

  • Combine the ingredients in a small bowl. I like to put them in a resealable container, close the lid, and shake gently to combine.

For the cheese sauce

  • Heat a small saucepan over medium-low heat. Add the cheese and heat through. Whisk in the remaining ingredients. Keep warm until needed, stirring occasionally.

Notes

The cheese sauce is great for dipping tortilla chips, too!

Nutrition

Calories: 125kcal | Carbohydrates: 5g | Protein: 6g | Fat: 9g | Saturated Fat: 6g | Polyunsaturated Fat: 0.1g | Monounsaturated Fat: 0.1g | Cholesterol: 32mg | Sodium: 1429mg | Potassium: 147mg | Fiber: 0.4g | Sugar: 4g | Vitamin A: 522IU | Vitamin C: 5mg | Calcium: 169mg | Iron: 0.2mg

Nutritional values are approximate.

Easy Pimento Cheese Grits

Pimento cheese is one of those things that does not last very long in our house. Make a batch, do a quick errand, come back.. gone! It doesn’t seem to matter how much I make, it’s gone in an instant. Where does it go? Well, one place is in this delicious easy grits dish. Creamy, yummy grits with kicked up pimento cheese. You can’t beat it. Sure, pimento cheese is great on crackers or sandwiches, but in grits… oh me is it ever amazing. Always make extra.

Easy Pimento Cheese Grits

Cheese Grits Elevated

As much as grits are a wonderful thing, the star of this show is the pimento cheese and it deserves the love and the attention it needs to be extraordinary. First, hand shred your cheese. None of that pre-shredded bagged stuff. It has cornstarch or other coatings on it to keep it from sticking. Nope, pass on that. If you’re not a big fan of shredding with your old hand-powered box shredder, get one of these. It’s awesome!

Second, make the pimento cheese the night before you make this dish. Let it get happy in the fridge, just hanging out. It’s better that way. The flavors and the consistency are better the next day.

Also try my smoked tomato cheese grits.

Easy Pimento Cheese Grits
Print Pin
5 from 1 vote

Easy Pimento Cheese Grits

Great cheesy creamy grits!
Course Side
Cuisine American
Keyword grits, pimento cheese
Prep Time 1 hour
Cook Time 15 minutes
Servings 6
Calories 818kcal

Ingredients

For the grits

For the pimento cheese

Instructions

For the grits

  • Add the milk and water to a large pot and bring to a boil over medium-high heat.
  • Reduce the heat to low and add the grits, stirring as you pour.
  • Add salt to taste.
  • Let the grits simmer for 15 minutes, stirring often, until they are thick and creamy.
  • Turn off the heat. Stir in the pimento cheese and season with pepper.
  • Serve garnished with parsley if desired.

For the pimento cheese

  • Place all ingredients except the salt and pepper into a bowl.
  • Combine.
  • Add salt and pepper to taste and stir.
  • Refrigerate at least an hour before using.

Notes

You can make the pimento cheese the day ahead.

Nutrition

Calories: 818kcal | Carbohydrates: 33g | Protein: 24g | Fat: 65g | Saturated Fat: 24g | Polyunsaturated Fat: 18g | Monounsaturated Fat: 13g | Trans Fat: 0.1g | Cholesterol: 118mg | Sodium: 1353mg | Potassium: 292mg | Fiber: 2g | Sugar: 9g | Vitamin A: 1852IU | Vitamin C: 23mg | Calcium: 809mg | Iron: 2mg

Nutritional values are approximate.

Crispy Cajun Fries

These crispy Cajun fries get their crunchiness from a combination of corn flour and cornmeal. They’re something I’d never experienced before. They’re different, quite different, than regular ole deep fried fries. They have much more flavor, and a totally different texture. The outside is crunchy, the inside is creamy. I could not stop eating them, that’s for sure, and they made for the perfect side for my fried Cajun shrimp.

Crispy Cajun Fries

Thinner Is Crispier

I like to cut my potatoes thin when I make these crispy Cajun fries. I reserve thicker cuts for baking or grilling. For deep frying I want them thin and all the same size so they come out cooked evenly and perfectly crunchy. I keep my knife super sharp for dishes like this, and my fries always come out great (not to brag… but I just did).

I use my lil ole Fry Daddy deep fryer for this fries when it’s just the two of us. Its perfect for small batches. It fries well and uses less oil than a big fryer. If I need to I can fry in batches. Fries don’t take long so I don’t worry about them getting cold in between batches.

I get out my big deep fryer when it’s time to fry a large batch of food. It comes to temperature quickly and it maintains that temperature perfectly. It has a built-in oil filter and storage unit so I can re-use the oil several times.

Also try my quick fix herbed fries.

Crispy Cajun Fries
Print Pin
5 from 1 vote

Crispy Cajun Fries

These crispy Cajun fries get their crunchiness from a combination of corn flour and cornmeal.
Course Side
Cuisine American
Keyword Cajun, crispy, fries
Prep Time 10 minutes
Cook Time 18 minutes
Servings 6
Calories 1256kcal

Ingredients

Instructions

  • Place uncooked fries into a large bowl of cold water.
  • Add the hot sauce and stir.
  • Let soak for 10 minutes.
  • Heat oil in a deep fryer or Dutch oven to 375 F.
  • Place corn flour, corn meal and Cajun seasoning in a large resealable bag or container.
  • Drain the potatoes but do not pat dry. You want them damp.
  • Add to the seasoning bag.
  • Seal and shake to coat.
  • Fry potatoes (working in batches if needed) 7-10 minutes or until golden brown.
  • Remove to a wire rack on a baking sheet or paper towel-lined plate and season with salt.

Notes

Serve immediately for the best fry experience!

Nutrition

Calories: 1256kcal | Carbohydrates: 275g | Protein: 34g | Fat: 8g | Saturated Fat: 1g | Polyunsaturated Fat: 4g | Monounsaturated Fat: 2g | Sodium: 61mg | Potassium: 4472mg | Fiber: 26g | Sugar: 9g | Vitamin A: 6910IU | Vitamin C: 52mg | Calcium: 309mg | Iron: 13mg

Nutritional values are approximate.

Mushroom and Onion Baked Potatoes

Loaded baked potatoes are something I’ve had a love affair with ever since my college days. They were a great way to get a cheap, and still delicious, dinner. Yep, I love a baked potato as a meal. I don’t need anything else. These mushroom and onion baked potatoes are great as either a main dish or a side. They aren’t shy on the mushrooms. You won’t go searching for them. You’re going to get plenty in each and every bite. Cooked perfectly, this is a favorite potato of mine!

Mushroom and Onion Baked Potatoes

The Topping Full Of Goodness!

The bigger the potatoes you use for your mushroom and onion baked potatoes, the more of the yummy mushroom and onion mixture you can pack inside. But, on the off chance you end up with leftover stuffing, you cannot go wrong with using it as a topping for grilled burgers. It’s fantastic on burgers. And it’s great in omelets too! So make extra, you’ll love it!

Whether you cook your potatoes in the oven or on a grill, potato nails help ensure they cook nice and evenly! And they look kinda cool too!

Also try my cheesy broccoli baked potatoes.

Mushroom and Onion Baked Potatoes
Print Pin
5 from 1 vote

Mushroom and Onion Baked Potatoes

Make extra mushroom mixture for topping burgers!
Course Main or Side
Cuisine American
Keyword baked, potatoes
Prep Time 15 minutes
Cook Time 1 hour
Servings 4
Calories 360kcal

Equipment

Ingredients

For the potatoes

For the mushroom mixture

Instructions

For the potatoes

  • Preheat oven to 400 F
  • Pierce each potato 4 times with a sharp knife.
  • Brush potatoes with oil.
  • Sprinkle some salt onto a plate and roll the potatoes in the salt.
  • Place potatoes directly on the oven center rack. You might want to put a baking sheet lined with foil beneath them to catch any drippings.
  • Bake until potatoes are done (210 F internal temperature, or tender all the way through when poked with a knife), 40-60 minutes depending on their size. You can also test for doneness by squeezing the potatoes (with potholders on). If they give easily, they are done.
  • When ready to serve, poke the tops of the potatoes with a fork in cross pattern (i.e. from edge-to-edge and top-to-bottom). Pretend you are tracing the lines you would make if cutting the potatoes with a knife. Then, grab the potatoes from the ends and squeeze. The potatoes will open up perfectly. Fluff with the fork before adding the mushroom mixture.
  • Top with cheese if desired.
  • Place the potatoes under the broiler for a minute or two if you want to melt and toast the cheese.

For the mushroom mixture

  • Melt butter in a large skillet over medium-high heat.
  • Stir in the Worcestershire sauce.
  • Add the mushrooms and cook until they start to soften, about 5 minutes, stirring gently on occasion.
  • Add the onions and stir.
  • Cook another 5 minutes, stirring gently on occasion, until the onions are just softened.
  • Reduce heat to low.
  • Add the garlic and season with salt and pepper, to taste.
  • Stir and cook another 2-3 minutes or until the garlic is cooked.
  • Remove from heat until ready to use.

Notes

The mushroom and onion mixture is also great on hamburgers!

Nutrition

Calories: 360kcal | Carbohydrates: 80g | Protein: 13g | Fat: 1g | Saturated Fat: 1g | Polyunsaturated Fat: 1g | Monounsaturated Fat: 1g | Cholesterol: 1mg | Sodium: 153mg | Potassium: 2090mg | Fiber: 7g | Sugar: 10g | Vitamin A: 30IU | Vitamin C: 29mg | Calcium: 94mg | Iron: 4mg

Nutritional values are approximate.

Easy Asian Slaw

I was in need of a good side dish for a batch of my orange chicken. The chicken is crazy good, with a thick, slightly sweet sauce that has just a slight kick to it. This easy Asian slaw was the perfect side. Crunchy with a hint of sesame oil, we both loved it. The red onion added a great little heat. I used a bag of pre-made slaw mix, but you could go thru the trouble of shredding your own cabbage too. Either way, you can’t lose with this slaw.

Easy Asian Slaw

Soak Time

The original recipe for this easy Asian slaw stresses that you shouldn’t add the dressing until you’re ready to serve it. We actually enjoyed it even more the second day, dressing it completely the first day. The cabbage and onion soaked up the delicious flavors from the dressing. I’ve made this several times and I prefer it that way. I think the ingredients hold up to the sauce over several days without getting soggy. Otherwise I’d leave the sauce out until I’m just ready to serve it.

Also try some Tub’s coal miner slaw.

Easy Asian Slaw
Print Pin
5 from 1 vote

Easy Asian Slaw

The original recipe for this easy Asian slaw stresses that you shouldn't add the dressing until you're ready to serve it.
Course Salad
Cuisine Asian
Keyword Asian, cole slaw
Prep Time 15 minutes
Cook Time 5 minutes
Total Time 20 minutes
Servings 12
Calories 463kcal

Ingredients

For the slaw

  • 1 bunch green onions sliced thin
  • 32 ounces coleslaw mix with carrots if desired
  • 1 small red onion sliced thin

For the dressing

Instructions

For the slaw

  • Add the green onions to a large bowl.
  • Add the slaw mix and red onion and toss to combine.

For the dressing

  • Whisk all dressing ingredients together.
  • Pour over the slaw and toss to coat.
  • Serve immediately.

Notes

Always give the slaw a good stir or toss before serving.

Nutrition

Calories: 463kcal | Carbohydrates: 100g | Protein: 21g | Fat: 3g | Saturated Fat: 1g | Polyunsaturated Fat: 1g | Monounsaturated Fat: 1g | Sodium: 5748mg | Potassium: 2091mg | Fiber: 27g | Sugar: 60g | Vitamin A: 1145IU | Vitamin C: 369mg | Calcium: 494mg | Iron: 7mg

Nutritional values are approximate.

Deep Fried Parmesan Zucchini

It’s not that I don’t like ‘normal’ zucchini. I mean, yeah, it’s pretty ok in a stir-fry. But, deep fried Parmesan zucchini? Now THAT’S yummy zucchini! You can’t beat the flavor and the crunch. And of course, you gotta dip them in Ranch dressing. You’re already committed at this point. Sure, it’s not quite as healthy as stir-fried. Or raw on a salad. But, sometimes, you gotta let go and this… well, what a way to go!

Deep Fried Parmesan Zucchini

Kick’Em Up

You can substitute Italian bread crumbs for the unseasoned bread crumbs and Italian seasoning if you want. I preferred to be able to amp up the Italian seasoning in my deep fried Parmesan zucchini, though. And make sure you drain the ‘coins’ well after frying. They’ll stay crisper that way.

If it’s just the two of us, I fire up my Fry Daddy fryer when I make these yummy appetizer.

I get out my big deep fryer when it’s time to fry a large batch of food. It comes to temperature quickly and it maintains that temperature perfectly. It has a built-in oil filter and storage unit so I can re-use the oil several times.

Also try my deep-fried ravioli.

Deep Fried Parmesan Zucchini
Print Pin
5 from 1 vote

Deep Fried Parmesan Zucchini

You can substitute Italian bread crumbs for the unseasoned bread crumbs and Italian seasoning if you want.
Course Side Dish or Appetizer
Cuisine American
Keyword deep-fried, vegetable
Prep Time 10 minutes
Cook Time 10 minutes
Servings 8
Calories 188kcal

Ingredients

Instructions

  • Heat oil to 350 F in a Dutch oven or deep fryer. You can also use a skillet.
  • Rinse the zucchini and pat completely dry. Slice into 1/4" pieces.
  • Place flour into a pie plate or shallow bowl.
  • In another pie plate or shallow bowl add the milk. Whisk the eggs into the milk.
  • In a third pie plate or shallow bowl combine the bread crumbs, Parmesan, Italian seasoning and garlic powder.
  • Coat the zucchini sliced in the flour. Make sure you get the flour on all sides.
  • Next, dip the zucchini in the milk mixture, coating completely.
  • Lastly, roll the zucchini in the bread crumb mixture.
  • Working in batches if necessary, fry the zucchini slices for 3-4 minutes or until golden brown, turning once or twice.
  • Transfer to a wire rack or a paper towel-lined plate to drain.

Notes

Serve immediately with Ranch dressing if desired.

Nutrition

Calories: 188kcal | Carbohydrates: 27g | Protein: 9g | Fat: 5g | Saturated Fat: 2g | Polyunsaturated Fat: 1g | Monounsaturated Fat: 1g | Trans Fat: 0.01g | Cholesterol: 56mg | Sodium: 244mg | Potassium: 334mg | Fiber: 2g | Sugar: 4g | Vitamin A: 337IU | Vitamin C: 14mg | Calcium: 144mg | Iron: 2mg

Nutritional values are approximate.