Easy Homemade Peanut Butter Ice Cream

If you’re a peanut butter-aholic, this easy homemade peanut butter ice cream is for you. In no time at all you can enjoy delightful spoon after spoon of this delicious, creamy, smooth peanut butter flavor-packed treat. You seriously could not find an easier recipe for a fantastic ice cream. This will satisfy the peanut butter lover in you!

Easy Homemade Peanut Butter Ice Cream

Customize Your Ice Cream

You could embellish this easy homemade peanut butter ice cream. If you wanted to, that is. You don’t have to. I thought it was fantastic made just as the recipe states. It’s creamy delicious and packed with peanut flavor. But, I can see wanting to add a little crunch or something else maybe. Perhaps a few handfuls of toasted peanuts. That’d be good, for sure. And a good drizzle of chocolate syrup? That’d take it way over the top!

I use my lil Cuisinart ice cream maker for this and all the ice creams that I make at home. It keeps me in the ‘easy’ mode because it’s easy to use and easy to clean. All I have to do is make sure that I put the freezer bowl into the freezer a good day ahead so that it gets super cold.

Easy Homemade Peanut Butter Ice Cream
Print Pin
5 from 1 vote

Easy Homemade Peanut Butter Ice Cream

Creamy delicious and packed with peanut flavor.
Course Dessert
Cuisine American
Keyword homemade ice cream, peanut butter
Prep Time 15 minutes
Cook Time 25 minutes
Servings 12
Calories 223kcal

Ingredients

Instructions

  • Place all ingredients into a food processor.
  • Process until creamy smooth.
  • Add mixture to your ice cream maker and process per manufacturer's directions (usually 20-25 minutes). Freeze overnight before serving.
  • Makes about 1 1/2 quarts.

Nutrition

Calories: 223kcal | Carbohydrates: 19g | Protein: 5g | Fat: 14g | Saturated Fat: 5g | Polyunsaturated Fat: 2g | Monounsaturated Fat: 6g | Cholesterol: 19mg | Sodium: 106mg | Potassium: 166mg | Fiber: 1g | Sugar: 17g | Vitamin A: 190IU | Vitamin C: 0.5mg | Calcium: 66mg | Iron: 0.3mg

Nutritional values are approximate.

Homemade Red Velvet Klondike Bars

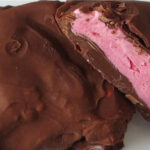
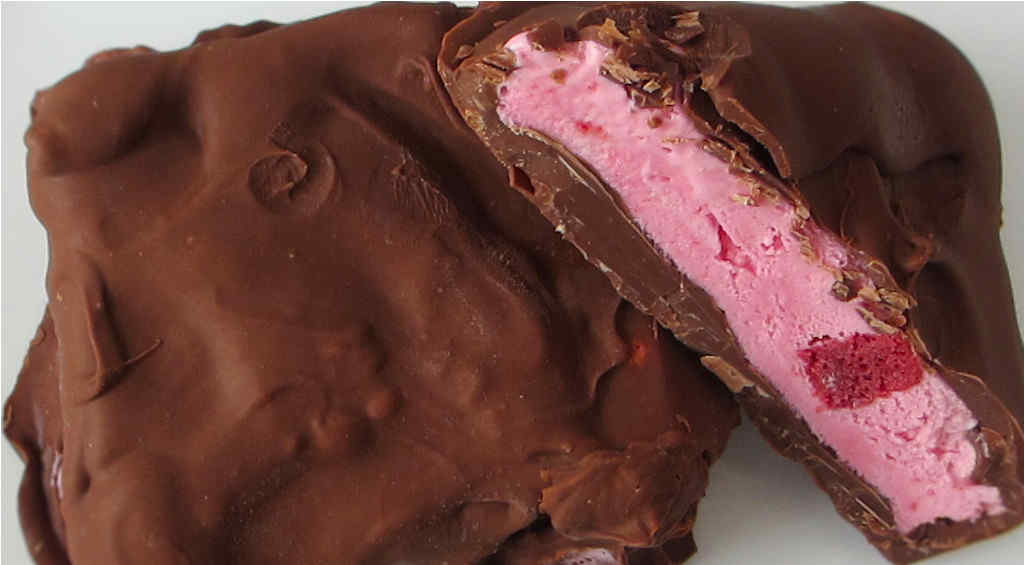
Klondike bars are a very dangerous thing. Whatever gene you have to be born with to control yourself around them is one that I do not have. I thought that the store-bought ones were tempting enough until I made homemade red velvet Klondike bars. Now I know what true temptation is.
Homemade Red Velvet Klondike Bars

No Chocolatiers Live Here, That’s For Sure

I’m not a baker or chocolatier or anything like the experts that make chocolate treats. I was lucky to get the chocolate on these bars in an even remotely even manner. These homemade red velvet Klondike bars came out tasting fantastic. I couldn’t care less if some had a bit more chocolate than others.

One of the biggest keys to these bars is the coconut oil. It doesn’t take a lot of the oil, but it’s very important to the texture and sheen of the chocolate.

You can, of course, substitute any ice cream flavor you like. Red velvet ice cream was only available here for a limited time, so I had to grab it while I could. For a simpler but just as crazy good treat, try my homemade mini ice cream sandwiches. If you love red velvet as much as my wife does, my red velvet ice cream cone cupcakes are delicious too!

Also try my frozen yogurt dots.

Homemade Red Velvet Klondike Bars
Print Pin
5 from 1 vote

Homemade Red Velvet Klondike Bars

I thought that the store-bought ones were tempting enough until I made homemade red velvet Klondike bars. Now I know what true temptation is.
Course Dessert
Cuisine American
Keyword dessert, homemade
Prep Time 6 hours
Cook Time 2 hours 20 minutes
Total Time 8 hours 20 minutes
Servings 4 -6 servings
Calories 391kcal

Equipment

Ingredients

Instructions

  • Add ice cream to an 8″ x 8″ baking dish lined with parchment paper. Add enough so that the ice cream is 1/2″ – 1″ thick. Spread out evenly using a spatula.
  • Freeze for at least 6 hours or until the ice cream is completely refrozen.
  • Turn pan upside down to remove the ice cream. Cut into 4-6 equal-sized squares. Return the squares to the freezer to re-freeze.
  • Place coconut oil and chocolate chips into a double boiler over medium heat and and melt, stirring often.
  • Remove chocolate from heat and let cool to room temperature. Do not rush this step.
  • Working quickly, take ice cream squares from freezer and dip into the chocolate.
  • Flip with a fork and quickly remove to parchment paper.
  • Place bars in freezer for 20 minutes.
  • Wrap in thin foil before serving.

Notes

Well-frozen ice cream is key to making sure the chocolate sticks well. Also do not rush cooling the chocolate sauce. It needs to be at room temperature. Any warmer and it will melt the ice cream and not adhere.

Nutrition

Calories: 391kcal | Carbohydrates: 31g | Protein: 5g | Fat: 28g | Saturated Fat: 21g | Cholesterol: 58mg | Sodium: 106mg | Potassium: 263mg | Fiber: 1g | Sugar: 28g | Vitamin A: 556IU | Vitamin C: 1mg | Calcium: 169mg | Iron: 1mg

Nutritional values are approximate.

Grilled Banana Sundae

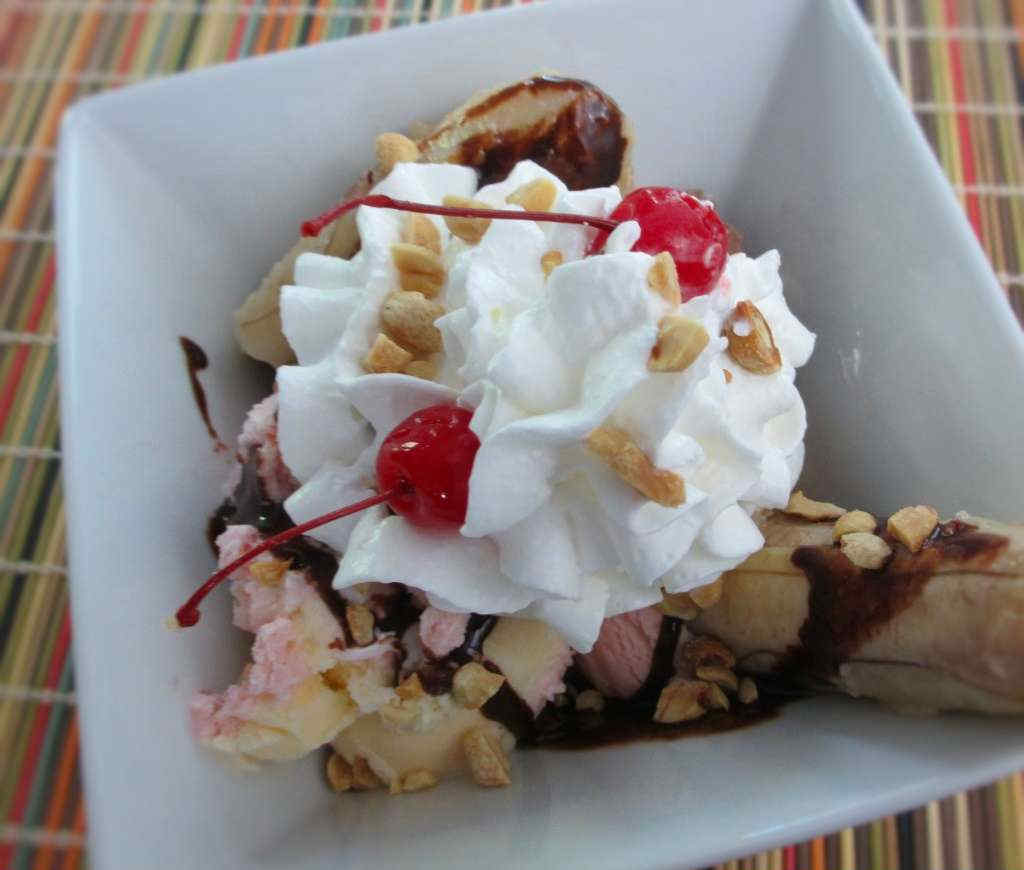
I worked at a Baskin Robbins as a teenager. It is still one of my all-time favorite jobs. One of our biggest sellers (besides my awesome milkshakes) were banana sundaes. These are not those treats. We did not serve grilled banana sundaes at Baskin Robbins. We should have because they are crazy good! All the same flavors as the classic but with a nicely grilled ooey-gooey banana too!

Grilled Banana Sundae

Grilled Bananas? Optional

My wife is not a fan of grilled bananas, specially if they get a bit soft. And they do when grilled. So, if you’re the same way, just use regular ole fresh bananas and you’ll still have a great dessert. I think the grilled bananas add a little mystique to the dish. Something different.

Substitute grilled Twinkies for the banana for a totally different twist on a sundae!

Grilled Banana Sundae
Print Pin
5 from 1 vote

Grilled Banana Sundae

All the same flavors as the classic but with a nicely grilled ooey-gooey banana too!
Course Dessert
Cuisine American
Keyword dessert, grilled
Prep Time 5 minutes
Cook Time 15 minutes
Total Time 20 minutes
Servings 2
Calories 126kcal
Author Mike

Ingredients

Instructions

  • Start up your grill for direct cooking.
  • While still keeping the skins on, cut the ends off of the bananas and then cut a slit into the skin, lengthwise. Do not cut all the way through the banana.
  • Place the bananas on the grill and cook until one side is black.
  • Flip and cook until the other side is black.
  • Place ice cream into bowls.
  • Unroll the bananas from their skins, halve, and place in bowls alongside the ice cream.
  • Add chocolate syrup, whipped cream, cherries and peanuts and serve.

Nutrition

Calories: 126kcal | Carbohydrates: 32g | Protein: 1g | Fat: 1g | Saturated Fat: 1g | Cholesterol: 1mg | Sodium: 4mg | Potassium: 427mg | Fiber: 3g | Sugar: 19g | Vitamin A: 85IU | Vitamin C: 10mg | Calcium: 13mg | Iron: 1mg

Nutritional values are approximate.

Mini Ice Cream Sandwiches

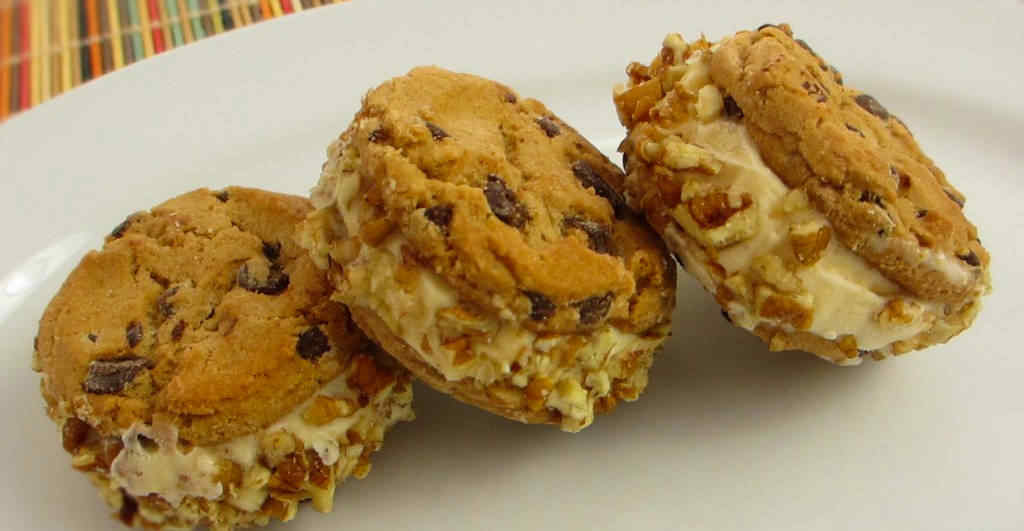
Something so simple… something so good! I made these mini ice cream sandwiches for July 4th. They only take a few minutes to throw together (plus add in some freezer time). They disappear in seconds.

I used smaller chocolate chip cookies. Of course, you could use bigger cookies and make these not-so-mini ice cream sandwiches.

Mini Ice Cream Sandwiches

Make A Bunch. Make Them Different.

Next time I’ll try a different ice cream. Probably mint chocolate chip. And I might dip them in chocolate shell. Oh man, that’s a great idea! I wish I had some chocolate shell in the house!

If you’re making these for a crowd, I’d make a number of different variations so everyone can get one that they like. Chocolate. Vanilla. Strawberry. Etc.

Also make some homemade red velvet Klondike bars. They’re a bit more trouble but oh so worth it!

Mini Ice Cream Sandwiches
Print Pin
5 from 1 vote

Mini Ice Cream Sandwiches

Something so simple… something so good! I made these mini ice cream sandwiches for July 4th. They only take a few minutes to throw together (plus add in some freezer time). They disappear in seconds.
Course Dessert
Cuisine American
Prep Time 5 minutes
Cook Time 15 minutes
Total Time 20 minutes
Author Mike

Equipment

Ingredients

Instructions

  • Let the ice cream soften just a bit.
  • Spread the nuts out on a large plate.
  • Scoop ice cream on a cookie bottom. You want enough so that it just sticks out around the edges when you press the other cookie down on top of it. If you have to, run a knife along the edges to smooth them a little.
  • Roll the edges in the nuts, pressing down slightly.
  • Wrap in small pieces of foil or plastic wrap and return to the freezer for 10-15 minutes to harden.

Nutritional values are approximate.

Ice Cream with Peeps Syrup

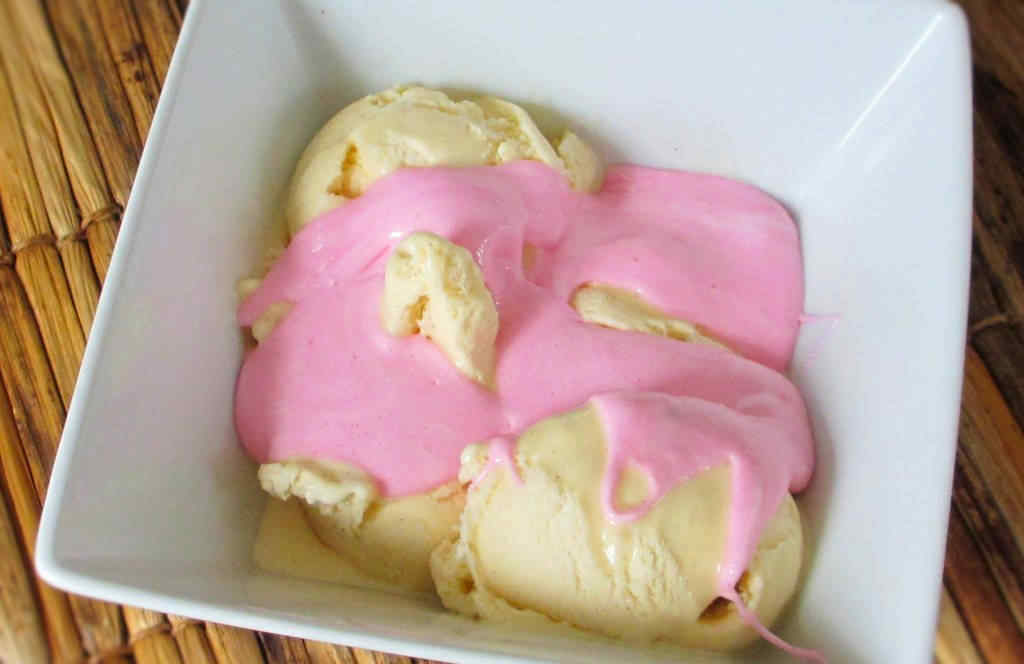
I admit it. I have a strange fascination with melting Peeps. My wife can’t even come into the kitchen when I’m melting them. She just can’t stand seeing them ‘die’. So she was nowhere to be found when I made ice cream with Peeps syrup.

Ice Cream with Peeps Syrup

Poor Lil Peeps

The other day I made Shamrock Peep Rice Krispies treats that came out rather good. Then I came across this idea to melt Peeps to make syrup for ice cream. I found it at the We Are Not Martha blog. Another opportunity to melt Peeps? Sign me up! Heck tried it over Rice Krispies treats too!

For an awesome milkshake made with peeps, check out our toasted peep milkshake. Ice cream is also fantastic topped with my slow cooker dulce de leche.

Ice Cream with Peeps Syrup
Print Pin
5 from 1 vote

Ice Cream with Peep Syrup

I admit it. I have a strange fascination with melting Peeps. My wife can’t even come into the kitchen when I’m melting them. So she was nowhere to be found when I made ice cream with Peeps syrup.
Course Dessert
Cuisine American
Cook Time 5 minutes
Total Time 5 minutes
Servings 2

Ingredients

  • 4 scoops of your favorite ice cream
  • 10 Peeps

Instructions

  • Place Peeps in a medium non-stick pan over medium heat.
  • Add in 1 tablespoon of water.
  • Melt Peeps, stirring occasionally.
  • Pour syrup over ice cream and serve.

Nutritional values are approximate.