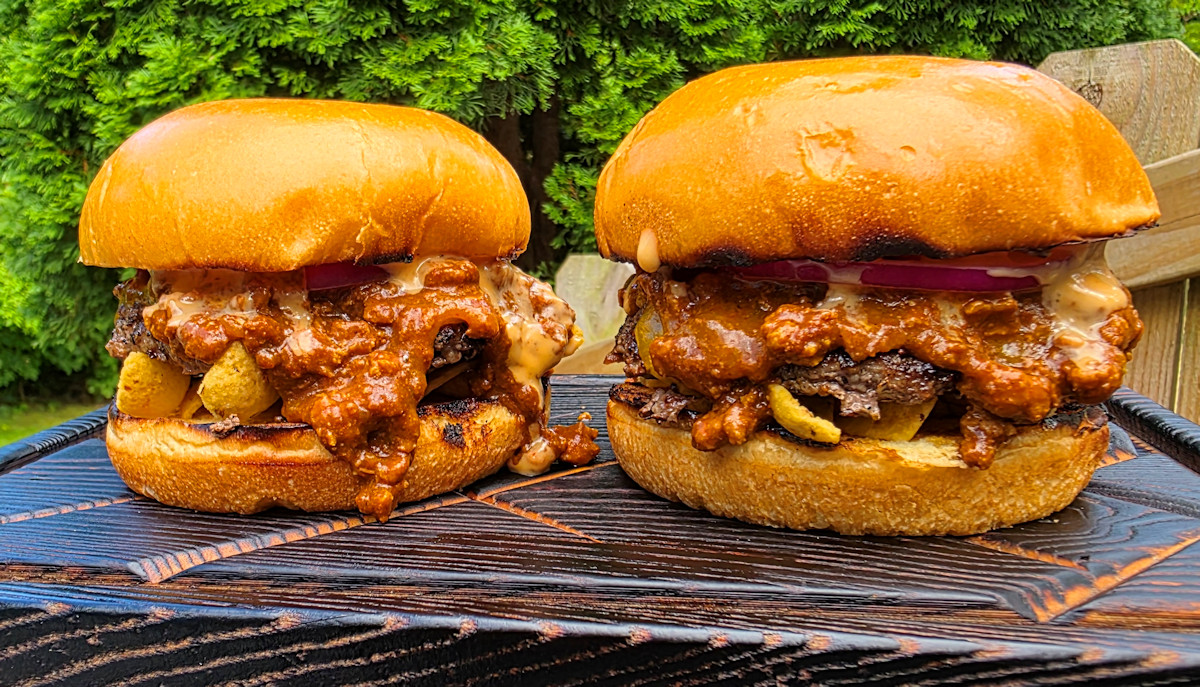
These deluxe nacho cheese smash burgers more than hit the spot. The sauce is amazing. It’s packed with great things. Believe me, it’s not just some boring old melted cheese. It’s what a smash burger needs. Grab a pile of napkins, because you’re going to need them. And don’t worry about any cheese sauce that drips onto your plate. That’s what the last bite of the bun is for: sopping up that great last bit of greatness.
Easy And Delicious And Messy
Making deluxe nacho cheese smash burgers isn’t difficult. You don’t need a bunch of fancy equipment or a lot of time. Just a hot griddle and a burger press. Any griddle will do, whether it’s on a grill, cooktop, stove or even a standalone outdoor flattop. Just get those patties nice and thin and use quality fresh toppings. And a great sauce.
Oh That Sauce!
I highly recommend making extra nacho cheese sauce. It’s great as a chip dip, over fries, you name it! No more boring cheese sauce, this stuff is fantastic!
Sheesh. I had no idea. I’ve made homemade salsa a number of times. It wasn’t terribly difficult, but it wasn’t crazy easy either. I started looking around for a better way and kept hearing about a spicy tomato sauce that people were using as a base for making salsa. El Pato tomato sauce is apparently the key to easy salsa success. So I grabbed a few cans at our local international market and got to making this quick fix spicy salsa. This isn’t fancy, but boy does it ever hit the spot. Perfectly tomato-y, perfectly spicy and with the just right amount of cilantro and onion. And wow is it ever easy to make.
The Only Salsa That’s Easier Comes From A Jar
It seriously takes you longer to read this sentence than it does to make a batch of this quick fix spicy salsa. Ok, well, you’d have to be a crazy good onion and cilantro chopper, but it’s probably possible. Don’t let the simplicity fool you either, this salsa has great flavor. I found it very difficult to stop eating it. Just grab a bag of your favorite tortilla chips and make a batch today!
It wasn’t the day for the usual onion rings. Nothing wrong with the usual ones, don’t get me wrong. But it was time for a bolder version. Something with some kick behind it. It’s my opinion that more restaurants should serve spicy onion rings. Sure, you can still get the tame stuff. But go bold, I say. Get some heat!
Crunchy Spicy Goodness
It’s important to be gentle when making these spicy onion rings. You go roughing them up while you’re making them and you’ll end up with big gaps in the batter. You don’t want that. You’re aiming for consistency. You want them golden brown. And crunchy. And of course, spicy.
Flour is the key to this operation. The first roll in the flour gets the rings dried out. Don’t rush it. Get them well-coated. Inside and out. The second time in the flour you’re after that crunchy batter. Again, get them well-coated. Don’t worry about getting batter fingers. Concentrate on the job at hand. You’ll be rewarded in the end.
The Presto Fry Daddy is perfect for making smaller batches of food. It only uses a few cups of oil and comes to temperature quickly. Clean-up is easy too!
You'll need two medium bowls. In the first, whisk together the flour, cayenne, salt, pepper and baking powder. In the second whisk together the milk and egg.
Heat 2"-3" of oil to 375F in a deep fryer or Dutch oven.
Meanwhile, place the separated onion rings into the flour mixture. Using your hands, gently coat the rings in the flour.
Transfer the rings to the milk and dunk and turn to coat well.
Drain well and transfer the rings back to the flour mixture. Using your hands again, gently coat the rings in the flour.
Working in batches as needed, deep-fry the rings until golden brown. This will take 2-3 minutes.
Transfer to a wire rack or paper towel to drain. Season immediately with more salt.
Serve hot.
Notes
Season the rings with more salt right out of the fryer.
I love BBQ sauce on a burger. And I love onion rings. And I love my burgers smash burger-style. So why not combine all three of my loves into one great, delicious dinner-sized burger! These rodeo smash burgers deliver on taste. And bonus! You don’t even need a side dish! All you need is in one bite!
So Many BBQ Sauces
You can use any BBQ sauce you like. Go sweet one night. Maybe try a little spicy the next. If you’re using a gas grill to make your burgers, you might want a smoky BBQ sauce to give your burgers that ‘hot off the charcoal grill’ flavor. Whatever you use, you can’t go wrong with these rodeo smash burgers.
The equipment
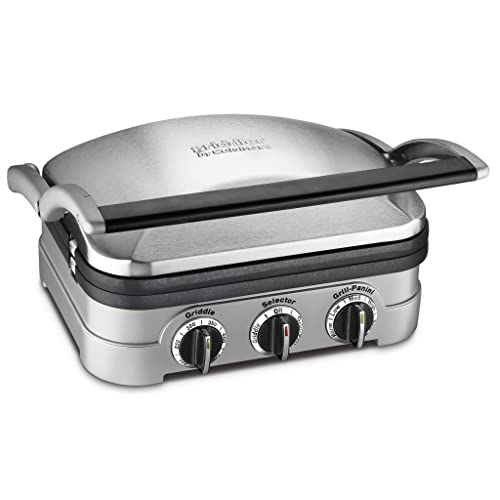
Here’s the equipment I use. You can get by using two cast iron skillets. Use a larger skillet for cooking the burgers, and a smaller one to smash the burgers and keep them flat. Since I’m a cooking gadget collector, I prefer to use a few more tools.
The griddle
First, a griddle. You can buy griddles that sit on top of your grill grates or ones that replace them. Just about every grill I have has a griddle on it. I use them for a lot of things, not just smash burgers. You want one that can be placed over the hottest part of your grill so it gets screaming hot.
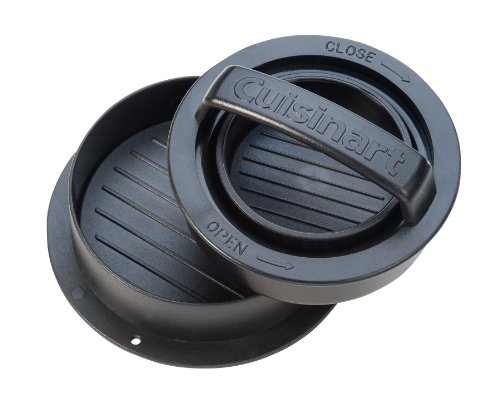
Next, you need a burger press. You can use a heavy cast iron skillet, like I mentioned. Or get a burger press. For easy cleanup I wrap mine in foil first. When I’m done, just peel off the foil and toss. Super easy. Get a press that’s at least big enough to cover two burgers. You only smash one at a time, but if you want to keep them flat, you want to rest the press on top so bigger (and heavier) is better. Plus I’ve found that a bigger, heavier press tends to stay on the burgers whereas a smaller, lighter one is hard to keep centered on the burgers, specially if you have a bunch of them cooking at once.
Next up, a dome. While not 100% required, it does speed the time it takes to melt the cheese and it does it in a nice even fashion. In my opinion you don’t really need one if you’re using a super melty cheese, such as American, but for thicker slices like say a deli pepper jack, you want the cheese to melt before you over-cook the burger and that’s where a dome comes in handy.
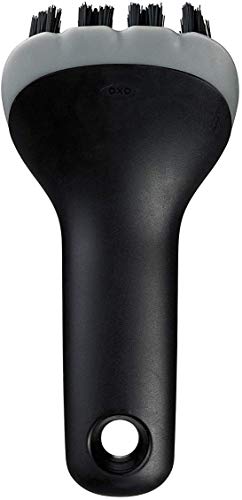
Lastly, you need something to clean your griddle. I like to clean mine when I’m done cooking, but you can do it at the start instead. I use one of these pad holders with a griddle cleaning pad. Then I add a bit of water to my griddle then use the pad (connected to the holder) to scrub off any big chunks and get up some of the grease. I don’t go crazy with it, I always heat the heck out of my griddle before cooking, but I get the worst. The long arm on the pad holder makes it perfect for scrubbing a hot griddle, too.
Fire up your grill for medium-high heat. Place a griddle or a large cast iron pan over the highest heat.
Season the ground beef with the salt and pepper, mix and form into two 4 ounce balls (not patties!).
Place the balls of beef on the griddle and let cook for one minute. Just let them cook, don’t mess with them.
Take your press and flatten out the patties. I like to use the point of the press and work my way around the ball first, doing a little section at a time and then finally I press down on the entire patty to flatten it out. You can also just flatten out the ball all at once. At this point I also like to season the patties some more.
Let the patties cook until you start to notice a little char along the edges. Flip, season again if desired, and continue cooking another minute or so until the other side is charred. The burgers are thin so they will cook very quickly so watch out.
Top patties with cheese and let cook another 30 seconds to melt the cheese.
Remove patties from grill and toast buns if desired.
Slather insides of buns with mayonnaise.
Add patties to bun bottoms. Top with onion rings and BBQ sauce.
Notes
After you make a few smash burgers the process becomes very easy and always delivers great results.
I love a simple fried chicken sandwich. Delicious, moist, tender chicken. Crunchy breading. Served on a bun with lettuce, tomato, onion… and a sauce. A good sauce. A little something to cut through the heaviness from that deep-fried loveliness. This copycat Bojangle’s Bo’s Special sauce did the trick. This nice creamy sauce has a little edge to it. A little kick. Thanks to horseradish.
Heck I’m Not Even A Fan Of Horseradish
The funny thing about this copycat Bojangle’s Bo’s Special Sauce? I’m not even a big fan of horseradish and I still loved it. Sometimes dishes go too far with the horseradish for me. It’s not that I don’t like that taste, that flavor. It just makes my mouth feel weird! But not in this sauce! This sauce has the perfect balance of flavors, even the horseradish!
Make a batch and keep it on hand for more than just fried chicken sandwiches. Try it on burgers. Lunchmeat sandwiches. Any place you might want to use mayonnaise, this is better.
I store my homemade sauces in squeeze bottles. If refrigerated, I set them out thirty minutes to an hour before using so they come to room temperature. You don’t want to put cold sauce on hot food!
The Char-Broil Big Easy is a great cooker. I can treat it like a grill. Or an (oil-less) deep-fryer. And I can bake in it. This broccoli rice casserole on the Char-Broil Big Easy starts as your standard make-in-the-oven recipe. No magic occurring here. No strange tools required. Just a pan, a Big Easy and some simple ingredients. And great results.
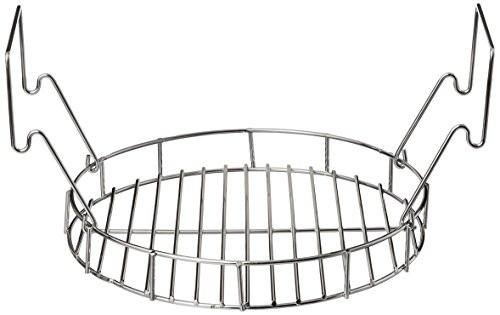
I did use a bunk bed basket when I made this dish. I just think it makes everything easier to get in and out of the cooker. So, I use it whenever I can. It’s perfect for lifting this casserole out. I don’t have to worry about the pan collapsing on me.
Cheesy Greatness
This broccoli rice casserole on the Char-Broil Big Easy is packed with creamy cheesy yumminess. It takes no time at all to put together. And not much time to cook, either.
I was able to fit the entire recipe amount into a single 8″ Dutch oven disposable pan. It was close, though. You might be a little over. If so you can just divide the mixture between two pans and cook them separately.
Melt the butter in a large skillet or medium pot over medium-high heat.
Add the onion and celery and cook until soft, about 5 minutes.
Stir in the soups and half and half.
Add the cheese cubes and stir until melted.
Stir in the rice.
Fire up your Big Easy.
While the Big Easy is heating, place the pan into a Big Easy bunk bed basket.
Spoon the mixture into the pan. The pan will be very full. If you cannot fit all of the mixture into the pan divide it between two pans and bake separately.
Lower the bunk bed basket into the Big Easy basket and attach at the sides.
Transfer the basket to the Big Easy and cook for 45 minutes to 1 hour or until hot and bubbly.
Carefully remove the basket from the Big Easy. Then remove the bunk bed basket.
Make sure you support the bottom of the aluminum pan when handling it.
Serve immediately.
Notes
Although the Big Easy bunk bed basket is not required, it makes handling the pan much easier and safer.
I’d be more than happy if every day was ‘smash burger day’. I love them. I love the thin patties. The crunchy edges. The seasoned patties. The great toppings. Everything about them makes me happy. Sometimes I keep them simple, sometimes I don’t. My smash burger royale isn’t complicated, but it sure is good. Actually, I’d call it great.
Classic Tastes
Once you’ve made a smash burger or two you’ll find them to be as easy to make as the non-smash ones. And like any other burgers, they’re open to all sorts of toppings. Sometimes I go crazy. Sometimes I go classic. This smash burger royale is more classic. And it’s definitely fantastic.
The equipment
Here’s the equipment I use. You can get by using two cast iron skillets. Use a larger skillet for cooking the burgers, and a smaller one to smash the burgers and keep them flat. Since I’m a cooking gadget collector, I prefer to use a few more tools.
The griddle
First, a griddle. You can buy griddles that sit on top of your grill grates or ones that replace them. Just about every grill I have has a griddle on it. I use them for a lot of things, not just smash burgers. You want one that can be placed over the hottest part of your grill so it gets screaming hot.
Next, you need a burger press. You can use a heavy cast iron skillet, like I mentioned. Or get a burger press. For easy cleanup I wrap mine in foil first. When I’m done, just peel off the foil and toss. Super easy. Get a press that’s at least big enough to cover two burgers. You only smash one at a time, but if you want to keep them flat, you want to rest the press on top so bigger (and heavier) is better. Plus I’ve found that a bigger, heavier press tends to stay on the burgers whereas a smaller, lighter one is hard to keep centered on the burgers, specially if you have a bunch of them cooking at once.
Next up, a dome. While not 100% required, it does speed the time it takes to melt the cheese and it does it in a nice even fashion. In my opinion you don’t really need one if you’re using a super melty cheese, such as American, but for thicker slices like say a deli pepper jack, you want the cheese to melt before you over-cook the burger and that’s where a dome comes in handy.
Lastly, you need something to clean your griddle. I like to clean mine when I’m done cooking, but you can do it at the start instead. I use one of these pad holders with a griddle cleaning pad. Then I add a bit of water to my griddle then use the pad (connected to the holder) to scrub off any big chunks and get up some of the grease. I don’t go crazy with it, I always heat the heck out of my griddle before cooking, but I get the worst. The long arm on the pad holder makes it perfect for scrubbing a hot griddle, too.
Fire up your grill for medium-high heat. Place a griddle or a large cast iron pan over the highest heat.
Add the oil and spread out a bit. Crack the eggs onto the oiled griddle.
Wait until the white is completely opaque then gently flip the eggs. Season with salt and pepper.
Cook another 30 seconds then remove to a plate.
Season the ground beef with the salt and pepper, mix and form into four 4 ounce balls (not patties!).
Place the balls of beef on the griddle and let cook for one minute. Just let them cook, don’t mess with them.
Take your press and flatten out the patties. I like to use the point of the press and work my way around the ball first, doing a little section at a time and then finally I press down on the entire patty to flatten it out. You can also just flatten out the ball all at once. At this point I also like to season the patties some more.
Let the patties cook until you start to notice a little char along the edges. Flip, season again if desired, and continue cooking another minute or so until the other side is charred. The burgers are thin so they will cook very quickly so watch out.
Top patties with cheese and let cook another 30 seconds to melt the cheese.
Toast the buns. Remove, add the patties.
Add remaining ingredients to assemble the burgers.
Devour immediately.
Notes
After you make a few smash burgers the process becomes very easy and always delivers great results.
I’m a big fan of country-style ribs. In fact, I grew up eating them regularly. My mom has a recipe she’d make where she’d cover the ribs in paprika, broil them for a bit of color, then finish them by baking them in sauerkraut and carrots. I could eat them all day long. That’s why I was so intrigued by the idea of smoked sous vide country-style ribs. The end result reminded me of just what it is: smoked, tender, juicy pork shoulder. Crazy tender and juicy. And just the right amount of smoke too. I serve these ribs on top of (you guessed it), kraut and carrots.
Smoked Perfection
I wasn’t shy with the BBQ seasoning on my smoked sous vide country-style ribs. First, they needed some color when they came out of sous vide. You know how that is if you sous vide meat. It isn’t exactly pretty. So I covered it in rub and put it on my smoker over apple wood. I was very happy with the end results.
I use my Anova immersion circulator for this and any other time I need to sous-vide. It’s easy to use which is a good thing for me!
I use an Anova sous vide cooker. It’s my immersion circulator workhorse!
Oh my goodness. This macaroni and cheese on the Char-Broil Big Easy is delicious. I love using my Big Easy for side dishes in addition to the many turkeys and chickens that I cook. I have several of the cookers, making it easy for me to cook up an entire meal. This recipe makes a big batch of unbelievably creamy, cheesy mac and cheese. And it makes plenty for a crowd, too.
Baking Away In Big Easy-ville
Everything in this dish is cooked indoors before you transfer it outdoors. What you want is for your macaroni and cheese on the Char-Broil Big Easy to get bubbly hot and browned to perfection. And it will.
If you’re cooking more than one pan at a time keep in mind that usually the bottom pan will get done sooner. So watch them and if you have to, take the bottom one out first.
You can also use your Big Easy to reheat any leftovers. I recommend adding a splash or two of milk first. Then cover with foil and stick into the cooker until hot and bubbly. You can actually hear it bubble if you listen real close.
Feel free to try this same approach with your favorite mac-and-cheese recipe that requires baking or reheating in the oven. The Big Easy does that and does it well. Outside. In the fresh air.
The bunk bed basket lets you double the amount of cooking space you have on your Big Easy. And it’s easy to take in and out of the cooker too!
Sprinkle panko over the tops of the macaroni and cheese.
If you do not have a Bunk Bed basket you'll have to cook the mac-and-cheese in two batches. Otherwise, place the pans into the baskets and add the baskets to the Big Easy (it takes a little finagling but you can fit two in there).
Place the basket in the Big Easy and cook 20-30 minutes or until the top of the mac-and-cheese starts to brown. See my note below.
Carefully remove pans from the Big Easy and serve.
Notes
I like to cook the pasta first, reserving it until needed. That way I use one less pan.If you are cooking using two Bunk Bed baskets note that the bottom basket will likely cook faster than the top. If need be, remove the bottom one and return the Big Easy basket to the cooker for a few more minutes.
One of the most popular side dishes I’ve made is the Spanish style beans we discovered years ago. And after roasting a large (ok, huge) batch of Hatch chiles the other day I decided to take my old trusty Spanish style bean recipe and make Southwestern style beans. And boy, did it ever come out great, too. It reminds me of a meatless chili, actually. Just like a big bowl of chili it would be perfect on a cool fall day in Indiana.
Oh So Good!
Ranch style beans have such a wonderful flavor that I could eat them right out of the can. If you can’t find freshly roasted green chiles, just add canned chopped green chiles to these southwestern style beans.
I like to use my good ole trusty Dutch oven to make this soup and pretty much darned near anything like it on my stovetop. It’s nice and big and sturdy. That extra weight helps it maintain and distribute heat perfectly. As an added bonus, it’s actually pretty easy to clean up too!