Roasted Garlic Chicken with Parmesan Gravy

I loved this roasted garlic chicken with Parmesan gravy so much that I made it twice in one week. The downside was that the house pretty much smelled like garlic all week. That glorious garlic aroma, in my opinion. Some may not share my enthusiasm about so much garlic, but I definitely would NOT cut back on the amount of garlic in this dish.

Roasted Garlic Chicken with Parmesan Gravy

Garlic. And Lots Of It.

If you follow this recipe for roasted garlic chicken with Parmesan gravy as it is, you’ll be as happy as happy can be with the end result. I also changed up the garlic a few times. Once I made it with garlic that I had first been cooked in a slow cooker. Fantastic. Once I made it with garlic that I smoked on my smoker while I was smoking a few racks of ribs. Devine.

No matter what garlic you use, use a lot. And I do mean a lot. Twenty cloves may seem like a lot now, but you won’t regret using the full amount or more. The gravy, rich and creamy with a slight nutty Parmesan taste is so good I’d have had it for dinner by itself if I could.

Enjoy. And also try my 40-clove garlic chicken.

Roasted Garlic Chicken with Parmesan Gravy
Print Pin
5 from 1 vote

Roasted Garlic Chicken with Parmesan Gravy

I loved this roasted garlic chicken with Parmesan gravy so much that I made it twice in one week.
Course Main
Cuisine American
Keyword chicken, gravy
Prep Time 10 minutes
Cook Time 45 minutes
Total Time 55 minutes
Servings 4 servings
Calories 519kcal

Equipment

Ingredients

Instructions

  • Preheat oven to 400 F.
  • Heat the oil in a large sauce pan or cast iron skillet over medium-high heat.
  • Season the chicken with salt and pepper. Don’t be shy with the seasoning.
  • Add chicken to skillet and brown on both sides, 3-5 minutes each.
  • Remove to a plate and reserve.
  • Add the onion and saute for 3 minutes.
  • Add the garlic, stir and saute for another 2 minutes.
  • Add the thyme and flour. Cook for 1 minute, stirring constantly.
  • Slowly add the broth. Scrape up any bits that are stuck to the bottom of the pan. There’s nothing but flavor in those bits!
  • Remove from heat.
  • Stir in the Parmesan.
  • Return the chicken to the pan, cover, and place in the oven for 15 minutes. Check that the chicken has reached 165 F.
  • Serve.

Notes

You can substitute boneless, skinless chicken breasts if desired.

Nutrition

Calories: 519kcal | Carbohydrates: 16g | Protein: 35g | Fat: 35g | Saturated Fat: 13g | Trans Fat: 1g | Cholesterol: 175mg | Sodium: 770mg | Potassium: 618mg | Fiber: 1g | Sugar: 4g | Vitamin A: 244IU | Vitamin C: 17mg | Calcium: 218mg | Iron: 2mg

Nutritional values are approximate.

Smoked Cheez-Its

Smoked Cheez-Its are the perfect game-time snack. They’re addictingly good. They’ll disappear unexpectedly quickly, so make sure you make extra. And make all sorts of different flavors. Since I had all sorts of different flavors of Kosmos Q seasonings on hand I was able to make all sorts of variations, from the mild and sweet to the hot and spicy.

Smoked Cheez-Its

You Can Smoke Any Snack Cracker!

Truth be told, the method for making smoked Cheez-Its can be used for pretty much any snack cracker. You’ll want to use a fairly mild-flavored cracker, or use one that compliments the seasoning you want to use. You don’t want the cracker flavor to fight the seasoning.

Don’t crowd the crackers in the pan. Make sure they get spread out to get some of the smoke flavor, too.

Also try some smoked Cheetos.

Smoked Cheez-Its
Print Pin
5 from 1 vote

Smoked Cheez-Its

Don't crowd the crackers in the pan. Make sure they get spread out to get some of the smoke flavor, too.
Course Appetizer
Cuisine American
Keyword crackers, smoked
Prep Time 10 minutes
Cook Time 1 hour 30 minutes
15 minutes
Servings 12
Calories 157kcal

Ingredients

Instructions

  • Fire up your smoker for 225 F. Use a lighter wood. You want a bit of smoke but don't overdo it.
  • Place the crackers in a large bowl.
  • In a separate small bowl, whisk together the oil, Worcestershire sauce and seasoning. Drizzle over the crackers and gently stir to coat the crackers. Take your time, you want them all covered well.
  • Transfer the coated crackers to a large disposable pan, spread out evenly, and place onto the smoker.
  • Smoke the crackers for 90 minutes, stirring every 30 minutes. The crackers will turn a golden brown. They'll be a little soft, but don't worry, they'll get crunchier when they cool.
  • Remove from the smoker and let cool before serving. Optionally, spread out onto a wire rack to cool quicker.

Notes

You can also use other flavors of Cheez-It or even try a mix of different ones.

Nutrition

Calories: 157kcal | Carbohydrates: 20g | Protein: 2g | Fat: 8g | Saturated Fat: 2g | Polyunsaturated Fat: 3g | Monounsaturated Fat: 2g | Trans Fat: 1g | Sodium: 402mg | Potassium: 83mg | Fiber: 1g | Sugar: 3g | Vitamin A: 27IU | Vitamin C: 1mg | Calcium: 54mg | Iron: 2mg

Nutritional values are approximate.

Red Pepper Remoulade

If you’re looking for an easy-to-make remoulade that really shines with seafood, this red pepper remoulade is it. I used the remoulade on crab cakes, but it’d be perfect with shrimp too. Or as a dipping sauce for fried fish fillets. It’s also great with other things, such as onion rings and yes, even French fries! It’s nice and creamy. It’s not spicy, but flavorful. It packs in a lot of flavor despite being incredibly easy to make.

Red Pepper Remoulade

Great On Sandwiches. Fantastic, Actually.

Another great use for red pepper remoulade? Yep, on roasted, grilled or fried shrimp po boy sandwiches. Burgers. Smear it all over those burger buns before serving. Man, that’s good eats!

If you prefer a spicier remoulade, substitute spicy chili sauce. Or just add a few pinches of dried red pepper flake or cayenne. Or just try my spicy remoulade instead!

Red Pepper Remoulade
Print Pin
5 from 2 votes

Red Pepper Remoulade

If you’re looking for a easy-to-make remoulade that really shines with seafood, this red pepper remoulade is it. 
Course Sauce
Cuisine American
Keyword roasted red pepper, sauce
Prep Time 5 minutes
Total Time 5 minutes
Servings 2 cups
Calories 833kcal
Author Based on a recipe from Rachael Ray

Equipment

Ingredients

Instructions

  • Place all ingredients into a blender or food processor.
  • Process until smooth.

Notes

Store in the fridge until ready to use.

Nutrition

Calories: 833kcal | Carbohydrates: 14g | Protein: 3g | Fat: 84g | Saturated Fat: 13g | Trans Fat: 1g | Cholesterol: 47mg | Sodium: 1631mg | Potassium: 276mg | Fiber: 4g | Sugar: 9g | Vitamin A: 540IU | Vitamin C: 11mg | Calcium: 23mg | Iron: 1mg

Nutritional values are approximate.

Quick Fix Pizza Tots

I created a ‘quick fix’ category here so I’d have a place to click on for my easiest recipes. A short list of ingredients and a short amount of time is the rule. Something you can throw together and yet still enjoy. Like these quick fix pizza tots. It doesn’t take much to take your standard frozen tater tots (one of my favorite go-to quick sides) and give them a little different flavor. In this case, the flavors of pizza.

Quick Fix Pizza Tots

Pizza Without The Dough

If I’d found some pepperoni slices in the pantry (trust me, I looked) I would’ve chopped them up and added them to these quick fix pizza tots when I added the cheese. Crumbled cooked Italian sausage would be great too! Just keep it quick, and easy. Canned black olives. Onion. Diced green bell pepper. These are all great ideas for topping this super-simple side dish.

I highly recommend that you shred or grate your own cheese at home. Don’t buy the pre-shredded or pre-grated stuff. It has stuff added to it to keep it from sticking together. That ‘stuff’ affects how the cheese melts. Get the real stuff.

Also try my quick fix seasoned tots. Just as easy, Just as great.

Quick Fix Pizza Tots
Print Pin
5 from 1 vote

Quick Fix Pizza Tots

I created a ‘quick fix’ category here so I’d have a place to click on for my easiest recipes. A short list of ingredients and a short amount of time is the rule. Like these quick fix pizza tots
Course Side
Cuisine American
Keyword pizza, tater tots
Prep Time 5 minutes
Cook Time 20 minutes
Total Time 25 minutes
Servings 4 servings
Calories 346kcal
Author Mike

Ingredients

Instructions

  • Preheat oven to 450 F.
  • Lightly grease a baking sheet.
  • Pour the tots onto the sheet and spread out evenly.
  • Bake for 15 minutes.
  • Sprinkle the tots with the salt and cheese.
  • Whisk together the pizza sauce and Italian seasoning and drizzle over the tots.
  • Bake another 5 minutes.
  • Sprinkle with more salt before serving, if desired.

Notes

Serve hot.

Nutrition

Calories: 346kcal | Carbohydrates: 34g | Protein: 10g | Fat: 20g | Saturated Fat: 8g | Cholesterol: 30mg | Sodium: 976mg | Potassium: 438mg | Fiber: 3g | Sugar: 1g | Vitamin A: 381IU | Vitamin C: 11mg | Calcium: 227mg | Iron: 1mg

Nutritional values are approximate.

Roasted Hatch Chile Queso Dip

Here recently I bought my first ever case of Hatch chiles. I had no idea how big a case would be, but I do now. Over 150 peppers. I roasted them all, freezing some (whole) for later use. The rest, well, I put to work immediately. Starting with this wonderful roasted Hatch chile queso dip. The roasted chiles add such a fantastic flavor to what is your pretty-much-standard queso dip. A good queso dip that is mighty good to start with. Nice and creamy, this is the perfect dip for a party. I didn’t add any hot sauce, but you could. Just don’t go crazy with it, you don’t want to hide the taste of the peppers.

Roasted Hatch Chile Queso Dip

Great On Burgers, Too.

You can use this recipe for roasted Hatch chile queso dip to make a great topping for hamburgers. Or hot dogs. Just cut back on the half and half and let the sauce come to the desired thickness.

If you can’t find roasted Hatch chiles, you can substituted canned roasted chiles or, you can roast poblano or Anaheim chiles in the oven or on the grill and use those instead. Or get the real deal delivered directly to your door.

Roasted Hatch Chile Queso Dip
Print Pin
4 from 1 vote

Roasted Hatch Chile Queso Dip

The roasted chiles add such a fantastic flavor to what is your pretty-much-standard queso dip (which is mighty good to start with). Nice and creamy, this is the perfect dip for a party.
Course Appetizer
Cuisine American
Keyword cheese, dip
Prep Time 10 minutes
Cook Time 15 minutes
Total Time 25 minutes
Servings 6 cups
Calories 592kcal

Equipment

Ingredients

Instructions

  • Heat oil over medium heat in a large saucepan.
  • Add the onion and cook for 5 minutes or until the onion starts to soften.
  • Add the garlic, stir and cook another minute.
  • Add the flour, stir, and cook for 2 minutes.
  • Whisk in the evaporated milk. Stir and cook until the mixture thickens.
  • Add salt and pepper and stir.
  • Stir in the cheese until melted.
  • Slowly stir in the half and half until the sauce reaches the desired thickness.
  • Stir in the Hatch chiles and serve warm.

Notes

If the dip is too thick, stir in a (very) little more of the half and half.

Nutrition

Calories: 592kcal | Carbohydrates: 12g | Protein: 29g | Fat: 48g | Saturated Fat: 25g | Cholesterol: 129mg | Sodium: 992mg | Potassium: 208mg | Fiber: 2g | Sugar: 4g | Vitamin A: 953IU | Vitamin C: 9mg | Calcium: 809mg | Iron: 1mg

Nutritional values are approximate.

Quick Fix Bloody Mary Potato Chips

No reason to be locked into only a handful of flavored chips at the store when you can make them taste however you want! Today I made a big batch of my quick fix Bloody Mary potato chips. Potato chips. Bloody Mary seasoning. That’s it! And oh-so-good! They’re the perfect snack to enjoy while you’re enjoying a Bloody Mary! And the best part is I decide how much seasoning I get. No more of those barely-seasoned chips for me (or you!).

Quick Fix Bloody Mary Potato Chips

No Need For The Fancy Chips Here

You don’t need to grab the expensive potato chips when you make quick fix Bloody Mary potato chips. The key here is to warm up the chips just enough that the oils they were cooked in come back to the surface of the chips. That gives the seasoning something to cling to. No big pile of seasoning at the bottom of the bowl with these chips, nope. Nothing but flavor.

Of course, you can make homemade potato chips in a deep-fryer and then toss them in the seasoning too! Just don’t over-drain the chips as they come out of the hot oil or the flavors won’t have anything to adhere to. Make sure you get them good and coated.

Also try my quick fix Ramen-seasoned potato chips.

Quick Fix Bloody Mary Potato Chips
Print Pin
5 from 1 vote

Quick Fix Bloody Mary Potato Chips

You don't need to grab the expensive chips when you make quick fix Bloody Mary potato chips.
Course Snack
Cuisine American
Keyword potato chips, quick fix
Prep Time 15 minutes
Cook Time 5 minutes
Servings 4
Calories 452kcal

Ingredients

Instructions

  • Preheat your oven to 275 F.
  • Spread chips out onto a baking sheet. Bake for 5 minutes. You should see that the oils in the chips have come to the surface.
  • Gently transfer chips to a large bowl and sprinkle with the seasoning. Use a spatula to carefully stir to coat.
  • Serve immediately.

Notes

Be gentle when stirring to avoid breaking the chips.

Nutrition

Calories: 452kcal | Carbohydrates: 46g | Protein: 5g | Fat: 29g | Saturated Fat: 3g | Polyunsaturated Fat: 7g | Monounsaturated Fat: 16g | Trans Fat: 1g | Sodium: 448mg | Potassium: 1020mg | Fiber: 3g | Sugar: 1g | Vitamin C: 18mg | Calcium: 18mg | Iron: 1mg

Nutritional values are approximate.

Mango Jalapeno Sloppy Joes

These mango jalapeno Sloppy Joes prove that the classic dish isn’t just for kids. They are packed with incredible flavors. Taco seasoning. Delicious marinade. Cheese. And a wonderful mango topping. Oh, and don’t forget the salsa verde mayonnaise! Darned different, and crazy good, I could not get enough of these! I highly recommend that you double the recipe!

Mango Jalapeno Sloppy Joes

A Wonderfully Different Sloppy Joe

I used frozen mango chunks when I made these mango jalapeno Sloppy Joes. They’re much easier to deal with than a whole fresh mango. I always have trouble cutting them! Our local grocery store has them packaged in 1 cup bags for making smoothies. One cup is exactly what you’ll need if you decide to double the recipe. It was a sign!

I like to use my good ole trusty Dutch oven to make this Sloppy Joe recipe and pretty much darned near anything like it on my stovetop. It’s nice and big and sturdy. That extra weight helps it maintain and distribute heat perfectly. As an added bonus, it’s actually pretty easy to clean up too!

The simple salsa verde mayonnaise is also excellent on grilled hamburgers.

Also try my more traditional kid’s version of Sloppy Joes. They remind me of my childhood favorite!

Mango Jalapeno Sloppy Joes
Print Pin
5 from 1 vote

Mango Jalapeno Sloppy Joes

I highly recommend that you double the recipe.
Course Main
Cuisine American
Keyword fruity, sloppy Joes, spicy
Prep Time 15 minutes
Cook Time 30 minutes
Servings 8
Calories 491kcal

Ingredients

For the meat mixture

  • 1 pound ground beef
  • 1 packet taco seasoning or use 2 tablespoon of my homemade seasoning
  • 2 tablespoons Moore's Original Marinade
  • ½ cup water
  • 1 ½ cups sharp cheddar cheese shredded (do not use pre-shredded, instead shred the cheese right before use).
  • 2 tablespoons hot sauce
  • 2 tablespoons olive oil
  • ½ medium sweet onion chopped
  • ½ medium green bell pepper chopped
  • 1 small jalapeno pepper seeded, minced
  • ½ cup mango diced (you can use frozen, just thaw it ahead of time)
  • ½ teaspoon kosher salt
  • 1 tablespoon sugar

For the sauce

For the sandwiches

  • 8 hamburger buns

Instructions

For the meat mixture

  • Brown the ground beef in a large skillet over medium-high heat.
  • Drain any excess fat.
  • Stir in the taco seasoning, water, cheese, marinade and hot sauce.
  • Keep stirring until the mixture reaches a boil, then reduce the heat to a simmer.
  • Continue simmering for 10 minutes, stirring often.
  • Remove from heat and cover to keep warm.
  • In a separate skillet, heat the oil over medium high heat and add onion, bell pepper, jalapeno and mango.
  • Sprinkle with the salt and sugar.
  • Cook until the vegetables are well caramelized, stirring often, about 15 minutes.

For the sauce

  • Combine the salsa verde and mayonnaise and mix well.

For the sandwiches

  • Toast the buns as desired.
  • Slather with the sauce and top with the meat mixture.
  • Serve.

Notes

I like these served open-faced, too!

Nutrition

Calories: 491kcal | Carbohydrates: 32g | Protein: 19g | Fat: 32g | Saturated Fat: 10g | Polyunsaturated Fat: 8g | Monounsaturated Fat: 9g | Trans Fat: 1g | Cholesterol: 67mg | Sodium: 1213mg | Potassium: 342mg | Fiber: 2g | Sugar: 10g | Vitamin A: 975IU | Vitamin C: 16mg | Calcium: 231mg | Iron: 3mg

Nutritional values are approximate.

Easy Roasted Potatoes on the Char-Broil Big Easy

Note: This recipe was developed using the Char-Broil Big Easy Oil-Less Fryer. If you are cooking using the Char-Broil Smoker-Roaster Grill you should cook with the lid open and the temperature set to High. You might also need to adjust the cooking time.

What could be better than potatoes packed with flavor and roasted on a grill? Yeah, nothing. These easy roasted potatoes were made on the Char-Broil Big Easy in no time flat. The Big Easy is a great side-making machine. And it doesn’t heat up the house, which is sure great these days because it’s HOT here in Indiana!

Easy Roasted Potatoes on the Char-Broil Big Easy

Get A Bunk Bed Basket For More Room

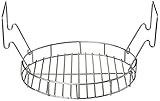
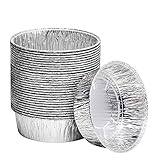
You can fit a single disposable pan (for 3/4 pounds of potatoes) in the basket that comes with your Big Easy. Get a bunk bed basket and you can do a full 1 1/2 pounds of potatoes at once. You have to get a bunk bed for your Char-Broil Big Easy to make great side dishes like these easy roasted potatoes.

These Dutch oven pans are also great. They give you maximum cooking space in the Big Easy, great for sides like this one.

It’s always a good idea to keep a few spare grease trays on hand for your Char-Broil Big Easy.

Love your Big Easy as much I love mine? Check out my Big Easy Add-Ons page and my free Big Easy eCookbook!

Easy Roasted Potatoes on the Char-Broil Big Easy
Print Pin
5 from 1 vote

Easy Roasted Potatoes on the Char-Broil Big Easy

You can fit a single disposable pan (for 3/4 pounds of potatoes) in the basket that comes with your Big Easy.
Course Side
Cuisine American
Keyword Big Easy, Char-Broil, potatoes, roasted potatoes
Prep Time 5 minutes
Cook Time 15 minutes
Servings 6
Calories 92kcal

Ingredients

Instructions

  • Fire up your Big Easy. Meanwhile, prepare the potatoes.
  • Place the potatoes into a microwave-safe bowl.
  • Microwave for 3 minutes on high. Stir and check for doneness.
  • Microwave another 2 minutes (or longer if needed) until just tender. Do not over-cook, they need to have a little bite to them.
  • Drizzle the potatoes with the oil.
  • Sprinkle with the remaining ingredients.
  • Stir to coat completely.
  • Divide the potatoes between two disposable pans and transfer the pans to a Big Easy basket fitted with a Bunk Bed so you can cook both pans at the same time.
  • Place the basket into the Big Easy and cook for 10 minutes or until the potatoes start to turn golden brown around the edges.
  • Carefully remove the pans from the Big Easy and serve.

Notes

You can substitute baby potatoes. If using multiple baskets, the potatoes towards the bottom may cook faster than those up top.

Nutrition

Calories: 92kcal | Carbohydrates: 20g | Protein: 2g | Fat: 1g | Saturated Fat: 0.1g | Polyunsaturated Fat: 0.1g | Monounsaturated Fat: 0.3g | Sodium: 145mg | Potassium: 482mg | Fiber: 3g | Sugar: 1g | Vitamin A: 54IU | Vitamin C: 23mg | Calcium: 15mg | Iron: 1mg

Nutritional values are approximate.

Mac and Ernie’s Fried Shrimp

I’m a fried shrimp addict. You’d think that by now I’d have enough recipes for making them. Yet I’m always on the look out for more and more. I came across this recipe from a roadside eatery in Texas, Mac and Ernie’s, and knew I had to make it. Not so much because the breading seemed different, but because it uses evaporated milk. And what a difference it makes! Crispy crunchy lightly spicy outside, tender, slightly sweet inside, Mac and Ernie’s fried shrimp are exactly what I was craving.

Mac and Ernie's Fried Shrimp

Fresh-Caught Is Better-Tasting

I used fresh-caught Florida shrimp for my Mac and Ernie’s fried shrimp. I try to get either gulf shrimp or Florida shrimp and avoid the farm-raised imported shrimp as much as possible. The taste difference is noticeable. Why go through the effort of frying your own shrimp only to use poorer quality shrimp?

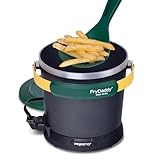
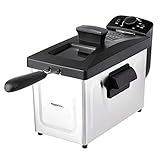
I get out my big deep fryer when it’s time to fry a large batch of food. It comes to temperature quickly and it maintains that temperature perfectly. It has a built-in oil filter and storage unit so I can re-use the oil several times.

Also try my roadside seafood fried shrimp.

Mac and Ernie's Fried Shrimp
Print Pin
5 from 1 vote

Mac and Ernie’s Fried Shrimp

Be sure to not over-cook the shrimp.
Course Appetizer or Main
Cuisine American
Keyword deep-fried, shrimp
Prep Time 15 minutes
Cook Time 15 minutes
Servings 8
Calories 287kcal

Ingredients

Instructions

  • Heat oil in a deep fryer or Dutch oven to 360 F.
  • Combine the flour, pepper, salt, Cajun seasoning and onion powder in a bowl (I like to use a pie plate).
  • Beat the eggs in another bowl.
  • Add the evaporated milk and beat to combine.
  • Working in batches, dip the shrimp in the egg mixture.
  • Shake off excess then roll in the flour mixture. Shake off excess.
  • Fry 2 minutes or until golden brown.
  • Remove to a paper towel-lined plate.

Notes

Serve with cocktail sauce.

Nutrition

Calories: 287kcal | Carbohydrates: 49g | Protein: 11g | Fat: 5g | Saturated Fat: 2g | Polyunsaturated Fat: 1g | Monounsaturated Fat: 2g | Trans Fat: 0.01g | Cholesterol: 59mg | Sodium: 937mg | Potassium: 240mg | Fiber: 2g | Sugar: 5g | Vitamin A: 424IU | Vitamin C: 1mg | Calcium: 135mg | Iron: 3mg

Nutritional values are approximate.

Copycat Merkts Sharp Cheddar Cheese Spread

I have a major league addiction to Merkts sharp cheddar cheese spread. Truth is, I can’t tell you how many are in my fridge. I can’t tell you how many boxes of rounds I have in my pantry. Well, sadly, there are times when I run out of spread and my local grocery runs out too. Sad times indeed. Time to make a copycat version of Merkts sharp cheddar cheese spread at home! Delightfully creamy, lightly sharp, this is the cheese spread dreams are made of. We often have this with our weekday lunches. Served with crackers it’s a really great snack!

Copycat Merkts Sharp Cheddar Cheese Spread

Add Some Kick

I usually use pepper jack cheese in my copycat Merkts sharp cheddar cheese spread. Yeah, it might not be a true copycat at that point, but oh, oh me, that slight kick really is awesome. It’s not like that little bit of pepper made it super spicy, but just enough. Like I needed an excuse to smear more cheese spread on my crackers!

I do recommend that you let the spread get happy in the fridge overnight before serving. If you prefer your spread a little more spreadable, let it sit at room temperature 15 minutes before using.

Also try my pimento cheese spread.

Copycat Merkts Cheese Spread
Print Pin
3.60 from 5 votes

Copycat Merkts Sharp Cheddar Cheese Spread

For a little kick, use pepper jack instead of Monterey Jack
Course Appetizer
Cuisine American
Keyword cheese spread
Prep Time 15 minutes
Cook Time 1 hour
Servings 12
Calories 1284kcal

Ingredients

  • 8 ounces extra sharp cheddar cheese freshly shredded, not pre-shredded
  • 4 ounces Monterey jack cheese freshly shredded, not pre-shredded
  • 2 ounces cream cheese
  • 1 teaspoon kosher salt
  • 1 teaspoon paprika plus a little more, for garnish
  • ½ cup half and half you might need a tad more

Instructions

  • Place all ingredients except for the half and half into a large food processor. Blend for 1 minute, stopping every 15 seconds or so to scrape the sides.
  • Add the half and half and continue blending for 1-2 minutes, stopping every 15 seconds or so to scrape the sides. You want the mixture to be smooth. If needed, add more half and half. Ours comes out perfect without it and it matches the consistency of the real spread.
  • Blend for 1 minute. Take the lid off and use a spatula to scrape down the sides.
  • Transfer spread to a bowl. Cover and refrigerate for 1 hour to overnight.
  • Serve sprinkled lightly with more paprika.

Notes

For best results, let the cheese come to near room temperature before serving.

Nutrition

Calories: 1284kcal | Carbohydrates: 14g | Protein: 60g | Fat: 111g | Saturated Fat: 63g | Polyunsaturated Fat: 4g | Monounsaturated Fat: 26g | Cholesterol: 326mg | Sodium: 4061mg | Potassium: 420mg | Fiber: 0.1g | Sugar: 8g | Vitamin A: 3617IU | Vitamin C: 7mg | Calcium: 1790mg | Iron: 1mg

Nutritional values are approximate.