Smoked Cheez-Its

Smoked Cheez-Its are the perfect game-time snack. They’re addictingly good. They’ll disappear unexpectedly quickly, so make sure you make extra. And make all sorts of different flavors. Since I had all sorts of different flavors of Kosmos Q seasonings on hand I was able to make all sorts of variations, from the mild and sweet to the hot and spicy.

Smoked Cheez-Its

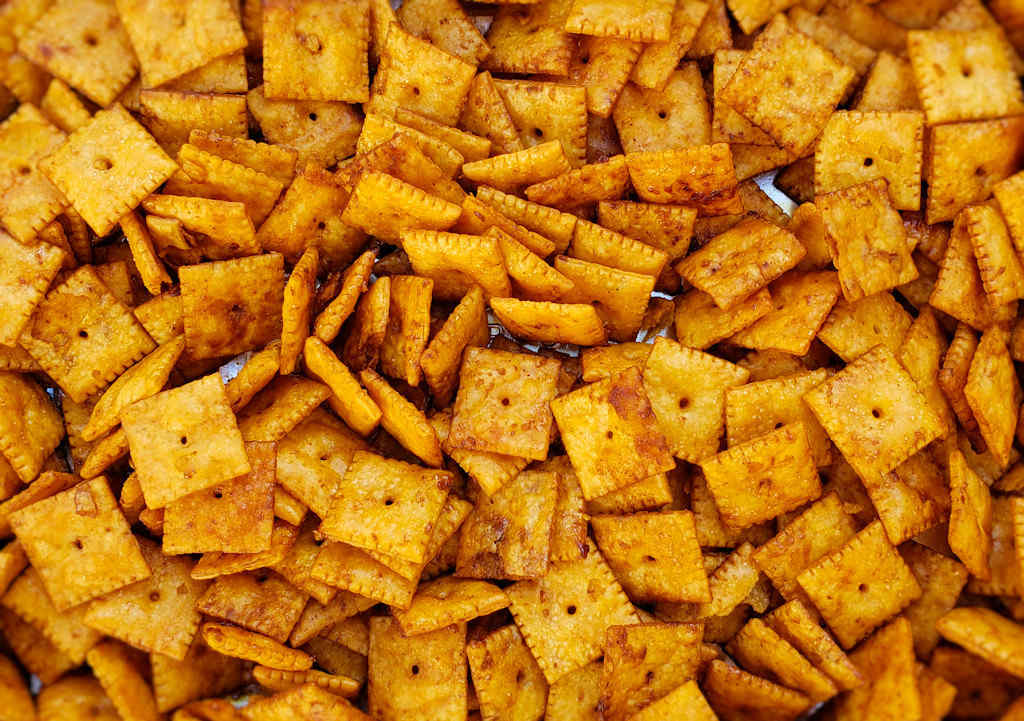
Trust me told, the method for making smoked Cheez-Its can be used for pretty much any snack cracker. You’ll want to use a fairly mild-flavored cracker, or use one that compliments the seasoning you want to use. You don’t want the cracker flavor to fight the seasoning.

Don’t crowd the crackers in the pan. Make sure they get spread out to get some of the smoke flavor, too.

Also try some smoked Cheetos.

Smoked Cheez-Its
Print Pin
5 from 1 vote

Smoked Cheez-Its

Don't crowd the crackers in the pan. Make sure they get spread out to get some of the smoke flavor, too.
Course Appetizer
Cuisine American
Keyword crackers, smoked
Prep Time 10 minutes
Cook Time 1 hour 30 minutes
15 minutes
Servings 12
Calories 157kcal

Equipment

  • large disposable pan

Ingredients

Instructions

  • Fire up your smoker for 225 F. Use a lighter wood. You want a bit of smoke but don't overdo it.
  • Place the crackers in a large bowl.
  • In a separate small bowl, whisk together the oil, Worcestershire sauce and seasoning. Drizzle over the crackers and gently stir to coat the crackers. Take your time, you want them all covered well.
  • Transfer the coated crackers to a large disposable pan, spread out evenly, and place onto the smoker.
  • Smoke the crackers for 90 minutes, stirring every 30 minutes. The crackers will turn a golden brown. They'll be a little soft, but don't worry, they'll get crunchier when they cool.
  • Remove from the smoker and let cool before serving. Optionally, spread out onto a wire rack to cool quicker.

Nutrition

Calories: 157kcal | Carbohydrates: 20g | Protein: 2g | Fat: 8g | Saturated Fat: 2g | Polyunsaturated Fat: 3g | Monounsaturated Fat: 2g | Trans Fat: 1g | Sodium: 402mg | Potassium: 83mg | Fiber: 1g | Sugar: 3g | Vitamin A: 27IU | Vitamin C: 1mg | Calcium: 54mg | Iron: 2mg

Nutritional values are approximate.

Cowboy Big Mac Smash Burgers

Now THIS is a burger! This isn’t some dainty, fit-in-the-palm-of-your-hand two-bite burger. This is an elbows-out, juice-running-down-your-forearms, do-the-burger-hunch burger. Two all beef patties. Very special sauce. Lettuce. Cheese. Onions. Pickle. Sesame seed buns. These Cowboy Big Mac Smash Burgers (based on a recipe from Kent Rollins) are the kind of burger I find in my dreams.

Cowboy Big Mac Smash Burgers

Nine times out of ten, when I make burgers, I make Smash Burgers. I love the crispy edges, the thin patties, the fresh toppings… Cowboy Big Mac Smash Burgers aren’t messing around. Now, that being said, if you want to make these as single burgers you can and they’re just as delicious! Trust me! Sometimes I just can’t handle those monster-sized patties. So I do single patties instead, and I’ll even use 4.5 ounce patties instead of 8. I used to use 4 ounces, but I’ve found that 4.5 ounces ‘smash’ out to a size that covers the burger buns perfectly.

Also try my classic smash burgers and my delicious Thousand Island BBQ smash burgers.

Cowboy Big Mac Smash Burgers
Print Pin
5 from 1 vote

Cowboy Big Mac Smash Burgers

You can use smaller patties if you wish.
Course Main
Cuisine American
Keyword burger sauce, burgers
Prep Time 2 hours 15 minutes
Cook Time 20 minutes
Servings 2
Calories 2008kcal

Ingredients

For the burgers

For the special sauce

Instructions

For the special sauce

  • In a small bowl, whisk together the mayonnaise, pickle relish, mustard, adobo sauce, vinegar, sugar, garlic powder, onion powder and smoked paprika.
  • Fold in the onion. Cover and refrigerate for 2 hours before you're ready to make the burgers.

For the burgers

  • Fire up your grill for direct medium-high heat cooking.
  • Season the burger patties with salt and pepper on both sides. Don't be shy with the seasoning.
  • Place the patties on grill. Smash down with a spatula or grill press.
  • Grill the burgers for 2-3 minutes per side.
  • Top the patties with cheese and grill until they've reached your desired doneness and the cheese is melted. Remove from the grill.
  • Take 2 of the bun tops and cut off the tops. These will be the two middle buns for the Big Macs. Discard the bun bottoms or use them for something else (like making bread crumbs, feeding the birds, etc).
  • Toast the buns and two bun slices on the grill as desired.
  • Make the burgers by first spreading some of the sauce on the bun bottoms.
  • Add some of the lettuce and a burger patty. Top with the sliced bun.
  • Slather the top of the sliced bun with more of the sauce. Add lettuce, the remaining patties, pickles and top bun.

Nutrition

Calories: 2008kcal | Carbohydrates: 62g | Protein: 97g | Fat: 150g | Saturated Fat: 49g | Polyunsaturated Fat: 30g | Monounsaturated Fat: 54g | Trans Fat: 6g | Cholesterol: 380mg | Sodium: 3268mg | Potassium: 1579mg | Fiber: 4g | Sugar: 18g | Vitamin A: 1301IU | Vitamin C: 6mg | Calcium: 501mg | Iron: 13mg

Nutritional values are approximate.

Smash Burger

Smash burgers are a popular meal in our house. They’re easy to make, cook up in no time, and most important, they remind me of the classic diner burgers of my youth. I will go out of my way for a good griddled burger no matter where I am. Fortunately, I can make them quite easily on my backyard grill with just a few tools. Thin patties, seasoned simply with just salt and pepper, cooked over onion until the perfect lightly crunchy edges are obtained. Served on toasted buns with traditional toppings, such as pickles, tomato, lettuce. A little ketchup, sure. Maybe a little mustard. And even a little mayonnaise. Whatever you prefer, no matter what you add, you’ll enjoy a great burger.

Smash Burger

Here’s the equipment I use. You can get by using two cast iron skillets. Use a larger skillet for cooking the burgers, and a smaller one to smash the burgers and keep them flat. Since I’m a cooking gadget collector, I prefer to use a few more tools.

First, a griddle. You can buy griddles that sit on top of your grill grates or ones that replace them. Just about every grill I have has a griddle on it. I use them for a lot of things, not just smash burgers. You want one that can be placed over the hottest part of your grill so it gets screaming hot.

Next, you need a burger press. You can use a heavy cast iron skillet, like I mentioned. Or get a burger press. For easy cleanup I wrap mine in foil first. When I’m done, just peel off the foil and toss. Super easy. Get a press that’s at least big enough to cover two burgers. You only smash one at a time, but if you want to keep them flat, you want to rest the press on top so bigger (and heavier) is better. Plus I’ve found that a bigger, heavier press tends to stay on the burgers whereas a smaller, lighter one is hard to keep centered on the burgers, specially if you have a bunch of them cooking at once.

Next up, a dome. While not 100% required, it does speed the time it takes to melt the cheese and it does it in a nice even fashion. In my opinion you don’t really need one if you’re using a super melty cheese, such as American, but for thicker slices like say a deli pepper jack, you want the cheese to melt before you over-cook the burger and that’s where a dome comes in handy.

Lastly, you need something to clean your griddle. I like to clean mine when I’m done cooking, but you can do it at the start instead. I use one of these pad holders with a griddle cleaning pad. Then I add a bit of water to my griddle then use the pad (connected to the holder) to scrub off any big chunks and get up some of the grease. I don’t go crazy with it, I always heat the heck out of my griddle before cooking, but I get the worst. The long arm on the pad holder makes it perfect for scrubbing a hot griddle, too.

Also try my Cowboy Big Mac Smash burgers.

Smash Burger
Print Pin
5 from 1 vote

Smash Burger

Smash burgers are a popular meal in our house. They're easy to make, cook up in no time, and most important, they remind me of the classic diner burgers of my youth.
Course Main
Cuisine American
Keyword burgers
Prep Time 15 minutes
Cook Time 15 minutes
Servings 4
Calories 1986kcal

Ingredients

  • 1 pound ground beef
  • kosher salt to taste
  • ground black pepper to taste
  • 1 onion sliced thin, optional
  • 4 slices American cheese
  • 4 hamburger buns
  • additional toppings dill pickle slices, ketchup, etc, optional

Instructions

  • Fire up your grill for high heat. Place a griddle or a large cast iron pan over the highest heat.
  • Season the ground beef and form into four 4 ounce balls (not patties!).
  • Place on the onion slices on the griddle and divide into four equal piles. You want the piles to be about the size of your buns.
  • Place the balls of beef on top of the onion piles and let cook for one minute. Just let them cook, don't mess with them.
  • Take your press and flatten out the patties. I like to use the point of the press and work my way around the ball first, doing a little section at a time and then finally I press down on the entire patty to flatten it out. You can also just flatten out the ball all at once. At this point I also like to season the patties some more.
  • Let the patties cook until you start to notice a little char along the edges. Flip, season again if desired, and continue cooking another minute or so until the other side is charred. The burgers are thin so they will cook very quickly so watch out.
  • Add the cheese slices. If desired, cover in a dome to help the cheese melt.
  • Toast the buns. Remove, add the patties and serve with desired toppings. Devour immediately.

Nutrition

Calories: 1986kcal | Carbohydrates: 100g | Protein: 111g | Fat: 124g | Saturated Fat: 52g | Trans Fat: 7g | Cholesterol: 406mg | Sodium: 2572mg | Potassium: 1715mg | Fiber: 5g | Sugar: 18g | Vitamin A: 798IU | Vitamin C: 10mg | Calcium: 1282mg | Iron: 15mg

Nutritional values are approximate.

Planked Lemon Pepper Asparagus

I should’ve bought more lemon pepper wing dust from Kosmo’s Q. Sure, I put it on wings. But I’ve found myself using it more and more on grilled vegetables. Like these planked lemon pepper asparagus. You can’t get much easier and you can’t get much more flavorful than this grilled side dish. The plank adds just a slight hint of cedar.

Planked Lemon Pepper Asparagus

The seasoning adds a serious lemony peppery kick to anything including these planked lemon pepper asparagus. I’m not shy with it because I love it. You might want to start with less and see what you think. You can always add more. The asparagus will take on a great citrusy flavor with a hint of cedar and just the right amount of pepper. Perfect.

Also try my planked lemon pepper Brussels sprouts.

Planked Lemon Pepper Asparagus
Print Pin
4 from 1 vote

Planked Lemon Pepper Asparagus

The seasoning adds a serious lemony peppery kick to anything.
Course Side
Cuisine American
Keyword asparagus, cedar plank, lemon pepper
Prep Time 15 minutes
Cook Time 20 minutes
Servings 8
Calories 23kcal

Ingredients

Instructions

  • Place a cedar plank in water while preparing the asparagus.
  • Trim the asparagus. I've found the easiest way to do this is to just bend them until they break. They break right at the point where one piece is the woodsy stem part you discard and the other is the yummy edible part.
  • Fire up your grill for direct cooking, around 400 F.
  • Gently toss the sprouts with the oil. Just use enough to lightly coat them.
  • Sprinkle with the Kosmos Q Lemmon Pepper wing dust. How much you add is up to you, but my opinion is more is better.
  • Transfer the asparagus to the plank.
  • Transfer to the grill and grill for 20-25 minutes or until the plank is charred and the asparagus is as tender as you prefer and has a little char on them too. I find myself taking the smaller pieces off and sampling them as they cook. Not only are they delicious it also helps me determine when they are done.

Notes

Kosmos Q wing dust contains enough salt so you won’t need to add any to the sprouts. You can add freshly ground black pepper if you like.
Nutritional values do not include the wing dust.

Nutrition

Calories: 23kcal | Carbohydrates: 4g | Protein: 2g | Fat: 1g | Saturated Fat: 1g | Polyunsaturated Fat: 1g | Sodium: 2mg | Potassium: 229mg | Fiber: 2g | Sugar: 2g | Vitamin A: 857IU | Vitamin C: 6mg | Calcium: 27mg | Iron: 2mg

Nutritional values are approximate.

Rotisserie Roasted Potatoes

Oh how I do love roasted potatoes. I love the creamy insides. I love the crispy, golden skin. Baby potatoes are my favorites, but I’ll take a good roasted fingerling any day of the week, too! My ‘weapon of choice’ this time for making roasted potatoes was my gas grill rotisserie. It’s something I’ve been wanting to do for a while. Sure, I can roast potatoes directly on the grill or in a grill basket, but without paying attention to them, I can end up with an un-even roasting. Not with the rotisserie. Perfect potatoes, all around!

Rotisserie Roasted Potatoes

I think one of the reasons my rotisserie roasted potatoes are so fantastic is the type of basket that I use. I could’ve used one of my bigger baskets, the one I use for peanuts, but I didn’t want my potatoes bouncing around like a bunch of bingo balls. So instead I used my only Fire flat rotisserie basket. This lovely toy locks the potatoes in (you want to use ones that are all about the same size) and keeps them from banging into each other. You don’t want scarred, bashed in potatoes. And you want as much of the oil and seasoning to stay on as possible. This basket performs perfectly.

Also try my rotisserie French fries.

Rotisserie Roasted Potatoes
Print Pin
5 from 1 vote

Rotisserie Roasted Potatoes

Oh how I do love roasted potatoes. I love the creamy insides. I love the crispy, golden skin. Baby potatoes are my favorites, but I'll take a good roasted fingerling any day of the week,
Course Side
Cuisine American
Keyword roasted potatoes, rotisserie
Prep Time 20 minutes
Cook Time 10 minutes
Servings 8
Calories 175kcal

Ingredients

Instructions

  • Fill a pot fitted with a steamer rack with 1"-2" of water and bring to a boil.
  • Scrub the potatoes clean and add to the basket. Cover and let steam for 10 minutes or until just tender when poked with a toothpick. Transfer the potatoes to a colander to drain.
  • Fire up your grill for high heat cooking. You want direct heat below (and around) where your rotisserie basket will be.
  • Place the potatoes in a bowl and toss with a few splashes of oil and season well with salt and pepper.
  • Transfer the potatoes to the rotisserie, close and place on the grill. Turn on the rotisserie, close the grill and let the potatoes roast for 10 minutes. Check for color. If the skin has a bit of a char to it remove and serve, otherwise keep grilling, checking every 5 minutes for doneness.

Notes

I prefer to steam, or partially cook, the potatoes before placing into the rotisserie. I like to grill them over very high heat so that the skin gets a slight crunch to it. If you cook the raw potatoes over very high heat without pre-cooking them the outsides may burn before the potatoes are tender inside.

Nutrition

Calories: 175kcal | Carbohydrates: 40g | Protein: 5g | Fat: 1g | Saturated Fat: 1g | Polyunsaturated Fat: 1g | Monounsaturated Fat: 1g | Sodium: 14mg | Potassium: 955mg | Fiber: 5g | Sugar: 2g | Vitamin A: 5IU | Vitamin C: 45mg | Calcium: 27mg | Iron: 2mg

Nutritional values are approximate.

Grilled Radishes with Gorgonzola Butter

This is not my first time grilling radishes. I’ve even grilled black radishes before. And golden ones too. But this is my first time serving them grilled as an appetizer. A wonderful creamy gorgonzola butter tames the heat from the radishes, which take on a slightly soft exterior but still crunchy insides. These grilled radishes with gorgonzola butter are a little different and quite good.

Grilled Radishes with Gorgonzola Butter

You don’t want to overcook your grilled radishes with gorgonzola butter. It’s easier if you select ones that are all roughly the same size so that they all cook in about the same amount of time.

I always use a grill basket when I make dishes like this one.

Got leftover gorgonzola butter? It’s great on burgers or grilled steaks.

Grilled Radishes with Gorgonzola Butter
Print Pin
4 from 1 vote

Grilled Radishes with Gorgonzola Butter

Select radishes that are all roughly the same size so that they all cook in about the same amount of time.
Course Side
Cuisine American
Keyword gorgonzola butter, grilled, radishes
Prep Time 15 minutes
Cook Time 15 minutes
Servings 6
Calories 102kcal

Ingredients

For the Gorgonzola butter

  • 2 ounces Gorgonzola cheese crumbled
  • 4 tablespoons unsalted butter softened

For the grilled radishes

Instructions

For the Gorgonzola butter

  • Place the Gorgonzola and butter in a blender. Pulse a few times until creamy smooth.

For the grilled radishes

  • Fire up your grill for direct cooking, 400 – 450 F.
  • Cut radishes in half. Place in a bowl. Drizzle with a little oil and season well with salt and pepper. Stir to coat.
  • Transfer to a grill basket or skewer if desired. You can also cook the radishes directly on the grill if they are large enough to not fall between the grates.
  • Place the radishes on the grill and cook over high heat 4-5 minutes per side or until lightly browned.
  • Serve immediately with the gorgonzola butter for dipping.

Nutrition

Calories: 102kcal | Carbohydrates: 1g | Protein: 2g | Fat: 10g | Saturated Fat: 7g | Polyunsaturated Fat: 1g | Monounsaturated Fat: 3g | Trans Fat: 1g | Cholesterol: 27mg | Sodium: 136mg | Potassium: 46mg | Fiber: 1g | Sugar: 1g | Vitamin A: 306IU | Vitamin C: 1mg | Calcium: 54mg | Iron: 1mg

Nutritional values are approximate.

Grilled Shotgun Shells (Stuffed Manicotti Shells)

My wife and I have been noticing recipes for shotgun shells around the internet for a bit now. They’re manicotti shells stuffed with a meat and cheese mixture and wrapped in bacon. Most folks are smoking them for a few hours, then finishing them over high heat to get the bacon cooked. We decided to use just a gas grill (although you can just as easily use a charcoal grill!) to make grilled shotgun shells. For a little smoke we added a small smoke box full of hickory pellets. The end result was out-of-this-world fantastic. Crispy bacon, cheesy spinach and sausage stuffing, all with a slight hint of smoke. It’s impossible to stop eating them!

Grilled Shotgun Shells

There are a hundred ways of making shotgun shells. But, we really liked the simplicity of using a gas grill. No need to go from low-and-slow to high-and-fast to get the bacon done, it cooked to perfection in 45 minutes. No turning, flipping, nothing. Just put the stuffed shells on the grill and wait for the magic to happen.

Because we like a little kick to our dishes, we ended up using a spicy BBQ seasoning on top of the shells. You can use any seasoning you like. We recommend that you stay away from anything that contains a lot of sugar since the high grill temperature might burn the seasoning.

If you’re using a charcoal grill, just make sure you keep the temperature 350 F, or even a touch lower. You’ll want to light your charcoal 30-45 minutes or so before you plan on starting to cook the shells. If you want a bit of smoky flavor, add a chunk or two of hickory once the coals are lit.

Grilled Shotgun Shells
Print Pin
5 from 1 vote

Grilled Shotgun Shells

Be careful to not over-grill the shells as they'll get very crispy.
Course Appetizer or Main
Cuisine American
Keyword grilled, Shotgun shells, stuffed pasta shells
Prep Time 4 hours 30 minutes
Cook Time 45 minutes
Servings 6
Calories 704kcal

Ingredients

For the stuffing

  • 1 tablespoon olive oil
  • 1 cup onion finely chopped
  • 1 pound sweet Italian sausage casings removed
  • 1 tablespoon garlic minced
  • 1 large egg
  • 16 ounces Ricotta cheese
  • 10 ounces frozen chopped spinach thawed completely
  • ½ cup Parmesan cheese shredded or grated
  • 1 teaspoon dried basil
  • ¼ cup plain bread crumbs
  • ½ teaspoon kosher salt
  • ½ teaspoon ground black pepper

For the shells

For serving

Instructions

For the stuffing

  • Heat the oil in a large skillet over medium heat.
  • Add onion and cook until just starting to soften.
  • Crumble in the sausage and cook until done. Break up the sausage more as it cooks.
  • Add the garlic and cook, stirring, another minute.
  • Remove from heat and let cool.
  • Break the egg into a large bowl and beat with a whisk or fork.
  • Stir in the Ricotta, spinach, Parmesan, basil, breadcrumbs, salt and pepper.
  • Add the cooked sausage mixture and stir until well combined.

For the shells

  • Bring a large pot of water to a boil. Add salt to taste.
  • Add the shells and cook, stirring occasionally, for 5 minutes. You don't want to fully cook the shells.
  • Remove the shells to a strainer to drain the water then transfer to a baking sheet to cool slightly.
  • Carefully stuff each shell with the sausage mixture. Don't press too hard or you'll tear the shells. You want to fill them right up to the ends.
  • Wrap each shell in a piece of bacon then return to the baking sheet.
  • Sprinkle the bacon all around with the BBQ seasoning.
  • Place baking sheet in the fridge for 4-6 hours for everything to set before cooking.

Cooking the shells

  • Fire up your grill for indirect cooking at 350 F.
  • Transfer the shells to the grill and cook for 45 minutes or until the bacon is done and just starting to crisp. I start checking them every 5 minutes after 30 minutes to make sure the shells don't get too crispy and the bacon isn't over-cooked.

For serving

  • Serve shells garnished with parsley along with warm marinara for dipping or drizzling.

Nutrition

Calories: 704kcal | Carbohydrates: 13g | Protein: 33g | Fat: 58g | Saturated Fat: 23g | Polyunsaturated Fat: 7g | Monounsaturated Fat: 24g | Trans Fat: 0.1g | Cholesterol: 167mg | Sodium: 1482mg | Potassium: 676mg | Fiber: 3g | Sugar: 3g | Vitamin A: 6102IU | Vitamin C: 8mg | Calcium: 362mg | Iron: 3mg

Nutritional values are approximate.

Buffalo Shrimp

I have what can easily be described as an addiction to Buffalo wings and anything with Buffalo wing sauce in the ingredients. So it came as no surprise that I devoured these Buffalo shrimp. I made them on the grill, which was about as easy to do as possible, but you can also make them in the oven. The shrimp soak up the fantastic sauce in no time. I loved them, and definitely should’ve made more!

Buffalo Shrimp

I used a nice medium Buffalo wing sauce when I made these shrimp. I love the flavor of shrimp, and didn’t want some mouth-blisteringly-hot sauce burying that great taste. I could easily see making a mix of medium and mild for appetizers for a get-together. The shrimp only take a few minutes to cook so you can satisfy a crowd in no time at all. Serving them with blue cheese or ranch dressing is optional, in my opinion. They’re great by themselves!

Oh, don’t forget that the oyster shells are super hot when taken off the grill. You might want to let your guests know to not handle them for at least a few minutes. They do cool off relatively quickly.

Also try my spicy bacon-wrapped shrimp.

Buffalo Shrimp
Print Pin
4 from 1 vote

Buffalo Shrimp

These spicy shrimp are sure to disappear in no time!
Course Appetizer
Cuisine American
Keyword grilled, oyster shells, shrimp
Prep Time 10 minutes
Cook Time 10 minutes
Servings 4
Calories 5kcal

Ingredients

Instructions

  • Place the shrimp in a bowl.
  • Combine the spices and sprinkle over the shrimp. Toss to coat.
  • Place shrimp in the oyster shells. Add enough Buffalo sauce to almost fill the shells.
  • Cook the shrimp (see below). Warning: The sauce will be very hot as will the shells, so be careful handing them after they are cooked.
  • Serve with blue cheese dressing for dipping if desired.

In the oven

  • Bake at 350 F for 10 minutes or until the shrimp are no longer translucent and the sauce is hot and bubbly.

On the grill

  • Cook over medium heat for 10 minutes or until the shrimp are no longer translucent and the sauce is hot and bubbly.

Nutrition

Calories: 5kcal | Carbohydrates: 1g | Protein: 1g | Fat: 1g | Saturated Fat: 1g | Polyunsaturated Fat: 1g | Monounsaturated Fat: 1g | Sodium: 1mg | Potassium: 20mg | Fiber: 1g | Sugar: 1g | Vitamin A: 53IU | Vitamin C: 1mg | Calcium: 4mg | Iron: 1mg

Nutritional values are approximate.

Perfect Grilled Baked Potatoes

I love baked potatoes. As a side dish or as a main, there’s a million ways to top them. But for me, there’s only one way to cook them: baked to a perfect 210 F internal temperature. These perfect grilled baked potatoes are guaranteed to be fluffy and delicious. Sometimes I make them in the oven. And sometimes I make them on my grill. Gas or charcoal, it doesn’t matter, you can make great potatoes on either one.

Perfect Grilled Baked Potatoes

You might notice a little something poking out of the middle of my perfect grilled baked potatoes. Those are potato nails. They direct heat into the center of the potatoes so that they cook more evenly. They’re available from Weber on Amazon. They’re not required, but they work and they’re cool. And they come with a little tool for removing them because trust me, you don’t want to forget and grab them with your hands!

Perfect Grilled Baked Potatoes Temperature

If you have an oil-less fryer from Char-Broil, you can also make great baked potatoes using it.

Perfect Grilled Baked Potatoes
Print Pin
5 from 1 vote

Perfect Grilled Baked Potatoes

Sometimes I make baked potatoes in the oven. And sometimes I make them on my grill. Gas or charcoal, it doesn’t matter, you can make great potatoes on either one.
Course Side Dish
Cuisine American
Keyword baked, grilled, potatoes
Prep Time 15 minutes
Cook Time 1 hour 15 minutes
Servings 4
Calories 292kcal

Ingredients

Instructions

  • Fire up your grill for indirect cooking. You want the temperature at the grates to be 350-400 F.
  • Rinse off the potatoes and pat dry.
  • Use a knife to poke 3-4 holes in the tops of the potatoes, going about 1/2 of the way into the potato.
  • If you're using potato nails insert them now.
  • Drizzle the potatoes with just a bit of oil. Use your hand to rub the oil all over the potato. If you don't want to get your hands oily just use a brush.
  • Sprinkle the potatoes with salt. Don't be shy with it and make sure you get all sides.
  • Transfer the potatoes to the grill and cook for 1 hour to 1 hour 15 minutes. If you're not sure how consistent or high your grill temperature is, I recommend checking them after 45 minutes.
  • Once the potatoes have reached an internal temperature around 210 F (a degree or two isn't going to make a big difference), they are done. If the potatoes are different sizes you'll want to check the temperature in more than one place.
  • Remove and let cool slightly before serving.

Nutrition

Calories: 292kcal | Carbohydrates: 67g | Protein: 8g | Fat: 1g | Saturated Fat: 1g | Sodium: 18mg | Potassium: 1539mg | Fiber: 5g | Sugar: 2g | Vitamin A: 4IU | Vitamin C: 21mg | Calcium: 48mg | Iron: 3mg

Nutritional values are approximate.

Grilled Potatoes with Onion and Garlic

Often times, it’s the simple recipes that taste the best. These grilled potatoes with onion and garlic are proof of that. You can throw this together for two people, six people or even twenty people in no time. It’s the perfect side dish for anything grilled, from burgers to hot dogs to chicken, you name it. No need to mess with this recipe, just make it and enjoy.

Grilled Potatoes with Onion and Garlic

These grilled potatoes with onion and garlic remind me of the days when I would go camping. I’d be lakeside, somewhere, trying to catch fish, and often without any luck. I didn’t worry, though, because I always had some hot dogs or burgers in the cooler, waiting for a hot grill. Back then it was park grill, today it’d be my portable Weber. I’d pre-make packets of these potatoes and toss them on too. In no time, I was enjoying a great meal in the great outdoors. You can’t beat that.

A grill basket makes grilling these potatoes much easier. And clean-up is much easier, too!

Grilled Potatoes with Onion and Garlic
Print Pin
5 from 1 vote

Grilled Potatoes with Onion and Garlic

You can assemble the packets ahead of time to make cooking fuss-free.
Course Side
Cuisine American
Keyword garlicky, grilled, onion, potatoes
Prep Time 15 minutes
Cook Time 20 minutes
Servings 4
Calories 110kcal

Ingredients

Instructions

  • Fire up your grill for medium-high heat.
  • Transfer the potatoes, onion and garlic to a large bowl.
  • Drizzle with the oil and season with salt and pepper. Toss to combine and coat.
  • Tear off a large piece of aluminum foil.
  • Place the potato mixture in the center of the foil and fold up the edges to seal.
  • Transfer to a grill and cook 15-20 minutes or until tender. To test, you can poke the potatoes with a thin skewer. Once the potatoes are as tender as you like, remove the packets from the grill.
  • Carefully open the packets (the hot steam released might burn you) and serve.

Nutrition

Calories: 110kcal | Carbohydrates: 25g | Protein: 3g | Fat: 1g | Saturated Fat: 1g | Polyunsaturated Fat: 1g | Monounsaturated Fat: 1g | Sodium: 58mg | Potassium: 618mg | Fiber: 3g | Sugar: 6g | Vitamin A: 17IU | Vitamin C: 14mg | Calcium: 30mg | Iron: 1mg

Nutritional values are approximate.