Baked Cheese Ravioli with Meat Sauce

Summer came and went. And apparently so did fall. We skipped ahead to winter. And I needed some stick-to-my-ribs belly-warming grub. This baked cheese ravioli with meat sauce dish hit the spot. And it was crazy easy to make too. Don’t let the simplicity of this dish fool you. It tastes great. It fills you up. And it’s fairly budget-conscious too!

Baked Cheese Ravioli with Meat Sauce

Change Things Up

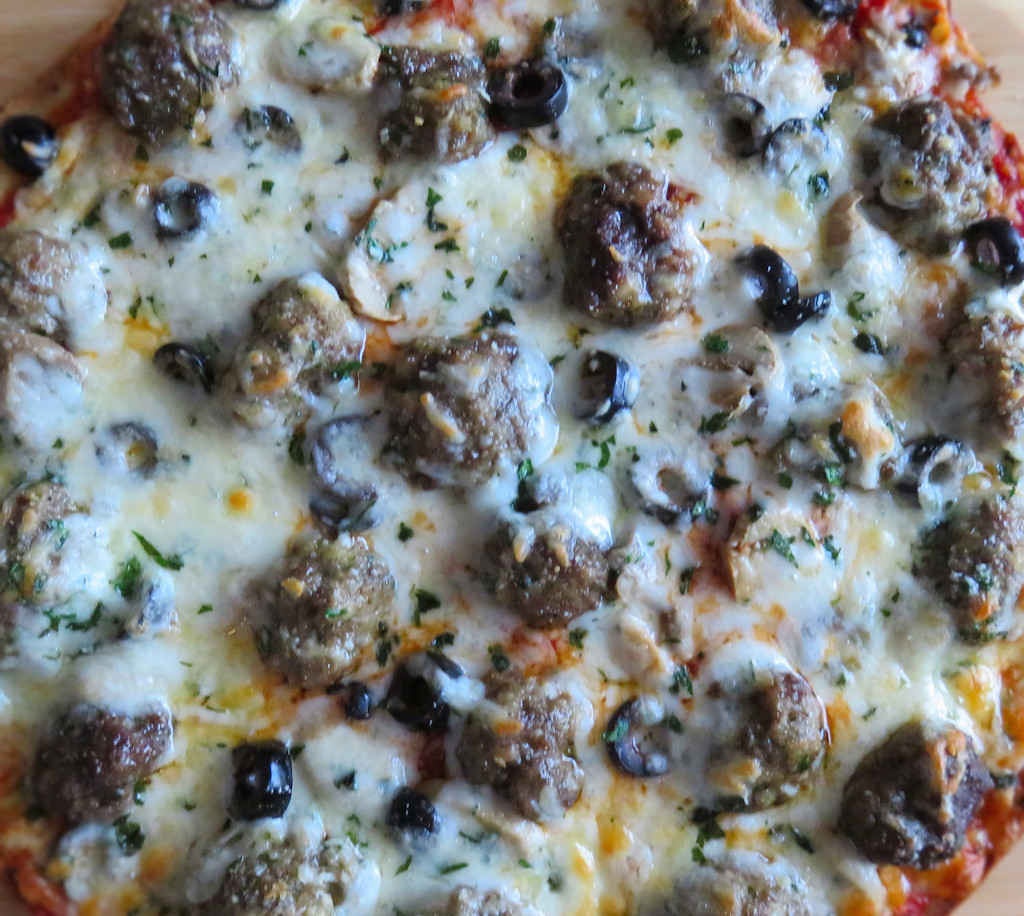
The base recipe for these baked cheese ravioli with meat sauce is great just as it is. But that doesn’t mean you can’t make a few changes. I like a few good pinches of red pepper flake in my meat sauce. A little kick. Spicy Italian sausage will do that for you too. And don’t hesitate to use something other than cheese ravioli. Mushroom ravioli are great too!

Good Cheese Makes A Great Dish Better

I love shredding my own cheese. Do I save a bunch of money doing that? Probably not. Is it better? You bet! That stuff you buy in the store that’s already shredded has ‘stuff’ on it. Stuff to keep it from sticking together. Well that stuff also makes it melt different. And taste different. So shred your own. It’s easy. I use this shredder. It’s crazy fast and easy to clean up. And it shreds perfectly!

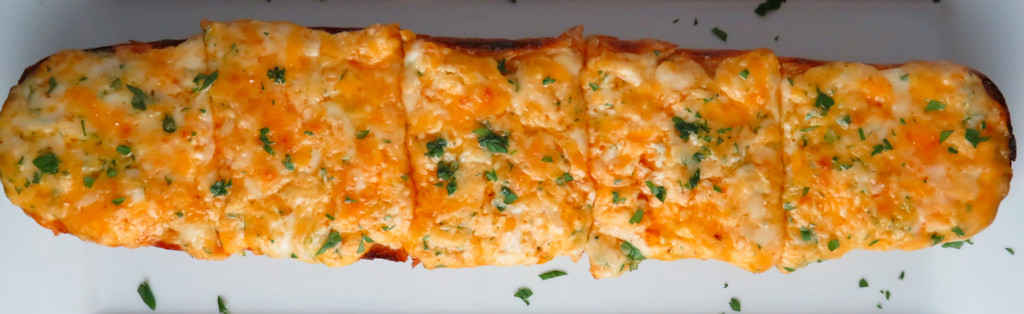
Also try my slow cooker ravioli lasagna.

Baked Cheese Ravioli with Meat Sauce
Print Pin
5 from 1 vote

Baked Cheese Ravioli with Meat Sauce

The perfect cold weather comfort food.
Course Main
Cuisine American
Keyword cheese, ravioli
Prep Time 15 minutes
Cook Time 30 minutes
Servings 8
Calories 5030kcal

Ingredients

  • 1 pound Italian sausage
  • 1 medium sweet onion chopped
  • 28 ounces crushed tomatoes
  • ¼ cup tomato paste
  • 1 tablespoon Italian seasoning
  • 25 ounces cheese ravioli frozen
  • 2 cups mozzarella shredded
  • 1 tablespoon fresh parsley chopped, for garnish

Instructions

  • Crumble the sausage into a large skillet. Cook over medium heat until lightly browned.
  • Add the onion and cook until it is soft.
  • Add the crushed tomatoes, tomato paste, and Italian seasoning. Stir. Let the sauce come to a slow simmer.
  • Meanwhile, cook the ravioli per the package instructions. Drain well.
  • Preheat your oven to 350 F.
  • Spray a 9 x 11 baking dish with non-stick spray.
  • Spread 1 cup of the meat sauce over the bottom of the dish and spread out evenly. It'll be thin but try to get it everywhere.
  • Add the cooked ravioli, distributing it evenly around the pan. Do not overlap the pasta.
  • Add half of the cheese then another cup of sauce.
  • Add the last of the ravioli and sauce, followed by the remaining cheese.
  • Cover the dish in foil and bake for 20 minutes.
  • Remove the foil. Turn your broiler on and place the dish under the broiler for a few minutes (keeping an eye on it the entire time) until you get a little browning on top.
  • Serve garnished with the chopped parsley.

Nutrition

Calories: 5030kcal | Carbohydrates: 399g | Protein: 237g | Fat: 279g | Saturated Fat: 109g | Polyunsaturated Fat: 21g | Monounsaturated Fat: 80g | Cholesterol: 904mg | Sodium: 10688mg | Potassium: 4787mg | Fiber: 43g | Sugar: 76g | Vitamin A: 4645IU | Vitamin C: 118mg | Calcium: 1800mg | Iron: 96mg

Nutritional values are approximate.

Pierogi and Smoked Sausage Casserole

I can’t say I’ve eaten a lot of pierogis in my life. I should apologize to myself for that because I actually like them a lot. So I grabbed a few packages of pre-made onion pierogis, cooked them up, and some fresh mushrooms and mushroom soup and made this really great pierogi and smoked sausage casserole. Cheesy and creamy, it was perfect for a cool day here in Indianapolis.

Pierogi and Smoked Sausage Casserole

Go Meatless

Adding smoke sausage along with fresh mushrooms really makes this casserole even better. You can actually leave out the meat. Me, I love smoked sausage. I make sure to slice it thin to help ensure I get a piece in every bite. You can use kielbasa or Polish sausage, or whatever your favorite is instead if you prefer.

This pierogi and smoked sausage casserole is pretty savory. If you want a little more edge to yours add a pinch or two of cayenne pepper. Or dried red pepper flake, or even smoked paprika.

Also try my chicken cordon bleu casserole.

Pierogi and Smoked Sausage Casserole
Print Pin
4 from 1 vote

Pierogi and Smoked Sausage Casserole

I grabbed a few packages of onion pierogies, cooked them up, and made this really great pierogi and smoked sausage casserole. Cheesy and creamy, it was perfect for a cool day here in Indianapolis.
Course Main
Cuisine American
Keyword casserole, sausage, smoked
Prep Time 10 minutes
Cook Time 35 minutes
Total Time 45 minutes
Servings 8
Calories 445kcal

Ingredients

  • 2 16 ounce pierogies cooked per package instructions
  • 1 pound Polish sausage or kielbasa, sliced into thin rounds
  • 8 ounces fresh mushrooms sliced thin
  • 2 10.75 ounce cream of mushroom soup
  • 2 cups milk
  • 2 cups extra sharp cheddar cheese shredded
  • 2 cups Swiss cheese shredded

Instructions

  • Preheat oven to 350 F.
  • Spray a 9″ x 13″ casserole dish with non-stick spray.
  • Place cooked pierogies into the bottom of the dish and spread out evenly.
  • Lightly brown the sausage in a skillet along with the mushrooms.
  • Evenly place sausage over the pierogies.
  • In a small bowl stir together the soup and milk until smooth.
  • Pour over the pierogies and top with the cheeses.
  • Bake for 30-35 minutes or until bubbly hot.
  • Let cool slightly before serving.

Notes

Nutritional values do not include the pierogies.

Nutrition

Calories: 445kcal | Carbohydrates: 7g | Protein: 25g | Fat: 35g | Saturated Fat: 18g | Cholesterol: 100mg | Sodium: 753mg | Potassium: 354mg | Fiber: 1g | Sugar: 4g | Vitamin A: 606IU | Vitamin C: 1mg | Calcium: 494mg | Iron: 1mg

Nutritional values are approximate.

Hot Broccoli Dip

This hot broccoli dip fit into my plans perfectly. I needed a dip for a family get-together, and I needed a big batch of it to boot. I figured if I was going to have leftovers I had better make a dip that I could use for other than a dip. This dip is more than a dip. It’s also absolutely fantastic (maybe, just maybe, more fantastic than when used as a dip) on baked potatoes.

Hot Broccoli Dip

Great As A Dip. Great On Baked Taters, Too!

This hot broccoli dip was a big hit at our get-together. I’d make it again, and make a little extra for baked potatoes. If you’re serving it as a dip, serve with celery, carrots, crackers or thick chips, such as Fritos Scoops. Wimpy chips need not apply!

Also try my pizza dip.

Hot Broccoli Dip
Print Pin
4 from 1 vote

Hot Broccoli Dip

This hot broccoli dip fit into my plans perfectly. I needed a dip for a family get-together, and I needed a big batch of it to boot.
Course Appetizer
Cuisine American
Keyword broccoli, dip
Prep Time 15 minutes
Cook Time 30 minutes
Total Time 45 minutes
Servings 4 cups
Calories 419kcal

Ingredients

  • 6 slices bacon
  • 1 head broccoli
  • Kosher salt
  • 1 8 ounce cream cheese softened
  • 1 1 ounce Ranch dressing mix
  • 2 cups extra-sharp cheddar cheese shredded
  • 1 16 ounce sour cream

Instructions

  • Preheat oven to 400 F.
  • Cook bacon in a skillet until crispy. Remove to a paper towel-lined plate to drain. Crumble or chop fine.
  • Bring a large pot of salted water to a boil. Cut the broccoli florets off the head. Add to the boiling water and let boil for 1 1/2 minutes. Drain and rinse with cold water. Chop into small pieces.
  • Combine all ingredients in a large bowl.
  • Spray a 9″ x 9″ baking dish with non-stick spray. Add the dip mixture and spread out evenly. Cover and bake for 20 minutes, or until hot and bubbly,

Nutrition

Calories: 419kcal | Carbohydrates: 11g | Protein: 23g | Fat: 33g | Saturated Fat: 16g | Trans Fat: 1g | Cholesterol: 82mg | Sodium: 639mg | Potassium: 602mg | Fiber: 4g | Sugar: 3g | Vitamin A: 1530IU | Vitamin C: 136mg | Calcium: 481mg | Iron: 2mg

Nutritional values are approximate.

Pimento Cheese Spread

I made a big batch of super-tasty roasted tomato soup the other day. I think it’s pretty much law that you must have a grilled cheese sandwich with a bowl of tomato soup. But, if you know me, I had to do things just a bit different. So, I decided to make pimento cheese. I’ve made pimento cheese grilled cheese sandwiches before. And I loved them. But to change things up I made pimento cheese bread sticks. I just took a great creamy pimento cheese mixture and spread it over toasted ciabatta bread. Under the broiler for a bit and then… fantastic-ness!

Pimento Cheese Spread

Great On Burgers And Dogs, Too

On the off-chance that you have some leftover pimento cheese spread, I cannot recommend enough just how great it can be on grilled burgers or hot dogs.

I highly recommend that you shred or grate your own cheese at home. Don’t buy the pre-shredded or pre-grated stuff. It has stuff added to it to keep it from sticking together. That ‘stuff’ affects how the cheese melts. Get the real stuff.

Also try my easy pimento cheese.

Pimento Cheese Spread
Print Pin
5 from 1 vote

Pimento Cheese Spread

Creamy pimento cheese mixture, spread over toasted ciabatta bread. Under the broiler for a bit and then… fantasticness!
Course Sauce
Cuisine American
Keyword pimento cheese
Prep Time 5 minutes
Total Time 5 minutes
Servings 4
Calories 478kcal

Ingredients

Instructions

  • Combine the cheddar, Asiago and mayonnaise in a bowl.
  • Empty the jar of pimentos into a small food processor and pulse a few times.
  • Stir the pimentos into the cheese mixture. Add the pimento juice a little at a time, stirring. Add more juice until you get the consistency you desire.
  • Stir in the red pepper flake, if using.
  • Spread on crunchy bread.

Nutrition

Calories: 478kcal | Carbohydrates: 4g | Protein: 18g | Fat: 43g | Saturated Fat: 16g | Polyunsaturated Fat: 13g | Monounsaturated Fat: 10g | Trans Fat: 0.1g | Cholesterol: 77mg | Sodium: 753mg | Potassium: 116mg | Fiber: 1g | Sugar: 1g | Vitamin A: 1449IU | Vitamin C: 29mg | Calcium: 552mg | Iron: 1mg

Nutritional values are approximate.

Crab Grilled Cheese Sandwiches

Grilled cheese sandwiches aren’t uncommon in our household, not at all. They’re easy and good and that’s all you can ask for. But, sometimes I just gotta mix things up. Not crazy mix things up, but crazy good mix things up. The filling in these crab grilled cheese sandwiches is just like a good crab salad. It just needs a little ‘help’, and that comes in the form of melted oooey gooey Swiss cheese on crispy golden bread. A nice crunch then creamy salad and cheese. Perfect.

Crab Grilled Cheese Sandwiches

Simple. Yet Delicious.

The crab salad inside these crab grilled cheese sandwiches is actually quite good and simple. It’d also be perfect inside appetizer sandwiches. Ya know, the fancy ones they serve at teas.

I used my Cuisinart Griddler to make these sandwiches.

Also try my mushroom grilled cheese and my white pizza grilled cheese sandwiches.

Crab Grilled Cheese Sandwiches
Print Pin
4 from 1 vote

Crab Grilled Cheese Sandwiches

The filling in these crab grilled cheese sandwiches is just like a good crab salad. It just needs a little ‘help’, and that comes in the form of melted oooey gooey Swiss cheese on crispy golden bread. 
Course Main
Cuisine American
Keyword crab, grilled cheese, sandwich
Prep Time 5 minutes
Cook Time 10 minutes
Total Time 15 minutes
Servings 2 sandwiches
Calories 456kcal
Author Mike

Ingredients

  • 6 ounces lump crab meat picked over for shells
  • 2 tablespoons mayonnaise plus more, perhaps
  • 4 tablespoons green onions chopped
  • ½ teaspoon lemon zest
  • ¼ teaspoon ground black pepper
  • 4 slices bread I used 6 small slices of Vienna bread
  • 4 slices Swiss cheese
  • 1 tablespoon butter

Instructions

  • In a bowl combine the crab, mayonnaise, green onions, lemon zest and pepper.
  • Heat a large skillet over medium-high heat or turn a panini press on high.
  • Slather one side of each piece of bread with butter.
  • Lay two slices of bread-butter side down in the skillet or onto the panini press.
  • Add a slice of cheese to each, then divide the crab mixture between them.
  • Add remaining slice of cheese to each and top with other piece of bread, butter-side up.
  • Fry until golden brown on the bottom then flip and fry on the other side until done, or close your press and cook until nice and golden brown.
  • Remove from skillet or panini press and slice and serve.

Nutrition

Calories: 456kcal | Carbohydrates: 31g | Protein: 31g | Fat: 23g | Saturated Fat: 8g | Trans Fat: 1g | Cholesterol: 74mg | Sodium: 1166mg | Potassium: 352mg | Fiber: 3g | Sugar: 5g | Vitamin A: 446IU | Vitamin C: 9mg | Calcium: 406mg | Iron: 3mg

Nutritional values are approximate.

Grilled Open-Faced Beef, Cheese and Gravy Sandwiches

These grilled open-faced beef, cheese and gravy sandwiches just blew us away. Cooked over charcoal, the sandwiches take on a lovely light smoky flavor. The beef is tender, juicy and packed with flavor.  Covered in a tasty beef gravy, every bite is just fantastic. Served over thick, hearty grilled bread, it’s the sandwich you’ve been looking for.

Grilled Open-Faced Beef, Cheese and Gravy Sandwiches

Burgers With A Big Twist

There’s nothing I would really change about this recipe for Grilled Open-Faced Beef, Cheese and Gravy sandwiches. It’s a great alternative to cooking your usual burgers on the grill. You could make this with ground turkey, I would think, though you might have to add a little fat (vegetable oil) to keep the turkey from getting too tough when seared. You might want to grab a bottle of pre-made turkey gravy instead of making the beef version in the recipe below.

Nothing Fancy Here, Folks

The gravy on these sandwiches isn’t anything fancy or fru-fru. It’s simple and beefy and that’s it. It gets just the right thickness to pour over your sandwiches. You’ll get plenty of everything in each and every bite. No need to worry about those dreaded ‘no gravy’ bites.

This is yet another brilliant recipe from the BBQ Pit Boys.

Also try my open-faced turkey sandwiches.

Grilled Open-Faced Beef, Cheese and Gravy Sandwiches
Print Pin
4 from 1 vote

Grilled Open-Faced Beef, Cheese and Gravy Sandwiches

These grilled open-faced beef, cheese and gravy sandwiches just blew us away. Cooked over charcoal, the sandwiches take on a lovely light smoky flavor.
Course Main
Cuisine American
Keyword beef, gravy, sandwich
Prep Time 15 minutes
Cook Time 45 minutes
Total Time 1 hour
Servings 4 servings
Calories 870kcal

Ingredients

For the beef gravy

Instructions

  • Fire up your grill for direct and indirect cooking. Charcoal is definitely best for this recipe.
  • Form the beef into equal-sized patties.
  • Sear over direct heat on both sides, but do not cook all the way. Remove from heat and place in a large bowl.
  • Add the onion, tomatoes, chiles, Italian seasoning and rub. Use a potato masher or fork to combine all ingredients and break the ground beef into chunks.
  • Place a large cast iron pan on your grill over indirect heat.
  • Add the meat mixture and spread out evenly. Use a spatula or the back of a large spoon to lightly compact the meat into the pan.
  • Cook for 20 minutes or until the beef is cooked and most of the liquid has evaporated.
  • Top mixture with the cheese slices, cover and cook another 2-3 minutes or until the cheese has melted.
  • Remove the pan from the grill. Lightly toast the bread slices on the grill.
  • Serve meat over the bread topped with the beef gravy.

For the beef gravy

  • Add a small skillet to the grill over direct heat. Add the butter and melt.
  • Add the beef broth. Bring to a boil.
  • Add the butter to the skillet and melt.
  • Add 1 1/2 cups of broth. Bring to a boil.
  • Combine the flour and water in a cup and whisk into the beef broth.
  • Continue stirring until the gravy is thickened. Remove from heat.

Notes

You’ll need a large cast iron skillet. Remember to not grab the skillet handle without a heat-proof glove once you’ve placed it onto the grill.

Nutrition

Calories: 870kcal | Carbohydrates: 20g | Protein: 54g | Fat: 62g | Saturated Fat: 28g | Trans Fat: 3g | Cholesterol: 206mg | Sodium: 975mg | Potassium: 833mg | Fiber: 2g | Sugar: 4g | Vitamin A: 482IU | Vitamin C: 2mg | Calcium: 438mg | Iron: 7mg

Nutritional values are approximate.

Bread Machine Jalapeno Cheese Bread

I’ve been inspired lately by my bread making expertise. Ok, not really. But I have been really happy with how great my last few loaves have turned out, like this bread machine jalapeno cheese bread. I make the dough in my bread machine, then roll it out, shape it, and let it rise again. Finally, into the oven and done! I’ve proven to myself too many times before that I should not make dough by hand. I let the bread machine do it. Like this jalapeno cheese bread. Not too spicy, and not too cheesy, but just right and the perfect texture for sandwiches.

Bread Machine Jalapeno Cheese Bread

Try Some Delicious Substitutions

I think you could substitute just about anything for the jalapenos and the cheese in your bread machine jalapeno cheddar bread. Chopped roasted poblanos and pepper jack cheese would make for a great combination. As would diced green chiles (drained very well first) and Monterey jack cheese. The options are pretty much endless. Just don’t use any ingredients that are extremely moist.

Also try my bread machine garlic herb pepperoni bread and my Italian herb bread.

Bread Machine Jalapeno Cheese Bread
Print Pin
4.50 from 2 votes

Bread Machine Jalapeno Cheese Bread

I’ve been inspired lately by my bread making expertise. Ok, not really. But I have been really happy with how great my last few loaves have turned out, like this bread machine jalapeno cheese bread. 
Course Bread
Cuisine American
Keyword bread, homemade, spicy
Prep Time 10 minutes
Cook Time 3 hours
Total Time 3 hours 10 minutes
Servings 1 loaf
Calories 1693kcal
Author Mike

Ingredients

Instructions

  • Place ingredients into your bread machine in the order listed.
  • Select the dough cycle and let the machine do its job.
  • Lightly flour a work surface and add the dough. Punch down to flatten.
  • Use a rolling pin to shape the dough into a rectangle the width of your bread pan. Lightly oil the bread pan.
  • Roll the dough up into a tight log. Seal the seam and ends tightly and transfer to your bread pan.
  • Cover loosely with plastic wrap and place in a warm place to rise, doubling in size, about one hour.
  • Preheat oven to 350 F.
  • Bake bread for 30 minutes or until the bread has a nice crust on it.
  • Remove to a wire rack to cook slightly before slicing and serving.

Nutrition

Calories: 1693kcal | Carbohydrates: 300g | Protein: 60g | Fat: 25g | Saturated Fat: 13g | Cholesterol: 59mg | Sodium: 2686mg | Potassium: 555mg | Fiber: 11g | Sugar: 27g | Vitamin A: 1026IU | Vitamin C: 50mg | Calcium: 471mg | Iron: 4mg

Nutritional values are approximate.

Bacon Cheese-Stuffed Peppers

I absolutely loved these bacon cheese-stuffed peppers. Every bite was full of my favorite things, like cheese and bacon. And a bit of sharp onion and sweet roasted bell pepper. I left the onions fairly crunchy because I was looking for a great crunch (along with the crunch of the bacon) to contrast the soft pepper and gooey cheese. You can cook yours further if you want but don’t go overboard. Crunch here is a good thing.

Bacon Cheese-Stuffed Peppers

Add A Bit Of Heat, If You Want

For a spicier version, substitute habanero jack cheese for the cheeses, and use poblano peppers instead of red bell peppers. A sprinkle or two of red pepper flake on top isn’t going to hurt anything either. You can’t go wrong with bacon cheese-stuffed peppers no matter how you change them up (if you do). And for me, spicier is better!

I highly recommend that you shred or grate your own cheese at home. Don’t buy the pre-shredded or pre-grated stuff. It has stuff added to it to keep it from sticking together. That ‘stuff’ affects how the cheese melts. Shred it yourself and use the good stuff.

This recipe was inspired by a recipe from the BBQ Pit Boys.

Also try my sausage-stuffed Hatch chiles.

Bacon Cheese-Stuffed Peppers
Print Pin
4 from 1 vote

Bacon Cheese-Stuffed Peppers

I absolutely loved these bacon cheese-stuffed peppers. Every bite was full of my favorite things, like cheese and bacon. And a bit of sharp onion and sweet roasted bell pepper. 
Course Side
Cuisine American
Keyword peppers, stuffed
Prep Time 15 minutes
Cook Time 1 hour 30 minutes
Total Time 1 hour 45 minutes
Servings 4 servings
Calories 336kcal

Ingredients

  • ½ pound bacon
  • 2 red bell peppers
  • 1 tablespoon vegetable oil
  • beer
  • ¼ cup white onion chopped
  • ¼ cup Monterey jack cheese more or less, shredded
  • ¼ cup Mozzarella cheese more or less, shredded

Instructions

  • Preheat oven to 375 F.
  • Line a baking sheet with foil and add the bacon.
  • Bake for 30-40 minutes until crisp, turning once. Remove to a paper towel-lined plate to drain.
  • Cut peppers in half vertically. Remove any seeds.
  • Place peppers on a baking dish and fill the halves with the beer. Cover with foil and place in the oven for 20-30 minutes or until tender.
  • Meanwhile, crumble the bacon into a bowl and add the onion and cheeses.
  • Uncover the peppers and pour off any remaining beer. Fill cavities with the bacon mixture and return to the oven, uncovered, until the cheese is melted.

Nutrition

Calories: 336kcal | Carbohydrates: 5g | Protein: 11g | Fat: 30g | Saturated Fat: 13g | Trans Fat: 1g | Cholesterol: 49mg | Sodium: 460mg | Potassium: 263mg | Fiber: 1g | Sugar: 3g | Vitamin A: 1986IU | Vitamin C: 77mg | Calcium: 97mg | Iron: 1mg

Nutritional values are approximate.

Chipotle Garlic Cheese Bread

Until 15 minutes ago, our gotta-have-it-garlic bread was our favorite garlic bread. This chipotle garlic cheese bread is similar in that, boy, is it ever packed with flavor, but oh does it ever bring the cheese. It reminds me of the garlic cheese bread Pizza Hut used to have on the menu but with ten times the flavor and cheese (which reminds me… be sure to check out my copycat of Pizza Hut’s pan pizza). It’s seriously over the top, but really, when you make garlic cheese bread are you thinking ‘healthy’? It’s an indulgence. And then some.

Chipotle Garlic Cheese Bread

Make Ahead, Enjoy Later

You can make this chipotle garlic cheese bread ahead of time. Just wrap it in foil (loosely, so that the cheese doesn’t stick to the foil) and keep it in the fridge. When you’re ready to reheat it just toss it in a 350 F oven for 10-15 minutes until hot. Let it cool slightly before slicing or the ooey gooey cheese will run all over the place.

Also try my buttery garlic herb knots, grilled garlic cheese bread and my super-easy garlic-cheese crescent rolls.

Chipotle Garlic Cheese Bread
Print Pin
5 from 1 vote

Chipotle Garlic Cheese Bread

This chipotle garlic cheese bread is packed with flavor, and oh does it ever bring the cheese.
Course Side
Cuisine American
Keyword cheese, garlic bread
Prep Time 15 minutes
Cook Time 5 minutes
Total Time 20 minutes
Servings 8 servings
Calories 314kcal
Author Mike

Ingredients

  • 6 tablespoons unsalted butter softened
  • 2 teaspoons Chipotle chili powder or more
  • 1 cup Mozzarella cheese shredded
  • 1 cup sharp cheddar cheese shredded
  • ¾ cup green onions chopped
  • 1 tablespoon parsley chopped plus more for garnish
  • ½ cup mayonnaise
  • 2 tablespoons sour cream
  • 1 large French bread halved horizontally

Instructions

  • Combine the butter and chipotle chili powder in a large bowl. Add more seasoning if you want it spicier.
  • Add the remaining ingredients except for the bread (and parsley garnish). Gently fold to combine.
  • Place bread halves onto a baking sheet lined with aluminum foil.
  • Spread the cheese mixture onto the bread. Don’t be shy. If you have leftover mixture consider yourself lucky (not all loaves are the same size, so it happens!).
  • Place bread under the broiler until starting to brown, 3-5 minutes.
  • Remove from the oven and let cool slightly before garnishing with parsley and slicing for serving.

Nutrition

Calories: 314kcal | Carbohydrates: 8g | Protein: 9g | Fat: 28g | Saturated Fat: 12g | Trans Fat: 1g | Cholesterol: 56mg | Sodium: 339mg | Potassium: 88mg | Fiber: 1g | Sugar: 1g | Vitamin A: 810IU | Vitamin C: 2mg | Calcium: 194mg | Iron: 1mg

Nutritional values are approximate.

4-Cheese Meatball Pizza

It was meatball week here. I made a monster batch of my homemade meatballs with plans of using them in all sorts of dishes, from spaghetti and meatballs to meatball sandwiches and meatball soup to, of course, 4-cheese meatball pizza. I love the texture of meatballs on a pizza. They add a nice meatiness to each and every bite, plus they add even more wonderful Italian flavor.

4-Cheese Meatball Pizza

The No-Leftover Zone

The combination of four different cheeses made for a delightful pizza feast. There weren’t any leftovers. That happens with pizza around here. Roasted cauliflower? Probably gonna have some leftovers. Leftover 4-cheese meatball pizza? Nope.

I highly recommend that you shred or grate your own cheese at home. Don’t buy the pre-shredded or pre-grated stuff. It has stuff added to it to keep it from sticking together. That ‘stuff’ affects how the cheese melts. Shred it yourself and use the good stuff.

As much as I love my meatball sandwiches, meatballs on a pizza are my favorite. Also try my cafeteria-style pizza.

4-Cheese Meatball Pizza
Print Pin
5 from 1 vote

4-Cheese Meatball Pizza

I love the texture of meatballs on a pizza. They add a nice meatiness to each and every bite, plus they add even more wonderful Italian flavor.
Course Main
Cuisine American
Keyword meatballs, pizza
Prep Time 15 minutes
Cook Time 15 minutes
Total Time 30 minutes
Servings 1 pizza
Calories 2626kcal
Author Mike

Ingredients

  • 1 large pizza dough I used my bread machine pizza dough
  • ½ cup pizza sauce I used my homemade sauce
  • 8 meatballs cooked, cut in half (I used my homemade meatballs. See the note below). If using frozen, thaw first.
  • Any other desired toppings I added mushrooms and black olives… plus a few pinches of dried red pepper flake
  • 1 cup provolone cheese shredded
  • 1 cup cheddar cheese shredded
  • 1 cup Monterey Jack cheese shredded
  • cup fresh Parmesan cheese shredded

Instructions

  • Note: I used my homemade meatballs. Normally I make them at least 2 ounces each. For the pizza I made 1 ounce meatballs instead. You can still use large meatballs, but instead of halving them you will probably want to quarter them.
  • Preheat oven to 420 F
  • If using store-bought pizza dough or crust, prepare per the package instructions.
  • Ladle sauce onto the pizza and spread out edge-to-edge.
  • Distribute the meatballs around the pizza.
  • Add any other toppings that you desire.
  • Sprinkle with the cheeses.
  • Transfer to a pizza stone or pan and bake 10-12 minutes or until the dough is crispy and the cheeses are melted.

Nutrition

Calories: 2626kcal | Carbohydrates: 198g | Protein: 140g | Fat: 143g | Saturated Fat: 80g | Cholesterol: 391mg | Sodium: 5995mg | Potassium: 1111mg | Fiber: 8g | Sugar: 31g | Vitamin A: 3701IU | Vitamin C: 9mg | Calcium: 2687mg | Iron: 15mg

Nutritional values are approximate.