Slow Cooker Hawaiian Pineapple Chicken

Cold crappy weather. All I wanted was something easy to throw into the slow cooker. Something tasty. Something with a Hawaiian twist. Slow cooker Hawaiian pineapple chicken fit the bill perfectly.  It had a wonderfully sweet combination of honey, brown sugar and pineapple. Crunchy veggies and plenty of salty soy sauce. The chicken was tender and packed with flavors. It wasn’t fancy but it was good. I’m a pineapple addict, and this dish satisfied my craving and then some!
Slow Cooker Hawaiian Pineapple Chicken

Searing For Success

I’m kind of a stickler about texture when it comes to meat in a crockpot. Searing gives this slow cooker Hawaiian pineapple chicken that texture I was hoping for. Whenever possible I sear the meat first. I need that contrast, a little crunch, a little char along the edges. Not fully cooked through, but seared just enough. You can skip it if you prefer to just add the chicken directly to your cooker.

I used boneless skinless chicken thighs but you can substitute boneless chicken breasts instead. If you prefer to sear them like I did the thighs, I recommend that you butterfly them first so they have the same thickness throughout for more even cooking.

Also try my slow cooker French onion soup.

Slow Cooker Hawaiian Pineapple Chicken
Print Pin
4 from 1 vote

Slow Cooker Hawaiian Pineapple Chicken

A wonderfully sweet combination of honey, brown sugar and pineapple. Crunchy veggies and plenty of salty soy sauce. The chicken is tender and packed with flavors. It’s not fancy but it’s good.
Course Main
Cuisine American
Keyword chicken, slow cooker
Prep Time 15 minutes
Cook Time 5 hours 30 minutes
Total Time 5 hours 45 minutes
Servings 4 servings
Calories 690kcal

Ingredients

Instructions

  • Season thighs with salt and pepper.
  • Working in batches, heat oil in a large skillet and brown the thighs on both sides, 3-5 minutes. Remove to a plate.
  • Place the pineapple and honey into a slow cooker.
  • Add the honey, soy sauce, brown sugar, ginger, garlic and sesame seeds. Stir.
  • Add the chicken and any juices that have accumulated in the plate.
  • Cover and cook on low for 5 hours.
  • Stir in the bell peppers.
  • In a small bowl or glass combine the cornstarch with the water.
  • Stir into the slow cooker and cook another 30 minutes.
  • Serve over cooked rice garnished with parsley or green onions, if desired.

Notes

You can substitute chicken breasts for the thighs.

Nutrition

Calories: 690kcal | Carbohydrates: 48g | Protein: 39g | Fat: 38g | Saturated Fat: 10g | Trans Fat: 1g | Cholesterol: 221mg | Sodium: 688mg | Potassium: 648mg | Fiber: 1g | Sugar: 42g | Vitamin A: 1109IU | Vitamin C: 41mg | Calcium: 65mg | Iron: 2mg

Nutritional values are approximate.

The Best Hot Dog Recipes

I’m a huge fan of hot dogs. Nothing beats a perfectly-cooked dog topped with the best flavors. No plain ole dogs here, these are all something special!

Big Mac Hot Dogs
1
Alpine Hot Dogs
Alpine Hot Dogs
These Alpine hot dogs combine great mushroom flavor with yummy all-beef hot dogs and great creamy nutty Swiss cheese. Every bite is delicious.
Check out this recipe
2
Blue Moon Hot Dogs
Blue Moon Hot Dogs
The coolness of the salad on these blue moon hot dogs contrasts well with the just-off-the-grill wieners.
Check out this recipe
3
Cajun Meatloaf
Cajun Hot Dogs
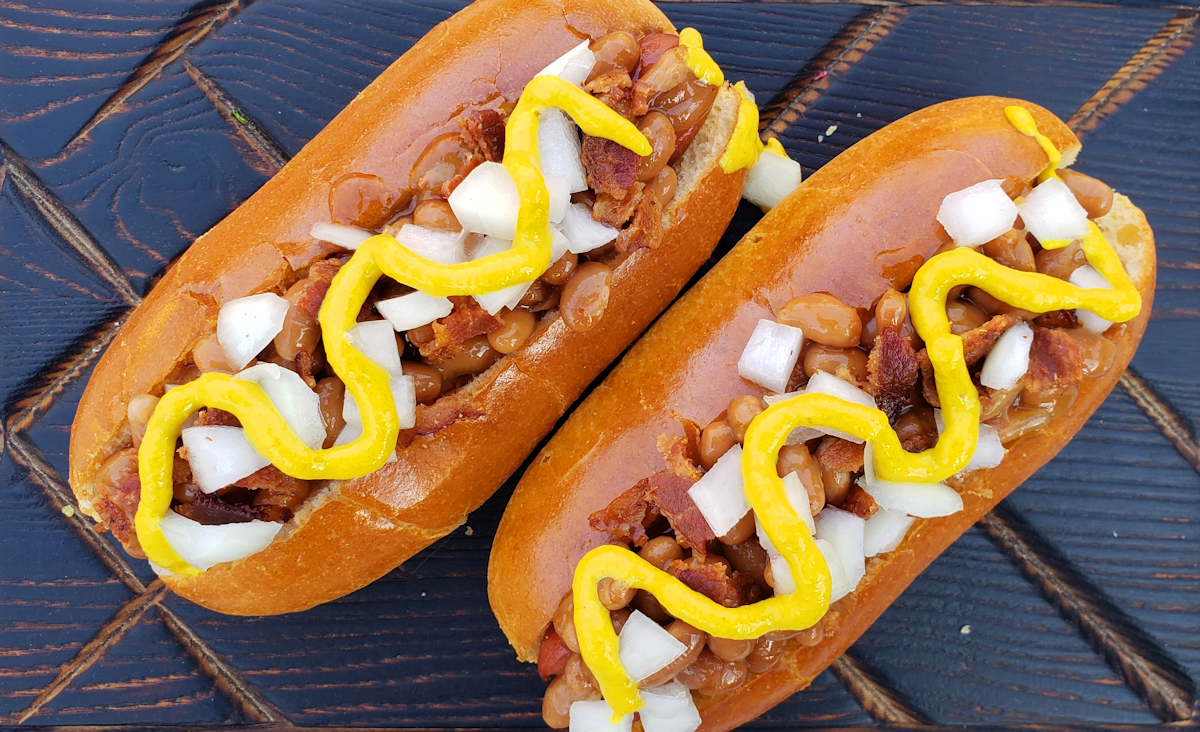
Do this next time you cook up some hot dogs. Take a few hot dogs and roll them in Cajun seasoning before cooking them on the grill. That’s it. The result? Totally great.
Check out this recipe
4
Carolina Dogs
Carolina Hot Dogs
I love putting coleslaw on my pulled pork sandwiches, so why not take that same idea and completely amp-up a hot dog? A grilled all-beef dog. Tender moist smoked pulled pork. Tangy Carolina coleslaw. These Carolina hot dogs were a big hit in our house.
Check out this recipe
5
Cedar-Planked Hot Dogs
Oh my goodness. I was just about as happy as a kid on Christmas morning as I cooked these cedar-planked hot dogs.
Check out this recipe
6
Big Mac Hot Dogs
Big Mac Hot Dogs
One of the most fun things I've made!
Check out this recipe
7
Charlie Mac Dog
Charlie Mac Dog
Everything about this dog screams yummy. 
Check out this recipe
8
Cowboy Hot Dogs
Cowboy Hot Dogs
Now THESE are hot dogs. You’ve got your smoky crispy bacon. There’s sauteed sweet onions and mushrooms. And cheese. 
Check out this recipe
9
French Connection Hot Dogs
These French Connection hot dogs have quickly become a favorite in our household. We love the crunch from the fried onions, the creamy cheese, and the spicy BBQ sauce. These dogs disappear fast.
Check out this recipe
10
German Cowboy Dog
German Cowboy Hot Dog
I could’ve eaten more of these German Cowboys hot dogs than I’ll ever admit online. Or admit even in person for that matter!
Check out this recipe
11
Big Kahuna Dogs
Big Kahuna Hot Dogs
From the moment i ran across this great idea for the Big Kahuna hot dogs I knew one thing: I was going to go big on the pineapple and spicy on the BBQ sauce.
Check out this recipe
12
Grilled Cuban Hot Dogs
Grilled Cuban Hot Dog
Although certainly not an authentic take on the (yummy) Cuban sandwich, these grilled Cuban hot dogs do remind you of the tastes of the handheld classic. 
Check out this recipe
13
Islander Hot Dogs
Islander Hot Dogs
These Islander hot dogs are another example of a great dog that doesn’t take a lot of work to put together. Think hot dog. Think salad. Put them together.
Check out this recipe
14
Pickled Hot Dogs
Pickled Hot Dogs
When I made these pickled hot dogs, a little voice in the back of my head kept asking if I was making Vienna sausages. To which I replied, No. They may sort of look like Vienna sausages (if they came in a jar), but oh my, they are something completely different.
Check out this recipe
15
Seattle-Style Hot Dogs
Mmmmmm. Oh my goodness. Where have I been that I didn’t know that slathering cream cheese on a hot dog is just about the best thing ever? 
Check out this recipe
16
Stroganoff Hot Dogs
Stroganoff Hot Dogs
These Stroganoff hot dogs combine grilled onions and mushrooms with a creamy sauce and fresh toppings. 
Check out this recipe

Quick Fix Roasted Garlic And Herb Potato Chips

If you buy any amount of potato chips I’m going to make a bold prediction. You’re bored. Bored of the same flavors. Bored of chips that claim to be bold or better or whatever and never live up to the promises. Well stop it. I did. Now I but plain ole chips. Ruffled usually. And wavy. And then I season them my way. Like these quick fix roasted garlic and herb potato chips. These aren’t boring. Not even close to it.

Quick Fix Roasted Garlic And Herb Potato Chips

Heat ‘Em. Spice ‘Em. Eat ‘Em.

It’s literally that easy to make these quick fix roasted garlic and herb potato chips. The seasoning comes from fine folks over at Weber. I know I can trust them. I own over 15 Weber grills. I’ve got a pantry full of Weber sauces and seasonings. They don’t mess around. This seasoning proves it. It’s full of garlic flavor. And delicious herbs. The chips taste great. You can see the seasoning. And the cool part is I can add a little or a lot. I’m in control here.

Also try some quick fix rotisserie chicken-seasoned potato chips. Oh yes, they’re different. And they’re great!

Quick Fix Roasted Garlic And Herb Potato Chips
Print Pin
5 from 1 vote

Quick Fix Roasted Garlic And Herb Potato Chips

The solution to boring potato chips.
Course Snack
Cuisine American
Keyword potato chips, quick fix
Prep Time 15 minutes
Cook Time 5 minutes
Servings 4
Calories 452kcal

Ingredients

Instructions

  • Preheat your oven to 275 F.
  • Spread chips out onto a baking sheet. Bake for 5 minutes. You should see that the oils in the chips have come to the surface.
  • Gently transfer chips to a large bowl and sprinkle with the seasoning. Use a spatula to carefully stir to coat.
  • Serve immediately.

Notes

Be gentle when stirring to avoid breaking the chips.

Nutrition

Calories: 452kcal | Carbohydrates: 46g | Protein: 5g | Fat: 29g | Saturated Fat: 3g | Polyunsaturated Fat: 7g | Monounsaturated Fat: 16g | Trans Fat: 1g | Sodium: 448mg | Potassium: 1020mg | Fiber: 3g | Sugar: 1g | Vitamin C: 18mg | Calcium: 18mg | Iron: 1mg

Nutritional values are approximate.

Smoked Hazelnut Butter

When I first came across the idea of using smoked hazelnuts in butter I knew exactly what I was going to use it for: baked sweet potatoes. I love sweet potatoes, and baking them like Russets is one of my favorite ways to serve them. Crunchy skin and creamy insides, they make for something different than the ‘usual’ baked potato side dish.

Smoked Hazelnut Butter

Great Crunch And Flavor

The smoked nuts add a nice light smoky flavor, and a little crunch. I often serve sweet potatoes with roasted pecans. The smoked hazelnuts are different than pecans. They are also great right off the smoker as a snack. Well, let them cool off a bit first of course.

I leave it up to you to decide how many smoked hazelnuts you want to add to the butter. I still wanted to taste the butter, so I didn’t overwhelm it with the nuts. I also added a few good sprinkles of Gorgonzola to my baked sweet potato. It was a great dish.

I used my Weber Smoker when I smoked the hazelnuts.

Smoked Hazelnut Butter
Print Pin
5 from 1 vote

Smoked Hazelnut Butter

When I first came across the idea of using smoked hazelnuts in butter I knew exactly what I was going to use it for: baked sweet potatoes.
Course Sauce
Cuisine American
Keyword butter, smoked
Prep Time 10 minutes
Total Time 10 minutes
Servings 1 cup
Calories 1035kcal

Equipment

Ingredients

Instructions

  • Place the nuts into a blender or chopper and pulse until the desired texture is achieved. I like mine pretty fine, but you may want more of a crunch.
  • Add butter and pulse. If too thick, add a little oil and pulse a few more times.
  • Season with salt and pulse a few more times.

Notes

Store in an airtight container in the fridge until ready to use.

Nutrition

Calories: 1035kcal | Carbohydrates: 42g | Protein: 33g | Fat: 88g | Saturated Fat: 14g | Cholesterol: 50mg | Sodium: 476mg | Potassium: 1428mg | Fiber: 12g | Sugar: 27g | Vitamin A: 772IU | Vitamin C: 8mg | Calcium: 658mg | Iron: 6mg

Nutritional values are approximate.

Stove Top Stuffing Meatloaf

This is the world’s easiest, tastiest meatloaf. Stove Top stuffing meatloaf is our absolute go-to dish when we’re hankerin’ for some good ole comfort food. Hot out of the oven, or leftover and served as a sandwich, it doesn’t matter. This is always on the top of our list. As a bonus, it’s easy to keep all of the ingredients on hand. We can make dinner without a lot of planning ahead or fuss.

Stove Top Stuffing Meatloaf

Picking Your Stuffing

There are a lot of varieties of Stove Top Stuffing mix out there. We really like the chicken-flavored one in this Stove Top Stuffing meatloaf. The stuffing adds the best flavor to the meatloaf. And when you’re in a rush, grabbing that box of mix is sure quicker and easier than making it yourself from scratch.

Nothing Fancy

Yeah, I know. It’s easy and it ain’t fancy. But this sure hit the spot.

I always make extra gravy. I’m a gravy-aholic. There’s nothing worse than not having enough gravy.

Check out my list of my favorite meatloaf recipes!

Stove Top Stuffing Meatloaf
Print Pin
5 from 1 vote

Stove Top Stuffing Meatloaf

The stuffing adds the best flavor to the meatloaf.
Course Main
Cuisine American
Keyword meatloaf
Prep Time 15 minutes
Cook Time 1 hour
Servings 8
Calories 316kcal

Ingredients

  • 1 package Stove Top stuffing I used chicken-flavored
  • 1 cup hot water
  • 2 packages brown gravy mix or 3, if you want extra gravy for sides such as mashed potatoes
  • 1 ½ pounds ground beef
  • 1 cup cold water
  • 2 large eggs beaten

Instructions

  • Preheat your oven to 350 F. Make the meatloaf while it's warming up.
  • Empty the stuffing mix into a medium-sized bowl. Pour the hot water over the top and stir lightly. Let sit for 5 minutes to absorb the water.
  • In another medium-sized bowl combine 1 package of the brown gravy and the cold water. Stir until the mix is dissolved.
  • Add the ground beef and beaten egg. Using your hands, mix well.
  • Add the stuffing mix to the meat mixture and combine well. Make sure you get the stuffing distributed evenly throughout.
  • Line a deep baking dish with foil or spray lightly with cooking spray.
  • Add the meat mixture to the pan and form into a loaf.
  • Bake 45-55 minutes or until no longer pink and the internal temperature reaches 160 F. Remove from the oven and let rest 5 minutes.
  • Prepare the other package of gravy per package instructions.
  • Slice meatloaf and serve with the gravy.

Notes

Fantastic served with mashed potatoes. Or French fries.

Nutrition

Calories: 316kcal | Carbohydrates: 16g | Protein: 19g | Fat: 19g | Saturated Fat: 7g | Polyunsaturated Fat: 1g | Monounsaturated Fat: 8g | Trans Fat: 1g | Cholesterol: 107mg | Sodium: 375mg | Potassium: 299mg | Fiber: 1g | Sugar: 2g | Vitamin A: 68IU | Calcium: 43mg | Iron: 3mg

Nutritional values are approximate.

Rotisserie Chicken-Seasoned Shake’N Bake Pork Chops

One of my favorite things to make is baked pork chops. As a kid, Shake’N Bake was often a go-to dinner and it still is for me to this day. But, I admit, I like to stir things up a bit by making my own mix. I like to make all sorts of different flavors. I was walking into the grocery store the other day and of course they make sure that I’m instantly surrounded by the aroma coming from the rotisserie chicken roasters. However, my first thought wasn’t to go snag a chicken. Instead, it was “Oh, I gotta make rotisserie chicken-seasoned Shake’N Bake pork chops”!

Rotisserie Chicken-Seasoned Shake'N Bake Pork Chops

Wonderfully Delicious

Indeed, these pork chops taste just like what you’d expect. Yes, you can use this mix on chicken. But me, I love baked pork chops even more so that’s what I made! These rotisserie chicken-seasoned Shake’N Bake pork chops really hit the spot. I made these three times in one week that’s how much I love this mix!

Also try my chipotle shake’n bake on pork chops. Or chicken.

Rotisserie Chicken-Seasoned Shake'N Bake Pork Chops
Print Pin
5 from 1 vote

Rotisserie Chicken-Seasoned Shake’N Bake Pork Chops

I was blown away by how much I loved this rotisserie chicken-seasoned Shake’n Bake mix on pork chops (I’m sure it’d rock big time on chicken too!).
Course Seasoning
Cuisine American
Keyword baked, pork chops
Prep Time 5 minutes
Total Time 5 minutes
Servings 4 cups
Calories 466kcal
Author Mike

Ingredients

Curry Shake’N Bake

Instructions

Curry Shake’N Bake

  • Combine the dry ingredients in a bowl.
  • Add the oil and stir until the lumps are all gone.

For pork chops

  • Preheat oven to 425 F.
  • Rinse chops and pat dry.
  • Working in batches, transfer chops to a resealable bag.
  • Add Shake'n Bake mix.
  • Seal and shake to coat chops.
  • Shake off excess coating and transfer chops to a foil-lined baking sheet.
  • Bake for 20-25 minutes or until done.

For chicken

  • Preheat oven to 400 F.
  • Working in batches, transfer chicken pieces to a resealable bag.
  • Add Shake'n Bake mix.
  • Seal and shake to coat chicken.
  • Shake off excess coating and transfer chicken to a foil-lined baking sheet.
  • Bake for 40-45 minutes for bone-in chicken or 20 minutes for boneless chicken until done.

Notes

Store the seasoning mix in an air-right container for up to 2 months until ready to use.

Nutrition

Calories: 466kcal | Carbohydrates: 65g | Protein: 12g | Fat: 18g | Saturated Fat: 12g | Sodium: 2340mg | Potassium: 261mg | Fiber: 5g | Sugar: 8g | Vitamin A: 258IU | Vitamin C: 6mg | Calcium: 177mg | Iron: 5mg

Nutritional values are approximate.

Cedar Planked Spicy Nacho Cheese Doritos

It’s great to be in control. It seems sometimes a rare thing in our lives. Well, when you make some cedar planked spicy nacho cheese Doritos you’re in control. You decide how much of that cedar aroma you want. And how much flavor the cedar is going to bring. You even get to decide how roasted crunchy the chips end up. You’ll love the results of your efforts, believe me. Control never tasted or felt so good!

Cedar Planked Spicy Nacho Cheese Doritos

Best Easiest Snack Ever

There’s nothing complicated going on here. You do have to be careful you don’t go crazy nuts and leave the chips on the grill too long. The process for making cedar planked spicy nacho cheese Doritos is simple. These are great snacks for your next grill party. You can make a lot of them, and quick. Do like I do and make some cool ranch Doritos too. And some regular nacho cheese for sure!

Doritos Rock. So Do Other Chips.

I bet you’re thinking… Can I do this with other chips, too? Why sure! You can place any chip onto planks and grill them. But, watch out! Thinner chips, such as potato chips, will cook a lot faster! You might want to do a ‘test run’ with a few chips first to get a feel for the amount of time you want to grill them.

Also try some cedar planked nacho cheese Doritos. Same great idea, but not spicy!

Cedar Planked Spicy Nacho Cheese Doritos
Print Pin
5 from 1 vote

Cedar Planked Spicy Nacho Cheese Doritos

Nice and crispy, with a hint of cedar smoke.
Course Snack
Cuisine Main
Keyword cedar plank, tortilla chips
Prep Time 1 hour
Cook Time 5 minutes
Servings 4
Calories 147kcal

Ingredients

Instructions

  • Soak plank (or planks if you need more than one) in water for at least 1 hour.
  • Fire up your grill to medium-high heat, around 400 F.
  • Place the plank over indirect heat. Add the chips. Close the lid.
  • Let the chips grill for 2-5 minutes. Check them at least once. If they start to turn dark brown or char on the edges, remove them.
  • Let cool slightly before serving.

Notes

Note: If you prefer a stronger cedar flavor and aroma, place your soaked plank over direct heat for a few minutes first. Get a nice char on the plank. Then move it to indirect heat and add the chips.

Nutrition

Calories: 147kcal | Carbohydrates: 17g | Protein: 2g | Fat: 8g | Saturated Fat: 1g | Polyunsaturated Fat: 3g | Monounsaturated Fat: 3g | Trans Fat: 0.1g | Sodium: 196mg | Potassium: 63mg | Fiber: 1g | Sugar: 1g | Vitamin C: 0.1mg | Calcium: 39mg | Iron: 0.3mg

Nutritional values are approximate.

Crispy Cajun Wings on the Char-Broil Big Easy

Got a Char-Broil Big Easy? Think you can’t join the tailgating crowd with it? That it’s just for turkeys? Well, wrong! It’s time to fire up and make some fantastic crispy Cajun wings on the Char-Broil Big Easy! These great wings take just a little effort, just a little time, and they come out absolutely fantastic. And the sauce is nothing to sneeze at either! These are great tasting wings too!

Crispy Cajun Wings on the Char-Broil Big Easy

It’s Super Easy

There are just two simple steps to making crispy Cajun wings on the Char-Broil Big Easy. First, you need to air dry the wings coated in seasoned baking powder (not baking soda) overnight in a fridge on a wire rack. This helps dry out the skin, making it easier to get it crispy later. And second, when it comes time to cook the wings, make sure you don’t over-crowd your Big Easy. The high heat circulates around the wings, helping crisp up the skin.

Load Up

You can use a bunk bed basket (and you’ll want to) for more wings. And in fact, if you’re patient, you can fit two bunk bed baskets into the Big Easy at once. Or do like me and get more than one Big Easy and have a wing-cooking funfest!

Don’t Forget The Sauce

Sure, you can use any sauce you want on these wings. But you’ll want to keep that Cajun theme going and make a batch of the sauce below. It has a nice spicy kick to it with a great flavor that compliments the seasoned wings perfectly.

It’s always a good idea to keep a few spare grease trays on hand for your Char-Broil Big Easy.

Check out my favorite appetizer and desserts made on the Big Easy!

Crispy Cajun Wings on the Char-Broil Big Easy
Print Pin
5 from 1 vote

Crispy Cajun Wings on the Char-Broil Big Easy

Tasty, crispy wings!
Course Appetizer
Cuisine American
Keyword Big Easy, wings
Prep Time 12 hours
Cook Time 45 minutes
Servings 2
Calories 769kcal

Ingredients

For the wings

  • 2 pounds chicken wings flats and drumettes separated, tips saved to make stock
  • 1 tablespoon baking powder
  • 3 teaspoons Cajun seasoning or more, to taste

For the sauce

Instructions

For the wings

  • Place the wings in a large bowl or resealable container.
  • Combine the baking powder and Cajun seasoning.
  • Sprinkle half of the seasoning mix over the wings.
  • Using your hands, toss the wings to coat.
  • Add the remaining seasoning and repeat.
  • Transfer the wings to a wire rack over a baking sheet.
  • Place in the fridge 12 hours or overnight to dry out the skin.
  • Fire up your Big Easy.
  • Lightly spray the basket and the bunk bed basket with non-stick spray. Let the Big Easy preheat for 5-10 minutes.
  • Add the wings to the baskets and lower into the Big Easy. Do not let the wings touch or overlap. You can stand them on end if you want to fit more wings into the baskets. You can also use up to two bunk bed baskets at a time, adding more cooking area.
  • Cook until the wings are lightly browned and crispy, usually 30 minutes. While the wings are cooking make the wing sauce.
  • Transfer the wings to a large bowl. Pour as much sauce as desired over the wings and toss to coat. Serve hot.

For the sauce

  • Melt the butter in a small saucepan over medium heat.
  • Stir in the hot sauce and Worcestershire.
  • Reduce heat and keep warm until ready to use.

Notes

Wings towards the bottom of the cooker may cook faster so check them after 30 minutes.

Nutrition

Calories: 769kcal | Carbohydrates: 5g | Protein: 46g | Fat: 63g | Saturated Fat: 26g | Polyunsaturated Fat: 9g | Monounsaturated Fat: 22g | Trans Fat: 1g | Cholesterol: 250mg | Sodium: 1723mg | Potassium: 570mg | Fiber: 1g | Sugar: 2g | Vitamin A: 2602IU | Vitamin C: 25mg | Calcium: 407mg | Iron: 4mg

Nutritional values are approximate.

Make-Ahead Garlic Bread

I used to buy frozen garlic bread from the grocery store. Regularly. And on occasion I’d make it from scratch. I was looking for something better and easier. This make-ahead garlic bread makes sure I always have great garlic bread on hand and for a better price. And it tastes a whole lot better too! Oh, and even better, I can make it as buttery and as garlicky as I want!

Make-Ahead Garlic Bread

Perfect From The Freezer

I was afraid that all the buttery goodness in the topping would make this make-ahead garlic bread stick together. I feared I’d open the door to a huge block of bread stuck together. I’d be unable to even chisel a single piece away. But no! The pieces are frozen individually first, making sure they don’t stick. I keep them in a large one gallon freezer bag, always on hand for dinner!

Need more? Make my gotta-have-it garlic bread.

Make-Ahead Garlic Bread
Print Pin
5 from 1 vote

Make-Ahead Garlic Bread

Easy and great to have on hand. And so much tastier than the store-bought stuff!
Course Side
Cuisine American
Keyword garlic bread
Prep Time 30 minutes
Cook Time 15 minutes
Servings 6
Calories 1209kcal

Ingredients

Instructions

  • In a small bowl, combine the butter, garlic, olive oil, salt and parsley using a fork. You want the mixture to form a paste.
  • Cut the bread into 1" thick pieces.
  • Using a knife or spoon, place 1/2 tablespoon of the butter mixture onto each slice of bread.
  • Spread it out edge-to-edge, covering the bread completely.
  • Place the bread slices on a baking sheet and freeze for at least 15 minutes or until the butter isn't tacky.
  • Transfer the slices to freezer bags and freeze until ready to use.

Baking instructions

  • Preheat your oven to 400 F.
  • Place frozen bread slices on a baking sheet and bake 10-15 minutes or until nicely browned.

Notes

To get the bread extra crunchy, put under the broiler for 30 seconds.

Nutrition

Calories: 1209kcal | Carbohydrates: 219g | Protein: 49g | Fat: 16g | Saturated Fat: 5g | Polyunsaturated Fat: 4g | Monounsaturated Fat: 4g | Cholesterol: 13mg | Sodium: 3376mg | Potassium: 739mg | Fiber: 10g | Sugar: 25g | Vitamin A: 301IU | Vitamin C: 6mg | Calcium: 399mg | Iron: 16mg

Nutritional values are approximate.

Spaghetti and Meatball Nests

I’ve found spaghetti and meatballs to be a welcome go-to meal this fall. Usually that means making them in the slow cooker. My favorite recipe is absolutely delicious and uses ingredients I (luckily) always have on hand. As good as that is, I’ve made it enough times now that I might have been burning out on it. Time for something a bit different. Same great flavors, but more fanciful. These spaghetti and meatball nests are crazy easy to make and mighty fun to eat! And I love the little crust on the pasta!

Spaghetti and Meatball Nests

Not Complicated But Oh So Good

The original recipe for these spaghetti and meatball nests called for Italian sausage, which would also be fantastic. I happened to stock up on frozen pre-made meatballs just before access to the grocery store became more limited, so that’s what I used! Smoked sausage would be great too, or you can go meatless and use something like a good mushroom spaghetti sauce. Yum!

I highly recommend that you hand grate or shred your cheeses in anything you make. It really makes a huge difference in taste and texture. And the hand-done stuff melts better, too!

This recipe was based on a recipe from Johnsonville.

Spaghetti and Meatball Nests
Print Pin
5 from 1 vote

Spaghetti and Meatball Nests

The original recipe called for Italian sausage, which would also be fantastic. I happened to stock up on frozen pre-made meatballs just before access to the grocery store became more limited, so that’s what I used! 
Course Main
Cuisine American
Keyword meatballs, spaghetti
Prep Time 10 minutes
Cook Time 40 minutes
Servings 4
Calories 408kcal

Ingredients

  • 12 meatballs frozen prepared, thawed
  • 1 ¾ cup marinara sauce divided
  • ½ pound spaghetti broken in half
  • 1 egg
  • ¼ cup Parmesan cheese grated
  • ¼ cup Mozzarella cheese shredded
  • 1 teaspoon dried basil or Italian seasoning

Instructions

  • Place meatballs in a medium saucepan with 1 1/2 cups of the marinara sauce.
  • Bring to a boil then reduce to a simmer and continue simmering, stirring occasionally, while preparing the rest of the dish.
  • You want to heat the meatballs thoroughly.
  • Preheat oven to 400 F.
  • Spray a large muffin pan with non-stick spray.
  • Use a pan that holds 12 muffins. You can get by with a 9-muffin pan and enjoy the remaining meatballs on the side (or just heat 9!).
  • Cook the halved spaghetti according to the package directions.
  • Rinse and drain well.
  • In a bowl, stir together the egg, Parmesan cheese, mozzarella cheese, remaining 1/4 cup of the marinara sauce and spaghetti. Make sure the spaghetti is well coated.
  • Divide the spaghetti mixture into 12 of the muffin pan cups. Using your finger, make an indentation in the middle of each cup to create a nest.
  • Bake for 13-15 minutes or until the spaghetti is set. You don't want it to get crunchy, so check it after 13 or so minutes.
  • Transfer spaghetti nests to a platter. I used a spatula and tongs to both support the nests on the bottoms and sides. Be careful, some may want to fall apart on you. It won't be the end of the earth if they do!
  • Add a meatball to each nest then divide the sauce over the tops.
  • Sprinkle with additional Parmesan cheese and a little dried basil and Italian seasoning and serve.

Notes

Also great with Pecorino-Romano cheese.

Nutrition

Calories: 408kcal | Carbohydrates: 49g | Protein: 21g | Fat: 14g | Saturated Fat: 6g | Trans Fat: 1g | Cholesterol: 81mg | Sodium: 748mg | Potassium: 635mg | Fiber: 4g | Sugar: 6g | Vitamin A: 624IU | Vitamin C: 8mg | Calcium: 153mg | Iron: 3mg

Nutritional values are approximate.