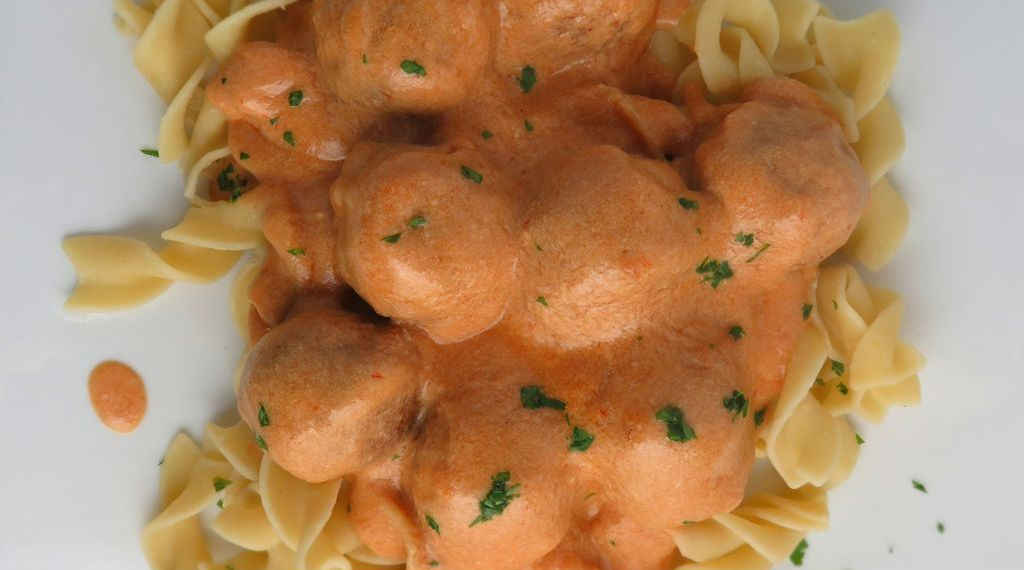
Just because I’m throwing a bunch of stuff into the slow cooker doesn’t mean I don’t expect greatness in 8 hours or so. This slow cooker meatball Stroganoff really hit the spot on a cold day. Tender meatballs (you can use pre-cooked or make your own, whatever floats your boat!). Creamy sauce (I could’ve eaten a bowl of the sauce when no one was watching). Just what I wanted. Simple comfort food at its best.
Super Easy And Delicious
I used store-bought meatballs from the freezer section because, hey, they were on sale! That and I didn’t have time to make meatballs from scratch for this slow cooker meatball stroganoff. If you do use homemade meatballs make sure you cook them fully first. You do still want to get a bit of a sear on the outside. Texture is important when cooking in a slow cooker and that sear will give you just that. Plus the yum-yums leftover in the pan after browning the meatballs really makes the sauce taste fantastic. Don’t just throw the meatballs into the crockpot as is, brown them first!
Just because I’m throwing a bunch of stuff into the slow cooker doesn’t mean I don’t expect greatness in 8 hours or so. This slow cooker meatball Stroganoff really hit the spot on a cold day.
Heat the oil in a large skillet over medium-high heat.
Add the meatballs and brown on all sides to give the meatballs a little texture. Remove to a slow cooker sprayed with non-stick spray.
Add the tomato paste, Worcestershire sauce, salt and flour to the skillet. Scrape up any yum-yum bits that are on the bottom of the skillet and saute for 1 minute.
Stir in the broth and reduce the heat to medium and bring to a simmer.
Stir in the sherry.
Fold in the sour cream. Stir well and pour over the meatballs.
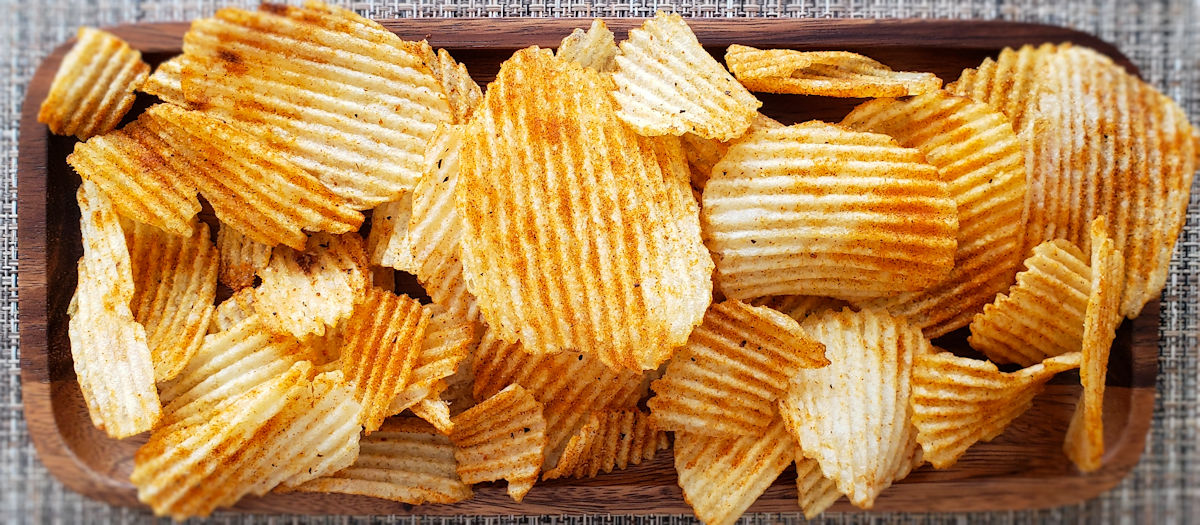
My local grocery store puts the hot-out-of-the-roaster rotisserie chickens near the entrance for a reason. They know the aroma will drive me crazy and get me to hankerin’ for rotisserie chicken. What they don’t know is it actually makes me crave my quick fix rotisserie chicken-seasoned potato chips instead! Yep, that same great flavor as the classic chicken, all on a crunchy chip! Ready in minutes, these are some highly addictive snacks! I recommend making a big batch and serving these at the next game party at your house. Everyone will be pleasantly surprised as they enjoy these totally different chips!
Go Heavy On The Seasoning
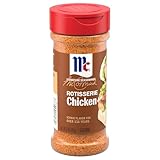
I recommend that you use a ‘heavy hand’ when it comes time to add the seasoning to your quick fix rotisserie chicken-seasoned potato chips. Get some on each and every chip. Front and back. Edge to edge. Be gentle with the chips as you stir them, too. Even with thick chips you might break them if you stir them too hard. Nice and easy is what you are looking for. No one wants broken, dinky-sized chips. They want big, crunchy, heavily-seasoned chips!
I prefer to use wavy chips for this recipe. The ridges capture the seasoning better, so more sticks to the chips. That’s why we’re here, right? More seasoning!
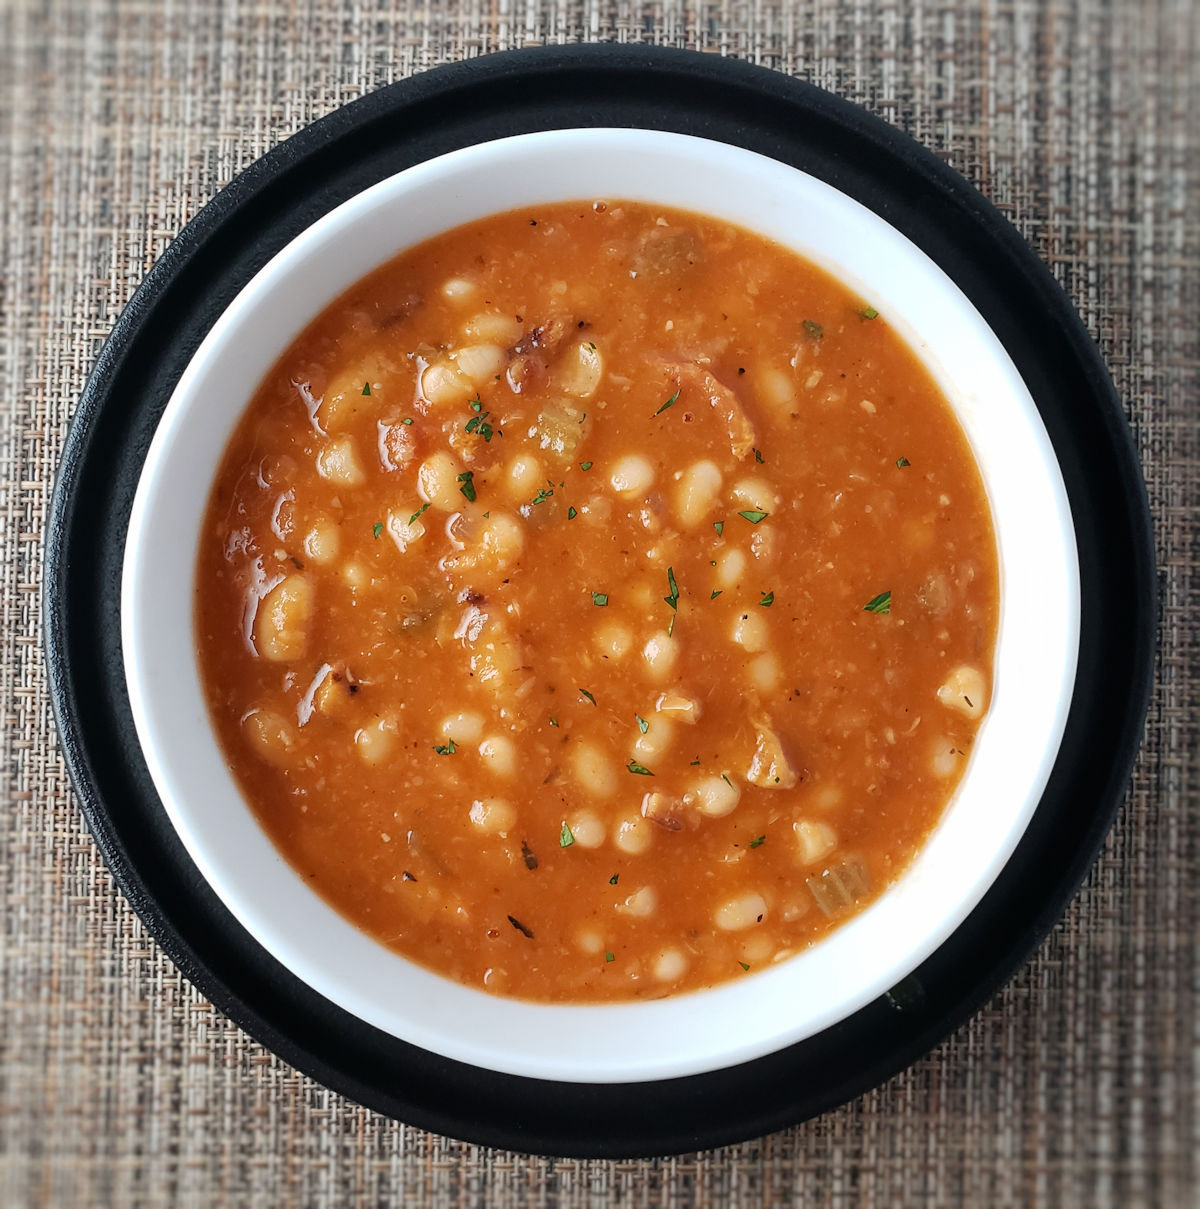
When I was a young kid, barely knee-high to a grasshopper, bean and bacon soup was by far my favorite canned soup. I remember cold days, playing in the snow, only to run inside to a big ole bowl of hot, satisfying soup. I’m pretty sure I didn’t think about it much beyond ‘man, this sure is good soup!’. No “what a wonderful combination of vegetables, broth and seasonings”. Well, a few years later I now enjoy my Campbell’s bean and bacon soup copycat recipe. Same great taste, same great texture, and still as satisfying as ever. This is one great bowl full of deliciousness! And best of all it tastes just like I remember from years ago.
No Ham Stock? No Problem.
The recipe for this Campbell’s bean and bacon soup copycat recipe calls for a few cups of ham stock. I dunno about you, but I don’t have any ham stock on hand. In fact, I don’t think I’ve ever made ham stock. I probably should. But until then I have to take a little shortcut and use ham base. Ham base is something I do have on hand because I found that it makes for the best slow cooker ham and bean soup! It is crazy packed with flavor and is well worth finding in your local grocery store or online!
Seems Complicated. Is It?
If you look over the ingredients list for this soup and get worried, don’t. This really is not a complicated dish to make. And you are definitely rewarded in the end for your efforts.
This soup is fantastic on a fall or winter’s day. Well, even on a hot summer’s day too, but boy does it hit the spot when the weather is cooler.
Place the beans in a large bowl. Add enough water to cover them by 2". Let them soak overnight.
Drain the beans and place in a large pot or Dutch oven over medium-high heat.
Crumble in the bacon and add the carrots, celery, onion, thyme, garlic, tomato paste, pepper, water and ham stock.
Bring to a boil then reduce heat to a simmer, stirring continuously to dissolve the tomato paste.
Cover and simmer for 3 hours or until the beans are tender. About 30 minutes in, taste the liquid and add salt and pepper to taste.
Ladle out 2 cups of the soup into a bowl and let cool slightly. Transfer to a blender (working in batches if needed) and process until smooth. Pour the pureed soup back into the pot and stir.
Stir in the vinegar and liquid smoke.
Taste and add more salt and pepper as needed.
Serve hot.
Notes
If you don’t have ham stock you can make your own or substitute water. To make your own, combine 2 teaspoons of ham base with 2 cups of water in a small sauce pan over medium-high heat. Stir until the ham base dissolves. Use the liquid as a substitute for the ham stock.
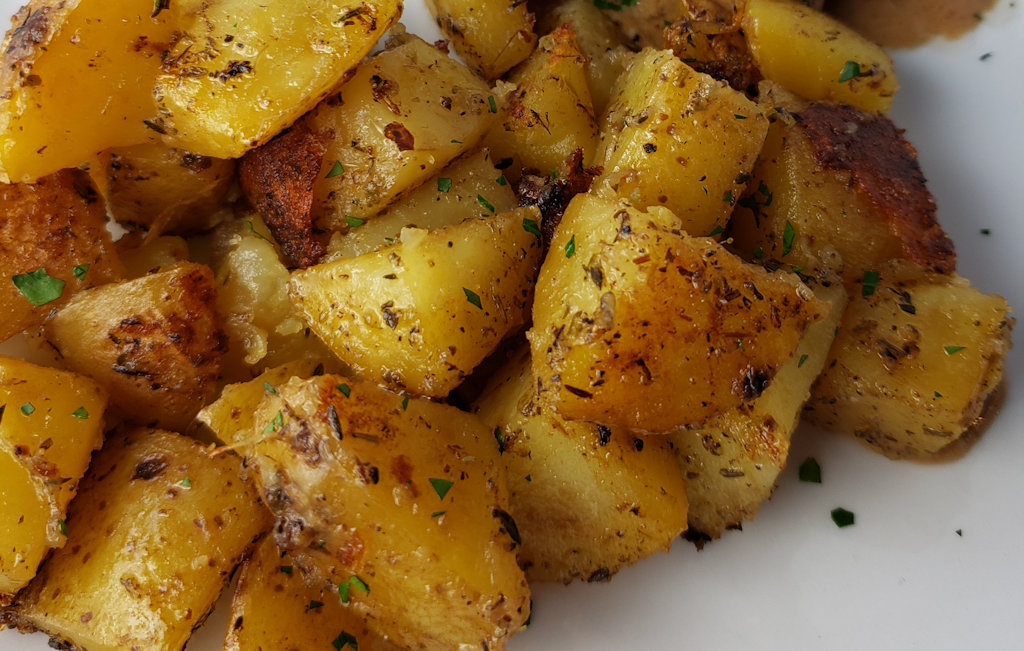
I’ve lost count of how many times we’ve made these garlic herb sous vide potatoes in the last week or two. The weather has been nice and that meant grilling. I was looking for an easy side. Now, I didn’t make these potatoes on the grill, but I did finish them there. You can finish them in a skillet on the stovetop too. Either way, they’re packed with wonderful garlic and herb flavors.
The perfect side dish
The potatoes are cooked perfectly. They’re velvety creamy inside. Finishing them off over high heat adds a nice crunchy layer. These potatoes make for a great side dish.
As written, the amounts of dried herbs used infuse a good amount of flavor into these garlic herb sous vide potatoes. We like our potatoes to pack flavor. If you’re a little on the ‘less is more’ side when it comes to dried herbs, I’d suggest using slightly less thyme and oregano. You can change your mind and add a bit more when you are browning the potatoes after they’re cooked.
If you prefer to finish the potatoes on a grill, no problem! Just use a cast iron skillet or griddle over direct high heat.
I use an Anova sous vide cooker. It’s my immersion circulator workhorse!
Sure, you can grab a box of Hamburger Helper from the store and make up a batch of stick-to-your-ribs pasta and burger. It’s the perfect one-dish meal. Or you could make this copycat recipe of Chili Cheese Hamburger Helper and do what I did: add more cheese! Ok, no, you don’t have to add more cheese. But you could. Ah, the joys of cooking at home, especially when it’s cold out and you need something to warm you up. This dish fits the bill perfectly.
It’s Easy. And Changeable.
It really can’t get much easier than this copycat recipe of Chili Cheese Hamburger Helper. I’ve been known to change it up a bit sometimes. You definitely don’t have to use elbow macaroni, though it is the classic ingredient for sure. Pepper jack cheese makes for a nice change instead of cheddar. A little kick never hurt anyone. Ground turkey or chicken instead of beef are winners, too! So go crazy with it!
Drain Well For Best Results
Just make sure you do drain the beef (or whatever protein you use) well before adding the rest of the ingredients. You can use any mix of ground beef you want. I prefer 80/20 and that definitely means I need to drain it well. A leaner beef should still be drained and drained well too!
See You In The Oven
You can reheat any leftovers on the stovetop or in a baking dish in the oven. You could probably use a microwave too, but I have to fess up. I hate reheating things in the microwave. No matter how you heat them, add a bit of water and stir after it has started to warm up a bit. Don’t go crazy with the water, though. You can always add more.
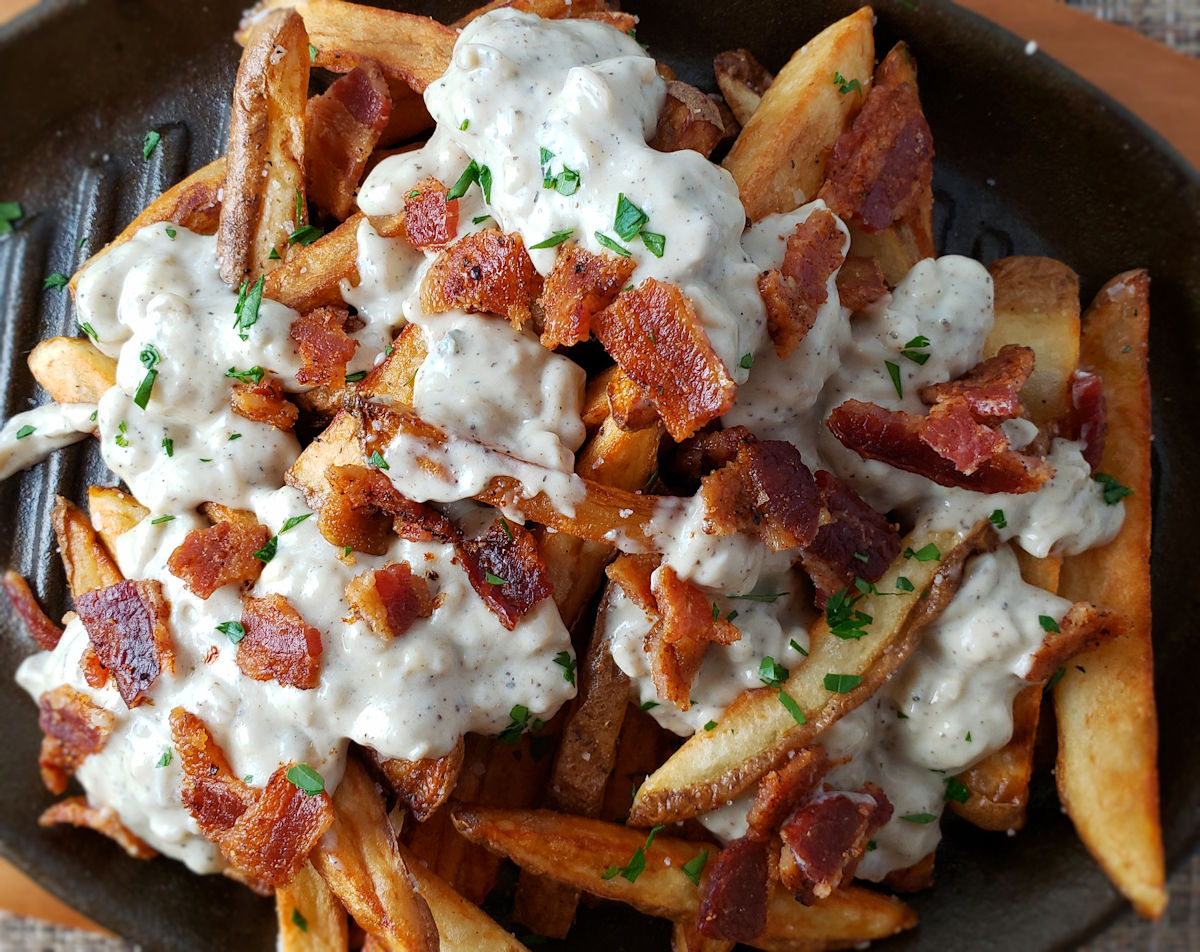
Oh me. Oh my. There are few things as dangerous as a plate of bacon and blue cheese French fries. If ever there was something that causes my self-control to go totally out the window, this is it. I lose the ability to function normally. It all starts with perfectly crispy, delicious French fries. Homemade. Hot out of the deep-fryer. The kind of fries where half of them disappear before they even make it to a plate.
Then comes the blue cheese sauce. That wonderful funky blue cheese flavor. Creamy with hints of garlic and shallot. Delicious. And finally, bacon. Well, not ‘finally’. “And next, bacon!” Crispy, smoky, perfectly-cooked bacon. These are the fries dreams are made of. You bet I dream about them. You will too after you have some.
Crazy Good Fries Like No Other
If you’d rather not make fries for these bacon and blue cheese French fries from scratch, you can use frozen ones instead. Just bake the fries per the package instructions, making sure you get them good and crispy. While they’re baking, make the sauce and cook the bacon. Serve hot-out-of-the-oven.
Tot Me
I have another addiction and that’s tater tots. Or crispy crowns. Both. And fries. Ok, sure, I have lots of problems. But anyway, you can make this same recipe with tater tots or crispy crowns! And it’s still crazy yummy good!
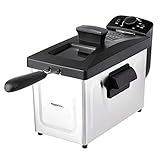
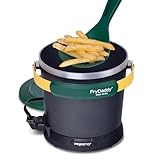
If it’s just the two of us, I’ll fire up my Fry Daddy fryer. It’s the perfect size for both of us. It fries everything perfectly. And as an added bonus, it doesn’t use a lot of oil, which saves me money.
I get out my big deep fryer when it’s time to fry a large batch of food. It comes to temperature quickly and it maintains that temperature perfectly. It has a built-in oil filter and storage unit so I can re-use the oil several times.
For the blue cheese sauce (make first and keep warm while making the fries)
Add butter to a small skillet over medium heat.
Add shallot and garlic. Sauté for 4-5 minutes or until just starting to soften.
Add the cheese, milk and pepper.
Stirring constantly, raise the heat to medium-high and let the mixture get to a simmer. The cheese should be melted and the sauce will start to thicken.
Remove from heat and cover until ready to use.
For the fries
Fill a large bowl with cold water.
Slice the potatoes into thin, 1/8″-1/4″ sticks. Try to keep them the same thickness.
Place fries into the water. Add more water if needed to keep them full submerged.
Add the oil to the fryer and plug it in according to the manufacturer’s instructions.
Drain the fries. Refill with more cold water. Stir the potatoes. Repeat this step (draining, refilling) until the water is no longer cloudy. This usually just takes me two times.
Drain the potatoes well and transfer to a large kitchen towel. Pat dry. Make sure you get them dry or they will splatter when you add them to the hot oil.
Working in batches if needed, fry the potatoes until just starting to turn a light brown. You are not cooking them fully, you do not want them to be golden brown yet. Do not over-crowd the fryer.
Remove the fries from the fryer using the slotted spoon that comes with the unit. Place on a wire rack over a baking pan to drain. Spread them out evenly.
Let the fries cool to room temperature, about 10 minutes.
Working in batches if necessary, return the fries to the fryer and finish cooking them. You want them nice and lightly golden brown. I’ve found that you can actually crowd the fryer a little more than usual for this step. The fries are mostly cooked, you’re just crisping them up and giving them some color so a little extra potatoes in there isn’t going to hurt. Just don’t over-fill the fryer.
Remove the fries to the wire rack again to drain. Season well with salt and pepper. I prefer to transfer the fries from the rack to a large bowl, sprinkle them with the seasonings, and toss to season evenly.
Transfer the fries to a serving dish and top with the cheese sauce and sprinkle with the bacon.
Now that it’s a bit cooler out, Sunday afternoons have become our ‘movie time’. We curl up on the sofa and find a classic movie we’ve both always wanted to see. And that means we need a snack to go with it. This French onion dip popcorn was the ideal bowl of crunchy delicious goodness for our latest film choice, Rebel Without A Cause. Quite frankly, I’m not sure which was better. The popcorn or the film!
Better Than The Dip
You betcha, French onion dip popcorn is packed with that classic dip flavor. A little onion flavor. A little beef bouillon. A bit salty. But hey, don’t stop there. You need more crunch! More onion flavor! Oh yes, bring in the French fried onions! And don’t be shy with them!
Oh. It probably doesn’t need to be mentioned but, yeah, you’re gonna have onion breath.
If using bagged pre-popped popcorn, spread the popcorn out onto a large baking sheet and place in a pre-heated 350 F oven for 5 minutes to warm the popcorn.
Transfer popcorn to a large bowl.
Combine the butter and soup mix and drizzle over the popcorn.
Add the French fried onions and stir to combine and coat well.
Serve immediately.
Notes
Add your favorite snacks too! Peanuts, pretzel sticks… you name it!
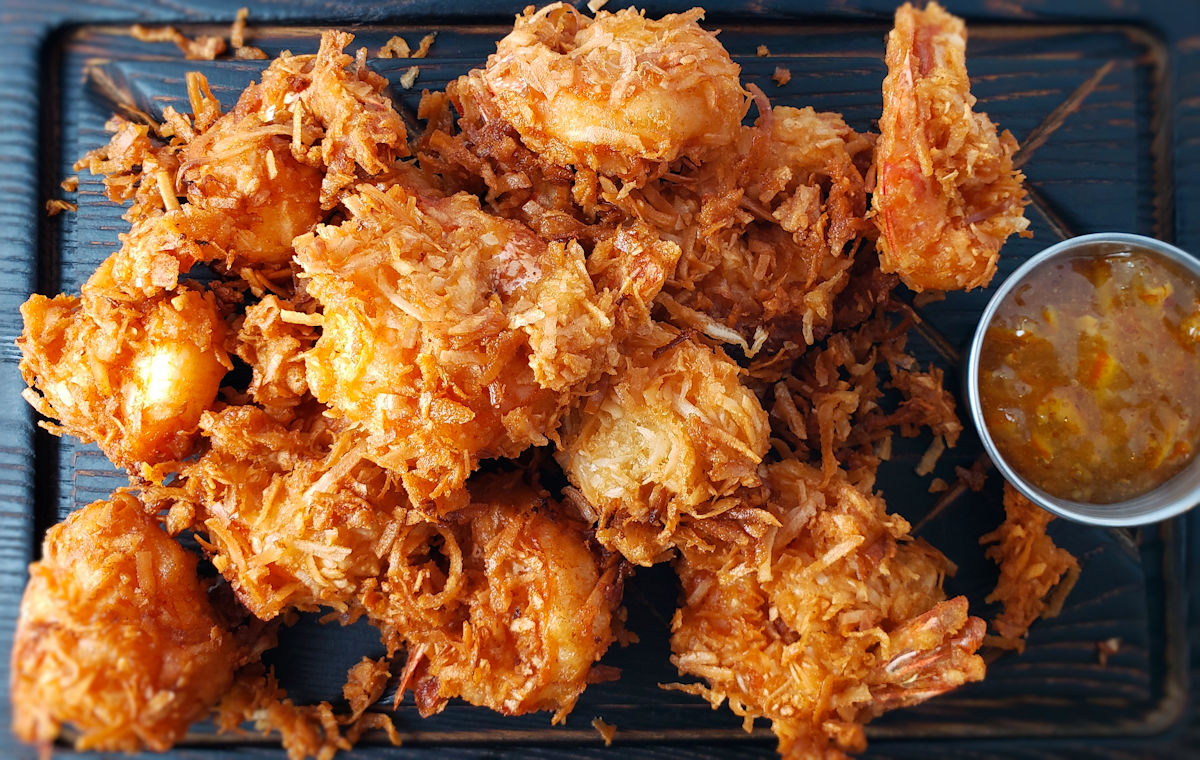
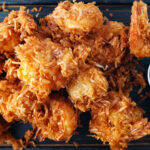
Oh me. It was a happy day for the big-time shrimp addict in me. I made a copycat recipe of the Outback Steakhouse Gold Coast coconut shrimp, along with an orange marmalade dipping sauce. The shrimp were incredible. So crispy. The perfect batter. And loaded with fantastic, tasty, sweet coconut. They were delicious and great on their own. If you wanted to eat them that way…
But oh, they weren’t served by themselves. Alongside, the dipping sauce added a unique taste that offset some of that coconut sweetness. The two made for an unforgettable dinner dish. Dinner felt really fancy tonight. Even though it was actually very easy to make. It sure didn’t last long. I really wish I’d made more!
The Dipping Sauce Rocks!
Although the shrimp are the star of the show in this copycat recipe of Outback Steakhouse Gold Coast coconut shrimp, I cannot overstate how great the dipping sauce is. It’s somewhat reminiscent of cocktail sauce in that it has a good horseradish flavor. The orange keeps the tropical theme going. And along comes a great mustardy hit. It may sound a bit different, but I assure you, it’s different in a great way. There were no leftover shrimp or dipping sauce.
Honestly, unless you have something other dish you want to use the orange marmalade in, use it to double the recipe for the dipping sauce. That way you won’t have to be so reserved when you dip your shrimp. You can load up!
I used my small Fry Daddy fryer to make this dish. That required me to cook them in batches. For a quicker fry, ensuring that everything is done at the same time, I’d recommend using a larger fryer or Dutch oven.
The Presto Fry Daddy is perfect for making smaller batches of food. It only uses a few cups of oil and comes to temperature quickly. Clean-up is easy too!
Place all ingredients in a small bowl. Stir until well combined. Cover and refrigerate for at least 1 hour before serving. Note: Also prepare the batter (below) at this time since it also requires 1 hour of resting time.
For the shrimp
To prepare the batter, place the beer, flour and 1/2 cup of the coconut flakes, sugar and salt into a medium-sized bowl. Whisk to combine well. Cover. Let sit for 1 hour.
Heat a few inches of oil in a Dutch oven or deep fryer to 350 F.
Place remaining coconut in a pie plate or shallow bowl.
Pat shrimp dry and sprinkle with paprika.
Working in batches if needed, dip shrimp into the beer batter, turning to coat completely.
Transfer the shrimp to the coconut and roll to coat well.
Fry shrimp 2-3 minutes or until shrimp are golden brown, turning them as they cook. Remove to a paper towel-lined plate to drain.
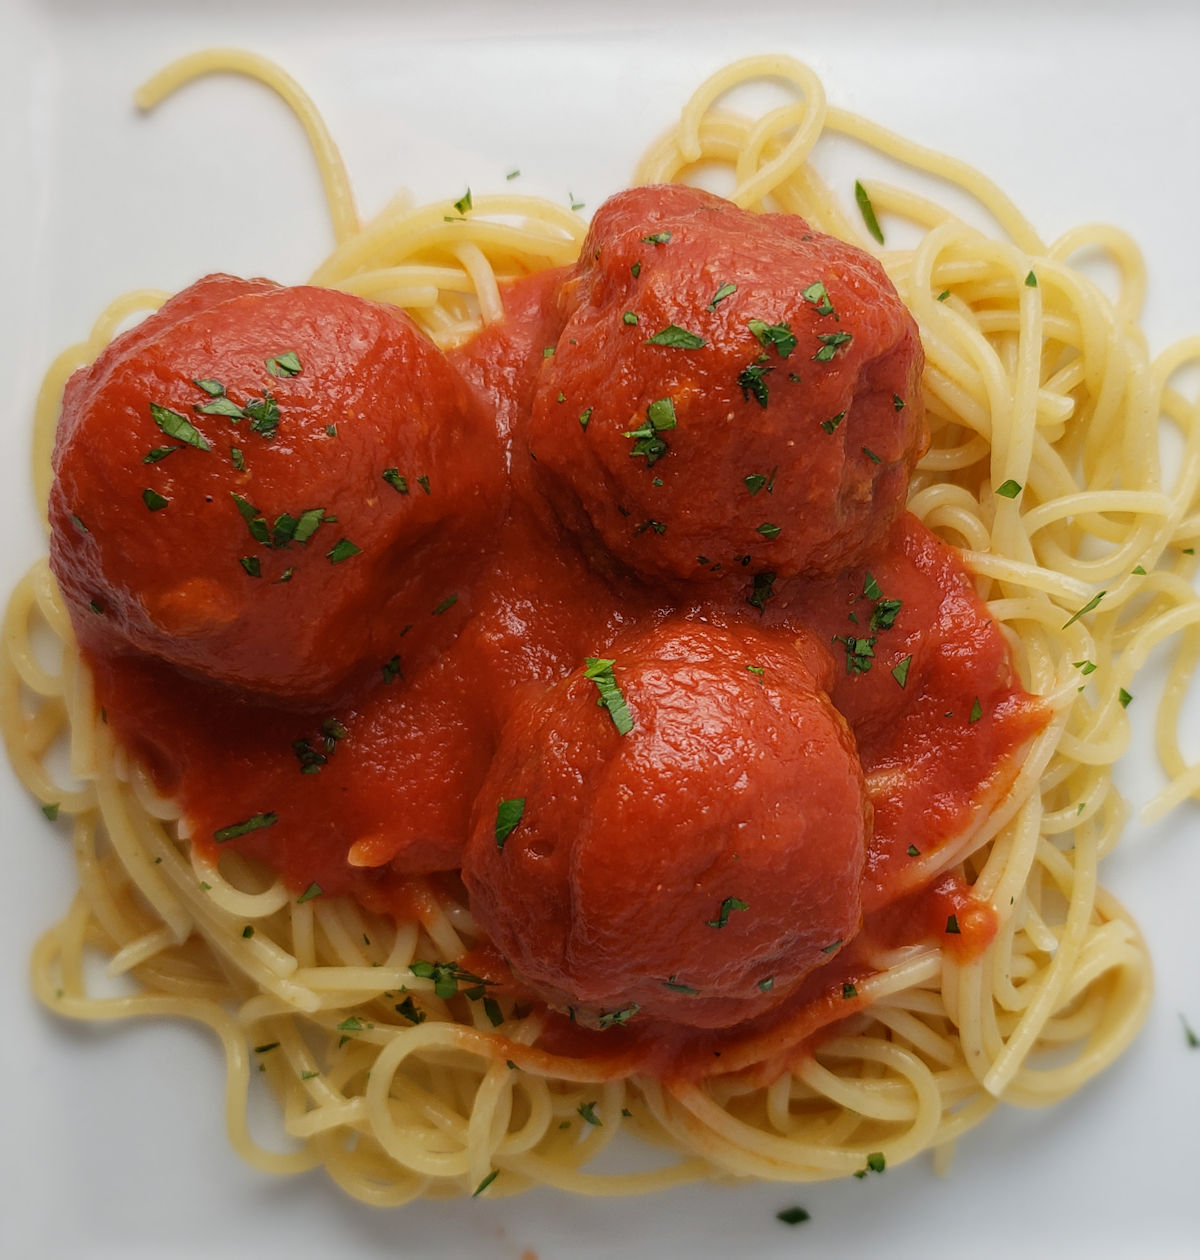
We both really, really enjoyed this copycat recipe of Old Spaghetti Factory meatballs. To begin with, they were super-easy to make. Second, the recipe makes a good-sized batch of meatballs, perfect for keeping on-hand during the colder months. We actually doubled the recipe so we’d have plenty around for quick dinners or even lunches. Last, they of course taste fantastic! Super tender meatballs with basic, simple flavors. We were able to make these with ingredients we already had on hand. Nothing fancy going on here, just great meatballs!
Everyone Loves Great Meatballs
You don’t have to make the tomato sauce for these copycat recipe of the Old Spaghetti Factory meatballs if you don’t want to. You can use any tomato-based sauced that you want. Or cream sauce for that matter. The meatballs are great anywhere you need, well, meatballs of course! They are completely cooked when they come out of the oven, ready for pasta, pizzas or sub sandwiches!
Grilled To Perfection
You don’t have to bake the meatballs. They’re absolutely fantastic grilled. I like to cook them on my charcoal grill. I mound up lit charcoal in the middle of the grill. Then I arrange the meatballs around it, in a big circle. I close the lid and let them cook for 10 or so minutes. Then I rotate them so the tops become the bottoms and vice-versa. Close the lid and cook another 10-15 minutes or until they reach 165 F. I test several of them, poking a thermometer all the way in, to be sure.
They can also be cooked on a gas grill. I like to sear them over direct heat then move them to indirect heat to finish cooking. That can take 10-20 minutes depending on how long I seared them.
Place onion, garlic, parsley and bread crumbs into a food processor. Process for 30 seconds, scraping down the sides as needed.
Break the egg into a large bowl and whisk. Add the water, olive oil, salt, pepper and nutmeg and whisk until well combined.
Add the bread mixture to the bowl and stir with a spatula.
Crumble in the ground beef. Using your hands, mix thoroughly until the bread crumb mixture is distributed evenly throughout.
Preheat oven to 425 F.
Line a large baking sheet with foil. Spray lightly with non-stick spray. Add 1/4 cup of the tomato sauce to the bottom of the pan.
Using an ice scream scoop, scoop a portion of the meat into the palm of your hand and form into a ball about the size of a golf ball. Try to keep the meatballs all about the same size so that they cook evenly. Transfer to the baking pan but do not let the meatballs touch each other.
Bake for 15 minutes. Using a fork or spatula, break the meatballs lose of the pan if they are sticking.
Bake another 10 minutes or until meatballs reach 165 F.
Heat the tomato sauce in a large skillet. Season with salt and pepper and heat until just simmering.
Add the meatballs and cover and simmer for 2 minutes.
Serve meatballs over pasta with some of the tomato sauce.
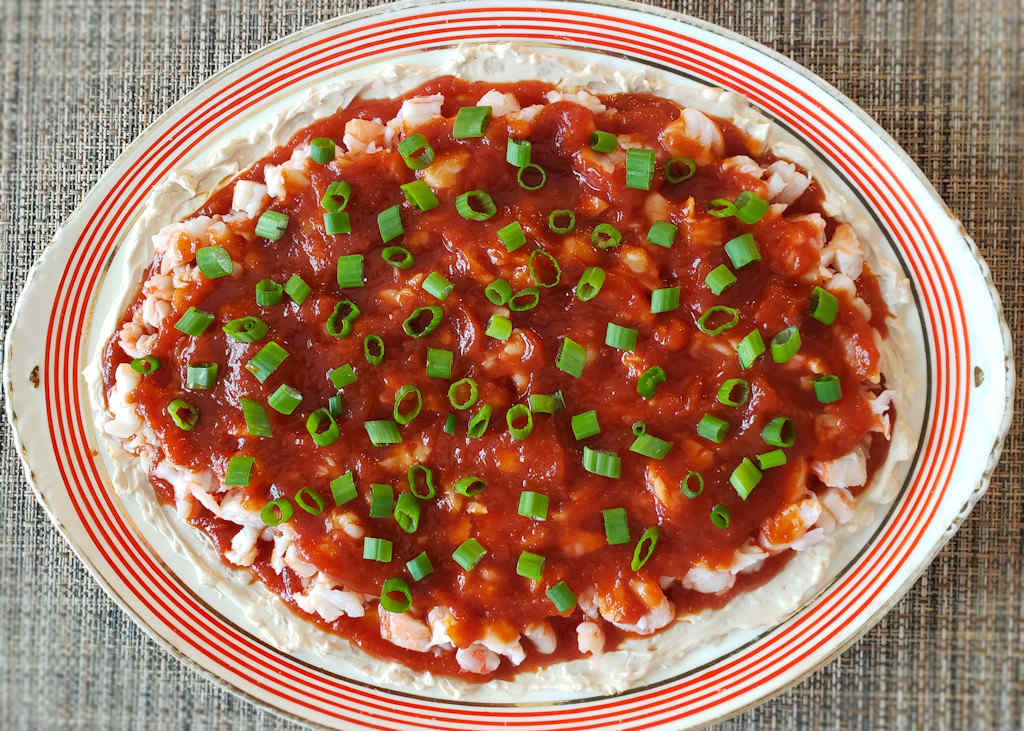
I absolutely could not get enough of this old fashioned shrimp dip. My wife made this for the Super Bowl. When she brought it out I admit I might have made a face. That ‘what is that?’ face. But I grabbed a cracker and dug in and wow! What a great dip! I instantly went from the ‘what?’ face to the ‘amazing!’ face! Fantastically creamy rich, but with the tang of cocktail sauce, this dip packs in tons of flavor and of course my favorite, shrimp!
Classic Greatness
I think this old fashioned shrimp dip is perfect just as it is. And it’s perfect for a crowd, too. You could, though, substitute crab for the shrimp. I’d be ok with that. Especially since I’m a crab addict in addition to being a shrimp addict. It’s a great dip either way. Just grab lots of crackers!
This is the kind of dip that once you get to dipping it, you’re going to find it really hard to stop. Before you know it, the plate is wiped clean and you’re asking for more!
Chunky Or Not
We chopped the shrimp for this dip fairly small. But not too small that we couldn’t not notice them. We bought whole, frozen shrimp that were already cooked, shelled, and deveined so our prep-time was pretty minimal. You could get by with the canned tiny shrimp, but they’ll be a bit harder to notice when you take a bite. At least texture-wise.
Spicy Or Not
I’m not saying you need to make this dip like crazy hot, kicked-up spicy and all, but you could add a bit of heat. It’s easy too. Just use spicy cocktail sauce! Not crazy hot, but noticeable!
Keep Your Cool
Refrigerate your serving platter for a bit before adding the dip. It’ll help keep it nice and cool, longer.