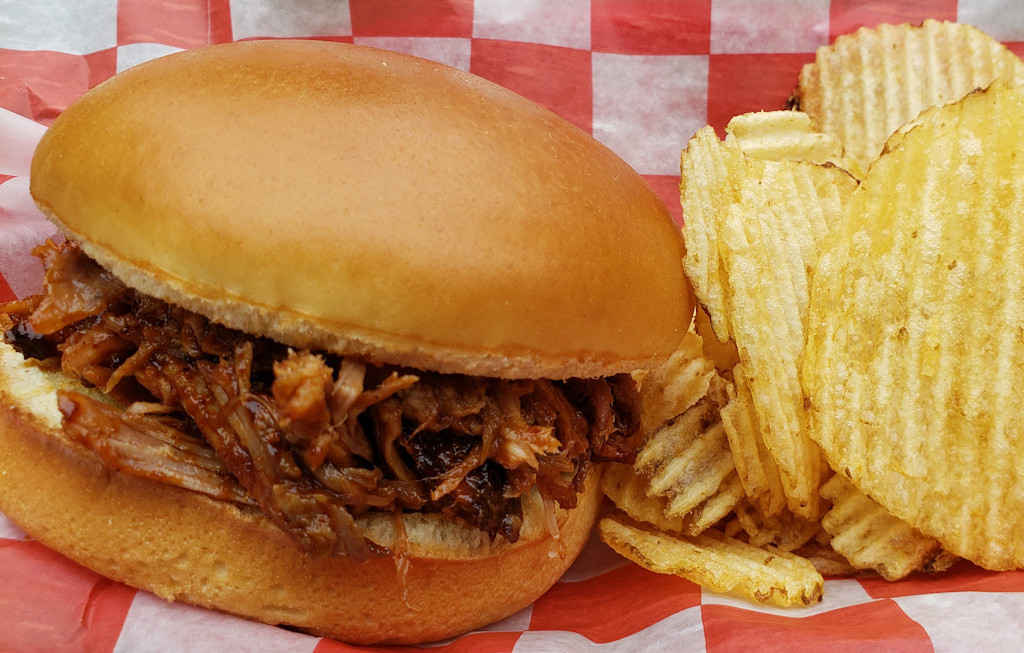
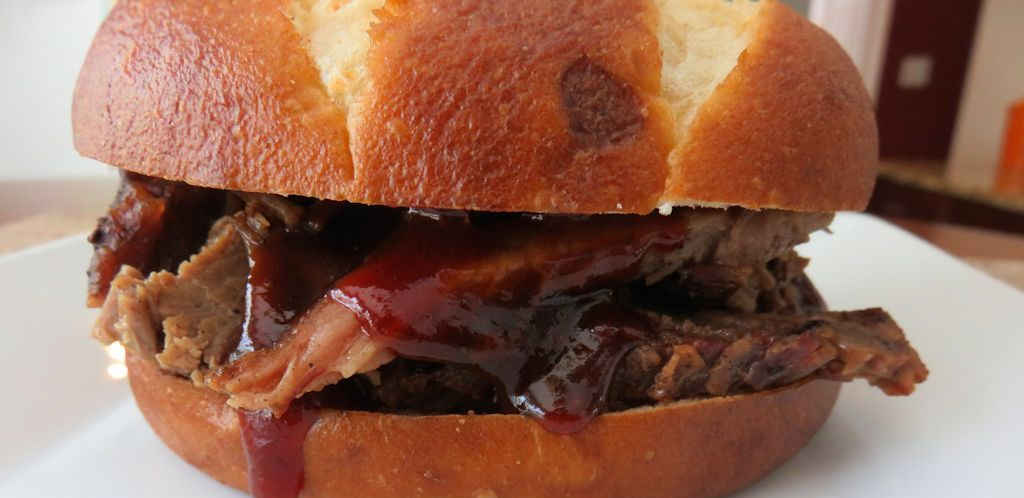
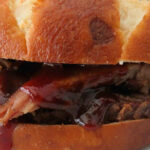
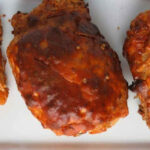
This sauce originates from a BBQ joint in Seattle, Washington, called Wood Shop BBQ. It’s pretty much a traditional (great) BBQ sauce but with a pretty healthy dose of Worcestershire sauce to boot. I used it on my awesome pulled pork BBQ, but I think this sauce would be even better on smoked brisket or beef ribs.
The Big BBQ Sauce Feud
It has been a while since my wife and I sort of disagreed on a recipe. While this Wood Shop BBQ sauce is pretty Worcestershire-sauce-y, I thought it was pretty darned good. But my wife couldn’t get passed the amount of Worcestershire sauce. I also thought that the sauce got way better after sitting in the fridge for a few days. So, I recommend you start with half of what the recipe states and go from there. I am a huge Worcestershire sauce fan, so I used almost the full amount.
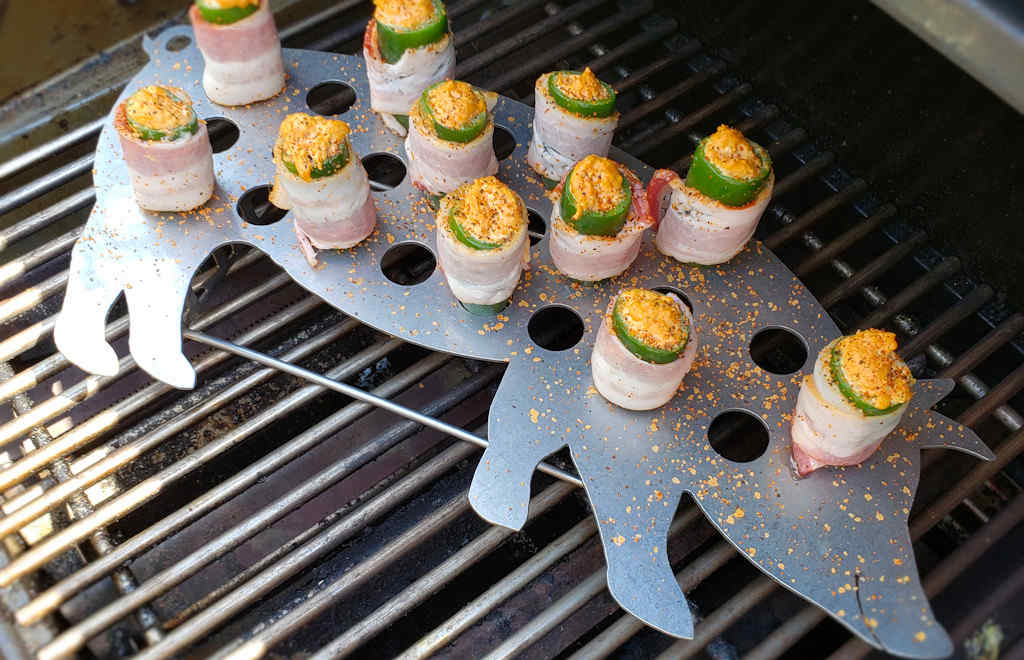
Search around these days and most people are making what are called ABTs (atomic Buffalo turds… I didn’t make up the name so don’t blame me!). They’re sliced (usually) stuffed jalapenos that are grilled or smoked. I love them. But sometimes I like mine the old way, as poppers. Cooked whole, not halved, and stuffed with all sorts of crazy goodness, wrapped in bacon, and grilled until perfect. That’s just what these cheesy jalapeno poppers are. Perfect.
Heat, Tamed
The nice thing about these little treats is that after cooking the jalapenos mellow a lot. So yeah, they are a bit spicy but definitely not screaming hot by any stretch. And any heat that there is gets tamed down a bit by the cheeses and the bacon. Even if you don’t like spicy foods I would not let that discourage you from making these. You’ll still love them. And hey, if you’re still worried, have a little cool Ranch dressing ready on the side for dipping just in case.
Cooked whole, not halved, and stuffed with all sorts of crazy goodness, wrapped in bacon, and grilled until perfect. That’s just what these cheesy jalapeno poppers are. Perfect.
Note: This recipe was developed using the Char-Broil Big Easy Oil-Less Fryer. If you are cooking using the Char-Broil Smoker-Roaster Grill you should cook with the lid open and the temperature set to High. You might also need to adjust the cooking time.
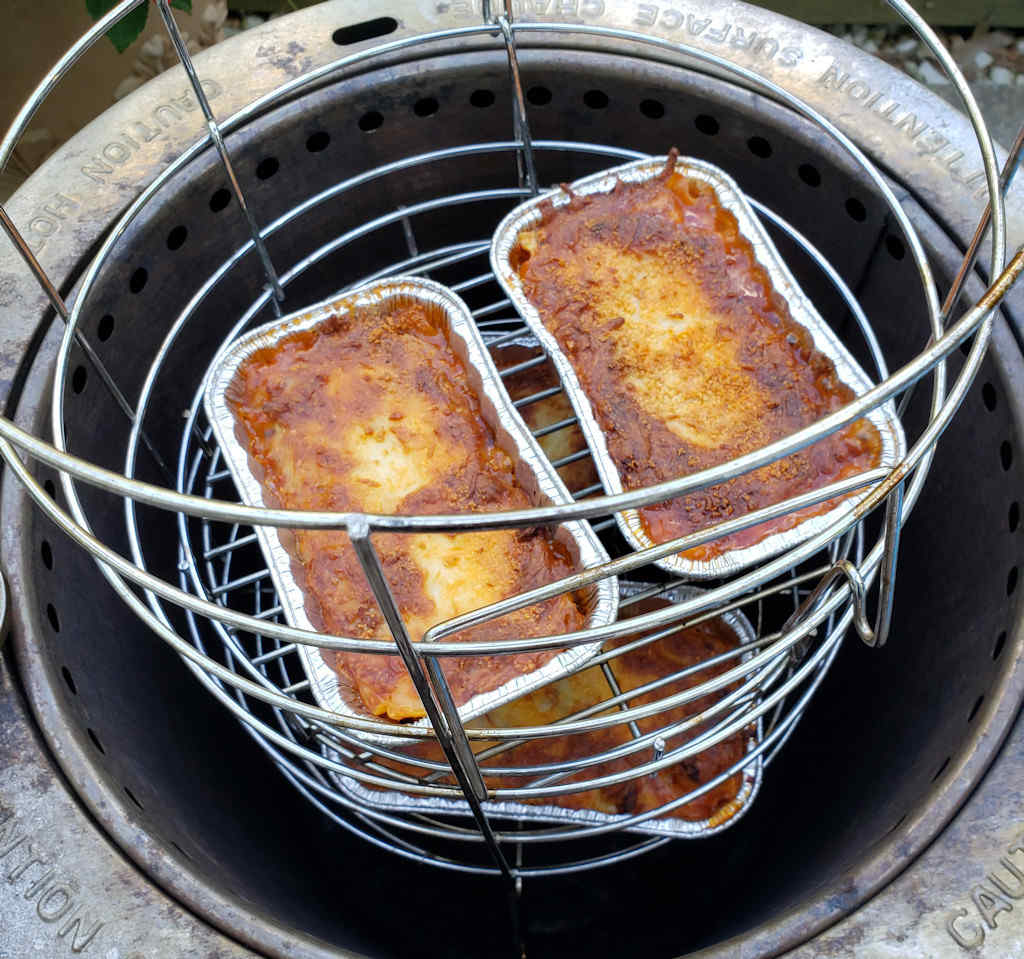
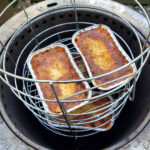
My mom makes a fantastic lasagna. It has been my favorite since I was knee-high to a grasshopper (a little kid, that is!). We make it often, though we do make a slightly different version. Usually we bake it in the oven, but this time we decided to make mini lasagna on the Char-Broil Big Easy using smaller pans. The results were amazing. Fantastic mini lasagna, hot and bubbly in no-time, ready to devour!
Oh So Good. And Fun, Actually.
The technique for making mini lasagna on the Char-Broil Big Easy is almost the same as how we make big baking pans of lasagna. The difference is that the noodles have to be cut to fit the miniature pans. We found that the best approach was to cut an inch off the end of the noodles, then cut them in half. They fit perfectly!
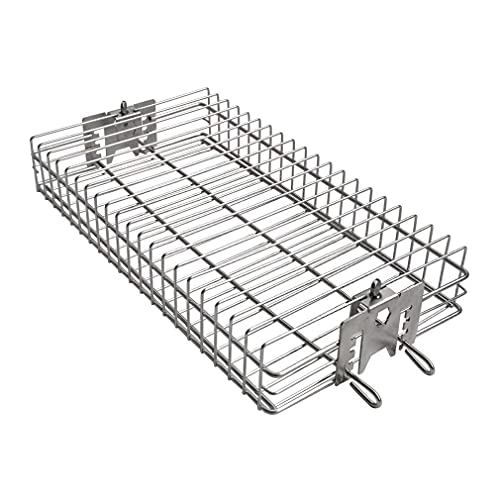
Grab A Bunk Bed Basket
We used a bunk bed basket to make 4 mini lasagnas at a time. They cooked evenly and quickly.
We used these disposable aluminum pans. Leftovers can be wrapped in foil and kept in the freezer.
1poundfresh buffalo mozzarella torn into chunks, or use shredded
Instructions
For the meat sauce
Crumble the meats into a large pot or Dutch oven and brown over medium high heat.
Drain fat if desired.
Add the onion and cook until softened.
Add the garlic and cook another minute.
Add in all of the sauce ingredients.
Bring to a boil and reduce to a simmer and cook, covered, 1-2 hours.
Continue cooking with lid off for another hour, adding a bit more water if the sauce is too thick.
For the lasagna
Cook noodles per package instructions. Drain well.
Cut 1" off of each noodle end then cut each in half in the middle.
First, spread a little sauce out on the bottom of each pan.
Then, layer the ingredients in the following order. Try to divide the ingredients evenly between each layer, but you don't have to be picky about it.
Noodle halve
Sauce
Ricotta
Mozzarella
Parmesan
Repeat for 3 total layers.
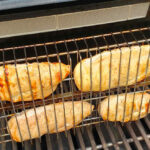
Fire up your Big Easy. You can cook 2 lasagnas at a time in the basket that comes with the Big Easy. With a bunk bed basket you can cook 4 at a time.
Place loaf pans into the Big Easy basket (and bunk bed, if using). Place in the Big Easy and cook for 15 minutes or until the cheese is hot and bubbly.
Cook the remaining 4 pans while the first pans rest. Alternately, keep them in the oven on low or warm until the final pans are done.
Let rest 15 minutes before serving.
Notes
Also great sliced thin and served on bread as sandwiches!
Well, here we go again. Another dish that results in my tossing any semblance of self control right out of the window. This Cajun fried chicken sandwich is absolutely packed with flavor. The chicken is oh-my tender, juicy and even has just a bit of a kick. This is the kind of sandwich where you close your eyes before taking each bite. Only one thing matters, and that’s getting these yummies into your mouth. No need to look. Just take a bite! And another!
Perfect, Every Single Bite
I tend to use boneless skinless chicken thighs when I make Cajun fried chicken sandwiches. You could use boneless skinless chicken breasts, if you desire. I just like the additional flavor from the thighs. Either way, make sure you pound them out and nice and thin, and more importantly, keep the meat the same thickness throughout. If you don’t it won’t cook as consistently and … it’ll look weird.
If I’m cooking for a crowd, I’ll break out my big deep fryer. But, if it’s just the two of us, I’ll fire up my Fry Daddy fryer. It’s the perfect size for both of us. It fries everything perfectly. And as an added bonus, it doesn’t use a lot of oil, which saves me money.
I get out my big deep fryer when it’s time to fry a large batch of food. It comes to temperature quickly and it maintains that temperature perfectly. It has a built-in oil filter and storage unit so I can re-use the oil several times.
Trim an excess fat from the chicken. Pound each piece flat. I like to put them in a one gallon baggie and then pound them so the chicken doesn't splatter.
Whisk together the buttermilk, dressing, and seasoning. Pour into a large resealable container. Add the chicken and seal.
Refrigerate overnight.
For the slaw
Combine all but the dressing in a large bowl.
Drizzle dressing over the top of the slaw and stir to combine. Cover and refrigerate until ready to make the sandwiches,
For the batter
Heat 3" of vegetable oil in a Dutch oven or heat a deep fryer filled with oil to 375 F.
Whisk together the batter ingredients in a pie pan or shallow bowl.
Remove chicken from the brine and shake off any excess. Transfer to the batter mixture and coat well, turning to get all sides.
Place chicken in the oil and fry until internal temperature is 160-165 F, turning once. If you pounded the chicken very thin it won't take long to cook, 2-3 minutes per side. The coating will turn a lovely golden brown when it's done.
Remove pieces to a wire rack or paper towel-lined plate to drain.
For the sandwiches
Toast the buns if you wish.
Add a piece of chicken to each bun and top with plenty of the slaw and few pickle slices.
Notes
These are also great without the slaw. Just add your favorite condiments.
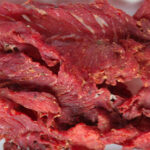
I’m a big fan of beef jerky, I’ve made it for years. And as good as it always was, I was always searching for a way to perfect my technique. More flavor. More tender, but still with a slight tug. Sous vide has done that for me and more. It’s the only way I make jerky now, drying it on my Nesco Snackmaster Pro. Sometimes I make my own flavors and sometimes, I order packages seasonings, like this Honey flavor from Walton’s. This sous vide Honey Jerky on the Nesco Snackmaster Pro is a great slightly sweet jerky. Almost a dessert jerky!
Easy Results Every Time
This approach to jerky is simple and highly repeatable so it’s not like you have to stress over the next batch being just as good as the last. Just mix up the seasoning with a bit of cure and add to thinly-sliced beef. A few hours in sous vide then onto the Nesco Snackmaster Pro dehydrator until perfectly dried. Not too tender, not too tough. Each and every time.
I like my jerky to be pretty flavorful so I usually end up adding a bit more seasoning than the manufacturer recommends. The Honey seasoning is great as is, but a little more is… better. I liked the additional sweetness I got by adding more.
Always make sure you have plenty of trays for your dehydrator so you can make maximum use of the drying time!
Sous Vide Honey Jerky on the Nesco Snackmaster Pro
I like my jerky to be pretty flavorful so I usually end up adding a bit more seasoning than the manufacturer recommends. The Honey seasoning is great as is, but a little more is… better.
Set up your immersion circulator for 108 F sous vide.
Combine the jerky seasoning and salt cure per package instructions. Wilbur's has an excellent conversion chart if you need to adjust your quantities for the amount of beef being used. For the cure, visit this link here. For converting the sure cure quantity, visit this link.
Place the meat into a large bowl and sprinkle with the seasoning/cure mixture. DO NOT ADD WATER. Using your hands, mix the seasonings and meat well.
Transfer the meat to a sealable bag and vacuum seal. Make sure there are no leaks.
Transfer bag to sous vide setup and heat for 2 hours.
Increase temperature to 130 F and heat for an additional 4 hours.
Turn on your dehydrator and heat it to 160 F.
Remove the meat from the bag and transfer to the dehydrator. Do not overlap the pieces.
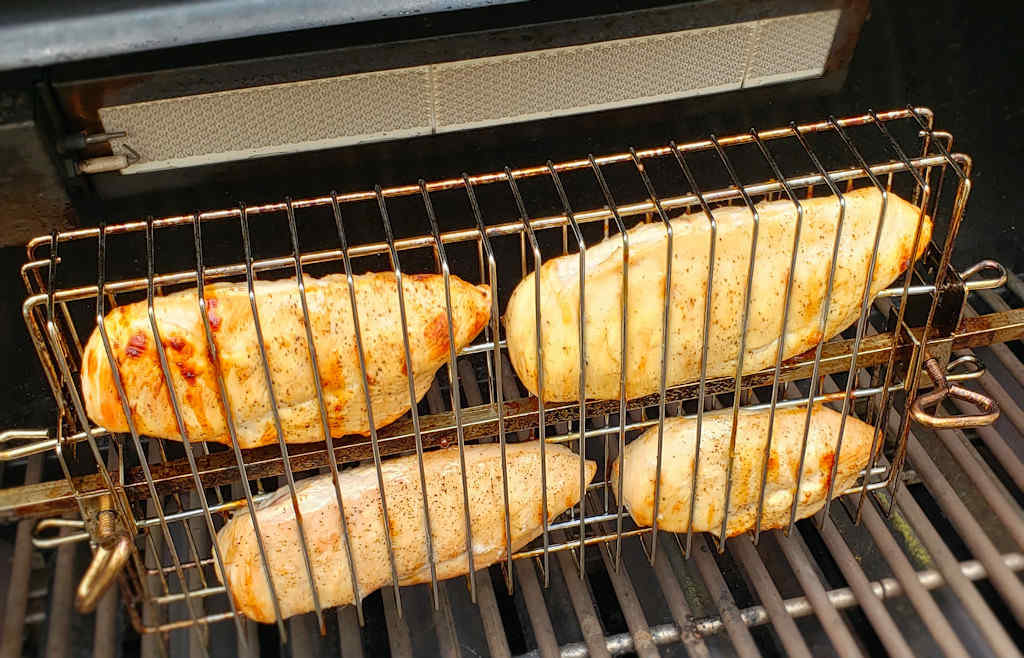
I’ve been on a quest to make what I call the best grilled boneless skinless chicken breasts. Usually they end up too dry. Or to tough. I want mine tender and juicy, perfect for a salad or sandwich. I’m happy with my results with these tender and juicy rotisserie chicken breasts. Very happy. I used my rotisserie to grill breasts that were brined for a few hours. The brine not only tenderizes, it also adds a nice light herby flavor.
Simple And Delicious
These tender and juicy rotisserie chicken breasts were perfect sliced thin and served over greens for our dinners. I didn’t season the chicken with anything but freshly ground black pepper before grilling it. You definitely do not need to add salt to them as they brined in salt for long enough. You could add other seasonings as desired, though, but remember that the brine also adds a lot of flavor. And don’t use seasonings that have any salt in them, or are at least reduced sodium.
I love cooking using a rotisserie. I have a few different types, depending on what I’m going to cook. For this recipe, I use a basket that lets me clamp down on the chicken breasts. That way they aren’t flopping around as the rotisserie spins.
Place water in a large pot over high heat and bring to a boil.
Stir in the salt and brown sugar until dissolved. Remove from heat and let cool completely.
Add vinegar, pickling spice, black pepper, allspice, garlic powder, and tarragon and mix well.
Transfer brine to a large resealable container (or keep it in the pot if you have a tight-fitting lid).
Add the chicken. Make sure it's fully submerged. Add more water if it's not.
Cover and refrigerate for 4-8 hours.
Fire up your grill for direct heat cooking with a rotisserie.
Remove the chicken from the brine and shake off any excess.
Pat dry and sprinkle generously with pepper. Transfer to a rotisserie basket (you might have to work in batches) and put onto the grill.
Grill until the internal temperature reaches 165 F. Mine took about 20 minutes. Cook time will depend on the heat and how thick your chicken breasts are.
Notes
You can also cook the chicken directly on your grill grates over medium-high heat.
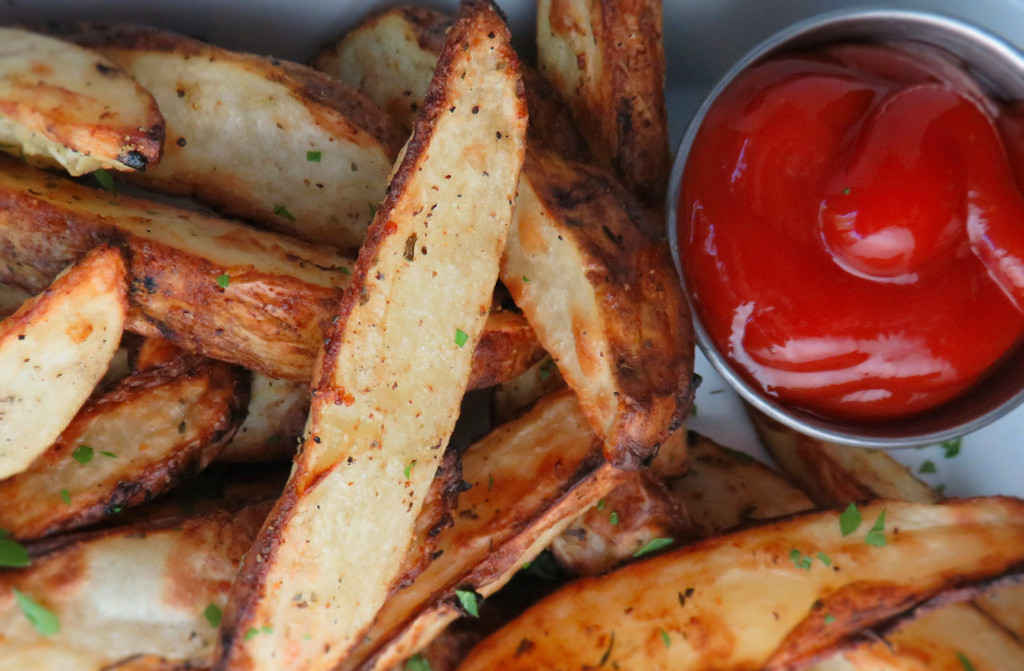
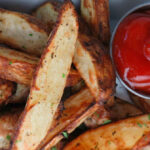
There are two things that make these garlic Parmesan potato wedges absolutely fantastic: Kosmos Q garlic Parmesan wing dust and a Vortex BBQ loaded with hot charcoal. The wing dust packs tremendous garlicky cheesy flavor. Yes, I use it on wings. A lot. And also potato wedges. And homemade potato chips. It’s great stuff. The Vortex gets crazy hot, giving these potatoes a lightly crunchy exterior and a creamy soft interior.
Nice ‘n Cruncy
Adding baking powder to the potatoes before putting them on the grill adds a bit of extra crunch to them. You can skip it if you like, these garlic Parmesan potato wedges using the Vortex are tremendous either way. You can also make them a bit spicier if you prefer, like my Kickin’ Cajun potato wedges.
With a 22″ grill you’ll be able to fit a decent amount of potatoes around a Vortex. You’ll have just enough space leftover for a few pieces of chicken, too. It’ll be tight. I’ve found that the limited space is an excellent excuse for getting another grill!
Kosmos Q makes a lot of other great flavored wing dusts that are great on potato wedges too. Try them all! I did!
Fill your Vortex BBQ with charcoal and light it up while preparing the potatoes.
Slice potatoes in half lengthwise, then half again lengthwise, and finally one more time lengthwise (i.e. you're cutting them into 1/8ths). You don't want them super thin, so for smaller potatoes you might only have to cut them 1/4ths. Transfer to a bowl.
Drizzle the potatoes with the oil and toss to coat.
Sprinkle the potatoes with the seasoning and baking powder and toss to coat. I've found that stirring them with your hands works best.
Once the charcoal is just ashed over place the potato wedges in a circle around the edges of your grill. Don't let the potatoes touch. It's ok if you need to put them in two or three rows. If some pieces are thicker than others try to locate those nearer the fire.
Place the cover on the grill with the top and bottom vents wide open.
Cook for 20-30 minutes, rotating the lid 90 degrees every 5 or so minutes. Start checking the potatoes after 15 minutes. Sometimes one side off the grill needs more heat as the wedges there aren't cooking quite as quickly as others. Just rotate the lid so the vent is near that side and let cook a bit longer.
Remove and serve immediately.
Notes
For the best results and even cooking, try to cut the potato wedges all close to the same size as possible.
The main reason I purchased Steven Raichlen’s book, The Brisket Chronicles, was this right here. The best smoked beef brisket. Yes, I know people like their brisket different ways, and they might not agree with me. But for me, this is by far the best brisket I’ve ever smoked.
A Recipe From One Of The Best
The approach to making the best smoked brisket is very straight-forward. It’s based on the same technique that Aaron Franklin, of Franklin Barbecue fame, uses day-after-day to produce some of the finest brisket on the planet.
Checks Every Box
This is the best smoked brisket because it checks all of the boxes for me. Tender. Moist. Packed with flavor. The meaty beef brisket flavor shines through. It’s not buried under overly sweet or overly spicy rubs or sauces. There’s just the right amount of fat left on the brisket. Not too much, not too little.
This Is My Happy Place
I could not stop devouring this brisket. I could not have been happier with the results. I’ve smoked brisket for years. This here is my go-to technique from now on. And I have to admit it, the pink butcher paper was a big part the success.
Begin by trimming the fat from the brisket. Keep 1/4" of the fat, but remove the rest.
Fire up your smoker for smoking at 250 F. Use whatever wood you prefer. I used hickory.
Combine the salt, pepper and red pepper flakes. Rub the mixture onto the brisket. Don't be shy, get it on good and thick and everywhere. Don't miss a spot.
Transfer to the smoker and smoke until the meat reaches 165 F.
Remove the brisket to a large piece of pink butcher paper. Wrap tightly. If your brisket is large you might want to use two pieces of paper, one wrapped left-to-right and one wrapped top-to-bottom of the brisket to make sure it gets sealed.
Return the brisket to the smoker and continue cooking to 205 F.
Remove the brisket and place it into a cooler for 2-4 hours. Do not remove it from the paper during this time and do not open the cooler. I use an old cooler since the brisket may leave a (wonderful) aroma in the cooler. Do not use a styrofoam cooler as it will melt.
Unwrap the brisket. Pour any juices that have accumulated into a bowl. Slice thin against the grain and then drizzle with the reserved juices.
Notes
I like to take a picture of the brisket after I have trimmed the fat. This lets me identify (and remember) the direction of the meat grain so that I can slice it against the grain when done. Sometimes I find it hard to spy the grain after the meat has been covered in rub and smoked.
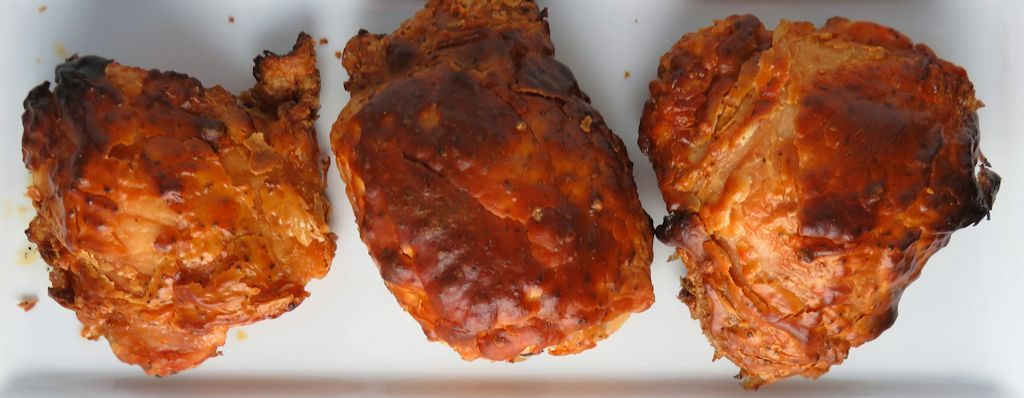
Up until now, I’ve used lighter, thinner coatings when making ‘fried’ chicken using my Vortex insert on my Weber charcoal grill. Even the pre-made mixes I’ve used create that perfect thin coating. This time I thought I’d delve into the world of thicker coatings and see how the Vortex would hold up. And boy, did it ever deliver! As always the chicken turned out so moist and tender. And then, again, there’s that perfectly crispy skin and coating. Cooked perfectly, all the way through no matter how thick the batter. This Pioneer Takeout chicken using the Vortex was fantastic!
Mighty Good Easy Chicken
Pioneer Take Out in a chicken restaurant chain that started in California. Although never as big as Kentucky Fried Chicken, if this version of their chicken, grilled instead of deep-fried, is any indication of how good their food is, they should be everywhere! Pioneer Take Out chicken using the Vortex is fantastic!
This time I thought I’d delve into the world of thicker coatings and see how the Vortex would hold up. And boy, did it ever deliver! As always the thicken turned out so moist and tender. And then, again, there’s that perfectly crispy skin and coating. Cooked perfectly, all the way through no matter how thick the batter. This Pioneer Takeout chicken was fantastic!
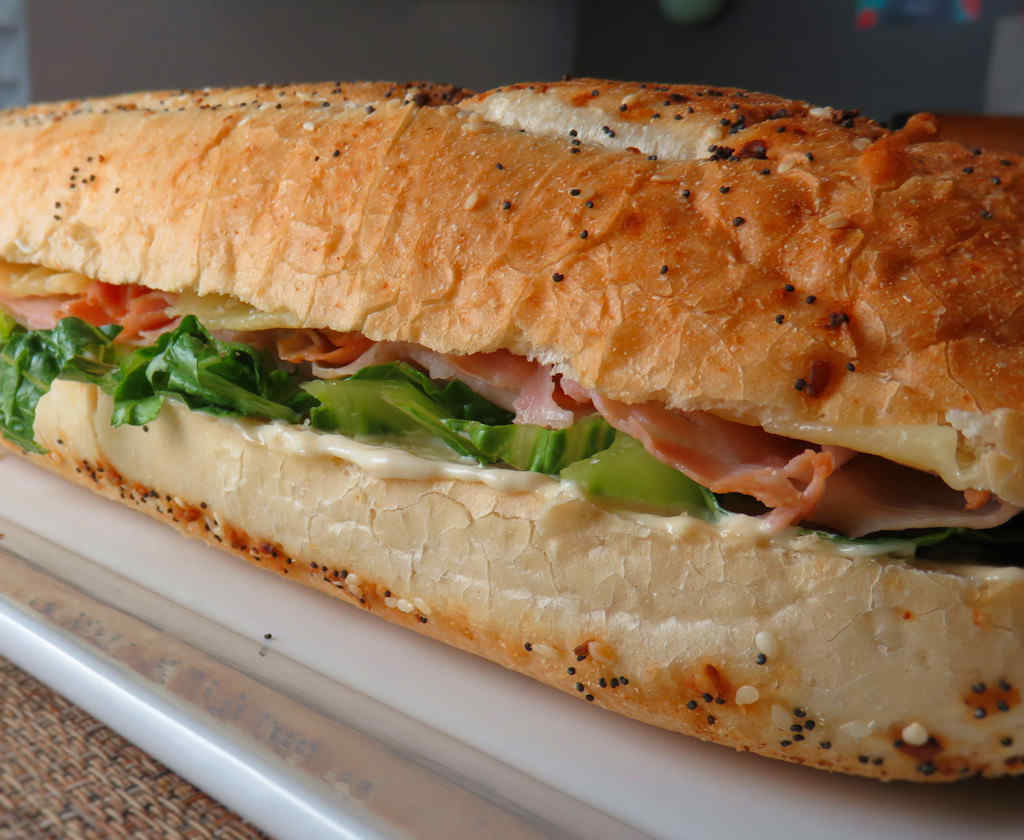
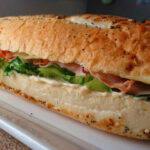
I’m not sure. Maybe it was the simple flavors. Or the fresh bread. But there was something about this copycat of Firehouse Hook and Ladder Sub that I really, really liked. I made this three days in a row. I probably would’ve made it a fourth day if I hadn’t run out of sandwich meat. This sub is now my go-to sandwich when I pack lunches for day trips, especially if we’re going antiquing.
Have It Your Way
I think it’d be ok to play with this recipe for a copycat Firehouse Subs Hook and Ladder sub. The base recipe is fantastic, but there’s always room for personalizing it if you’re in the mood. Spice it up a little bit with jalapeno jack cheese maybe. Use rotisserie chicken instead of turkey or ham, perhaps. Use a different bread. But, I wouldn’t mess with the mix of mayonnaise and spicy mustard. I think it was my favorite part. Not too mustardy. Not too mayonnaise-y. After all, it’s a great-tasting sandwich spread.
I almost always use Blue Plate mayonnaise in the dishes I make. I think it is the best around. If you can’t find it locally you can pick it up online for a fair price.
Split the sub roll lengthwise and top the bottom slice with the meats and cheese. Toast both bread halves for a few minutes, until the cheese is just starting to melt.
Combine the mayonnaise and mustard. Slather on the top bun.
Add the lettuce and onion. Serve.
Notes
This is a delicious sub no matter which sandwich meats you use!