This baked Italian sub pizza packs on everything I love about a classic Italian sub (er… hoagie). Sandwich meats. Black olives and banana peppers (yum). Cheese. Lots of cheese. Some more cheese. And just a bit of Italian dressing and basil. Quick to make and quick to disappear, these pizzas make for a great fast lunch or dinner. Every bite sure is tasty gooey cheesy!
The Best Toppings In Every Bite
To spice this baked Italian sub pizza up, use hot banana peppers, spicy salami and maybe toss a few jalapeno slices on there to boot. Oh, and a good bit of dried red pepper flake ain’t gonna hurt either.
I highly recommend that you shred or grate your own cheese at home. Don’t buy the pre-shredded or pre-grated stuff. It has stuff added to it to keep it from sticking together. That ‘stuff’ affects how the cheese melts. Shred it yourself and use the good stuff.
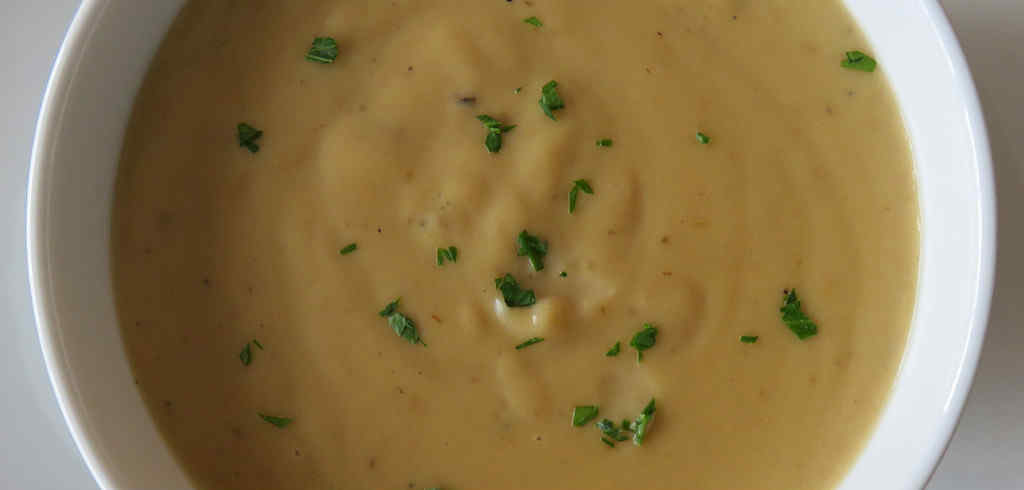
This is quite easily and most definitely the best cream of mushroom soup we’ve ever had. Eating it was an absolute pleasure. Packed with mushroom flavor and velvety smooth, it’s divine. Perfect on a cool fall day with flurries coming down.
It’s hard to take a great picture of what is essentially a brown soup, but I tried. The picture definitely does not do the flavor of this cream of mushroom soup justice. No picture could.
Mushrooms. Everywhere.
To get such great mushroom flavor, this soup is packed with mushrooms, both fresh and dried that have been reconstituted. If you really, really love meaty mushrooms, then you’ll love this soup right out of the pot. If you love mushrooms but don’t prefer a lot of them, serve the creamy soup with a few spoonfuls of the mushrooms added in at the end.
I like to use my good ole trusty Dutch oven to make this soup and pretty much darned near anything like it on my stovetop. It’s nice and big and sturdy. That extra weight helps it maintain and distribute heat perfectly. As an added bonus, it’s actually pretty easy to clean up too!
To get such great mushroom flavor, this soup is packed with mushrooms, both fresh and dried that have been reconstituted. If you really, really love meaty mushrooms, then you’ll love this soup right out of the pot.
Place the dried porcini mushrooms into a small bowl and cover with hot water. Set aside to allow to reconstitute until soft. Reserve the liquid and slice the mushrooms.
Meanwhile, warm the chicken stock in a small pot.
Melt the butter in a medium pot over medium-high heat.
Add the onion and celery and saute for 5 minutes.
Add the sliced mushrooms and cook another 10 minutes.
Add the flour and stir. The mixture will get thick.
Reduce heat to low and cook for 10 minutes.
Stir in the warmed chicken stock, the liquid from the reconstituted porcini mushrooms, and the heavy cream..
Season with salt and pepper to taste.
Bring to a simmer and let simmer for 30 minutes, stirring occasionally.
Serve.
Notes
There are a lot of mushrooms in this soup. They are needed to give it such a fantastic mushroom flavor, but if you find them to be too much in the soup, just serve the creamy liquid portion with as little or as much of the mushroom ‘meat’ as you wish. We enjoyed the soup served both ways, with or without the mushrooms.
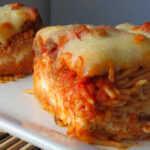
I was going to change the name of this dish to just ‘spaghetti casserole’ because (before I made it) I thought that calling it Million Dollar Spaghetti was a bit pretentious. Well, as you can tell, I didn’t change the name. That’s because, yeah, Million Dollar Spaghetti is the perfect name for it.
If you close your eyes and take a bite of this spaghetti you’ll almost think you are eating lasagna. Actually, it’s very close in flavor to my mom’s easy lasagna, a recipe I make and devour regularly. Spaghetti sauce, Italian sausage, pasta, a little Italian seasoning and plenty of cheese. What’s not to love?
Great. Until Its Gone.
Million Dollar Spaghetti was a huge hit in our house. We were sad when the last piece disappeared. But not super sad since we knew it won’t be long until we make this again. And again.
Jazz It Up
You can easily change this recipe up to meet your own tastes. Maybe add some fresh mushrooms in when you cook the sausage. Or a few bell peppers. For me, a pinch or two of red pepper flake is always a good idea too. You don’t have to use an expensive jarred spaghetti sauce, either. Good ole Prego (I used Italian Sausage and Garlic) works just great!
I highly recommend that you shred or grate your own cheese at home. Don’t buy the pre-shredded or pre-grated stuff. It has stuff added to it to keep it from sticking together. That ‘stuff’ affects how the cheese melts. Shred it yourself and use the good stuff.
I love a nice, big po boy sandwich. Even the most complicated po boy isn’t complicated, like this deluxe andouille po boy. In minutes I’m having a great meal. I do go through the ‘trouble’ of making my own po boy bread, but that’s mostly because I just cannot seem to find great po boy bread here. French bread will do in a bind, but it’s just not quite the same. The texture is definitely different. For a topping, I use a simple but wonderfully spicy lettuce mixture. And you can never, ever go wrong with andouille sausage. That perfect spicy kick, in a casing that pops when you bite into it.
A Crazy Good Sandwich
I use the lettuce mixture on all of my po boys, not just this andouille version. It’s also great on hamburgers or hot dogs. It takes only a minute or two to make. When I pick up heads of iceberg lettuce at the grocery store I’ll shred and chop them and place them into baggies or containers along with a paper towel. That way I always have lettuce on hand for a quick po boy.
I almost always use Blue Plate mayonnaise in the dishes I make. I think it is the best around. If you can’t find it locally you can pick it up online for a fair price.
I love a nice, big po boy sandwich. Even the most complicated po boy isn’t complicated, like this andouille po boy. In minutes I’m having a great meal.
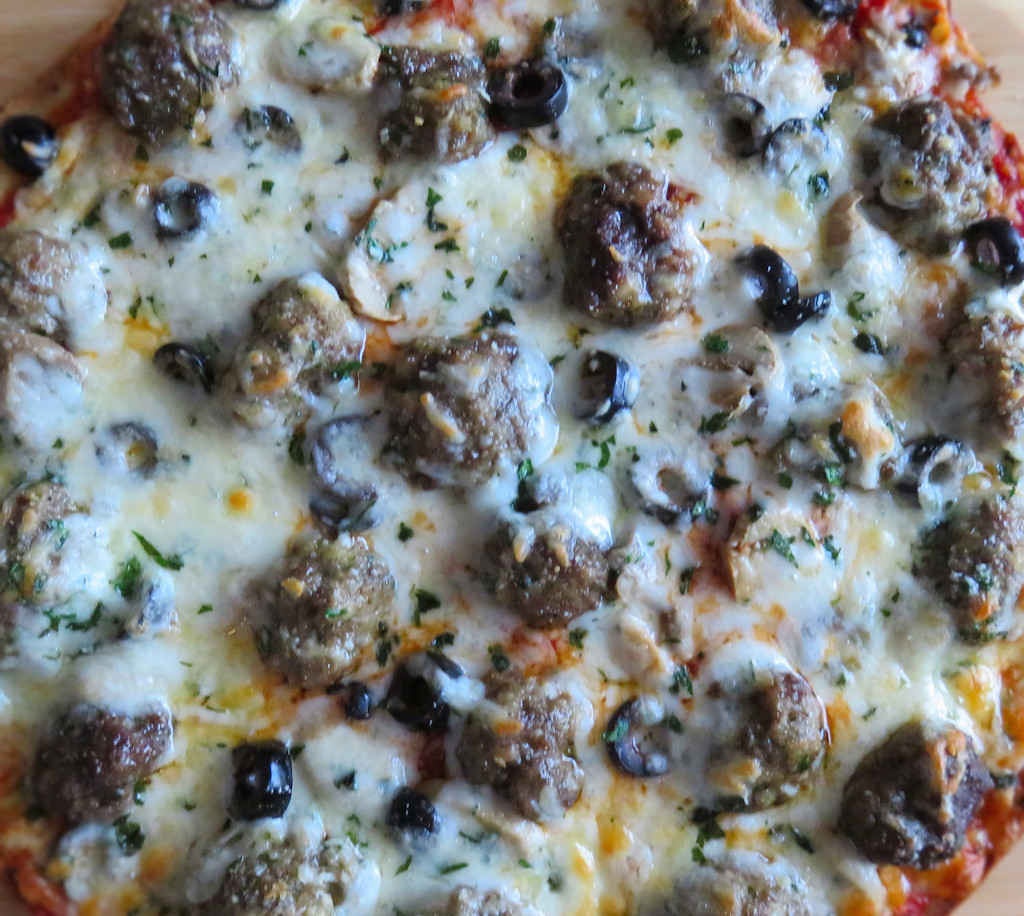
It was meatball week here. I made a monster batch of my homemade meatballs with plans of using them in all sorts of dishes, from spaghetti and meatballs to meatball sandwiches and meatball soup to, of course, 4-cheese meatball pizza. I love the texture of meatballs on a pizza. They add a nice meatiness to each and every bite, plus they add even more wonderful Italian flavor.
The No-Leftover Zone
The combination of four different cheeses made for a delightful pizza feast. There weren’t any leftovers. That happens with pizza around here. Roasted cauliflower? Probably gonna have some leftovers. Leftover 4-cheese meatball pizza? Nope.
I highly recommend that you shred or grate your own cheese at home. Don’t buy the pre-shredded or pre-grated stuff. It has stuff added to it to keep it from sticking together. That ‘stuff’ affects how the cheese melts. Shred it yourself and use the good stuff.
8meatballscooked, cut in half (I used my homemade meatballs. See the note below). If using frozen, thaw first.
Any other desired toppingsI added mushrooms and black olives… plus a few pinches of dried red pepper flake
1cupprovolone cheeseshredded
1cupcheddar cheeseshredded
1cupMonterey Jack cheeseshredded
⅓cupParmesan cheeseshredded
Instructions
Note: I used my homemade meatballs. Normally I make them at least 2 ounces each. For the pizza I made 1 ounce meatballs instead. You can still use large meatballs, but instead of halving them you will probably want to quarter them.
Preheat oven to 420 F
If using store-bought pizza dough or crust, prepare per the package instructions.
Ladle sauce onto the pizza and spread out edge-to-edge.
Distribute the meatballs around the pizza.
Add any other toppings that you desire.
Sprinkle with the cheeses.
Transfer to a pizza stone or pan and bake 10-12 minutes or until the dough is crispy and the cheeses are melted.
Notes
More cheese is better on this pizza! It can handle it!
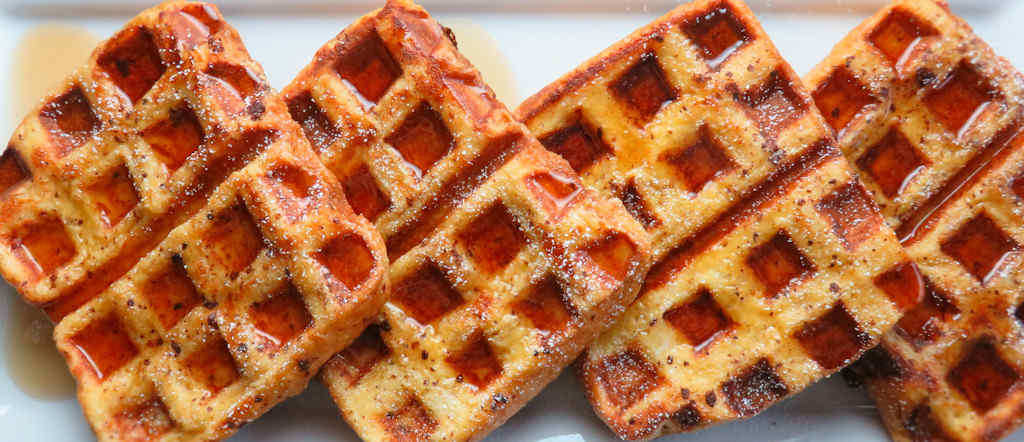
I love Texas toast. And I love French toast. And of course I love waffles. That sums up how I feel about these amazing Texas toast French toast waffles! Incredibly easy to make and beyond yummy. Self-control was very challenging with a platter of these little tasty beauties in front of me. I have a really bad addiction to anything that has nooks and crannies in it where butter and syrup and go. I cannot resist them.
The French Toast Of My Dreams
Sweet, with a hint of cinnamon and vanilla, you can substitute any bread you like, but I prefer Texas toast because it can more than handle the job of holding up to an egg batter and a waffle iron.
I often contemplate what I would do differently to a recipe after I make it. A little twist or something. I can honestly say there is absolutely nothing I would change about Texas toast French toast waffles. Except to maybe double the recipe.
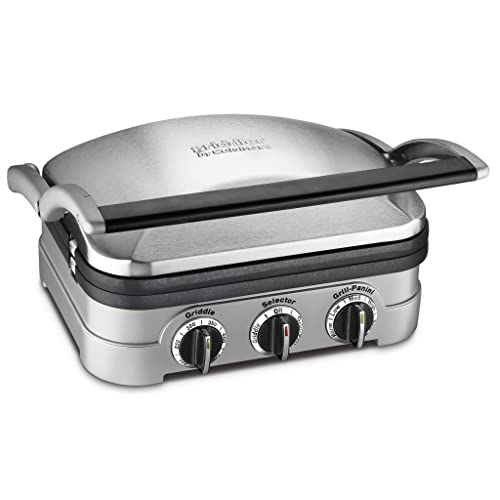
I use my Cuisinart Griddler to make these waffles. It’s a cooking beast for everything from breakfast to dinner to desert.
I love Texas toast. And I love French toast. And of course I love waffles. That sums up how I feel about Texas toast French toast waffles! Incredibly easy to make and beyond yummy. Self-control was very challenging with a platter of these little tasty beauties in front of me.
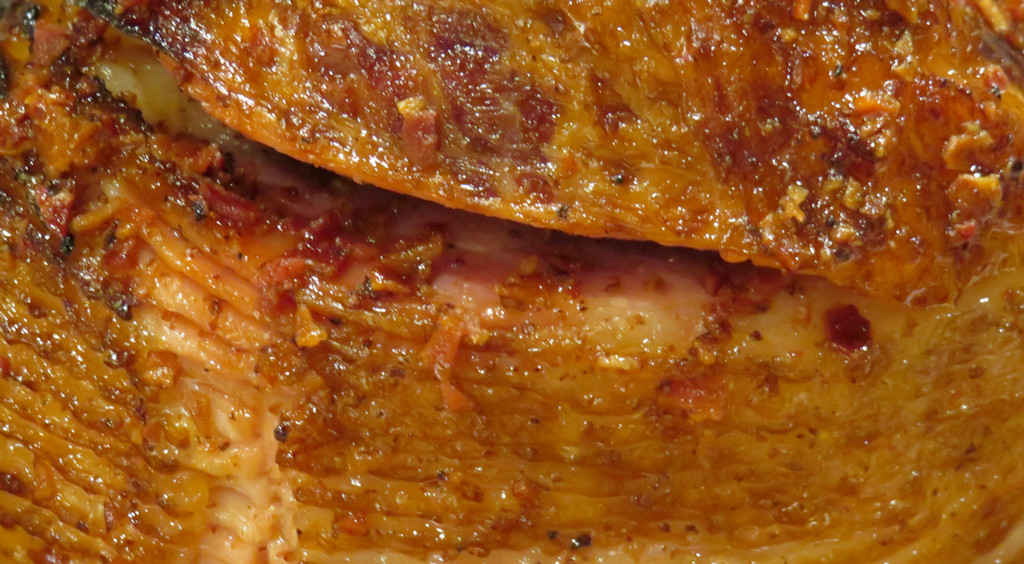
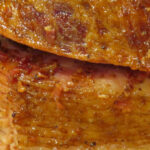
What’s better than spiral ham? Bacon-glazed spiral ham, of course. It’s spiral-ham-sale-time here, so I backed up the truck and grabbed a nice big smoked ham. Of course, they’re easy to reheat. And just as easy to glaze during the last 30 minutes. The bacon glaze adds a bit more smokiness, but also some sweetness, a little tartness and a little tang thanks to two different kinds of mustard. I don’t usually use the bag of glaze that comes with many hams. It kinda scares me, to tell the truth. I’d rather use something that I made at home so I know what’s in it!
A Great Tasting Glaze
You can substitute pretty much any jelly you want in place of the Creole mustard, but I’d stay away from ‘darker’ ones, such as blueberry or the like. Go for lighter colors. And don’t be afraid to use a spicy jelly such as jalapeno pepper jelly. You may also want to double the amount of bacon-glaze, serving any leftover glaze as a drizzle over the sliced ham when you serve it. Bacon-glazed spiral ham is a wonderful thing and more glaze is… more wonderful!
I made a lot, and I do mean a lot, of beer can chickens on my Char-Broil Big Easy last weekend. So, I had a good amount of chicken on hand. That got me to thinking beer can chicken jambalaya. I took the classic jambalaya recipe from Chef John Folse and used my tender, incredibly flavorful beer can chicken instead of browned fresh chicken.
Deliciousness In Every Bite
There’s no loser in this beer can chicken jambalaya, but for me the winner is the rice (well, and me for getting to eat it). It absorbs flavors from the vegetables and meats and broth and spices and turns out just flat-out incredible. This is one rich, tasty dish. I make this often because it seems I often have leftover beer can chicken.
You can add shrimp to this jambalaya if you want, but I prefer mine without it. It’s hard to re-heat shrimp leftovers without them becoming way too tough. This recipe makes a big, big batch. Since there’s only two of us I was guaranteed to have leftovers and then some.
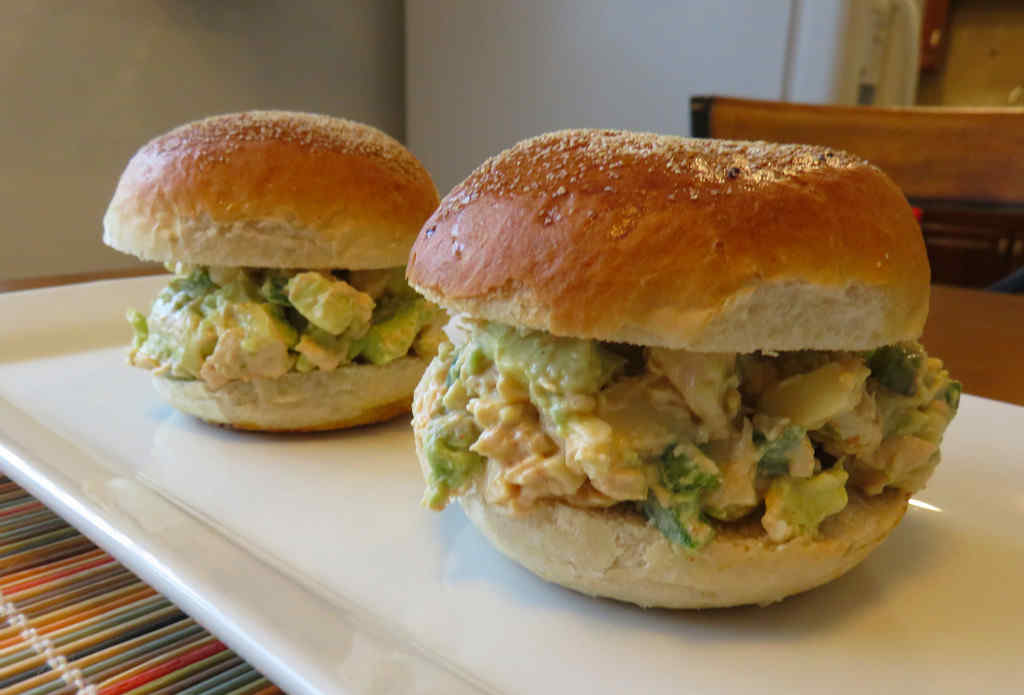
A better name for this spicy chicken salad would be ‘the greatest, absolutely fantastic, totally different, outrageously superb chicken salad’, but that’s too long for a blog post title. This is not your typical chicken salad. Sure, it’s mayonnaise-creamy, but there are special, unexpected ingredients in there too. Like cheese (in a chicken salad????! Seriously, who does that?). And bell pepper (why didn’t I think of that? It adds great crunch and flavor). And tart sour cream???! And my favorite flavors, spicy smoky chipotle and cooling creamy avocado. What a great and definitely different chicken salad this is!
A Seriously Good Twist On A Classic
I wouldn’t change a thing about this spicy chicken salad. If you aren’t going to use the entire batch at once, I do recommend that you only mix in avocado with what you will use. After all, the avocado isn’t going to keep for long. You’re better off mixing it in when you need it.
I almost always use Blue Plate mayonnaise in the dishes I make. I think it is the best around. If you can’t find it locally you can pick it up online for a fair price.
A better name for this spicy chicken salad would be ‘absolutely fantastic, totally different, outrageously great chicken salad’, but that’s too long for a blog post title. This is not your typical chicken salad.
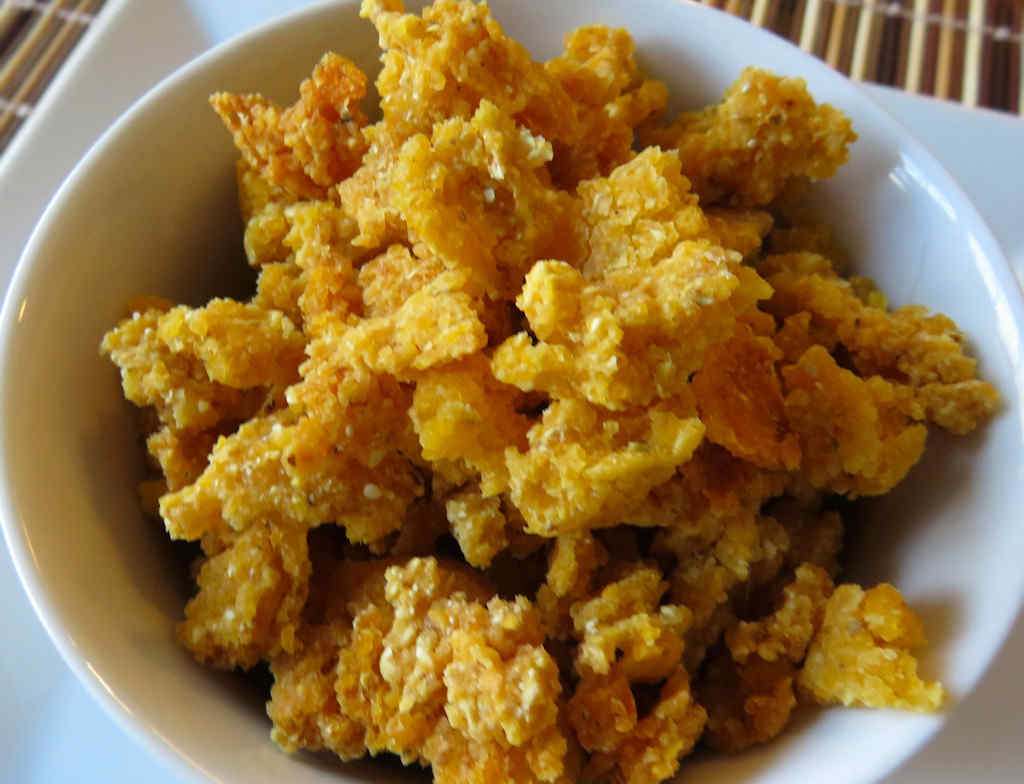
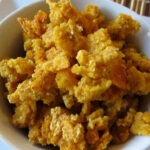
One of the first recipes I made out of Big Bad Breakfast: The Most Important Book of the Day from John Currence was homemade frosted corn flakes. As soon as I saw it I was like wow…. how cool would it be to eat a bowl of cereal that I made? So I did. And it was fantastic. So much more corn flavor than the stuff in a box! I mean they were super corny! I could not get over just how much I enjoyed this cereal. It was like I hadn’t had a bowl in years. It didn’t wow me any more, I guess. Well, now I’m wow’d again!
Crunchy Until The Last Spoonful
These homemade frosted corn flakes were also a lot crunchier than the ones out of a box. They can definitely hold up to milk. You know how with the store-bought flakes you only have a few minutes before you have bowl of soggy sadness. Not with these. You’ll be crunching until the last flake.
The recipe calls for real sugar. I didn’t try it using a sugar substitute. My gut feeling is that you’re better using the real deal.
Combine the cornmeal, masa, 3 tablespoons of the sugar, vanilla extract, and all of the salt.
Add 2 cups of boiling water and stir until blended. Add more water as needed, getting the batter to a consistency just a little thinner than that of pancake batter.
Pour the batter out onto the lined baking sheet and spread out evenly. Try to get it as thin as possible (mine was a bit thick, but you’re aiming for 1/8″ if possible).
Sprinkle the batter with the remaining sugar.
Bake for 45 minutes, turning every 15 minutes. The batter will dry out and start to crack. If your batter is thick like mine you might have to bake it a little longer.
Remove from the oven and let cool.
Break up the corn into bite-sized pieces. It’s like breaking up brittle, but you want smaller pieces.
Return to the oven and bake another hour or until fully dried.
Remove and let cool completely. The flakes will get a bit crunchier after cooling.
Keep in an airtight container.
Notes
These flakes are thicker and ‘cornier’ than the store-bought stuff.