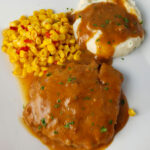
Sage Sausage Biscuit Gravy

Breakfast becomes dinner around here pretty often. Maybe not often enough, really. Who really has time to enjoy breakfast in the morning, especially during the week? You’re in a hurry, you’re on your way out the door. You don’t have time to savor biscuits and gravy or anything else. That’s why making this sage sausage biscuit gravy for dinner is special. A hint of sage with creamy gravy. Not too thick. Not too thin.

Sage Sausage Biscuit Gravy

The Perfect Biscuit Gravy

You can serve this sage sausage biscuit gravy over any biscuit. I did a rare thing and made buttermilk biscuits from scratch. For the first time. And I have to say, there didn’t require much more effort than opening a tube of biscuits. But hey, whichever works. I’ve done both and I’ll take either one, just give me lots of gravy!

Whisk the milk in good. Don’t think, eh, I can get away with half-way whisking it. Get in there and the milk all incorporated and get the gravy nice and thick!

Also try my biscuits and Tasso gravy.

Sage Sausage Biscuit Gravy
Print Pin
5 from 1 vote

Sage Sausage Biscuit Gravy

Making this sage sausage biscuit gravy for dinner is special. A hint of sage with creamy gravy. Not too thick. Not too thin.
Course Gravy
Cuisine American
Keyword biscuits, gravy, sausage
Prep Time 5 minutes
Cook Time 20 minutes
Total Time 25 minutes
Servings 4 servings
Calories 496kcal

Equipment

Ingredients

Instructions

  • Crumble the sausage into a hot large skillet. As it cooks break it into even smaller pieces. Cook until browned then remove to a plate.
  • Add the butter and melt.
  • Add the flour. Stir and cook for 1 minute.
  • Slowly whisk in the milk and stir until it is thickened.
  • Add the sausage back to the skillet and stir to warm through.
  • Season with salt and pepper, to taste.
  • Serve over biscuits.

Notes

When reheating any leftover gravy you might have to add a splash or two of milk to thin it a little.

Nutrition

Calories: 496kcal | Carbohydrates: 9g | Protein: 21g | Fat: 42g | Saturated Fat: 17g | Trans Fat: 1g | Cholesterol: 113mg | Sodium: 762mg | Potassium: 411mg | Fiber: 1g | Sugar: 5g | Vitamin A: 496IU | Vitamin C: 1mg | Calcium: 117mg | Iron: 2mg

Nutritional values are approximate.

Easy Asian Ramen Stir Fry

This is our go-to easy-to-prep and even easier-to-make stir fry. I often make Asian Ramen stir fry on the side burner of our gas grill using a wok, but you can make it on the stovetop just as easily. The marinated chicken is packed with flavor, and comes out nice and tender and juicy. The noodles are simple, fast, and less hassle than rice. For the vegetables, well, they vary with whatever we can find at the market.

Easy Asian Ramen Stir Fry

Longer-Cooking Vegetables Fry First

The key to our easy Asian Ramen stir fry is the order in which you cook the vegetables. Don’t get me wrong, it’s not complicated. Just start with the vegetables that take longer to cook, usually the harder ones. You know the culprits: broccoli, cauliflower, onion and the like.

Quick Cooking Vegetables Fry Next

Then add in the quicker cooking ones. The softer ones. And don’t overcook any of them. You want just a bit of a ‘bite’ to them. I like to separate mine into two different bowls. Long-cooking ones in one bowl. And yep, you guessed it, shorter-cooking ones in another. That way I don’t have to think real hard once I get the cooking party going!

Chicken Is Last

I always cook the chicken last, even though it could be first instead. I like it to be nice and hot since I don’t want to serve cold chicken. You can actually cook it ahead of time and just warm it real quick before serving.

With the addition of Japanese barbecue sauce you’ll find yourself enjoying every bite just like we do.

Easy Asian Ramen Stir Fry
Print Pin
5 from 1 vote

Easy Asian Ramen Stir Fry

The key to our easy Asian Ramen stir fry is the order in which you cook the vegetables.
Course Main
Cuisine American
Keyword Asian, Ramen, stir fry
Prep Time 15 minutes
Cook Time 15 minutes
Servings 4
Calories 1797kcal

Ingredients

For the Ramen

For the chicken

For the stir fry

  • 2 tablespoons vegetable oil divided, sesame oil can be used also
  • 1 small head broccoli broken into florets
  • 1 small onion cut into big-sized pieces
  • ½ cup snap peas pod strings removed
  • 1 small squash cut into bite-sized pieces
  • 8 ounces mushrooms sliced if large, whole if small
  • 1 tablespoon Japanese Barbecue sauce spicy, if desired, or substitute sesame oil

Instructions

For the Ramen

  • Prepare the Ramen noodles per the package instructions but do not use the flavoring packet.
  • Drain and set aside.

For the chicken

  • In a medium bowl whisk together the soy sauce, brown sugar and corn starch until smooth.
  • Add in the ginger, garlic and red pepper and stir.
  • Add the chicken to the sauce and marinate in the fridge for 15-30 minutes.

For the stir fry

  • Heat 1 tablespoon of oil in a wok or large skillet over medium-high heat.
  • Add the broccoli, onion and whatever long-cooking vegetables you are using and cook until just starting to turn tender, about 3 minutes.
  • Add softer vegetables and cook another 2 minutes, stirring.
  • Remove vegetables from the pan.
  • Add remaining oil to the wok and heat for 1 minute.
  • Add the chicken and cook, stirring often, until done, about 4 minutes.
  • Add in the cooked Ramen noodles, stirring to break them up.
  • Add the cooked vegetables and Japanese Barbecue sauce.
  • Stir to heat thoroughly.
  • Serve immediately.

Notes

You can use any vegetables you want. Start stir frying with the vegetables that are harder and will take longer to cook, then add the softer ones that cook quicker.

Nutrition

Calories: 1797kcal | Carbohydrates: 233g | Protein: 139g | Fat: 41g | Saturated Fat: 11g | Polyunsaturated Fat: 10g | Monounsaturated Fat: 15g | Trans Fat: 0.1g | Cholesterol: 289mg | Sodium: 10967mg | Potassium: 5858mg | Fiber: 23g | Sugar: 83g | Vitamin A: 80554IU | Vitamin C: 205mg | Calcium: 545mg | Iron: 17mg

Nutritional values are approximate.

Slow Cooker Rice

I didn’t have a reason to make rice in a slow cooker. It was something that I just wanted to try it. I usually just make rice on the stove top and most times I get it right. I don’t have a fancy rice cooker.

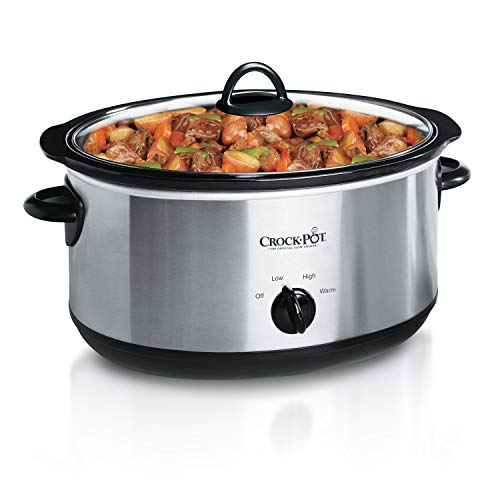
My slow cooker was sitting there with that ‘use me’ look on it’s face so I fired it up, added the rice and a few other ingredients. In just over 6 hours, I had a big ole batch of cooked rice. I can’t imagine anything any easier!

Slow Cooker Rice

The No Boo-Boo Zone

It ain’t fancy, but slow cooker rice is exactly what I was looking for: a big batch of rice with no fuss and little chance of me making a boo-boo. I needed the rice for an upcoming dinner. Time would be tight and I knew that if I made the rice last minute, when the pressure was high, I might over or under cook it and I wouldn’t have time to re-make it. So I just cooked it a day in advance and kept it in the fridge overnight. It was just as good leftover.

Slow cooker rice is perfect served with chicken sauce piquante.

Slow Cooker Rice
Print Pin
4 from 1 vote

Slow Cooker Rice

My slow cooker was sitting there with that ‘use me’ look on it’s face so I fired it up, added the rice and a few other ingredients. In just over 6 hours, I had a big ole batch of cooked rice. I can’t imagine anything any easier!
Course Side
Cuisine American
Keyword crockpot, rice, slow cooker
Prep Time 5 minutes
Cook Time 6 hours
Total Time 6 hours 5 minutes
Servings 6
Calories 117kcal

Equipment

Ingredients

  • 2 ¼ cups water
  • 1 cup rice
  • 3 tablespoons butter
  • 1 tablespoon parsley chopped
  • 1 teaspoon Kosher salt

Instructions

  • Spray your slow cooker with non-stick spray.
  • Add all ingredients.
  • Stir and cook on low 6-8 hours until done. Start checking for doneness after 5 hours just in case.

Notes

Fluff with a fork before serving.

Nutrition

Calories: 117kcal | Carbohydrates: 25g | Protein: 2g | Fat: 1g | Saturated Fat: 1g | Cholesterol: 1mg | Sodium: 402mg | Potassium: 49mg | Fiber: 1g | Sugar: 1g | Vitamin A: 69IU | Vitamin C: 1mg | Calcium: 21mg | Iron: 1mg

Nutritional values are approximate.

Cheesy Chicken Fajita Baked Potatoes

I made chicken fajitas the other day. They were fantastic. But as with just about anything I make, my brain instantly asked ‘can I put this inside a baked potato?’. And the answer was ‘yes’. By golly, I sure can. So here are my cheesy chicken fajita baked potatoes. Packed with fantastic fajita flavor. Crispy delicious vegetables. And plenty of cheese. Topped with Mexican crema and well, of course, more cheese!

Cheesy Chicken Fajita Baked Potatoes

Full Of Flavor

There’s nothing not to like about these cheesy chicken fajita baked potatoes. Each and every bite is full of flavor. You’ll find yourself taking bite after bite enjoying it more and more as you go.

Don’t be shy with the fajita seasoning as you make the chicken mixture. More is definitely better in this case. I add it to the chicken, to the vegetables, and then I sprinkle the inside of the potatoes with more. Like I said, more is better in this case.

I could not find Oaxaca cheese the day I was in the market. Monterey Jack makes a fantastic substitute.

I highly recommend that you shred or grate your own cheese at home. Don’t buy the pre-shredded or pre-grated stuff. It has stuff added to it to keep it from sticking together. That ‘stuff’ affects how the cheese melts. Shred it yourself and use the good stuff.

Also try my loaded The Works baked potato.

Cheesy Chicken Fajita Baked Potatoes
Print Pin
5 from 1 vote

Cheesy Chicken Fajita Baked Potatoes

A favorite in our household!
Course Main
Cuisine American
Keyword baked potatoes, fajita
Prep Time 30 minutes
Cook Time 20 minutes
Servings 8
Calories 536kcal

Equipment

Ingredients

For the fajita mixture

  • 4 chicken thighs boneless, skinless, trimmed of any excess fat
  • ¼ cup fajita seasoning divided, you might use more or less
  • 4 tablespoons unsalted butter divided
  • ½ medium sweet onion sliced
  • 1 poblano pepper sliced
  • 1 medium red bell pepper sliced
  • 1 pound Oaxaca cheese shredded, divided

For the baked potatoes

Instructions

For the chicken fajita mixture

  • Season the thighs with the fajita seasoning. Don't be shy with the seasoning. Let the chicken set for 15 minutes or up to 2 hours.
  • Preheat a griddle or large skillet over high heat.
  • Add 2 tablespoons of butter to the skillet. Add the thighs and cook for 4 minutes per side until lightly charred and cooked to 165 F.
  • Remove the chicken to a platter to cool slightly then cut into small cubes.
  • Add remaining butter to the skillet and add the onions and peppers. Cook until lightly softened and charred, stirring often.
  • Add the chicken to the vegetables. Season with more fajita seasoning and stir to combine.
  • Add half of the cheese and mix until melted.
  • Reduce heat to low and cover until ready to use.

For the potatoes

  • Preheat oven to 400 F.
  • Rinse the potatoes under cold water and brush off any dirt. Dry well with a paper towel.
  • Pierce each potato 4 times with a sharp knife.
  • Brush potatoes with oil.
  • Sprinkle some salt onto a plate and roll the potatoes in the salt.
  • Place potatoes directly on the oven center rack. You might want to put a baking sheet lined with foil beneath them to catch any drippings.
  • Bake until potatoes are done (210 F internal temperature, or tender all the way through when poked with a knife), 40-60 minutes depending on their size. You can also test for doneness by squeezing the potatoes (with potholders on). If they give easily, they are done.
  • Remove the potatoes from the oven and let cool slightly before slicing.
  • Season insides with salt and pepper (or use more fajita seasoning and then divide the chicken mixture between the potatoes. Pile it good and high.
  • Top with remaining cheese and place in the oven for 5 minutes to melt.
  • Serve topped with crema and chopped cilantro.

Notes

You can substitute shredded Monterey Jack or pepper jack for the cheese.

Nutrition

Calories: 536kcal | Carbohydrates: 39g | Protein: 26g | Fat: 31g | Saturated Fat: 18g | Polyunsaturated Fat: 2g | Monounsaturated Fat: 5g | Trans Fat: 0.3g | Cholesterol: 91mg | Sodium: 563mg | Potassium: 969mg | Fiber: 3g | Sugar: 3g | Vitamin A: 754IU | Vitamin C: 43mg | Calcium: 67mg | Iron: 2mg

Nutritional values are approximate.

Herb Butter for Steak Sandwiches

I was just making a simple good ole steak sandwich for my dinner. Nothing fancy. Just a little thin-sliced ribeye, some bell pepper, onion and cheese. It’s quick, and it’s easy and I like it. A lot. Usually I just slather the bread with mayonnaise. Why? Because I’m addicted to mayonnaise. But then I thought, this time… I’m doing something with a bit more flavor. Something that steps up my simple sandwich. And this equally-as-simple herb butter for steak sandwiches was born!

Herb Butter for Steak Sandwiches

I Actually Thought I Didn’t Need This

Herb butter for steak sandwiches… Do you need it? Yeah, actually, you do. The addition of a little dill and a little garlic really makes for a better sandwich. Neither flavor is overwhelming, but it adds just enough. And butter? Well, butter goes well with steak. Any time, be it on a thick-cut sirloin on a thin-cut ribeye for sandwiches.

Try my quick fix steak sandwiches made using the Cuisinart Griddler!

Herb Butter for Steak Sandwiches
Print Pin
5 from 1 vote

Herb Butter for Steak Sandwiches

A great addition to any steak sandwich!
Course Sandwich Spread
Cuisine American
Keyword butter, herbs
Prep Time 5 minutes
Cook Time 5 minutes
Servings 4
Calories 22kcal

Equipment

Ingredients

  • ½ cup butter unsalted. softened
  • 1 tablespoon fresh dill diced
  • 3 cloves garlic minced

Instructions

  • Combine all ingredients in a small bowl.
  • Apply to sandwich rolls and bake for a few minutes to toast the bread.

Notes

Depending on the size of your rolls you can get 4 sandwiches out of one batch of the butter.

Nutrition

Calories: 22kcal | Carbohydrates: 2g | Protein: 1g | Fat: 1g | Saturated Fat: 1g | Polyunsaturated Fat: 0.1g | Monounsaturated Fat: 0.2g | Cholesterol: 3mg | Sodium: 32mg | Potassium: 50mg | Fiber: 0.1g | Sugar: 1g | Vitamin A: 57IU | Vitamin C: 1mg | Calcium: 39mg | Iron: 0.1mg

Nutritional values are approximate.

Slow Cooker Hawaiian Pineapple Chicken

Cold crappy weather. All I wanted was something easy to throw into the slow cooker. Something tasty. Something with a Hawaiian twist. Slow cooker Hawaiian pineapple chicken fit the bill perfectly.  It had a wonderfully sweet combination of honey, brown sugar and pineapple. Crunchy veggies and plenty of salty soy sauce. The chicken was tender and packed with flavors. It wasn’t fancy but it was good. I’m a pineapple addict, and this dish satisfied my craving and then some!

Slow Cooker Hawaiian Pineapple Chicken

Searing For Success

I’m kind of a stickler about texture when it comes to meat in a crockpot. Searing gives this slow cooker Hawaiian pineapple chicken that texture I was hoping for. Whenever possible I sear the meat first. I need that contrast, a little crunch, a little char along the edges. Not fully cooked through, but seared just enough. You can skip it if you prefer to just add the chicken directly to your cooker.

I used boneless skinless chicken thighs but you can substitute boneless chicken breasts instead. If you prefer to sear them like I did the thighs, I recommend that you butterfly them first so they have the same thickness throughout for more even cooking.

Also try my slow cooker French onion soup.

Slow Cooker Hawaiian Pineapple Chicken
Print Pin
4 from 1 vote

Slow Cooker Hawaiian Pineapple Chicken

A wonderfully sweet combination of honey, brown sugar and pineapple. Crunchy veggies and plenty of salty soy sauce. The chicken is tender and packed with flavors. It’s not fancy but it’s good.
Course Main
Cuisine American
Keyword chicken, slow cooker
Prep Time 15 minutes
Cook Time 5 hours 30 minutes
Total Time 5 hours 45 minutes
Servings 4 servings
Calories 690kcal

Ingredients

Instructions

  • Season thighs with salt and pepper.
  • Working in batches, heat oil in a large skillet and brown the thighs on both sides, 3-5 minutes. Remove to a plate.
  • Place the pineapple and honey into a slow cooker.
  • Add the honey, soy sauce, brown sugar, ginger, garlic and sesame seeds. Stir.
  • Add the chicken and any juices that have accumulated in the plate.
  • Cover and cook on low for 5 hours.
  • Stir in the bell peppers.
  • In a small bowl or glass combine the cornstarch with the water.
  • Stir into the slow cooker and cook another 30 minutes.
  • Serve over cooked rice garnished with parsley or green onions, if desired.

Notes

You can substitute chicken breasts for the thighs.

Nutrition

Calories: 690kcal | Carbohydrates: 48g | Protein: 39g | Fat: 38g | Saturated Fat: 10g | Trans Fat: 1g | Cholesterol: 221mg | Sodium: 688mg | Potassium: 648mg | Fiber: 1g | Sugar: 42g | Vitamin A: 1109IU | Vitamin C: 41mg | Calcium: 65mg | Iron: 2mg

Nutritional values are approximate.

Quick Fix Roasted Garlic And Herb Potato Chips

If you buy any amount of potato chips I’m going to make a bold prediction. You’re bored. Bored of the same flavors. Bored of chips that claim to be bold or better or whatever and never live up to the promises. Well stop it. I did. Now I but plain ole chips. Ruffled usually. And wavy. And then I season them my way. Like these quick fix roasted garlic and herb potato chips. These aren’t boring. Not even close to it.

Quick Fix Roasted Garlic And Herb Potato Chips

Heat ‘Em. Spice ‘Em. Eat ‘Em.

It’s literally that easy to make these quick fix roasted garlic and herb potato chips. The seasoning comes from fine folks over at Weber. I know I can trust them. I own over 15 Weber grills. I’ve got a pantry full of Weber sauces and seasonings. They don’t mess around. This seasoning proves it. It’s full of garlic flavor. And delicious herbs. The chips taste great. You can see the seasoning. And the cool part is I can add a little or a lot. I’m in control here.

Also try some quick fix rotisserie chicken-seasoned potato chips. Oh yes, they’re different. And they’re great!

Quick Fix Roasted Garlic And Herb Potato Chips
Print Pin
5 from 1 vote

Quick Fix Roasted Garlic And Herb Potato Chips

The solution to boring potato chips.
Course Snack
Cuisine American
Keyword potato chips, quick fix
Prep Time 15 minutes
Cook Time 5 minutes
Servings 4
Calories 452kcal

Ingredients

Instructions

  • Preheat your oven to 275 F.
  • Spread chips out onto a baking sheet. Bake for 5 minutes. You should see that the oils in the chips have come to the surface.
  • Gently transfer chips to a large bowl and sprinkle with the seasoning. Use a spatula to carefully stir to coat.
  • Serve immediately.

Notes

Be gentle when stirring to avoid breaking the chips.

Nutrition

Calories: 452kcal | Carbohydrates: 46g | Protein: 5g | Fat: 29g | Saturated Fat: 3g | Polyunsaturated Fat: 7g | Monounsaturated Fat: 16g | Trans Fat: 1g | Sodium: 448mg | Potassium: 1020mg | Fiber: 3g | Sugar: 1g | Vitamin C: 18mg | Calcium: 18mg | Iron: 1mg

Nutritional values are approximate.

Smoked Hazelnut Butter

When I first came across the idea of using smoked hazelnuts in butter I knew exactly what I was going to use it for: baked sweet potatoes. I love sweet potatoes, and baking them like Russets is one of my favorite ways to serve them. Crunchy skin and creamy insides, they make for something different than the ‘usual’ baked potato side dish.

Smoked Hazelnut Butter

Great Crunch And Flavor

The smoked nuts add a nice light smoky flavor, and a little crunch. I often serve sweet potatoes with roasted pecans. The smoked hazelnuts are different than pecans. They are also great right off the smoker as a snack. Well, let them cool off a bit first of course.

I leave it up to you to decide how many smoked hazelnuts you want to add to the butter. I still wanted to taste the butter, so I didn’t overwhelm it with the nuts. I also added a few good sprinkles of Gorgonzola to my baked sweet potato. It was a great dish.

I used my Weber Smoker when I smoked the hazelnuts.

Smoked Hazelnut Butter
Print Pin
5 from 1 vote

Smoked Hazelnut Butter

When I first came across the idea of using smoked hazelnuts in butter I knew exactly what I was going to use it for: baked sweet potatoes.
Course Sauce
Cuisine American
Keyword butter, smoked
Prep Time 10 minutes
Total Time 10 minutes
Servings 1 cup
Calories 1035kcal

Equipment

Ingredients

Instructions

  • Place the nuts into a blender or chopper and pulse until the desired texture is achieved. I like mine pretty fine, but you may want more of a crunch.
  • Add butter and pulse. If too thick, add a little oil and pulse a few more times.
  • Season with salt and pulse a few more times.

Notes

Store in an airtight container in the fridge until ready to use.

Nutrition

Calories: 1035kcal | Carbohydrates: 42g | Protein: 33g | Fat: 88g | Saturated Fat: 14g | Cholesterol: 50mg | Sodium: 476mg | Potassium: 1428mg | Fiber: 12g | Sugar: 27g | Vitamin A: 772IU | Vitamin C: 8mg | Calcium: 658mg | Iron: 6mg

Nutritional values are approximate.
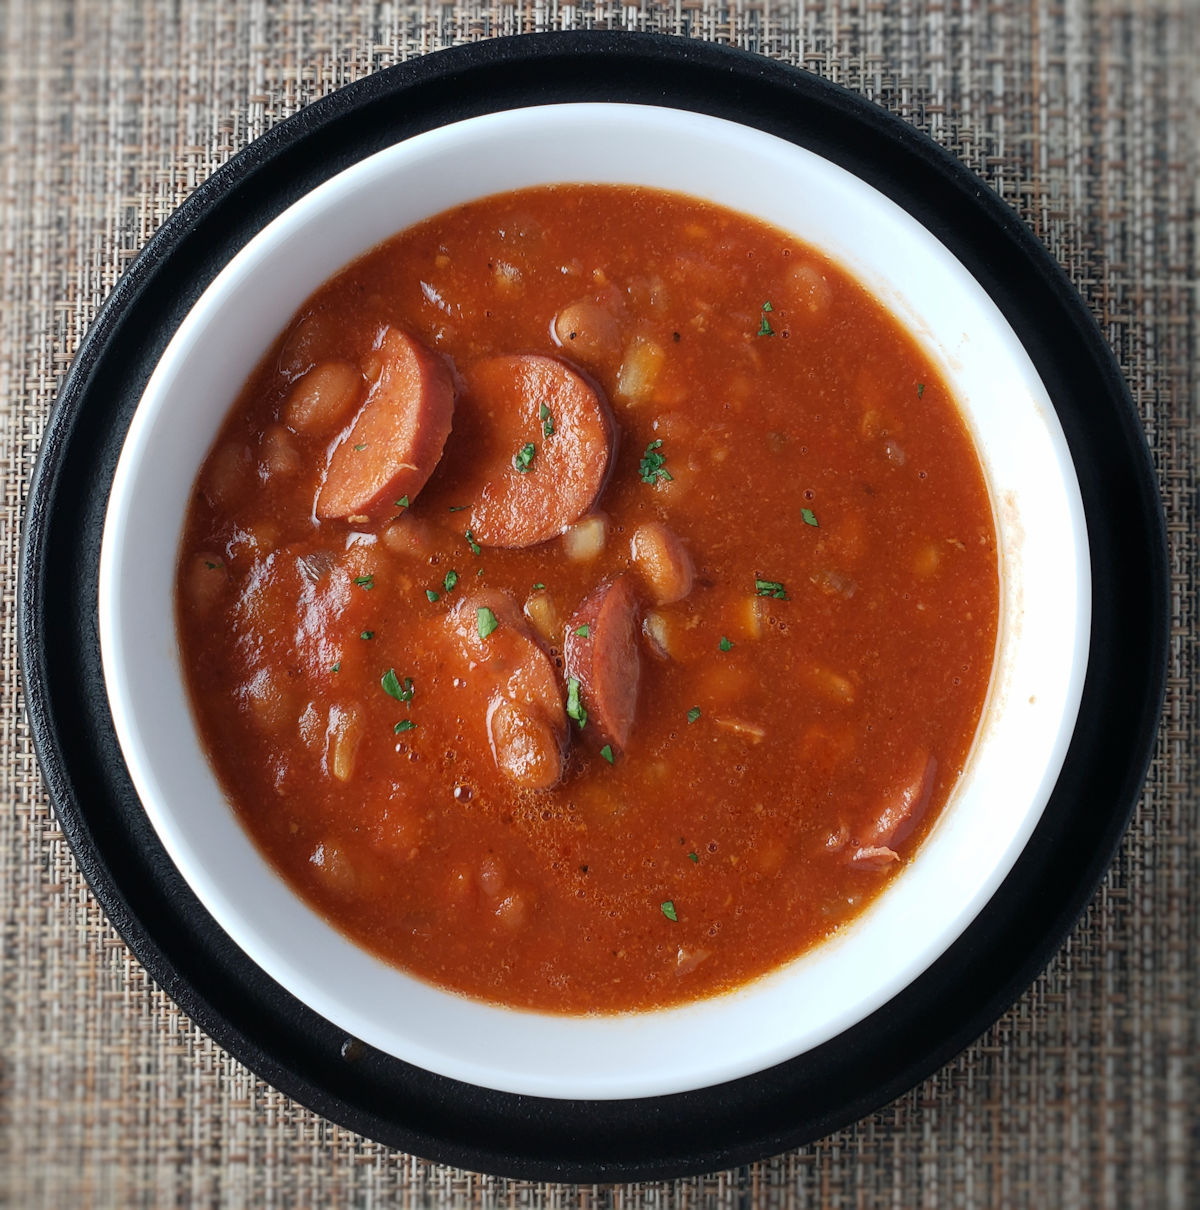
Stove Top Stuffing Meatloaf

This is the world’s easiest, tastiest meatloaf. Stove Top stuffing meatloaf is our absolute go-to dish when we’re hankerin’ for some good ole comfort food. Hot out of the oven, or leftover and served as a sandwich, it doesn’t matter. This is always on the top of our list. As a bonus, it’s easy to keep all of the ingredients on hand. We can make dinner without a lot of planning ahead or fuss.

Stove Top Stuffing Meatloaf

Picking Your Stuffing

There are a lot of varieties of Stove Top Stuffing mix out there. We really like the chicken-flavored one in this Stove Top Stuffing meatloaf. The stuffing adds the best flavor to the meatloaf. And when you’re in a rush, grabbing that box of mix is sure quicker and easier than making it yourself from scratch.

Nothing Fancy

Yeah, I know. It’s easy and it ain’t fancy. But this sure hit the spot.

I always make extra gravy. I’m a gravy-aholic. There’s nothing worse than not having enough gravy.

Check out my list of my favorite meatloaf recipes!

Stove Top Stuffing Meatloaf
Print Pin
5 from 1 vote

Stove Top Stuffing Meatloaf

The stuffing adds the best flavor to the meatloaf.
Course Main
Cuisine American
Keyword meatloaf
Prep Time 15 minutes
Cook Time 1 hour
Servings 8
Calories 316kcal

Ingredients

  • 1 package Stove Top stuffing I used chicken-flavored
  • 1 cup hot water
  • 2 packages brown gravy mix or 3, if you want extra gravy for sides such as mashed potatoes
  • 1 ½ pounds ground beef
  • 1 cup cold water
  • 2 large eggs beaten

Instructions

  • Preheat your oven to 350 F. Make the meatloaf while it's warming up.
  • Empty the stuffing mix into a medium-sized bowl. Pour the hot water over the top and stir lightly. Let sit for 5 minutes to absorb the water.
  • In another medium-sized bowl combine 1 package of the brown gravy and the cold water. Stir until the mix is dissolved.
  • Add the ground beef and beaten egg. Using your hands, mix well.
  • Add the stuffing mix to the meat mixture and combine well. Make sure you get the stuffing distributed evenly throughout.
  • Line a deep baking dish with foil or spray lightly with cooking spray.
  • Add the meat mixture to the pan and form into a loaf.
  • Bake 45-55 minutes or until no longer pink and the internal temperature reaches 160 F. Remove from the oven and let rest 5 minutes.
  • Prepare the other package of gravy per package instructions.
  • Slice meatloaf and serve with the gravy.

Notes

Fantastic served with mashed potatoes. Or French fries.

Nutrition

Calories: 316kcal | Carbohydrates: 16g | Protein: 19g | Fat: 19g | Saturated Fat: 7g | Polyunsaturated Fat: 1g | Monounsaturated Fat: 8g | Trans Fat: 1g | Cholesterol: 107mg | Sodium: 375mg | Potassium: 299mg | Fiber: 1g | Sugar: 2g | Vitamin A: 68IU | Calcium: 43mg | Iron: 3mg

Nutritional values are approximate.
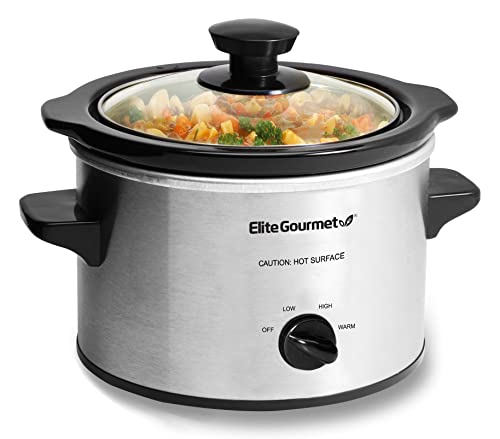
Rotisserie Chicken-Seasoned Shake’N Bake Pork Chops

One of my favorite things to make is baked pork chops. As a kid, Shake’N Bake was often a go-to dinner and it still is for me to this day. But, I admit, I like to stir things up a bit by making my own mix. I like to make all sorts of different flavors. I was walking into the grocery store the other day and of course they make sure that I’m instantly surrounded by the aroma coming from the rotisserie chicken roasters. However, my first thought wasn’t to go snag a chicken. Instead, it was “Oh, I gotta make rotisserie chicken-seasoned Shake’N Bake pork chops”!

Rotisserie Chicken-Seasoned Shake'N Bake Pork Chops

Wonderfully Delicious

Indeed, these pork chops taste just like what you’d expect. Yes, you can use this mix on chicken. But me, I love baked pork chops even more so that’s what I made! These rotisserie chicken-seasoned Shake’N Bake pork chops really hit the spot. I made these three times in one week that’s how much I love this mix!

Also try my chipotle shake’n bake on pork chops. Or chicken.

Rotisserie Chicken-Seasoned Shake'N Bake Pork Chops
Print Pin
5 from 1 vote

Rotisserie Chicken-Seasoned Shake’N Bake Pork Chops

I was blown away by how much I loved this rotisserie chicken-seasoned Shake’n Bake mix on pork chops (I’m sure it’d rock big time on chicken too!).
Course Seasoning
Cuisine American
Keyword baked, pork chops
Prep Time 5 minutes
Total Time 5 minutes
Servings 4 cups
Calories 466kcal
Author Mike

Ingredients

Curry Shake’N Bake

Instructions

Curry Shake’N Bake

  • Combine the dry ingredients in a bowl.
  • Add the oil and stir until the lumps are all gone.

For pork chops

  • Preheat oven to 425 F.
  • Rinse chops and pat dry.
  • Working in batches, transfer chops to a resealable bag.
  • Add Shake'n Bake mix.
  • Seal and shake to coat chops.
  • Shake off excess coating and transfer chops to a foil-lined baking sheet.
  • Bake for 20-25 minutes or until done.

For chicken

  • Preheat oven to 400 F.
  • Working in batches, transfer chicken pieces to a resealable bag.
  • Add Shake'n Bake mix.
  • Seal and shake to coat chicken.
  • Shake off excess coating and transfer chicken to a foil-lined baking sheet.
  • Bake for 40-45 minutes for bone-in chicken or 20 minutes for boneless chicken until done.

Notes

Store the seasoning mix in an air-right container for up to 2 months until ready to use.

Nutrition

Calories: 466kcal | Carbohydrates: 65g | Protein: 12g | Fat: 18g | Saturated Fat: 12g | Sodium: 2340mg | Potassium: 261mg | Fiber: 5g | Sugar: 8g | Vitamin A: 258IU | Vitamin C: 6mg | Calcium: 177mg | Iron: 5mg

Nutritional values are approximate.