Mushroom and Onion Baked Potatoes

Loaded baked potatoes are something I’ve had a love affair with ever since my college days. They were a great way to get a cheap, and still delicious, dinner. Yep, I love a baked potato as a meal. I don’t need anything else. These mushroom and onion baked potatoes are great as either a main dish or a side. They aren’t shy on the mushrooms. You won’t go searching for them. You’re going to get plenty in each and every bite. Cooked perfectly, this is a favorite potato of mine!

Mushroom and Onion Baked Potatoes

The Topping Full Of Goodness!

The bigger the potatoes you use for your mushroom and onion baked potatoes, the more of the yummy mushroom and onion mixture you can pack inside. But, on the off chance you end up with leftover stuffing, you cannot go wrong with using it as a topping for grilled burgers. It’s fantastic on burgers. And it’s great in omelets too! So make extra, you’ll love it!

Whether you cook your potatoes in the oven or on a grill, potato nails help ensure they cook nice and evenly! And they look kinda cool too!

Also try my cheesy broccoli baked potatoes.

Mushroom and Onion Baked Potatoes
Print Pin
5 from 1 vote

Mushroom and Onion Baked Potatoes

Make extra mushroom mixture for topping burgers!
Course Main or Side
Cuisine American
Keyword baked, potatoes
Prep Time 15 minutes
Cook Time 1 hour
Servings 4
Calories 360kcal

Equipment

Ingredients

For the potatoes

For the mushroom mixture

Instructions

For the potatoes

  • Preheat oven to 400 F
  • Pierce each potato 4 times with a sharp knife.
  • Brush potatoes with oil.
  • Sprinkle some salt onto a plate and roll the potatoes in the salt.
  • Place potatoes directly on the oven center rack. You might want to put a baking sheet lined with foil beneath them to catch any drippings.
  • Bake until potatoes are done (210 F internal temperature, or tender all the way through when poked with a knife), 40-60 minutes depending on their size. You can also test for doneness by squeezing the potatoes (with potholders on). If they give easily, they are done.
  • When ready to serve, poke the tops of the potatoes with a fork in cross pattern (i.e. from edge-to-edge and top-to-bottom). Pretend you are tracing the lines you would make if cutting the potatoes with a knife. Then, grab the potatoes from the ends and squeeze. The potatoes will open up perfectly. Fluff with the fork before adding the mushroom mixture.
  • Top with cheese if desired.
  • Place the potatoes under the broiler for a minute or two if you want to melt and toast the cheese.

For the mushroom mixture

  • Melt butter in a large skillet over medium-high heat.
  • Stir in the Worcestershire sauce.
  • Add the mushrooms and cook until they start to soften, about 5 minutes, stirring gently on occasion.
  • Add the onions and stir.
  • Cook another 5 minutes, stirring gently on occasion, until the onions are just softened.
  • Reduce heat to low.
  • Add the garlic and season with salt and pepper, to taste.
  • Stir and cook another 2-3 minutes or until the garlic is cooked.
  • Remove from heat until ready to use.

Notes

The mushroom and onion mixture is also great on hamburgers!

Nutrition

Calories: 360kcal | Carbohydrates: 80g | Protein: 13g | Fat: 1g | Saturated Fat: 1g | Polyunsaturated Fat: 1g | Monounsaturated Fat: 1g | Cholesterol: 1mg | Sodium: 153mg | Potassium: 2090mg | Fiber: 7g | Sugar: 10g | Vitamin A: 30IU | Vitamin C: 29mg | Calcium: 94mg | Iron: 4mg

Nutritional values are approximate.
Easy Asian Slaw

I was in need of a good side dish for a batch of my orange chicken. The chicken is crazy good, with a thick, slightly sweet sauce that has just a slight kick to it. This easy Asian slaw was the perfect side. Crunchy with a hint of sesame oil, we both loved it. The red onion added a great little heat. I used a bag of pre-made slaw mix, but you could go thru the trouble of shredding your own cabbage too. Either way, you can’t lose with this slaw.

Easy Asian Slaw

Soak Time

The original recipe for this easy Asian slaw stresses that you shouldn’t add the dressing until you’re ready to serve it. We actually enjoyed it even more the second day, dressing it completely the first day. The cabbage and onion soaked up the delicious flavors from the dressing. I’ve made this several times and I prefer it that way. I think the ingredients hold up to the sauce over several days without getting soggy. Otherwise I’d leave the sauce out until I’m just ready to serve it.

Also try some Tub’s coal miner slaw.

Easy Asian Slaw
Print Pin
5 from 1 vote

Easy Asian Slaw

The original recipe for this easy Asian slaw stresses that you shouldn't add the dressing until you're ready to serve it.
Course Salad
Cuisine Asian
Keyword Asian, cole slaw
Prep Time 15 minutes
Cook Time 5 minutes
Total Time 20 minutes
Servings 12
Calories 463kcal

Ingredients

For the slaw

  • 1 bunch green onions sliced thin
  • 32 ounces coleslaw mix with carrots if desired
  • 1 small red onion sliced thin

For the dressing

Instructions

For the slaw

  • Add the green onions to a large bowl.
  • Add the slaw mix and red onion and toss to combine.

For the dressing

  • Whisk all dressing ingredients together.
  • Pour over the slaw and toss to coat.
  • Serve immediately.

Notes

Always give the slaw a good stir or toss before serving.

Nutrition

Calories: 463kcal | Carbohydrates: 100g | Protein: 21g | Fat: 3g | Saturated Fat: 1g | Polyunsaturated Fat: 1g | Monounsaturated Fat: 1g | Sodium: 5748mg | Potassium: 2091mg | Fiber: 27g | Sugar: 60g | Vitamin A: 1145IU | Vitamin C: 369mg | Calcium: 494mg | Iron: 7mg

Nutritional values are approximate.

Sausage Breakfast Sandwich using the Cuisinart Griddler

Ever have a sausage breakfast sandwich from your local fast food joint and end up feeling disappointed? Barely any sausage. Funny looking eggs. Tiny little English muffin. Well, folks, now’s the time to fire up your Cuisinart Griddler and make a proper sausage breakfast sandwich. In no time at all. Tons of sausage. Melty cheese. Perfect egg. And a fresh, toasted muffin. This is the way to start out the day! (Although I admit, I have made these for dinner on more than one occasion!)

Feel free to substitute bagels for the English muffins if you want. Yum.

Sausage Breakfast Sandwich using the Cuisinart Griddler

Load Up Your Griddler

I wrote the recipe below for sausage breakfast sandwich using the Cuisinart Griddler for 2 sandwiches. You can actually make 4 at a time on the Griddler. It might be a bit crowded, but it’s possible. You can also save time by toasting the muffins in a toaster or in an oven instead of using the Griddler. And you can save more time by making the eggs in a skillet while the sausage is cooking. But don’t cook the sausage anywhere but on the Griddler. The patties get yummy crispy edges. You want that slightly crunchy edge. They come out great!

Also try my farmhouse breakfast potatoes.

Sausage Breakfast Sandwich using the Cuisinart Griddler
Print Pin
5 from 1 vote

Sausage Breakfast Sandwich using the Cuisinart Griddler

Well, folks, now’s the time to fire up your Cuisinart Griddler and make a proper sausage breakfast sandwich. In no time at all. Tons of sausage. Melty cheese. Perfect egg. And a fresh, toasted muffin.
Course Breakfast
Cuisine American
Keyword breakfast, Cuisinart, Griddler, sandwich, sausage
Prep Time 5 minutes
Cook Time 30 minutes
Servings 2
Calories 628kcal

Ingredients

  • ½ pound breakfast sausage
  • 2 English muffins split
  • 2 large eggs
  • 2 slices American cheese or any good melting cheese
  • butter

Instructions

  • Heat up your Griddler using the griddle plates. Set the Griddle dial to 425 F and the Selector to Griddle. Open the Griddler with the plates flat, side-by-side.
  • Open the tube of breakfast sausage. Cut the sausage into 2 1/4 pound pieces (I cut the log in half, then each half into half and use 2 slices. I save the other 2 for more sandwiches at a later time). Place the pieces into a resealable bag or on cutting board covered with a piece of wax paper. Use a meat mallet to flatten the sausage into large thin patties. You want them to be big enough to cover the muffins.
  • Transfer the sausage patties to the lower Griddler plate. Close the lid to cook them and keep them flat.
  • You want to cook the patties until done, when they reach 165 F. I like a little crunchy edges on mine. Remove and place in a warm oven or cover to keep warm.
  • Spread a little butter on each muffin half. Transfer to the Griddler butter side down and toast until nice and brown and golden. Remove and place in a warm oven or cover to keep warm.
  • Spread a little butter out onto the lower griddle and crack the eggs onto the plates. Cook until done, flipping once. Make sure that the yolk is set or close to it.
  • Assemble the sandwiches by placing the sausage patties onto the muffin bottoms. Add the cheese, egg and muffin top and serve.

Notes

You can actually make 4 of these sandwiches at once on the Griddler. It’ll get a big crowded, but you can do it. Read my post for more info.

Nutrition

Calories: 628kcal | Carbohydrates: 27g | Protein: 32g | Fat: 43g | Saturated Fat: 15g | Trans Fat: 1g | Cholesterol: 289mg | Sodium: 1408mg | Potassium: 453mg | Fiber: 2g | Sugar: 1g | Vitamin A: 554IU | Vitamin C: 1mg | Calcium: 287mg | Iron: 3mg

Nutritional values are approximate.
Quick Fix Turkey Reuben Sandwiches

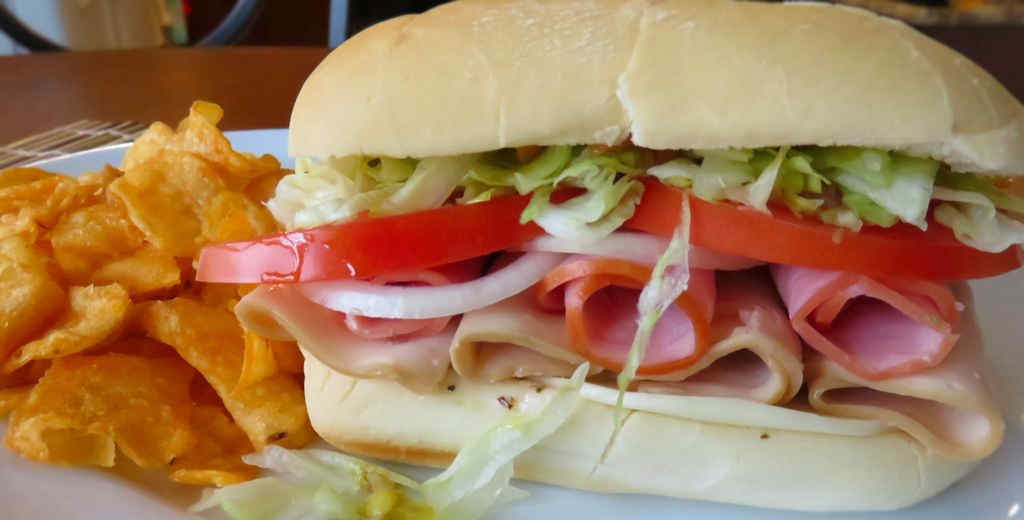
Quick fix turkey Reuben sandwiches changed my mind about what I used to refer to as ‘fake Reubens’. I had a thing against turkey Reubens. Once I ordered a ‘real’ Reuben in a restaurant and they accidentally brought me a turkey one instead. It was one of the worst days of my life. Or so I thought. Well, now I must apologize. I was wrong. I thought no way could a corned beef-less sandwich be anywhere as good as the classic. Well, this is a mighty good sandwich. And it’s crazy easy to make, too. That’s a lot of wins in this little sandwich. Now, I make them regularly.

Quick Fix Turkey Reuben Sandwiches

A Great Reuben Variation Ready In Minutes

I could eat my share of quick fix turkey Reuben sandwiches. And I’d even order one at a restaurant. Those would have roasted turkey, and if you have that on hand by all means put some on this sandwich. I used thin-sliced sandwich meat. Thick-sliced would work just as well. No matter what, it’s quick, easy and delicious!

For me, just personally, I am a firm believer that every Reuben must be served with a dill pickle spear. An ice cold one at that. With plenty of crunchy.

Also try my quick fix turkey Manhattan.

Quick Fix Turkey Reuben Sandwiches
Print Pin
5 from 1 vote

Quick Fix Turkey Reuben Sandwiches

Use thin- or thick-sliced turkey sandwich meat.
Course Main
Cuisine American
Keyword corned beef, quick fix, sandwich
Prep Time 5 minutes
Cook Time 10 minutes
Servings 2
Calories 494kcal

Equipment

Ingredients

Instructions

  • Heat a large skillet over medium-high heat.
  • Lay the bread slices on a cutting board.
  • Divide the dressing between the slices and spread out evenly on one side of each.
  • A Swiss cheese and turkey to two of the slices.
  • Top with the kraut.
  • Add top slices of bread to make sandwiches.
  • Spread 1/2 tablespoon of the butter on the tops of each sandwich.
  • Transfer the sandwiches to the skillet, bread-side down (that is, flip the sandwich as you move it from the cutting board to the skillet).
  • Spread remaining butter over the tops of the sandwiches as they cook.
  • Once the bottoms are done (golden brown and crispy) and the cheese has started to melt, carefully flip the sandwiches.
  • Cook another 3-5 minutes or until that side is golden brown and crispy.
  • Remove from skillet and place on cutting board.
  • Cut each in half and serve.

Notes

Also great made using Russian dressing.

Nutrition

Calories: 494kcal | Carbohydrates: 41g | Protein: 19g | Fat: 28g | Saturated Fat: 9g | Polyunsaturated Fat: 9g | Monounsaturated Fat: 7g | Cholesterol: 52mg | Sodium: 1386mg | Potassium: 305mg | Fiber: 5g | Sugar: 11g | Vitamin A: 406IU | Vitamin C: 5mg | Calcium: 387mg | Iron: 3mg

Nutritional values are approximate.

Quick Fix Turkey Manhattan

Sometimes I just want a quick turkey meal. I might use leftover turkey, or I might just toss a turkey breast into the oven. Jennie-O makes a frozen oven-ready turkey breast that you just bake for about 90 minutes. No thawing, brining, basting. Nothing. You don’t even have to take it out of the bag (well, until it’s cooked that is). Everything else is already done for you. You don’t even really have to think about it! Add some leftover mashed potatoes and gravy and I’m good-to-go. Say hello to my quick fix turkey Manhattan!

Quick Fix Turkey Manhattan

Perfect For Leftover Turkey

If you decide to make an oven-ready Jennie-O turkey breast you’ll have plenty of leftovers to make more than these quick fix turkey Manhattan sandwiches. I have an awesome copycat of Stove Top chicken stuffing that is the perfect side dish for turkey. But, to be truly ‘quick fix’, you’ll have to use the stuff out of the box! That’s why it’s called quick fix!

Also try my quick fix turkey Reuben.

Quick Fix Turkey Manhattan
Print Pin
5 from 1 vote

Quick Fix Turkey Manhattan

What leftover turkey was made for.
Course Main
Cuisine American
Keyword sandwich, turkey
Prep Time 5 minutes
Cook Time 1 hour 30 minutes
Total Time 1 hour 35 minutes
Servings 8 servings
Calories 239kcal
Author Mike

Ingredients

Instructions

  • Cook the turkey breast per package instructions. Slice.
  • Top bread slices with turkey, mashed potatoes, and loads of gravy.
  • Serve.

Notes

Also great with plain old white bread!

Nutrition

Calories: 239kcal | Carbohydrates: 17g | Protein: 24g | Fat: 9g | Saturated Fat: 2g | Trans Fat: 1g | Cholesterol: 53mg | Sodium: 410mg | Potassium: 236mg | Fiber: 1g | Sugar: 2g | Vitamin A: 20IU | Calcium: 14mg | Iron: 7mg

Nutritional values are approximate.
Pimento Cheese Fondue

Oh yes! Give me a bowl of pimento cheese fondue and stand back! Smooth, creamy, cheesiness, loaded with pimentos. Pimentos in every bite. Pimentos everywhere. Perfect for dipping just about anything that can be dipped. I found celery to be the perfect combination for this dip. Crackers too. And corn chips. Heck, just about anything you can find is gonna be good in this fondue.

Pimento Cheese Fondue

Makes For A Great Sauce, Too

Pimento cheese fondue isn’t just for dipping, either. Spread a little on your sandwich bread. Put a big ole dollop on your baked potato. Or use it as a sauce for steamed vegetables, like broccoli or cauliflower.

Yes, I do have a fondue pot. I love it. They get a bad rap. They’re fun!

Don’t mess with that pre-shredded cheese when you make this fondue. Get a grater/shredder and you’ll never regret it!

Also try my cheese fondue mac-and-cheese!

Pimento Cheese Fondue
Print Pin
3.50 from 2 votes

Pimento Cheese Fondue

Oh yes! Give me a bowl of pimento cheese fondue and stand back! Smooth, creamy, cheesiness, loaded with pimentos. Pimentos in every bite. Perfect for dipping just about anything that can be dipped.
Course Appetizer
Cuisine American
Keyword dip, pimento, pimiento
Prep Time 10 minutes
Cook Time 10 minutes
Servings 16
Calories 147kcal

Equipment

Ingredients

Instructions

  • Combine Cheddar, cream cheese, mayonnaise and heavy cream in a medium saucepan over medium-low heat.
  • Stir until melted, about 4 minutes.
  • Stir in pimientos, pickle relish, onion powder, garlic salt, hot sauce, if using, and some black pepper.
  • Transfer to a serving dish and serve with crackers or favorite dippers.

Notes

You can transfer the mixture to a fondue pot or small slow cooker set to low to keep warm.

Nutrition

Calories: 147kcal | Carbohydrates: 2g | Protein: 5g | Fat: 14g | Saturated Fat: 7g | Trans Fat: 1g | Cholesterol: 37mg | Sodium: 246mg | Potassium: 50mg | Fiber: 1g | Sugar: 1g | Vitamin A: 600IU | Vitamin C: 6mg | Calcium: 120mg | Iron: 1mg

Nutritional values are approximate.
Roasted Garlic Parmesan Potatoes on the Char-Broil Big Easy

Note: This recipe was developed using the Char-Broil Big Easy Oil-Less Fryer. If you are cooking using the Char-Broil Smoker-Roaster Grill you should cook with the lid open and the temperature set to High. You might also need to adjust the cooking time.

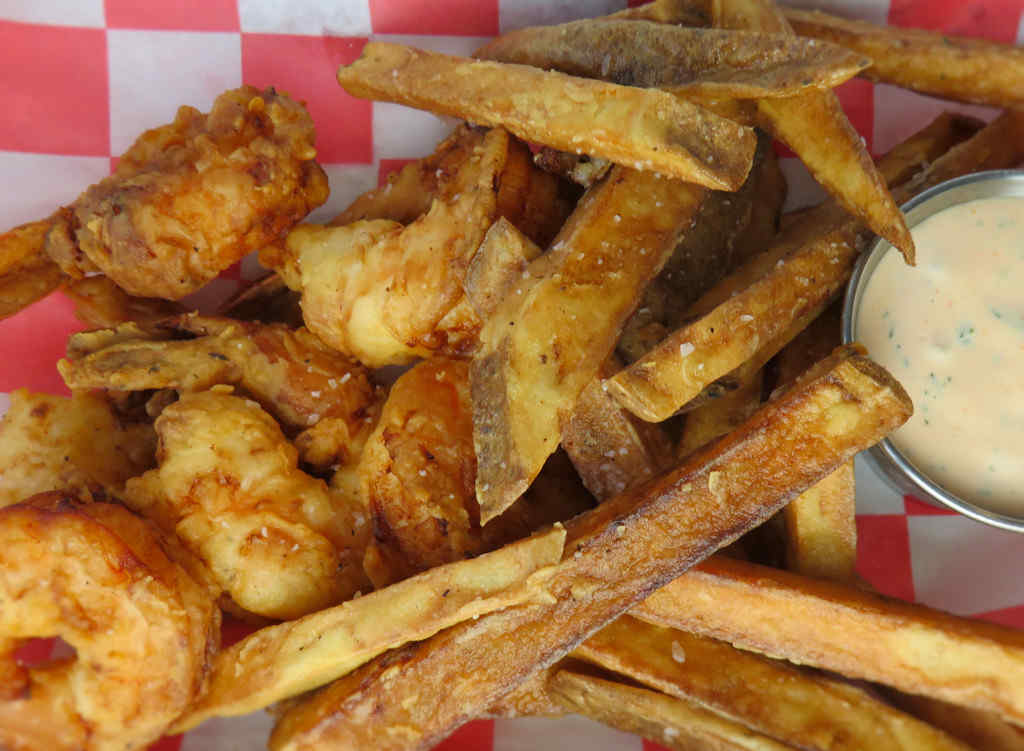
This is one of the best side dishes we’ve made. Roasted garlic Parmesan potatoes on the Char-Broil Big Easy was crazy easy to make, used simple ingredients, yet came out absolutely delicious. The idea for these roasted garlic Parmesan potatoes came to me after making roasted mushrooms with the same sauce. The sauce is so good I had to find other dishes that would use it, and here it is!

Roasted Garlic Parmesan Potatoes on the Char-Broil Big Easy

Super Easy. Super Delicious.

I like to partially cook my potatoes first before placing them into the Char-Broil Big Easy. It makes this dish easier and quicker. It also helps ensure that the potatoes in this roasted garlic Parmesan potatoes dish on the Char-Broil Big Easy are cooked evenly, and that’s important.

The sauce is amazing, and has quickly become one of our favorites.

You have to get a bunk bed basket for your Big Easy. Or get a two. You can get two in the cooker at once, but it takes some gymnastics. It’s the quickest way to double or triple the cooking area on your fryer.

Love your Big Easy as much I love mine? Check out my Big Easy Add-Ons page and my free Big Easy eCookbook!

It’s always a good idea to keep a few spare grease trays on hand for your Char-Broil Big Easy.

Also try my garlic butter potatoes made on the Big Easy.

Roasted Garlic Parmesan Potatoes on the Char-Broil Big Easy
Print Pin
5 from 1 vote

Roasted Garlic Parmesan Potatoes on the Char-Broil Big Easy

The sauce is amazing, and has quickly become one of our favorites.
Course Side
Cuisine American
Keyword Big Easy, Char-Broil, garlic Parmesan, potatoes
Prep Time 15 minutes
Cook Time 30 minutes
Servings 8
Calories 280kcal

Equipment

Ingredients

For the potatoes

  • 1 ½ pounds small potatoes halved
  • 4 small mushrooms sliced
  • 2 green onions sliced

For the sauce

Instructions

For the sauce

  • Melt the butter in a large skillet over medium heat.
  • Add the garlic and Italian seasoning along with a few pinches each of salt and pepper. Stir and cook for 1 minute.
  • Whisk in the flour. Continue whisking while cooking for another 1 minute.
  • Reduce heat to low and whisk in the vegetable broth.
  • Turn the heat back up to medium and bring the mix to a slight simmer. Continue whisking as the sauce thickens, 2-3 minutes.
  • Add the cream, cheese and parsley and whisk until the cheese melts and the sauce becomes creamy and smooth.
  • Reduce heat to low and stir often until the sauce is as thick as you want it. If you get it too thick add a bit more broth or cream and stir.
  • Season to taste with salt and pepper, stir, and keep warm until ready to use.

For the potatoes

  • Fire up your Big Easy.
  • Place the potatoes in a microwave-safe bowl.
  • Microwave on medium high, stirring occasionally, until the potatoes are just tender.
  • Transfer the potatoes to a large bowl.
  • Gently stir in the sauce.
  • Divide the potatoes between the two pans. Place one pan in the bottom of the Big Easy basket. Place the other in a bunk bed basket and transfer it to the Big Easy basket.
  • Lower the basket into the Big Easy. Cook until the potatoes start to turn golden brown and the sauce begins to bubble.
  • Carefully remove the pans from the Big Easy basket.
  • Stir and serve.

Notes

The sauce is great on pretty much anything.

Nutrition

Calories: 280kcal | Carbohydrates: 22g | Protein: 13g | Fat: 16g | Saturated Fat: 10g | Polyunsaturated Fat: 1g | Monounsaturated Fat: 4g | Cholesterol: 45mg | Sodium: 710mg | Potassium: 459mg | Fiber: 2g | Sugar: 3g | Vitamin A: 769IU | Vitamin C: 19mg | Calcium: 383mg | Iron: 1mg

Nutritional values are approximate.
Creamy Nacho Cheese Sauce

Oh, me. What a lovely creamy nacho cheese sauce this is. So smooth. So cheesy. It’s absolutely wonderful by itself as a dip for chips. It’s crazy good on nachos. Spooned on burgers. Drizzled on tacos. Anything that needs cheese (which is practically everything) needs this sauce.

Creamy Nacho Cheese Sauce

Nachos Elevated

You can mix this sauce up by using a different cheese or even a mix of cheeses. Just don’t use that pre-shredded stuff. Although it has its uses, this isn’t it. That stuff has a coating that isn’t going to melt well. You’ll end up with a less-than-creamy nacho cheese sauce and that’s just not right.

Feel free to stir in some chopped chives, cooked crumbled bacon, or chopped chipotles in adobo sauce before serving.

This smooth (thanks to evaporated milk), delicious sauce would be great on potato chip nachos.

Creamy Nacho Cheese Sauce
Print Pin
5 from 1 vote

Creamy Nacho Cheese Sauce

Feel free to stir in some chopped chives, cooked crumbled bacon, or chopped chipotles in adobo sauce before serving.
Course Sauce
Cuisine American
Keyword cheese sauce
Prep Time 5 minutes
Cook Time 15 minutes
Servings 8
Calories 177kcal

Equipment

Ingredients

Instructions

  • Empty the can of evaporated milk into a medium saucepan over medium-high heat.
  • Whisk in the cornstarch. Bring to a simmer, whisking often.
  • Continue simmering and whisking until the sauce starts to thicken and is the consistency of a thin clam chowder.
  • Remove from heat.
  • Add the cheese and stir to melt. If you need, you can briefly the pan to the heat to help melt it.
  • Add the hot sauce, if using, and stir.

Notes

Great for dipping chips!

Nutrition

Calories: 177kcal | Carbohydrates: 6g | Protein: 9g | Fat: 13g | Saturated Fat: 7g | Polyunsaturated Fat: 0.4g | Monounsaturated Fat: 3g | Cholesterol: 41mg | Sodium: 256mg | Potassium: 152mg | Fiber: 0.01g | Sugar: 4g | Vitamin A: 386IU | Vitamin C: 2mg | Calcium: 311mg | Iron: 0.1mg

Nutritional values are approximate.
Garlic Butter Potatoes on the Char-Broil Big Easy

Note: This recipe was developed using the Char-Broil Big Easy Oil-Less Fryer. If you are cooking using the Char-Broil Smoker-Roaster Grill you should cook with the lid open and the temperature set to High. You might also need to adjust the cooking time.

These garlic butter potatoes on the Char-Broil Big Easy were made in just minutes and made for the perfect side dish. The potatoes are tender, soft inside. With just a slight crunchy exterior. Oh, and the garlic butter sauce! Oh my goodness! The sauce is so creamy good. I just love garlic! You just want to swirl the potatoes around in the sauce. Get them good and coated. Then…. Boom! Devour!

Garlic Butter Potatoes on the Char-Broil Big Easy

A Bunk Bed Basket Means More!

You can fit a single disposable pan (for 3/4 pounds of potatoes) in the basket that comes with your Big Easy. Get a bunk bed basket and you can do a full 1 1/2 pounds of potatoes at once. You have to get a bunk bed for your Char-Broil Big Easy to make great side dishes like these garlic butter potatoes. It also gives you the ability to cook a side dish on one level and a main dish on another!

It’s always a good idea to keep a few spare grease trays on hand for your Char-Broil Big Easy.

Love your Big Easy as much I love mine? Check out my Big Easy Add-Ons page and my free Big Easy eCookbook!

Garlic Butter Potatoes on the Char-Broil Big Easy
Print Pin
5 from 1 vote

Garlic Butter Potatoes on the Char-Broil Big Easy

Although you can cook the potatoes in the Big Easy from start to finish, I recommend using a microwave to par-cook them first.
Course Side
Cuisine American
Keyword Big Easy, Char-Broil, garlicky, potatoes
Prep Time 5 minutes
Cook Time 15 minutes
Servings 6
Calories 193kcal

Ingredients

Instructions

  • Fire up your Big Easy. Meanwhile, prepare the potatoes.
  • Place the potatoes into a microwave-safe bowl.
  • Microwave for 3 minutes on high. Stir and check for doneness.
  • Microwave another 2 minutes (or longer if needed) until just tender. Do not over-cook, they need to have a little bite to them.
  • In a small bowl, stir together the melted butter, oil, garlic, salt and pepper.
  • Pour over the potatoes and stir to coat completely.
  • Divide the potatoes between two disposable pans and transfer the pans to a Big Easy basket fitted with a Bunk Bed so you can cook both pans at the same time.
  • Place the basket into the Big Easy and cook for 10 minutes or until the potatoes start to turn golden brown around the edges.
  • Stir the potatoes.
  • Divide the mozzarella and Parmesan between the two pans and return to the Big Easy for another 3-5 minutes or until the cheese is melted and starts to get golden brown.
  • Carefully remove the pans from the Big Easy.
  • Garnish with parsley and serve.

Notes

Be careful removing the potatoes from the Big Easy. Make sure you support the pan from underneath.

Nutrition

Calories: 193kcal | Carbohydrates: 22g | Protein: 10g | Fat: 8g | Saturated Fat: 4g | Polyunsaturated Fat: 1g | Monounsaturated Fat: 3g | Cholesterol: 22mg | Sodium: 352mg | Potassium: 528mg | Fiber: 3g | Sugar: 2g | Vitamin A: 343IU | Vitamin C: 25mg | Calcium: 225mg | Iron: 1mg

Nutritional values are approximate.
Also try my Swiss scalloped potatoes and my roasted garlic Parmesan potatoes, also made on the Big Easy.

Turkey Breast Roast using Sous Vide

Butterball sells a 3 pound turkey breast roast that you can find in your grocery’s frozen section. They’re very convenient and tasty. I usually roast mine, which comes out great, but not always as tender and juicy as I’d hoped. Well, sous vide to the rescue and then some! In no time at all, sous vide cooks up the turkey roast just flat out perfectly. Tasty. Juicy. Tender. You cannot beat it, whether you slice it thick to serve with gravy and mashed potatoes ala Thanksgiving or slice it thin for (out of this world!) sandwiches.

Turkey Breast Roast using Sous Vide

A Few Tips

There are a few key (but simple) things to keep in mind when making turkey breast roast using sous vide.

First, you have to remove the gravy packet. It doesn’t go into the sous vide. Now, removing it is easy if the turkey breast roast is defrosted, but if it’s frozen you’ll have to run it under cold water for a few minutes until you can pull it away.

Second, keep the turkey in the mesh bag that it comes in until you are ready to sear it at the end. Remove it carefully once the breast is sous vide or you’ll end up removing a lot of the seasoning.

Last, season the roast liberally. If you think you put too much on you probably nailed it perfectly. There’s a lot of turkey that needs to be seasoned. Don’t be shy with it and you’ll get that flavor in every bite.

If you own a smoker, you can skip the searing step and instead place the roast on a smoker for 30 minutes or so to let that great smoke flavor absorb into the turkey.

I use an Anova sous vide cooker. It’s my immersion circulator workhorse!

Also try my sous vide corned beef.

Turkey Breast Roast using Sous Vide
Print Pin
5 from 2 votes

Turkey Breast Roast using Sous Vide

Tasty. Juicy. Tender. You cannot beat it, whether you slice it thick to serve with gravy and mashed potatoes ala Thanksgiving or slice it thin for (out of this world!) sandwiches.
Course Main
Cuisine American
Keyword sous vide, turkey
Prep Time 15 minutes
Cook Time 3 hours
Servings 8
Calories 172kcal

Instructions

  • Set up your immersion circulator for 138 F.
  • Note: Keep the turkey in the mesh packaging until you are ready to sear it.
  • Remove the gravy packet. Note: If using a frozen breast, run briefly under cold water long enough to loosen and remove the gravy packet.
  • Sprinkle the breast with paprika and plenty of the seasoning. Don't be shy with it.
  • Transfer to a bag and vacuum seal.
  • Transfer bag to sous vide setup and cook for 5 hours if frozen, or 3 hours if defrosted.
  • Remove bag from water and cut open, draining off any juices. Remove breast (carefully so it stays intact) from mesh bag.
  • Sear the breast on all sides in a large skillet with a few tablespoons of oil over high heat. Or sear on a hot grill or under a broiler. You'll want to sear for about 1 minute per side.
  • Slice as desired.

Notes

This roast makes for some mighty delicious sandwiches.
I have followed this recipe using a frozen roast and it came out perfectly too! I sous vide mine for 5 hours at 145 F.

Nutrition

Calories: 172kcal | Protein: 37g | Fat: 3g | Saturated Fat: 1g | Trans Fat: 1g | Cholesterol: 92mg | Sodium: 350mg | Potassium: 412mg | Sugar: 1g | Vitamin A: 34IU | Calcium: 24mg | Iron: 1mg

Nutritional values are approximate.