Jalapeno Popper Wontons

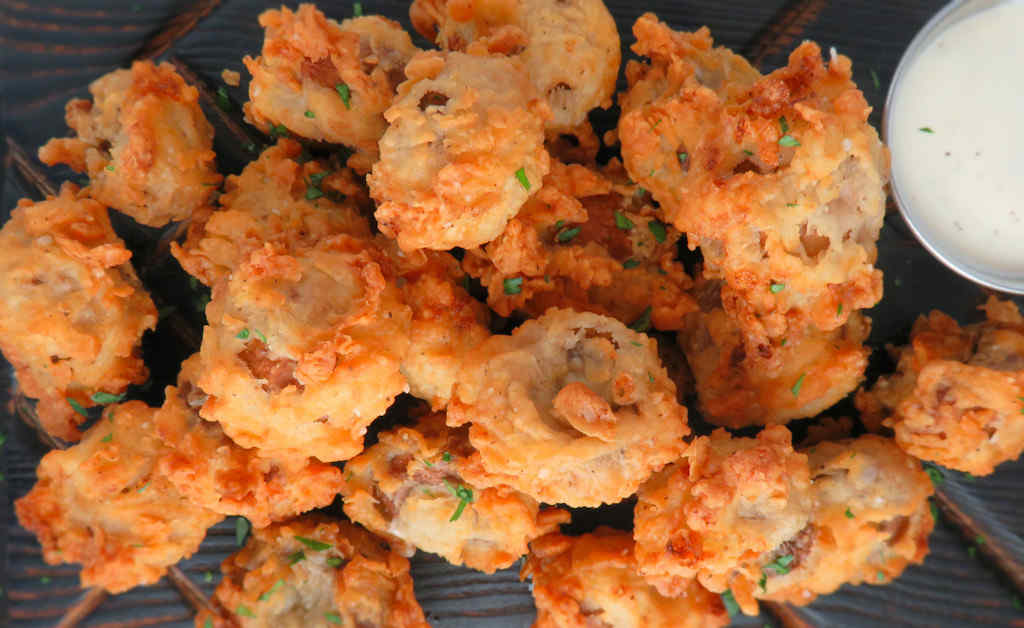
Oh my. It’s probably best that I didn’t count how many of these jalapeno popper wontons I devoured. They just disappear like that. They’re crazy good crunchy, for starters. The filling is creamy and cheesy with just a hint of heat. For dipping I had some sweet chili sauce. Cool Ranch dressing would be great too.

Jalapeno Popper Wontons

Crunchy Flavorful Treats

You can make a whole bunch of jalapeno popper wontons in almost no time at all. You can assemble them hours before, even the day before. Then all you have to do is fry them. Frying doesn’t take long, and fortunately, they don’t tend to stick together in the fryer so you can get quite a few in at once. Just get them good and golden brown and let them drain well before serving.

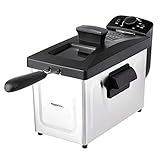
The Presto Fry Daddy is perfect for making smaller batches of food. It only uses a few cups of oil and comes to temperature quickly. Clean-up is easy too!

Also try my cheesy jalapeno poppers.

Jalapeno Popper Wontons
Print Pin
5 from 1 vote

Jalapeno Popper Wontons

You can make a whole bunch of jalapeno popper wontons in almost no time at all. You can assemble them hours before, even the day before.
Course Appetizer
Cuisine American
Keyword jalapeno popper, spicy, wontons
Prep Time 30 minutes
Cook Time 30 minutes
Servings 12
Calories 293kcal

Ingredients

Instructions

  • Combine all but the wrappers and oil in a large bowl.
  • Working in batches, place a wonton wrapper in front of with one corner pointing towards you (in other words, diamond shaped).
  • Spoon a heaping teaspoon of the filling onto the center of the wrapper.
  • Dip a finger in water and run it along all 4 edges of the wonton then fold the bottom corner over the filling and to the top corner.
  • Gently press down on the wrapper to remove any air then press along the edges to seal.
  • Heat a deep fryer filled with oil to 350 F.
  • Working in batches, fry the wonton for 2-3 minutes, flipping once, until golden brown.
  • Remove to a wire rack to drain and cool.
  • Serve immediately with sauces for dipping.

Notes

You can assemble the wontons well in advance and refrigerate until ready to fry. Leftovers (lol, if there are any) can be reheated in the oven and will retain most of their crunchiness.

Nutrition

Calories: 293kcal | Carbohydrates: 20g | Protein: 9g | Fat: 20g | Saturated Fat: 11g | Polyunsaturated Fat: 1g | Monounsaturated Fat: 5g | Cholesterol: 61mg | Sodium: 465mg | Potassium: 136mg | Fiber: 1g | Sugar: 2g | Vitamin A: 732IU | Vitamin C: 6mg | Calcium: 190mg | Iron: 1mg

Nutritional values are approximate.

Farmhouse Breakfast Potatoes

My wife said that these farmhouse breakfast potatoes were almost as good as her mom’s. That’s saying a lot. A whole lot. My wife’s mom was a great cook. Anything that I can make that is even remotely close to being as good as something she made is a major accomplishment. There’s no question, these potatoes are fantastic. They make the perfect breakfast side dish, for sure. And they’d be good for a dinner side too!

Farmhouse Breakfast Potatoes

Potato Perfection

I did change the recipe for these farmhouse breakfast potatoes just a bit from the original version. I found that adding the vegetables to the pan (I like to use a cast iron skillet) too soon in the cooking process can cause them to char a bit more than I wanted. Especially the onions. So I added them a bit later, after the potatoes had already started to get a good crisp on them. The vegetables still came out tender, as I wanted.

I like to make this dish in a large cast iron skillet. Nothing crisps up potatoes like cast iron does.

Also try my sausage breakfast sandwiches made on a Cuisinart Griddler (you can also make them on the stovetop). My homemade corn flakes are great too!

Farmhouse Breakfast Potatoes
Print Pin
5 from 1 vote

Farmhouse Breakfast Potatoes

You can double this recipe for 8 servings, but you'll need a really large, deep skillet. I find it much easier to cook 4 servings in a regular 10" skillet.
Course Breakfast, Side Dish
Cuisine American
Keyword breakfast, potatoes
Prep Time 15 minutes
Cook Time 1 hour
Servings 6
Calories 289kcal

Ingredients

  • 6 medium Russet potatoes
  • ½ tablespoon vegetable oil for frying
  • 4 tablespoons butter divided, for frying, you might need more
  • ½ large onion diced
  • ½ medium green bell pepper diced
  • ½ medium red bell pepper diced
  • ½ medium yellow bell pepper diced
  • kosher salt
  • ground black pepper

Instructions

  • Preheat your oven to 375 F.
  • Scrub the potatoes clean and dry well, then transfer to a baking sheet.
  • Bake for 45-60 minutes until the potatoes are tender when poked with a fork or knife.
  • About 10 minutes before the potatoes are done, start cooking the vegetables. Add the oil to a large skillet and heat over medium-high heat.
  • Stir in the onion and peppers and cook 5-7 minutes or until just starting to soften.
  • Remove to a plate or bowl.
  • Remove the potatoes from the oven and let cool until you can handle them.
  • Cut into 1" cubes. Note: I do not peel my potatoes, but you can if you wish.
  • Add butter to the skillet over medium-high heat and melt.
  • Add the potatoes and spread out evenly.
  • Sprinkle liberally with salt and pepper.
  • Cook for 5-7 minutes, without stirring, or until the bottoms of the potatoes just start to get crispy.
  • Flip gently, season again, and continue cooking, without stirring, another 5-7 minutes or until the bottoms just start to get crispy. If the potatoes get too dry add more butter and stir gently.
  • Add the vegetables back in.
  • Stir the mixture and heat thoroughly for 5 minutes.
  • Remove and serve.

Notes

Yukon gold potatoes are a great substitute for the Russets.

Nutrition

Calories: 289kcal | Carbohydrates: 62g | Protein: 8g | Fat: 2g | Saturated Fat: 2g | Polyunsaturated Fat: 1g | Monounsaturated Fat: 1g | Cholesterol: 1mg | Sodium: 22mg | Potassium: 1454mg | Fiber: 5g | Sugar: 4g | Vitamin A: 560IU | Vitamin C: 78mg | Calcium: 54mg | Iron: 3mg

Nutritional values are approximate.

Copycat Outback Steakhouse Blue Cheese Salad Dressing

Goodness gracious me. I wasn’t expecting much from this copycat of the blue cheese salad dressing from Outback Steakhouse. I don’t know why. Maybe I was afraid that it’d be too funky from the blue cheese. Whatever it was, I was wrong because this instantly became my favorite salad dressing. And my favorite wing dipping sauce. Oh, and it’s great for dipping bacon-wrapped shrimp too. I know this for a fact.

Copycat Outback Steakhouse Blue Cheese Dressing

It’s Better The Next Day

You really need to let this copycat Outback Steakhouse blue cheese salad dressing ‘get happy’ in the fridge for at least an hour before serving. I actually prefer to let it sit overnight. The flavors get blended as you wait, and the wait is worth it. If you taste the dressing just moments after you make it you might be disappointed as it won’t have much flavor. That flavor comes later, so be patient!

More and more, I’ve been serving my salad dressings in the same little sauce cups I use for serving dipping sauces. I like them for wings and nuggets, and even chicken tenders. They have the added bonus of helping me control my serving size, something I need help with with this dressing for sure!

Check out my new site, Dress My Salad, for more great salad dressing ideas!

Also try my copycat Outback Steakhouse Ranch dressing.

Copycat Outback Steakhouse Blue Cheese Dressing
Print Pin
5 from 1 vote

Copycat Outback Steakhouse Blue Cheese Salad Dressing

You really need to let this copycat Outback Steakhouse blue cheese salad dressing 'get happy' in the fridge for at least an hour before serving. I actually prefer to let it sit overnight.
Course Salad Dressing
Cuisine American
Keyword copycat, homemade salad dressing, Outback Steakhouse
Prep Time 10 minutes
Cook Time 1 hour
Total Time 1 hour 10 minutes
Servings 2 cups
Calories 1569kcal

Ingredients

Instructions

  • Mix all ingredients in a small bowl.
  • Refrigerate for 1-4 hours before serving

Notes

Stir before serving.

Nutrition

Calories: 1569kcal | Carbohydrates: 4g | Protein: 5g | Fat: 171g | Saturated Fat: 28g | Trans Fat: 1g | Cholesterol: 103mg | Sodium: 1552mg | Potassium: 113mg | Fiber: 1g | Sugar: 6g | Vitamin A: 250IU | Vitamin C: 1mg | Calcium: 92mg | Iron: 1mg

Nutritional values are approximate.

Copycat Red Lobster Tartar Sauce

It was fish-and-chips week here. I’m a big fan of fish-and-chips, and I find myself ordering it regularly when we eat out. Usually I just like mine hit with a few good shakes of malt vinegar and maybe a squeeze or two of lemon. This time I decided to make a copycat Red Lobster tartar sauce. And all I can say is… Wow! Now this is a great tartar sauce. I thought my beer-battered fish would be the winner-winner, but the tartar sauce really came through!

Copycat Red Lobster Tartar Sauce

Perfect For Fish-And-Chips…

The perfect thickness for dipping fish or spreading onto a fish sandwich and packed with flavor, this copycat Red Lobster tartar sauce is really fantastic. I find myself looking forward to my next fish-and-chips lunch more and more now. Will it replace malt vinegar as my favorite? Yeah, it might actually. It’s just that good.

… And Shrimp!

I have to admit that my usual order at Red Lobster is the shrimp. I’m a shrimp-aholic. I love fried shrimp. Walt’s fried shrimp is probably my favorite. And even though cocktail sauce is my go-to dipping sauce, I’ve found that I like dipping my shrimp in tartar sauce more and more!

I almost always use Blue Plate mayonnaise in the dishes I make. I think it is the best around. If you can’t find it locally you can pick it up online for a fair price.

Also try my copycat of Red Lobster’s Cheddar Bay biscuits. Love tartar sauce as much as I do? Try my spicy Old Bay version too!

Copycat Red Lobster Tartar Sauce
Print Pin
4.50 from 2 votes

Copycat Red Lobster Tartar Sauce

I’m a big fan of fish-and-chips, and I find myself ordering it regularly when we eat out. Usually I just like mine hit with a few good shakes of malt vinegar and maybe a squeeze or two of lemon.
Course Sauce
Cuisine American
Keyword copycat, Red Lobster, tartar sauce
Prep Time 5 minutes
Chill time 30 minutes
Total Time 35 minutes
Servings 4 servings
Calories 203kcal

Equipment

Ingredients

Instructions

  • Combine all ingredients in a small bowl or container.
  • Cover and refrigerate for at least 30 minutes before serving.

Notes

Stir before servings. Also great on fish sandwiches!

Nutrition

Calories: 203kcal | Carbohydrates: 4g | Protein: 1g | Fat: 21g | Saturated Fat: 3g | Trans Fat: 1g | Cholesterol: 12mg | Sodium: 210mg | Potassium: 18mg | Fiber: 1g | Sugar: 3g | Vitamin A: 373IU | Vitamin C: 1mg | Calcium: 4mg | Iron: 1mg

Nutritional values are approximate.

Pimento Cheese Pasta Salad

Join me as I dance the happy dance! Nothing makes me happier than this pimento cheese pasta salad. Incredible, that’s the best way to describe it. Full of bold flavors reminiscent of my southern favorite, pimento cheese, this dish is a real winner. Nothing but happiness is in this dish.

Pimento Cheese Pasta Salad

Make It. Enjoy It. Don’t Change It.

I tend to mess with recipes, but not this one for pimento cheese pasta salad. It doesn’t need more of this or less of that. It just needs to be made and enjoyed. No fretting, no second guessing, nothing. Make it. Enjoy it. Worry about other things and not “I wonder if I could add….”.

This recipe calls for pickle juice. I have a lot of recipes that call for it. That’s why I never throw out the juice that’s left after I’ve polished off the last pickle in the jar. If by chance you don’t have any on hand, you can actually order pickle juice now, without the pickles! (I also recommend asking your neighbors to give you their jars of juice!)

I almost always use Blue Plate mayonnaise in the dishes I make. I think it is the best around. If you can’t find it locally you can pick it up online for a fair price.

Also try my macaroni and cheese pasta salad.

Pimento Cheese Pasta Salad
Print Pin
5 from 1 vote

Pimento Cheese Pasta Salad

Full of bold flavors reminiscent of my southern favorite, pimento cheese, this salad is a real winner. Make it just like the recipe states and you won’t be disappointed.
Course Side
Cuisine American
Keyword pasta salad
Prep Time 10 minutes
Cook Time 30 minutes
Servings 8
Calories 386kcal

Ingredients

Instructions

  • Cook the pasta per package instructions. Rinse under cold water and drain well.
  • In a large bowl, whisk together the mayonnaise, sour cream, mustard, 3 tablespoons of the green onion, pickle juice, garlic powder, onion powder, salt, pepper and paprika until creamy smooth.
  • Add in the pasta and gently fold to coat.
  • Fold in the pimentos (all but a tablespoon or so, saving the rest for garnish) and cheese.
  • Refrigerate for 20 minutes.
  • Serve garnished with remaining green onion and pimentos.

Notes

Stir before serving.

Nutrition

Calories: 386kcal | Carbohydrates: 24g | Protein: 12g | Fat: 27g | Saturated Fat: 10g | Trans Fat: 1g | Cholesterol: 45mg | Sodium: 528mg | Potassium: 180mg | Fiber: 2g | Sugar: 3g | Vitamin A: 1202IU | Vitamin C: 25mg | Calcium: 235mg | Iron: 1mg

Nutritional values are approximate.

Meatloaf Meatballs

I didn’t need any help with my meatloaf addiction. I didn’t think it could get any worse. But, no, along came meatloaf meatballs and my problem got worse. A lot worse. Each one of these little lovely balls of meaty goodness tastes just like a meatloaf. Complete with a delicious glaze. I mean, come on, what’s not to love?!

Meatloaf Meatballs

Great Meatballs For Any Dish

These meatloaf meatballs aren’t just for serving as appetizers. Nope. Serve them with mashed potatoes and gravy for a crazy good change to meatloaf dinner. Put them on a sub roll with gravy and make a meatloaf po boy sandwich. Now that’s eating right there!

Usually I don’t link to something I don’t have, but I came across this meatball mold and just had to post it. It looks kinda cool, and would save some time making meatballs for sure!

Also try my spicy meatballs.

Meatloaf Meatballs
Print Pin
5 from 1 vote

Meatloaf Meatballs

I didn’t need any help with my meatloaf addiction. I didn’t think it could get any worse. But, no, along came meatloaf meatballs and my problem got worse. A lot worse. Each one of these little lovely balls of meaty goodness taste just like a meatloaf. Complete with a delicious glaze.
Course Appetizer
Cuisine American
Keyword meatballs, meatloaf
Prep Time 15 minutes
Cook Time 30 minutes
Servings 16
Calories 134kcal

Ingredients

For the meatballs

For the glaze

Instructions

For the meatballs

  • Preheat oven to 350 F.
  • Line a large baking sheet with parchment paper or use a silicone mat.
  • Melt the butter in a saute pan over medium heat.
  • Add the onions and cook until softened, about 5 minutes.
  • Reduce heat to low.
  • Stir in the garlic and saute for 3 minutes.
  • Remove from heat and let cool enough to handle.
  • In a large bowl, combine the beef, eggs, bread crumbs, milk, Worcestershire sauce, thyme, salt and the cooked onion mixture. Form into balls (we made 1" sized meatballs) and place onto the baking sheet. Do not let the meatballs touch.
  • Bake for 20 minutes.
  • Using tongues or a spoon, working in batches, transfer the meatballs to the bowl of glaze.
  • Dunk or roll them to get them covered in the glaze.
  • Shake off any excess and return to the baking sheet.
  • Bake another 10 minutes or until lightly browned. If you want a bit of a crunchy exterior, place the meatballs under the broiler for a minute or two.
  • Serve immediately.

For the glaze

  • Combine all ingredients in a medium bowl.

Notes

You can transfer the meatballs to a slow cooker to keep them warm.

Nutrition

Calories: 134kcal | Carbohydrates: 7g | Protein: 8g | Fat: 8g | Saturated Fat: 3g | Trans Fat: 1g | Cholesterol: 39mg | Sodium: 322mg | Potassium: 177mg | Fiber: 1g | Sugar: 4g | Vitamin A: 92IU | Vitamin C: 1mg | Calcium: 29mg | Iron: 1mg

Nutritional values are approximate.

Bread Machine Italian Herb Bread

I am not a baker. That’s why I have a bread machine. I’m lucky even still to get something that resembles a loaf of bread. And I’m really lucky (and happy) if I get a loaf that tastes as fantastic as this bread machine Italian herb bread. The aroma from this bread as it bakes is insanely amazing. If I could bottle it I would and I’d put it into air fresheners or one of those oil infuser things. Herbs are throughout the bread so there’s no chance you take a bite and don’t get all that deliciousness.

Bread Machine Italian Herb Bread

Add A Bit Of Heat. If You Want To.

I wouldn’t change a thing about this bread machine Italian herb bread. Well, that’s sort of true. I sometimes sneak in a pinch or two or three of red pepper flake. Just enough for a bit of spiciness but not so much that the bread is ‘hot’. But trust me, the bread is fantastic just as it is. The herb flavor (and aroma) just cannot be beat. And neither can the flavors.

I keep practicing making bread by hand, and sometimes I get it and most of the times it just comes out ok. Until I’m a master, I’ll keep using my trusty bread machine.

Also try my jalapeno cheese bread made using a bread machine.

Bread Machine Italian Herb Bread
Print Pin
5 from 1 vote

Bread Machine Italian Herb Bread

I sometimes sneak in a pinch or two or three of red pepper flake.
Course Bread
Cuisine American
Keyword bread, herbs
Cook Time 2 hours 45 minutes
Total Time 2 hours 45 minutes
Servings 8
Calories 259kcal

Ingredients

Instructions

  • Place ingredients into bread machine in the order listed.
  • Process on dough cycle.
  • Lightly flour a flat work surface and your hands. Remove dough from bread machine and work into a ball, folding with your hands.
  • Transfer to lightly oiled bread baking pan.
  • Cover loosely with plastic wrap that has been lightly sprayed with non-stick spray.
  • Transfer to a warm place and let rise until doubled, 45 minutes to an hour.
  • Preheat oven to 375 F.
  • Carefully remove the wrap. Bake for 30-40 minutes or until golden brown.
  • Remove and let cool slightly before slicing.

Notes

For best results, use freshly grated Parmesan.

Nutrition

Calories: 259kcal | Carbohydrates: 43g | Protein: 9g | Fat: 5g | Saturated Fat: 4g | Cholesterol: 2mg | Sodium: 347mg | Potassium: 117mg | Fiber: 2g | Sugar: 2g | Vitamin A: 31IU | Vitamin C: 1mg | Calcium: 55mg | Iron: 1mg

Nutritional values are approximate.

Sloppy Joe French Bread Pizza

I was addicted to Sloppy Joes as a kid. And I’m still addicted as an ‘adult’. I don’t walk by the Sloppy Joe cans or mixes at the grocery store and think, “kids stuff”. No, I think to myself, “self, that sounds fantastic.”. Making Sloppy Joes at home is about as easy as it can get, and this recipe here for using it to make Sloppy Joe French bread pizza takes that old classic and makes it truly fantastic. I could eat a scary amount of this pizza.

As a kid I’d go the playground after mom would make me Sloppy Joes for lunch. As an adult I… uh… well, I don’t do that. I might work out in the yard later but right now I’m going to sit back and recall my yummy pizza.

Sloppy Joe French Bread Pizza

Pizza Perfection

What can I say about this recipe for Sloppy Joe French bread pizza? Make it. Just go make it. That’s all. Ok, don’t overcook the onion and peppers. That’s the only thing I can come up with. It’s perfect as it is. I wouldn’t change a thing about it. I loved Sloppy Joes as a kid and I still love those same flavors today.

Also try my quick fix French bread pizza.

Sloppy Joe French Bread Pizza
Print Pin
5 from 1 vote

Sloppy Joe French Bread Pizza

Making Sloppy Joes at home is about as easy as it can get, and this recipe here for using it to make French bread pizza takes that old classic and makes it truly fantastic. I could eat a scary amount of this pizza.
Course Main
Cuisine American
Keyword French bread, pizza
Prep Time 5 minutes
Cook Time 30 minutes
Servings 6
Calories 556kcal

Ingredients

For the Sloppy Joe mixture

For the French bread pizza

  • 1 loaf French bread cut in half lengthwise
  • 1 ½ cups Colby Jack cheese shredded

Instructions

For the Sloppy Joe mixture

  • Crumble the ground beef into a large skillet or Dutch oven over medium-high heat. Cook until it just starts to brown. Drain off any excess grease.
  • Add the onion and pepper and stir. Cook until the beef is completely done and the vegetables just start to soften. You want them to still have a little crunch to them.
  • Add the remaining Sloppy Joe mixture ingredients. Stir. If the mixture is too dry add a small amount of water.
  • Turn off the heat and let the mixture sit for 5 minutes.

For the French bread pizza

  • Preheat oven to 350 F.
  • Place the bread on a large baking sheet lined with foil.
  • Divide the Sloppy Joe mixture between the bread halves. It's not time to be shy. You want it thick and you want it crust-to-crust.
  • Sprinkle with the cheese.
  • Bake for about 15 minutes or until the bread starts to brown and is lightly crunchy. The cheese should be nice and melted.
  • Remove from the oven and let rest for a few minutes then slice and serve.

Notes

You can substitute your favorite cheese for the Colby.

Nutrition

Calories: 556kcal | Carbohydrates: 48g | Protein: 29g | Fat: 27g | Saturated Fat: 13g | Trans Fat: 1g | Cholesterol: 85mg | Sodium: 895mg | Potassium: 466mg | Fiber: 2g | Sugar: 8g | Vitamin A: 498IU | Vitamin C: 6mg | Calcium: 283mg | Iron: 5mg

Nutritional values are approximate.

Copycat PF Chang’s Crispy Honey Chicken

I don’t know how much chicken you get when you order the crispy honey chicken at PF Chang’s. After taking a bite of this copycat PF Chang’s crispy honey chicken I knew how much I was going to get when I made it at home: a lot. The coating was perfectly crunchy. The chicken was moist, tender, with a hint of soy sauce. And the sauce, oh yes, the sauce, was a wonderful combination of Asian-inspired flavors with a hint of sweetness.

Copycat PF Chang's Crispy Honey Chicken

You Can Spice It Up Too!

The next time I make this copycat PF Chang’s crispy honey chicken I might add just a bit of heat to the chicken seasoning. Not much, but I prefer a little kick with my sweet. Some red pepper flake will take it up a notch.

Depending on how many people I’m serving, I’ll either break out my big deep fryer or, if it’s just us two, I’ll use my lil ole Fry Daddy fryer. It’s the perfect size of just a few people. It only uses a few cups of oil, so I save big time on oil. And it’s super easy to clean up.

I get out my big deep fryer when it’s time to fry a large batch of food. It comes to temperature quickly and it maintains that temperature perfectly. It has a built-in oil filter and storage unit so I can re-use the oil several times.

I served the chicken over my super-easy slow cooker rice.

Also try my copycat Panda Express SweetFire chicken.

Copycat PF Chang's Crispy Honey Chicken
Print Pin
4 from 2 votes

Copycat PF Chang’s Crispy Honey Chicken

The coating was perfectly crunchy. The chicken was moist, tender, with a hint of soy sauce. And the sauce, oh yes, the sauce, was a wonderful combination of Asian-inspired flavors with a hint of sweetness.
Course Main
Cuisine American
Keyword Asian, chicken, crispy
Prep Time 1 hour
Cook Time 30 minutes
Total Time 1 hour 30 minutes
Servings 4 servings
Calories 532kcal
Author Mike

Ingredients

For the chicken

  • 1 pound chicken breast boneless, skinless, cut into chunks
  • vegetable oil for frying
  • rice cooked and warmed, for serving

For the batter

For the chicken seasoning

For the sauce

Instructions

For the chicken

  • Place chicken into a resealable. container.
  • Combine the chicken seasoning ingredients and sprinkle over the chicken.
  • Seal and toss to coat. Refrigerate for 1 hour.
  • Whisk together the batter ingredients and refrigerate for 1 hour.
  • Heat 3″ of oil to 350 F in a deep fryer or Dutch oven.
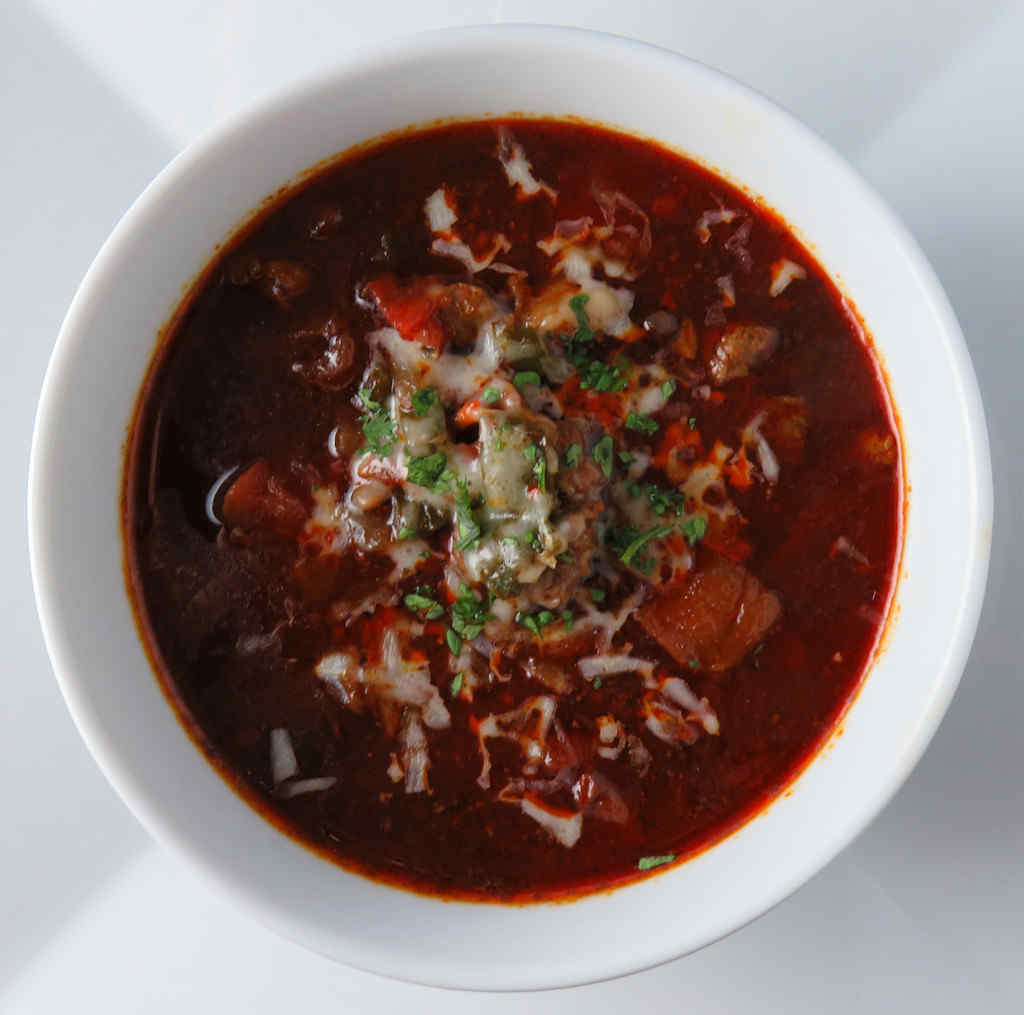
  • Meanwhile, make the sauce by whisking together all but the cornstarch and water in a medium saucepan.
  • Bring to a simmer. Whisk together the cornstarch and water and slowly whisk into the sauce.
  • Let simmer until thickened then reduce heat.
  • Keep warm until ready to use.
  • Add chicken to batter and, working in batches, fry until done, about 5 minutes per piece. Remove to a paper towel-lined plate or wire rack to drain.
  • Serve chicken over rice with plenty of sauce.

Notes

This dish is also great prepared using boneless, skinless thighs.

Nutrition

Calories: 532kcal | Carbohydrates: 86g | Protein: 29g | Fat: 4g | Saturated Fat: 1g | Trans Fat: 1g | Cholesterol: 113mg | Sodium: 1353mg | Potassium: 521mg | Fiber: 1g | Sugar: 53g | Vitamin A: 93IU | Vitamin C: 2mg | Calcium: 33mg | Iron: 2mg

Nutritional values are approximate.

Christmas Stocking Pizzas

True story: If you leave out Christmas stocking pizzas for Santa Claus you’ll get two times as many presents than you would if you leave out just milk and cookies! Trust me on this! Santa will appreciate your efforts and reward you nicely. These little pizzas make for a great holiday-time project. They’re quite easy to make, and rather fun to boot. It’s an excellent treat for young and old alike!

Fun To Make… And Eat!

You can make your Christmas stocking pizzas with whatever toppings you like, of course. We liked how the mini pepperoni and the Italian sausage ones looked. And tasted. They didn’t last, that’s for sure. You want to use smaller-sized toppings since the pizzas aren’t that large!

You’ll need a template to make the pizzas. Ours is just over 5″ tall when printed. Just download the picture below and print it. If you want to make smaller (or bigger) pizzas just size the graphic in your favorite editing software.

Christmas stocking

Happy Holidays!

I highly recommend that you shred or grate your own cheese at home. Don’t buy the pre-shredded or pre-grated stuff. It has stuff added to it to keep it from sticking together. That ‘stuff’ affects how the cheese melts. Get the real stuff.

Print Pin
4 from 1 vote

Christmas Stocking Pizzas

If you leave out Christmas stocking pizzas for Santa Claus you'll get two times as many presents than you would if you leave out just milk and cookies!
Course Appetizer or Main
Cuisine American
Keyword Christmas, pizza
Prep Time 30 minutes
Cook Time 15 minutes
Servings 5
Calories 223kcal

Ingredients

  • 1 pound pre-made pizza dough If frozen defrost overnight in the fridge then let come to room temperature on the countertop for 2 hours before using.
  • pizza sauce
  • mozzarella cheese shredded
  • mini pepperonis
  • Italian sausage Cooked and crumbled. If using links remove from casings before cooking. I like to pulse my cooked sausage in a food processor a few times to get it nice and finely crumbled.

Instructions

  • Preheat oven per package instructions. Prepare 2 large baking sheets, if required (some pre-made doughs require that you first grease the pans).
  • Print out the stocking template and cut around the edges.
  • Roll dough out onto a lightly floured surface.
  • Place the template onto the dough and cut around the edges. We found that a sharp-tipped knife or kitchen scissors worked best.
  • Transfer the dough to a baking pan. Keep making stockings until you're out of dough. We were able to get 5 out of a 1 pound dough but that took some thinking as we moved the pattern around. You can easily get 4 stockings without much worry.
  • Add toppings as desired. For a few we used sauce, mini pepperoni and then cheese all over. For the rest we used sauce and sausage, with cheese just at the top.
  • Bake until the dough is lightly browned and the cheese is bubbly.
  • Remove and let cool slightly before serving.

Notes

These are fun. You gotta make them at least once!

Nutrition

Calories: 223kcal | Carbohydrates: 43g | Protein: 7g | Fat: 3g | Saturated Fat: 1g | Polyunsaturated Fat: 1g | Sodium: 656mg | Fiber: 1g | Sugar: 6g | Iron: 2mg

Nutritional values are approximate.