Smoked Turkey Legs

The first time I picked up a smoked turkey leg was at a Renaissance Faire outside of Baltimore, Maryland. The turkey had these great ham-like texture and flavor that I could not get enough of. And I thought it was cool to walk around with a huge turkey leg like a good heathen might do. At every Renaissance Faire I’ve ever been to, the smoked turkey leg booth is always the first place I stop.

Smoked Turkey Legs

Like Being At A Ren Faire

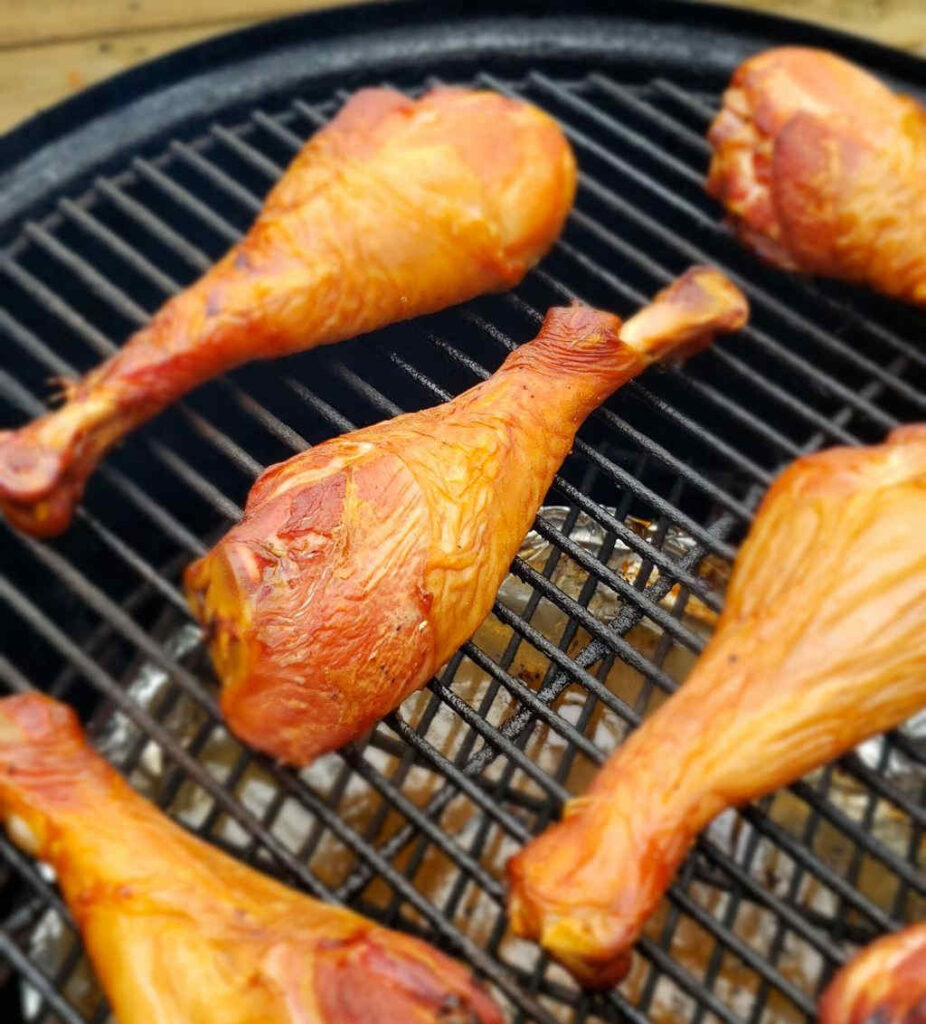
Making smoked turkey legs at home is easy. I found fresh legs in the poultry section of our grocery store, but you might have to look into the frozen section if you can’t find them fresh. I found super duper big turkey legs, and I found more manageable ones (which is what I went with). Either will do just fine, just keep in mind that the really big ones take more space on your smoker.

I made my legs with the skin on. I think it keeps the legs a bit more moist during the smoking process. The skin does not get super crispy (you’re not smoking them at a high temperature) so feel free to remove it before or even after cooking if you wish.

I used my Weber Smokey Mountain smoker for these legs.

Any leftover turkey leg meat I had went into a delicious smoked turkey noodle soup. Yum!

You can also use turkey wings or legs to make smoked turkey broth, which makes for the world’s tastiest gravy!

Smoked Turkey Legs
Print Pin
4 from 1 vote

Smoked Turkey Legs

The first time I picked up a smoked turkey leg was at a Renaissance Faire outside of Baltimore, Maryland. The turkey had these great ham-like texture and flavor that I could not get enough of.
Course Main
Cuisine American
Keyword smoked, turkey
Prep Time 1 day
Cook Time 5 hours
Servings 6 legs
Calories 1046kcal

Equipment

Ingredients

Instructions

  • Place 1 gallon of water into a large stockpot over high heat.
  • Add the rub, curing salt, sugar, peppercorns, bay leaves and liquid smoke.
  • Bring to a boil and stir to dissolve the salt.
  • Remove from heat and let cool to room temperature.
  • Add the remaining water and the ice.
  • Add the turkey legs. If the legs are not submerged cover them with a heavy plate or pot lid to keep them under the water.
  • Transfer to the fridge overnight.
  • Remove the pot from the fridge and drain.
  • Rinse the turkey legs with cold water, removing any pieces of peppercorns or other spices that may be stuck. Pat dry.
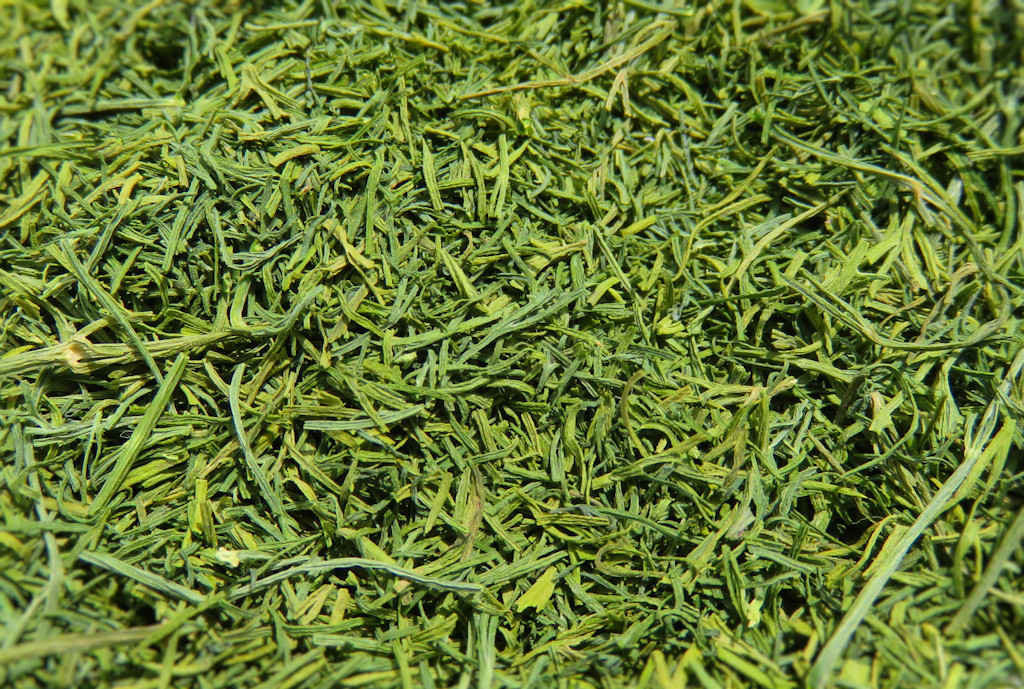
  • Fire up your smoker for 250 F. I used hickory but you can use whatever your favorite wood is.
  • Add legs to the smoker and smoke for 4-5 hours or until the meat reaches 165 F as measured in the thickest parts of the legs.
  • Remove and serve.

Notes

You can also use this technique on turkey thighs.

Nutrition

Calories: 1046kcal | Carbohydrates: 18g | Protein: 133g | Fat: 46g | Saturated Fat: 14g | Cholesterol: 481mg | Sodium: 561mg | Potassium: 1876mg | Fiber: 1g | Sugar: 17g | Vitamin A: 31IU | Vitamin C: 1mg | Calcium: 158mg | Iron: 12mg

Nutritional values are approximate.

Fiery Mushroom Burgers

“Absolutely fantastic”. We both agree, these fiery mushroom burgers were absolutely fantastic. The flavor of the mushrooms is so savory, deep, fantastic…. all with just the right amount of spiciness. Originally, the recipe for the mushrooms (from a 2021 issue of Louisiana Kitchen and Culture magazine, a long-time favorite of mine) was meant as a topping for steak. But I immediately thought of it on burgers. And they definitely did not disappoint.

Fiery Mushroom Burgers

A Real Keeper Recipe

This recipe is one of those that goes into my ‘go-to’ folder of keepers. Destined to be made again and again. To be truthful, this blog is my recipe ‘box’. I got tired of searching all over the house or thru my emails for my favorite things to make. Now I just post them here!

Spot-On Great Burgers

These fiery mushroom burgers hit the spot. I don’t ever see myself even tweaking the recipe, changing this or that. Nope. This is it right here. And any time I need mushrooms (and boy would these be great on Salisbury steak), I’m making these.

Also try my blue cheese burgers with caramelized onions and my classic brat burgers.

Fiery Mushroom Burgers
Print Pin
5 from 1 vote

Fiery Mushroom Burgers

This recipe is one of those that goes into my 'go-to' folder of keepers. Destined to be made again and again.
Course Main
Cuisine American
Keyword burgers, mushroom, spicy
Prep Time 10 minutes
Cook Time 30 minutes
Servings 4
Calories 486kcal

Ingredients

For the fiery mushrooms

For the burgers

Instructions

For the fiery mushrooms

  • In a small bowl whisk together the lemon juice, fish sauce, soy sauce and brown sugar until the brown sugar has dissolved.
  • Stir in the jalapeno slices.
  • Melt the butter in a large skillet over medium-high heat.
  • Add the sliced mushrooms. Saute 8-10 minutes or until they have released their liquid.
  • Increase the heat to high. Stir in the garlic and cook, stirring often, until the mushrooms turn golden brown, 5-7 minutes.
  • increate heat to high, add garlic and cook stirring, until mushrooms golden brown 5-7 more

For the burgers

  • Season the burger patties with salt and pepper and cook as desired.
  • Top with Swiss cheese.
  • Toast the buns as desired.
  • Place cooked patties on the buns. Top with plenty of fiery mushrooms and serve.

Notes

I prefer mini portabellas for these burgers, but you can use your favorite mushrooms instead.

Nutrition

Calories: 486kcal | Carbohydrates: 28g | Protein: 29g | Fat: 29g | Saturated Fat: 13g | Polyunsaturated Fat: 2g | Monounsaturated Fat: 10g | Trans Fat: 1g | Cholesterol: 87mg | Sodium: 456mg | Potassium: 754mg | Fiber: 2g | Sugar: 7g | Vitamin A: 311IU | Vitamin C: 8mg | Calcium: 226mg | Iron: 4mg

Nutritional values are approximate.

Mexican Rice

This is by far my favorite, hands-down, go-to recipe for Mexican rice. The flavors are so incredible, so good, that I could just sit down with a bowl of this rice and have it for dinner. And the house smells so awesome while it is cooked. It definitely gets my tummy growling. This is a keeper.

Frying the rice gives it a fantastic color and great texture. A little bite, but not crunchy. The sauce used for cooking the rice has such a rich flavor. I love it.

Mexican Rice

Rinsing The Rice Is Key

You have to make sure you really thoroughly rinse the rice for this Mexican rice to come out perfect. Get rid of that starch. Don’t rush it. Keep rinsing and rinsing until the water is clear. Anything less is… well, less.

I like to use my good ole trusty Dutch oven to make this soup and pretty much darned near anything like it on my stovetop. It’s nice and big and sturdy. That extra weight helps it maintain and distribute heat perfectly. As an added bonus, it’s actually pretty easy to clean up too!

You can certainly leave out the jalapenos, though trust me that they do not make this rice spicy. They just add great flavor.

For a twist, use roasted diced tomatoes. And serve alongside tacos made with slow cooker taco meat.

Mexican Rice
Print Pin
5 from 1 vote

Mexican Rice

This is by far my favorite, hands-down, go-to recipe for Mexican rice. The flavors are so incredible, so good, that i could just sit down with a bowl of this rice and have it for dinner.
Course Side
Cuisine American
Keyword Mexican, rice
Prep Time 10 minutes
Cook Time 45 minutes
Servings 8
Calories 191kcal

Equipment

Ingredients

Instructions

  • Note; This dish is best made in a Dutch oven or large oven-safe pot.
  • Preheat oven to 350 F.
  • Place tomato and onion into a blender and pureé.
  • Rinse the rice by placing in a strainer and running under cold water. You want the water from the rice to be clear. Don't rush this, it's an important step. It usually takes me at least 5 minutes, stirring the rice occasionally to make sure that all the rice grains get rinsed well.
  • Drain well when done.
  • Heat the oil in a Dutch oven over high heat.
  • Add the rice and fry for 6-8 minutes, stirring often, until it is golden brown.
  • Reduce the heat to medium and add the garlic and 2
  • Reduce heat to medium, add garlic and 2 of the jalapenos.
  • Stir while cooking for 2 minutes.
  • Add in the tomato mixture and salt.
  • Bring a boil then remove from heat and cover.
  • Place a lid on the Dutch oven and transfer to the oven for at least 30 minutes. Check on it after 15 minutes to make sure there's enough liquid (if not, add just a bit of water).
  • Check if the rice is done. If not return to the oven 5 minutes at a time, checking on it, until perfect.
  • Remove the rice from the oven.
  • Stir in the cilantro, last jalapeno and lime juice and serve.

Notes

If the jalapenos are too hot for you, substitute two medium poblano peppers instead.

Nutrition

Calories: 191kcal | Carbohydrates: 41g | Protein: 4g | Fat: 1g | Saturated Fat: 0.1g | Polyunsaturated Fat: 0.1g | Monounsaturated Fat: 0.1g | Cholesterol: 1mg | Sodium: 663mg | Potassium: 205mg | Fiber: 2g | Sugar: 2g | Vitamin A: 186IU | Vitamin C: 13mg | Calcium: 39mg | Iron: 1mg

Nutritional values are approximate.

Dried Dill on the Nesco Snackmaster Pro

I tend to be a dry-herb kind of guy, but sometimes a recipe needs fresh instead. To keep from wasting any unused fresh herbs I just toss them onto my Nesco Snackmaster Pro dehydrator and let them dry for later use. I needed dill for a dish I was making (a creamy cucumber salad!), and had a few stems left. I could’ve kept the dill intact, but I opted to remove it from the stems instead. Dried Dill on the Nesco Snackmaster Pro is great either way!

Dried Dill on the Nesco Snackmaster Pro

Storage

I keep the dried dill made on the Nesco Snackmaster Pro in air-tight containers. So I remember what is what, I write the contents on a small piece of blue painter’s masking tape. The tape is great for marking items, dry or in the freezer or wherever. It peels off so easily, you never have to worry about fussing with it.

I also use blue painters tape to identify my trays in the dehydrator. I write numbers on them so if I have to rotate the trays I can keep track of them. It just makes things a bit easier.

You can dry any fresh herbs in the Nesco Snackmaster Pro. Like cilantro, rosemary and basil.

Dried Dill on the Nesco Snackmaster Pro
Print Pin
5 from 1 vote

Dried Dill on the Nesco Snackmaster Pro

I keep the dried dill in air-tight containers.
Course Dehydrator
Cuisine American
Keyword dehydrator, herbs, nesco snackmaster pro
Prep Time 5 minutes
Cook Time 6 hours
Servings 1
Calories 0.4kcal

Ingredients

  • 1 bunch dill fresh, rinsed, patted dry

Instructions

  • Rinse the dill to remove any foreign material.
  • Dry well with kitchen towels.
  • Optionally: remove the dill from the stems.
  • Place onto the Nesco Snackmaster Pro trays. Do not let the stems overlap.
  • Dry at 95 F for 4-6 hours. Rotate the trays every hour or so.
  • If drying whole stems, remove the dill from them.
  • Grind if desired.
  • Store in an air-tight container.

Notes

You’ll definitely want some extra trays for your dehydrator so you can make plenty of dried dill.

Nutrition

Calories: 0.4kcal | Carbohydrates: 0.1g | Protein: 0.03g | Fat: 0.01g | Monounsaturated Fat: 0.01g | Sodium: 1mg | Potassium: 7mg | Fiber: 0.02g | Vitamin A: 77IU | Vitamin C: 1mg | Calcium: 2mg | Iron: 0.1mg

Nutritional values are approximate.

Peel and Eat Grilled Shrimp

Talk about just up-and-disappearing, these peel and eat grilled shrimp were so dang good they didn’t stick around long enough to even cool off. The spice mixture that coats the shrimp is spot-on, with hints of sweetness and a warm earthiness. Seems odd, perhaps, but they were fantastic. So fantastic that I made them two nights in a row.

Peel and Eat Grilled Shrimp

Messily Fantastic

My motto has always been: The messier the dish, the tastier it is. Well, maybe that’s part of why I loved these peel and eat grill shrimp so much. They are messy. Very messy. I tried them once with shell-on (but deveined) shrimp and once using peeled (but still tail-on) shrimp. Both were fantastic, but I preferred the shell-on shrimp (I bought mine online from Shrimp to Shore). They’re messier. You get to peel them. And you get to lick your fingers even more it seems.

Also try my marinated grilled shrimp.

Peel and Eat Grilled Shrimp
Print Pin
4 from 1 vote

Peel and Eat Grilled Shrimp

My motto has always been: The messier the dish, the tastier it is. Well, maybe that's part of why I loved these peel and eat grill shrimp so much.
Course Appetizer or Main
Cuisine American
Keyword shrimp
Prep Time 15 minutes
Cook Time 15 minutes
Servings 6
Calories 247kcal

Equipment

Ingredients

Instructions

  • Fire up your grill for high-heat direct cooking. You can use skewers, a grill pan, griddle or cook the shrimp directly on the grates. Alternatively, you can cook the shrimp in a large skillet on the stove top over medium-high heat.
  • Whisk together the paprika, chili powder, brown sugar, cumin, garlic, vegetable oil, salt and pepper in a large bowl.
  • Add the shrimp and use spatula to turn and coat well. I actually prefer to use my hands to make sure that the shrimp get fully coated, but the paprika does make your fingers turn red. It just dawned on my that food-safe gloves would've been a smart idea!
  • Transfer the shrimp to the grill. Skewer first if using skewers. Make sure that the shrimp lay flat on the grill and do not overlap. If cooking indoors, add a splash of oil to the skillet before adding the shrimp, also keeping them in one layer. You might have to cook them in batches so they don't overlap.
  • Cook for 2 minutes per side, flipping once.
  • Transfer shrimp to a serving platter or bowl and toss with the green onion before serving.

Notes

Serve with plenty of napkins nearby!

Nutrition

Calories: 247kcal | Carbohydrates: 8g | Protein: 32g | Fat: 10g | Saturated Fat: 6g | Polyunsaturated Fat: 1g | Monounsaturated Fat: 1g | Cholesterol: 381mg | Sodium: 1998mg | Potassium: 243mg | Fiber: 1g | Sugar: 5g | Vitamin A: 1079IU | Vitamin C: 17mg | Calcium: 251mg | Iron: 4mg

Nutritional values are approximate.

Brussels Sprouts Caesar Salad

Brussels sprouts were on sale. That’s how I ended up making a Caesar salad. I could’ve grilled them. Or roasted them. But I had salad on the brain. Simple salad. I didn’t want a bunch of ingredients, or have to make a dressing. That’s how I ended up with this Brussels sprouts Caesar salad. Shred and slice some sprouts, toss in pre-made Caesar salad dressing, toss on a few Croutons and grab a fork. Time to eat.

Brussels Sprouts Caesar Salad

Crunchily Good

I absolutely love the crunch and rawness of this Brussels sprouts Caesar salad. I don’t like them chopped into super tiny bits, I like to keep some bigger pieces so I get all that crunch. This is a really great way to throw together a quick salad that looks great and tastes even better.

Also try my Caesar pasta salad.

Brussels Sprouts Caesar Salad
Print Pin
5 from 1 vote

Brussels Sprouts Caesar Salad

This Brussels sprouts Caesar salad is a really great way to throw together a quick salad that looks great and tastes even better.
Course Salad
Cuisine American
Keyword Brussels sprouts, salad
Prep Time 15 minutes
Cook Time 15 minutes
Servings 10
Calories 40kcal

Ingredients

Instructions

  • Fit a food processor with a slicer blade. Feed Brussel sprouts thru the food processor. Alternatively, slice sprouts thin with a knife.
  • Drizzle the salad with the dressing and stir to coat. Season with salt and pepper and stir again. If the salad is too dry add more dressing and stir more.
  • Serve garnished with croutons.

Notes

This salad can only be made using fresh Brussels sprouts.

Nutrition

Calories: 40kcal | Carbohydrates: 8g | Protein: 3g | Fat: 1g | Saturated Fat: 1g | Sodium: 24mg | Potassium: 353mg | Fiber: 3g | Sugar: 2g | Vitamin A: 684IU | Vitamin C: 77mg | Calcium: 38mg | Iron: 1mg

Nutritional values are approximate.

Catalina Salad Dressing

I’d say that about half the time, we make our own salad dressings and the other half of the times we buy them. There’s nothing wrong with bottled dressings, but sometimes we prefer something fresh and something we can ‘tweak’ a bit if we want. This Catalina salad dressing is one of our all-time favorites. It’s quite easy to make and always delicious. It also uses ingredients that we almost always have on hand, and that’s a definite plus too!

Catalina Salad Dressing

The Onion Is Key

The grated white onion is one of the key ingredients in this Catalina salad dressing. Don’t skip it and don’t skimp on it. I used about a tablespoon, but you might want more. Or less. I used a Microplane grater to get the onion just perfect. It’s easy to hold and does a fantastic job.

This dressing gets even better after sitting in the fridge for a few hours. Just make sure to give it a good shake before serving.

I always double this recipe when making it.

Check out my new site, Dress My Salad, for more great salad dressing ideas!

I also find myself using these sauce dipping cups more and more when serving salad dressings. They help me control my servings a bit better.

Also try my Honky Tonk Sweet and Spicy salad dressing.

Catalina Salad Dressing
Print Pin
5 from 1 vote

Catalina Salad Dressing

We loved this simple and delicious homemade Catalina salad dressing. Why would you buy dressing at the store when you can make an even better version at home?
Course Salad Dressing
Cuisine American
Keyword salad dressing
Prep Time 5 minutes
Cook Time 5 minutes
Total Time 10 minutes
Servings 2 cups
Calories 1434kcal
Author Mike

Ingredients

Instructions

  • Place all but the onion in a blender.
  • Pulse a few times.
  • Add white onion to taste and blend until smooth.
  • Store in the fridge until ready to use.

Notes

Stir before serving.

Nutrition

Calories: 1434kcal | Carbohydrates: 122g | Protein: 1g | Fat: 110g | Saturated Fat: 89g | Sodium: 3062mg | Potassium: 277mg | Fiber: 1g | Sugar: 117g | Vitamin A: 578IU | Vitamin C: 4mg | Calcium: 31mg | Iron: 1mg

Nutritional values are approximate.

Mini Lasagna using a Gas Grill

I’ve been addicted to my mom’s lasagna ever since I was knee-high to a grasshopper. My wife and I make my mom’s recipe often, though I admit we have changed it a bit over the years. And we sometimes even change up how we cook it. Usually, it’s baked in the oven. This time, we made two-person mini serving-sized portions and cooked them using a gas grill. Not only does cooking outside keep from heating up the house on a hot day, it also adds a little different flavor to these mini lasagna using a gas grill.

Mini Lasagna using a Gas Grill

The Perfect Meal

Nothing beats bubbly hot mini lasagna right off a gas grill. The disposable meatloaf pans are perfect for leftovers, if you have any. Just cover in foil and place in the fridge for later, or freeze for the future. You can reheat the lasagna on the gas grill too. Just toss them on the grill (defrost first if frozen) and heat for about 20 minutes. I sometimes add just a little water around the edges of the pan just before reheating.

These disposable mini meatloaf pans are great for cooking and cleanup!

You can also make fantastic deep-dish pizza on a gas grill.

Mini Lasagna using a Gas Grill
Print Pin
5 from 1 vote

Mini Lasagna using a Gas Grill

The disposable meatloaf pans are perfect for leftovers, if you have any
Course Main
Cuisine Italian
Keyword gas grill, lasagna
Prep Time 15 minutes
Cook Time 3 hours 30 minutes
Servings 8
Calories 887kcal

Ingredients

For the meat

  • 1 pound ground beef
  • 1 pound Italian sausage
  • 1 large white onion diced
  • 2-4 cloves garlic minced

For the sauce

For the lasagna

  • 1 package lasagna noodles
  • 16 ounces ricotta cheese
  • ½ cup Parmesan grated
  • 1 pound fresh buffalo mozzarella torn into chunks, or use shredded

Instructions

For the meat sauce

  • Crumble the meats into a Dutch oven and brown over medium high heat. Drain fat if desired.
  • Add the onion and cook until softened.
  • Add the garlic and cook another minute.
  • Add in all of the sauce ingredients.
  • Bring to a boil and reduce to a simmer and cook, covered, 1-2 hours.
  • Continue cooking with lid off for another hour, adding a bit more water if the sauce is too thick.

For the lasagna

  • Cook noodles per package instructions. Drain well.
  • Cut 1" off of each noodle end then cut each in half in the middle.
  • First, spread a little sauce out on the bottom of each pan.
  • Then, layer the ingredients in the following order. Try to divide the ingredients evenly between each layer, but you don't have to be picky about it.
  • Noodle half
  • Sauce
  • Ricotta
  • Mozzarella
  • Parmesan
  • Repeat for 3 total layers.
  • Fire up your gas grill for indirect cooking at 350 F.
  • Place loaf pans onto your grill over indirect heat.
  • Close the lid and cook 30 minutes or until the cheese is hot and bubbly.
  • Let rest 15 minutes before serving.

Notes

If your grill doesn’t cook evenly, rotate the trays every 15 minutes.

Nutrition

Calories: 887kcal | Carbohydrates: 55g | Protein: 48g | Fat: 52g | Saturated Fat: 24g | Polyunsaturated Fat: 4g | Monounsaturated Fat: 20g | Trans Fat: 1g | Cholesterol: 163mg | Sodium: 1422mg | Potassium: 969mg | Fiber: 4g | Sugar: 9g | Vitamin A: 1262IU | Vitamin C: 11mg | Calcium: 530mg | Iron: 4mg

Nutritional values are approximate.

Blue Cheese Burgers with Caramelized Onions

My goodness, these blue cheese burgers with caramelized onions were good. Not sorta good, but close-your-eyes-when-you-take-a-bite good. Blue cheese and onions are the perfect match. Put them on perfectly cooked burgers and you’ve got a real winner. You can make the burgers really any way you like, but for me my go-to method is on an outdoor griddle. I like my patties thin, with a bit of a crunchy edge to them, so I end up smashing them before they really get cooking.

Blue Cheese Burgers with Caramelized Onions

The Perfect Amount Of Funk

Sometimes blue cheese makes my wife go ‘ewww’. Not the case with these blue cheese burgers with caramelized onions. The blue cheese is by no means overpowering. You do taste it, but it adds such a wonderful creaminess, a little tang, that you just want more. Make these and you’ll never want a burger any other way.

It Starts With The Patties

I start making my burgers by first making the patties. We prefer 4 ounce (or sometimes 5 ounce) patties. The Weber burger press helps get them perfect each time. And quickly, too. You just weigh out the meat, and place it in the press. Push down (you gotta put a bit of weight into it). And boom! Out comes a perfectly shaped patty!

Also try my fiery mushroom burgers.

Blue Cheese Burgers with Caramelized Onions
Print Pin
5 from 1 vote

Blue Cheese Burgers with Caramelized Onions

The blue cheese is by no means overpowering. You do taste it, but it adds such a wonderful creaminess and a little tang,
Course Main
Cuisine American
Keyword blue cheese, burgers, onion
Prep Time 15 minutes
Cook Time 30 minutes
Servings 4
Calories 686kcal

Ingredients

  • 3 tablespoons olive oil
  • 2 medium sweet onions halved, sliced thin
  • 1 teaspoon dried rosemary crushed
  • 1 teaspoon kosher salt divided
  • 1 ½ pounds ground beef
  • ½ teaspoon ground black pepper
  • ½ cup blue cheese crumbled
  • 4 hamburger buns
  • 8 lettuce leaves I used iceberg
  • 4 slices tomato

Instructions

  • Note; You can make this recipe on a grill using a griddle or indoors, using a skillet (preferably cast iron).
  • Heat the oil on a grill griddle or in a large skillet over medium-high heat.
  • Toss the onions with the rosemary and 1/4 teaspoon of salt. Transfer to the griddle or skillet and cook 8 minutes or until starting to soften. Turn and cook another 8 minutes or until the onions are completely soft and caramelized. Add more oil as the onion cooks if they are too dry but do not drench them. Remove to a bowl, cover and keep warm until ready to use.
  • Shape the beef into 4 equally-sized patties. Season well on both sides with remaining salt and all of the pepper.
  • Transfer the patties to the grill or skillet and cook 5-6 minutes per side until done as desired. I prefer thin patties, so I smash my patties onto my griddle as they start to cook. Just before removing the patties, top each with some of the caramelized onion and the blue cheese crumbles.
  • Toast or grilled the buns as desired.
  • Top the buns with the patties. Add lettuce and tomato and serve.

Notes

Substitute gorgonzola for the blue cheese for a slightly creamier, smoother cheese topping!

Nutrition

Calories: 686kcal | Carbohydrates: 37g | Protein: 39g | Fat: 42g | Saturated Fat: 17g | Polyunsaturated Fat: 2g | Monounsaturated Fat: 17g | Trans Fat: 2g | Cholesterol: 133mg | Sodium: 1224mg | Potassium: 915mg | Fiber: 3g | Sugar: 13g | Vitamin A: 3935IU | Vitamin C: 21mg | Calcium: 240mg | Iron: 6mg

Nutritional values are approximate.

Montreal Steak-Seasoned Smoked Bologna

This Montreal Steak-seasoned smoked bologna was destined for greatness. That greatness was in the form of a fried bologna sandwich. The bologna takes on such a great flavor from the seasoning and smoke. You’d never think it was ‘just’ bologna because it isn’t. It’s something special, something amazing.

Montreal Steak-Seasoned Smoked Bologna

Freeze The Leftovers For More Joy Later

I slice my Montreal Steak-seasoned smoked bologna thin, for sandwiches. I usually end up with a lot of slices. Much more than I could ever use in a few days. So I freeze it for later use. To maximum quality, I put the slices into vacuum-sealer bags and seal them. But, to make sure the slices don’t stick together I put burger patty paper between each slice.

Of course you can use whatever seasoning you prefer when smoking bologna. I just happened to be craving Montreal Steak for some reason. Probably because I ran across a jar of it in my spice rack and thought…. hmmmm… what can I use this on?

Montreal Steak-Seasoned Smoked Bologna

Also try my red chile smoked bologna.

Montreal Steak-Seasoned Smoked Bologna
Print Pin
5 from 1 vote

Montreal Steak-Seasoned Smoked Bologna

You can use whatever seasoning you prefer when smoking bologna.
Course Main
Cuisine American
Keyword bologna, smoked
Prep Time 15 minutes
Cook Time 3 hours
Servings 16
Calories 438kcal

Ingredients

Instructions

  • Fire up your smoker for 250 F. Use any wood you like, but I've found that fruit woods or hickory work best for me.
  • Start by scoring the chub. I've tried getting fancy diamond patterns, and sometimes they're great and sometimes they're not. Checkerboard works best for me! Either way, you want to make about 1/2" cuts so that the smoke and seasoning penetrate the bologna.
  • Spread the mustard liberally over the bologna. The mustard will help the seasoning adhere to the meat.
  • Now add the seasoning. Don't be shy. Get it on all sides, everywhere.
  • Transfer to the smoker and smoke for 3 hours.
  • Remove from the smoker and let rest before slicing. I've found that a super-sharp knife is great for slicing the bologna thin for sandwiches. You can use a meat slicer also. If you're having trouble getting good slices, freeze the chub for 15 or so minutes then try slicing it.

Notes

This bologna makes for some of the best sandwiches!

Nutrition

Calories: 438kcal | Carbohydrates: 8g | Protein: 22g | Fat: 35g | Saturated Fat: 13g | Polyunsaturated Fat: 2g | Monounsaturated Fat: 15g | Cholesterol: 85mg | Sodium: 1382mg | Potassium: 449mg | Fiber: 1g | Sugar: 6g | Vitamin A: 120IU | Vitamin C: 1mg | Calcium: 122mg | Iron: 2mg

Nutritional values are approximate.