Restaurant Style Peel and Eat Shrimp

We recently returned from a vacation to the Fernandina Beach area of Florida. We’d never been before and so enjoyed our time there. From the moment I made the reservations I dreamed of one thing about the trip. Nope, it wasn’t the beach, or the great warm weather or nice people. I dreamed of eating restaurant style peel and eat shrimp. And I don’t mean sort of dreamed about it, either. I was obsessed. And after we got home I made an exact copy of those same dishes so I could keep enjoying them. It was like being back on the beach, except I was in the middle of Indiana!

Restaurant-Style Peel-and-Eat Shrimp

Use Good Shrimp For The Best Results

You want to use the best shrimp I could get when I made these restaurant style peel-and-eat shrimp. That means not farm raised somewhere far, far away. Lucky me, I found a family-owned seafood company just south of Amelia Island that ships fantastic shrimp for a good price, Shrimp To Shore. The shrimp are wild caught, perfectly sized, and crazy delicious. They’re what made this a memorable dish.

Oh, if you’re in the Fernandina Beach or Amelia Island areas and are craving great peel-and-eat shrimp, stop by The Salty Pelican and Slider’s Seaside Grill and order up a plate!

Also try my Italian barbecue shrimp.

Restaurant-Style Peel-and-Eat Shrimp
Print Pin
5 from 1 vote

Restaurant Style Peel and Eat Shrimp

Use the best shrimp you can find for the best results
Course Appetizer or Main
Cuisine American
Keyword restaurant, shrimp
Prep Time 15 minutes
Cook Time 5 minutes
Servings 1
Calories 249kcal

Equipment

Ingredients

Instructions

  • Fill a large pot halfway with water.
  • Add the beer, 2 tablespoons of Old Bay, pickling spice, and one lemon (halved along with the juice).
  • Bring the water to a boil.
  • Add the shrimp.
  • Cook for 2-4 minutes or until done as desired.
  • Drain the shrimp in a colander but do not rinse. Sprinkle with more Old Bay as desired and toss gently.
  • Serve with the remaining lemon (sliced) and cocktail sauce. I serve my shrimp over fresh crushed ice.

Notes

I like to cook a single shrimp first. I use it as a test to determine the exact cook time for the remaining shrimp. In my case, my 20 count shrimp took 2 minutes and 40 seconds to be perfect. Shrimp aren’t cheap, and you want the best-cooked shrimp. I think it’s worth this extra step to determine the ideal cook time!

Nutrition

Calories: 249kcal | Carbohydrates: 42g | Protein: 5g | Fat: 2g | Saturated Fat: 1g | Polyunsaturated Fat: 1g | Monounsaturated Fat: 1g | Sodium: 25mg | Potassium: 507mg | Fiber: 8g | Sugar: 6g | Vitamin A: 290IU | Vitamin C: 118mg | Calcium: 189mg | Iron: 5mg

Nutritional values are approximate.

Denver Omelet Nachos

The first time I had a Denver omelet was on a Delta airlines flight when I was a kid. That was long long ago. Even at a young age I knew I was hooked on them. I loved that wonderful combination of cheese, ham, onion, mushroom and peppers. These Denver omelet nachos takes those long-time favorite flavors and put them on top of my other favorite: crispy tater tots. Yep, it’s a marriage made in heaven for sure. And for a delightful twist, a lightly spicy cream sauce. The sauce cuts through some of that richness and makes the world a wonderful place again. Ok, so maybe it doesn’t do that but it is mighty darned good!

Denver Omelet Nachos

A Delicious Twist With Classic Flavors

I think of these Denver omelet nachos as the perfect grownup version of the breakfast dish I had as a kid. Nothing wrong with the old way, either, definitely not. But this is a great twist on a long-time favorite. And as a bonus, my wife declared this to be one of the things we’ve made! Plus who doesn’t like crispy tater tots?

Also try my Memphis mile-high BBQ nachos.

Denver Omelet Nachos
Print Pin
5 from 1 vote

Denver Omelet Nachos

These Denver omelet nachos takes those long-time favorite flavors and put them on top of my other favorite: crispy tater tots.
Course Main
Cuisine American
Keyword nachos
Prep Time 15 minutes
Cook Time 25 minutes
Servings 4
Calories 1404kcal

Ingredients

For the nachos

  • 1 bag tater tots or crispy crowns
  • kosher salt to taste
  • ground black pepper to taste
  • 2 tablespoons olive oil divided
  • 8 ounces ham steak cubed
  • 4 ounces button mushrooms diced
  • ½ cup red bell pepper diced
  • ½ cup green bell pepper diced
  • ½ cup onion diced
  • 4 large eggs
  • ¼ cup whole milk
  • 1 tablespoon unsalted butter
  • 3 cups Colby Jack cheese shredded, for topping
  • 2 large green onions sliced, for garnish

For the sauce

Instructions

For the sauce

  • Whisk together all ingredients.
  • Transfer to a squeeze bottle or bowl in the fridge until ready to use.

For the nachos

  • Preheat oven to 425 F.
  • Prepare the tater tots or crispy crowns according to package instructions. Make sure to get them good and crispy.
  • Season well with salt and pepper.
  • Reduce the oven temperature to 300 F for melting the cheese before serving.
  • Add half the oil to a large skillet or saute pan over high heat.
  • Add the ham and cook until just starting to brown on the edges.
  • Transfer to a paper towel-lined plate.
  • Add the remaining oil.
  • Add the mushrooms, peppers and onion.
  • Stir and cook until the vegetables are just starting to turn tender.
  • Transfer to a bowl.
  • Add in the ham.
  • Stir and season with salt and pepper.
  • Whisk together the eggs and milk in a small bowl.
  • Season with salt and pepper.
  • Add the butter to the skillet and reduce heat to medium.
  • Add the eggs.
  • Stirring constantly, scramble the eggs until just set (do not overcook!).
  • Remove to a plate and lightly break up the eggs using a fork.
  • Assemble the nachos by dividing the tots between 4 oven-proof plates.
  • Top with the ham and vegetable mixture, followed by the eggs.
  • Sprinkle with cheese and place in the oven for about 3 minutes or until the cheese has melted.
  • Serve drizzled with the sauce and garnished with the green onions.

Notes

Add a little minced jalapeno for a nice kick.

Nutrition

Calories: 1404kcal | Carbohydrates: 69g | Protein: 48g | Fat: 106g | Saturated Fat: 35g | Polyunsaturated Fat: 35g | Monounsaturated Fat: 31g | Trans Fat: 1g | Cholesterol: 338mg | Sodium: 3099mg | Potassium: 1246mg | Fiber: 7g | Sugar: 6g | Vitamin A: 2220IU | Vitamin C: 85mg | Calcium: 785mg | Iron: 4mg

Nutritional values are approximate.

Deep-Fried Brussels Sprouts

Who doesn’t love crispy Brussels sprouts leaves? Normally, I’ll grill or roast my sprouts. Most of the leaves that fall off and get super crispy disappear in no time. But why should the leaves be the crispiest yummiest part? They shouldn’t be. That’s why I deep-fried Brussels sprouts and… wow…

Deep-Fried Brussels Sprouts

Very Different And Very Good

Would I make deep-fried Brussels sprouts every day? No. Well, probably not. They’re very good, and even better drizzled in fish sauce. Or, if you prefer, serve the fish sauce on the side. Then you can dip these little delicious bites a little or a lot!

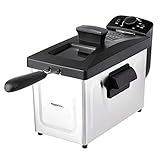
I get out my big deep fryer when it’s time to fry a large batch of food. It comes to temperature quickly and it maintains that temperature perfectly. It has a built-in oil filter and storage unit so I can re-use the oil several times.
Have you tried pickled Brussels sprouts? They’re delicious too!

Deep-Fried Brussels Sprouts
Print Pin
4 from 1 vote

Deep-Fried Brussels Sprouts

Drizzle the Brussels sprouts with fish sauce or serve it on the side.
Course Side
Cuisine American
Keyword Brussels sprouts, deep-fried
Prep Time 10 minutes
Cook Time 10 minutes
Servings 4
Calories 49kcal

Equipment

Ingredients

Instructions

  • Heat oil to 350 F in a deep fryer or Dutch oven.
  • Trim any loose leaves from the Brussels sprouts and cut in half.
  • Working in batches, fry the oil for 2 1/2 – 3 minutes or until golden brown and crispy.
  • Remove to a paper towel-lined plate or wire rack-lined baking sheet to drain.
  • Season immediately with salt.
  • Serve drizzled with fish sauce.

Notes

Also serve fish sauce on the side as a dipping sauce.

Nutrition

Calories: 49kcal | Carbohydrates: 10g | Protein: 4g | Fat: 1g | Saturated Fat: 1g | Polyunsaturated Fat: 1g | Monounsaturated Fat: 1g | Sodium: 28mg | Potassium: 441mg | Fiber: 4g | Sugar: 2g | Vitamin A: 855IU | Vitamin C: 96mg | Calcium: 48mg | Iron: 2mg

Nutritional values are approximate.

Copycat Hamburger Helper Beef Noodle

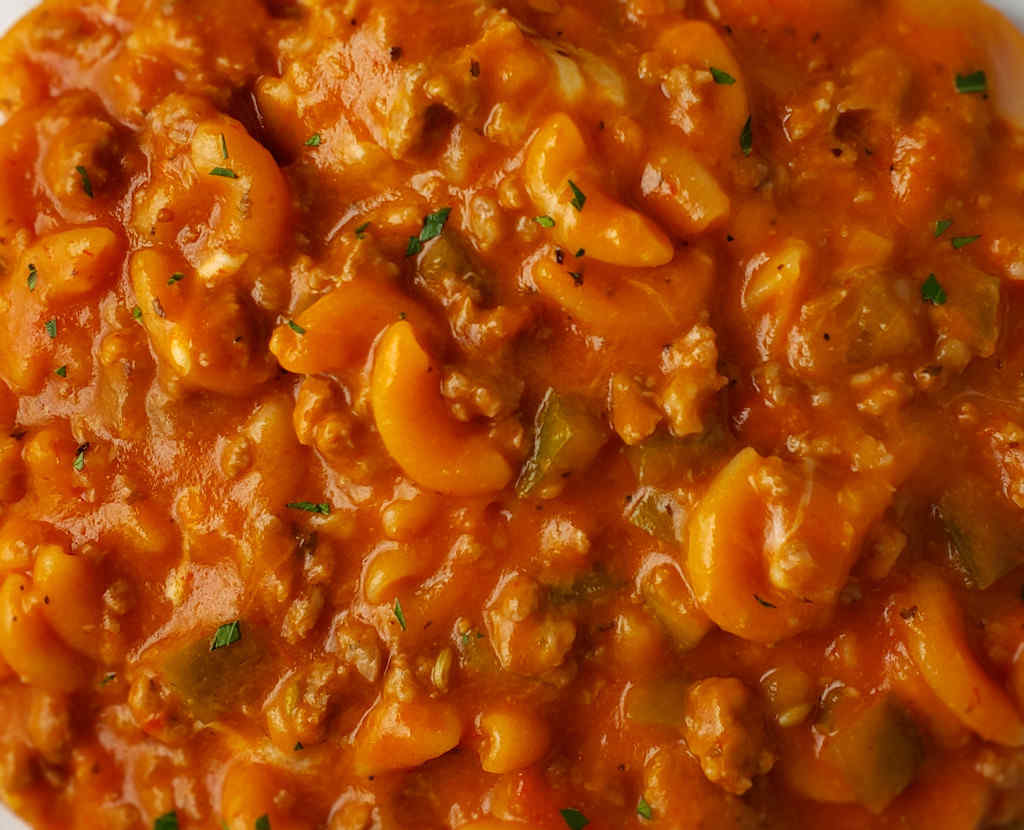
I could not even begin to tell you the last time I had Hamburger Helper Beef Noodle. No doubt it was back in my bachelor days, when even opening a box in preparation for dinner was a challenge. I ran across this recipe for copycat Hamburger Helper beef noodle and instantly realized I needed to make a copycat of those same flavors again. And this is it. Browned ground beef in a creamy, perfectly-seasoned sauce with wonderful perfectly-cooked egg noodles. This tastes exactly how I remember the original. Actually, it does taste even better.

Copycat Hamburger Helper Beef Noodle

Egg Noodles For The Win

You can pretty much put any pasta you want in this copycat Beef Noodle Hamburger Helper. I had half a bag of leftover Amish egg noodles that were absolutely perfect in this dish. You want the noodles to still have a bit of a ‘bite’ to them, so don’t over cook them. Mushy pasta won’t work here. Well, anywhere really….

If you long for the original, you still find it in stores and online. And there’s nothing wrong with it, either! Now they have all sorts of cool new flavors. Many more than there were to choose from when I was a young hungry lad that could barely open a can.

Also try my copycat cheeseburger hamburger helper.

Copycat Hamburger Helper Beef Noodle
Print Pin
3.69 from 19 votes

Copycat Hamburger Helper Beef Noodle

A wonderful flashback dish!
Course Main
Cuisine American
Keyword copycat, Hamburger helper
Prep Time 10 minutes
Cook Time 30 minutes
Servings 6
Calories 288kcal

Ingredients

Instructions

  • Brown the ground beef in a large skillet. Break into small pieces. Drain any excess fat once cooked.
  • Meanwhile, whisk together the cornstarch, sugar, onion powder, garlic powder, salt and pepper.
  • Boil the water in a small pan on the stovetop or in the microwave. Remove from heat and add the bouillon cubes. Stir until dissolved. Add to the skillet with the beef and stir to combine.
  • Add milk to skillet and stir.
  • Add the cornstarch mixture to the skillet and stir.
  • Add the egg noodles. Stir and bring to a boil.
  • Reduce heat to a simmer, cover, and cook for 12-15 minutes or until the noodles are tender. Stir occasionally. If you need you may add more water, but add it sparingly.
  • Remove from heat and let stand for 5 minutes before stirring and serving.

Notes

You may have to add a bit of water if reheating from leftover.

Nutrition

Calories: 288kcal | Carbohydrates: 14g | Protein: 17g | Fat: 18g | Saturated Fat: 7g | Polyunsaturated Fat: 1g | Monounsaturated Fat: 7g | Trans Fat: 1g | Cholesterol: 72mg | Sodium: 475mg | Potassium: 338mg | Fiber: 1g | Sugar: 4g | Vitamin A: 108IU | Vitamin C: 1mg | Calcium: 97mg | Iron: 2mg

Nutritional values are approximate.

Quick Fix Nashville Hot Chicken Potato Chips

I find myself being un-impressed with most store-bought ‘spicy’ potato chips. Yeah, some are spicy, but they don’t taste good. And some taste great, but they sure aren’t spicy. The solution? Make some quick fix Nashville hot chicken potato chips at home. Done in minutes, spiced just like I want, these are the chips I was searching for! All I need are some chips and Kosmo’s Q Nashville hot wing dust! No more unimpressive store-bought chips for me.

Quick Fix Nashville Hot Chicken Potato Chips

Ruffled Chips For The Win

I prefer to use wavy ruffled chips any time I make my quick fix Nashville hot chicken potato chips. The thick chips hold up to being tossed in the seasoning. And the ridges give the seasoning more and more places to cling to, making sure I get nothing but flavor in each and every bite!

Also try my quick fix salt and vinegar, lemon pepper, and garlic Parmesan potato chips.

Quick Fix Nashville Hot Chicken Potato Chips
Print Pin
5 from 1 vote

Quick Fix Nashville Hot Chicken Potato Chips

Thick chips hold up better to being tossed in the seasoning.
Course Snack
Cuisine American
Keyword potato chips, quick fix, spicy
Prep Time 15 minutes
Cook Time 5 minutes
Servings 4
Calories 452kcal

Ingredients

Instructions

  • Preheat your oven to 275 F.
  • Spread chips out onto a baking sheet. Bake for 5 minutes. You should see that the oils in the chips have come to the surface.
  • Gently transfer chips to a large bowl and sprinkle with the seasoning. Use a spatula to carefully stir to coat.
  • Serve immediately.

Notes

Be gentle when stirring to avoid breaking the chips.

Nutrition

Calories: 452kcal | Carbohydrates: 46g | Protein: 5g | Fat: 29g | Saturated Fat: 3g | Polyunsaturated Fat: 7g | Monounsaturated Fat: 16g | Trans Fat: 1g | Sodium: 448mg | Potassium: 1020mg | Fiber: 3g | Sugar: 1g | Vitamin C: 18mg | Calcium: 18mg | Iron: 1mg

Nutritional values are approximate.

Apple Pie Baked Beans on the Char-Broil Big Easy

Note: This recipe was developed using the Char-Broil Big Easy Oil-Less Fryer. If you are cooking using the Char-Broil Smoker-Roaster Grill you should cook with the lid open and the temperature set to High. You might also need to adjust the cooking time.

Oh me. Just thinking back to these apple pie baked beans on the Char-Broil Big Easy has me wanting to make another batch. Now. Right now. In just over an hour I could be enjoying these slightly sweet, flavor-packed beans. And so could a few others, because this recipe makes a big batch.

Apple Pie Baked Beans on the Char-Broil Big Easy

A Bunk Bed Basket makes it even easier

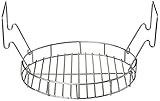
To make these apple pie baked beans on the Char-Broil Big Easy, I needed a few things. First, a Bunk Bed basket. This is the first thing you should buy after getting a Big Easy. It nearly doubles your cooking space and makes sides dishes like this one a breeze. It also makes it easier to add and remove dishes from your cooker. You can fit three baskets in the Big Easy at once, but it takes a good bit of adjusting and luck to make it work.

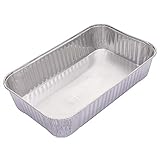
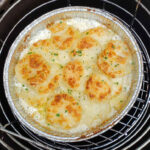
Next up, I needed pans for the apple pie baked beans on the Char-Broil Big Easy. I recently discovered that Dutch oven line pans fit perfectly. They are 8″ in diameter and have tall sides so they hold a lot of food. They’re great so I ordered a big lot of them. I know I’ll use them up quick because I use my Big Easy a lot.

Also try my spicy barbecue-and-bacon baked beans made on the Big Easy.

It’s always a good idea to keep a few spare grease trays on hand for your Char-Broil Big Easy.

Love your Big Easy as much I love mine? Check out my Big Easy Add-Ons page and all 3 of my huge free Big Easy eCookbooks!

Apple Pie Baked Beans on the Char-Broil Big Easy
Print Pin
5 from 1 vote

Apple Pie Baked Beans on the Char-Broil Big Easy

I added onion and bacon. These beans are amazing!
Course Side
Cuisine American
Keyword baked beans, Big Easy, Char-Broil
Prep Time 15 minutes
Cook Time 1 hour
Servings 10
Calories 211kcal

Ingredients

For the beans

Optional add-ons

  • bell pepper chopped
  • onion chopped
  • jalapeno slices
  • bacon cooked, chopped
  • garlic minced

Instructions

  • Fire up your Big Easy.
  • Place pie filling into a blender and pulse a few times. You don't want to puree the filling, you just want to chop up the larger pieces of apple. Transfer to a bowl.
  • Add the beans, BBQ sauce and BBQ seasoning plus any add-ons if using. Stir to combine.
  • Divide the bean mixture between two pans (they'll be completely full) and carefully transfer the pans to the Big Easy basket and bunk bed basket.
  • Lower the basket into the Big Easy and cook for 1 hour. If possible, stir the beans every 15 minutes or so. It can be hard to stir the bottom pan. Don't worry if you can't stir they'll be just fine either way. If you've added bell pepper or onion you might want to check if they've cooked to your liking. They might require another 15-30 minutes of cooking time.
  • Once the beans are hot and bubbly remove the basket from the Big Easy.
  • Let cool slightly before carefully removing the pans. Remember the pans are full and aren't rigid. Try to support the bottoms of the pans as you remove them.

Notes

Disposable pans make for easy cleanup!

Nutrition

Calories: 211kcal | Carbohydrates: 43g | Protein: 8g | Fat: 2g | Saturated Fat: 1g | Polyunsaturated Fat: 0.3g | Monounsaturated Fat: 1g | Cholesterol: 11mg | Sodium: 667mg | Potassium: 502mg | Fiber: 9g | Sugar: 6g | Vitamin A: 11IU | Vitamin C: 4mg | Calcium: 84mg | Iron: 3mg

Nutritional values are approximate.

Quick Fix Lemon Pepper Potato Chips

Because I’m a chicken wing nut, I have a lot of various wing seasonings on hand at all times. And I do mean a lot. But, you know those seasonings (and any other of my favorites) are great on potato chips? No reason to be locked into only a handful of flavored chips at the store when you can make them taste however you want! Today I made a batch of my quick fix lemon pepper potato chips. Chips. Lemon pepper seasoning. That’s it! And oh-so-good!

Quick Fix Lemon Pepper Potato Chips

Cheap Chips For The Win

You don’t need to grab the expensive chips when you make quick fix lemon pepper potato chips. The key here is to warm up the chips just enough that the oils they were cooked in come back to the surface of the chips. That gives the seasoning something to cling to. No big pile of seasoning at the bottom of the bowl with these chips, nope. Nothing but flavor.

Of course, you can make homemade potato chips in a deep-fryer and then toss them in the seasoning too! Just don’t over-drain the chips as they come out of the hot oil or the flavors won’t have anything to adhere to. Make sure you get them good and coated.

Also try my quick fix salt and vinegar, Nashville hot chicken, and garlic Parmesan potato chips.

Quick Fix Lemon Pepper Potato Chips
Print Pin
5 from 1 vote

Quick Fix Lemon Pepper Potato Chips

Chips. Lemon pepper seasoning. That's it! And oh-so-good!
Course Snack
Cuisine American
Keyword lemon pepper, potato chips, quick fix
Prep Time 15 minutes
Cook Time 5 minutes
Servings 4
Calories 452kcal

Ingredients

Instructions

  • Preheat your oven to 275 F.
  • Spread chips out onto a baking sheet. Bake for 5 minutes. You should see that the oils in the chips have come to the surface.
  • Gently transfer chips to a large bowl and sprinkle with the seasoning. Use a spatula to carefully stir to coat.
  • Serve immediately.

Notes

Be gentle when stirring to avoid breaking the chips.

Nutrition

Calories: 452kcal | Carbohydrates: 46g | Protein: 5g | Fat: 29g | Saturated Fat: 3g | Polyunsaturated Fat: 7g | Monounsaturated Fat: 16g | Trans Fat: 1g | Sodium: 448mg | Potassium: 1020mg | Fiber: 3g | Sugar: 1g | Vitamin C: 18mg | Calcium: 18mg | Iron: 1mg

Nutritional values are approximate.

Southern Marinated Fried Chicken using the Vortex

What’s better than ‘fried’ chicken made using the Vortex BBQ insert? If you’ve made it before, you know what I’m talking about. If you haven’t made it before, you’re missing out. In fact, you need to stop reading this point right now and order one for your charcoal grill. Then make this southern marinated fried chicken using the Vortex. It’s amazing. Crunchy skin. Tender, juicy meat. And packed with flavor and then some. You’ll swear it was fried in oil.

Southern Marinated Fried Chicken using the Vortex

Tender, Juicy Chicken With That Great Crunchy Skin

The seasoning is the key to the flavor in this southern marinated fried chicken using the Vortex. Nothing fancy, but oh so good on chicken. Left to marinate overnight, the seasoning ends up flavoring every bite, all the way through. And with no trouble at all, the Vortex cooks the chicken up perfectly.

I’ve never had leftover ‘fried’ chicken made using the Vortex. And I don’t think I ever will. There’s nothing about it but goodness. And even though I’ve made it hundreds of times, I’m still impressed each and every time. I still think that I’m enjoying fried chicken even though it’s grilled. It’s an amazing experience that is easy to boot.

Also try my spicy hot Vortex chicken.

Southern Marinated Fried Chicken using the Vortex
Print Pin
5 from 1 vote

Southern Marinated Fried Chicken using the Vortex

The seasoning is the key to the flavor in this southern marinated fried chicken.
Course Main
Cuisine American
Keyword fried chicken, marinated, Vortex
Prep Time 15 minutes
Cook Time 1 day 45 minutes
Servings 4
Calories 129kcal

Equipment

Ingredients

For the seasoning

For the chicken

Instructions

For the seasoning

  • Combine all ingredients.

For the chicken

  • Rinse chicken and pat dry.
  • Transfer chicken to a sealable bag or container.
  • Add HALF of the seasoning. Seal, and toss to coat. Refrigerate overnight.
  • Fire up your Vortex with a full load of coals. Let them ash over before cooking.
  • Combine the remaining seasoning with the pepper and flour.
  • Roll chicken in the flour mixture and coat well.
  • Place the chicken on the grill grate around the Vortex.
  • Close the lid (leaving the top vent open) and cook for 45 minutes or until the chicken reaches 165 F. You may turn the lid 90 degrees every 15 minutes of cooking if desired.
  • Lightly brush the tops of the chicken pieces with oil and cook another 5 minutes to crisp the skin.
  • Remove and serve.

Notes

You can use your favorite chicken cuts.

Nutrition

Calories: 129kcal | Carbohydrates: 27g | Protein: 4g | Fat: 1g | Saturated Fat: 1g | Polyunsaturated Fat: 1g | Monounsaturated Fat: 1g | Cholesterol: 1mg | Sodium: 1748mg | Potassium: 80mg | Fiber: 1g | Sugar: 1g | Vitamin A: 3IU | Vitamin C: 1mg | Calcium: 15mg | Iron: 2mg

Nutritional values are approximate.

Potluck Macaroni and Cheese

My wife declared this potluck macaroni and cheese our go-to dish for family get-togethers. I agree, it’s not just darned good but it makes a mighty big batch to boot. You can make it in a (big) crockpot or on the stovetop (in a pretty big pot). It’s creamy, cheesy and downright yummy. And I do mean mega creamy and mega cheesy, too. No one is gonna be screaming for more cheese.

The Mexican cheese adds a wonderfully different flavor but it doesn’t make the dish spicy. If you want to spice up your mac and cheese, substitute Mexican Velveeta. Don’t worry, it won’t be so hot that it’ll run grandma off. But you might want to warn her a bit.

Potluck Macaroni and Cheese

Like Having A Cheesy Canvas For Other Flavors

You can make hundreds more variations on this recipe for potluck macaroni and cheese. I like to add drained jarred pimentos. Or chopped roasted red bell peppers. Or roasted green chiles or jalapenos. The possibilities are endless. Oh, and don’t be afraid to use different kinds of cheeses.

This isn’t meant to be the diet version of mac and cheese, though. Don’t go using 2% milk and what-not. It’s mac-and-cheese. Not a salad.

Also try my mac and cheese soup.

Potluck Macaroni and Cheese
Print Pin
5 from 2 votes

Potluck Macaroni and Cheese

You can make hundreds more variations on this recipe for potluck macaroni and cheese. I like to add drained jarred pimentos. Or chopped roasted red bell peppers. Or roasted green chiles or jalapenos.
Course Side Dish
Cuisine American
Keyword mac and cheese, macaroni and cheese
Prep Time 10 minutes
Cook Time 2 hours 45 minutes
Servings 16 servings
Calories 402kcal

Equipment

Ingredients

  • 3 cups elbow macaroni
  • 16 ounces Velveeta cubed
  • 2 cups Mexican cheese blend shredded
  • 2 cups white cheddar cheese shredded, can substitute any shredded white cheese
  • 1 ¾ cups whole milk
  • 12 ounces evaporated milk
  • ¾ cup unsalted butter melted
  • 3 large eggs lightly beaten

Instructions

  • Cook macaroni according to package directions. Drain well.
  • Transfer to a 5 quart or larger slow cooker that has been sprayed with non-stick spray.
  • Stir in the remaining ingredients.
  • Cook, covered, on low for 2-1/2 hours, stirring every 30 minutes.

Notes

You can also cook this on the stovetop. Instead of transferring to a slow cooker, just return the drained pasta to the pot in which you cooked it. Stir in the remaining ingredients. Cover and cook on low for 30 minutes or until the cheeses have melted and the mixture is heated thoroughly, stirring often.

Nutrition

Calories: 402kcal | Carbohydrates: 27g | Protein: 19g | Fat: 24g | Saturated Fat: 15g | Trans Fat: 1g | Cholesterol: 107mg | Sodium: 685mg | Potassium: 296mg | Fiber: 1g | Sugar: 7g | Vitamin A: 921IU | Vitamin C: 1mg | Calcium: 455mg | Iron: 1mg

Nutritional values are approximate.

Quick Fix Garlic Parmesan Potato Chips

I got tired of sitting around whining that no one was making good new flavors of potato chips. Oh sure, every once-in-a-while there’d be something new, but nothing seemed to wow me and I always ended up with the classics, BBQ, sour cream and onion and well, plain. Nothing wrong with the classics. They are classics for a reason. But I wanted something new. I had a pouch of garlic Parmesan wing dust from Kosmo’s sitting around and thought… Hmmmmm. I bet that’d be great on chips. It’s sure as heck fantastic on wings. Quick fix garlic Parmesan potato chips to the rescue!

Quick Fix Garlic Parmesan Potato Chips

Nothing But Flavor And Crunch

These quick fix garlic Parmesan potato chips were delicious. Kosmo’s wing dusts are never, ever lacking in flavor. It didn’t take a whole lot of dust to really amp up what was just a bag of good-ole plain ruffled chips. My faith in chips is back!

Of course, you can make homemade potato chips in a deep-fryer and then toss them in the seasoning too! Just don’t over-drain the chips as they come out of the hot oil or the flavors won’t have anything to adhere to. Make sure you get them good and coated.

Also try my quick fix salt and vinegar, lemon pepper, and Nashville hot potato chips.

Quick Fix Garlic Parmesan Potato Chips
Print Pin
5 from 1 vote

Quick Fix Garlic Parmesan Potato Chips

Inspired by a recipe from Simple Comfort Food
Course Snack
Cuisine American
Keyword garlic Parmesan, potato chips, quick fix
Prep Time 10 minutes
Cook Time 5 minutes
Servings 4
Calories 452kcal

Ingredients

Instructions

  • Preheat your oven to 275 F.
  • Spread chips out onto a baking sheet. Bake for 5 minutes. You should see that the oils in the chips have come to the surface.
  • Gently transfer chips to a large bowl and sprinkle with the seasoning. Use a spatula to carefully stir to coat.
  • Serve immediately.

Notes

Be gentle when stirring to avoid breaking the chips.

Nutrition

Calories: 452kcal | Carbohydrates: 46g | Protein: 5g | Fat: 29g | Saturated Fat: 3g | Polyunsaturated Fat: 7g | Monounsaturated Fat: 16g | Trans Fat: 1g | Sodium: 448mg | Potassium: 1020mg | Fiber: 3g | Sugar: 1g | Vitamin C: 18mg | Calcium: 18mg | Iron: 1mg

Nutritional values are approximate.