Crabmeat Stuffed Oyster Shells

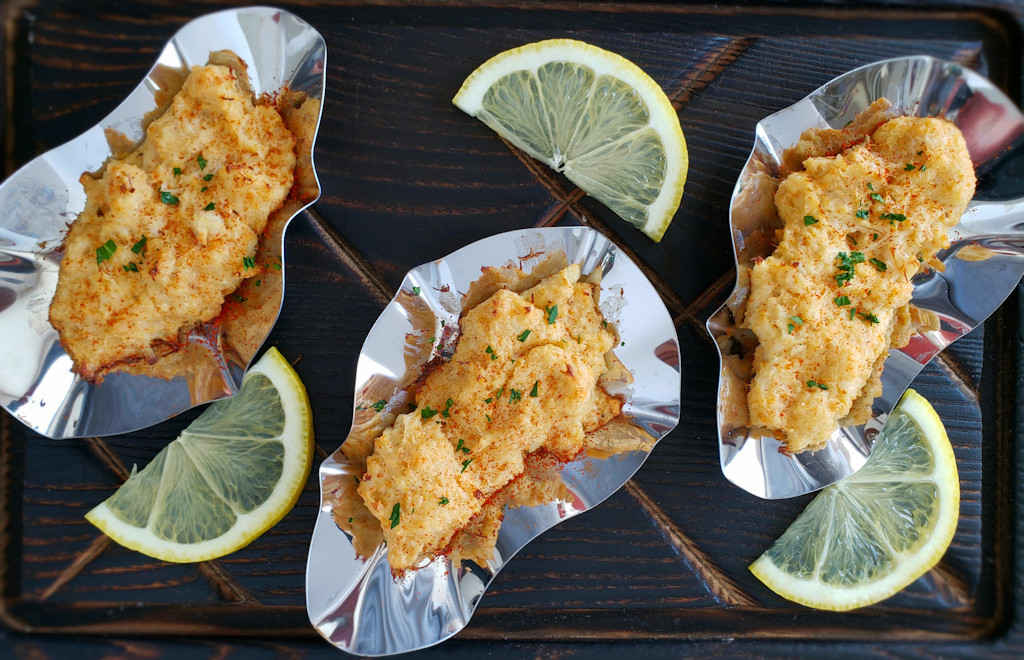
Think crab cakes. Cooked and served in oyster shells, these are easy to make and fun to eat. I have a real problem containing myself around crab cakes, and these are no exception. Simple ingredients, nothing hides that great crab flavor. I really enjoyed my crabmeat stuffed oyster shells… except that I should’ve made more! This has quickly become a favorite in our house. They’re easy to make and delicious to boot! I was already a big crab addict. These just made that worse!

Crabmeat Stuffed Oyster Shells

Fun Shells Make For Fun Food!

I used stainless steel reusable oyster shells, which have quickly become my go-to servers for seafood and well, just about anything I can fit into them. Even though they go onto a grill or in the oven, they cool off quickly so you can handle them. Just pick them up and slurp them down, just like you were eating oysters. Fun! It also means I can devour a whole bunch of these crabmeat stuffed oyster shells in no time!

I love anything with Old Bay Seasoning in it.

Crabmeat Stuffed Oyster Shells
Print Pin
4.50 from 2 votes

Crabmeat Stuffed Oyster Shells

Think crab cakes. Cooked and served in oyster shells, these are easy to make and fun to eat. I have a real problem containing myself around crab cakes, and these are no exception.
Course Appetizer
Cuisine American
Keyword crab, oyster shells
Prep Time 15 minutes
Cook Time 15 minutes
Servings 4
Calories 153kcal

Ingredients

Instructions

  • Fire up your grill for direct cooking or preheat an oven to 450 F.
  • Combine the cream cheese, garlic powder, Old Bay, paprika and breadcrumbs. Gently fold in the crab meat.
  • Divide the mixture between the shells (about 1/4 cup in each).
  • Grill or bake for 10 minutes. If using an oven, place the shells under the broiler and additional 2-3 minutes to brown.
  • Serve with lemon slices.

Notes

Old Bay seasoning addicts like me would add a little extra of the good stuff!

Nutrition

Calories: 153kcal | Carbohydrates: 5g | Protein: 10g | Fat: 10g | Saturated Fat: 6g | Cholesterol: 49mg | Sodium: 479mg | Potassium: 138mg | Fiber: 1g | Sugar: 1g | Vitamin A: 404IU | Vitamin C: 3mg | Calcium: 58mg | Iron: 1mg

Nutritional values are approximate.

Cedar Plank Potato Skins

If you’d ask me what my favorite bar foods are, I’d say wings and potato skins. I can sit and eat either or both for hours (proven!) with a cold beer (or two) and watch a game on the big screen. When I’m at home, I like to make cedar plank potato skins. They’re just as great as my bar favorite, but they have a twist. That hint of cedar aroma, a little taste. The cedar planks add something different. Face it, if they didn’t, I wouldn’t use them!

Cedar Plank Potato Skins

A Better Potato Skin

There’s one thing that can make a cedar planked potato skin less than stellar, and for me, that’s soft soggy potato skin. It needs to be just a bit crunchy. Don’t be afraid to bake your potatoes just a bit longer than you might normally for baked potatoes. Get that skin a bit crunchier. You’ll be happy you did. If you have to, you can finish the skins over direct heat to get more crunchy.

Also try my grilled potato skins and my planked Hasselback potatoes.

This recipe is based on a recipe from the Wildwood Grilling Outlet.

Cedar Plank Potato Skins
Print Pin
5 from 1 vote

Cedar Plank Potato Skins

 When I’m at home, I like to make cedar plank potato skins. They’re just as great as my bar favorite, but they have a twist. That hint of cedar aroma, a little taste. Different.
Course Appetizer
Cuisine American
Keyword cedar plank, potato skins
Prep Time 30 minutes
Cook Time 15 minutes
Servings 2
Calories 439kcal

Ingredients

  • 2 large Russet potatoes baked, cooled
  • vegetable oil
  • kosher salt to taste
  • ground black pepper to taste
  • 2 slices bacon cooked, crumbled
  • ½ cup cheddar cheese shredded
  • 2 tablespoons sour cream for garnish
  • 1 green onion sliced, for garnish

Instructions

  • Soak a medium sized cedar plank in water for 30 minutes.
  • Fire up your grill for indirect cooking at 400 F.
  • Poke a few holes in the potatoes using a knife. Lightly brush them with oil and season heavily with salt.
  • Grill for 45 minutes to 1 hour or until tender. Potatoes should reach at least 200 F internal temperature to be done. Remove and let cool slightly.
  • Cut the potatoes in half and scoop out enough of the insides so you leave 1/4"-1/2" thick around the sides and bottom. Season well with salt and pepper.
  • Place the potatoes on the cedar plank and add the cheese and bacon. Grill for 5-10 minutes over indirect heat until the cheese has melted.
  • Garnish with sour cream and green onions and serve immediately.

Notes

Substitute pepper jack for the cheddar for a nice little kick.

Nutrition

Calories: 439kcal | Carbohydrates: 68g | Protein: 15g | Fat: 13g | Saturated Fat: 8g | Cholesterol: 37mg | Sodium: 206mg | Potassium: 1600mg | Fiber: 5g | Sugar: 3g | Vitamin A: 421IU | Vitamin C: 22mg | Calcium: 269mg | Iron: 3mg

Nutritional values are approximate.

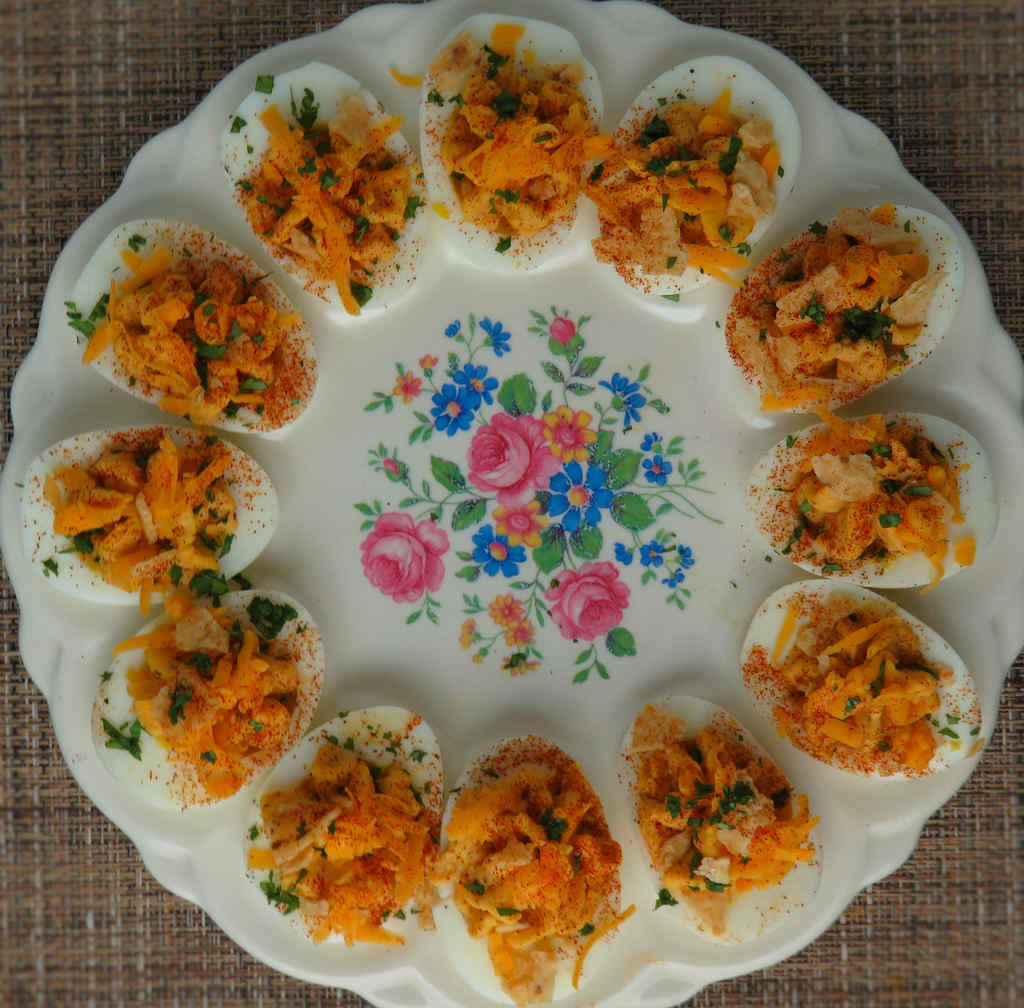
Chili Deviled Eggs

If there’s a plate of deviled eggs to be found, I’m there. These chili deviled eggs take the old school classic to a totally new place. They have a good bit of a mustardy tang to them, more so than grandma’s much-loved version. But undoubtedly, the big score is the crunchy corn chip topping, contrasting the creamy smooth filling perfectly. These are different but not so crazy different that you’ll scare anyone away from the appetizer table. I could not get enough of them, that’s for sure.

Chili Deviled Eggs

These Are Some Addicting Bites!

Instead of sprinkling the chili powder over the deviled eggs I first put the powder into a fine handheld sieve (away from the eggs). I then gently tap the sieve over the eggs. This (usually) produces a nice consistent sprinkling of the chili powder, much better than the days when I used my hands and ended up with big chunks of chili powder here and hardly any over there.

As much as I cook, and as much as I think I can actually do a few things correctly in the kitchen, I stink at boiling eggs. I mean stink bad too. So I ‘cheat’. I bought an egg cooker. This little bugger does up to 7 eggs at a time, perfectly!!! I love it!

Also try my creamed spinach deviled eggs.

Chili Deviled Eggs
Print Pin
4 from 1 vote

Chili Deviled Eggs

If there’s a plate of deviled eggs to be found, I’m there. These chili deviled eggs take the old school classic to a totally new place. 
Course Appetizer
Cuisine American
Keyword deviled, eggs
Prep Time 5 minutes
Cook Time 30 minutes
Servings 24
Calories 78kcal

Ingredients

For the eggs

For the topping

  • ½ cup corn chips finely crushed (or tortilla chips)
  • ½ cup Cheddar cheese shredded
  • ½ teaspoon chili powder
  • ¼ cup fresh parsley finely chopped

Instructions

For the eggs

  • Slice the eggs in half lengthwise.
  • Carefully remove the yolks and place into a medium bowl.
  • Smash the yolks with a fork. Add the remaining ingredients. Combine well, smashing any chunks with a fork. You want the mixture to be smooth enough to pipe thru a piping bag or cake decorating tool.
  • Pipe the filling into the egg halves.

For the topping

  • Top each filled egg with the crushed chips and cheddar.
  • Sprinkle with chili powder and parsley and serve.

Notes

Got a crowd that’s craving spicy? Substitute pepper jack for the cheddar. Or even habanero jack.

Nutrition

Calories: 78kcal | Carbohydrates: 2g | Protein: 4g | Fat: 6g | Saturated Fat: 2g | Trans Fat: 1g | Cholesterol: 97mg | Sodium: 102mg | Potassium: 47mg | Fiber: 1g | Sugar: 1g | Vitamin A: 245IU | Vitamin C: 1mg | Calcium: 36mg | Iron: 1mg

Nutritional values are approximate.

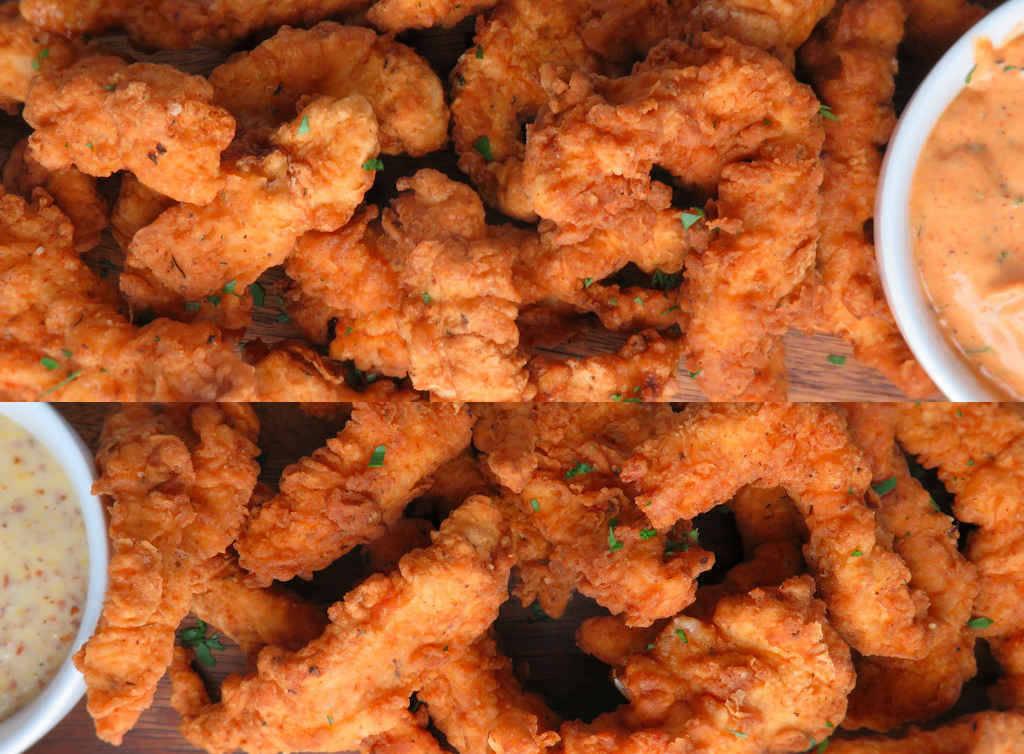
Blackened Chicken Fingers

Come here, my little bites of yumminess! These blackened chicken fingers are scary good. Scary as in there’s no way I was able to control myself around them. Pick up one, dunk it in my favorite dipping sauce, devour. Repeat.

If you’re a fan of the spicy like I am, I highly recommend adding more of the blackened seasoning. And for even more of that great flavor, dust the chicken fingers with a bit more of the seasoning right after they come out of the fryer.

And yes, this recipe also makes great blackened chicken nuggets!

Blackened Chicken Fingers

Great Flavor, Everywhere!

I’m a big fan of adding seasonings (and not just salt and pepper) to my flour when I am making fried goodies like these blackened chicken fingers. You’ll often find me adding Old Bay (crazy good on fried chicken!), cayenne pepper, or even any ole mix I find in the pantry.

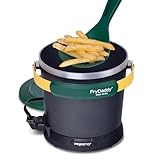
If I’m cooking for a crowd, I’ll break out my big deep fryer. But, if it’s just the two of us, I’ll fire up my Fry Daddy fryer. It’s the perfect size for both of us. It fries everything perfectly. And as an added bonus, it doesn’t use a lot of oil, which saves me money.

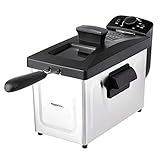
I get out my big deep fryer when it’s time to fry a large batch of food. It comes to temperature quickly and it maintains that temperature perfectly. It has a built-in oil filter and storage unit so I can re-use the oil several times.

Also try my homemade chicken nuggets. Like them spicy? Yeah, make my spicy chicken nuggets too.

Blackened Chicken Fingers
Print Pin
5 from 1 vote

Blackened Chicken Fingers

Come here, my little bites of yumminess! These blackened chicken fingers are scary good. Scary as in there’s no way I was able to control myself around them. Pick up one, dunk it in my favorite dipping sauce, devour. Repeat.
Course Appetizer or Main
Cuisine American
Keyword chicken fingers, spicy
Prep Time 15 minutes
Cook Time 15 minutes
Servings 2
Calories 352kcal

Ingredients

Instructions

  • Heat a few inches of oil to 350 F in a deep fryer or Dutch oven.
  • Place the chicken strips in a bowl and sprinkle with two teaspoons of the blackened seasoning. Toss to coat.
  • In a medium bowl or pie plate combine the flour and remaining blackened seasoning.
  • In another medium bowl or pie plate, whisk together the egg, milk, and hot sauce.
  • Working in batches, dip the chicken pieces in the flour mixture and coat well. Transfer to the egg mixture and coat. Transfer back to the flour mixture and coat one last time.
  • Fry 5-6 minutes until golden brown and crunchy. The thicker your fingers are the longer they may take. Bigger pieces may take longer than 6 minutes.
  • Transfer to a wire rack-lined baking sheet to drain and cool slightly before serving.

Notes

Best served with Ranch dressing for dipping!

Nutrition

Calories: 352kcal | Carbohydrates: 24g | Protein: 43g | Fat: 8g | Saturated Fat: 2g | Trans Fat: 1g | Cholesterol: 203mg | Sodium: 1358mg | Potassium: 718mg | Fiber: 1g | Sugar: 1g | Vitamin A: 214IU | Vitamin C: 4mg | Calcium: 44mg | Iron: 1mg

Nutritional values are approximate.

Bacon-Wrapped Pineapple Poppers

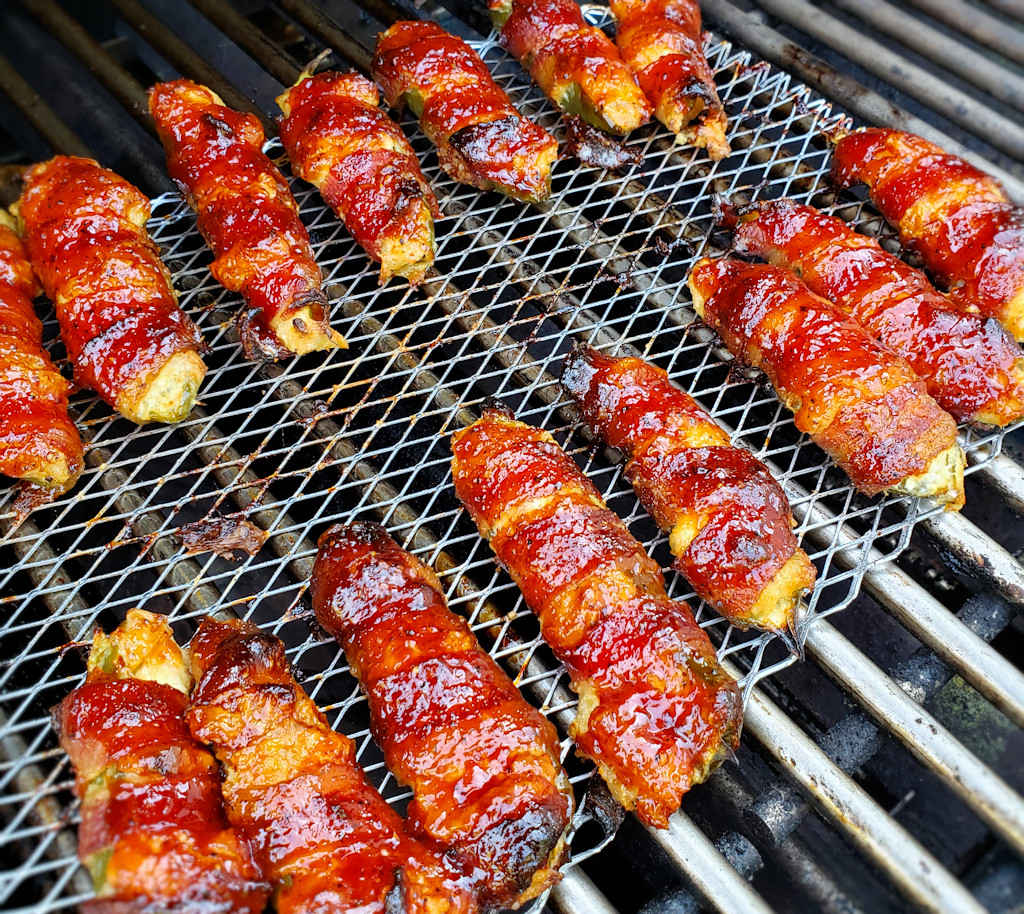
Oh my goodness. I could eat a lot, and I do mean a lot, of these bacon-wrapped pineapple poppers. They are the perfect combination of heat and sweet, smoky and creamy. I could eat them as appetizers. I could eat them for dessert. With little effort, and not much time, you can make a grill-full of these little yummies. Just stand back and watch them disappear! Make extra, you’re going to want them!

Bacon-Wrapped Pineapple Poppers

Make Extra. You’ll Need Them.

You can change up these bacon-wrapped pineapple poppers by simply using a different BBQ sauce. I wouldn’t touch the rest of the recipe, it’s perfect just like it is. Use a sweet BBQ sauce for your non-heat-lovin’ friends. Use a spicy BBQ sauce for your no-pain-no-gain friends. Or something in-between. Add a smoky BBQ sauce to give them that hot-off-the-charcoal grill flavor.

I recommend that you use a grill basket when making this dish. It makes cooking easier and you don’t have to worry about anything falling through the grates. And cleanup is easier too!

Also try my grilled okra poppers.

Bacon-Wrapped Pineapple Poppers
Print Pin
5 from 1 vote

Bacon-Wrapped Pineapple Poppers

Oh my goodness. I could eat a lot, and I do mean a lot, of these bacon-wrapped pineapple poppers. They are the perfect combination of heat and sweet, smoky and creamy. 
Course Appetizer
Cuisine American
Keyword bacon, pineapple
Prep Time 20 minutes
Cook Time 40 minutes
Servings 10
Calories 933kcal

Ingredients

  • 20 large jalapenos cut in half lengthwise, membranes and seeds removed
  • 8 ounces cream cheese softened
  • 20 ounces crushed pineapple drained
  • 32 ounces bacon 20 pieces, cut in half in the middle to make 40 smaller pieces
  • your favorite BBQ sauce

Instructions

  • Fire up your grill for indirect cooking or low-heat direct cooking. You want a cook temperature around 375 F.
  • Place cream cheese and pineapple into a medium bowl and stir until well blended.
  • Spread cheese mixture into the jalapeno halves, leveling off the tops. You don't want any cheese 'mounds' or you'll have oozing.
  • Wrap bacon around the jalapenos.
  • Transfer to the grill and cook for 30 or so minutes until the bacon is beginning to crisp.
  • Brush the tops with BBQ sauce and cook another 5 minutes.
  • Remove jalapenos from grill to a wire rack and let cool just slightly before serving. The bacon will get crisper as they cool.

Notes

Try to get jalapenos that are all roughly the same size so that they cook consistently.

Nutrition

Calories: 933kcal | Carbohydrates: 12g | Protein: 2g | Fat: 98g | Saturated Fat: 40g | Cholesterol: 111mg | Sodium: 210mg | Potassium: 171mg | Fiber: 2g | Sugar: 10g | Vitamin A: 635IU | Vitamin C: 39mg | Calcium: 35mg | Iron: 1mg

Nutritional values are approximate.

Slow Cooker Creamy Bacon Chicken

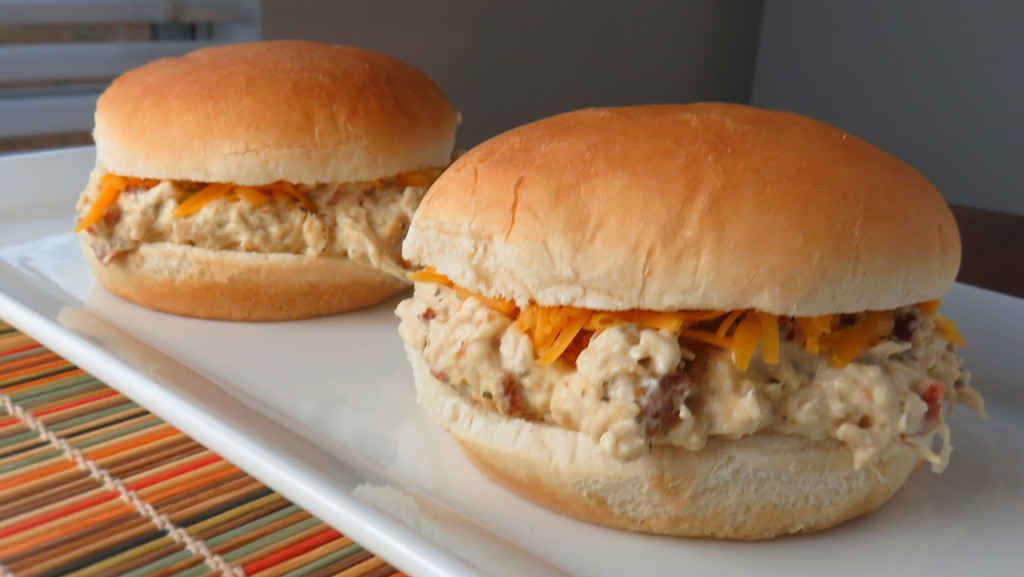
On a bun. As a dip. In a wrap. On a cracker. It doesn’t matter how you serve this slow cooker creamy bacon chicken, you’re going to love it. Tender, moist chicken. Creamy cheese. Bacon. Ranch dressing flavors. Bacon. Oh, I said that already. I love bacon. There’s no reason that you couldn’t add a bit more bacon to the crockpot. Kinda slip an extra piece or two in for that extra bacon-y flavor.

Slow Cooker Creamy Bacon Chicken

Creamy Deliciousness

Slow cooker creamy bacon chicken is mighty darned good as it is. Now, you know me (or well, maybe you don’t) but I like a little kick to my food. I would not be afraid to use jalapeno cream cheese instead of the plain stuff. And I wouldn’t be afraid to add a few squirts of Sriracha or my favorite hot sauce, either. Heck, throw in some diced roasted jalapenos too. You can always make two versions. One nice and mellow and one nice and spicy.

Shredded vs Cubed

If you want your chicken to have a bit more texture than the shredded version in the recipe, just cut into small cubes instead. Same great taste with a little bit different bite.

Also try my slow cooker teriyaki chicken.

Slow Cooker Creamy Bacon Chicken
Print Pin
4 from 1 vote

Slow Cooker Creamy Bacon Chicken

On a bun. As a dip. It doesn’t matter how you serve this slow cooker creamy bacon chicken, you’re going to love it. 
Course Main
Cuisine American
Keyword chicken, crockpot, slow cooker
Prep Time 15 minutes
Cook Time 8 hours
Total Time 8 hours 15 minutes
Servings 6 servings
Calories 332kcal

Equipment

Ingredients

Instructions

  • Place chicken into your slow cooker.
  • Top with the cheese and dressing seasoning.
  • Cover and cook on low for 8 hours or until the chicken is tender.
  • Remove the chicken and shred with a fork.
  • Return the meat to the slow cooker. Stir in the bacon.
  • Serve as a dip or on buns with extra sharp cheddar cheese as sandwiches.

Notes

Great on crackers or slider buns!

Nutrition

Calories: 332kcal | Carbohydrates: 1g | Protein: 37g | Fat: 19g | Saturated Fat: 6g | Trans Fat: 1g | Cholesterol: 122mg | Sodium: 452mg | Potassium: 635mg | Sugar: 1g | Vitamin A: 64IU | Vitamin C: 2mg | Calcium: 10mg | Iron: 1mg

Nutritional values are approximate.

Soft Pretzel Bites

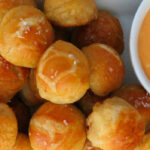
Wow. I seriously had no idea how easy it would end up being to make soft pretzel bites at home. I figured no way could the dough get right. No way would it have the same texture, the same flavor. No way could I have been more wrong. These little morsels of yumminess are out-of-this-world great. Add a little warm cheese sauce for dipping and I’ve got a plate of … well, pretzel bites that are going to disappear in a seriously mind-bogglingly-fast amount of time.

What’s easier than making dough in a bread machine? Nothing! Well, if I’m not making it. I can mess even that up. Not this time. The dough is amazing. It’s so light, fluffy. It’s actually fun to play with. And easy to work with too!

Soft Pretzel Bites

Eat ‘Em Like Popcorn

I preferred to butter my soft pretzel bites then return them to the oven. The original recipe called for buttering them after they were fully baked. I found them to be a little ‘wet’ no matter how conservative I would be with the melted butter. So, I brushed them and let them bake a little longer to ‘set’ the butter. I think they were perfect and my wife definitely agreed!

Also try my sourdough pretzel bites.

Soft Pretzel Bites
Print Pin
5 from 1 vote

Soft Pretzel Bites

These little morsels of yumminess are out-of-this-world great. Add a little warm cheese sauce for dipping and I’ve got a plate of … well, pretzel bites that are going to disappear in a seriously mind-bogglingly-fast amount of time.
Course Appetizer
Cuisine American
Keyword pretzel bites
Prep Time 15 minutes
Cook Time 2 hours
Servings 12
Calories 140kcal

Ingredients

For the dough

For the pretzel bites

Instructions

For the dough

  • Place warm water, flour, brown sugar and yeast into your bread machine in the order listed.
  • Select dough cycle and let process.
  • Flour a flat surface and turn the dough out into a large ball.
  • Roll flat and cut into 8 equally-sized pieces.
  • Roll each piece into a 12" rope about 1" thick.
  • Cut into bite-sized pieces. Depending on how well I rolled my dough I got 6-8 bites out of each.

For the pretzel bites

  • Bring 2 quarts of water and the baking soda to a fast boil.
  • Preheat oven to 425 F.
  • Working small batches, add the dough pieces to the boiling water and boil for 10 seconds.
  • Remove to a baking sheet that has been sprayed with non-stick spray or is lined with s silpat.
  • Bake the bites for 10 minutes or until just turning brown.
  • Lightly brush the bites with butter and sprinkle with salt.
  • Return to the oven to get golden brown.
  • Serve warm.

Notes

Store any leftover bites in an air-tight container.

Nutrition

Calories: 140kcal | Carbohydrates: 29g | Protein: 4g | Fat: 1g | Saturated Fat: 1g | Sodium: 1379mg | Potassium: 55mg | Fiber: 1g | Sugar: 3g | Vitamin C: 1mg | Calcium: 13mg | Iron: 2mg

Nutritional values are approximate.

Rio Grande Dip

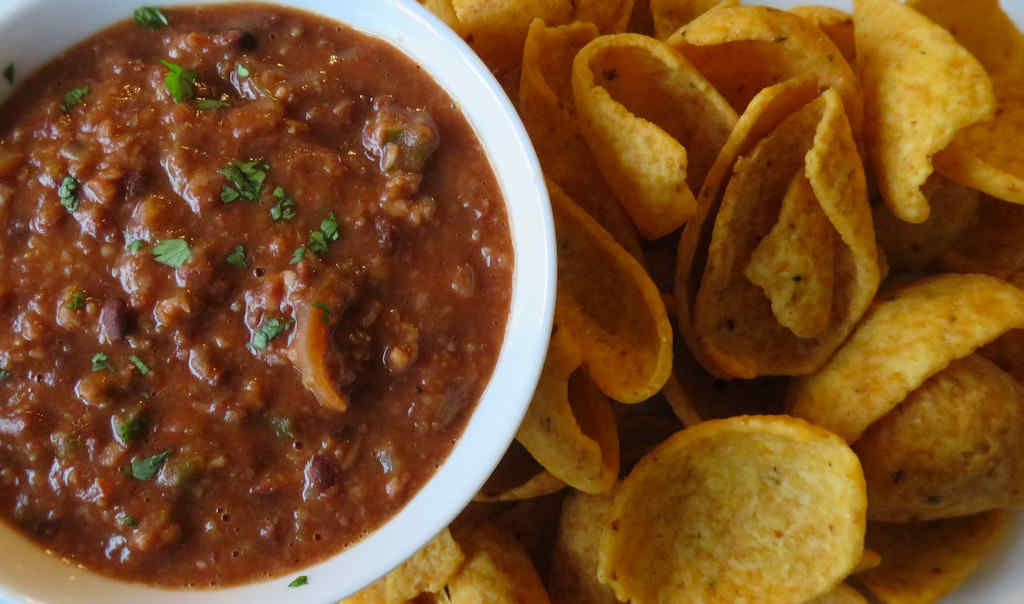
I absolutely loved this dip. Almost all of my favorite flavors were in each bite. Italian sausage, onion, refried black beans (if you haven’t tried refried black beans, you should because they are great!), spicy tomato salsa, green chiles, and of course, cheese. Now, I didn’t go crazy with the cheese as I normally would in a dip like this Rio Grande dip. Nope, I love all of the ingredients so much that I wanted each to be represented. No hiding under the cheese!

Rio Grande Dip

A Totally Different Dip Experience

I found it interesting that the original recipe used Italian sausage. That’s what I used, and I loved it. It does seem that for a more southwestern angle, you might want to use Mexican chorizo or just ground beef. But no matter which you use, this Rio Grande dip is a winner.

I like to use my good ole trusty Dutch oven to make this dip and pretty much darned near anything like it on my stovetop. It’s nice and big and sturdy. That extra weight helps it maintain and distribute heat perfectly. As an added bonus, it’s actually pretty easy to clean up too!

Oh, and I would highly recommend making a double batch. This dip makes an excellent topping for nachos, hot dogs, or even baked potatoes. It’s good stuff!

Also try my pizza dip.

Rio Grande Dip
Print Pin
5 from 1 vote

Rio Grande Dip

I didn’t go crazy with the cheese as I normally would in a dip like this Rio Grande dip. Nope, I love all of the ingredients so much that I wanted each to be represented. No hiding under the cheese!
Course Appetizer
Cuisine American
Keyword dip, southwestern
Prep Time 5 minutes
Cook Time 15 minutes
Total Time 20 minutes
Servings 16 servings
Calories 97kcal

Equipment

Ingredients

  • ½ pound Italian sausage I used hot, but you can also substitute Mexican chorizo
  • ½ cup sweet onion finely chopped
  • 2 15 ounce refried black beans
  • 1 ½ cups salsa
  • 1 4 ounce fire-roasted diced green chiles un-drained
  • 1 ½ cups Monterey Jack cheese shredded, plus more for garnish
  • cilantro chopped, for garnish
  • Tortilla or corn chips for serving

Instructions

  • Crumble the sausage into a large skillet or Dutch oven and brown over medium-high heat.
  • Add in the beans, salsa, and chile peppers. Stir. Bring to a simmer.
  • Add in the cheese and reduce heat to low. Stir to melt.
  • Serve with chips, garnished with more cheese and chopped cilantro, if desired.

Notes

Stir before serving.

Nutrition

Calories: 97kcal | Carbohydrates: 2g | Protein: 5g | Fat: 8g | Saturated Fat: 4g | Cholesterol: 20mg | Sodium: 334mg | Potassium: 120mg | Fiber: 1g | Sugar: 1g | Vitamin A: 199IU | Vitamin C: 1mg | Calcium: 90mg | Iron: 1mg

Nutritional values are approximate.

Nacho Cheddar Saltines

My addiction to flavored saltine crackers is getting worse. It all started a few weeks ago when I made a batch of Fire-Eater saltines. They were packed with heat and flavor. They disappeared in no time at all. I’ve since made several other flavors, all of them great. But these nacho cheddar saltines aren’t great. They’re greater than great. Very similar in flavor to those little old fish-looking crackers, but oh so much better. And easier to make that’s for sure!

Nacho Cheddar Saltines

Make A Bunch. A Whole Bunch.

There’s absolutely no point in making only one sleeve of nacho cheddar saltines. They’ll be gone before the 8 hour ‘resting’ time is up. Make a whole box and you’ll thank me.

You can use something like Kernel Seasons Nacho Cheddar seasoning when you make these crackers. Or grab a big ole jar of cheddar cheese powder and go to town!

Also try my delicious bagel-seasoned saltines.

Nacho Cheddar Saltines
Print Pin
5 from 1 vote

Nacho Cheddar Saltines

These nacho cheddar saltines aren’t great. They’re greater than great. Very similar in flavor to those little old fish-looking crackers, but oh so much better. And easier to make that’s for sure!
Course Appetizer
Cuisine American
Keyword cheese, crackers
Prep Time 12 hours
Total Time 12 hours
Servings 8 servings
Calories 79kcal
Author Mike

Ingredients

Instructions

  • Place crackers in a large resealable bag or container.
  • Pour in the oil.
  • Sprinkle with the seasoning.
  • Seal and gently toss to coat.
  • Let sit (on the counter) for 12 hours to get ‘happy’, tossing gently every once-in-a-while.
  • Serve as-is or with cream cheese for topping.

Notes

Also great served topped with sliced cheese.

Nutrition

Calories: 79kcal | Carbohydrates: 1g | Protein: 1g | Fat: 9g | Saturated Fat: 7g | Sodium: 1mg | Potassium: 1mg | Fiber: 1g | Sugar: 1g | Vitamin A: 1IU | Calcium: 1mg | Iron: 1mg

Nutritional values are approximate.

Mini Corn Dogs

Ooooh, you dangerous little mini corn dogs you. The original recipe says two of you are a serving. Yeah…. right. You’re too good to only have two.

These are not like scaled-down versions of your typical corn dog. Hot dogs are replaced by tasty Lit’ Smokies, which bring a whole lot more flavor to the game. And they’re fun to eat too!

Mini Corn Dogs

Batter Up!

My rule-of-thumb when making mini corn dogs is: don’t skimp on the batter. Now, if you want yours thinner, go right ahead and I won’t make faces at you. But for me, more is better. You’ll find you’ll perfect your dipping technique after a few dogs. I settled in on a simple method: dip the Lit’l Smokies so they are fully covered, then lift them out of the batter and let the batter run down the sausage and coat the sides and bottom. The result? Nice and even batter.

I get out my big deep fryer when it’s time to fry a large batch of food. It comes to temperature quickly and it maintains that temperature perfectly. It has a built-in oil filter and storage unit so I can re-use the oil several times.

Also try my mini corn dog muffins!

Mini Corn Dogs
Print Pin
5 from 1 vote

Mini Corn Dogs

Ooooh, you dangerous little mini corn dogs you. The original recipe says two of you are a serving. Yeah…. right. You're too good to only have two.
Course Appetizer
Cuisine American
Keyword corn dogs, deep-fried
Prep Time 15 minutes
Cook Time 25 minutes
Servings 12
Calories 292kcal

Ingredients

Instructions

  • Preheat oil to 350 F.
  • Make the cornbread batter in a large bowl by stirring together the mix, buttermilk and egg.
  • Pour some of the batter into a small glass.
  • Working in batches, insert a toothpick into the sausages, leaving enough for a handle.
  • Dip the toothpick into the batter. I like to tip the glass a bit on it's side to get maximum coverage. I stick the sausage into the batter then lift it up and out of the batter (but still in the glass) to let the batter run down the sausage, coating it completely.
  • Transfer to the fryer and fry 1-2 minutes, rotating them as they cook, until golden brown.
  • Transfer to wire rack-lined backing sheet to drain and cool.
  • Serve with your favorite dipping sauces.

Notes

I doubled the amount of cornbread mix that the original recipe called for. I found myself getting a pretty thick coating on the sausages, and I liked that. With just one box you might run out of coating before you run out of sausages.

Nutrition

Calories: 292kcal | Carbohydrates: 30g | Protein: 9g | Fat: 15g | Saturated Fat: 5g | Trans Fat: 1g | Cholesterol: 55mg | Sodium: 699mg | Potassium: 141mg | Fiber: 3g | Sugar: 10g | Vitamin A: 124IU | Vitamin C: 1mg | Calcium: 54mg | Iron: 2mg

Nutritional values are approximate.