Beef and Bean Burritos

These are our go-to beef and bean burritos. Nothing fancy and not  complicated. They taste fantastic and have just the right spice balance. The recipe makes a big huge batch of burritos. Leftovers freeze well and are perfect warmed up for a quick and easy lunch.

Beef and Bean Burritos

Easy. And Delicious.

Now, don’t let the fact that I used canned sauce and beans throw you off. I grabbed the good stuff at the store when I picked up the ingredients for these beef and bean burritos. It makes a big difference.

Freezing Leftovers

If you’re going to freeze the leftovers, I suggest wrapping them tightly in wax paper. The enchiladas will absorb a lot of the sauce. That’s why I like to make a little extra on the side for dipping or drizzling. If I’m freezing them I always grab a can or two extra of sauce and heat it up at the same time I heat up the burritos.

I highly recommend that you shred or grate your own cheese at home. Don’t buy the pre-shredded or pre-grated stuff. It has stuff added to it to keep it from sticking together. That ‘stuff’ affects how the cheese melts. Shred it yourself and use the good stuff.

The best side dish for these? Fiesta corn, of course.

Beef and Bean Burritos
Print Pin
5 from 1 vote

Beef and Bean Burritos

These are our go-to beef and bean burritos. Nothing fancy and not  complicated. They taste fantastic and have just the right spice balance. 
Course Main
Cuisine American
Keyword beans, beef, burrito
Prep Time 10 minutes
Cook Time 30 minutes
Total Time 40 minutes
Servings 6 servings
Calories 632kcal
Author Mike

Ingredients

Instructions

  • Preheat oven to 170 F.
  • Heat a splash of oil in a large skillet over medium heat.
  • Add the onions and cook until soft.
  • Add the ground beef and cook until done, breaking up the meat as it cooks.
  • Add the cumin, chili powder, oregano and salt. Stir.
  • Add 2 cans of the enchilada sauce. Reduce heat to low and simmer for 5 minutes.
  • In a medium saucepan over low heat add the refried beans and cheese. Stir until the cheese is melted. Remove from heat.
  • Heat tortillas in the oven for a few minutes.
  • Divide bean and cheese mixture between the tortillas, spreading out evenly.
  • Divide meat between tortillas, spreading out evenly down the center of the tortillas.
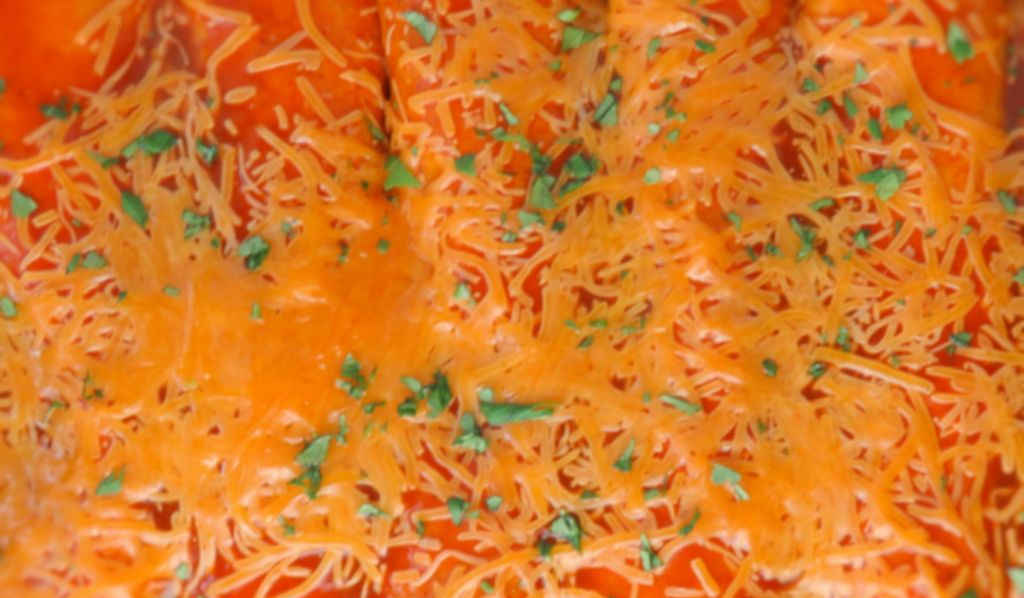
  • Fold sides of the tortillas in the roll. Transfer to a large baking dish, seam-side down. Sprinkle with the cheese.
  • Cover with foil and transfer to the oven until warm.
  • Meanwhile, warm the remaining enchilada sauce.
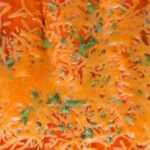
  • When ready to serve, drizzle with warmed sauce and sprinkle with chopped cilantro.

Notes

Reheat in a 350 F oven for 10-15 minutes.

Nutrition

Calories: 632kcal | Carbohydrates: 33g | Protein: 35g | Fat: 39g | Saturated Fat: 16g | Trans Fat: 2g | Cholesterol: 122mg | Sodium: 706mg | Potassium: 558mg | Fiber: 2g | Sugar: 4g | Vitamin A: 267IU | Vitamin C: 2mg | Calcium: 203mg | Iron: 5mg

Nutritional values are approximate.

Quick Fix Taco Salads

It was one of THOSE days. Not enough time to even think about dinner. But, a quick glance in the fridge and pantry and I was able to throw together a plan. Quick fix taco salads it would be. And you know, they turned out great! Crunchy shells, crunchy lettuce, and all of our favorite salad toppings.

Quick Fix Taco Salads

Nice And Easy. And Delicious.

I used chopped grilled chicken to top these salads, but any cooked meat (or no meat for that matter) would be great too. Like chilled cooked shrimp. Or warm taco beef crumbles. Just because these taco salads are quick to fix doesn’t mean that they are low on flavor.

I highly recommend that you shred or grate your own cheese at home. Don’t buy the pre-shredded or pre-grated stuff. It has stuff added to it to keep it from sticking together. That ‘stuff’ affects how the cheese melts. Shred it yourself and use the good stuff.

Also try my quick fix shrimp tacos.

Quick Fix Taco Salads
Print Pin
5 from 1 vote

Quick Fix Taco Salads

Just because these taco salads are quick to fix doesn’t mean that they are low on flavor.
Course Main
Cuisine American
Keyword salad, taco
Prep Time 15 minutes
Cook Time 10 minutes
Total Time 25 minutes
Servings 4 servings
Calories 231kcal
Author Mike

Equipment

Ingredients

Suggested toppings

  • cheddar cheese shredded
  • black olives sliced or chopped
  • meat cooked chicken, beef taco meat, or shrimp
  • cilantro chopped
  • sweet corn kernels
  • tomatoes diced
  • avocado diced
  • green onions sliced
  • tortilla strips

Instructions

  • Place chopped salad into a large bowl.
  • Drizzle with dressing.
  • Add desired toppings and toss lightly to coat.
  • Spoon into taco salad shells and serve.

Nutrition

Calories: 231kcal | Carbohydrates: 25g | Protein: 3g | Fat: 12g | Sodium: 165mg | Potassium: 1mg | Fiber: 1g | Vitamin A: 3IU | Vitamin C: 1mg | Calcium: 1mg | Iron: 7mg

Nutritional values are approximate.

Grilled Creamy Shrimp and Mushroom Pasta

It was one of those almost-stormy evenings. I was in the mood for grilling, but as a backup, I needed to pick something I could cook inside in case the skies opened up. Well, they didn’t, so I was able to grill the fantastic shrimp for this grilled creamy shrimp and mushroom pasta. If it had stormed, I would’ve roasted the shrimp in the oven and still enjoyed a great dinner. But grilled shrimp, well, that’s just better.

Creamy Grilled Shrimp and Mushroom Pasta

Easy And Fantastic

The cream sauce and mushrooms in this grilled creamy shrimp and mushroom pasta are fantastic. The entire dish is incredibly easy to put together. If you don’t want to fret with the shrimp just use pre-cooked frozen shrimp from your grocery store. Just defrost them ahead of time and you’ll be good-to-go.

No Worries

Don’t be surprised when you start making the sauce that the cream cheese doesn’t melt and get creamy. Once you add the hot water from making the pasta the cream cheese will dissolve and make a fantastic sauce.

Beware Of Flare-Ups

When grilling the shrimp, the butter and oil in the marinade may cause flare-ups on your grill. Be prepared to move the skewered shrimp to another place on the grill until the fire dies down. And by all means, don’t burn yourself!

I recommend that you use a grill basket when making this dish if you don’t have skewers. It makes cooking easier and you don’t have to worry about anything falling through the grates. And cleanup is easier too!

Also try my creamy Cajun sausage ravioli and my Caribbean shrimp pasta.

Creamy Grilled Shrimp and Mushroom Pasta
Print Pin
4 from 1 vote

Grilled Creamy Shrimp and Mushroom Pasta

Don’t be surprised when you start making the sauce that the cream cheese doesn’t melt and get creamy. Once you add the hot water from making the pasta the cream cheese will dissolve and make a fantastic sauce.
Course Main
Cuisine American
Keyword creamy, mushroom, shrimp
Prep Time 1 hour 40 minutes
Cook Time 1 hour
Total Time 2 hours 40 minutes
Servings 4 servings
Calories 635kcal
Author Mike

Ingredients

For the grilled shrimp

For the mushrooms and pasta

  • 8 ounces angel hair pasta or fettuccine or linguine
  • 10 tablespoons unsalted butter divided
  • 8 ounces mushrooms sliced
  • 2 cloves garlic minced
  • 3 ounces cream cheese cubed
  • 2 tablespoons parsley chopped, plus a bit more for garnish
  • 1 teaspoon dried basil
  • 1 cup water from the cooked pasta, you may not need the entire cup

Instructions

For the grilled shrimp

  • Combine all but the shrimp in a medium bowl.
  • Add the shrimp and toss to coat.
  • Cover and refrigerate for 1 hour.
  • Remove from fridge and let set at room temperature for 30 minutes.
  • Fire up your grill.
  • Thread shrimp onto skewers and place on grill.
  • Brush with remaining marinade (caution: flare-ups can occur) and cook for 3-4 minutes.
  • Flip, brush with more marinade and cook another 2-3 minutes or until the shrimp are done.
  • Remove from grill.

For the mushrooms and pasta

  • Cook the pasta per package instructions, reserving 1 cup of the water from the pot.
  • Melt 2 tablespoons of the butter in a large skillet.
  • Add the mushrooms and saute for 10 minutes or until golden brown and soft.
  • Season with salt and pepper.
  • Remove the mushrooms and reserve.
  • Add remaining butter to the skillet and melt.
  • Add the garlic, cream cheese cubes, parsley and basil. Whisk to combine. Note: The sauce will not be creamy.
  • Add 2/3 cup of the reserved pasta water and whisk. The sauce will come together and get creamy.
  • Add the mushrooms, grilled shrimp, and pasta. Stir to combine. If too thick add a bit more of the pasta water and stir.
  • Serve garnished with freshly chopped parsley.

Notes

I throw the shrimp onto the grill while the mushrooms are sauteeing.

Nutrition

Calories: 635kcal | Carbohydrates: 9g | Protein: 28g | Fat: 56g | Saturated Fat: 33g | Trans Fat: 2g | Cholesterol: 430mg | Sodium: 1352mg | Potassium: 565mg | Fiber: 2g | Sugar: 5g | Vitamin A: 2230IU | Vitamin C: 18mg | Calcium: 245mg | Iron: 4mg

Nutritional values are approximate.

Easy Kicked-Up Tomato Soup

You have those cans of tomato soup just sitting there in the pantry. It’s not bad soup. But those cans have been sitting there for a reason. That soups needs a little something. A little help to make it into great soup and not ‘just’ a can of soup. This easy kicked-up tomato soup is just that. Just add a few pantry and fridge ingredients and boom, great tomato soup for a cold day!

Easy Kicked-Up Tomato Soup

Canned Soup Re-Imagined

The diced tomatoes add a nice texture and freshness to this easy kicked-up tomato soup. You can definitely leave them out. At least here in the midwest US good fresh tomatoes are impossible to find this time of year.

I like a little crunch to my soup to give it even more texture, so I added a few homemade croutons. Optional, but yummy.

I like to use my good ole trusty Dutch oven to make this soup and pretty much darned near anything like it on my stovetop. It’s nice and big and sturdy. That extra weight helps it maintain and distribute heat perfectly. As an added bonus, it’s actually pretty easy to clean up too!

Also try my creamy cheese and tomato soup.

Easy Kicked-Up Tomato Soup
Print Pin
5 from 1 vote

Easy Kicked-Up Tomato Soup

You have those cans of tomato soup just sitting there in the pantry. It’s not bad soup. But those cans have been sitting there for a reason. That soups needs a little something.
Course Main
Cuisine American
Keyword soup, tomato
Prep Time 5 minutes
Cook Time 15 minutes
Servings 6 servings
Calories 177kcal

Equipment

Ingredients

  • 3 cans tomato soup 10.75 ounces
  • ¼ cup sherry
  • ¼ cup heavy cream
  • 3 tablespoons pesto
  • 2 tablespoons Parmesan grated, plus more for garnish
  • ½ cup tomatoes diced
  • olive oil

Instructions

  • Add soup to a pot over medium heat along with 3 cups of water.
  • Stir and heat.
  • Stir in the sherry, cream, pesto and Parmesan.
  • Heat through.
  • Serve sprinkled with the tomatoes, a drizzle of oil and more Parmesan.

Notes

I also like to add a few croutons.

Nutrition

Calories: 177kcal | Carbohydrates: 24g | Protein: 3g | Fat: 8g | Saturated Fat: 3g | Cholesterol: 15mg | Sodium: 656mg | Potassium: 872mg | Fiber: 2g | Sugar: 13g | Vitamin A: 990IU | Vitamin C: 21mg | Calcium: 60mg | Iron: 1mg

Nutritional values are approximate.

Blackened Fried Shrimp

I could probably eat a ton of these blackened fried shrimp. I was already badly addicted to fried shrimp. Then along came these beyond-delicious treats and my addiction somehow got worse. I didn’t even think that was possible. Yummy crunchy batter that has a great light spiciness to it. The batter isn’t too thick. It isn’t too thin. You really just can’t stop eating them.

Blackened Fried Shrimp

More Seasoning, More Better!

For a little extra kick, sprinkle the blackened fried shrimp with more of the seasoning just after you remove them from the hot oil. You have to do it when they’re still so hot so that the seasoning adheres.

Sure, You Could Use Store-Bought Seasoning…

Why go thru the trouble of making the blackened seasoning from scratch? That store-bought stuff is just way too salty for me. But you’re certainly free to use it. I bet by now there’s a low-salt store-bought version available somewhere!

If I’m cooking for a crowd, I’ll break out my big deep fryer. But, if it’s just the two of us, I’ll fire up my Fry Daddy fryer. It’s the perfect size for both of us. It fries everything perfectly. And as an added bonus, it doesn’t use a lot of oil, which saves me money.

I get out my big deep fryer when it’s time to fry a large batch of food. It comes to temperature quickly and it maintains that temperature perfectly. It has a built-in oil filter and storage unit so I can re-use the oil several times.

Also try my Cajun fried shrimp and my beer battered shrimp and fries.

Blackened Fried Shrimp
Print Pin
5 from 1 vote

Blackened Fried Shrimp

I could probably eat a ton of these blackened fried shrimp. I was already badly addicted to fried shrimp. Then along came these beyond-delicious treats and my addiction somehow got worse.
Course Appetizer or Main
Cuisine American
Keyword deep-fried, shrimp
Prep Time 15 minutes
Cook Time 15 minutes
Servings 4 servings
Calories 203kcal

Ingredients

For the blackened seasoning (may make a bit more than you'll need)

For the flour station

For the dipping station

  • 1 large egg
  • 2 tablespoons milk
  • 1 teaspoon hot sauce

Instructions

  • Place shrimp into a large bowl. Season with two teaspoons of the blackened seasoning and toss well.
  • Combine the flour and blackened seasoning. Dip the shrimp into the mixture and coat well. Transfer to a plate and place into the freezer for five minutes. Reserve the flour mixture.
  • Heat 3-4" of oil to 350 F in a deep fryer or Dutch oven.
  • Whisk together the egg, milk and hot sauce in a pie plate or shallow dish.
  • Dip the shrimp into the egg mixture and then return to the flour mixture to coat.
  • Shake off excess flour and fry 3-4 minutes or until golden brown, turning once.

Notes

Serve with your favorite tartar sauce or cocktail sauce.

Nutrition

Calories: 203kcal | Carbohydrates: 14g | Protein: 27g | Fat: 3g | Saturated Fat: 1g | Trans Fat: 1g | Cholesterol: 333mg | Sodium: 1778mg | Potassium: 177mg | Fiber: 1g | Sugar: 1g | Vitamin A: 374IU | Vitamin C: 9mg | Calcium: 198mg | Iron: 3mg

Nutritional values are approximate.

Memphis-Style Muffuletta

Muffuletta sandwiches are what I would have on a deserted island if I could choose only one food. I’d even go through the ‘trouble’ of making my own olive salad. When I first ran across this idea for a Memphis-style muffuletta I made a weird face. Huh? Why are you messing with my favorite? The answer was soon obvious: because this is really, really good. Similar to a muffuletta in many ways, but different too.

Memphis-Style Muffuletta

A Totally Different Olive Salad

The creamy olive salad in this Memphis-style muffuletta is totally different than a traditional muffuletta mix but it has many of the same flavors. The artichoke hearts are a totally different twist and quite honestly I might find myself adding them to my homemade muffuletta olive salad too.

Memphis-Style Muffuletta

I almost always use Blue Plate mayonnaise in the dishes I make. I think it is the best around. If you can’t find it locally you can pick it up online for a fair price.

The olive salad mix is also great on grilled hot dogs. If you prefer the original, try my more traditional muffuletta sandwich.

Memphis-Style Muffuletta
Print Pin
5 from 1 vote

Memphis-Style Muffuletta

When I first ran across this idea for a Memphis-style muffuletta I made a weird face. Huh? Why are you messing with my favorite? The answer was soon obvious: because this is really, really good. 
Course Main
Cuisine American
Keyword sandwich
Prep Time 15 minutes
Cook Time 1 hour
Total Time 1 hour 15 minutes
Servings 6 servings
Calories 277kcal

Equipment

Ingredients

Instructions

  • Whisk together the mayonnaise and salad dressing.
  • Fold in the olives, artichoke and celery.
  • Season with the pepper.
  • Slice bread horizontally. I like to remove some of the insides of the bread, but that’s optional.
  • Spoon half of the olive mixture onto the bottom half of the bread.
  • Add the cheese and meats.
  • Top with the remaining olive mix and top bread half.
  • Wrap tightly in foil or plastic wrap.
  • Refrigerate for at least 1 hour before slicing and serving.

Notes

Stir again before using.

Nutrition

Calories: 277kcal | Carbohydrates: 5g | Protein: 1g | Fat: 28g | Saturated Fat: 4g | Trans Fat: 1g | Cholesterol: 12mg | Sodium: 977mg | Potassium: 73mg | Fiber: 2g | Sugar: 2g | Vitamin A: 230IU | Vitamin C: 1mg | Calcium: 28mg | Iron: 1mg

Nutritional values are approximate.

Cajun Fried Shrimp

My two biggest food obsessions? Chicken wings and fried shrimp. I could eat either one anytime, anywhere. I’ve never had wings or shrimp that I didn’t absolutely love. Like these Cajun fried shrimp. Lightly crunchy. Stick-to-the-shrimp batter. A little heat. Perfectly cooked. Crazy tasty. And you know, they’re great looking too! You do eat with your eyes first, or so they say! I kinda think I eat with my nose first. I smell the aroma of the food often long before I see it! That’s what gets my mouth watering.

Cajun Fried Shrimp

My Kind Of Shrimp

This is shrimp done up right. I served these Cajun fried shrimp with a crazy wonderful remoulade that has ended up being a shrimp-dipping staple in our house. It’s great for fries fish, too.

For that little extra ‘something’ sprinkle the shrimp lightly with Old Bay seasoning just before serving.

If I’m cooking for a crowd, I’ll break out my big deep fryer. But, if it’s just the two of us, I’ll fire up my Fry Daddy fryer. It’s the perfect size for both of us. It fries everything perfectly. And as an added bonus, it doesn’t use a lot of oil, which saves me money.

I get out my big deep fryer when it’s time to fry a large batch of food. It comes to temperature quickly and it maintains that temperature perfectly. It has a built-in oil filter and storage unit so I can re-use the oil several times.

Also try my crispy fried shrimp and my blackened fried shrimp.

Cajun Fried Shrimp
Print Pin
5 from 1 vote

Cajun Fried Shrimp

I’ve never had wings or shrimp that I didn’t absolutely love. Like these Cajun fried shrimp. Lightly crunchy. Stick-to-the-shrimp batter. A little heat. Perfectly cooked.
Course Appetizer or Main
Cuisine Main
Keyword Cajun, deep-fried, shrimp
Prep Time 15 minutes
Cook Time 15 minutes
Total Time 30 minutes
Servings 6 servings
Calories 444kcal

Ingredients

For the Spicy Remoulade Sauce

Instructions

  • Heat 3-4" of oil to 350 F in a deep fryer or Dutch oven.
  • In a pie plate or shallow dish, whisk together the buttermilk, egg, and mustard.
  • In another pie plate or shallow dish, whisk together the flour, cornmeal, paprika, salt, cayenne and garlic powder.
  • Working in batches, add the shrimp to the flour mixture and coat well.
  • Shake off excess then place into the buttermilk mixture.
  • Shake off excess then return to the flour mixture, coating again.
  • Add to the hot oil and fry 3-4 minutes or until golden brown, turning once. Remove to a paper towel-lined plate to drain.
  • Serve with the spicy remoulade sauce.

For the Spicy Remoulade Sauce

  • Whisk together all ingredients in a small bowl. Refrigerate until ready to use.

Notes

Give the sauce another good stir before serving.

Nutrition

Calories: 444kcal | Carbohydrates: 22g | Protein: 29g | Fat: 26g | Saturated Fat: 5g | Trans Fat: 1g | Cholesterol: 333mg | Sodium: 2090mg | Potassium: 285mg | Fiber: 2g | Sugar: 4g | Vitamin A: 516IU | Vitamin C: 17mg | Calcium: 232mg | Iron: 4mg

Nutritional values are approximate.

Crispy Fried Shrimp

I can eat an embarrassing amount of crispy fried shrimp. My addiction to these little goodies started as a child. Maybe once every few months we would eat out at Sizzler. I would always get the fried shrimp. I would devour them.

That tradition lives on, believe me. That’s why I make them at home. In bigger batches. These crispy fried shrimp are nice and crispy and have a fantastic lightly savory flavor. No overpowering flavors here, you can still taste the wonderful shrimp.

Crispy Fried Shrimp

Right-Sized Shrimp For The Perfect Bites

I like to use shrimp that aren’t too big or too small when I make crispy fried shrimp. For me, 21-25 count (that means 21-25 shrimp are in a pound) are the perfect size. If I can get them, I use Louisiana Gulf Shrimp. I believe they have the best flavor but you can use whatever you prefer (or can find).

I get out my big deep fryer when it’s time to fry a large batch of food. It comes to temperature quickly and it maintains that temperature perfectly. It has a built-in oil filter and storage unit so I can re-use the oil several times.

You can use pre-shelled and pre-deveined shrimp but give them a once-over before using to make sure that there aren’t any shell pieces or veins left. Just in case.

If you’re looking for something super-simple for dipping your delicious crispy fried shrimp, try my quick cocktail sauce or my Carolina cocktail sauce.

Also try my Cajun fried shrimp and my panko fried shrimp.

Crispy Fried Shrimp
Print Pin
5 from 1 vote

Crispy Fried Shrimp

These crispy fried shrimp are nice and crispy and have a fantastic lightly savory flavor. No overpowering flavors here, you can still taste the wonderful shrimp.
Course Appetizer
Cuisine American
Keyword crispy, deep-fried, shrimp
Prep Time 15 minutes
Cook Time 20 minutes
Total Time 35 minutes
Servings 4 servings
Calories 629kcal

Ingredients

Instructions

  • Remove the shells from the shrimp up to the tail section.
  • Make an incision down the back and remove the vein.
  • Rinse with cold water.
  • In a large bowl or pie plate combine the egg and milk.
  • Place the flour in another large bowl or pie plate.
  • And in another large bowl or pie plate place the bread crumbs, salt, basil, parsley, garlic and onion powders.
  • Heat oil in a large Dutch oven or deep fryer to 350 F.
  • Working in batches, coat the shrimp in the egg mixture.
  • Shake off excess and then roll in flour.
  • Return shrimp to the egg mixture and coat again.
  • Shake off excess and then roll in the bread crumb mixture, coating well.
  • Transfer to hot oil and fry until golden brown, 3-4 minutes.
  • Remove to a paper towel-lined plate to let drain before serving.

Notes

Serve with cocktail sauce or tartar sauce for dipping.

Nutrition

Calories: 629kcal | Carbohydrates: 90g | Protein: 42g | Fat: 9g | Saturated Fat: 3g | Trans Fat: 1g | Cholesterol: 385mg | Sodium: 3084mg | Potassium: 390mg | Fiber: 4g | Sugar: 7g | Vitamin A: 236IU | Vitamin C: 5mg | Calcium: 363mg | Iron: 9mg

Nutritional values are approximate.

Silver Dollar Pancakes

As I was devouring the Big Bad Breakfast cookbook by John Currence, I came across this recipe for silver dollar pancakes. I flashed back to the last time I had them. I think it was in the 1970s in Reno, Nevada. Seriously. 40 plus years ago. How did that happen? I instantly bookmarked the recipe on my Kindle reader. I had everything on hand to make them except for buttermilk. A quick trip to the grocery store took care of that.

There’s nothing complicated here. The batter is perfect. You can use the same batter to make these full-sized, but for me, the memory of silver dollar pancakes made making them again even more special.

Silver Dollar Pancakes

Easy To Make. Even Easier To Eat.

I made these silver dollar pancakes using my Cuisinart Griddler. I opened the Griddler flat so I could use both griddle plates at the same time then set the selector to Griddle. The temperature was set to maximum the entire time. The top griddle doesn’t get as hot as what is normally the bottom griddle, so food cooked on that side will take a little longer to cook.

Of course you can use a skillet or any other type of griddle instead!

Looking for a great side dish for your pancakes? Make some waffle iron sausages!

Silver Dollar Pancakes
Print Pin
5 from 1 vote

Silver Dollar Pancakes

There’s nothing complicated here. The batter is perfect. You can use the same batter to make these full-sized, but for me, the memory of silver dollar pancakes made making them again even more special.
Course Breakfast
Cuisine American
Keyword pancakes
Prep Time 10 minutes
Cook Time 20 minutes
Total Time 30 minutes
Servings 8 servings
Calories 322kcal

Ingredients

Instructions

  • Whisk together the flour, sugar, baking powder, baking soda and salt in a large bowl.
  • In another bowl whisk together the buttermilk, milk, eggs and vanilla.
  • Add the buttermilk mixture to the flour mixture and whisk until completely incorporated.
  • Whisk in the melted butter.
  • Heat a griddle, Griddler, or large skillet over medium heat. Spray with non-stick spray (or melt 1/2 tablespoon of butter).
  • Working in batches, spoon 1 heaping tablespoon of batter onto the griddle. Do not crowd the pancakes. I was able to cook 12 at a time on the Cuisinart Griddler.
  • Once the tops of the pancakes start to bubble (2-3 minutes on the Griddler, maybe sooner on a stove-top), flip and continue to cook until browned, another 30 seconds or longer.
  • Keep cooked pancakes in a warmed oven until all of the batter is used.

Notes

You can freeze the pancakes and reheat later.

Nutrition

Calories: 322kcal | Carbohydrates: 43g | Protein: 8g | Fat: 13g | Saturated Fat: 7g | Trans Fat: 1g | Cholesterol: 91mg | Sodium: 755mg | Potassium: 160mg | Fiber: 1g | Sugar: 13g | Vitamin A: 462IU | Calcium: 271mg | Iron: 2mg

Nutritional values are approximate.

Creamy Cheese and Tomato Soup

Growing up, I saw my dad eat a lot of tomato soup. I kept as far away from it as I could. It was just too darned tomato-y for me. Now, if I’d had this creamy cheese and tomato soup things would’ve been a whole lot different. This soup has just the right amount of tomato. And just the right amount of creamy cheese goodness. Every bite is perfectly rich in flavor.

Creamy Cheese and Tomato Soup

The Perfect Bowl Of Comfort

Creamy cheese and tomato soup hit the spot on a never-ending-winter day. You can also serve it cool or at room temperature in the summer. If you can get real, fresh tomatoes you can chop them and roast them in the oven. Since fresh won’t have the juices like canned do, you might have to add a bit of tomato juice, sauce or even water.

I like to use my good ole trusty Dutch oven to make this soup and pretty much darned near anything like it on my stovetop. It’s nice and big and sturdy. That extra weight helps it maintain and distribute heat perfectly. As an added bonus, it’s actually pretty easy to clean up too!

Also try my creamy cheddar soup and my easy kicked-up tomato soup.

Creamy Cheese and Tomato Soup
Print Pin
5 from 1 vote

Creamy Cheese and Tomato Soup

This soup has just the right amount of tomato. And just the right amount of creamy cheese goodness. Every bite is perfectly rich in flavor.
Course Main
Cuisine American
Keyword cheese, creamy, soup, tomato
Prep Time 10 minutes
Cook Time 45 minutes
Total Time 55 minutes
Servings 2 servings
Calories 418kcal

Ingredients

Instructions

  • Preheat oven to 375 F.
  • Pour 1/4 cup of the olive oil onto a rimmed baking sheet.
  • Drain the canned tomatoes, reserving the juices.
  • Spread tomatoes out onto the baking sheet.
  • Sprinkle with garlic, salt and pepper.
  • Drizzle with another 1/4 cup of the oil and stir.
  • Bake until the tomatoes are very soft and are beginning to caramelize, 15-20 minutes, stirring occasionally.
  • Heat the remaining 1/4 cup olive oil in large pot over medium-high heat.
  • Add the onion, carrot, celery and cook until soft, about 8 minutes.
  • Add the tomato mixture to the pot along with the reserved juices and 1 cup water. Stir.
  • Simmer until the vegetables have cooked, about 20 minutes.
  • Add butter, Parmesan cheese, and cream. 
  • Use an immersion blender to combine. Alternatively, transfer to a blender. Let cool slightly then pulse until smooth.

Notes

Make sure you let the mixture cool slightly before adding to a blender, if using.

Nutrition

Calories: 418kcal | Carbohydrates: 23g | Protein: 10g | Fat: 34g | Saturated Fat: 17g | Cholesterol: 92mg | Sodium: 2249mg | Potassium: 732mg | Fiber: 6g | Sugar: 10g | Vitamin A: 6620IU | Vitamin C: 27mg | Calcium: 336mg | Iron: 3mg

Nutritional values are approximate.