Peel and Eat Grilled Shrimp

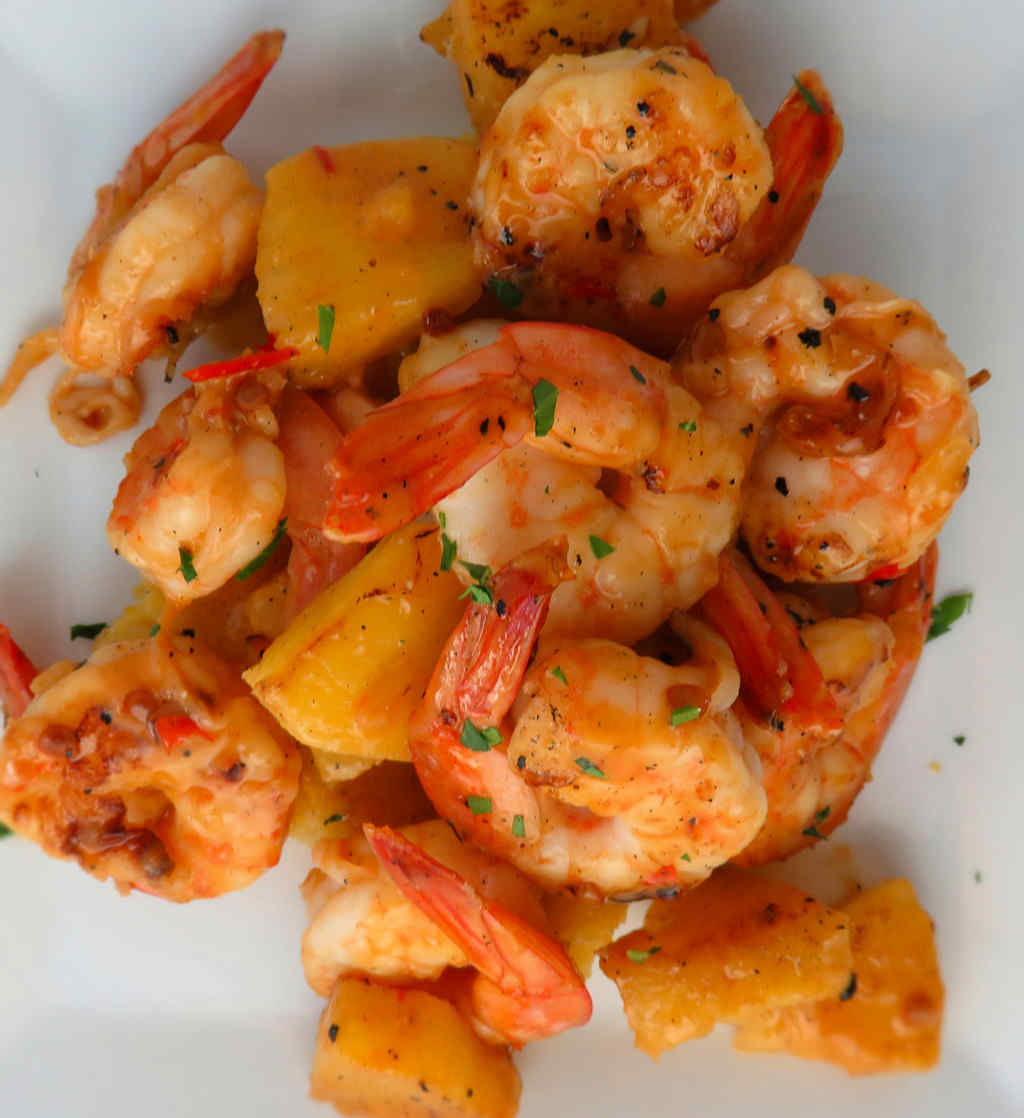
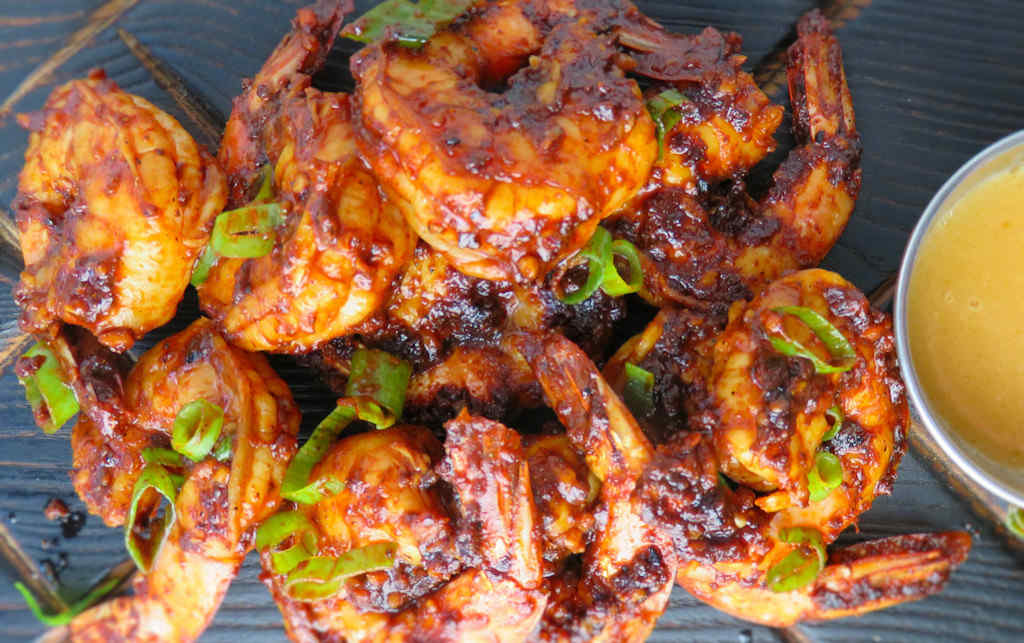
Talk about just up-and-disappearing, these peel and eat grilled shrimp were so dang good they didn’t stick around long enough to even cool off. The spice mixture that coats the shrimp is spot-on, with hints of sweetness and a warm earthiness. Seems odd, perhaps, but they were fantastic. So fantastic that I made them two nights in a row.
Peel and Eat Grilled Shrimp

Messily Fantastic

My motto has always been: The messier the dish, the tastier it is. Well, maybe that’s part of why I loved these peel and eat grill shrimp so much. They are messy. Very messy. I tried them once with shell-on (but deveined) shrimp and once using peeled (but still tail-on) shrimp. Both were fantastic, but I preferred the shell-on shrimp (I bought mine online from Shrimp to Shore). They’re messier. You get to peel them. And you get to lick your fingers even more it seems.

Weber Crafted® Roasting Basket, Stainless‑Steel…
  • Create food never thought possible in a grill with…
  • Designed to perfectly roast small, delicate food…

Also try my marinated grilled shrimp.
Peel and Eat Grilled Shrimp
Print Pin
4 from 1 vote

Peel and Eat Grilled Shrimp

My motto has always been: The messier the dish, the tastier it is. Well, maybe that's part of why I loved these peel and eat grill shrimp so much.
Course Appetizer or Main
Cuisine American
Keyword shrimp
Prep Time 15 minutes
Cook Time 15 minutes
Servings 6
Calories 247kcal

Equipment

Ingredients

Instructions

  • Fire up your grill for high-heat direct cooking. You can use skewers, a grill pan, griddle or cook the shrimp directly on the grates. Alternatively, you can cook the shrimp in a large skillet on the stove top over medium-high heat.
  • Whisk together the paprika, chili powder, brown sugar, cumin, garlic, vegetable oil, salt and pepper in a large bowl.
  • Add the shrimp and use spatula to turn and coat well. I actually prefer to use my hands to make sure that the shrimp get fully coated, but the paprika does make your fingers turn red. It just dawned on my that food-safe gloves would've been a smart idea!
  • Transfer the shrimp to the grill. Skewer first if using skewers. Make sure that the shrimp lay flat on the grill and do not overlap. If cooking indoors, add a splash of oil to the skillet before adding the shrimp, also keeping them in one layer. You might have to cook them in batches so they don't overlap.
  • Cook for 2 minutes per side, flipping once.
  • Transfer shrimp to a serving platter or bowl and toss with the green onion before serving.

Notes

Serve with plenty of napkins nearby!

Nutrition

Calories: 247kcal | Carbohydrates: 8g | Protein: 32g | Fat: 10g | Saturated Fat: 6g | Polyunsaturated Fat: 1g | Monounsaturated Fat: 1g | Cholesterol: 381mg | Sodium: 1998mg | Potassium: 243mg | Fiber: 1g | Sugar: 5g | Vitamin A: 1079IU | Vitamin C: 17mg | Calcium: 251mg | Iron: 4mg

Nutritional values are approximate.

Sale
Weber® 3-Piece BBQ Tool Set, Stainless Steel
  • Set of 3 includes Spatula, Locking Tongs, and Cold…
  • Durable, stainless-steel construction holds up to…
Weber® Grill Grate Scrubber, Grill Cleaning…
  • Designed for heavy-duty grill cleaning
  • Contoured handle offers a firm, comfortable grip
Weber® Outdoor Grill Spray Cleaner & Degreaser…
  • This 16 oz spray bottle of Weber Grill Grate…
  • Gentle on Your Grates: Grill cleaner spray is…
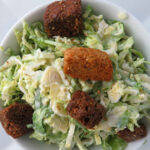
Brussels Sprouts Caesar Salad

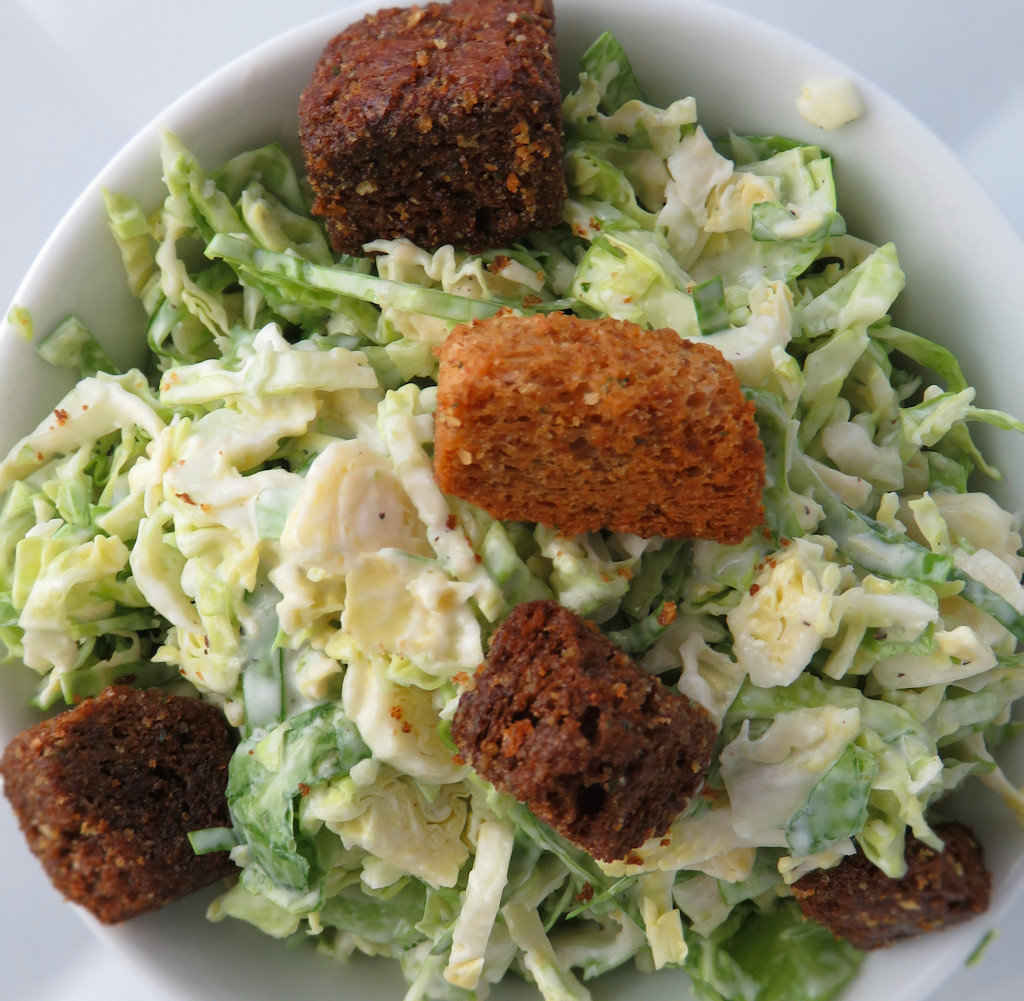
Brussels sprouts were on sale. That’s how I ended up making a Caesar salad. I could’ve grilled them. Or roasted them. But I had salad on the brain. Simple salad. I didn’t want a bunch of ingredients, or have to make a dressing. That’s how I ended up with this Brussels sprouts Caesar salad. Shred and slice some sprouts, toss in pre-made Caesar salad dressing, toss on a few Croutons and grab a fork. Time to eat.

Brussels Sprouts Caesar Salad

Crunchily Good

I absolutely love the crunch and rawness of this Brussels sprouts Caesar salad. I don’t like them chopped into super tiny bits, I like to keep some bigger pieces so I get all that crunch. This is a really great way to throw together a quick salad that looks great and tastes even better.

Cuisinart Food Processor 14-Cup Vegetable Chopper…
  • SUPERIOR FUNCTION: Cuisinart’s 720-watt motor…
  • MUST HAVE FEATURES: The 14-cup food processor has…

Also try my Caesar pasta salad.

Brussels Sprouts Caesar Salad
Print Pin
5 from 1 vote

Brussels Sprouts Caesar Salad

This Brussels sprouts Caesar salad is a really great way to throw together a quick salad that looks great and tastes even better.
Course Salad
Cuisine American
Keyword Brussels sprouts, salad
Prep Time 15 minutes
Cook Time 15 minutes
Servings 10
Calories 40kcal

Ingredients

Instructions

  • Fit a food processor with a slicer blade. Feed Brussel sprouts thru the food processor. Alternatively, slice sprouts thin with a knife.
  • Drizzle the salad with the dressing and stir to coat. Season with salt and pepper and stir again. If the salad is too dry add more dressing and stir more.
  • Serve garnished with croutons.

Notes

This salad can only be made using fresh Brussels sprouts.

Nutrition

Calories: 40kcal | Carbohydrates: 8g | Protein: 3g | Fat: 1g | Saturated Fat: 1g | Sodium: 24mg | Potassium: 353mg | Fiber: 3g | Sugar: 2g | Vitamin A: 684IU | Vitamin C: 77mg | Calcium: 38mg | Iron: 1mg

Nutritional values are approximate.

Sale
Mueller Pro-Series All-in-One, 12 Blade Mandoline…
  • Meal Prep MVP – A practical and innovative way to…
  • 12 Diverse Blades – With nine interchangeable…
OXO Good Grips 4 Piece Stainless Steel Measuring…
  • Set includes: 1/4 cup, 1/3 cup, 1/2 cup and 1 cup
  • Magnetic handles keep Cups together for storage…

Catalina Salad Dressing

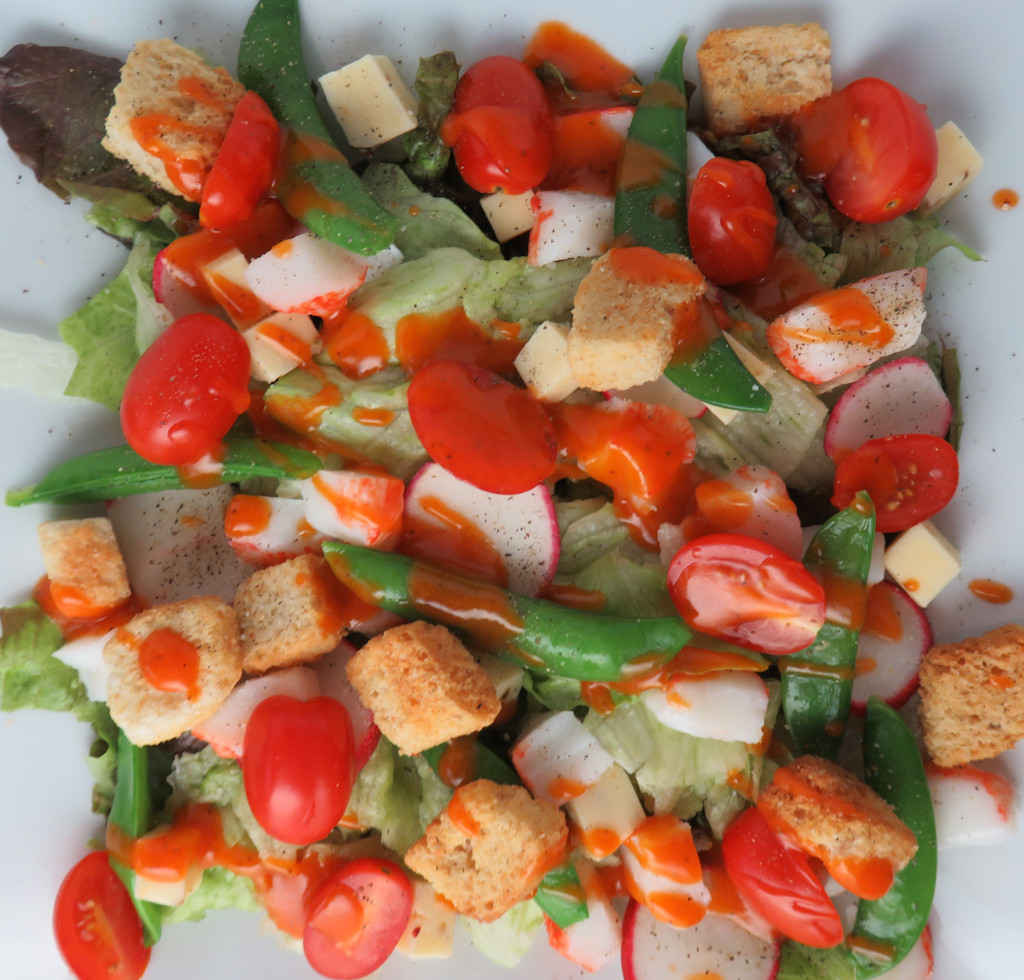
I’d say that about half the time, we make our own salad dressings and the other half of the times we buy them. There’s nothing wrong with bottled dressings, but sometimes we prefer something fresh and something we can ‘tweak’ a bit if we want. This Catalina salad dressing is one of our all-time favorites. It’s quite easy to make and always delicious. It also uses ingredients that we almost always have on hand, and that’s a definite plus too!

Catalina Salad Dressing

The Onion Is Key

The grated white onion is one of the key ingredients in this Catalina salad dressing. Don’t skip it and don’t skimp on it. I used about a tablespoon, but you might want more. Or less. I used a Microplane grater to get the onion just perfect. It’s easy to hold and does a fantastic job.

This dressing gets even better after sitting in the fridge for a few hours. Just make sure to give it a good shake before serving.

Catalina Salad Dressing

I always double this recipe when making it.

Kakamono 2-pack Porous Squeeze Bottles,Leak Proof…
  • Porous Seasoning Squeeze Bottle – Design of…
  • Multifunctional: Our condiment squeeze bottle is…

I also find myself using these sauce dipping cups more and more when serving salad dressings. They help me control my servings a bit better.

Sale
Artcome 14 Pack Stainless Steel Condiment Sauce…
  • Durable 2.5 oz capacity stainless steel sauce cups…
  • Height: 1.8 inches, Diameter (mouth): 2.4 inches…

Also try my Honky Tonk Sweet and Spicy salad dressing.

Catalina Salad Dressing
Print Pin
5 from 1 vote

Catalina Salad Dressing

We loved this simple and delicious homemade Catalina salad dressing. Why would you buy dressing at the store when you can make an even better version at home?
Course Salad Dressing
Cuisine American
Keyword salad dressing
Prep Time 5 minutes
Cook Time 5 minutes
Total Time 10 minutes
Servings 2 cups
Calories 1434kcal
Author Mike

Ingredients

Instructions

  • Place all but the onion in a blender.
  • Pulse a few times.
  • Add white onion to taste and blend until smooth.
  • Store in the fridge until ready to use.

Notes

Stir before serving.

Nutrition

Calories: 1434kcal | Carbohydrates: 122g | Protein: 1g | Fat: 110g | Saturated Fat: 89g | Sodium: 3062mg | Potassium: 277mg | Fiber: 1g | Sugar: 117g | Vitamin A: 578IU | Vitamin C: 4mg | Calcium: 31mg | Iron: 1mg

Nutritional values are approximate.

New Star Foodservice Condiment Squeeze Bottle Set…
  • 3-Pack Food-Safe Commercial-Grade Plastic: Made…
  • Versatile Use for Sauces, Oils, and Condiments…

Mini Lasagna using a Gas Grill

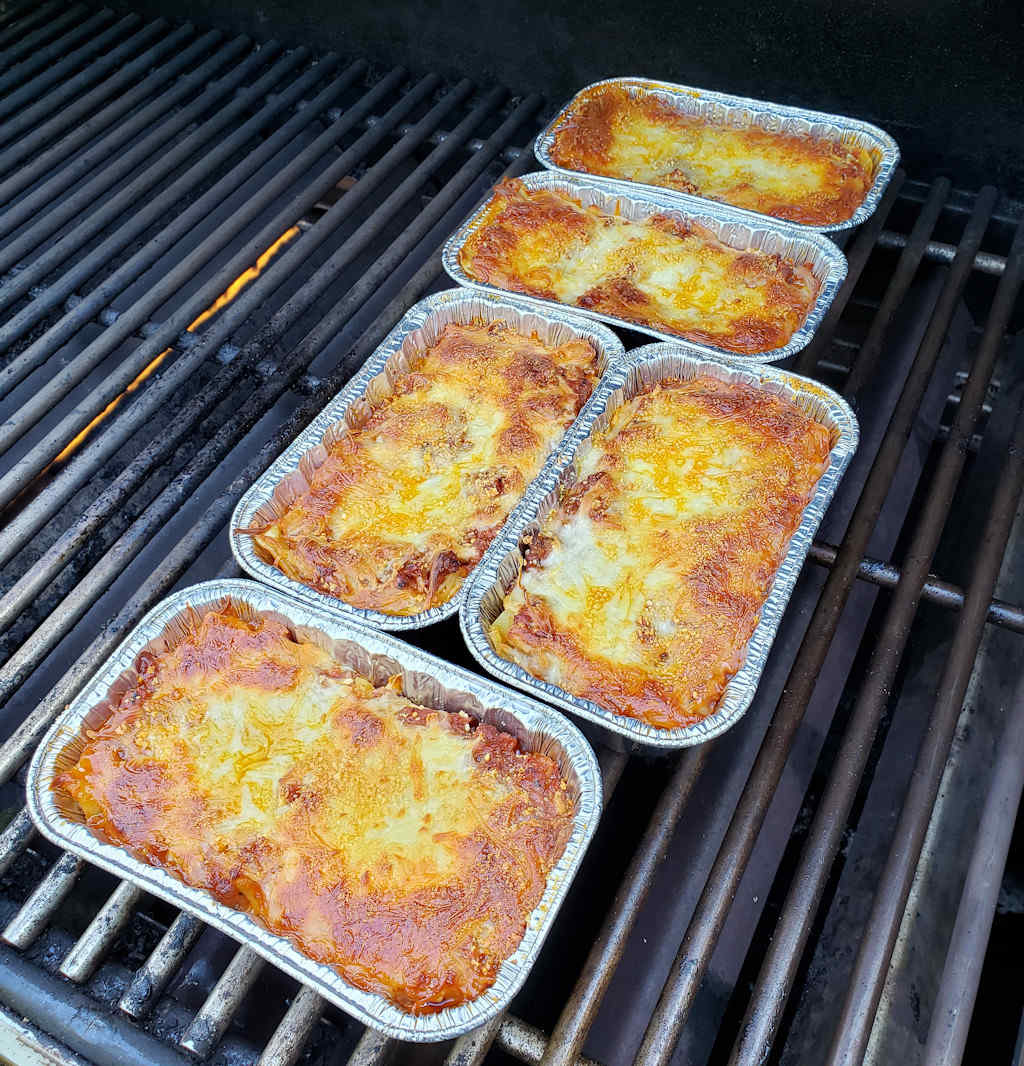
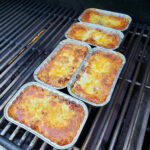
I’ve been addicted to my mom’s lasagna ever since I was knee-high to a grasshopper. My wife and I make my mom’s recipe often, though I admit we have changed it a bit over the years. And we sometimes even change up how we cook it. Usually, it’s baked in the oven. This time, we made two-person mini serving-sized portions and cooked them using a gas grill. Not only does cooking outside keep from heating up the house on a hot day, it also adds a little different flavor to these mini lasagna using a gas grill.

Mini Lasagna using a Gas Grill

The Perfect Meal

Nothing beats bubbly hot mini lasagna right off a gas grill. The disposable meatloaf pans are perfect for leftovers, if you have any. Just cover in foil and place in the fridge for later, or freeze for the future. You can reheat the lasagna on the gas grill too. Just toss them on the grill (defrost first if frozen) and heat for about 20 minutes. I sometimes add just a little water around the edges of the pan just before reheating.

Make sure you have a pair of good grill gloves. You don’t want to go picking up these hot pans with something wimpy. If they’re old, they’re probably getting thin in the spots that matter. Get new ones. And remember even the best gloves are not usually meant to hold crazy hot things for long periods. So plan your moves ahead of time. When it’s time to remove the pans I put a large baking sheet near my grill. I then pick them up one at a time and put them on the pan.

Kingsford Heat-Resistant BBQ Grill Gloves, Five…
  • EXTREME HEAT BARRIER: Aramid fiber construction…
  • SILICONE GRIP SURFACE: Silicone on both sides…

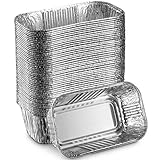
These disposable mini meatloaf pans are great for cooking and cleanup! It may seem like you get a whole bunch of them at once when you order them, but trust me you’ll find tons and tons of other dishes that are perfect for them! They’re great to use on a grill!

MontoPack Aluminum Disposable Loaf Pans | Deep…
  • MEET THE GREATEST THING SINCE SLICED BREAD: Our…
  • THESE HALF SIZES ARE PERFECT FOR LITTLE LOAVES…

You can also make fantastic deep-dish pizza on a gas grill.

Mini Lasagna using a Gas Grill
Print Pin
5 from 1 vote

Mini Lasagna using a Gas Grill

The disposable meatloaf pans are perfect for leftovers, if you have any
Course Main
Cuisine Italian
Keyword gas grill, lasagna
Prep Time 15 minutes
Cook Time 3 hours 30 minutes
Servings 8
Calories 887kcal

Ingredients

For the meat

  • 1 pound ground beef
  • 1 pound Italian sausage
  • 1 large white onion diced
  • 2-4 cloves garlic minced

For the sauce

For the lasagna

  • 1 package lasagna noodles
  • 16 ounces ricotta cheese
  • ½ cup Parmesan grated
  • 1 pound fresh buffalo mozzarella torn into chunks, or use shredded

Instructions

For the meat sauce

  • Crumble the meats into a Dutch oven and brown over medium high heat. Drain fat if desired.
  • Add the onion and cook until softened.
  • Add the garlic and cook another minute.
  • Add in all of the sauce ingredients.
  • Bring to a boil and reduce to a simmer and cook, covered, 1-2 hours.
  • Continue cooking with lid off for another hour, adding a bit more water if the sauce is too thick.

For the lasagna

  • Cook noodles per package instructions. Drain well.
  • Cut 1" off of each noodle end then cut each in half in the middle.
  • First, spread a little sauce out on the bottom of each pan.
  • Then, layer the ingredients in the following order. Try to divide the ingredients evenly between each layer, but you don't have to be picky about it.
  • Noodle half
  • Sauce
  • Ricotta
  • Mozzarella
  • Parmesan
  • Repeat for 3 total layers.
  • Fire up your gas grill for indirect cooking at 350 F.
  • Place loaf pans onto your grill over indirect heat.
  • Close the lid and cook 30 minutes or until the cheese is hot and bubbly.
  • Let rest 15 minutes before serving.

Notes

If your grill doesn’t cook evenly, rotate the trays every 15 minutes.

Nutrition

Calories: 887kcal | Carbohydrates: 55g | Protein: 48g | Fat: 52g | Saturated Fat: 24g | Polyunsaturated Fat: 4g | Monounsaturated Fat: 20g | Trans Fat: 1g | Cholesterol: 163mg | Sodium: 1422mg | Potassium: 969mg | Fiber: 4g | Sugar: 9g | Vitamin A: 1262IU | Vitamin C: 11mg | Calcium: 530mg | Iron: 4mg

Nutritional values are approximate.

Sale
Weber® 3-Piece BBQ Tool Set, Stainless Steel
  • Set of 3 includes Spatula, Locking Tongs, and Cold…
  • Durable, stainless-steel construction holds up to…
Weber® Grill Grate Scrubber, Grill Cleaning…
  • Designed for heavy-duty grill cleaning
  • Contoured handle offers a firm, comfortable grip
Weber® Outdoor Grill Spray Cleaner & Degreaser…
  • This 16 oz spray bottle of Weber Grill Grate…
  • Gentle on Your Grates: Grill cleaner spray is…

Blue Cheese Burgers with Caramelized Onions

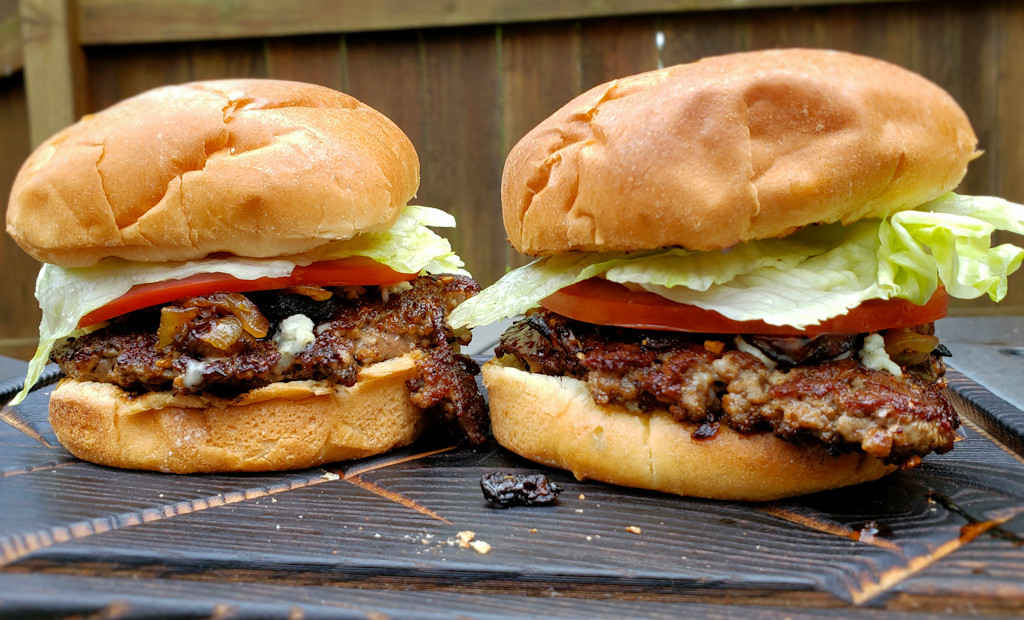
My goodness, these blue cheese burgers with caramelized onions were good. Not sorta good, but close-your-eyes-when-you-take-a-bite good. Blue cheese and onions are the perfect match. Put them on perfectly cooked burgers and you’ve got a real winner. You can make the burgers really any way you like, but for me my go-to method is on an outdoor griddle. I like my patties thin, with a bit of a crunchy edge to them, so I end up smashing them before they really get cooking.

Blue Cheese Burgers with Caramelized Onions

The Perfect Amount Of Funk

Sometimes blue cheese makes my wife go ‘ewww’. Not the case with these blue cheese burgers with caramelized onions. The blue cheese is by no means overpowering. You do taste it, but it adds such a wonderful creaminess, a little tang, that you just want more. Make these and you’ll never want a burger any other way.

It Starts With The Patties

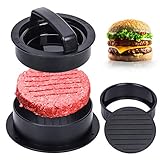
I start making my burgers by first making the patties. We prefer 4 ounce (or sometimes 5 ounce) patties. The Weber burger press helps get them perfect each time. And quickly, too. You just weigh out the meat, and place it in the press. Push down (you gotta put a bit of weight into it). And boom! Out comes a perfectly shaped patty!

Burger Press Hamburger Patty Maker with 100 Patty…
  • 3 in 1 Hamburger Press: The Burger press has…
  • Premium Durable Material: Our hamburger patty…

Also try my fiery mushroom burgers.

Blue Cheese Burgers with Caramelized Onions
Print Pin
5 from 1 vote

Blue Cheese Burgers with Caramelized Onions

The blue cheese is by no means overpowering. You do taste it, but it adds such a wonderful creaminess and a little tang,
Course Main
Cuisine American
Keyword blue cheese, burgers, onion
Prep Time 15 minutes
Cook Time 30 minutes
Servings 4
Calories 686kcal

Ingredients

  • 3 tablespoons olive oil
  • 2 medium sweet onions halved, sliced thin
  • 1 teaspoon dried rosemary crushed
  • 1 teaspoon kosher salt divided
  • 1 ½ pounds ground beef
  • ½ teaspoon ground black pepper
  • ½ cup blue cheese crumbled
  • 4 hamburger buns
  • 8 lettuce leaves I used iceberg
  • 4 slices tomato

Instructions

  • Note; You can make this recipe on a grill using a griddle or indoors, using a skillet (preferably cast iron).
  • Heat the oil on a grill griddle or in a large skillet over medium-high heat.
  • Toss the onions with the rosemary and 1/4 teaspoon of salt. Transfer to the griddle or skillet and cook 8 minutes or until starting to soften. Turn and cook another 8 minutes or until the onions are completely soft and caramelized. Add more oil as the onion cooks if they are too dry but do not drench them. Remove to a bowl, cover and keep warm until ready to use.
  • Shape the beef into 4 equally-sized patties. Season well on both sides with remaining salt and all of the pepper.
  • Transfer the patties to the grill or skillet and cook 5-6 minutes per side until done as desired. I prefer thin patties, so I smash my patties onto my griddle as they start to cook. Just before removing the patties, top each with some of the caramelized onion and the blue cheese crumbles.
  • Toast or grilled the buns as desired.
  • Top the buns with the patties. Add lettuce and tomato and serve.

Notes

Substitute gorgonzola for the blue cheese for a slightly creamier, smoother cheese topping!

Nutrition

Calories: 686kcal | Carbohydrates: 37g | Protein: 39g | Fat: 42g | Saturated Fat: 17g | Polyunsaturated Fat: 2g | Monounsaturated Fat: 17g | Trans Fat: 2g | Cholesterol: 133mg | Sodium: 1224mg | Potassium: 915mg | Fiber: 3g | Sugar: 13g | Vitamin A: 3935IU | Vitamin C: 21mg | Calcium: 240mg | Iron: 6mg

Nutritional values are approximate.

Meykers Hamburger Press Patty Maker 150 Paper…
  • Saving Storage Space : The detachable solid…
  • Making Hamburger Elegantly – Perfectly…
Gandeer 3 Pcs Cast Iron Grill Press 8 x 4 Inch…
  • Quality Material: the bacon press is made of food…
  • Practical Wood Handle Design:Featuring a…
Katbite 300Pcs 6×6 Inches Patty Paper, Burger…
  • Perfect Size: 6×6 inches of 300 count patty paper…
  • Non-Stick & Easy to Clean: Patty paper use the…

Montreal Steak-Seasoned Smoked Bologna

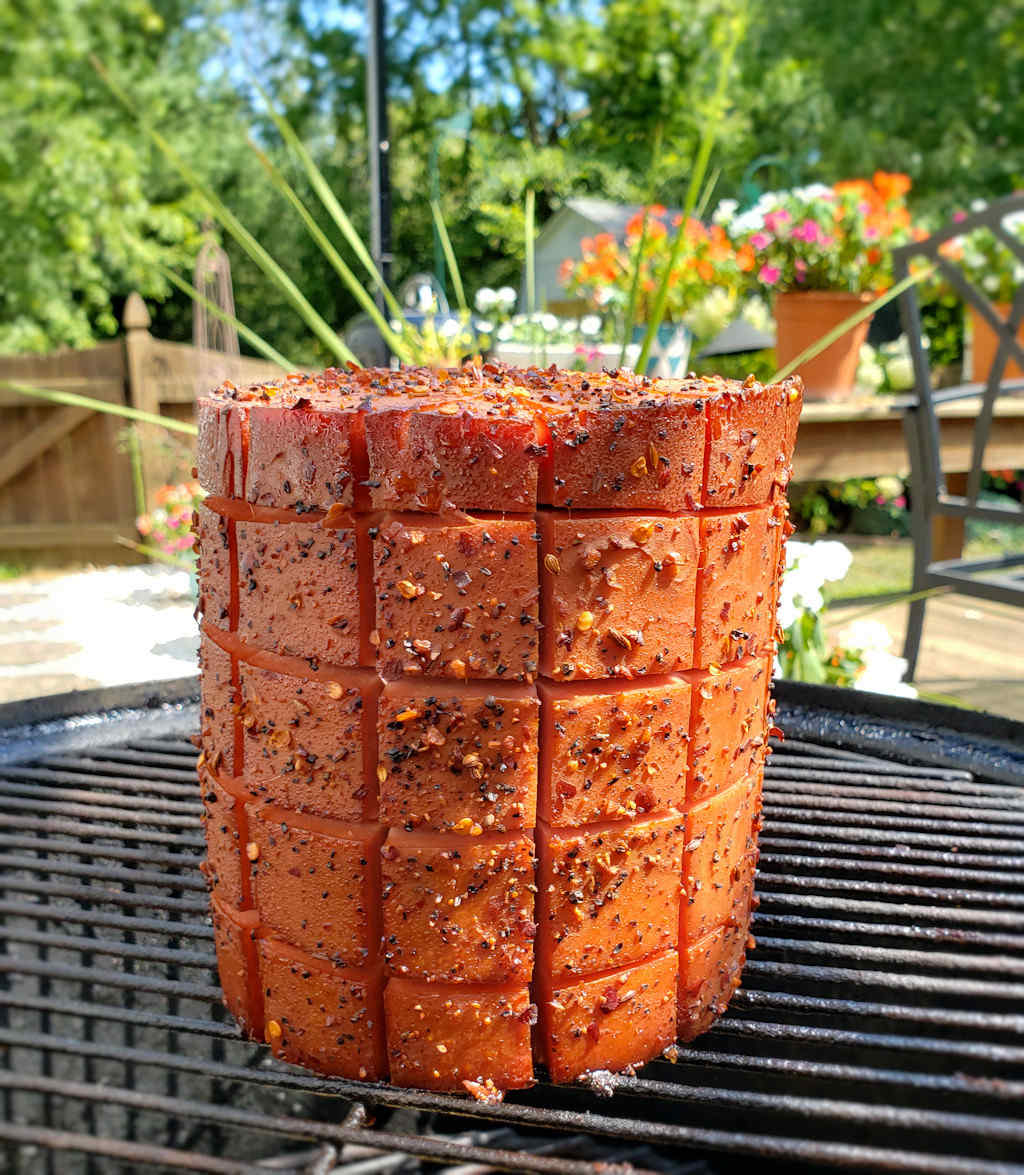
This Montreal Steak-seasoned smoked bologna was destined for greatness. That greatness was in the form of a fried bologna sandwich. The bologna takes on such a great flavor from the seasoning and smoke. You’d never think it was ‘just’ bologna because it isn’t. It’s something special, something amazing.

Montreal Steak-Seasoned Smoked Bologna

Freeze The Leftovers For More Joy Later

I slice my Montreal Steak-seasoned smoked bologna thin, for sandwiches. I usually end up with a lot of slices. Much more than I could ever use in a few days. So I freeze it for later use. To maximum quality, I put the slices into vacuum-sealer bags and seal them. But, to make sure the slices don’t stick together I put burger patty paper between each slice.

Handy Wacks P-50-X, 5×4-3/4-Inch Hamburger Patty…
  • Convenient and economical packaging solution for…
  • Place this paper sheet between your hamburger…

Of course you can use whatever seasoning you prefer when smoking bologna. I just happened to be craving Montreal Steak for some reason. Probably because I ran across a jar of it in my spice rack and thought…. hmmmm… what can I use this on?

Montreal Steak-Seasoned Smoked Bologna

Also try my red chile smoked bologna.

Montreal Steak-Seasoned Smoked Bologna
Print Pin
5 from 1 vote

Montreal Steak-Seasoned Smoked Bologna

You can use whatever seasoning you prefer when smoking bologna.
Course Main
Cuisine American
Keyword bologna, smoked
Prep Time 15 minutes
Cook Time 3 hours
Servings 16
Calories 438kcal

Ingredients

Instructions

  • Fire up your smoker for 250 F. Use any wood you like, but I've found that fruit woods or hickory work best for me.
  • Start by scoring the chub. I've tried getting fancy diamond patterns, and sometimes they're great and sometimes they're not. Checkerboard works best for me! Either way, you want to make about 1/2" cuts so that the smoke and seasoning penetrate the bologna.
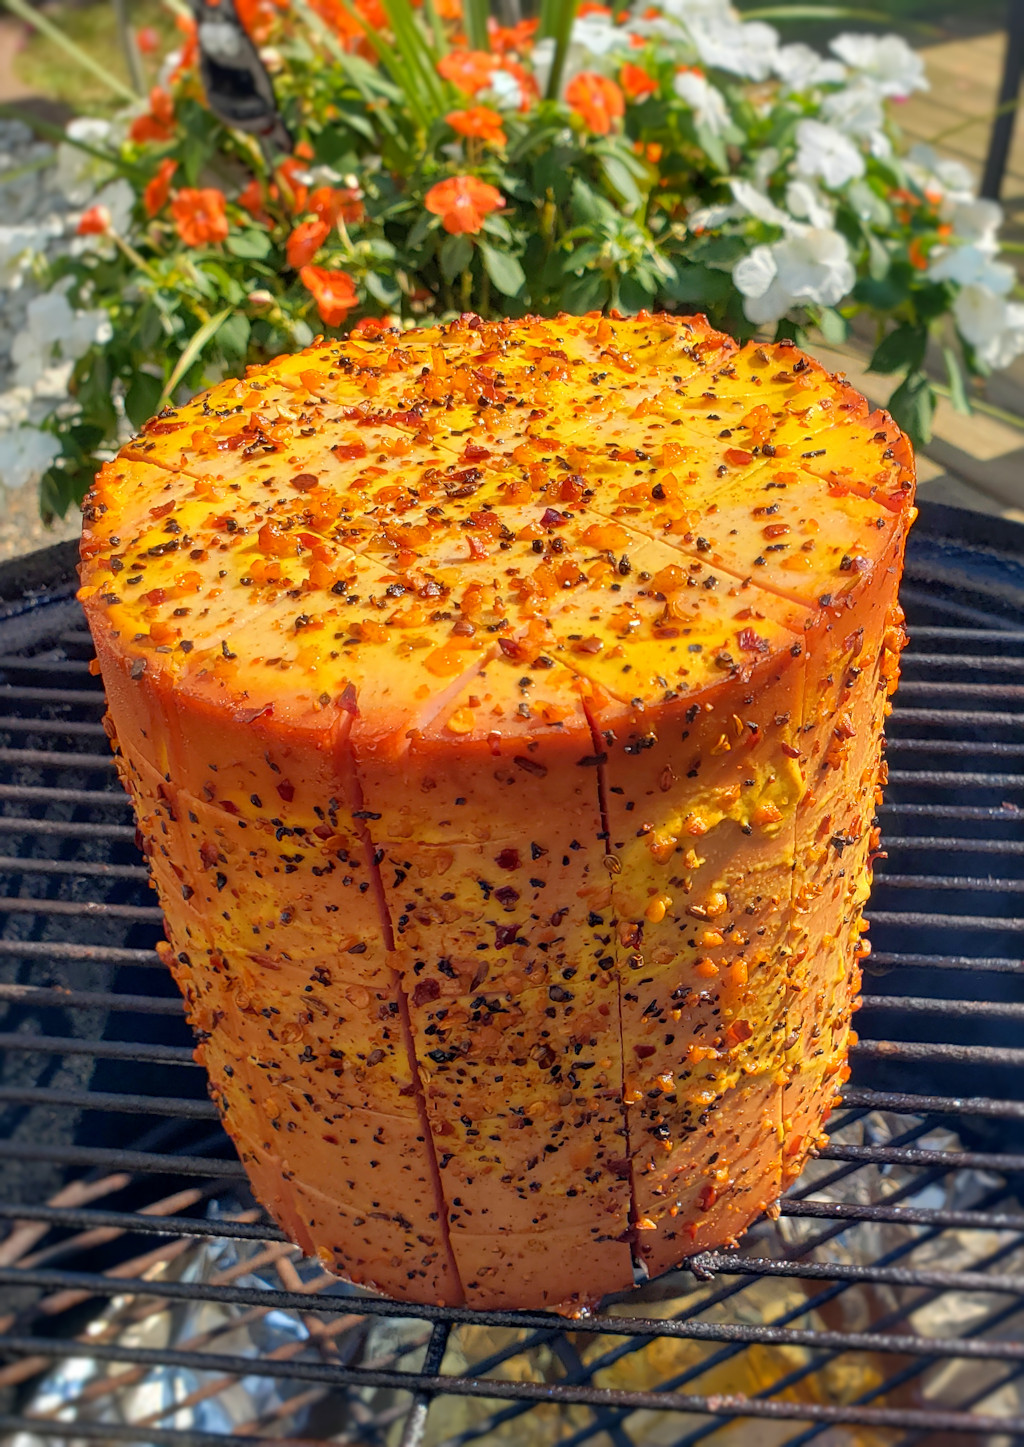
  • Spread the mustard liberally over the bologna. The mustard will help the seasoning adhere to the meat.
  • Now add the seasoning. Don't be shy. Get it on all sides, everywhere.
  • Transfer to the smoker and smoke for 3 hours.
  • Remove from the smoker and let rest before slicing. I've found that a super-sharp knife is great for slicing the bologna thin for sandwiches. You can use a meat slicer also. If you're having trouble getting good slices, freeze the chub for 15 or so minutes then try slicing it.

Notes

This bologna makes for some of the best sandwiches!

Nutrition

Calories: 438kcal | Carbohydrates: 8g | Protein: 22g | Fat: 35g | Saturated Fat: 13g | Polyunsaturated Fat: 2g | Monounsaturated Fat: 15g | Cholesterol: 85mg | Sodium: 1382mg | Potassium: 449mg | Fiber: 1g | Sugar: 6g | Vitamin A: 120IU | Vitamin C: 1mg | Calcium: 122mg | Iron: 2mg

Nutritional values are approximate.

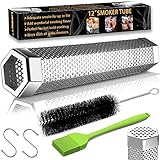
Smoke Tube for Pellet Smoker, 12” Smoker Tube for…
  • 【BILLOWING SMOKE AND BIG CAPACITY】 The pellet…
  • 【UNFORGETTABLE FLAVORS FOR HOT AND COLD…

Homemade Thousand Island Dressing

There are certainly a lot of homemade Thousand Island dressing recipes out on the internet. But I found this one to be slightly different. The flavor is richer. It’s deeper. And it has just a little kick to it. It’s just better than the rest. And it uses ingredients that I have on-hand. That’s a plus. Perfect on a salad, and even better on a Reuben sandwich.

Homemade Thousand Island Dressing

Spice It Up. I Did.

I wasn’t shy with the hot sauce when I made this homemade Thousand Island dressing. Now, I wasn’t making spicy wing sauce, no, but I wanted to get that spiciness. So many dressings are just creamy. Or just vinegary. A little heat changes things up.

So why is it called Thousand Island dressing? Because it came from the Thousand Island region between the US and Canada. I didn’t know that either.

Kakamono 2-pack Porous Squeeze Bottles,Leak Proof…
  • Porous Seasoning Squeeze Bottle – Design of…
  • Multifunctional: Our condiment squeeze bottle is…

Also try my 18000 Island dressing.

Homemade Thousand Island Dressing
Print Pin
5 from 1 vote

Homemade Thousand Island Dressing

There are certainly a lot of homemade Thousand Island dressing recipes out on the internet. But I found this one to be slightly different. The flavor is richer. It’s deeper. And it has just a little kick to it.
Course Salad Dressing
Cuisine American
Keyword homemade salad dressing, Thousand Island
Prep Time 5 minutes
Cook Time 1 hour
Servings 3 cups
Calories 703kcal

Equipment

Ingredients

Instructions

  • Combine everything in a bowl.
  • Refrigerate for 1 hour then check for seasoning.

Notes

Stir before serving.

Nutrition

Calories: 703kcal | Carbohydrates: 9g | Protein: 5g | Fat: 72g | Saturated Fat: 12g | Trans Fat: 1g | Cholesterol: 101mg | Sodium: 1415mg | Potassium: 209mg | Fiber: 3g | Sugar: 6g | Vitamin A: 823IU | Vitamin C: 19mg | Calcium: 38mg | Iron: 1mg

Nutritional values are approximate.

New Star Foodservice Condiment Squeeze Bottle Set…
  • 3-Pack Food-Safe Commercial-Grade Plastic: Made…
  • Versatile Use for Sauces, Oils, and Condiments…

Grilled Coconut and Pineapple Sweet Chili Shrimp

My picture of our grilled coconut and pineapple sweet chili shrimp definitely does not do this dish the justice it deserves. A wonderful blend of sweet pineapple and coconut with just a hint of spiciness, these shrimp disappear in no time every time we make them. We’ve had them over rice, over polenta, and just as is. No matter what else we had with them, the shrimp and sauce are the star of the show.

Grilled Coconut and Pineapple Sweet Chili Shrimp

The Sauce Is A Real Keeper

Feel free to use tail-off shrimp. Or keep the tails on, whichever you prefer. And don’t hesitate to double the sauce. If you’re serving these grilled coconut and pineapple sweet chili shrimp over rice or polenta a little extra sauce for drizzling at the end is a good thing. The sauce is also great on the side, perfect for dipping the shrimp.

A grilling basket is almost a must-have when it comes to making dishes like this one. It makes cooking easier for starters. It makes clean up easier too.

Weber Crafted® Roasting Basket, Stainless‑Steel…
  • Create food never thought possible in a grill with…
  • Designed to perfectly roast small, delicate food…

If you do decide to make extra sauce for the shrimp, I recommend these little sauce dipping cups for serving. They’re the perfect for shrimp, nuggets, and wings.

Sale
Artcome 14 Pack Stainless Steel Condiment Sauce…
  • Durable 2.5 oz capacity stainless steel sauce cups…
  • Height: 1.8 inches, Diameter (mouth): 2.4 inches…

Also try my easy grilled Cajun shrimp.

Grilled Coconut and Pineapple Sweet Chili Shrimp
Print Pin
5 from 1 vote

Grilled Coconut and Pineapple Sweet Chili Shrimp

A wonderful blend of sweet pineapple and coconut with just a hint of spiciness, these grilled shrimp with sweet chili are absolutely amazing.
Course Main
Cuisine American
Keyword coconut, grilled, pineapple, shrimp
Prep Time 20 minutes
Cook Time 15 minutes
Servings 4
Calories 184kcal

Ingredients

For the sauce

For the shrimp

  • 1 pound shrimp large, peeled and deveined. I used 20-25 count.
  • 2 slices pineapple cut into chunks

For the pineapple polenta (optional)

Instructions

For the sauce

  • To get coconut cream, place a can of unsweetened coconut milk in the fridge overnight. Do not SHAKE!
  • Open the can. The coconut cream is the solid that has floated to the top of the can. Scoop out 3 tablespoons but do not get any of the clear milk found below it in the can. You'll have leftover cream and milk for other uses (I made more of the sauce because it's fantastic on grilled fish and chicken too!).
  • Place the coconut cream, chili sauce, pineapple and sriracha into a blender and pulse a few times, just enough to chop up the pineapple a bit and get everything combined.

For the shrimp

  • Skewer the shrimp and pineapple pieces or place into a large grill basket. You can also grill them on a griddle.
  • Cook shrimp 3 minutes then brush with about a third of the sauce.
  • Flip and brush with half of the remaining sauce.
  • Continue grilling until the shrimp is done, another 3-4 minutes.
  • Brush shrimp with remaining sauce and serve over pineapple polenta, if desired.

For the pineapple polenta (optional)

  • Bring broth to a boil in a medium saucepan over medium-high heat.
  • Whisk in the polenta and cook until thick and creamy.
  • Season with salt and pepper and add the sage and pineapple. Stir.
  • Remove from heat and cover until ready to use.

Notes

The sauce is great for dipping any cooked shrimp.

Nutrition

Calories: 184kcal | Carbohydrates: 34g | Protein: 3g | Fat: 5g | Saturated Fat: 4g | Polyunsaturated Fat: 1g | Monounsaturated Fat: 1g | Sodium: 585mg | Potassium: 247mg | Fiber: 2g | Sugar: 15g | Vitamin A: 92IU | Vitamin C: 41mg | Calcium: 20mg | Iron: 1mg

Nutritional values are approximate.

Sale
Weber® 3-Piece BBQ Tool Set, Stainless Steel
  • Set of 3 includes Spatula, Locking Tongs, and Cold…
  • Durable, stainless-steel construction holds up to…
Weber® Grill Grate Scrubber, Grill Cleaning…
  • Designed for heavy-duty grill cleaning
  • Contoured handle offers a firm, comfortable grip
Weber® Outdoor Grill Spray Cleaner & Degreaser…
  • This 16 oz spray bottle of Weber Grill Grate…
  • Gentle on Your Grates: Grill cleaner spray is…
Wood Shop BBQ Sauce

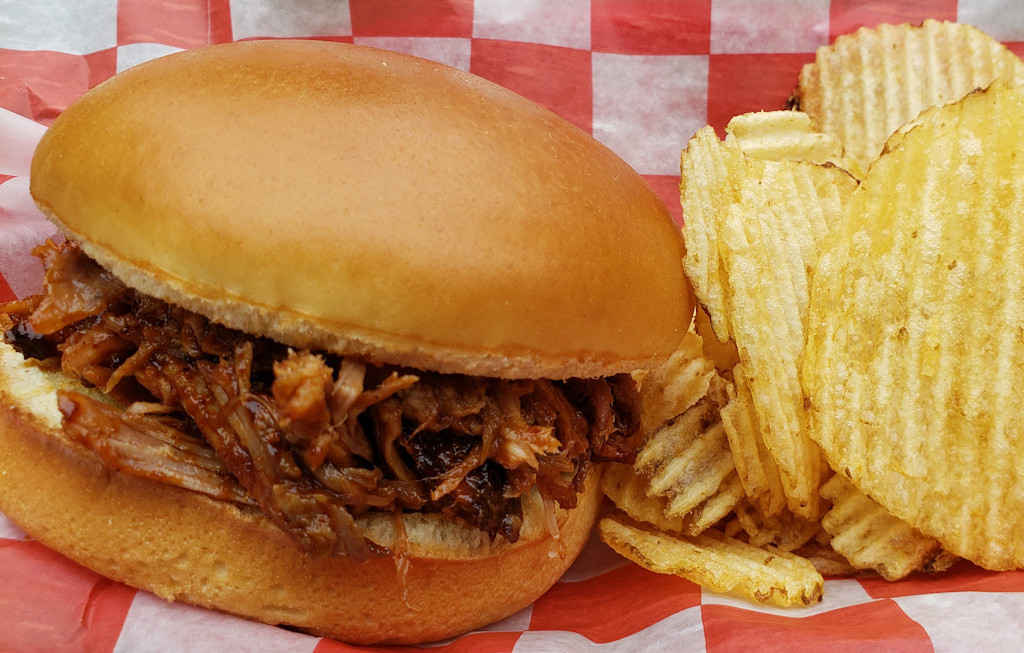
This sauce originates from a BBQ joint in Seattle, Washington, called Wood Shop BBQ. It’s pretty much a traditional (great) BBQ sauce but with a pretty healthy dose of Worcestershire sauce to boot. I used it on my awesome pulled pork BBQ, but I think this sauce would be even better on smoked brisket or beef ribs.

Wood Shop BBQ Sauce

The Big BBQ Sauce Feud

It has been a while since my wife and I sort of disagreed on a recipe. While this Wood Shop BBQ sauce is pretty Worcestershire-sauce-y, I thought it was pretty darned good. But my wife couldn’t get passed the amount of Worcestershire sauce. I also thought that the sauce got way better after sitting in the fridge for a few days. So, I recommend you start with half of what the recipe states and go from there. I am a huge Worcestershire sauce fan, so I used almost the full amount.

Ocapind 2 Pack 3 Hole Squeeze Bottles for Sauces…
  • 【 Materials】This set includes two 300ml…
  • 【Multi-hole Design】This pancake syrup…

Also try my copycat of Dreamland’s BBQ sauce.

Wood Shop BBQ Sauce
Print Pin
4 from 1 vote

Wood Shop BBQ Sauce

I would recommend that you use half of the Worcestershire sauce stated, taste, and add more if desired.
Course BBQ Sauce
Cuisine American
Keyword barbecue, BBQ, sauce
Prep Time 5 minutes
Cook Time 15 minutes
Servings 1 quart
Calories 3518kcal

Equipment

Ingredients

Instructions

  • Combine the ketchup, vinegar, Worcestershire, molasses, brown sugar, hot sauce and lemon juice together in a large saucepan and whisk until blended.
  • Place over medium heat and bring to a simmer, then add the chili powder, granulated garlic, onion powder, salt, pepper and cayenne.
  • Continue to simmer 30 to 45 minutes, stirring occasionally to keep from burning.

Notes

Store leftover sauce in the fridge.

Nutrition

Calories: 3518kcal | Carbohydrates: 825g | Protein: 40g | Fat: 21g | Saturated Fat: 4g | Polyunsaturated Fat: 12g | Monounsaturated Fat: 5g | Sodium: 32496mg | Potassium: 13724mg | Fiber: 54g | Sugar: 648g | Vitamin A: 44869IU | Vitamin C: 134mg | Calcium: 1681mg | Iron: 57mg

Nutritional values are approximate.

New Star Foodservice Condiment Squeeze Bottle Set…
  • 3-Pack Food-Safe Commercial-Grade Plastic: Made…
  • Versatile Use for Sauces, Oils, and Condiments…

Cheesy Jalapeno Poppers

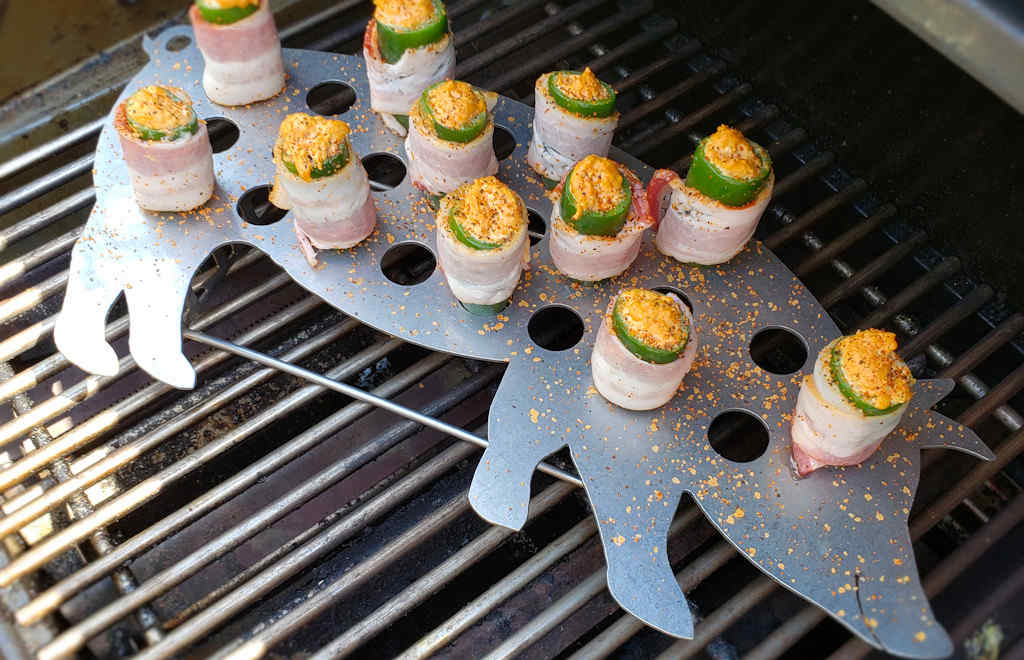
Search around these days and most people are making what are called ABTs (atomic Buffalo turds… I didn’t make up the name so don’t blame me!). They’re sliced (usually) stuffed jalapenos that are grilled or smoked. I love them. But sometimes I like mine the old way, as poppers. Cooked whole, not halved, and stuffed with all sorts of crazy goodness, wrapped in bacon, and grilled until perfect. That’s just what these cheesy jalapeno poppers are. Perfect.

Cheesy Jalapeno Poppers

Heat, Tamed

The nice thing about these little treats is that after cooking the jalapenos mellow a lot. So yeah, they are a bit spicy but definitely not screaming hot by any stretch. And any heat that there is gets tamed down a bit by the cheeses and the bacon. Even if you don’t like spicy foods I would not let that discourage you from making these. You’ll still love them. And hey, if you’re still worried, have a little cool Ranch dressing ready on the side for dipping just in case.

Geedel Rotary Cheese Grater, Kitchen Mandoline…
  • Makes Everything Simple : Just forget your bagged…
  • Premium Material : All parts of the rotary cheese…

Of course, cheesy jalapeno poppers give me an excuse to use my jalapeno popper rack. Not that I really needed an excuse.

Also try my jalapeno popper bites and my jalapeno popper wontons.

Cheesy Jalapeno Poppers
Print Pin
5 from 1 vote

Cheesy Jalapeno Poppers

Cooked whole, not halved, and stuffed with all sorts of crazy goodness, wrapped in bacon, and grilled until perfect. That’s just what these cheesy jalapeno poppers are. Perfect.
Course Appetizer
Cuisine American
Keyword jalapeno popper
Prep Time 10 minutes
Cook Time 2 hours
Servings 12
Calories 119kcal

Ingredients

For the jalapenos

For the filling

Instructions

For the filling

  • Combine all of the ingredients.

For the jalapenos

  • Fire up your grill for indirect cooking.
  • Pipe or spoon the mixture into the jalapenos. Use your finger to push the filling all the way to the bottom of the peppers, filling them completely.
  • Wrap a piece of bacon around each jalapeno and secure with a toothpick.
  • Transfer the peppers to a rack on your grill and sprinkle with rub or seasoning.
  • Cook 1-2 hours or until the peppers are tender, the bacon is cooked, and the filling is bubbly.
  • Serve hot.

Notes

You can substitute pepper jack for the mozzarella.

Nutrition

Calories: 119kcal | Carbohydrates: 3g | Protein: 5g | Fat: 10g | Saturated Fat: 6g | Cholesterol: 30mg | Sodium: 213mg | Potassium: 84mg | Fiber: 1g | Sugar: 1g | Vitamin A: 618IU | Vitamin C: 17mg | Calcium: 120mg | Iron: 1mg

Nutritional values are approximate.

Sale
Weber® 3-Piece BBQ Tool Set, Stainless Steel
  • Set of 3 includes Spatula, Locking Tongs, and Cold…
  • Durable, stainless-steel construction holds up to…
Weber® Grill Grate Scrubber, Grill Cleaning…
  • Designed for heavy-duty grill cleaning
  • Contoured handle offers a firm, comfortable grip
Weber® Outdoor Grill Spray Cleaner & Degreaser…
  • This 16 oz spray bottle of Weber Grill Grate…
  • Gentle on Your Grates: Grill cleaner spray is…