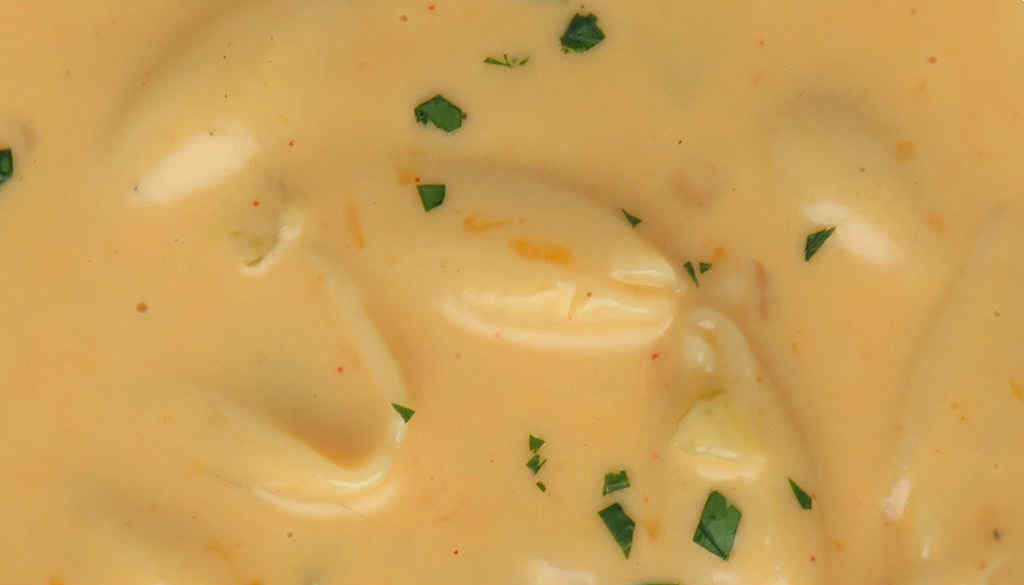
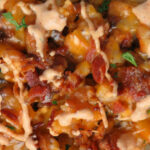
Wow, we were blown away with just how fantastic this slow cooker creamed corn was. Some of the credit goes to using the best sweet corn around, My Dad’s Sweet Corn. I put up a big batch of corn each summer for days just like today: cloudy, cold and dreary. The corn is creamy and sweet and smells, looks and tastes like summer.
A Few Thoughts
Corn from cans can be used instead of fresh, just drain the cans before adding to the slow cooker. For a spicier version of slow cooker creamed corn, use only half a brick of cream cheese and add 1/2 cup of cubed pepper jack cheese instead. Or a bit of cayenne pepper, but not much. You don’t want to bury the tremendous sweetness of the corn.
Wow, we were blown away with just how fantastic this slow cooker creamed corn was. The corn is creamy and sweet and smells, looks and tastes like summer.
I was looking for a salad for lunches for the work week. Something that would hold up, and wouldn’t get soggy yucky. Something with some crunch. And of course, something yummy. I found that and more in Martin’s broccoli salad. This is great stuff here. It’s perfect for packing for lunch, a picnic, and even served as a side dish with dinner.
Get Cheesy With It
I’ve made Martin’s broccoli salad a number of times now. I generally follow the recipe to a ‘T’. But I have been known to use different cheese (I love it with pepperjack). Or different nuts (roasted walnuts are fantastic). I thought about making it with cauliflower instead of broccoli. I think I’ll try that next! No matter what, you can’t go wrong with this recipe, even if you make it your own by changing it up a bit!
I almost always use Blue Plate mayonnaise in the dishes I make. I think it is the best around. If you can’t find it locally you can pick it up online for a fair price.
The original recipe did call for shredded cheese. I prefer cubed cheese. I think it holds up better to the other chopped ingredients and it doesn’t ‘hog’ all of the dressing.
I love meatloaf, and I’m not afraid to make it a little different than what one might consider a traditional meatloaf (though I love that too. Gimme plenty of potatoes and carrots too!). This Mexican meatloaf takes meatloaf to a new spicy, flavor-packed place. There’s absolutely nothing boring about it, that’s for sure, from the tender moist meat mixture, packed with vegetables, to the spicy smoky tomato salsa topping. Is it just as great the next day? Oh, it’s even better!
No Mushy Meatloaf!
I have a little rule about my meatloaf. I like to keep my vegetables cut a bit bigger than most. They don’t need to be cooked until mushy. They need to be a little crunchy, but not super crunchy. I don’t want the vegetables to get lost in the this fantastic Mexican meatloaf meatiness.
I love chipotles in adobo sauce. They aren’t too particularly hot, but the smokiness adds a great flavor to just about any dish.
This Mexican meatloaf takes meatloaf to a new spicy, flavor-packed place. There’s absolutely nothing boring about it, that’s for sure, from the tender moist meat mixture, packed with vegetables, to the spicy smoky tomato salsa topping. Is it just as great the next day? Oh, it’s even better!
You never, ever have to tell me twice that dinner is ready if it involves meatloaf. I’ve never had a meatloaf that I didn’t like. And I’ve had a few that I absolutely loved, like this barbecue meatloaf. Tender and moist, it packs a nice barbecue flavor that isn’t overwhelming. My tastes lean towards the slightly spicy, so I used an off-the-shelf spicy barbecue sauce when I made this meatloaf, but with so many different sauces out there you can use something totally different to suit your tastes.
One Delicious Meatloaf
If you really want to amp up the barbecue flavor, try smoking your barbecue meatloaf instead of cooking it in the oven. You can also put it on your grill, be it gas or charcoal. Just keep the pan away from fire so it doesn’t cook too fast. You want a little heat, but not direct heat. My big Weber Summit 670 is perfect for making a huge batch of this meatloaf but any grill where you can produce indirect heat will work great.
My favorite way to serve leftover meatloaf is sliced and then lightly frying it. Onto a bun or Texas toast with more sauce (or ketchup), mayonnaise, onion and lettuce.
You never, ever have to tell me twice that dinner is ready if it involves meatloaf. I’ve never had a meatloaf that I didn’t like. And I’ve had a few that I absolutely loved, like this barbecue meatloaf.
Heat the oil in a medium skillet over medium heat.
Add the onion and saute until soft, 8-10 minutes.
Add the garlic. Stir and cook another minute.
Stir in 2 tablespoons of the BBQ sauce and the Worcestershire sauce. Remove from heat and let cool.
Preheat your oven to 375 F.
In a large bowl combine the cooled onion mixture, breadcrumbs, parsley, and granulated onion. Add 1 tablespoon of half and half and stir to create a thick paste. If too thick and dry and a little more half and half and mix again.
Mix in the eggs.
Crumble in the ground beef and pork. Add green onions, Parmesan and salt, pepper and cayenne to taste. Using your hands combine the ingredients until everything is distributed evenly throughout each handful.
Spray an 8" x 11" pan with non-stick spray. Transfer the meat mixture to the pan and form into a large loaf, keeping at least an inch of clearance between the sides of the loaf and the pan.
Bake for 30 minutes.
Combine the 1/2 cup of BBQ sauce and the ketchup and brush half of the mixture over the top of the meatloaf.
Return to the oven and bake until the internal temperature reaches 155 F as measured in several locations.
Remove from the oven and brush with the remaining BBQ sauce and ketchup mixture.
Let rest 5-10 minutes before slicing thick and serving.
I had pretty low expectations for this mac and cheese soup. I thought it might be too thick. Or not have much flavor. Oh, boy was I wrong about everything. This soup was fantastic. It made for the perfect bowl of happiness on a cold, dreary winter’s day. Just the right amount of seasoning. Just the right amount of cheese. And oh so creamy smooth. I should’ve doubled the recipe.
Creamy Goodness In Every Bite
I like a bit of kick, a bit of heat, in my dishes so I admit to adding a good deal more cayenne pepper when I made this mac and cheese soup. Not so much that it overpowered the great flavors, but enough that I knew that it was there.
This soup was fantastic. It made for the perfect bowl of happiness on a cold, dreary winter’s day. Just the right amount of seasoning. Just the right of cheese. And oh so creamy smooth. I should’ve doubled the recipe.
I am a huge fan of cooking on cedar planks. From sides to main dishes to desserts, I love the flavor and aroma of cedar. I don’t go crazy with the cedar aroma or flavor. I char the planks just enough to add a hint of the wood to whatever I’m cooking. It adds something different to grilled foods. Like these cedar planked asparagus. Easy as can be to make, they come out crisp-tender (or, to your liking) with a great fresh asparagus flavor. And yes, just a hint of cedar sets these apart from just having grilled them.
Have Them Your Way
You can easily change the flavor of your cedar planked asparagus by changing the seasonings or using infused olive oil instead. I sometimes like to add a good pinch of red pepper flake for a bit of heat. Lemon-infused oil adds a great citrus flavor. A few roasted pecans or walnuts add crunch and well, nuttiness. You can’t mess these up. Just don’t overcook them.
I like to cook with cedar on my Weber grills. They last forever.
Note: This recipe was developed using the Char-Broil Big Easy Oil-Less Fryer. If you are cooking using the Char-Broil Smoker-Roaster Grill you should cook with the lid open and the temperature set to High. You might also need to adjust the cooking time.
This super easy marinated chicken on the Char-Broil Big Easy is exactly why I love using my oil-less fryer. I was serving salad for dinner, and wanted chicken to go with it. Not dried out, bland super market rotisserie chicken. Moist, tender flavor-packed chicken. And with as little fuss as possible. And this is it.
No Fancy Stuff Required
I don’t see any reason to use a super expensive fru-fru Italian dressing in this easy marinated chicken on the Char-Broil Big Easy. I used a 16 ounce bottle of generic dressing from our local grocery store. For $1, it added the perfect flavor, tenderness and juiciness to my chicken. Use any dressing (or even bottled marinade) you like, but stay away from anything that contains sugar or sugar-like substances. Sugar will cause the outside of the chicken to burn long before the insides are done.
This super easy marinated chicken is exactly why I love using my Char-Broil Big Easy. I was serving salad for dinner, and wanted chicken to go with it. Not dried out, bland super market rotisserie chicken. Moist, tender flavor-packed chicken.
I smoked a big ole bologna chubb not long ago. Of course I ended up with a lot of bologna. I ended up slicing it nice and thick, freezing some of it for later. Later as in ‘for the best fried bologna sandwich ever’ later. This is the sandwich bologna was invented for. Fried bologna with just a little bit of crunchy char around the edges. Melted gooey cheese. Crunchy BBQ chips and lettuce. And the tang of pickled chow chow. Mustard. Mayonnaise. All on white bread.
Keep It As Simple As Possible
You must use white bread when you make a fried bologna sandwich. It’s a law. Or should be. Let’s face it, you didn’t make this sandwich because of its organic farm-fresh ingredients. This isn’t fru-fru, this is a big ole honkin’ sandwich that you’ll love.
Melt the butter in a medium skillet over medium-high heat.
Meanwhile, spread one side of one of the bread slices with mayo.
Spread one side of the other slice of bread with the mustard.
Cut a 1" wide 'X' pattern in the middle of the bologna if using thin slices. This will keep it from curling. I didn't have to do this with my thick bologna.
Add bologna to skillet and swirl around to coat the bottom in the butter.
Cook a few minutes until browned, then flip and repeat.
Add the cheese slices to the bologna and cook another minute to melt.
Place the bologna on top of the mayo-topped bread slice.
Add the chow chow, potato chips and shredded lettuce.
Add the last piece of bread and gently push down on the sandwich to just crush the chips. Don't destroy them, just make the sandwich bite-able.
Devour.
Notes
Add a little BBQ sauce along with the mayonnaise for the BBQ version of this sandwich.
I had no idea just how much I would love these cedar planked shrimp with pesto. I mean, I can eat shrimp like the dickens. And I love anything that’s cooked on a cedar plank. But sometimes, pesto can be a bit much for me. Well, this was the first time ever where I absolutely could not get enough pesto. Each bite was perfect. I just wish I’d made more. A lot more. I served these as our main dish, but you can certainly serve them up as an appetizer too!
And Like That I’m Addicted To Pesto
You can certainly make your own pesto for these cedar planked shrimp. Make it your own. Me, I was looking for a simple dinner that still looked great and tasted even better so I went to the pantry for my pesto. I’m not much of a pesto aficionado but Classico Traditional pesto worked just fine for me!
If I was going to serve these shrimp as an appetizer I might do several planks, each with a different type of pesto. Mix it up a bit!
Fire up your grill for direct and indirect cooking. You'll use the direct heat to sear the cedar plank. You'll use indirect (low or no flame under the blank) heat to cook the shrimp.
Pat the shrimp dry.
Toss the shrimp with half of the pesto.
Toss shrimp in mixture, coating it all over.
Place your cedar plank over the direct heat for 15 or so minutes until charred on one side.
Move the plank to indirect heat. Add the shrimp. Drizzle lightly with oil. Note: You may not need much if any oil, depending on how thick your pesto is. A lighter thinner pesto may not require any. You only need the oil to slightly 'loosen' or thin the pesto.
Place the lemons over direct heat.
Close the grill lid and let cook until the shrimp start to turn pink.
Spoon the remaining pesto over the shrimp. Continue cooking until the shrimp are done. The lemons should get a nice char on them.
Drizzle two halves of the lemons over the shrimp (I used grill tongs to squeeze them).
Serve shrimp on the plank with the remaining lemon halves for squeezing.
Notes
I prefer to use tail-on shrimp since the tails make for great little handles for picking up the shrimp!
My first (big) bite of these copycat Lone Star Steakhouse Amarillo cheese fries made me think I’d just come upon the world’s largest plate of potato skins. Well, it has some of the flavors of potato skins at least. Good ones. Not the wimpy thin ones with no toppings. These fries are loaded with bacon. And cheese. And a taco-flavored Ranch dressing that you could just drink. I served this at home, but I’d been just as happy ordering a big ole plate of these fries while sitting at a bar sipping on a cold brew and watching my favorite team on the big screen!
Great As Is. Even Better Kicked Up!
You can make this recipe for copycat Lone Star Steakhouse Amarillo cheese fries just as it is and have a good ole time eating it. Or, you can use it as a base recipe for even more amped-up cheese fries. Add some green onion. Maybe a dollop or two of sour cream. Skip and bacon and add BBQ pulled pork or chicken instead. A little pico de gallo ain’t gonna hurt either! Own it!
Copycat Lone Star Steakhouse Amarillo Cheese Fries
My first (big) bite of these copycat Lone Star Steakhouse Amarillo cheese fries made me think I'd just come upon the world's largest plate of potato skins.