Yum Yum Sauce

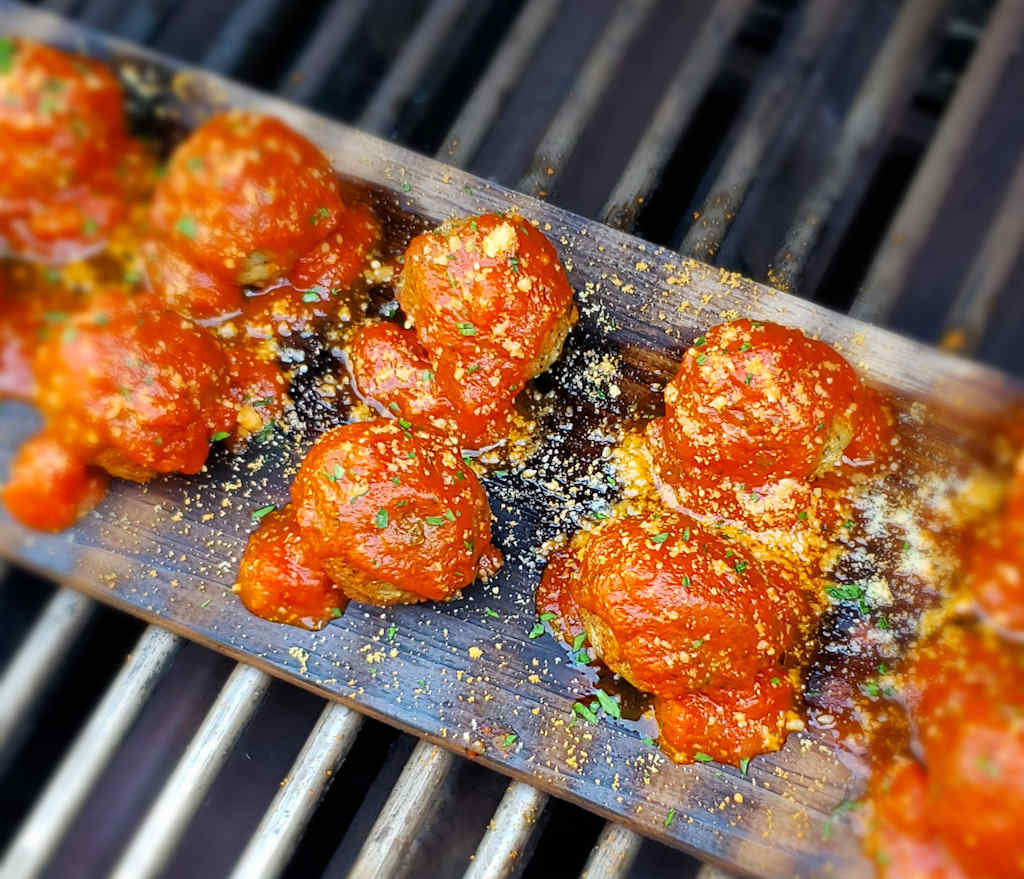
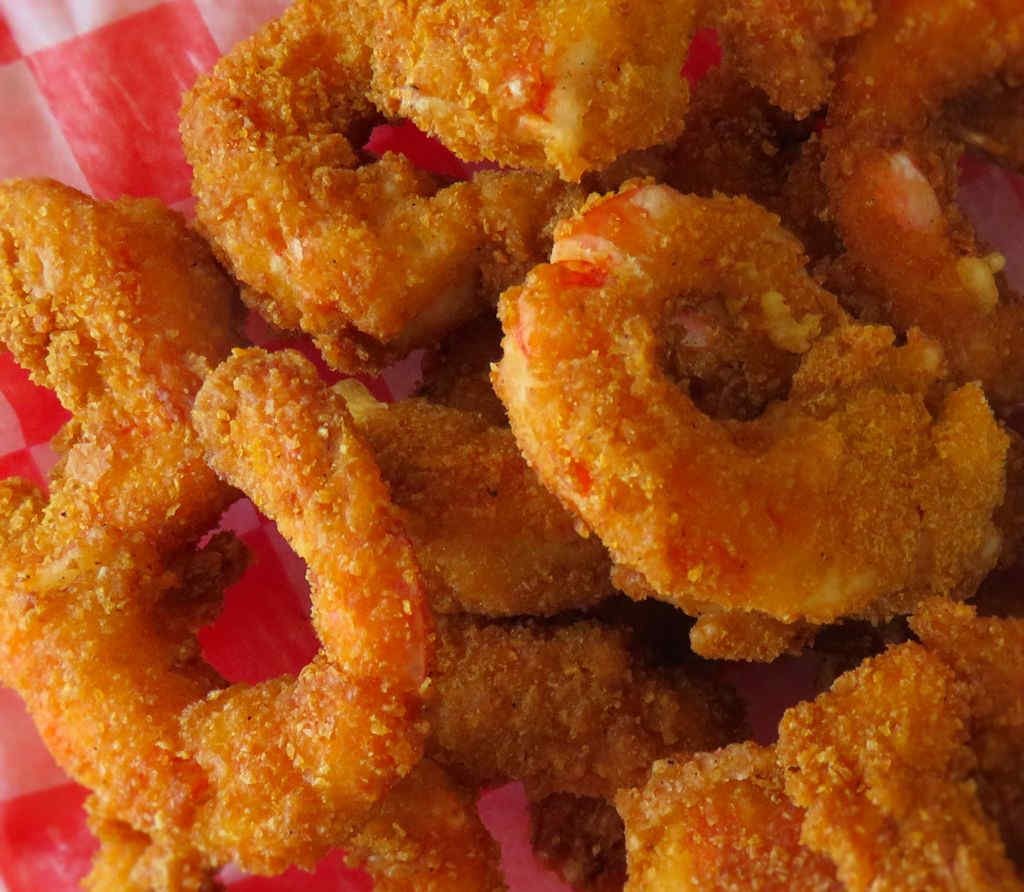
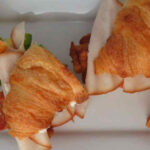
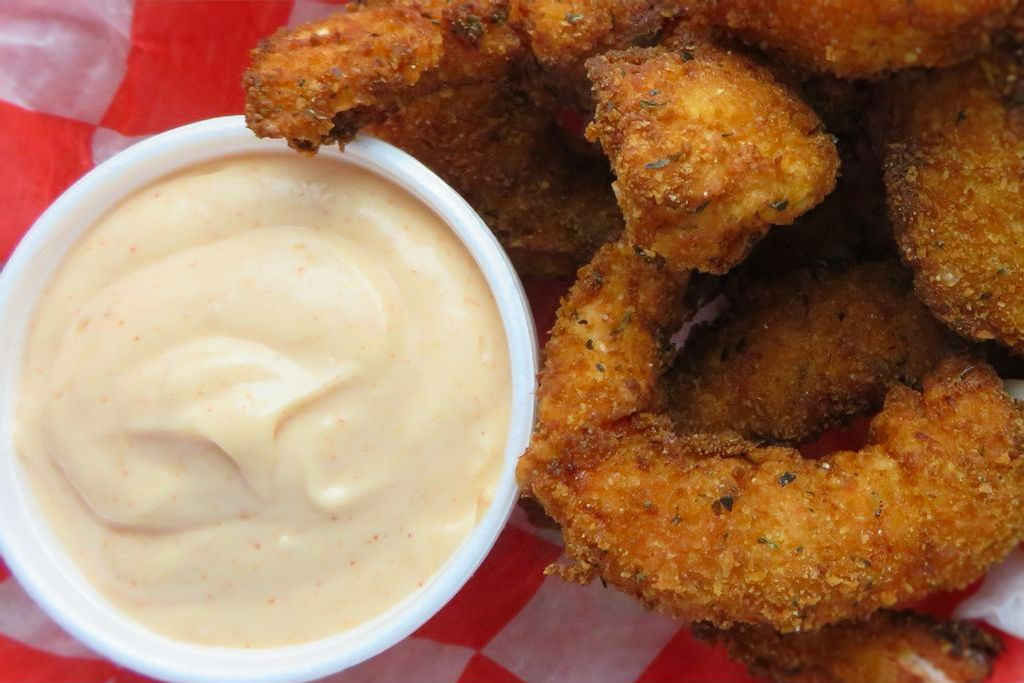
I went on a deep-fried shrimp kick the other day. It happens. Unfortunately it doesn’t happen often enough, because deep-fried shrimp are definitely one of my favorite things. I can grill shrimp all day long, but in the end, I gotta have them deep-fried. To make the shrimp even better I always make a dipping sauce or two along the side. Usually that means some sort of variation on a cocktail sauce, but this time I went with a mayonnaise-based sauce often found in Japanese Hibachi restaurants, Yum-Yum sauce. Nice and creamy with a slight vinegar twist, this sauce was perfect with the crispy shrimp.

Yum Yum Sauce

A Few Thoughts

As I note in the ingredients, you’ll want to use full-strength (not light) mayonnaise. Light mayonnaise is too thin, you want something that’ll stand up to the shrimp. I wouldn’t be afraid to add a few shakes of hot sauce, either. Or maybe a few good-sized pinches of dried pepper flake.

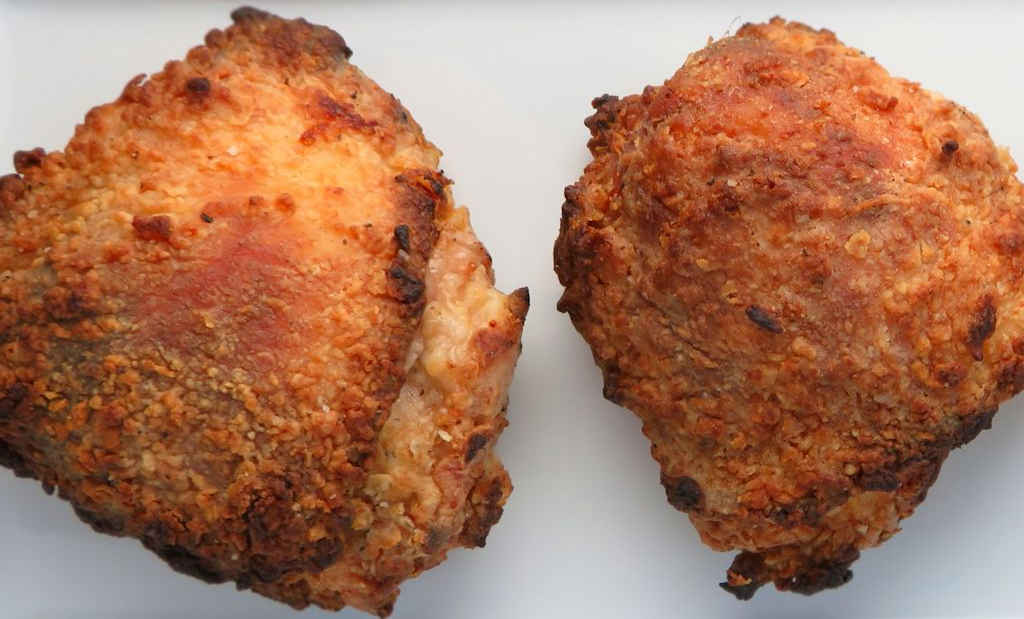
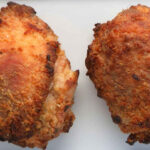
This sauce is also great for dipping chicken nuggets and tenders. It’s perfect for anything deep-fried.

I almost always use Blue Plate mayonnaise in the dishes I make. I think it is the best around. If you can’t find it locally you can pick it up online for a fair price.

Also try my easy fry dipping sauce.

Yum Yum Sauce
Print Pin
5 from 1 vote

Yum Yum Sauce

Often found in Japanese Hibachi restaurants, Yum-Yum sauce is nice and creamy with a slight vinegar twist.
Course Sauce
Cuisine American
Keyword Asian, sauce
Prep Time 30 minutes
Total Time 30 minutes
Servings 1 cup
Calories 1878kcal
Author Based on a recipe from My Fridge Food

Equipment

Ingredients

Instructions

  • Whisk together all ingredients.
  • Cover and place in fridge at least 30 minutes before using.

Notes

Store leftover sauce in the fridge. Stir before using.

Nutrition

Calories: 1878kcal | Carbohydrates: 39g | Protein: 3g | Fat: 190g | Saturated Fat: 41g | Trans Fat: 1g | Cholesterol: 154mg | Sodium: 1428mg | Potassium: 79mg | Fiber: 1g | Sugar: 40g | Vitamin A: 961IU | Vitamin C: 5mg | Calcium: 29mg | Iron: 1mg

Nutritional values are approximate.

Cedar Planked Meatballs

As simple as they are, cedar planked meatballs are just flat-out, crazy good. Whether your meatballs are destined for pasta or in a sandwich, you’ll get a fantastic light cedar woodsy flavor in each and every bite. These can be as fancy or as un-fancy as you want. I went completely easy. Thawed frozen meatballs. Jarred sauce. Dinner was ready in no time. It looked great and tasted even better!

Cedar Planked Meatballs

Raw Meat Meatballs Are Better

If you are using scratch-made meatballs make sure you check the internal temperature of several of them before adding the sauce. It’s ok to pre-cook them before planking them, but they’ll get more of that great cedar flavor if you cook them from raw. The raw meat loves to soak up the aroma much easier than the pre-cooked stuff will.

Don’t get el cheapo cedar planks when making cedar planked meatballs. You just won’t be happy. Get the good stuff. Trust me, I’ve tried to save money and I ended up paying for it. The planks ended up being thin, split and rough. Good planks are thicker, un-warped and won’t give you a handful of splinters.

Also try my cedar planked sausage sandwiches and one of our all-time-favorites, cedar planked Buffalo chicken bites.

Cedar Planked Meatballs
Print Pin
5 from 1 vote

Cedar Planked Meatballs

As simple as they are, cedar planked meatballs are just flat-out, crazy good. Whether your meatballs are destined for pasta or in a sandwich, you’ll get a fantastic light cedar woodsy flavor in each and every bite.
Course Main
Cuisine American
Keyword cedar plank, meatballs
Prep Time 30 minutes
Cook Time 30 minutes
Servings 1
Calories 2504kcal

Ingredients

  • 2 pounds meatballs if using frozen meatballs thaw first
  • 2 cups marinara sauce warmed
  • Parmesan cheese freshly grated

Instructions

  • Soak your cedar plank(s) in water for at least 30 minutes while you get your grill going.
  • Fire up your grill for direct and indirect cooking. Place the planks over the direct heat and let them get good and charred on both sides. I like to char what will be the serving side first, then flip them to char the bottom. Keep a spray bottle full of water on hand to put out any fires.
  • Transfer the meatballs to the planks and let heat over direct heat for 15 minutes or until the internal temperature of the meatballs reaches 155 F. Fresh meatballs may take longer.
  • Move the planks to indirect heat (or turn down the heat if using a gas grill). Spoon the marinara sauce over the tops and heat another 10 minutes. The meatballs should be at least 160 F for frozen or fresh beef or pork meatballs, and 165 F for poultry-based meatballs.
  • Sprinkle with the Parmesan and serve. You can actually use the planks as plates, no need to transfer the meatballs to a platter.

Notes

Add a little sprinkle of red pepper flake for a nice kick!

Nutrition

Calories: 2504kcal | Carbohydrates: 26g | Protein: 160g | Fat: 193g | Saturated Fat: 72g | Cholesterol: 653mg | Sodium: 3076mg | Potassium: 4226mg | Fiber: 7g | Sugar: 21g | Vitamin A: 2185IU | Vitamin C: 41mg | Calcium: 191mg | Iron: 13mg

Nutritional values are approximate.

Copycat Chili’s Crispy Shrimp

This is how to fry up some shrimp. The perfect batter, with the perfect consistency and flavor. Not too light and not too heavy. And perfectly crunchy. And the best part of this copycat Chili’s crispy shrimp? You can still taste the shrimp. Don’t mess with perfection, follow the recipe as it is and you’ll (very) soon be enjoying fantastic shrimp.

Copycat Chili's Crispy Shrimp

A Big Hit In Our House

The first time I made a copycat Chili’s crispy shrimp, my wife took one bite and immediately said that I don’t need to fry shrimp in any other way. Ever again. She also told me to not change anything about it. I tend to do that. You know. A little tweak here. A little something more or less there. Nope, not with these shrimp.

If I’m cooking for a crowd, I’ll break out my big deep fryer. But, if it’s just the two of us, I’ll fire up my Fry Daddy fryer. It’s the perfect size for both of us. It fries everything perfectly. And as an added bonus, it doesn’t use a lot of oil, which saves me money.

I get out my big deep fryer when it’s time to fry a large batch of food. It comes to temperature quickly and it maintains that temperature perfectly. It has a built-in oil filter and storage unit so I can re-use the oil several times.

Also try my copycat of Applebee’s peppercorn and garlic shrimp. I also make a mean copycat of Chili’s chicken crispers.

Copycat Chili's Crispy Shrimp
Print Pin
5 from 1 vote

Copycat Chili’s Crispy Shrimp

This is how to fry up some shrimp. The perfect batter, with the perfect consistency and flavor. Not too light and not too heavy. And perfectly crunchy.
Course Appetizer
Cuisine American
Keyword copycat, crispy, deep-fried, shrimp
Prep Time 10 minutes
Cook Time 15 minutes
Total Time 25 minutes
Servings 8
Calories 305kcal

Ingredients

For the shrimp

For the batter

Instructions

  • Heat at least 3″ of oil to 350 F in a deep fryer or Dutch oven.
  • Place the Corn Flakes crumbs in a shallow bowl.
  • Place all of the batter ingredients into a medium bowl and whisk until smooth.
  • Working in batches, coat the shrimp in the batter. Shake off any excess and then roll in the crumbs.
  • Fry 2-3 minutes until golden brown, turning once.

Notes

Serve with cocktail sauce or tartar sauce.

Nutrition

Calories: 305kcal | Carbohydrates: 28g | Protein: 27g | Fat: 9g | Saturated Fat: 6g | Cholesterol: 286mg | Sodium: 1093mg | Potassium: 139mg | Fiber: 1g | Sugar: 1g | Vitamin C: 5mg | Calcium: 183mg | Iron: 3mg

Nutritional values are approximate.

Barbecue Bean Chili Dogs

I’ve had my share of chili dogs. They’ve been a favorite of mine since I was knee-high-to-a-grasshopper. And most of the time that meant canned chili. These barbecue bean chili dogs aren’t those chili dogs. These are amazingly good. Think chili on a dog. Think baked beans on the side… but then, not on the side. The perfect topping for a hot dog.

Barbecue Bean Chili Dogs

Chili Dogs Elevated

I was tempted to add cheese to these barbecue bean chili dogs, but I resisted. A sharp cheddar might be a nice addition, but they’re perfect just topped with some nice crunchy onion. French fried onions… now, those would be awesome too!

Also try my home run hot dog chili on your next dog!

Barbecue Bean Chili Dogs
Print Pin
4 from 1 vote

Barbecue Bean Chili Dogs

I’ve had my share of chili dogs. They’ve been a favorite of mine since I was knee-high-to-a-grasshopper. And most of the time that meant canned chili. These barbecue bean chili dogs aren’t those chili dogs. 
Course Main
Cuisine American
Keyword barbecue, BBQ, chili, hot dogs
Prep Time 5 minutes
Cook Time 25 minutes
Servings 8
Calories 443kcal

Ingredients

For the chili

For the dogs

  • vegetable oil for brushing
  • 8 hot dogs
  • 8 hot dog buns
  • ½ medium white onion chopped

Instructions

For the chili

  • In a large skillet combine the barbecue sauce, kidney beans, black beans, chili seasoning, brown sugar and prepared mustard.
  • Bring to a boil then reduce heat to a low simmer.
  • Stirring often, simmer for 10-12 minutes.

For the dogs

  • Fire up a grill or a grill pan. Lightly brush the grill plates with oil. You can also use an air fryer or even boil the dogs in water.
  • Add dogs and cook for 10 minutes, turning once.
  • Toast the buns on the grill.
  • To serve, place dogs in buns and add plenty of the barbecue bean chili and sprinkle with onion.

Notes

Serve with hot, crunchy onion rings for a real treat!

Nutrition

Calories: 443kcal | Carbohydrates: 72g | Protein: 19g | Fat: 9g | Saturated Fat: 3g | Cholesterol: 20mg | Sodium: 912mg | Potassium: 660mg | Fiber: 11g | Sugar: 17g | Vitamin A: 947IU | Vitamin C: 2mg | Calcium: 133mg | Iron: 6mg

Nutritional values are approximate.

Warm German Potato Salad

I don’t know how long it has been since I’ve had warm German potato salad. It’s been a while for a reason. What I had was not good. It was thick. It was gloppy. And it was horribly vinegary. This salad? This is not that. This is fantastic! We could not stop eating it. The potatoes were cooked perfectly. There’s just the right amount of vinegar. Oh, and of course there’s bacon! One bite erased those bad potato salad memories in an instant!

Warm German Potato Salad

A Word Of Caution

Do not overcook your potatoes or the warm German potato salad will get too mushy. Err on the side of caution. You can always cook them more if you think they have too much ‘bite’. But you can never un-cook them.

I used a thin-cut bacon. Normally I’m a more-is-better bacon kind-of-guy, but not here. This is just the right amount of bacon. Thicker bacon would get in the way off all the other great flavors. This is an excellent salad for my Rouladen and Knodel dish.

Also try my jalapeno pimento cheese potato salad.

Warm German Potato Salad
Print Pin
5 from 1 vote

Warm German Potato Salad

This potato salad is fantastic! We could not stop eating it. The potatoes were cooked perfectly. There’s just the right amount of vinegar. Oh, and of course there’s bacon!
Course Side
Cuisine German
Keyword German, potato salad
Prep Time 15 minutes
Cook Time 30 minutes
Servings 6
Calories 179kcal

Equipment

Ingredients

Instructions

  • Bring a large Dutch oven (preferred) or pot of water to a boil.
  • Add the potatoes and return to a boil. Boil another 8-10 minutes or until just tender. Do not over cook.
  • Drain the potatoes.
  • Add the bacon to the pot and cook until brown and crispy.
  • Remove the bacon to a paper towel-lined plate to drain. Crumble.
  • Add the onion to the bacon grease and stir. Reduce heat to medium and cook until just browned.
  • Add the vinegar, water, sugar, salt and pepper. Stir and bring to a boil.
  • Add the potatoes and parsley and HALF of the crumbled bacon.
  • Transfer to a bowl for serving and sprinkle with the remaining crumbled bacon.

Notes

Best served warm.

Nutrition

Calories: 179kcal | Carbohydrates: 39g | Protein: 3g | Fat: 2g | Saturated Fat: 1g | Cholesterol: 1mg | Sodium: 807mg | Potassium: 734mg | Fiber: 3g | Sugar: 15g | Vitamin A: 124IU | Vitamin C: 17mg | Calcium: 25mg | Iron: 1mg

Nutritional values are approximate.

Leatha’s Bar-B-Que Inn Red Potato Salad

This right here is what potato salad is supposed to be. I’ll never make another potato salad again because there just isn’t any point. Leatha’s Bar-B-Que Inn red potato salad is it, the last recipe that I’ll ever need. I’ve never been there, but Leatha’s sounds exactly like the kind of BBQ joint that I would love. From the atmosphere to the food to the service, it receives nothing but high praise. I’m sure Hattiesburg, Mississippi, considers itself lucky to have it!

This potato salad is traditional in flavors, texture and appearance. The balance of everything is perfect. Just the right amount of egg. The right amount of mustard. Not too much mayonnaise. Everything is spot-on.

Leathas Bar-B-Que Inn Red Potato Salad

No Changes Needed. Ever.

Don’t go messing with Leatha’s Bar-B-Que Inn red potato salad. Don’t add bacon. Or onion. Or smoked paprika, or anything else you think might make it better because it won’t. None of that. I mess with a lot of recipe, but I won’t mess with this one. I’d probably get hit by lightning.

I almost always use Blue Plate mayonnaise in the dishes I make. I think it is the best around. If you can’t find it locally you can pick it up online for a fair price.

Also try my grilled steakhouse potato salad and my just-like-grandma’s potato salad.

Leatha's Bar-B-Que Inn Red Potato Salad
Print Pin
5 from 1 vote

Leatha’s Bar-B-Que Inn Red Potato Salad

This right here is what potato salad is supposed to be. I’ll never make another potato salad again because there just isn’t any point.
Course Side
Cuisine American
Keyword potato salad
Prep Time 10 minutes
Cook Time 20 minutes
Servings 16
Calories 4012kcal

Ingredients

Instructions

  • Add the potatoes to a large pot.
  • Cover with water and bring to a boil.
  • Reduce heat to a slow simmer and cook until tender, 15-20 minutes.
  • Drain and cool.
  • In a large bowl, combine the cooled potatoes, the smashed eggs, pepper and salt.
  • In another bowl, combine the mustard, sugar, mayo, relish and pimentos.
  • Pour the mustard mixture over the potatoes and stir gently to coat.

Notes

Stir before serving.

Nutrition

Calories: 4012kcal | Carbohydrates: 485g | Protein: 87g | Fat: 202g | Saturated Fat: 37g | Trans Fat: 1g | Cholesterol: 1210mg | Sodium: 11578mg | Potassium: 11142mg | Fiber: 46g | Sugar: 133g | Vitamin A: 7973IU | Vitamin C: 294mg | Calcium: 475mg | Iron: 27mg

Nutritional values are approximate.

Granny’s Secret Fried Chicken using the Vortex

I keep having to pinch myself when I make ‘fried’ chicken on my charcoal grill using the Vortex. Am I dreaming? I’m really eating deep-fried chicken, right? But it’s not. No oil was used in making Granny’s Secret Fried chicken using the Vortex, other than a very light coating at the end to help crisp up the skin. That’s it. The skin is amazingly crunchy and crazy delicious. The meat is so juicy that it drips all down your forearms. And tender? Super perfect texture, bite after bite. Seriously, this is crazy good fried chicken with the added bonus of being made on a grill without oil.

Granny’s Secret Fried Chicken using the Vortex

The Secret Is Out!

The ‘secret’ to Granny’s Secret Fried chicken using the Vortex is using Pearl Milling Company’s pancake mix for the coating. I’ve never used it on chicken. I will be from now on. It crisps up perfectly. Grandma’s secret is out! This is a super-easy recipe that takes very little time to produce great chicken. Once it’s on the grill, it’s pretty much no-fuss, just wait for the deliciousness to come!

Also try my spicy buttermilk and Hidden Valley Ranch fried chicken recipes, both using the Vortex. For a battered fried chicken try my Pioneer Take-out fried chicken too!

Granny’s Secret Fried Chicken using the Vortex
Print Pin
5 from 1 vote

Granny’s Secret Fried Chicken using the Vortex

I keep having to pinch myself when I make ‘fried’ chicken on my charcoal grill using the Vortex. Am I dreaming? I’m really eating deep-fried chicken, right? But it’s not.
Course Main
Cuisine American
Keyword fried chicken, Vortex
Prep Time 4 hours
Cook Time 45 minutes
Total Time 4 hours 45 minutes
Servings 4 servings
Calories 992kcal

Ingredients

For the brine

For the chicken

Instructions

For the brine

  • Combine all brine ingredients in a medium saucepan over medium heat.
  • Stir occasionally until the salt is dissolved and the honey is melted.
  • Remove from heat and let cool.

For the chicken

  • Place the chicken in a large resealable container.
  • Add the cooled brine.
  • Refrigerate for 3 1/2 hours.
  • Turn the chicken every 30 minutes or so if not fully submerged.
  • Fire up your Vortex. Fill it completely with charcoal.
  • Remove chicken from brine and rinse.
  • In a medium bowl, combine the egg, butter and milk.
  • In a resealable bag, combine the pancake mix, salt and pepper.
  • Working in batches, dip chicken into the egg mixture.
  • Shake off excess then place in the bag.
  • Seal and shake to coat.
  • Transfer chicken to the grill around the Vortex.
  • Close the lid and cook for 30-45 minutes. Turn the lid every 15 minutes.
  • Cook until the chicken reaches 165 F as tested in several places.
  • Lightly brush the chicken with oil and let cook another 5 minutes before removing.

Notes

Add a teaspoon or two of paprika, garlic powder and cayenne pepper to the coating mix for even more deliciousness!

Nutrition

Calories: 992kcal | Carbohydrates: 66g | Protein: 46g | Fat: 61g | Saturated Fat: 26g | Trans Fat: 1g | Cholesterol: 317mg | Sodium: 7650mg | Potassium: 658mg | Fiber: 2g | Sugar: 36g | Vitamin A: 1335IU | Vitamin C: 4mg | Calcium: 299mg | Iron: 4mg

Nutritional values are approximate.

Copycat Red Robin’s Haystack Tavern Burger

What’s better than onions on a burger? Why, onion straws of course! And what’s better than ketchup on a burger? Why, Campfire sauce of course! Put the two on a hot-off-the-grill patty with good ole American cheese and you don’t have to call me twice for dinner. This copycat of Red Robin’s Haystack Tavern burger is mighty good stuff. Now, when you order it at the restaurant you usually get a double. I made mine a single. In hindsight I’m not sure why because one patty was great, but two would’ve been better!

Copycat Red Robin's Haystack Tavern Burger

Extra Sauce Is Great For Fries

You might have a bit of the Campfire left after you make your copycat Red Robin Haystack Tavern burgers. That’s a good thing. Slather it on sandwiches. Dip some fries in it. Put it on hot dogs.

I recommend making a few extra onion straws. Half of them won’t last long enough to make it to the burgers. Oh, and they’re great dipped in the Campfire sauce too!

I like to use a burger press when I make burgers. It, in combination with some patty papers, enables me to crank out a whole bunch of equally-sized burger patties in no time at all with little cleanup.

Also try my copycat of Red Robin’s Royal Red Robin burger.

Copycat Red Robin's Haystack Tavern Burger
Print Pin
5 from 1 vote

Copycat Red Robin’s Haystack Tavern Burger

What’s better than onions on a burger? Why, onion straws of course! And what’s better than ketchup on a burger? Why, Campfire sauce of course! 
Course Main
Cuisine American
Keyword burgers, copycat, Red Robin
Prep Time 15 minutes
Cook Time 25 minutes
Servings 4 servings
Calories 1222kcal

Ingredients

For the burgers

  • 8 hamburger patties or 4 if making singles
  • kosher salt to taste
  • freshly ground black pepper to taste
  • 8 slices American cheese or 4 if making singles
  • 4 sesame seed hamburger buns
  • Campfire sauce from below, to taste
  • onion straws from below

For the Campfire sauce

For the onion straws

Instructions

For the burgers

  • Season the patties with salt and pepper and cook as desired. Top with cheese.
  • Toast the buns if desired.
  • Slather the insides of the buns with the Campfire sauce.
  • Add onion straws to bun bottoms. Add patties and top buns and serve.

For the Campfire sauce

  • Combine all ingredients. Refrigerate until ready to use.

For the onion straws

  • Place onion rings in a bowl. Add buttermilk to cover.
  • Heat oil to 350 F.
  • In a resealable container or bag add the flour, seasoning and salt. Shake to combine.
  • Working in very small batches so as to not have the onion straws stick together, take a few onions out of the buttermilk and shake off the excess.
  • Add to the flour mixture, seal and shake to coat.
  • Transfer to the hot oil and deep fry until golden brown. Remove to a paper towel-lined plate or wire rack to drain.

Notes

Serve with plenty of napkins.
The sauce is also great for dipping fries.

Nutrition

Calories: 1222kcal | Carbohydrates: 83g | Protein: 53g | Fat: 74g | Saturated Fat: 27g | Trans Fat: 1g | Cholesterol: 180mg | Sodium: 2523mg | Potassium: 1038mg | Fiber: 3g | Sugar: 23g | Vitamin A: 632IU | Vitamin C: 5mg | Calcium: 635mg | Iron: 9mg

Nutritional values are approximate.

Copycat Red Robin BLTA

Who doesn’t love a BLT sandwich? It screams summer, with ripe tomatoes and crunchy lettuce. Add avocado and you get a copycat of Red Robin’s BLTA. That’s bacon, lettuce, tomato and of course… avocado! The addition of avocado really takes the classic sandwich to a new, wonderful, place. And serving it on a sweet, pillowy croissant is the way to go.

Copycat Red Robin BLTA

Add A Bit Of A Kick

If you’re missing a little heat in your copycat Red Robin BLTA, mix a teaspoon or two of adobo sauce in with the mayonnaise. You don’t want to go crazy with it, but a little spiciness will offset the sweet bread and avocado perfectly. It also adds a bit more smokiness, helping that wonderful bacon smoke along a bit.

I almost always use Blue Plate mayonnaise in the dishes I make. I think it is the best around. If you can’t find it locally you can pick it up online for a fair price.

Also try my copycat Jason’s Deli California Club sandwich.

Copycat Red Robin BLTA
Print Pin
5 from 1 vote

Copycat Red Robin BLTA

Who doesn’t love a BLT sandwich? It screams summer, with ripe tomatoes and crunchy lettuce. Add avocado and you get a copycat of Red Robin’s BLTA. That’s bacon, lettuce, tomato and of course… avocado! 
Course Appetizer or Main
Cuisine American
Keyword copycat, Red Robin, sandwich
Prep Time 10 minutes
Total Time 10 minutes
Servings 2 servings
Calories 569kcal

Ingredients

  • 2 large croissants
  • mayonnaise to taste
  • 6 slices turkey breast sandwich meat
  • 4 slices bacon cooked until crisp
  • ½ avocado sliced
  • 2 leaves green lettuce
  • 1 tomato sliced

Instructions

  • Slice croissants in half. Slather with the mayonnaise.
  • Add turkey, bacon, avocado, lettuce and tomato. Serve.

Notes

No croissants? Just use bread!

Nutrition

Calories: 569kcal | Carbohydrates: 39g | Protein: 16g | Fat: 39g | Saturated Fat: 15g | Trans Fat: 1g | Cholesterol: 82mg | Sodium: 901mg | Potassium: 633mg | Fiber: 6g | Sugar: 10g | Vitamin A: 2174IU | Vitamin C: 15mg | Calcium: 47mg | Iron: 2mg

Nutritional values are approximate.

The Best Marinated Vegetable Salad

We both found this marinated vegetable salad to be truly the best. It’s absolutely incredible. We could not stop eating it. The dressing has the right balance of sweet and tart. The veggies have the right balance of crunch and tenderness. The seasoning is perfect.

This recipe makes a pretty big batch of salad so you’ll have a lot to feed a crowd. It’s the perfect dish for a family get-together or picnic. It’s super easy to make and travels well.

The Best Marinated Vegetable Salad

A Truly Fantastic Salad

You don’t have to be real picky as to which vegetables you add to make this the best marinated vegetable salad. It’s very flexible. You can pretty much walk down the produce aisle in your grocery store and grab whatever’s in season and you’ll soon be enjoying a fantastic dish.

I used quality vinegars when making this salad. It makes a difference, I think. So grab a good red and a good white and get to making and enjoying!

If fresh produce is out-of-season, try my marinated vegetable salad recipe that uses frozen veggies instead. And for an out-of-this-world great vegetable soup, try my best recipe.

Marinated Vegetable Salad
Print Pin
5 from 1 vote

Best Marinated Vegetable Salad

We both found this marinated vegetable salad to be absolutely incredible. We could not stop eating it. The dressing has the right balance of sweet and tart. The veggies have the right balance of crunch and tenderness. The seasoning is perfect.
Course Salad
Cuisine American
Keyword salad, vegetable
Prep Time 2 hours
Total Time 2 hours
Servings 10
Calories 49kcal

Equipment

Ingredients

Instructions

  • Whisk together the olive oil, vinegar, Italian seasoning, Dijon mustard, garlic, salt, sugar, and pepper in a small bowl.
  • In a large bowl, combine the cauliflower, cherry tomatoes, cherry pepper halves, zucchini, carrots, and onion.
  • Add the dressing to the vegetables and toss gently to coat.
  • Cover and refrigerate for 2-24 hours. Stir every hour.

Notes

Stir again before serving.

Nutrition

Calories: 49kcal | Carbohydrates: 8g | Protein: 2g | Fat: 1g | Saturated Fat: 1g | Sodium: 327mg | Potassium: 395mg | Fiber: 3g | Sugar: 4g | Vitamin A: 3357IU | Vitamin C: 34mg | Calcium: 42mg | Iron: 1mg

Nutritional values are approximate.