Waffle Iron Eggs and Biscuits

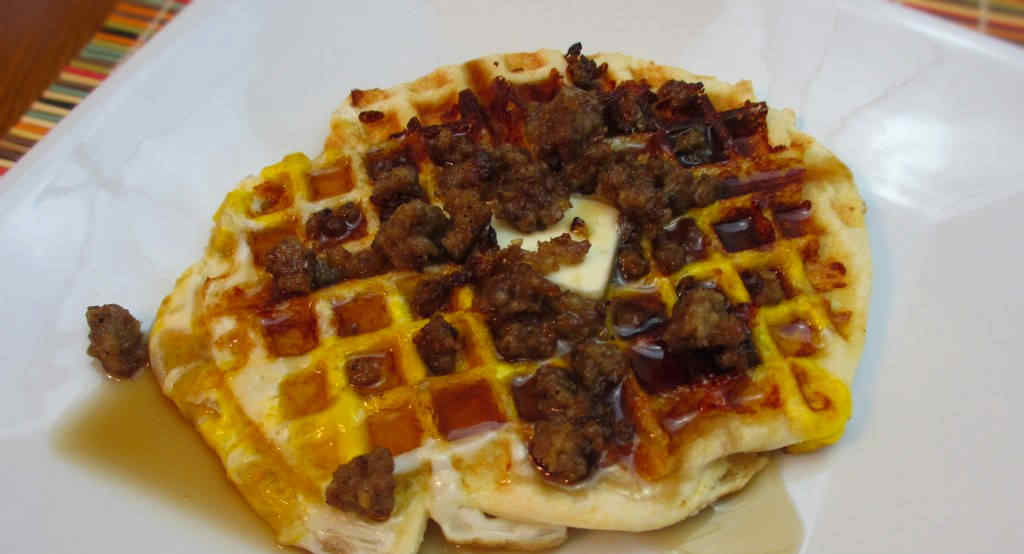
I found the original recipe for this great breakfast-for-dinner idea over at Amy’s Cooking Adventures. Putting an egg on top of batter in a waffle iron sounded like a pretty nifty approach to me, so I dove right in and made some waffle iron eggs and biscuits. This really is breakfast-in-a-bite. Everything you need. Everything you want. I thought these were a really fun idea. And they really hit the spot, too. I didn’t really need help loving waffles any more but these certainly made that happen.
Waffle Iron Eggs and Biscuits

Expect A Little Mess. It’s Worth It.

I have to warn you, you’re going to make a mess making these waffle iron eggs and biscuits. There’s really no way around it. No matter how gently you close the iron lid, somewhere along the line you’re going to pop a yolk and it’s going to run out. That’s ok, though. It’s worth the mess.
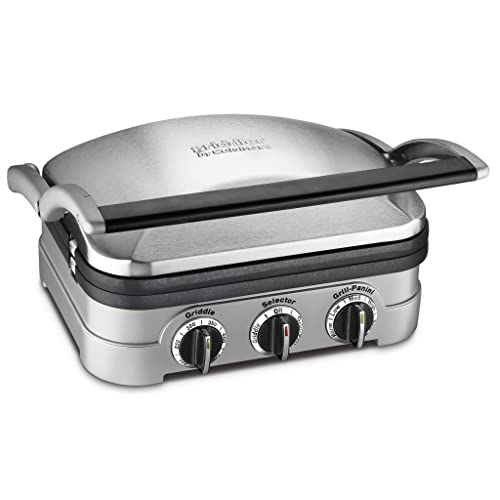
Guess what? You can also make chocolate chip ‘cookies’ using your waffle iron!
Waffle Iron Eggs and Biscuits
Print Pin
4 from 1 vote

Waffle Iron Eggs and Biscuits

Putting an egg on top of batter in a waffle iron sounded like a pretty nifty approach to me, so I dove right in and made some waffle iron eggs and biscuits.
Course Breakfast
Cuisine American
Keyword biscuits, breakfast, eggs, waffles
Prep Time 10 minutes
Cook Time 15 minutes
Total Time 25 minutes
Servings 4
Calories 923kcal

Ingredients

  • 2 ½ cups Bisquick plus a little more for dusting
  • â…” cup low fat milk
  • 4 slices bacon cooked, drained, crumbled
  • 1 cup cheese shredded (Swiss, cheddar, whichever you prefer)
  • 6 large eggs
  • 4 tablespoons unsalted butter cut into pats
  • ½ pound breakfast sausage cooked drained, crumbled
  • maple syrup

Instructions

  • Preheat your waffle iron as directed by the manufacturer and spray with non-stick spray as needed
  • Combine biscuit mix and milk until a dough forms.
  • Lightly dust a cutting board with more baking mix. Roll the dough out using a rolling pin until it is about 1/4″ thick. Cut into shapes slightly smaller than your waffle iron. (Our waffle iron is round. I found a saucer that was just smaller than the iron and used that as my template for cutting the dough).
  • Working in batches, place the dough pieces onto your waffle iron. Sprinkle with some bacon and cheese and top with a single egg each. (If you sprinkle the cheese in a circular pattern, creating a sort of ‘well’, the egg will not slide off as easily).
  • Very, very gently lower the top of the waffle iron and cook until done.
  • Serve topped with butter, sprinkled with the breakfast sausage crumbles, and drizzled with pure maple syrup.

Notes

The waffles can be frozen and reheated later.

Nutrition

Calories: 923kcal | Carbohydrates: 51g | Protein: 35g | Fat: 64g | Saturated Fat: 27g | Trans Fat: 1g | Cholesterol: 398mg | Sodium: 1764mg | Potassium: 500mg | Fiber: 2g | Sugar: 11g | Vitamin A: 1169IU | Vitamin C: 1mg | Calcium: 439mg | Iron: 4mg

Nutritional values are approximate.

Garlic Ricotta Stuffed Mushrooms

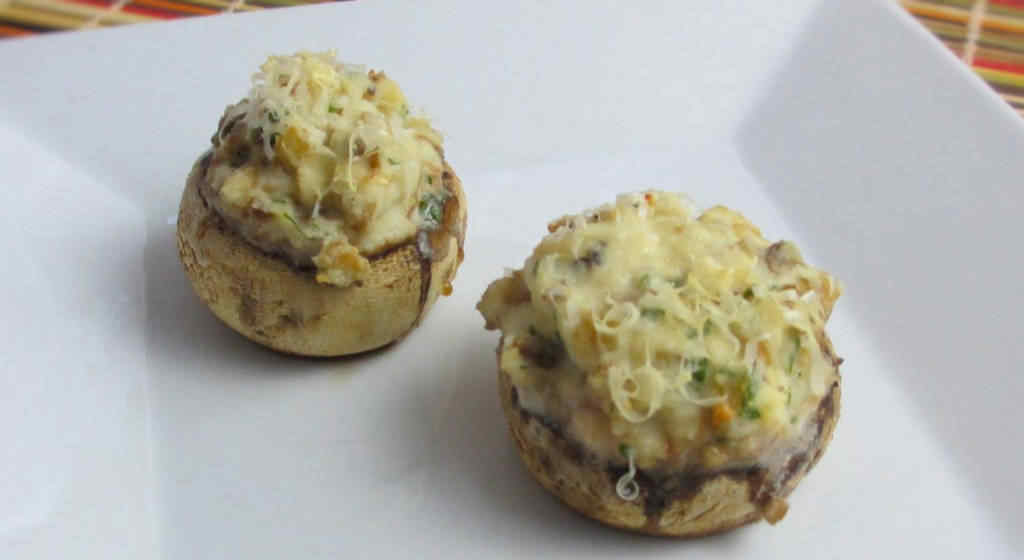
Well, these garlic ricotta stuffed mushrooms sure didn’t last long. We are both big fans of mushrooms, stuffed or not. You can make them in the oven or on the grill. They make for a great, easy side to whatever we  might be cooking on the grill (or indoors). Sometimes we marinate them. Sometimes we stuff them. Either way, they’re fantastic.

Garlic Ricotta Stuffed Mushrooms

Creamy Deliciousness

These garlic ricotta stuffed mushrooms have a wonderfully creamy filling. They’re great as sides or appetizers. Or both. Substitute Creole seasoning for the salt and pepper and shredded pepperjack cheese for the Mozzarella for a twist with a kick!

I highly recommend that you shred or grate your own cheese at home. Don’t buy the pre-shredded or pre-grated stuff. It has stuff added to it to keep it from sticking together. That ‘stuff’ affects how the cheese melts. Shred it yourself and use the good stuff.

Also try my crazy-good easy marinated mushrooms.

Garlic Ricotta Stuffed Mushrooms
Print Pin
5 from 1 vote

Garlic Ricotta Stuffed Mushrooms

These garlic ricotta stuffed mushrooms have a wonderfully creamy filling. They’re great as sides or appetizers. 
Course Side or Appetizer
Cuisine American
Keyword cheese, garlic, grilled, mushroom
Prep Time 10 minutes
Cook Time 35 minutes
Total Time 45 minutes
Servings 4
Calories 64kcal

Ingredients

Instructions

  • Preheat oven to 350 F. Alternatively, you can cook these on a medium-high heat grill. Just stuff the mushrooms and toss onto the grill until just tender.
  • Clean the mushrooms and remove the stems. Chop the stems along with one of the mushrooms (keeping the other 6 mushrooms whole).
  • Heat olive oil in a medium skillet over medium-high heat.
  • Add the chopped mushroom and stems and cook for 2-3 minutes.
  • Add the garlic and season with salt and pepper and cook another 2-3 minutes.
  • Remove from heat and let cool.Place into a medium bowl.
  • Add the ricotta and 2 tablespoons of the Mozzarella cheese and stir to combine.
  • Spray a baking sheet with non-stick spray.
  • Spoon the mushroom and cheese mixture into the mushroom caps and place onto the baking sheet.
  • Bake for 20-25 minutes.

Notes

You can substitute mozzarella or Pecorino Romano for the Parmesan.

Nutrition

Calories: 64kcal | Carbohydrates: 3g | Protein: 5g | Fat: 4g | Saturated Fat: 2g | Cholesterol: 11mg | Sodium: 272mg | Potassium: 168mg | Fiber: 1g | Sugar: 1g | Vitamin A: 115IU | Vitamin C: 2mg | Calcium: 100mg | Iron: 1mg

Nutritional values are approximate.

Blueberry Croissant Puff

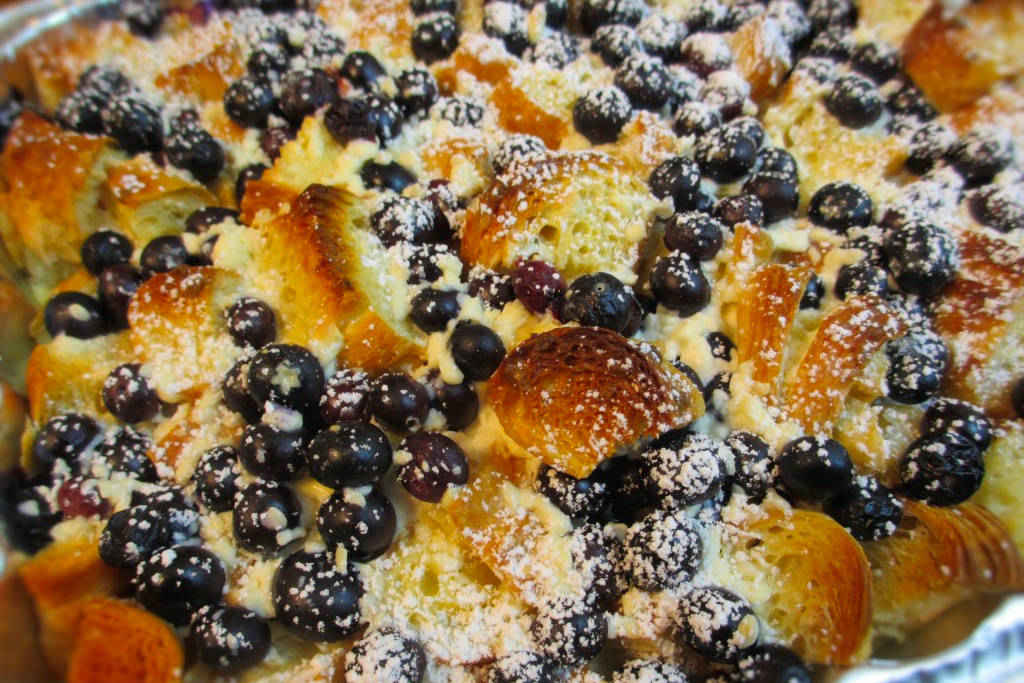
I made a big batch of this great blueberry croissant puff this morning for my wife to take to work. It disappeared so fast it made my head spin. A little sweet and a little tart, it’s definitely a great breakfast casserole that is a bit different.

Blueberry Croissant Puff

Very Easy and Very Delicious

This blueberry croissant puff was very easy to make. Our grocery store didn’t have large croissants, so I used mini croissants instead. For extra yumminess, substitute a little cream for the milk.

If you’re looking for the best recipes for breakfast all in a single cookbook, I cannot recommend John Currence’s Big Bad Breakfast: The Most Important Book of the Day enough!

Also try my blueberry ice cream!

Inspired by a recipe from The Girl That Ate Everything.

Blueberry Croissant Puff
Print Pin
5 from 1 vote

Blueberry Croissant Puff

 A little sweet and a little tart, it’s definitely a great breakfast casserole that is a bit different.
Course Main
Cuisine American
Keyword blueberry, croissant
Prep Time 20 minutes
Cook Time 1 hour
Total Time 1 hour 20 minutes
Servings 12
Calories 1086kcal

Ingredients

  • 10 cups croissants cubed (about 15 mini croissants or 6 or so large ones)
  • 1 pint blueberries rinsed
  • 2 8 ounce cream cheese softened
  • 1 â…“ cup sugar
  • 4 eggs
  • 2 teaspoons vanilla extract
  • 2 cups milk
  • powdered sugar

Instructions

  • Preheat oven to 350 F.
  • Spray a 9″ x 13″ pan with non-stick spray.
  • Add the croissants to the pan. Top with the blueberries.
  • Place the cream cheese, sugar, eggs, and vanilla in a large bowl. Beat with a hand-held blender until smooth. You can also use a counter-top blender or a whisk.
  • With the blender still running (or while whisking), slowly pour in the milk. Blend until smooth.
  • Pour milk mixture over the croissants.
  • Let set on the counter for 20 minutes.
  • Bake for 35-45 minutes. Start checking after 30 minutes to make sure the top doesn’t get too dark. If it does, cover it with foil and continue baking until cooked through.
  • Serve sprinkled with powdered sugar.

Notes

Also try this recipe using raspberries or strawberries!

Nutrition

Calories: 1086kcal | Carbohydrates: 122g | Protein: 22g | Fat: 57g | Saturated Fat: 32g | Trans Fat: 1g | Cholesterol: 232mg | Sodium: 1081mg | Potassium: 391mg | Fiber: 6g | Sugar: 52g | Vitamin A: 2141IU | Vitamin C: 4mg | Calcium: 167mg | Iron: 5mg

Nutritional values are approximate.
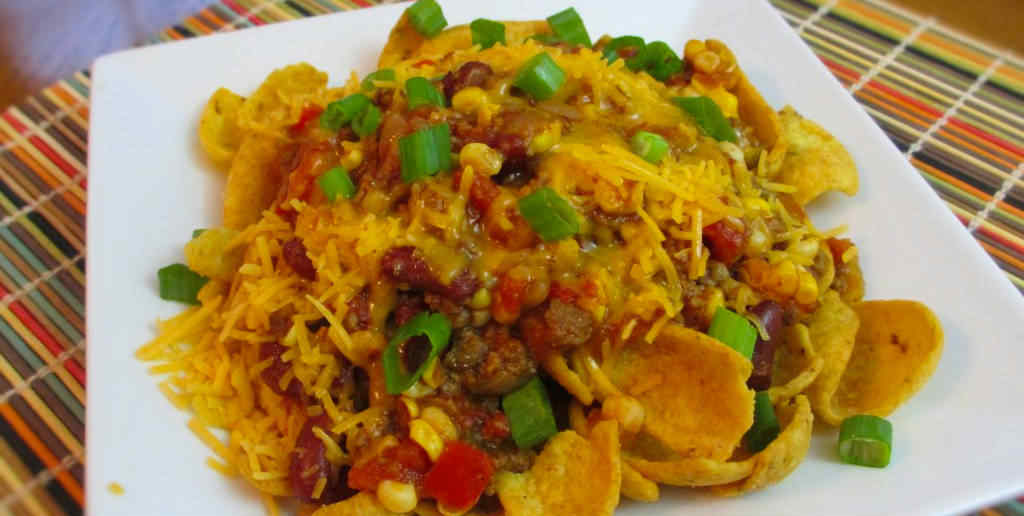
Southwestern Chili with Corn Chips

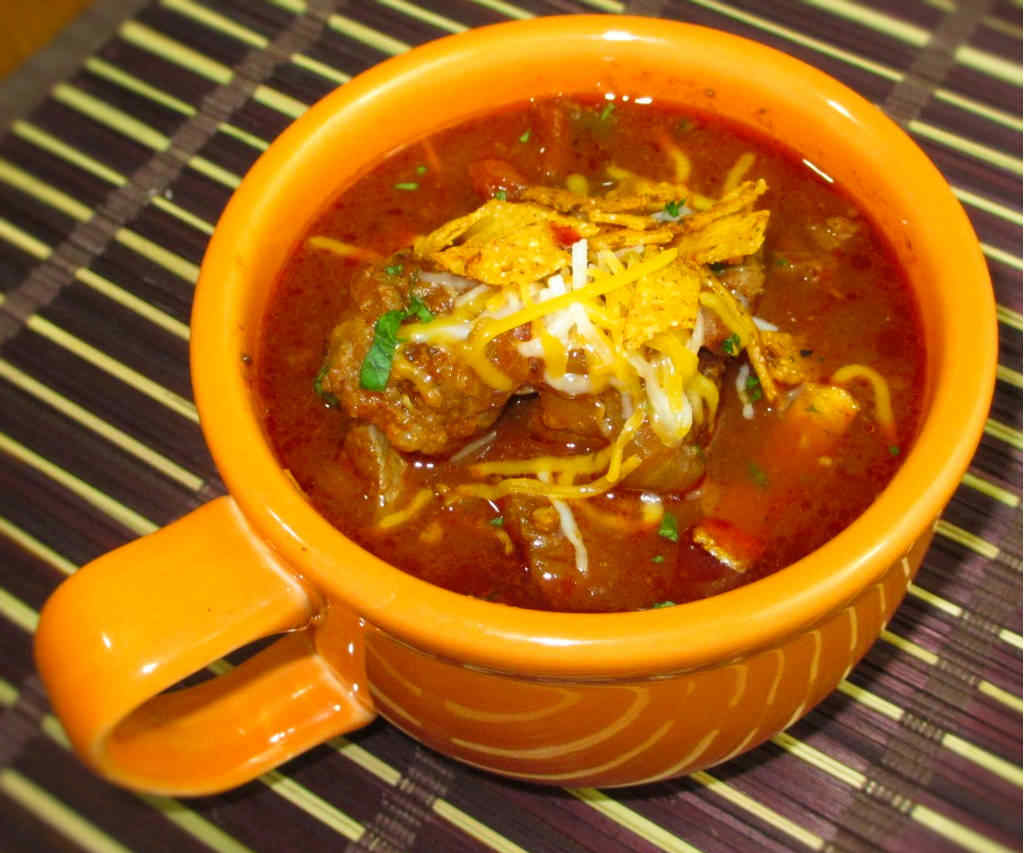
Give me a big ole bowl of Southwestern chili and some corn chips and I’m a happy guy. Make it spicy and I’m even happier. There’s a lot of stuff going on in this chili. Lots of great stuff. All things that I love. Despite the long ingredient list this is pretty much a ‘everything into the pot’ kind of recipe. So don’t let it scare you off. The flavors are amazing.

Southwestern Chili with Corn Chips

Not Your Usual Chili

This southwestern chili with corn chips isn’t your typical beef chili. Ya know, the one with beef, a broth. Some onion and tomatoes. Maybe some beans (if you’re outside of Texas, of course). It’s a lot more than that. It’s a mix of textures. Tender. Crunchy. Soft.

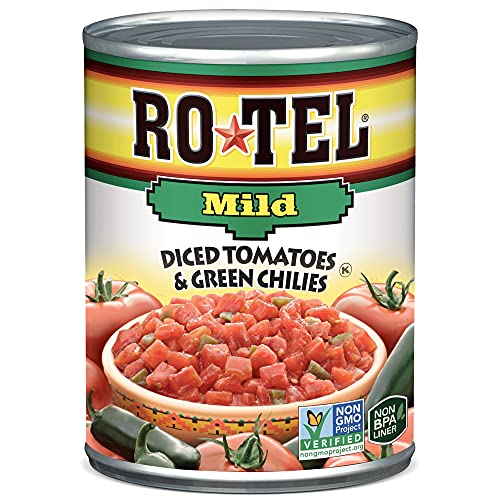
Want your chili spicier? Start with the Rotel. Grab the spicy stuff. The really hot stuff. Go find a jalapeno or two. Seed it. Or not. Dice it up. Add it in when you add the bell peppers. Add a pinch of cayenne. Or more than a pinch. Do it up right!

Also try my spicy ground beef chili.

Southwestern Chili with Corn Chips
Print Pin
4 from 1 vote

Southwestern Chili with Corn Chips

Give me a big ole bowl (or plate) of Southwestern chili and some corn chips and I’m a happy guy. Make it spicy and I’m even happier.
Course Main
Cuisine Southwestern
Keyword chili, corn chips, southwestern
Prep Time 20 minutes
Cook Time 30 minutes
Total Time 50 minutes
Servings 8
Calories 478kcal

Equipment

Ingredients

Serving suggestion

  • Corn chips
  • Green onions sliced
  • sharp cheddar cheese shredded
  • Sour cream

Instructions

  • Heat a Dutch oven or large pot over medium-high heat.
  • Crumble the beef into the pot and cook until done.
  • Remove to a paper towel-lined plate.
  • Remove all but 1 tablespoon of the drippings.
  • Add the onion and peppers and cook until starting to soften.
  • Add the garlic and cook another minute.
  • Add the tomato paste, chili powders, oregano, paprika, cumin and pepper flakes.Stir.
  • Stir in the masa and 1/2 cup of water. The mixture will begin to thicken.
  • Add the tomatoes, corn, kidney beans and beef. Stir.
  • Bring to a boil then reduce to a simmer and continue simmering for at least 15 minutes.
  • Season with salt and pepper to taste.

Notes

Serve with desired toppings.

Nutrition

Calories: 478kcal | Carbohydrates: 38g | Protein: 29g | Fat: 24g | Saturated Fat: 9g | Polyunsaturated Fat: 1g | Monounsaturated Fat: 10g | Trans Fat: 1g | Cholesterol: 81mg | Sodium: 638mg | Potassium: 1281mg | Fiber: 8g | Sugar: 9g | Vitamin A: 1587IU | Vitamin C: 34mg | Calcium: 85mg | Iron: 6mg

Nutritional values are approximate.
He-Man Chili

Winter doesn’t seem to want to let go this year.  That calls for chili. Or even better, this He-Man chili. This isn’t just your usual chili either. It has amazing flavor. There’s absolutely nothing boring about it. The broth is super-great. I find myself saving it for last so I can savor it the most. Not that the meaty part isn’t total greatness. But, oh, the broth! It has absorbed all the wonderful flavors of the chili. Each spoonful is amazing.

He-Man Chili

I’ve become a big fan of using Italian sausage in my chili. It really adds great flavor and a different texture than beef. It’s just one of the ingredients that really make this He-Man chili something special and something different.

I kinda like to keep the meats in my chilis a little chunky. Not big huge bites, no. I don’t want the texture of the meat to get lost in the rest of the ingredients, I want to notice it. Especially the Italian sausage with all of its great flavors.

Also try my old fashioned two-meat chili.

He-Man Chili
Print Pin
4 from 1 vote

He-Man Chili

Winter doesn’t seem to want to let go this year.  That calls for chili. Or even better, this He-Man chili.
Course Main
Cuisine American
Keyword beef, chili, sausage
Prep Time 20 minutes
Cook Time 2 hours
Total Time 2 hours 20 minutes
Servings 8
Calories 391kcal

Equipment

Ingredients

Suggested toppings

Instructions

  • Heat a large Dutch oven or pot.
  • Add the bacon and cook until crispy,
  • Remove to a large paper towel-lined plate.
  • Remove all but 2 tablespoons of the bacon drippings.
  • Crumble in the sausage and cook until done.
  • Remove to the plate with the bacon.
  • Crumble in the beef and cook until done.
  • Remove to the plate with the bacon and sausage.
  • Remove all but 1 tablespoon of the drippings and add the onion, bell pepper, and jalapeno and cook until just softened.
  • Add the garlic and cook for another minute.
  • Stir in the dry mustard, celery seed and chili powder.
  • Reduce heat and simmer for 10 minutes.
  • Add the tomatoes, Worcestershire sauce and broth.
  • Bring to a boil then reduce heat to a simmer.
  • Add Creole seasoning to taste.
  • Simmer 1 to 1 1/2 hours stirring every 30 minutes.
  • Serve with desired toppings.

Notes

Use regular sausage for a less-spicy version.

Nutrition

Calories: 391kcal | Carbohydrates: 9g | Protein: 20g | Fat: 31g | Saturated Fat: 11g | Trans Fat: 1g | Cholesterol: 84mg | Sodium: 883mg | Potassium: 628mg | Fiber: 2g | Sugar: 4g | Vitamin A: 1050IU | Vitamin C: 27mg | Calcium: 73mg | Iron: 4mg

Nutritional values are approximate.
Shamrock Peeps Rice Krispies Treats

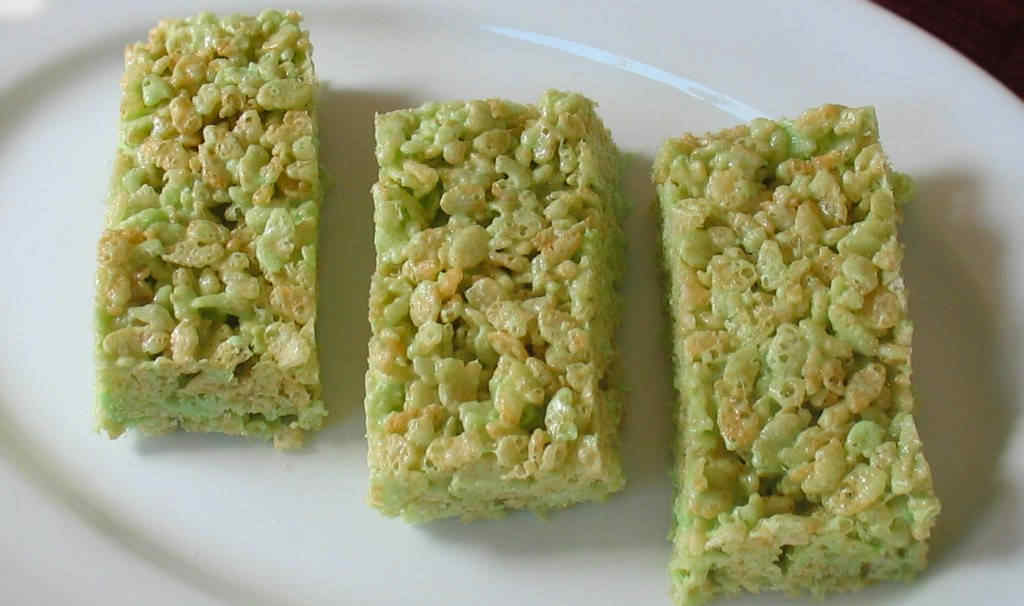
These shamrock Peeps Rice Krispies treats were fun to make…

…specially if you’re into watching poor little Peeps meet their demise in a hot pot! My wife hates when I do this to ‘them’.

Although I used green Peeps to make these for St. Patrick’s day, you can use any color, or even a combination of colors (don’t mix them together – let them melt in place). They taste just like your usual Rice Krispies treats. If you don’t have Peeps (they are now available year-round in some places), just use marshmallows and green food coloring.

Shamrock Peeps Rice Krispies Treats

Peeps melted down make for a fun syrup to add to any Rice Krispies treat.

Shamrock Peeps

Goodbye, Peeps!

These Shamrock Peeps Rice Krispies Treats are a great twist on those usual treats. If you’re in a hurry, buy the pre-made ones from the store. Make the Peeps syrup and pour it over top. Let it cool a bit and serve!

Also try my red velvet rice Krispies treats.

Shamrock Peeps Rice Krispies Treats
Print Pin
4 from 1 vote

Shamrock Peeps Rice Krispies Treats

These shamrock Peeps Rice Krispies treats were fun to make……especially if you’re into watching poor little Peeps meet their demise in a hot pot!
Course Snack
Cuisine American
Keyword Rice Krispie treats
Prep Time 5 minutes
Cook Time 45 minutes
Total Time 50 minutes
Servings 16
Calories 113kcal
Author Mike

Ingredients

Instructions

  • Spray a 9″ x 13″ baking dish with non-stick spray.
  • Melt the butter over low heat in a large non-stick saucepan.
  • Add the Peeps to the pot and melt them, stirring occasionally. Do not overcook or the butter will burn.
  • Remove pot from heat and stir in the cereal.
  • Pour the mixture into a baking dish and spread it out. I used a spatula sprayed with non-stick spray to make it easier to spread out the cereal.
  • Let cool 30 minutes and cut into bars.

Notes

Store any leftovers in the fridge.

Nutrition

Calories: 113kcal | Carbohydrates: 27g | Protein: 1g | Fat: 1g | Saturated Fat: 1g | Trans Fat: 1g | Cholesterol: 1mg | Sodium: 66mg | Potassium: 17mg | Fiber: 1g | Sugar: 18g | Vitamin A: 703IU | Vitamin C: 7mg | Calcium: 4mg | Iron: 3mg

Nutritional values are approximate.
Stuffed Pasta Shells

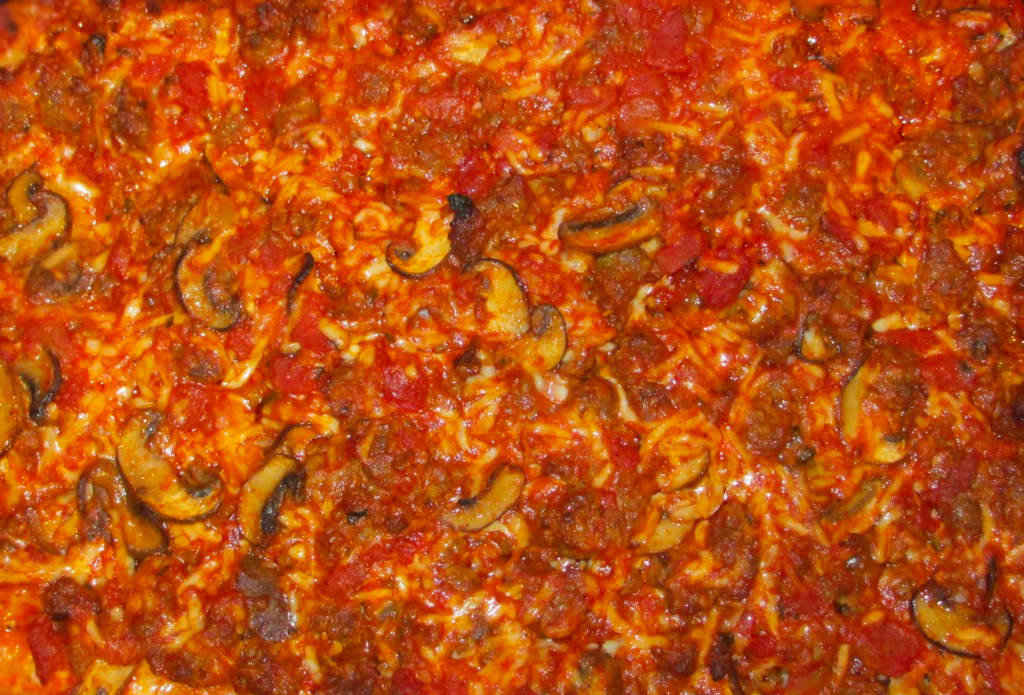
Welcome to my version of the standard stuffed pasta shells. Glorious large pasta stuffed with tons and tons of ooey-gooey cheeses. Mushroom-laden sauce. No one is going away hungry after devouring some of this goodness. This makes a big batch, enough for a big get-together. I served these stuffed pasta shells with plenty of my gotta-have-it garlic bread. It is definitely the perfect combination. Ok, I threw in a green salad too to keep things on the healthy side. A bit.

Stuffed Pasta Shells

Spice It Up. Just A Bit.

For a kicked-up version use spicy Italian sausage. I did. And I might have slipped in a few good pinches of red pepper flake too.

I highly recommend that you shred or grate your own cheese at home. Don’t buy the pre-shredded or pre-grated stuff. It has stuff added to it to keep it from sticking together. That ‘stuff’ affects how the cheese melts. Shred it yourself and use the good stuff.

Also try my slow cooker spaghetti and meatballs.

Stuffed Pasta Shells
Print Pin
5 from 1 vote

Stuffed Pasta Shells

No one is going away hungry after devouring some of this goodness. This makes a big batch, enough for a big get-together. 
Course Main
Cuisine Italian
Keyword stuffed pasta shells
Prep Time 10 minutes
Cook Time 1 hour 20 minutes
Total Time 1 hour 30 minutes
Servings 12
Calories 334kcal
Author Mike

Ingredients

Instructions

  • Preheat oven to 350 F.
  • Cook pasta per package instructions.
  • Drain well.
  • Meanwhile, cook sausage until done. Drain.
  • Combine the eggs, ricotta, parsley, salt, pepper and half of the mozzarella and Parmesan cheeses.
  • Stuff mixture into shells (I used a cookie press, but you can also put the stuffing into a plastic bag, cut a corner off, and squeeze).
  • Place shells into a 9×13 baking dish that has been sprayed with non-stick spray.
  • In a large bowl, combine the pasta sauce, mushrooms, remaining cheese and sausage.
  • Pour over the pasta shells.
  • Bake for 45-60 minutes or until bubbly hot.

Notes

Also great with a little Pecorino-Romano cheese added.

Nutrition

Calories: 334kcal | Carbohydrates: 3g | Protein: 22g | Fat: 26g | Saturated Fat: 13g | Trans Fat: 1g | Cholesterol: 99mg | Sodium: 1216mg | Potassium: 219mg | Fiber: 1g | Sugar: 1g | Vitamin A: 448IU | Vitamin C: 1mg | Calcium: 429mg | Iron: 1mg

Nutritional values are approximate.
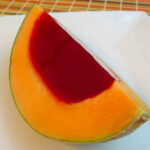
Jello-Filled Melon

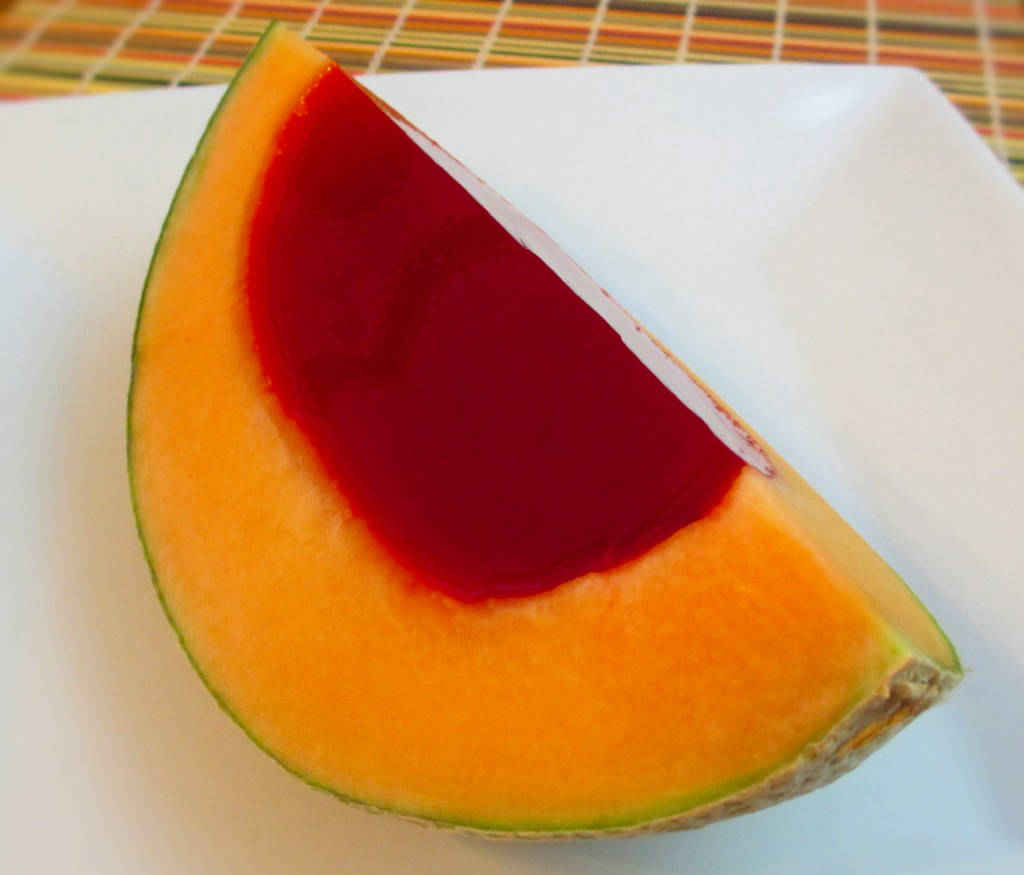
Who would’ve thought that cherry Jello and cantaloupe go together so well? This Jello-filled melon is just fun to look at and make. Everyone will oooh and ahhh when you serve it. And when they bite into it they’ll thank you. Because they aren’t expecting this to be great. Well, it’s not all for show.

Jello-Filled Melon

Have A Fun Breakfast!

Jello-filled melon is definitely on my list of favorite sides for breakfast (or breakfast for dinner…)! I can see trying this same recipe using a honeydew melon and a different flavor of Jello, such as lime! Or I might make both and have a melon bar!

Also try my crowd-pleasing skinned watermelon!

Jello-Filled Melon
Print Pin
5 from 1 vote

Jellin’ Melon

Who would’ve thought that cherry Jello and cantaloupe go together so well? This Jello-filled melon is just fun to look at and make. Everyone will oooh and ahhh when you serve it. And when they bite into it they’ll thank you.
Course Side
Cuisine American
Keyword jello-o, melon
Prep Time 10 minutes
Cook Time 3 hours
Total Time 3 hours 10 minutes
Servings 8
Calories 24kcal

Ingredients

Instructions

  • Cut the melon in half and scoop out the seeds. Also cut a small piece off the bottom of each half so that it stands up without rolling around.
  • Pour the contents of the Jello package into a medium bowl.
  • Whisk in the hot water and continue whisking for 2 minutes.
  • Stir in the cold water.
  • Place Jello into the refrigerator for 15-25 minutes or until it just starts to thicken. You don’t want it to gel, but you do want it to be thickened enough so that it doesn’t absorb into the melon.
  • Pour Jello into the melons and place in the refrigerator until completely gelled, about 3 hours. Note: I placed the melon halves on a baking sheet in the fridge BEFORE adding the Jello. I then poured the Jello into the halves using a measuring cup. This kept me from spilling the Jello as I probably would have had I filled them first and then tried to transfer them to the fridge.
  • Cut into wedges using a sharp and slightly wet knife. Serve.

Nutrition

Calories: 24kcal | Carbohydrates: 6g | Protein: 1g | Fat: 1g | Saturated Fat: 1g | Sodium: 12mg | Potassium: 184mg | Fiber: 1g | Sugar: 6g | Vitamin A: 2334IU | Vitamin C: 25mg | Calcium: 6mg | Iron: 1mg

Nutritional values are approximate.
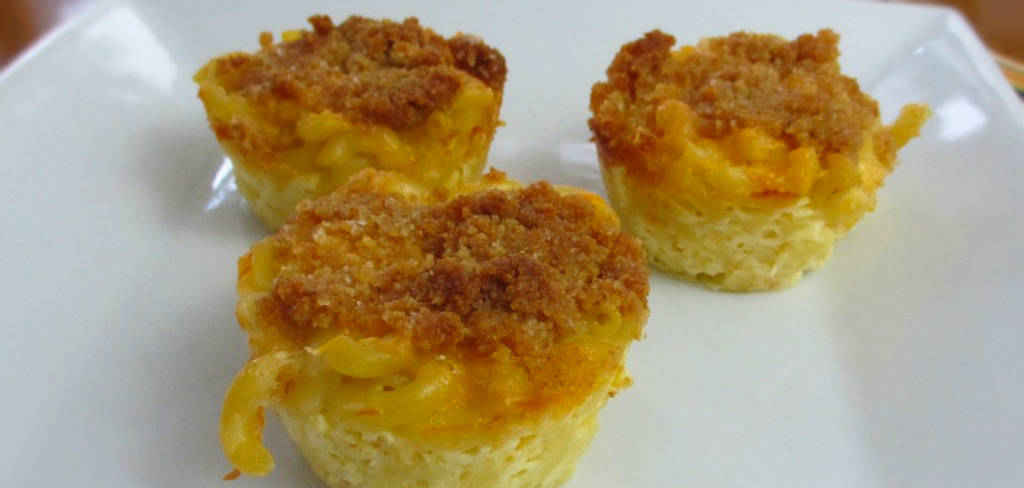
Macaroni-And-Cheese Muffins

These macaroni-and-cheese muffins would be great for a family gathering. They’re easy to make and taste fantastically cheesy! You can make a big, huge batch of them in no time. It might keep Uncle Henry from snagging all of the mac-and-cheese out of a dish. It’s a lot more obvious that you’re hogging them all when you have to stack 10 of these little round morsels onto your plate.

Macaroni-And-Cheese Muffins

Pop-In-Your-Mouth Goodness

Macaroni-and-cheese muffins are rather fun to eat too. You can use your favorite mac-and-cheese recipe instead, if you like. Just watch the cook time because you might have to adjust it a bit. You want the macaroni to set up good in the tins.

Also try my mac-and-cheese waffles.

Macaroni-And-Cheese Muffins
Print Pin
4 from 1 vote

Macaroni-And-Cheese Muffins

These macaroni-and-cheese muffins would be great for a family gathering. They’re easy to make and taste fantastically cheesy! You can make a big, huge batch of them in no time.
Course Side
Cuisine American
Keyword mac and cheese, macaroni and cheese, muffins
Prep Time 5 minutes
Cook Time 45 minutes
Total Time 50 minutes
Servings 12
Calories 231kcal
Author Found on the web

Ingredients

  • 2 cups elbow macaroni
  • ½ teaspoon kosher salt plus more for the pasta
  • 1 tablespoon unsalted butter softened
  • 1 large egg lightly beaten
  • 1 cup milk
  • 1 ½ cups sharp cheddar cheese shredded, divided
  • 1 ½ cups Mozzarella cheese shredded
  • ½ cup bread crumbs seasoned
  • 2 teaspoons olive oil

Instructions

  • Preheat oven to 350 F.
  • Add pasta to a large pot of lightly salted boiling water and cook for 8 minutes.
  • Drain and return to the pot.
  • Add the butter and egg and stir until the butter is melted and the pasta is coated.
  • Add the milk, 1 cup of the cheddar cheese and all of the Mozzarella cheese and stir until the cheeses are melted.
  • Spray a muffin pan with non-stick spray.
  • Spoon in the pasta mixture.
  • Top with the remaining cheddar cheese.
  • In a small bowl combine 1/2 teaspoon of salt, the bread crumbs and olive oil.
  • Sprinkle over the tops of pasta.
  • Bake for 30 minutes or until golden brown.
  • Let rest for 5 minutes, letting the cheese set, before removing from the muffin tins to serve.

Notes

Use your favorite cheeses.

Nutrition

Calories: 231kcal | Carbohydrates: 22g | Protein: 11g | Fat: 11g | Saturated Fat: 6g | Trans Fat: 1g | Cholesterol: 46mg | Sodium: 334mg | Potassium: 119mg | Fiber: 1g | Sugar: 2g | Vitamin A: 324IU | Calcium: 212mg | Iron: 1mg

Nutritional values are approximate.
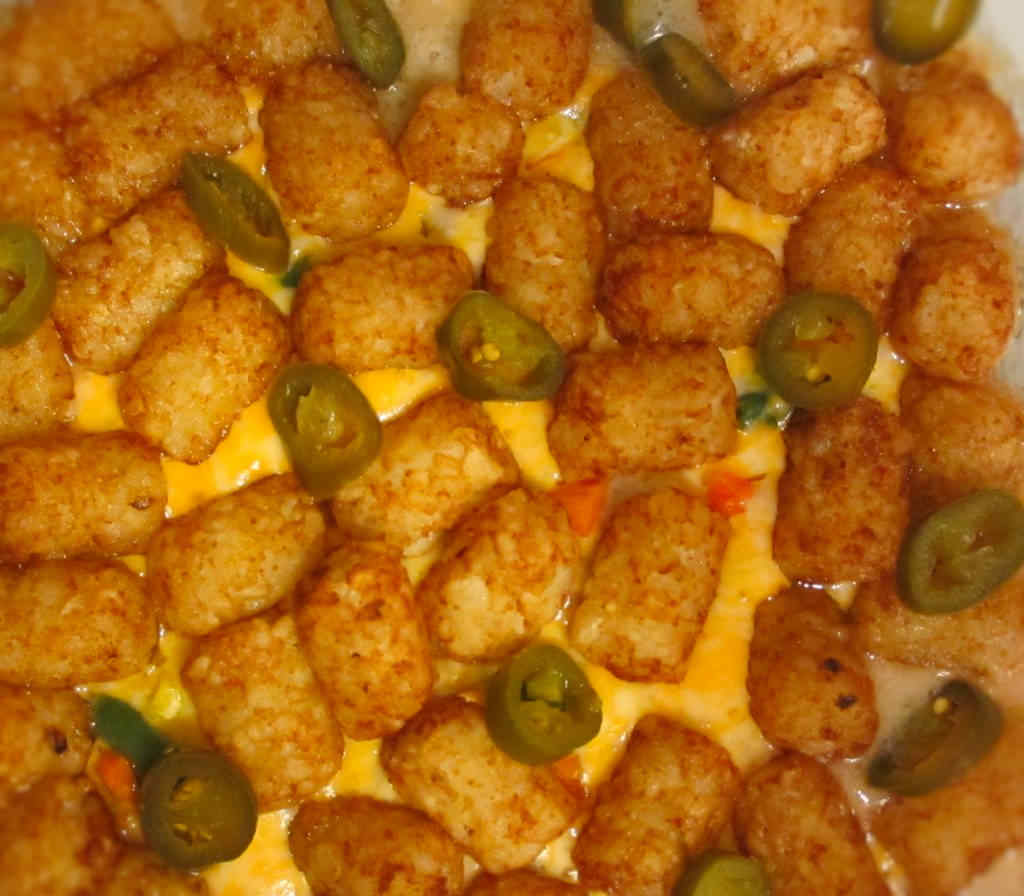
Tater Tot Casserole

I am addicted to tater tots. I can live without fries or baked potatoes and even potato chips, but you cannot take away my tots. Most people like them with ketchup, but not me. I bake them up extra crispy and top them with butter. Yes, butter. Try it. And try this tater tot casserole.

Tater Tot Casserole

Surprisingly Delicious

It’s my love of tots that made me try this tater tot casserole, and I was actually happy I did. At first glance I worried that it would be bland. Let’s face it, cream of mushroom soup isn’t really packed with flavor sensations. So I made a few changes to the original recipe. We both enjoyed it. It’s easy to make and makes good leftovers (if you have any).

I highly recommend that you shred or grate your own cheese at home. Don’t buy the pre-shredded or pre-grated stuff. It has stuff added to it to keep it from sticking together. That ‘stuff’ affects how the cheese melts. Shred it yourself and use the good stuff.

Also try my southwestern potato casserole.

Tater Tot Casserole
Print Pin
5 from 1 vote

Tater-Tot Casserole

Nothing can be easier than this casserole!
Course Main Dish
Cuisine American
Keyword casserole, tater tots
Prep Time 10 minutes
Cook Time 1 hour
Total Time 1 hour 10 minutes
Servings 4
Calories 653kcal

Ingredients

  • 1 pound ground beef
  • ½ medium onion minced
  • 1 10 3/4 ounce condensed cream of mushroom soup
  • ¼ cup milk
  • ½ – 1 tablespoon Creole seasoning
  • 1 cup frozen vegetables mixed or whatever is your favorite
  • 1 cup sharp cheddar cheese shredded
  • 1 pound tater tots frozen
  • Jalapeno slices to taste

Instructions

  • Preheat oven to 375 F. Spray a 2 quart baking dish with non-stick spray.
  • Heat a medium skillet over medium-high heat. Add the ground beef and brown.
  • Add in the onion and cook 4-5 minutes or until starting to soften. Drain. Spoon into the baking dish.
  • Mix the soup, milk and Creole seasoning together in a small bowl. Pour over the meat mixture.
  • Spread the vegetables over the top.
  • Sprinkle with the cheese and then add a layer of tater tots.
  • Top with jalapeno slices.
  • Bake for 45 minutes or until the potatoes are golden brown and the casserole is bubbling.

Notes

Use pepperjack cheese for a little more heat.

Nutrition

Calories: 653kcal | Carbohydrates: 38g | Protein: 31g | Fat: 43g | Saturated Fat: 17g | Trans Fat: 1g | Cholesterol: 112mg | Sodium: 768mg | Potassium: 809mg | Fiber: 5g | Sugar: 2g | Vitamin A: 3403IU | Vitamin C: 16mg | Calcium: 273mg | Iron: 4mg

Nutritional values are approximate.