Bacon Biscuit Pull-Aparts

When I first saw these bacon biscuit pull-aparts on the Picky Palate, I thought, “These have to be illegal in most states. They look just too good.”. They have everything that is yummy in them: biscuits, cheese and bacon with warmed maple syrup on top. These biscuits are perfect for breakfast, or as a side for dinner.
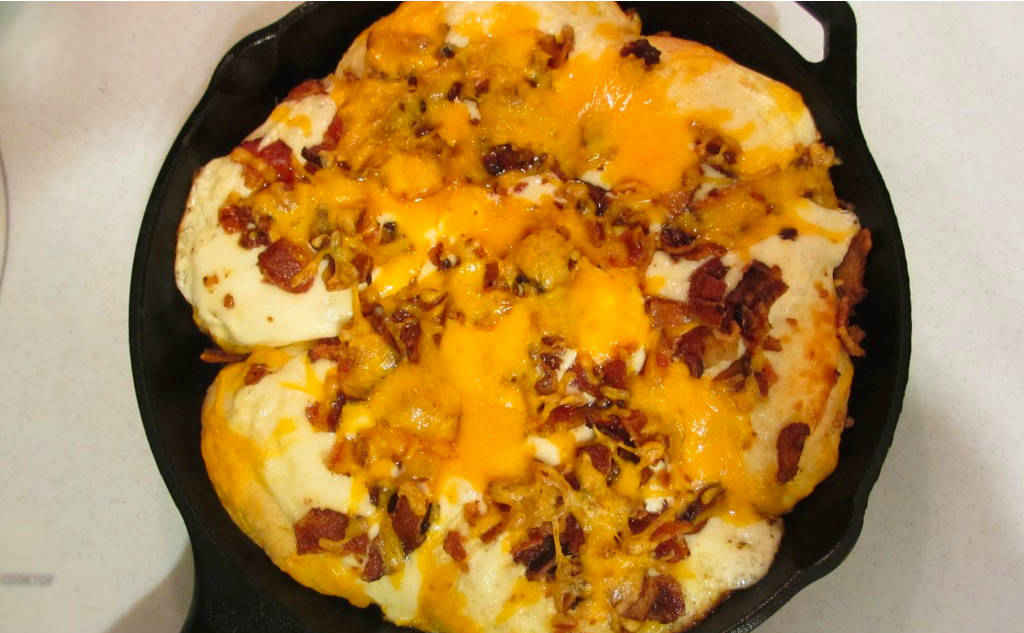
Bacon Biscuit Pull-Aparts

Yummy Gooey Goodness

The result is soft, cheesy gooey yumminess. The bacon biscuit pull-aparts were just as good left over as they were the evening I made them.

I highly recommend that you shred or grate your own cheese at home. Don’t buy the pre-shredded or pre-grated stuff. It has stuff added to it to keep it from sticking together. That ‘stuff’ affects how the cheese melts. Shred it yourself and use the good stuff.

I love making pull-apart breads. Try my pumpkin version. It’s perfect for fall. Actually, it’d be great for breakfast too!
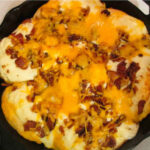
Bacon Biscuit Pull-Aparts
Print Pin
4 from 1 vote

Bacon Biscuit Pull-Aparts

When I first saw these bacon biscuit pull-aparts I thought, “These have to be illegal in most states. They look just too good.”
Course Main Dish
Cuisine American
Keyword bacon, biscuits
Prep Time 5 minutes
Cook Time 35 minutes
Total Time 40 minutes
Servings 4
Calories 753kcal

Ingredients

  • 5 slices thick-cut bacon or 1/4th of a breakfast sausage roll
  • 1 tablespoon unsalted butter melted
  • 1 tube biscuit dough
  • 6 fresh mozzarella sliced thin
  • 1 cup sharp cheddar cheese shredded
  • maple syrup warmed (for serving)

Instructions

  • Preheat oven to 350 F.
  • Cook bacon (or sausage) and let drain on a paper towel.
  • Brush butter around the inside of a 9″ cast iron skillet.
  • Place biscuits in skillet. You’ll want to pack them in much like dinner rolls.
  • Top with mozzarella, the bacon (or sausage) and cheddar.
  • Bake for 15-20 minutes.
  • Serve topped with warm maple syrup.

Notes

Use a 8″-9″ cast iron skillet for best results. You can use an 8″ skillet too, but you’ll have to use one less biscuit (trust me on this).

Nutrition

Calories: 753kcal | Carbohydrates: 57g | Protein: 20g | Fat: 49g | Saturated Fat: 17g | Trans Fat: 1g | Cholesterol: 69mg | Sodium: 1571mg | Potassium: 377mg | Fiber: 2g | Sugar: 4g | Vitamin A: 400IU | Calcium: 271mg | Iron: 4mg

Nutritional values are approximate.

Roasted Chicken on the Char-Broil Big Easy

Note: This recipe was developed using the Char-Broil Big Easy Oil-Less Fryer. If you are cooking using the Char-Broil Smoker-Roaster Grill you should cook with the lid open and the temperature set to High. You might also need to adjust the cooking time.

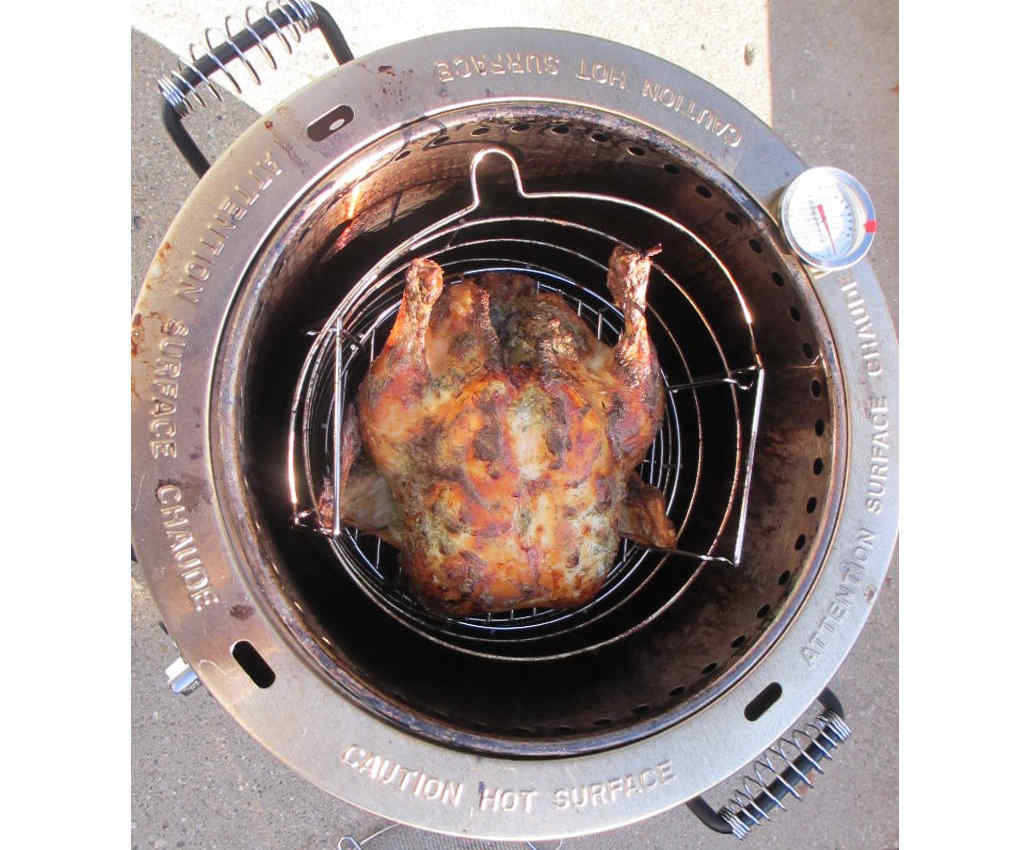
I bought a Big Easy a while back. It is one of my favorite “grills” by far. It doesn’t get any easier – marinate/brine/whatever meat you wish to cook and put it into the cooker. Turkeys and chickens take about 10 minutes per pound. A family pack of wings takes about 30 minutes. Done. No mess, no fuss. It’s a beautiful thing. And nothing is like roasted chicken on the Char-Broil Big Easy.

Roasted Chicken on the Char-Broil Big Easy

Easy Seasoning. Easy Chicken.

Garlic, dill and rosemary give this roasted chicken on the Char-Broil Big Easy a nice savory flavor. This is my go-to recipe for roasting chicken. I do not brine the birds or marinate them. I slather them (you can easily fit two decent-sized chickens into the Big Easy) with the mixture below and put them into the cooker.

The skin comes up super crispy and the entire bird is moist and tender and flavorful.

Also try my easy roasted turkey cooked on the Big Easy.

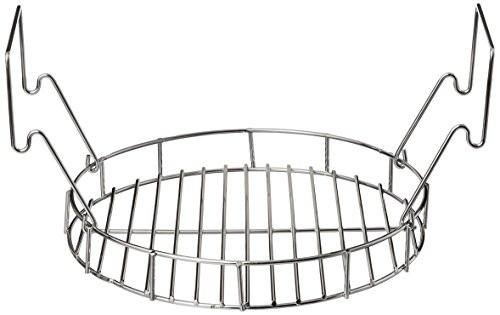
It’s always a good idea to keep a few spare grease trays on hand for your Char-Broil Big Easy.

Love your Big Easy as much I love mine? Check out my Big Easy Add-Ons page and my free Big Easy eCookbook!

Roasted Chicken on the Char-Broil Big Easy
Print Pin
4 from 3 votes

Garlic Rosemary Roasted Chicken on the Big Easy

Garlic, dill and rosemary give this chicken a nice savory flavor. This is my go-to recipe for roasting chicken.
Course Main
Cuisine American
Keyword Big Easy, Char-Broil, chicken
Prep Time 5 minutes
Cook Time 1 hour
Total Time 1 hour 5 minutes
Servings 1 chicken
Calories 246kcal
Author Mike

Ingredients

For gravy

Instructions

  • Rinse the bird and pat dry.
  • Mix remaining ingredients. Note: You may want to add more dill or rosemary. Taste the mixture and add more as you need.
  • Slather mixture all over and inside the bird. You can refrigerate for up to 12 hours before cooking. I’ve found that marinating isn’t necessary.
  • Place into a heated Big Easy (or onto a grill) and cook until meat in the thighs hits 185 F and the breasts hit 160 F.
  • Let rest 30 minutes before carving (if you can resist it that long!).

For gravy

  • To make gravy from the drippings, add the drippings to the broth in a small pan and bring to a boil. Reduce to a simmer. Slowly whisk in the flour and stir until thickened.

Notes

You can also use your favorite cuts of chicken instead.

Nutrition

Calories: 246kcal | Carbohydrates: 23g | Protein: 7g | Fat: 15g | Saturated Fat: 7g | Cholesterol: 31mg | Sodium: 9002mg | Potassium: 653mg | Fiber: 2g | Sugar: 2g | Vitamin A: 645IU | Vitamin C: 39mg | Calcium: 199mg | Iron: 4mg

Nutritional values are approximate.
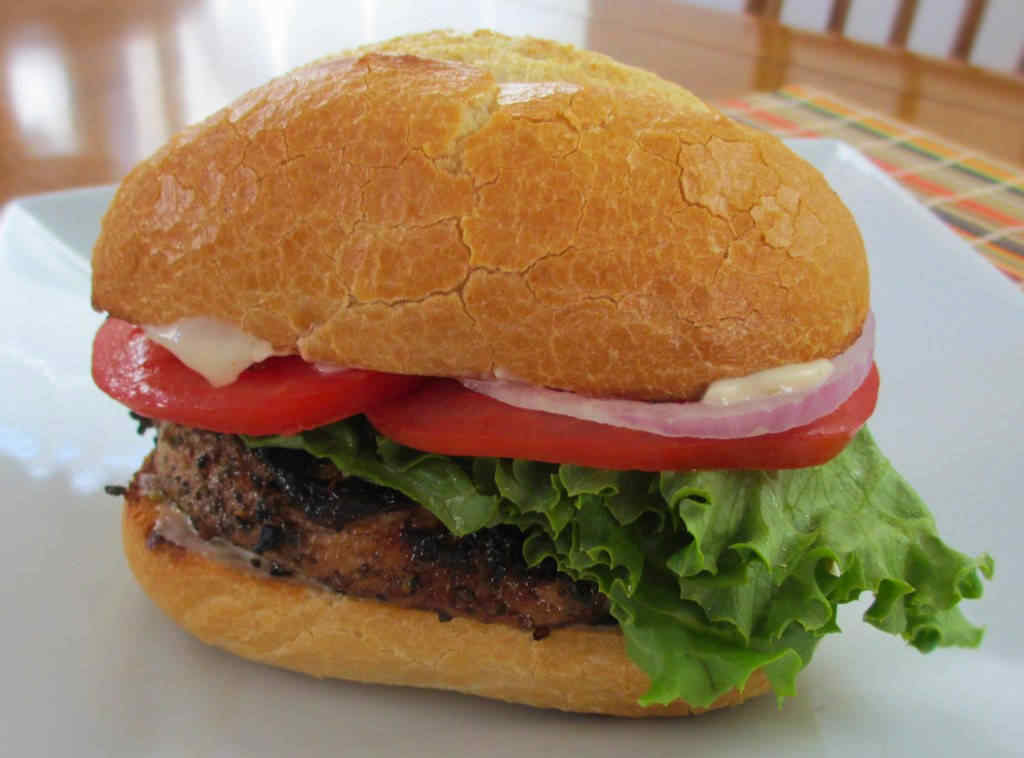
Grilled Italian Chicken Sandwiches

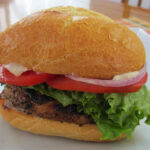
I was perusing Plain Chicken, one of my favorite blogs to follow, when I came across Steph’s great recipe for grilled Italian chicken tenders. I thought to myself, “Self? What do you think about making sandwiches from this recipe?” So that’s what I did. And, boy, what great grilled Italian chicken sandwiches they were! The chicken has a great Italian flavor, complimented by the fresh toppings. It’s oh-so-tender. It’s oh-so-juicy. This sandwich was a great change from my usual.

Grilled Italian Chicken Sandwiches

Deliciousness In Every Bite

You won’t be disappointed with these grilled Italian chicken sandwiches. You don’t have to use chicken tenders. Any cut of boneless chicken will do. I’m a big fan of chicken thighs so next time I make these I’ll use thighs instead. Chicken breasts would work great too. I recommend butterflying them first so that they have an even thickness throughout. That’ll help them cook evenly and faster. It also gives the marinade more surface area to flavor. If the butterflied chicken breast is too large for a single sandwich (and it probably will be), just cut into two pieces.

Also try my grilled Jamaican jerk chicken sandwiches.

Grilled Italian Chicken Sandwiches
Print Pin
5 from 1 vote

Grilled Italian Chicken Sandwiches

You won’t be disappointed with these grilled Italian chicken sandwiches. You don’t have to use chicken tenders. Any cut of boneless chicken will do. I’m a big fan of chicken thighs so next time I make these I’ll use thighs instead.
Course Main
Cuisine American
Keyword chicken, chicken sandwiches, grilled, Italian
Prep Time 4 hours 10 minutes
Cook Time 15 minutes
Total Time 4 hours 25 minutes
Servings 4
Calories 446kcal

Equipment

Ingredients

For the chicken

For the sandwiches

Instructions

  • Combine all of the marinade ingredients except for the chicken.
  • Place into a large resealable baggie and add the chicken.
  • Close and shake to cover.
  • Refrigerate for at least 4 hours.
  • Fire up your grill for direct and indirect cooking.
  • Shake off any excess marinade from the chicken and place over direct heat.
  • Sear then flip and sear the other side.
  • Remove to indirect heat and continue cooking until done (internal temperature of 165 F).
  • Remove and let cool slightly.
  • Toast buns if desired.
  • Slather both sides of the buns with the dressing.
  • Add chicken, lettuce, onion and tomato and serve.

Notes

The chicken is also great sliced thin and served over lettuce as a salad.

Nutrition

Calories: 446kcal | Carbohydrates: 44g | Protein: 43g | Fat: 10g | Saturated Fat: 1g | Trans Fat: 1g | Cholesterol: 109mg | Sodium: 1143mg | Potassium: 923mg | Fiber: 4g | Sugar: 10g | Vitamin A: 2711IU | Vitamin C: 16mg | Calcium: 82mg | Iron: 13mg

Nutritional values are approximate.
Snickers Cheesecake Bars

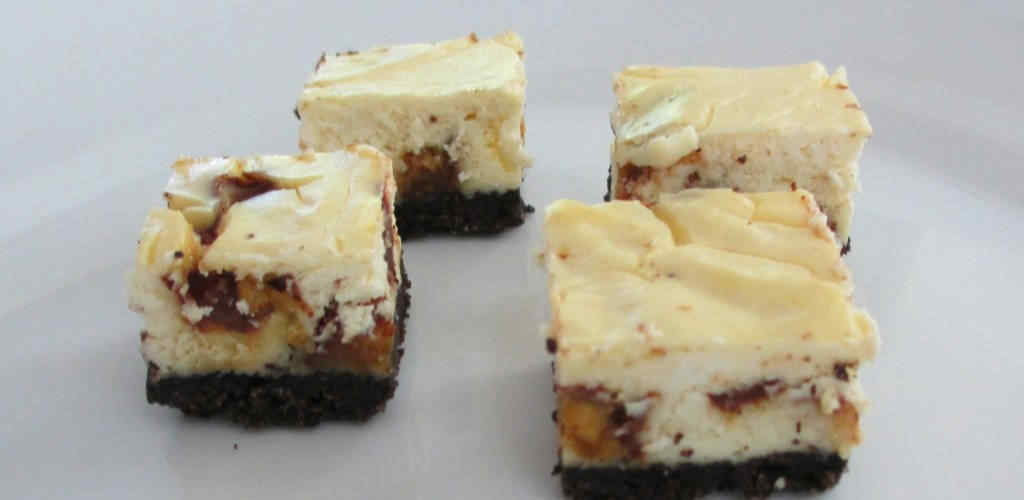
Oh me. These little Snickers cheesecake bars are dangerously good. Oooey gooeyness from the Snickers. Creaminess from the cream cheese. A little crunch from the Oreo crust. Yowsa. The problem with little bites like these is that it’s easy to lose track of how many you’ve had. That’s a good problem to have!

Snicker's Cheesecake Bars

Go Rogue

I plan on making other versions of these Snickers cheesecake bars. The base recipe is so simple, lending itself to using all sorts of other candy bars. But, I have to say, this Snickers version is pretty darned good and maybe shouldn’t be messed with.

Also try my sweetheart buddies.

Snicker's Cheesecake Bars
Print Pin
5 from 1 vote

Snickers Cheesecake Bars

Oh me. These little Snickers cheesecake bars are dangerously good.
Course Dessert
Cuisine American
Keyword bars, chocolate
Prep Time 5 minutes
Cook Time 4 hours
Total Time 4 hours 5 minutes
Servings 16
Calories 395kcal

Equipment

Ingredients

For the crust

  • 20 Oreos
  • 5 tablespoons unsalted butter melted

For the filling

  • 2 8 ounce cream cheese softened
  • 1 large egg
  • ¼ cup sugar
  • 2 teaspoons vanilla extract
  • 13 Snickers bars fun size, chopped

Instructions

  • Preheat oven to 350 F.
  • Tear off a piece of aluminum foil that is a few inches larger than a 9" x 9" baking dish. You want some of the foil to hang over the sides because you'll use it as a 'handle' to remove the bars later.
  • Place the Oreos in a blender or food blender and pulse until they form a fine crumb. Transfer to a medium-sized bowl.
  • Add butter to Oreo crumbs and stir.
  • Pour mixture into the baking pan and flatten out using a spatula. Press down to make a dense crust.
  • Place pan into the oven and bake 9-10 minutes. Remove from the oven and let cool.
  • Meanwhile, make the filling by beating the cream cheese, egg, sugar, and vanilla extract in a mixer for 3 minutes.
  • Gently fold in the Snickers.
  • Once the baked crust has cooled completely, spread the Snicker’s mixture over the crust, pressing into the corners.
  • Bake for 30-35 minutes (ours only took 30) until the cheesecake has started to brown just a little on top.
  • Remove from oven and let cool before then placing into the fridge for 3 hours.
  • Remove the cheesecake from the pan by grabbing two sides of the overhanging foil and pulling upwards. The cake should pull out easily. Place onto a cutting board.
  • Cut cheesecake into 16 bite-sized pieces.

Notes

Store in the fridge until ready to serve.

Nutrition

Calories: 395kcal | Carbohydrates: 43g | Protein: 6g | Fat: 23g | Saturated Fat: 10g | Trans Fat: 1g | Cholesterol: 41mg | Sodium: 230mg | Potassium: 207mg | Fiber: 1g | Sugar: 33g | Vitamin A: 389IU | Vitamin C: 1mg | Calcium: 63mg | Iron: 2mg

Nutritional values are approximate.
Best BBQ Beans on the Planet

The best? Really? Quite the bold claim saying that these are the best BBQ beans on the planet. So, being the skeptical person that I am, I figured these would be lame, middle-of-the-road, and nothing really to talk about.

Best BBQ Beans on the Planet

My Goodness, They Are The Best!

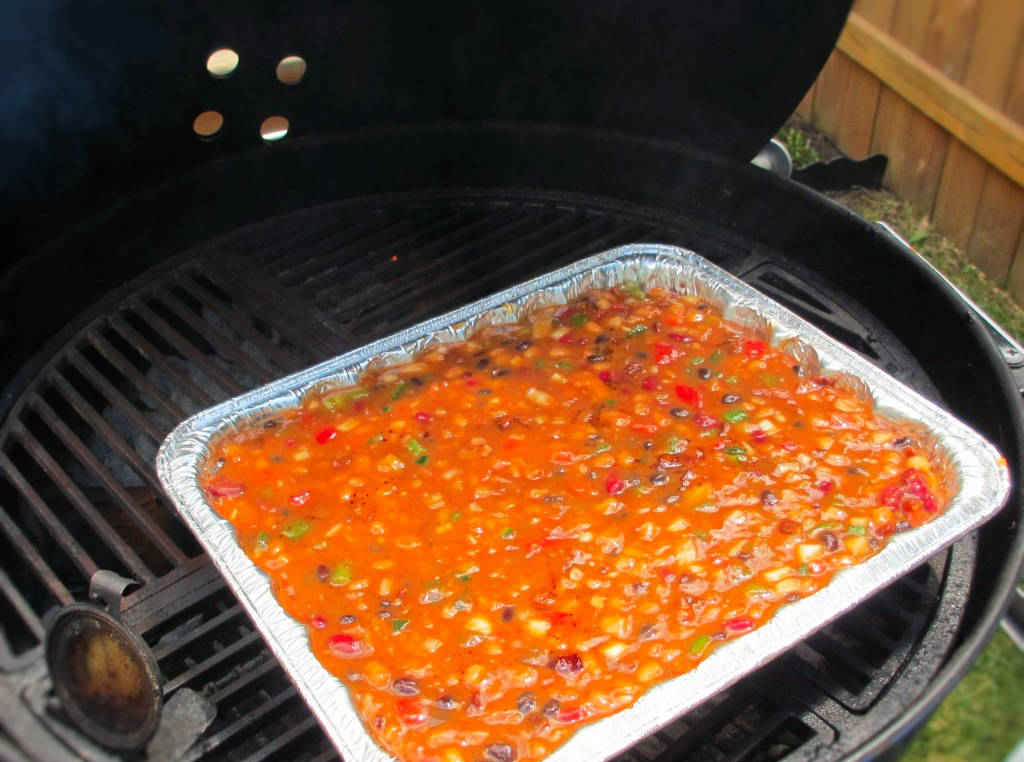
Well, I was wrong. These are the best BBQ beans on the planet and the best I’ve ever had. Now, to be fair, I’ve had some that were close seconds. But these are amazing. So are they the best on the planet? Inspired by Steven Raichlen, these are the best beans in the galaxy. Raichlen introduced me on to a world outside of just firing up some charcoal and tossing on a rubbery steak. And he gave me grill envy. I mean, really, have you seen his shows? He has the BEST toys!

Be cautious when lifting the pan of beans on and off the grill. Always support the pan on the bottom. I use oven mitts.

The only way to make these is on the grill, over indirect heat. Although you can make them in the oven, but you’d really be missing the point (and some flavor).

Also try my easy spicy grilled potatoes.

Best BBQ Beans on the Planet
Print Pin
5 from 1 vote

Best BBQ Beans on the Planet

These are the best BBQ beans on the planet and the best I’ve ever had. Now, to be fair, I’ve had some that were close seconds. But these are amazing.
Course Side
Cuisine American
Keyword barbecue, BBQ, beans
Prep Time 20 minutes
Cook Time 2 hours
Total Time 2 hours 20 minutes
Servings 16
Calories 263kcal

Ingredients

Instructions

  • Set up your grill for indirect cooking.
  • Place a few chunks of mesquite over the coals.
  • Add the bacon pieces to a large skillet or Dutch oven over high heat and cook until starting to crisp. Remove bacon to a plate. Reserve 2 tablespoons of the bacon drippings (I strained the rest and refrigerated it for oiling my grill grates).
  • Place all remaining ingredients into a 9" x 13" disposable pan with 3" sides. Stir.
  • Drizzle reserved bacon drippings over the top of the beans.
  • Place pan on grill over indirect heat.
  • Cook for at least 1 hour, monitoring to see if the beans get too hot or dry out (you might have to add water).
  • Remove beans once they and the vegetables are tender.
  • Cover grill

Notes

You’ll need a 9″ x 13″ disposable pan with 3″ sides.

Nutrition

Calories: 263kcal | Carbohydrates: 35g | Protein: 5g | Fat: 12g | Saturated Fat: 4g | Trans Fat: 1g | Cholesterol: 19mg | Sodium: 576mg | Potassium: 226mg | Fiber: 1g | Sugar: 31g | Vitamin A: 378IU | Vitamin C: 21mg | Calcium: 40mg | Iron: 1mg

Nutritional values are approximate.

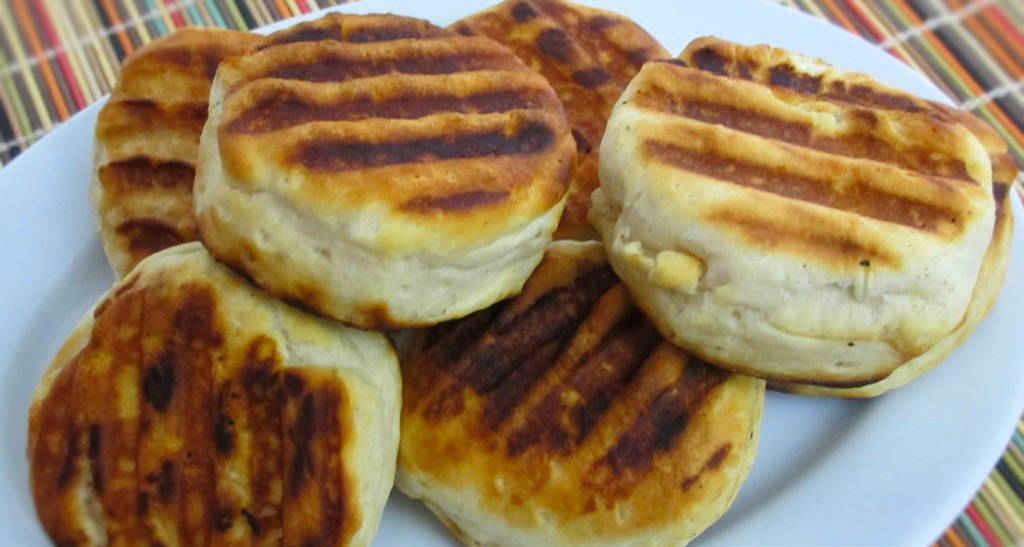
Grilled Biscuits

When it’s hot out I prefer to cook my entire meal on the grill. So, the other night when dinner was grilled scrambled eggs (done on a cast iron griddle) and grilled bacon, I decided to also grill up a tube of store-bought biscuits. And those grilled biscuits were great! No need to heat up the house. As a bonus you get that wonderful grill flavor!

Grilled Biscuits

Grilled To Perfection

The biscuits came out with a nice crunch and a little smoky flavor. They are really good and different from the usual baked biscuits. Perfect for topping with a little honey and butter.

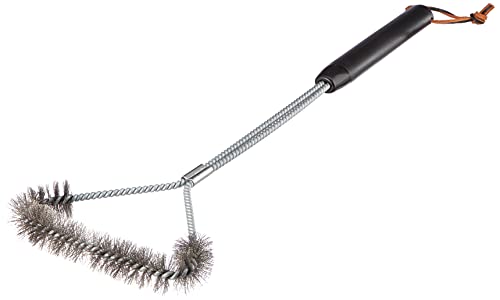
Get yourself a good set of grill tools for these biscuits and anything else you grill. You won’t regret the extra few bucks they cost over the cheap ones that you’re going to have to replace in a few years. I have had several sets of Weber tools for decades and have yet to replace a single one.

Breakfast on the grill is a great thing. Also try my grilled zesty ham steak.

Grilled Biscuits
Print Pin
5 from 1 vote

Grilled Biscuits

These grilled biscuits were great! No need to heat up the house. As a bonus you get that wonderful grill flavor!
Course Side
Cuisine American
Keyword biscuits, grilled
Prep Time 5 minutes
Cook Time 15 minutes
Total Time 20 minutes
Servings 4
Calories 1kcal
Author Mike

Ingredients

Instructions

  • Set up your grill for indirect cooking.
  • Separate the biscuits onto a baking sheet pan or plate.
  • Lightly brush the bottoms with vegetable oil and transfer to the grill.
  • While the biscuits cook for 5-7 minutes, lightly brush the tops with oil.
  • Flip and cook another 3-4 minutes.
  • Serve.

Notes

You can brush the tops with butter instead of oil.

Nutrition

Calories: 1kcal | Carbohydrates: 1g | Protein: 1g | Fat: 1g | Saturated Fat: 1g | Cholesterol: 1mg | Sodium: 1mg | Potassium: 1mg | Fiber: 1g | Sugar: 1g | Vitamin A: 1IU | Calcium: 1mg | Iron: 1mg

Nutritional values are approximate.
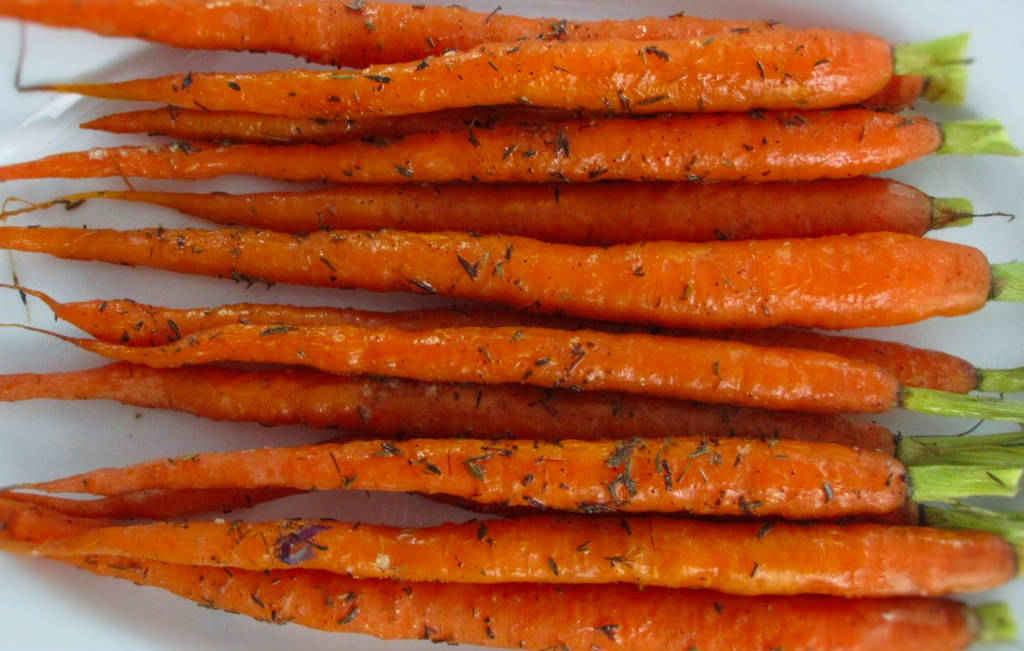
Roasted Carrots

I love the flavor from roasted vegetables, mostly carrots or Brussels sprouts and sometimes cauliflower. They have such a great sweetness to them. Sometimes I roast canned tomatoes for soups. Or I’ll roast onions as a side dish. And of course, a favorite, roasted garlic. Nothing is as simple as these roasted carrots. And nothing is as tasty.

Roasted Carrots

The Perfect Side Dish

Roasted carrots were the perfect side for our mushroom pork tenderloin with roasted garlic mashed potatoes. And hey, there’s no law that you have to only roast one vegetable at a time. Toss a few beets in there too. Just make sure they are all about the same size.

Also try my root beer carrots. Root beer makes for an excellent glaze.

Roasted Carrots
Print Pin
5 from 1 vote

Roasted Carrots

I love the flavor from roasted vegetables, mostly carrots or Brussels sprouts and sometimes cauliflower. They have such a great sweetness to them
Course Side
Cuisine American
Keyword carrots
Prep Time 5 minutes
Cook Time 30 minutes
Total Time 35 minutes
Servings 4
Calories 48kcal
Author Mike

Equipment

Ingredients

Instructions

  • Preheat oven to 400 F.
  • Place carrots on a baking sheet.
  • Drizzle lightly with the oil, rotating the carrots to get them coated.
  • Sprinkle with salt and pepper and thyme.
  • Roast in the oven for 20-30 minutes, rotating once, until the carrots just start to soften. You don’t want them to get too soft – a little crunch is good.

Notes

Serve at room temperature or chilled.

Nutrition

Calories: 48kcal | Carbohydrates: 11g | Protein: 1g | Fat: 1g | Saturated Fat: 1g | Sodium: 78mg | Potassium: 374mg | Fiber: 3g | Sugar: 5g | Vitamin A: 19027IU | Vitamin C: 9mg | Calcium: 45mg | Iron: 1mg

Nutritional values are approximate.
Mushroom Pork Tenderloin

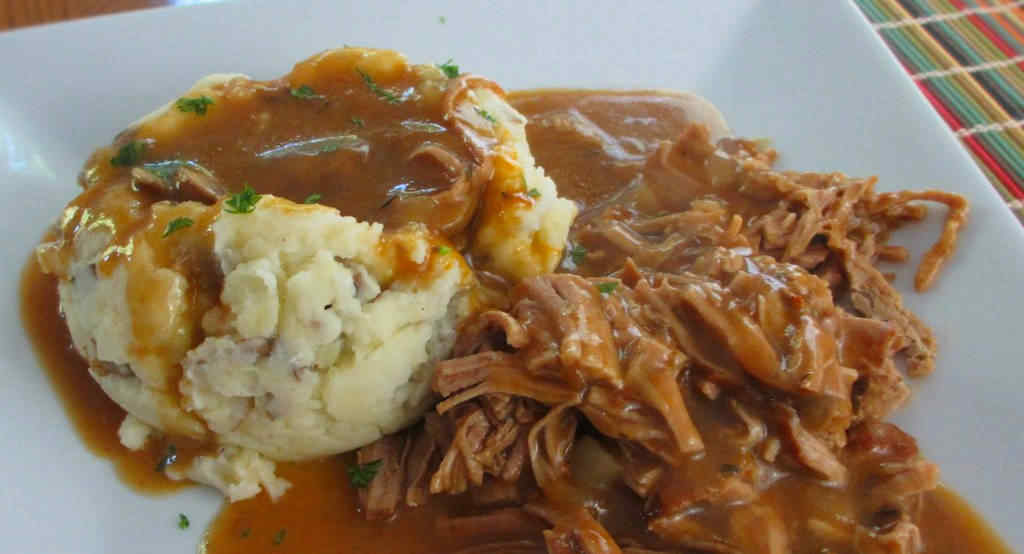
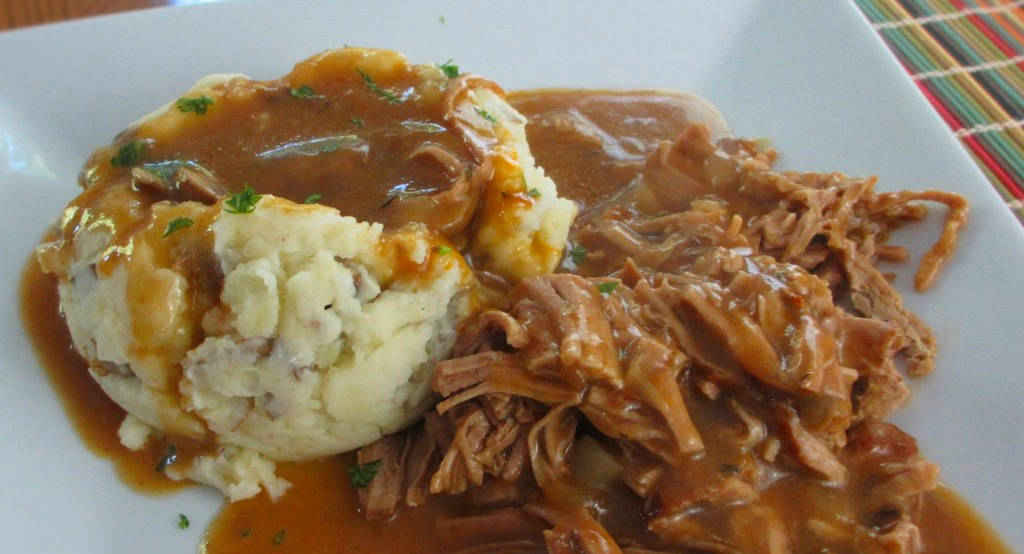
I was hankerin’ for some comfort food. Something that cooks slow all day, filling the house with a delicious aroma. This mushroom pork tenderloin was it. You know when you’ve hit the spot when all you hear are moans of delight when everyone starts eating. No one says a word. Perfect! I could sit down and eat a bowl of the mushroom gravy by itself, actually.

Mushroom Pork Tenderloin

Meat And Potatoes

We served this mushroom pork tenderloin with garlic mashed potatoes and roasted carrots. The sauce is crazy good over mashed potatoes. Well, it’s crazy good no matter what.

I like to use my good ole trusty Dutch oven to make this tenderloin and pretty much darned near anything like it on my stovetop. It’s nice and big and sturdy. That extra weight helps it maintain and distribute heat perfectly. As an added bonus, it’s actually pretty easy to clean up too!

I always run to the store whenever pork tenderloin goes on sale. It’s the pork equivalent of filet mignon. I rarely buy pork loin, it’s tougher, bigger cousin. And I shy away from anything pre-seasoned. I prefer to season my meat my way at home. Just me. You do you!

Also try my crazy-yummy pork medallions in mushroom Marsala sauce.

Mushroom Pork Tenderloin
Print Pin
5 from 1 vote

Mushroom Pork Tenderloin

I was hankerin’ for some comfort food. Something that cooks slow all day, filling the house with a delicious aroma. This mushroom pork tenderloin was it. 
Course Main
Cuisine American
Keyword mushroom, pork
Prep Time 15 minutes
Cook Time 5 hours 20 minutes
Total Time 5 hours 35 minutes
Servings 6
Calories 900kcal

Equipment

Ingredients

Instructions

  • Add 1 tablespoon of the oil to a Dutch oven over high heat.
  • Add the tenderloins and quickly sear on all sides. You’re not trying to cook them, just get a little color.
  • Reduce heat to medium-low.
  • Combine soups on a bowl and pour into the Dutch oven.
  • Cover and cook for 4 hours or until pork begins to fall apart.
  • Heat remaining oil over high heat in a small skillet.
  • Add the mushrooms.
  • Stirring, saute the mushrooms until they start to soften.
  • Remove mushrooms from heat and sprinkle with thyme.
  • Toss to mix.
  • Add mushrooms to Dutch oven and stir.
  • Cook 30 minutes-1 more hour until the pork completely falls apart.
  • Remove any large pieces of pork and chop or shred. Return them to the pot.
  • Serve with mashed potatoes and loads of the gravy.

Notes

The gravy is delicious and is great for mashed potatoes!

Nutrition

Calories: 900kcal | Carbohydrates: 12g | Protein: 135g | Fat: 31g | Saturated Fat: 10g | Trans Fat: 1g | Cholesterol: 403mg | Sodium: 1760mg | Potassium: 2757mg | Fiber: 1g | Sugar: 1g | Vitamin A: 25IU | Vitamin C: 1mg | Calcium: 52mg | Iron: 8mg

Nutritional values are approximate.
Roasted Garlic Mashed Potatoes

These roasted garlic mashed potatoes are outstanding. The roasted, savory flavor of these potatoes make them the perfect side. They also pass the ‘gravy lake test’, holding a nice big serving of gravy without getting runny. Rule #1: You can’t have too much gravy. Rule #2: You can’t have too much mashed potatoes.

Roasted Garlic Mashed Potatoes

Fantastic Flavor In Every Bite

I roasted the garlic for these mashed potatoes in the oven. You can also make a big batch of roasted garlic in no time by using your slow cooker. Either way, you’ll get that wonderful garlic aroma and flavor!

We served these with the delicious gravy from the mushroom pork tenderloins we made. And roasted carrots on the side.

Roasted Garlic Mashed Potatoes
Print Pin
5 from 1 vote

Roasted Garlic Mashed Potatoes

These roasted garlic mashed potatoes are outstanding. The roasted, savory flavor of these potatoes make them the perfect side. They also pass the ‘gravy lake test’, holding a nice big serving of gravy without getting runny.
Course Side
Cuisine American
Keyword garlicky, mashed potatoes
Prep Time 10 minutes
Cook Time 1 hour 40 minutes
Total Time 1 hour 50 minutes
Servings 8
Calories 110kcal
Author Found on the web

Ingredients

Instructions

  • Preheat oven to 350 F.
  • Cut the top off the head of garlic and place the head onto a small piece of aluminum foil.
  • Drizzle the garlic with oil and seal inside the foil.
  • Place in the oven and bake for 1 hour or until very tender.
  • Remove the garlic from the oven. Open the pouch and let it cool.
  • Meanwhile, bring a large pot of salted water to a boil.
  • Add the potatoes and boil until tender, 15-20 minutes.
  • Drain and let cool slightly.
  • Lightly chop the potatoes and return them to the (now empty) large pot.
  • Add in the remaining ingredients except for the parsley. Also squeeze in the cloves of roasted garlic.
  • Blend with a handheld mixer or potato masher until desired consistency is achieved.
  • Serve garnished with parsley.

Notes

You can also steam or roast the potatoes.

Nutrition

Calories: 110kcal | Carbohydrates: 23g | Protein: 3g | Fat: 1g | Saturated Fat: 1g | Cholesterol: 2mg | Sodium: 36mg | Potassium: 518mg | Fiber: 2g | Sugar: 2g | Vitamin A: 42IU | Vitamin C: 8mg | Calcium: 47mg | Iron: 1mg

Nutritional values are approximate.
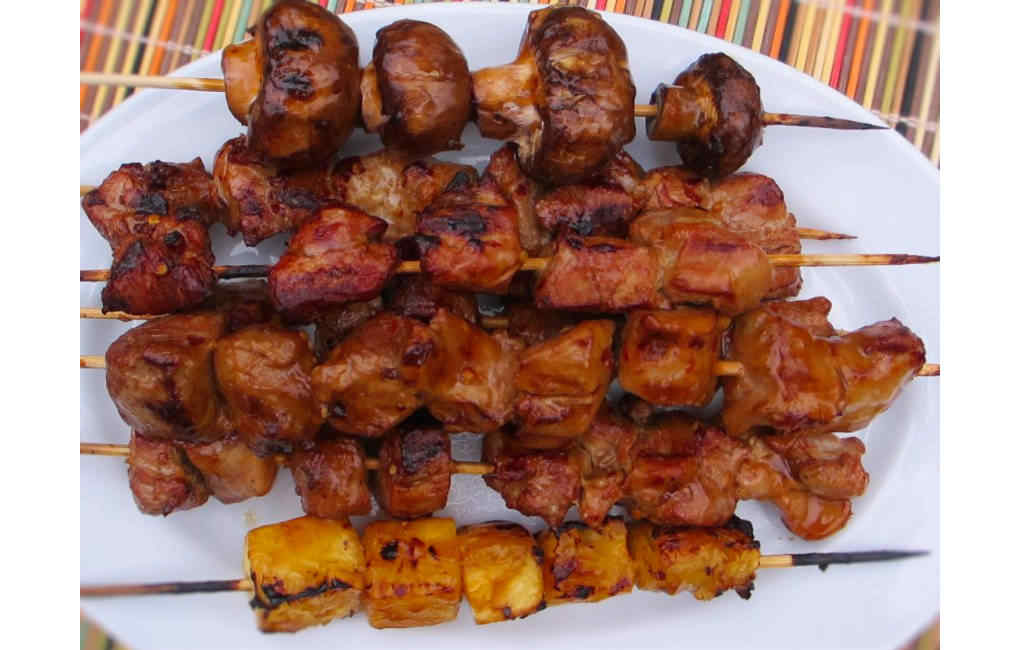
Grilled Teriyaki Pork Kabobs

My goodness, these grilled Teriyaki pork kabobs came out tasty! Just the perfect teriyaki flavor.. yummy! I can stop my search for the perfect teriyaki marinade and basting sauce now because this is the one! The marinade isn’t just great on pork, either. Cubes of chicken or steak are fantastic too, so feel free to mix it up. You can also add other vegetables, such as broccoli.

Grilled Teriyaki Pork Kabobs

A Great Flavor Combination

Serve the grilled Teriyaki pork kabobs with any remaining basting sauce over rice. You’ll find that these delicious skewers are a taste sensation. They are easy to make and feed a crowd.

If you don’t have a grill, just cook the meat and veggies in a wok. You can also stir-fry them in a large skillet.

Get yourself a good set of grill tools for these kabobs and anything else you grill. You won’t regret the extra few bucks they cost over the cheap ones that you’re going to have to replace in a few years. I have had several sets of Weber tools for decades and have yet to replace a single one.

Also try my grilled Teriyaki chicken fried rice.

Grilled Teriyaki Pork Kabobs
Print Pin
5 from 1 vote

Grilled Teriyaki Pork Kabobs

My goodness, these grilled Teriyaki pork kabobs came out tasty! Just the perfect teriyaki flavor.. yummy! I can stop my search for the perfect teriyaki marinade and basting sauce now because this is the one! The marinade isn’t just great on pork, either. 
Course Main
Cuisine Asian
Keyword grilled, pork, Teriyaki
Prep Time 15 minutes
Cook Time 3 hours 3 minutes
Total Time 3 hours 18 minutes
Servings 4
Calories 750kcal

Equipment

  • Skewers soaked in water for at least an hour

Ingredients

For the marinade

For the basting sauce

For the kabobs

  • pork tenderloin cubes from above
  • 12 mushrooms
  • 1 sweet onion cut into wedges
  • 1 pineapple cut into bite-sized cubes

Instructions

  • Combine all of the marinade ingredients.
  • Add pork and place into a large resealable baggie or container and refrigerate for at least 3 hours.
  • Prepare the basting sauce by combining all ingredients in a saucepan over medium heat.
  • Bring to a boil, then reduce heat to a simmer and simmer for 5 minutes.
  • Remove from heat.
  • Set up your grill for indirect and direct cooking.
  • Thread meat and vegetables onto skewers. I like to keep my ingredients separate (some people don’t like mushrooms, or some ingredients may need a little longer to cook), but feel free to alternative them on a single skewer.
  • Sear over direct heat then move to indirect heat and cook until the pork reaches 150 F, turning and basting with the basting sauce often.

Notes

If you don’t have a grill, just cook the meat and veggies in a wok. Serve with any remaining basting sauce over rice.

Nutrition

Calories: 750kcal | Carbohydrates: 47g | Protein: 100g | Fat: 18g | Saturated Fat: 6g | Trans Fat: 1g | Cholesterol: 295mg | Sodium: 1605mg | Potassium: 2388mg | Fiber: 5g | Sugar: 31g | Vitamin A: 239IU | Vitamin C: 114mg | Calcium: 90mg | Iron: 6mg

Nutritional values are approximate.