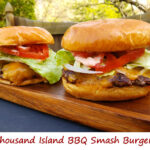
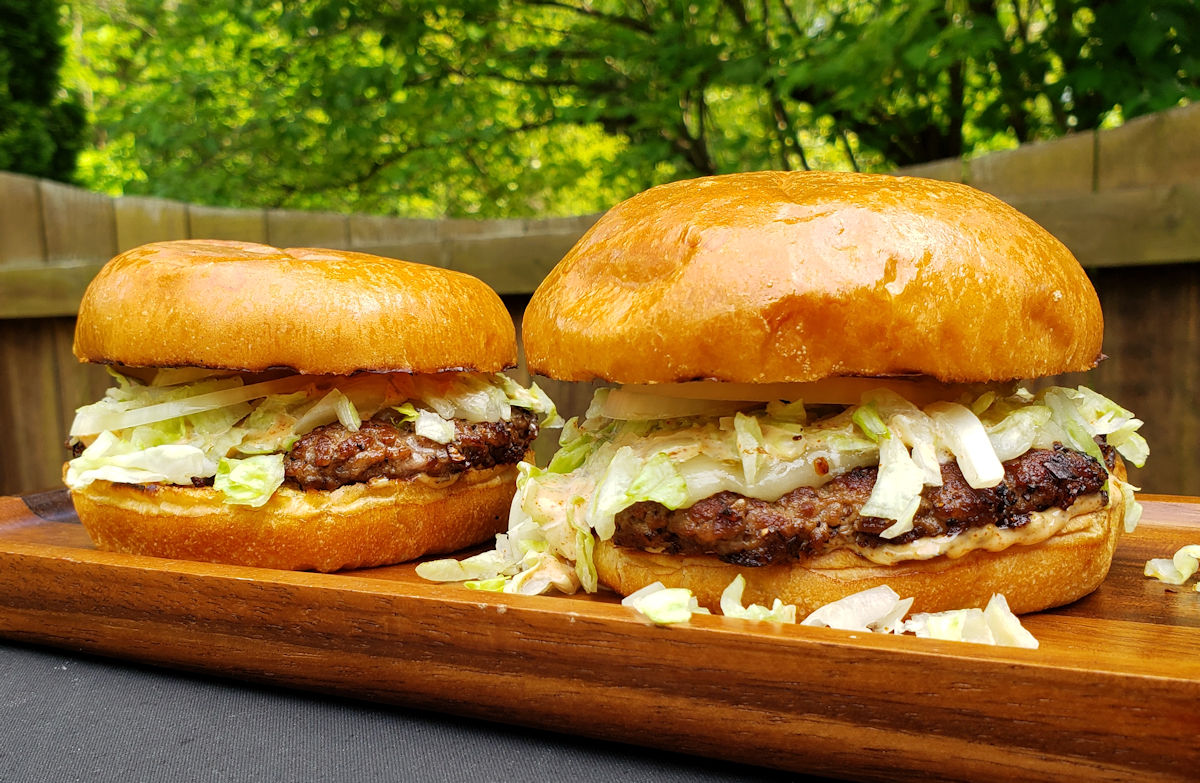
Smash Burger Patty Melts

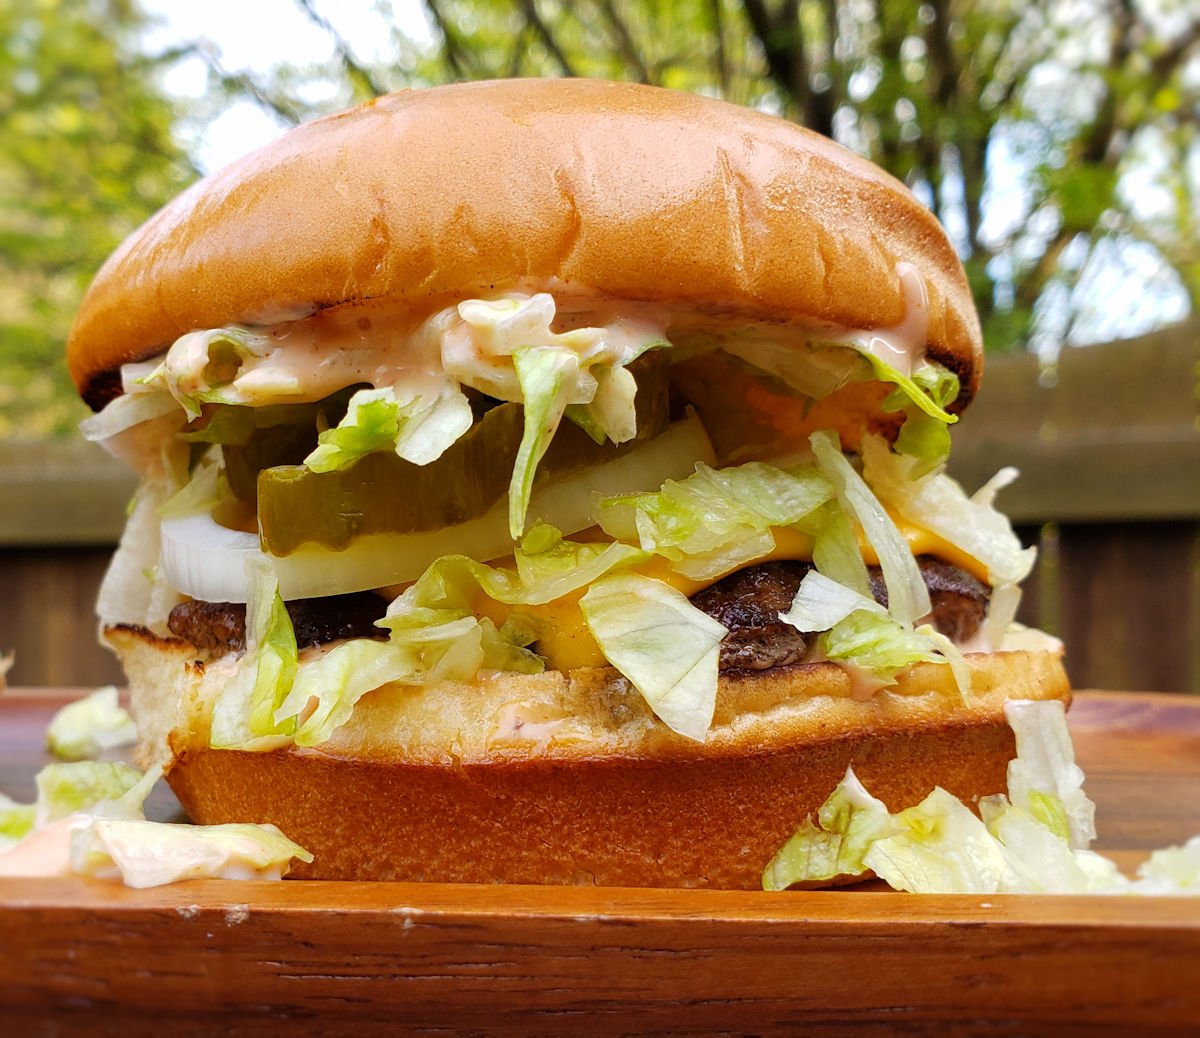
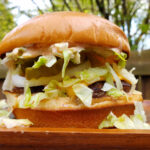
My wife and I had lunch at a burger pub the other day. She ordered their patty melt. It looked (and was) delicious. She said it was the best patty melt she’d ever had. “A challenge!” I thought. Time for me to get to making something even better. At home. And I did. These smash burger patty melts are now the best patty melts she’s ever had. They’re tastier. Juicier. And less messy. And made with our favorite, smash burgers instead of overly-thick patties.

Smash Burger Patty Melts

Griddled To Perfection

To make smash burger patty melts, you’ll need some sort of griddle or grill pan or even cast iron skillet for your grill. I use a big ole cast iron griddle. Yes, I have one for most of my grills because they’re great for more than just burgers. I find myself using them all of the time. They don’t take up the entire grill surface so I can still cook on the grates too if I need.

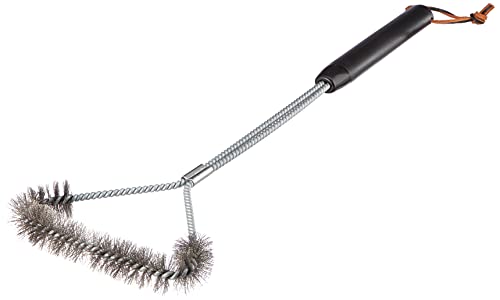
I don’t go crazy nuts obsessing about it, but I like to keep my griddle pretty clean. Especially if I’m toasting bread. No one wants yesterday’s chicken on today’s Texas toast. I use these scrubby pads attached to a long handle holder that prevents me from burning myself.

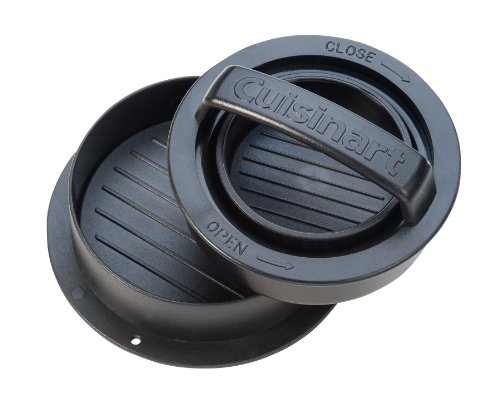
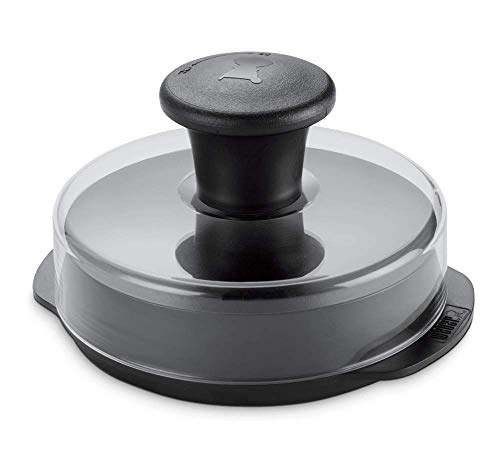
Last, I gotta get my patties thin and spread out. I use a burger press. I wrap the bottom in foil for easy clean up. This press makes for fantastic smash burgers with the right thickness so I get that little crunch around the edges. Perfect!

Also try my not-so-plain plain ole smash burgers and my pub sauce smash burgers!

Smash Burger Patty Melts
Print Pin
5 from 1 vote

Smash Burger Patty Melts

Flavor-packed patty melts that never disappoint!
Course Main
Cuisine American
Keyword burgers
Prep Time 15 minutes
Cook Time 30 minutes
Servings 4
Calories 787kcal

Equipment

Ingredients

For the sauce

For the burgers

  • mayonnaise
  • 8 pieces Texas Toast
  • 4 tablespoons unsalted butter cut into squares, divided
  • 1 large sweet onion sliced thin
  • 2 tablespoons Worcestershire sauce
  • 20 ounces ground beef I prefer 5 ounce patties for this. You don't have to be super accurate with the weight.
  • your favorite burger seasoning to taste. Salt and pepper works great too
  • 4 slices Swiss cheese
  • 4 slices pepper jack cheese

Instructions

For the sauce

  • Whisk together all ingredients in a small bowl.
  • Cover and refrigerate until ready to use.

For the burgers

  • Fire up your grill with a griddle or grill pan over direct medium-high heat.
  • Clean your griddle well. I use a brush and water, it works better than a scraper. Just be careful adding water to a hot griddle. DO NOT have any body parts near the griddle when you add the water as it will instantly create a cloud of very hot steam. Then scrub, scrub, scrub. Repeat as necessary. You want the griddle clean to toast the bread.
  • Lightly spread a thin layer of mayonnaise on one side of each slice of bread. Working in batches if necessary, lay the bread mayo-side down on the hot griddle and toast for 2-3 minutes or until lightly brown and crunchy.
  • Flip and lightly brown the non-mayo sides too. Remove to a plate for the final assembly step.
  • Once the griddle is hot add 2 tablespoons of butter. Once melted add the onion and cook for 20 minutes or longer, until they are golden brown and caramelized. Stir and flip often with a spatula or tongs. If they start to burn reduce the heat. If they get too dry add a bit more butter.
  • Stir in the Worcestershire sauce and cook for 1 more minute. Remove to a bowl and cover with foil or a plate to keep warm.
  • Form burger into 4 5-ounce patties. Don't pack them tightly, just get them lightly shaped.
  • Season beef on both sides. Don't be shy with it.
  • Add remaining 2 tablespoons of butter to the griddle. Add the burgers. Let them cook for 3 minutes then smash out as thinly as possible using a burger press.
  • Continue cooking burgers until you see a bit of a crunchy edge. Flip.
  • Cook burgers another 3 minutes. Add 1 slice of Swiss and 1 slice of pepper jack to each patty.
  • Divide the onion between the patties. Grill another minute or two to melt the cheese.
  • Divide sauce between the non-mayonnaise sides of the bread. Use a little or a lot, it's up to you.
  • Add the cooked patties and top bread slices and serve!

Notes

This recipe is best made using a griddle on a gas or charcoal grill. You can also use a griddle grill. If you don’t have a griddle you can use a large cast iron skillet, but you’ll have to cook the burgers in batches.

Nutrition

Calories: 787kcal | Carbohydrates: 12g | Protein: 35g | Fat: 66g | Saturated Fat: 27g | Polyunsaturated Fat: 10g | Monounsaturated Fat: 22g | Trans Fat: 2g | Cholesterol: 173mg | Sodium: 621mg | Potassium: 620mg | Fiber: 1g | Sugar: 8g | Vitamin A: 742IU | Vitamin C: 9mg | Calcium: 369mg | Iron: 4mg

Nutritional values are approximate.

Quick Fix Desert Heat Chips

I find myself being un-impressed with most store-bought ‘spicy’ potato chips. Yeah, some are spicy, but they don’t taste good. And some taste great, but they sure aren’t spicy. The solution? Make some quick fix Desert Heat potato chips. Done in minutes, spiced just like I want, these are the chips I was searching for! I owned these chips. I could put as much darned seasoning on there as I want! All I need are some chips and Buffalo Wild Wings Desert Heat Wing Seasoning!

Quick Fix Desert Heat Chips

Ruffled Chips For The Win

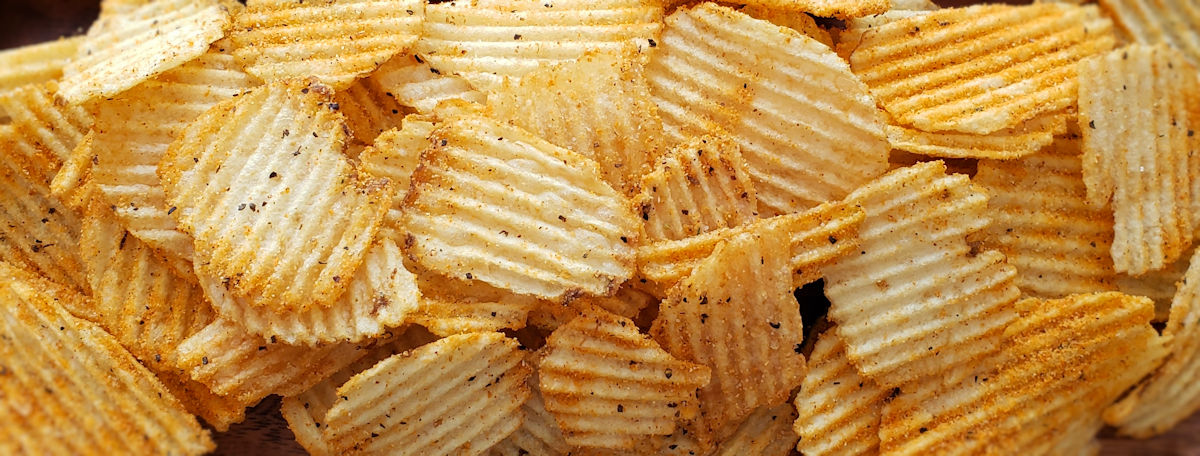
I prefer to use wavy ruffled chips any time I make my quick fix Desert Heat potato chips. The thick chips hold up to being tossed in the seasoning. And the ridges give the seasoning more and more places to cling to, making sure I get nothing but flavor in each and every bite!

Not that I mean to over-stress it, but I will mention you don’t need any fancy fru-fru chips for this recipe. In fact, I’d stay away from them. You want wavy chips, preferably. And frankly, you want chips that are a bit oily. Yep. Once heated, the chips will release that oil and that’s what you need to get the seasonings stuck on there good!

Also try my quick fix barbecue chips.

Quick Fix Desert Heat Chips
Print Pin
5 from 1 vote

Quick Fix Desert Heat Chips

I prefer to use wavy ruffled chips any time I make my quick fix Desert Heat potato chips.
Course Appetizer, Snack
Cuisine American
Keyword potato chips, quick fix, spicy
Prep Time 15 minutes
Cook Time 5 minutes
Servings 4
Calories 452kcal

Ingredients

Instructions

  • Preheat your oven to 275 F.
  • Spread chips out onto a baking sheet. Bake for 5 minutes. You should see that the oils in the chips have come to the surface.
  • Gently transfer chips to a large bowl and sprinkle with the seasoning. Use a spatula to carefully stir to coat.
  • Serve immediately.

Notes

Be gentle when stirring to avoid breaking the chips.

Nutrition

Calories: 452kcal | Carbohydrates: 46g | Protein: 5g | Fat: 29g | Saturated Fat: 3g | Polyunsaturated Fat: 7g | Monounsaturated Fat: 16g | Trans Fat: 1g | Sodium: 448mg | Potassium: 1020mg | Fiber: 3g | Sugar: 1g | Vitamin C: 18mg | Calcium: 18mg | Iron: 1mg

Nutritional values are approximate.

Easy Spicy Grilled Potatoes

This is my go-to dish when I am looking for a quick side for whatever I’m grilling (I love my Weber grills!) for dinner. These easy spicy grilled potatoes are packed with flavor. Yeah, they have a kick, but I control how much of a kick I’m in the mood for that day. The potatoes come out cooked perfectly. Creamy inside, with a light crunchy grilled exterior. Pre-cooking the potato ensures they all get cooked evenly. There’s nothing worse than biting into a pile of potatoes and finding one that is under-cooked. That’s potato sadness there. No one wants potato sadness!

Easy Spicy Grilled Potatoes

Pre-Cooked Potatoes Are Easier

Since I’m already grilling I prefer to pre-bake the potatoes for these easy grilled spicy potatoes on the grill. They can also be done ahead of time in the oven at 400 F. For bigger potatoes I like to use potato nails to make sure the insides get done perfectly.

You can’t make these potatoes without a grill basket. The stainless steel ones from Weber have lasted me forever and the large-sized ones hold a ton of potatoes (or whatever I’m grilling).

The potatoes haven’t done anything to you so be gentle when you flip them. Just one time is all you need.

Also try some grilled green beans!

Easy Spicy Grilled Potatoes
Print Pin
5 from 1 vote

Easy Spicy Grilled Potatoes

This is one of those to-taste recipes.
Course Side
Cuisine American
Keyword grilled, potatoes
Prep Time 10 minutes
Cook Time 1 hour 15 minutes
Servings 4
Calories 146kcal

Ingredients

Instructions

  • Fire up your grill for indirect cooking. You want the temperature at the grates to be 350-400 F.
  • Rinse off the potatoes and pat dry.
  • Use a knife to poke 3-4 holes in the tops of the potatoes, going about 1/2 of the way into the potato.
  • If you’re using potato nails insert them now.
  • Drizzle the potatoes with just a bit of oil.
  • Use your hand to rub the oil all over the potato. If you don't want to get your hands oily just use a brush.
  • Sprinkle the potatoes with salt. Don’t be shy with it and make sure you get all sides.
  • Transfer the potatoes to the grill and cook for about 30-45 minutes. If you're not sure how consistent or high your grill temperature is, I recommend checking them after 30 minutes.
  • The potatoes are done when you can insert a knife or skewer and it enters the flesh but still meets with some resistance. You aren't fully cooking them, just getting them just soft. You don't want them to fall apart later when you cut them.
  • Remove and let cool slightly.
  • Meanwhile, crank up your grill for direct cooking over medium-high heat.
  • Cut the potatoes in 1/4" – 1/2" cubes and transfer to a large bowl.
  • Add a little splash of oil to the potatoes and stir gently to coat.
  • Sprinkle with salt, pepper, cayenne and garlic powder. My suggestion is don't be shy with any of them, but add them all to taste.
  • Stir gently to coat.
  • Transfer the potatoes to a grill basket and place on a hot grill over direct heat.
  • Grill the potatoes until they start to get golden brown with a light char on the bottoms.
  • Flip gently and cook until golden brown on the other side.
  • Remove from grill and transfer the potatoes to a platter.
  • Sprinkle with chopped parsley and serve.

Notes

If you want a less-spicy version, substitute paprika for the cayenne.
This is a great recipe for using up those odd-shaped potatoes at the bottom of a bag of potatoes.

Nutrition

Calories: 146kcal | Carbohydrates: 33g | Protein: 4g | Fat: 0.1g | Saturated Fat: 0.05g | Polyunsaturated Fat: 0.1g | Monounsaturated Fat: 0.003g | Sodium: 9mg | Potassium: 769mg | Fiber: 2g | Sugar: 1g | Vitamin A: 2IU | Vitamin C: 11mg | Calcium: 24mg | Iron: 2mg

Nutritional values are approximate.

Big Mac Hot Dogs

I wanted to make these Big Mac hot dogs the minute I saw the idea floating around in the online recipe world. First, I love Big Macs. I make a few crazy variations on them at home. I’ve made Big Mac smash burgers, subs, hoagies and sliders! I don’t need an excuse to make Big Macs. These hot dogs taste a lot like the fast food favorite and man, were they fun to make! I was smiling the entire time because it felt like I was making the real deal! They are cool and yummy at the same time!

Big Mac Hot Dogs

And More Stuff. Have It Your Way.

Of course one of the advantages of making Big Mac hot dogs yourself is that you can kinda play around a bit. Me, I like a lot of onions and lettuce. Oh sure, give me a few extra pickles too. And extra of that special sauce. I want mine messy. The messier the better. Like sauce-running-down-the-front-of-my-arms messy. That’s the right kind of messy. My homemade version of the classic burgers are messy too.

I almost always use Blue Plate mayonnaise in the dishes I make. I think it is the best around. If you can’t find it locally you can pick it up online for a fair price.

Also try my Big Mac meatball subs.

Big Mac Hot Dogs
Print Pin
5 from 1 vote

Big Mac Hot Dogs

One of the most fun things I've made!
Course Main
Cuisine American
Keyword hot dogs
Prep Time 15 minutes
Cook Time 15 minutes
Servings 4
Calories 540kcal

Ingredients

For the sauce (you might have more than you need)

For the hot dogs

  • 4 hot dog buns top-sliced
  • 1 egg white whisked
  • 1 tablespoon sesame seeds
  • 4 hot dogs all-beef, preferred
  • 4 slices American cheese
  • 16 dill pickle chips
  • ½ cup onion minced
  • 1 cup iceberg lettuce shredded

Instructions

For the sauce

  • Whisk together all ingredients in a small bowl. Refrigerate until ready to use.

For the hot dogs

  • Note: Preheat your oven to 350 F to bake the buns.
  • Cook the hot dogs as desired. I grilled mine, but you can also steam them, pan fry them, bake them (you do have the oven on!) or even microwave them.
  • Lightly brush the tops of the buns with the egg white. Sprinkle with the sesame seeds. Bake in a preheated 350 F oven or on a grill for 3-4 minutes.
  • Slather the insides of the buns with the sauce. Don't be shy.
  • Add a piece of cheese to each bun.
  • Add a hot dog to each bun.
  • Slide 4 dill pickle chips alongside each hot dog.
  • Sprinkle tops of dogs with onion and lettuce.
  • Add more sauce if desired.
  • Serve.

Notes

Best served with fries!

Nutrition

Calories: 540kcal | Carbohydrates: 37g | Protein: 15g | Fat: 37g | Saturated Fat: 10g | Polyunsaturated Fat: 15g | Monounsaturated Fat: 10g | Trans Fat: 0.3g | Cholesterol: 53mg | Sodium: 1418mg | Potassium: 280mg | Fiber: 2g | Sugar: 6g | Vitamin A: 392IU | Vitamin C: 3mg | Calcium: 339mg | Iron: 3mg

Nutritional values are approximate.

Crispy Fries using a Fry Daddy Fryer

This is my go-to method for making a small batch of the best-tasting, crispiest French fries. Making delicious crispy fries using a Fry Daddy Fryer takes just a little bit of time and just a handful of ingredients. The end result is mouth-wateringly good and hard to resist. Most double-fried recipes require two different cooking temperatures. But, you can’t adjust the temperature on a Fry Daddy. Don’t let that worry you. These will be the best fries you’ve made. Or had.

Crispy Fries using a Fry Daddy Fryer

The Keys To Perfect Fries Every Time

There are two key steps to making sure these crispy fries using the Fry Daddy Fryer come out perfectly. First, make sure you rinse the raw potatoes in cold water and keep rinsing until the water is clear. You want all that starch gone, as if you’re making rice. Second, let the fries come to room temperature (or near it) before the second frying.

The fries will crisp up just a bit more after they come out of the fryer so it’s ok to remove them just before you think they’re like you want them. It’s not critical, but after doing these a time or two you’ll get the timing for what’s best for you. Don’t worry, they’ll be great no matter what!

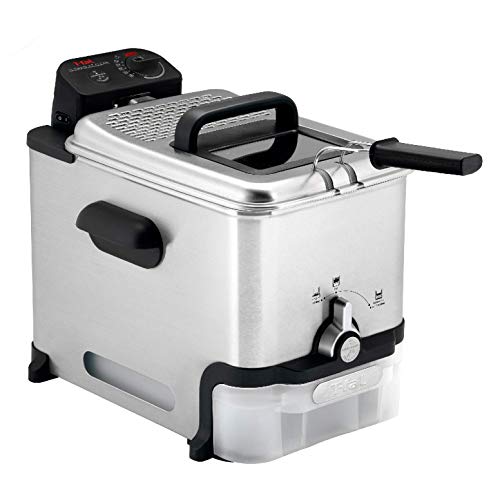
The Presto Fry Daddy is perfect for making smaller batches of food. It only uses a few cups of oil and comes to temperature quickly. Clean-up is easy too!

You’ll want to dip your fries in my copycat Freddy’s fry sauce, for sure!

Crispy Fries using a Fry Daddy Fryer
Print Pin
5 from 1 vote

Crispy Fries using a Fry Daddy Fryer

This is my go-to method for making a small batch of the best-tasting, crispiest French fries.
Course Side
Cuisine American
Keyword deep-fried, fries
Prep Time 15 minutes
Cook Time 30 minutes
Servings 4
Calories 2148kcal

Ingredients

  • 4 medium Russet potatoes cleaned, peeled if desired
  • 4 cups vegetable oil for frying
  • kosher salt or your favorite fry seasoning, to taste

Instructions

  • Fill a large bowl with cold water.
  • Slice the potatoes into thin, 1/8"-1/4" sticks. Try to keep them the same thickness.
  • Place fries into the water. Add more water if needed to keep them fully submerged.
  • Add the oil to the fryer and plug it in according to the manufacturer's instructions.
  • Drain the fries. Refill with more cold water. Stir the potatoes. Repeat this step (draining, refilling) until the water is no longer cloudy. This usually just takes me two times.
  • Drain the potatoes well and transfer to a large kitchen towel. Pat dry. Make sure you get them dry or they will splatter when you add them to the hot oil.
  • Working in batches if needed, fry the potatoes until just starting to turn a light brown. You are not cooking them fully, you do not want them to be golden brown yet. Do not over-crowd the fryer.
  • Remove the fries from the fryer using the slotted spoon that comes with the unit. Place on a wire rack over a baking pan to drain. Spread them out evenly.
  • Let the fries cool to room temperature, about 10 minutes.
  • Working in batches if necessary, return the fries to the fryer and finish cooking them. You want them nice and lightly golden brown. I've found that you can actually crowd the fryer a little more than usual for this step. The fries are mostly cooked, you're just crisping them up and giving them some color so a little extra potatoes in there isn't going to hurt. Just don't over-fill the fryer.
  • Remove the fries to the wire rack again to drain. Season well with salt. I prefer to transfer the fries from the rack to a large bowl, sprinkle them with the salt, and toss to season evenly.
  • Serve immediately.

Notes

If you haven’t tried your fries dipped in mayonnaise, now’s a great time to give it a whirl! 

Nutrition

Calories: 2148kcal | Carbohydrates: 38g | Protein: 5g | Fat: 224g | Saturated Fat: 17g | Polyunsaturated Fat: 63g | Monounsaturated Fat: 142g | Trans Fat: 1g | Sodium: 11mg | Potassium: 888mg | Fiber: 3g | Sugar: 1g | Vitamin A: 2IU | Vitamin C: 12mg | Calcium: 28mg | Iron: 2mg

Nutritional values are approximate.

Sweet and Sassy Red Potato Salad

If you put a paper plate loaded with fried chicken and this sweet and sassy red potato salad in front of me I’d honestly go for the potato salad first. And that’s saying a lot, because I love fried chicken almost more than anything. This salad is different, mostly thanks to the addition of pickle juice in the dressing. That pickle edge takes this dish from great to amazing.

Sweet and Sassy Red Potato Salad

The Perfect Side Dish

This sweet and sassy red potato salad would be the perfect side dish for a family get-together. Or a potluck. Or just a good old fashioned picnic. It travels well and tastes amazing. It’s perfect cold, and just as good (if not a tad better) served warm. You can’t go wrong with it.

I almost always use Blue Plate mayonnaise in the dishes I make. I think it is the best around. If you can’t find it locally you can pick it up online for a fair price.

I don’t like to boil my potatoes when making potato salad. I don’t like them little taters rolling around in the hot water, bumping each other, scraping each other’s skin off (yikes, that sounds even worse than I thought). Instead, I prefer to steam them. So I load up a steam basket, put it above a pot of slowly boiling water, and let it steam until the potatoes are just tender. The skins are left perfectly intact.

Sweet and Sassy Red Potato Salad
Print Pin
5 from 1 vote

Sweet and Sassy Red Potato Salad

If you put a paper plate loaded with fried chicken and this sweet and sassy potato salad in front of me I'd honestly go for the potato salad first.
Course Side
Cuisine American
Keyword potato salad, spicy, sweet
Prep Time 20 minutes
Cook Time 15 minutes
Servings 8
Calories 177kcal

Ingredients

For the salad

  • 2 pounds small red potatoes
  • 2 large eggs
  • ½ cup sweet pickles chopped fine
  • ½ cup sweet onions chopped fine
  • ¼ cup celery chopped fine
  • ¼ cup fresh chives chopped fine, divided

For the dressing

Instructions

For the salad

  • Steam or boil the potatoes until done. I prefer steaming them because it keeps the skins intact. Do not peel. Let the potatoes cool and cut into quarters.
  • Meanwhile, hard-boil and peel the eggs. Chop fine.
  • In a large bowl, gently combine the potato quarters, pickles, eggs, onion, celery and most of the chives (reserving some for garnish later).
  • Prepare the dressing (see below) and pour over the potato mixture. Gently stir with a spatula.
  • Serve warm or refrigerate for at least an hour if serving cold. Serve garnished with remaining chives.

For the dressing

  • In a medium bowl, whisk together the mayo, Dijon, pickle juice, and vinegar.
  • Add salt and pepper to taste and stir.
  • If the dressing is too thick add a bit more pickle juice and stir.

Nutrition

Calories: 177kcal | Carbohydrates: 4g | Protein: 2g | Fat: 17g | Saturated Fat: 3g | Polyunsaturated Fat: 10g | Monounsaturated Fat: 4g | Trans Fat: 0.04g | Cholesterol: 55mg | Sodium: 413mg | Potassium: 64mg | Fiber: 0.5g | Sugar: 3g | Vitamin A: 227IU | Vitamin C: 1mg | Calcium: 23mg | Iron: 0.4mg

Nutritional values are approximate.

Pub Sauce Smash Burgers

Oh man did these Pub Sauce smash burgers ever hit the spot. Juicy patties. Crisp fresh toppings. All with a wonderful sauce that is a combination of just about every good burger sauce you can think of. It’s reminiscent of a creamy steak sauce but it’s not too thick. It’s got a hint of sweetness. A bit salty. A little Asian-inspired flavor. And my favorite, garlic. Every bite is an umami-festival. These burgers are proof that even the simplest sauce can make a ‘plain’ burger something special. Sure, there are a few ingredients, but nothing fancy and nothing complicated.
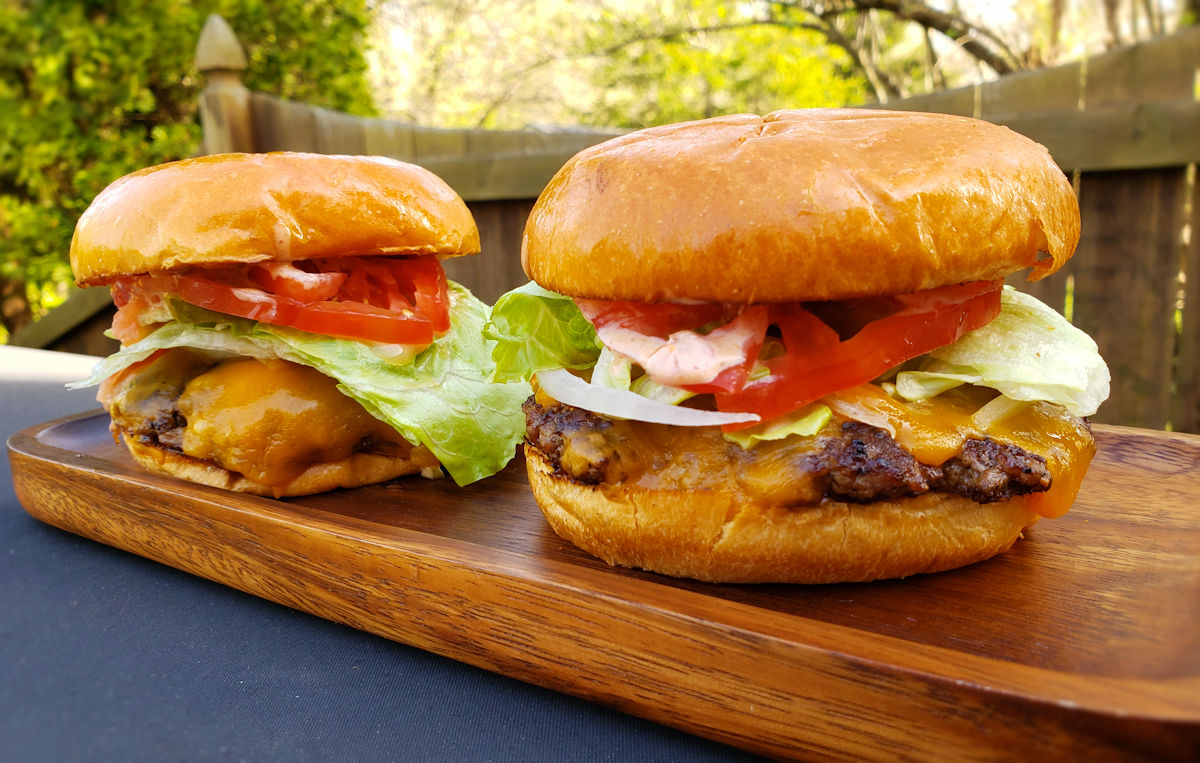
Pub Sauce Smash Burgers

Amazing Burgers

Making Pub Sauce smash burgers isn’t difficult. You don’t need a bunch of fancy equipment or a lot of time. Just a hot griddle and a burger press. Any griddle will do, whether it’s on a grill, cooktop, stove or even a standalone outdoor flattop. Just get those patties nice and thin and use quality fresh toppings. And a great sauce.
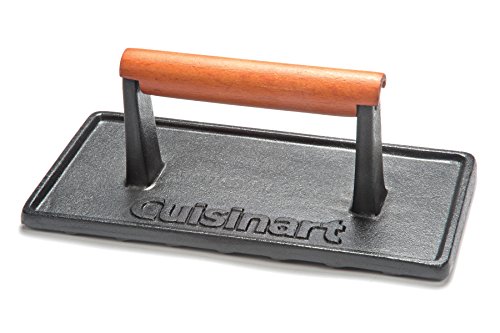
Also try my smash burger patty melts.

Pub Sauce Smash Burgers
Print Pin
5 from 1 vote

Pub Sauce Smash Burgers

Get those patties nice and thin and use quality fresh toppings.
Course Main
Cuisine American
Keyword smash burgers
Prep Time 15 minutes
Cook Time 20 minutes
Servings 4
Calories 831kcal

Ingredients

For the sauce

For the burgers

  • 1 pound ground beef formed into four 4-ounce patties
  • kosher salt to taste
  • ground black pepper to taste
  • 4 hamburger buns
  • 4 slices cheddar cheese or American cheese
  • 4 pieces iceberg lettuce torn or chopped
  • 4 slices tomato
  • 4 slices onion
  • 6 slices dill pickle chips

Instructions

For the sauce

  • Combine all ingredients. Refrigerate until ready to use.

For the burgers

  • Fire up your grill for direct medium-high heat cooking. You can also use an outdoor or indoor griddle or a large skillet on a stove.
  • Season the burger patties with salt and pepper on both sides. Don’t be shy with the seasoning.
  • Place the patties on grill. Smash down with a spatula or grill press.
  • Grill the burgers for 2-3 minutes per side.
  • Top the patties with cheese and grill until they’ve reached your desired doneness and the cheese is melted. Remove from the grill.
  • Toast the buns as desired.
  • Make the burgers by first spreading some of the sauce on the bun bottoms.
  • Add a burger patty.
  • Add onion, lettuce, tomato and pickle slices.
  • Slather the top bun with more of the sauce and serve.

Notes

Patties 4-5 ounces in weight work best.

Nutrition

Calories: 831kcal | Carbohydrates: 35g | Protein: 31g | Fat: 63g | Saturated Fat: 17g | Polyunsaturated Fat: 21g | Monounsaturated Fat: 19g | Trans Fat: 1g | Cholesterol: 115mg | Sodium: 3111mg | Potassium: 868mg | Fiber: 4g | Sugar: 12g | Vitamin A: 1171IU | Vitamin C: 13mg | Calcium: 358mg | Iron: 5mg

Nutritional values are approximate.
Quick Fix Copycat McRib Sandwich

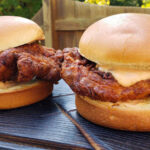
This isn’t some highfalutin’ food blog. I can barely afford to keep the lights on half of the time. I gotta cut corners wherever I can to keep this site up and running. So that’s why you’re not going to judge me when I say I really, really enjoyed this quick fix copycat of the McRib sandwich. I mean, you know what? It’s actually yummy! It kinda looks like the real thing and it’s fun to eat!

I should probably email the fine folks at On-Cor to apologize for doubting their products. Their BBQ rib patties look like the real McRib deal, sauce and all!

Quick Fix Copycat McRib Sandwich

They’re Yummy!

You can make 6 McRib sandwiches from a package of On-Cor BBQ Rib Patties. I actually prefer 2 patties per sandwich. I wrote the recipe to use only one per sandwich, but ….. well, use your own judgment. Make sure to get some of the sauce on there, too. The ribs actually come with more sauce then you’d think, plenty enough to heap on deep and that’s a good thing. That helps make these quick fix copycat McRib sandwiches double good!

And whatever you do, do not forget the pickles! That vinegary pickle goodness cuts thru the sweetness of the barbecue sauce.

Of course you serve this sandwich with copycat McDonald’s French fries!

Quick Fix Copycat McRib Sandwich
Print Pin
5 from 1 vote

Quick Fix Copycat McRib Sandwich

I actually prefer 2 patties per sandwich.
Course Main
Cuisine American
Keyword copycat, McRib, quick fix
Prep Time 4 minutes
Cook Time 45 minutes
Servings 6
Calories 797kcal

Ingredients

Instructions

  • Prepare rib patties per package instructions.
  • Toast the sub rolls if desired.
  • If you are baking the rib patties just add the rolls to the oven the last 5 minutes of cooking.
  • Place 1 patty on each sub roll bottom and add 1/3 cup of the sauce from the container the ribs came in.
  • Add 2 pickle chips and the top of the bun and serve.

Notes

Serve with napkins and a smile.

Nutrition

Calories: 797kcal | Carbohydrates: 100g | Protein: 27g | Fat: 21g | Saturated Fat: 6g | Polyunsaturated Fat: 0.03g | Cholesterol: 70mg | Sodium: 2111mg | Potassium: 711mg | Fiber: 2g | Sugar: 9g | Vitamin A: 51IU | Vitamin C: 1mg | Calcium: 88mg | Iron: 23mg

Nutritional values are approximate.
Copycat Freddy’s Burger Seasoning

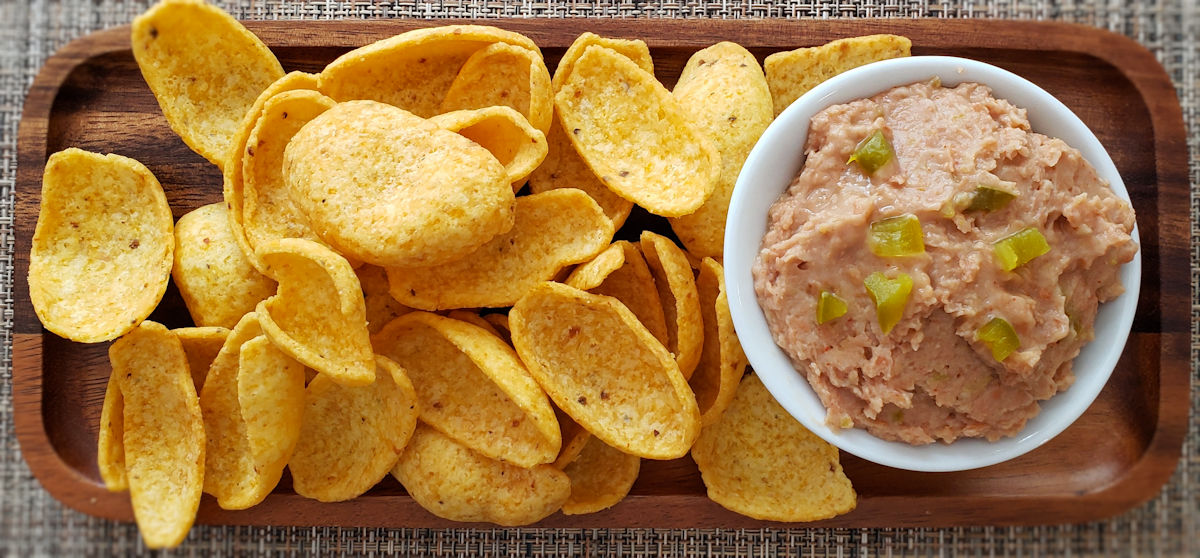
Chances are, if I have a grill fired up, there’s going to be a smash burger in my near future. They are my go-to quick-and-easy dinner. Simple. Fast. And oh so good. I want my patties to be packed with flavor. This copycat Freddy’s burger seasoning is an absolutely fantastic way to add great flavor to any burger. This stuff is like magic. A little smoky earthiness. A little garlicky and onion-y. Salty sweet. Add a little or a lot to your next burgers and you’ll be happy.

Copycat Freddy's Burger Seasoning

My Bad. But Still Good.

Oops on me, I didn’t have any turmeric for my copycat Freddy’s burger seasoning. No problem. I used dry mustard instead. You’re just looking for something with a little earthiness to it. Cumin would be great too, but my wife is not quite the big cumin fan, so mustard it was.

Also try some Freddy’s fry seasoning and burger sauce!

Copycat Freddy's Burger Seasoning
Print Pin
5 from 1 vote

Copycat Freddy’s Burger Seasoning

Add a little or a lot to your next burgers and you'll be happy.
Course Burger Sauce
Cuisine American
Keyword burger sauce
Prep Time 5 minutes
Total Time 5 minutes
Servings 12
Calories 112kcal

Ingredients

Instructions

  • Combine all ingredients.
  • To serve, sprinkle on both sides of burger patties just before cooking.

Notes

Keep in an airtight container until ready to use.

Nutrition

Calories: 112kcal | Carbohydrates: 27g | Protein: 1g | Fat: 1g | Saturated Fat: 0.2g | Polyunsaturated Fat: 0.4g | Monounsaturated Fat: 0.1g | Sodium: 11634mg | Potassium: 200mg | Fiber: 2g | Sugar: 21g | Vitamin A: 1970IU | Vitamin C: 1mg | Calcium: 30mg | Iron: 2mg

Nutritional values are approximate.
St Louis-Style Ribs using a Rotisserie

Rotisserie St Louis-style ribs are something I’ve been wanting to make for some time. I usually smoke my ribs, low-and-slow or high-and-fast on my smoker. This time I decided to give ribs on my gas grill a shot to see if I would like them as much as my ‘traditional’ method of cooking ribs. Well, by golly, I did and then some! I really enjoyed these ribs. They had great flavor. They were still moist and were as tender as could be. And they had this slight crunchiness to the skin that was just fantastic. Oh, and they were easy to make to boot! These were winner-winner ribs for sure!

St Louis-Style Ribs using a Rotisserie

Indirect Cooking

When you put your ribs on your grill it’s important that they do not sit (well, spin) over direct heat. If you look at the very far right of my picture above you’ll see that the very end of my rack got a little dark. That’s because there’s a burner right below that part of the ribs. I didn’t realize that until it was too late. I learned from my experience. The rest of the ribs were fantastic and I’d make them again and again (but I’d make sure that they were 100% in indirect heat!).

I put the apple juice into a cheap spray bottle and then spritz the ribs every 30 minutes or so. Spraying them is easier than using a brush and it makes sure I’m not brushing off any of the seasoning.

St Louis-Style Ribs using a Rotisserie
Print Pin
5 from 1 vote

St Louis-Style Ribs using a Rotisserie

These were winner-winner ribs for sure!
Course Main
Cuisine American
Keyword grilled, ribs, rotisserie
Prep Time 15 minutes
Cook Time 3 hours 30 minutes
Servings 4
Calories 630kcal

Ingredients

Instructions

  • Spread the mustard on all sides of the ribs. Just a light coating will do.
  • Sprinkle the rub over the ribs and pat gently to adhere. Don't forget to get the back and sides of the ribs.
  • Fire up your grill for rotisserie cooking over medium-low heat, around 300 F.
  • Place a large drip pan under the rotisserie.
  • Skew the ribs onto the rotisserie. Be careful doing this. Never put your hands where the sharp end can skewer you and not the ribs! Run the spit thru the first and second bone on one end. Bend the ribs slightly (like an 'S') and skewer between the next set of bones where you can skewer without breaking the ribs. Finally run the spit thru the last two bones. Secure with the rotisserie forks. It's ok if you have to remove the spit and try again to get the ribs nice and skewered down the middle. An extra hole or two isn't going to hurt anything!
  • Place the spit onto the grill and start the motor. Close the grill lid and cook for 2 – 3 hours or until the meat on the bones has pulled back from the ends by about 1/2". I like to spray my ribs with apple juice every 30 minutes while they spin. You can also brush them with the apple juice but do so carefully as you don't want to brush off your seasoning.
  • Brush the ribs with BBQ sauce and let cook another 10 minutes for the sauce to set.
  • Carefully remove the spit from the grill using thick grill gloves and remove the ribs.
  • Cover with foil and let rest 15 minutes before slicing and serving.

Notes

I like to use a smoky BBQ sauce to give these even more of a ‘hot off the smoker’ taste.

Nutrition

Calories: 630kcal | Protein: 35g | Fat: 53g | Saturated Fat: 17g | Polyunsaturated Fat: 9g | Monounsaturated Fat: 19g | Trans Fat: 1g | Cholesterol: 182mg | Sodium: 184mg | Potassium: 551mg | Calcium: 34mg | Iron: 2mg

Nutritional values are approximate.