Grilled Bacon and Cheese Stuffed Mushrooms

These grilled bacon and cheese stuffed mushrooms are the perfect grilled appetizer. Tender mushrooms that still have a little ‘bite’ to them. The cheese mixture is fantastic. Three different cheeses and a little seasoning combine with bacon and bell pepper for bite after bite of deliciousness. I say ‘bite’, but if you use small mushrooms you can pop these little treats into your mouth like popcorn. I did.

Grilled Bacon and Cheese Stuffed Mushrooms

Easy Cleanup

These disposable Dutch oven pans are perfect for making these grilled bacon and cheese stuffed mushrooms. They’re the perfect size for this recipe. They’re sturdy so you don’t have to worry about them collapsing. I use them for a lot of my grilled dishes.

You can pre-make these mushrooms by doing steps 1-8 then refrigerating the mushrooms for later. Then, when you’re ready to finish them, remove them from the fridge and let come to room temperature for 30 minutes before transferring to a hot grill to cook and heat thoroughly.

You can also make these on a Char-Broil Big Easy.

I highly recommend that you shred or grate your own cheese at home. Don’t buy the pre-shredded or pre-grated stuff. It has stuff added to it to keep it from sticking together. That ‘stuff’ affects how the cheese melts. Shred it yourself and use the good stuff.

Also try my grilled bacon-wrapped jalapeno-stuffed olives.

Grilled Bacon and Cheese Stuffed Mushrooms
Print Pin
5 from 1 vote

Grilled Bacon and Cheese Stuffed Mushrooms

These are the perfect easy appetizers.
Course Appetizer
Cuisine American
Keyword mushroom, stuffed
Prep Time 15 minutes
Cook Time 45 minutes
Servings 6
Calories 159kcal

Ingredients

  • 8 ounces mushrooms 12-16 small whole mushrooms
  • 4 tablespoons butter melted
  • kosher salt to taste
  • 4 ounces cream cheese softened
  • ½ cup Parmesan cheese shredded or grated
  • ¼ cup Mozzarella cheese shredded
  • 2 slices bacon (plus more for garnish if desired) cooked, chopped very fine
  • ¼ small green bell pepper (plus more for garnish if desired) chopped very fine
  • cayenne pepper to taste
  • paprika to taste
  • parsley chopped, for garnish, if desired

Instructions

  • Preheat your oven to 400 F.
  • Spray a small disposable pan with non-stick spray.
  • Clean the mushrooms and remove the stems.
  • Dip the mushrooms cap-side down into the butter and place onto the baking dish cap-side up.
  • Pour the remaining butter into the baking dish.
  • Sprinkle the mushrooms with salt. Bake 10 minutes. The mushrooms should just be soft and most of the water in them should be cooked out.
  • Remove from the oven.
  • Shake any remaining liquid out of the mushrooms into the pan and place them cap-side down.
  • Using a small spoon, gently fill each mushroom with the cheese mixture. Mound it up high. Return to the pan.
  • Sprinkle tops of the mushrooms with paprika.
  • Fire up your grill for cooking at 400 F.
  • Transfer the pan to the grill and cook 15-20 minutes or until the stuffing is hot.
  • Garnish with more bacon, bell pepper and parsley if desired and serve.

Notes

Try to use mushrooms that are equal in size so they are all done at the same time.

Nutrition

Calories: 159kcal | Carbohydrates: 3g | Protein: 8g | Fat: 13g | Saturated Fat: 7g | Polyunsaturated Fat: 1g | Monounsaturated Fat: 4g | Trans Fat: 0.01g | Cholesterol: 34mg | Sodium: 283mg | Potassium: 190mg | Fiber: 0.4g | Sugar: 2g | Vitamin A: 381IU | Vitamin C: 3mg | Calcium: 154mg | Iron: 0.3mg

Nutritional values are approximate.

Grilled Butterflied Chicken Legs

Grilled butterflied chicken legs aren’t new to the grilling scene but they have really grown in popularity since the price of wings has skyrocketed over the last few years. Even though wing prices are starting to come back down, I’ve found these legs to be a great (dare I say better?) main dish no matter what. They cook quickly and very evenly. They eat like thighs but are usually much cheaper. I sauced mine with an OG BBQ sauce. The sauce and skin got a nice little char on them, making this some of the best chicken I’ve had. Over charcoal or gas, this is a winner.

Grilled Butterflied Chicken Legs

It’s Really Easy. And Delicious.

Don’t be intimidated by the prospect of making grilled butterflied chicken legs. Butterflying the legs is super-easy, especially after you finish the first one. Just cut down the bone first, then alongside the bone, pulling the meat flat around it. I thought they looked a little odd at first, kind of ‘bat-like’ but the (minimal) amount of time it takes to do is worth it in the end. Butterflying also gives you a ‘peak inside’ as it were, allowing you to trim out any tough pieces before cooking. That’s a win.

I don’t mess around when it comes time to sauce my legs. I like a good bit of sauce and that means I need a good brush. And one with a long handle. The grill gets hot and saucing (in particular, heavy saucing) takes a bit of time. No reason to sacrifice some arm hair saucing dinner, I’ve always said.

Grilled Butterflied Chicken Legs

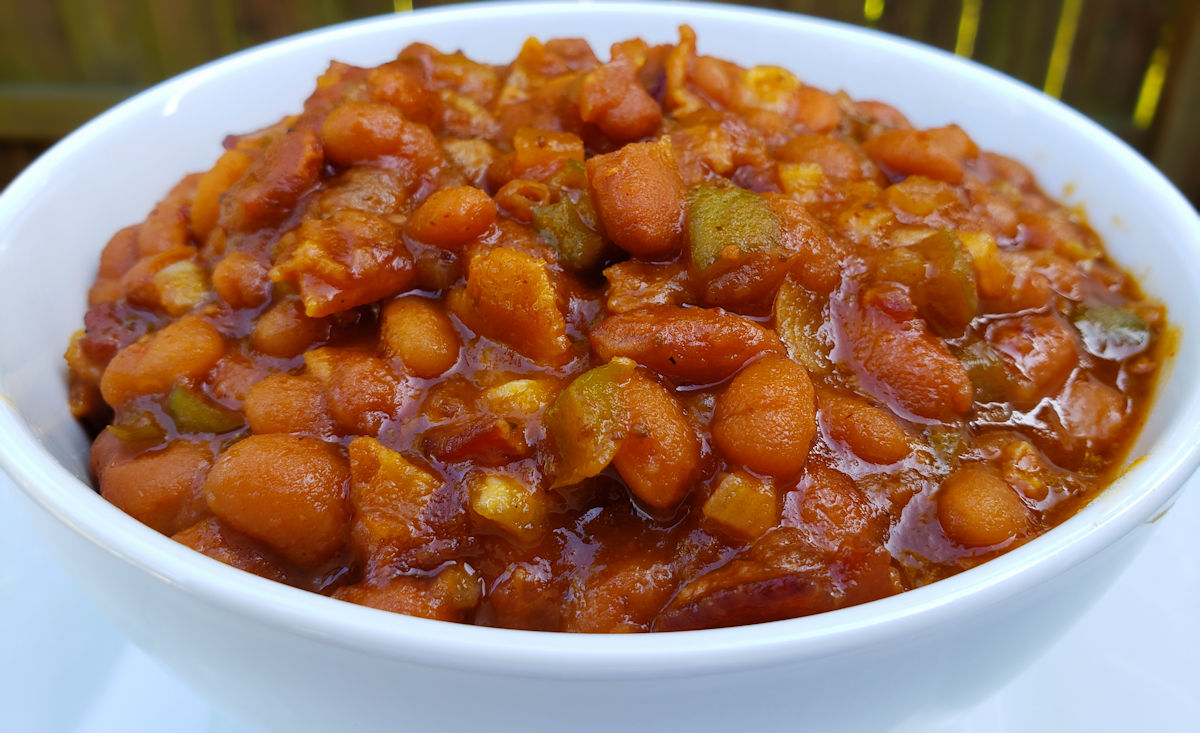
My quick fix BBQ beans are a great side for these legs.

Grilled Butterflied Chicken Legs
Print Pin
5 from 1 vote

Grilled Butterflied Chicken Legs

Over charcoal or gas, these legs are a winner.
Course Main
Cuisine American
Keyword chicken legs
Prep Time 15 minutes
Cook Time 45 minutes
Servings 4
Calories 551kcal

Instructions

  • Set up your grill for cooking at 400 F. I prefer to use a charcoal grill set up for indirect and direct cooking, but you can use any grill you want. You can also cook the chicken over direct heat entirely but the cook time will be shorter and you'll have to watch out that you don't burn them.
  • Place the legs onto a cutting board. Working one at a time, hold the legs so that the least-meaty part of the drumstick (known as the shallow side) is on top. Using a sharp knife (I prefer to use a paring knife), make a cut down from the top of each leg down to the bottom, cutting all the way to the bone right down the center.
  • Push the meat down and away from the bone while cutting along the sides of the bone from top to bottom. I use my thumb to slide between the meat and bone, pushing the meat down and away from the bone. Make sure you don't cut all the way through the meat. You'll end up with a relatively flat piece of meat on each side of the bone, with the mostly detached bone in the middle. I take this opportunity to trim out and tough bits, like tendons, that might be present on the legs so they are more tender.
  • Season both sides of the butterflied legs. Don't be shy. For extra flavor, refrigerate the wings for 1 hour before grilling.
  • Place legs onto the grill bone-side down.
  • Grill for 25-30 minutes or until the internal temperature reaches 145 F.
  • Flip the legs and cook until they reach 165 F, another 5-10 minutes. The legs are now bone-side up.
  • Sauce the butterflied legs liberally with BBQ sauce, flip and with move to direct heat.
  • Cook for 5 more minutes.
  • Sauce the tops of the legs and flip.
  • Cook another 5 minutes over direct heat to get the meat-side of the legs a little char.

Notes

I like my chicken to have a nice little char to it. Not burned, but just a little crunch here and there. 

Nutrition

Calories: 551kcal | Carbohydrates: 0.4g | Protein: 42g | Fat: 41g | Saturated Fat: 11g | Polyunsaturated Fat: 9g | Monounsaturated Fat: 17g | Trans Fat: 0.2g | Cholesterol: 240mg | Sodium: 216mg | Potassium: 523mg | Vitamin A: 237IU | Vitamin C: 1mg | Calcium: 23mg | Iron: 2mg

Nutritional values are approximate.

Sous Vide Grilled Chicken Breast

Salad week was coming. Every few weeks we switch to making salads for a while. Our favorite protein for salad is sous vide grilled chicken breast. My worst fear is that the chicken will not impress. That it’ll be chewy and as dry as the desert. Well, no tough, dry chicken here. This chicken comes out crazy juicy, super tender and big-time packed with flavor. Perfect for salads, thanks to a slow cooking process using an immersion circulator. It’s also got a lightly smoky flavor with a great light char. That’s thanks to a few minutes on a hot grill.

Sous Vide Grilled Chicken Breast

The Best Chicken For Salads

I used fresh thyme sprigs when I made this sous vide grilled chicken breast. The thyme flavor isn’t overpowering (I used 2 sprigs per breast). If you want a pronounced herb flavor, add more. You can also use any other fresh herb that you like. You can also leave it out and still have wonderfully tasty chicken. Just don’t be shy with the salt and pepper. This is the time to add flavor, before it’s cooked.

I use an Anova sous vide cooker. It’s my immersion circulator workhorse!

You can use this same recipe for cooking bone-in chicken breasts instead.

Also try my sous vide turkey breast roast.

Sous Vide Grilled Chicken Breast
Print Pin
5 from 1 vote

Sous Vide Grilled Chicken Breast

The perfect chicken for sandwiches or salads.
Course Main
Cuisine American
Keyword chicken, sous vide
Prep Time 15 minutes
Cook Time 1 hour 15 minutes
Servings 4
Calories 534kcal

Ingredients

Instructions

  • Fill a container with water. Add your immersion circulator and get the temperature to 146.5 F.
  • Brush the chicken breasts with the oil.
  • Season well with salt and pepper. Get the seasoning on all sides and don't be shy with it.
  • Transfer the chicken to a sealable vacuum bag. Add the sprigs of thyme on top.
  • Seal the bag using a vacuum sealer.
  • Transfer the bag to the heated water and cook for 1 hour.
  • Remove the bag from the water.
  • Remove the chicken. Discard the thyme and pat the chicken dry with a paper towel.
  • Fire up your grill for direct cooking over high heat. We're not looking to cook the chicken (it's already fully cooked). We just want to get some grill marks on it and add some texture.
  • Lightly spray the chicken with non-stick spray (you could also use more olive oil if desired) and transfer to the grill. Grill for just a minute or two and rotate 90 degrees and cook another minute or two.
  • Flip and repeat on the other sides to get grill marks.
  • Remove and let rest 5 minutes before serving.

Notes

Great anywhere you need cooked chicken, like chicken salad or on top of greens for a great garden salad.

Nutrition

Calories: 534kcal | Carbohydrates: 1g | Protein: 96g | Fat: 13g | Saturated Fat: 3g | Polyunsaturated Fat: 2g | Monounsaturated Fat: 5g | Trans Fat: 0.1g | Cholesterol: 289mg | Sodium: 678mg | Potassium: 1701mg | Fiber: 1g | Sugar: 0.1g | Vitamin A: 364IU | Vitamin C: 12mg | Calcium: 44mg | Iron: 2mg

Nutritional values are approximate.

Quick Fix Parmesan Garlic Potato Chips

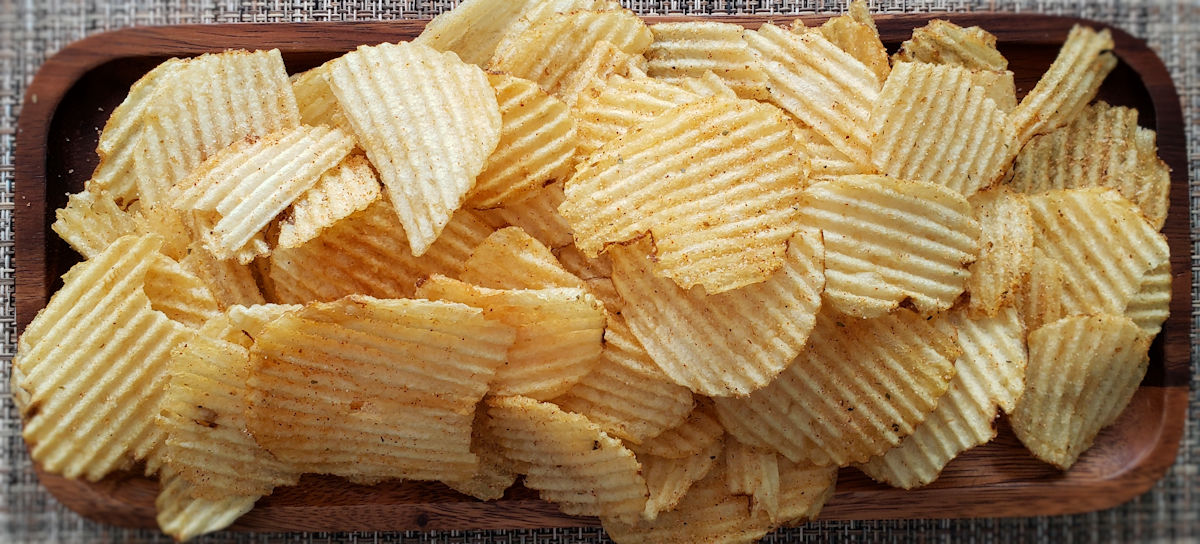
I am a big chicken wing fan. I’m always trying out new sauces and seasonings. When I tried Parmesan garlic from Croix Valley on wings, I loved it. And I also knew it’d be great on some quick fix potato chips. And, oh me, was it ever! No lightly-flavored lame-o chips here. Each and every chip is PACKED with flavor. As much flavor as you ever wanted and dreamed of! You own this! Herby. Cheesy. Garlicky. Goodness. Quick fix Parmesan garlic potato chips are a big winner.

Quick Fix Parmesan Garlic Potato Chips

Don’t Be Shy With The Seasoning

There’s nothing complicated going on here. The ‘hardest’ part of making quick fix Parmesan garlic potato chips is being sure that you are nice and gentle with the chips when you toss them to coat them. Don’t be shy with the seasoning. You aren’t making store-bought, lightly seasoned, barely-tasty chips. Go big.

Not that I mean to over-stress it, but I will mention you don’t need any fancy fru-fru chips for this recipe. In fact, I’d stay away from them. You want wavy chips, preferably. And frankly, you want chips that are a bit oily. Yep. Once heated, the chips will release that oil and that’s what you need to get the seasonings stuck on there good!

Also try my quick fix desert heat potato chips. And my quick fix mango chile-lime ones too!

Quick Fix Parmesan Garlic Potato Chips
Print Pin
5 from 1 vote

Quick Fix Parmesan Garlic Potato Chips

You don't need to grab the expensive chips when you make quick fix Parmesan garlic potato chips.
Course Snack
Cuisine American
Keyword potato chips, quick fix
Prep Time 15 minutes
Cook Time 5 minutes
Servings 4
Calories 452kcal

Ingredients

Instructions

  • Preheat your oven to 275 F.
  • Spread chips out onto a baking sheet. Bake for 5 minutes. You should see that the oils in the chips have come to the surface.
  • Gently transfer chips to a large bowl and sprinkle with the seasoning. Use a spatula to carefully stir to coat.
  • Serve immediately.

Notes

Be gentle when stirring to avoid breaking the chips.

Nutrition

Calories: 452kcal | Carbohydrates: 46g | Protein: 5g | Fat: 29g | Saturated Fat: 3g | Polyunsaturated Fat: 7g | Monounsaturated Fat: 16g | Trans Fat: 1g | Sodium: 448mg | Potassium: 1020mg | Fiber: 3g | Sugar: 1g | Vitamin C: 18mg | Calcium: 18mg | Iron: 1mg

Nutritional values are approximate.

Smash Burgers with Zesty Sauce

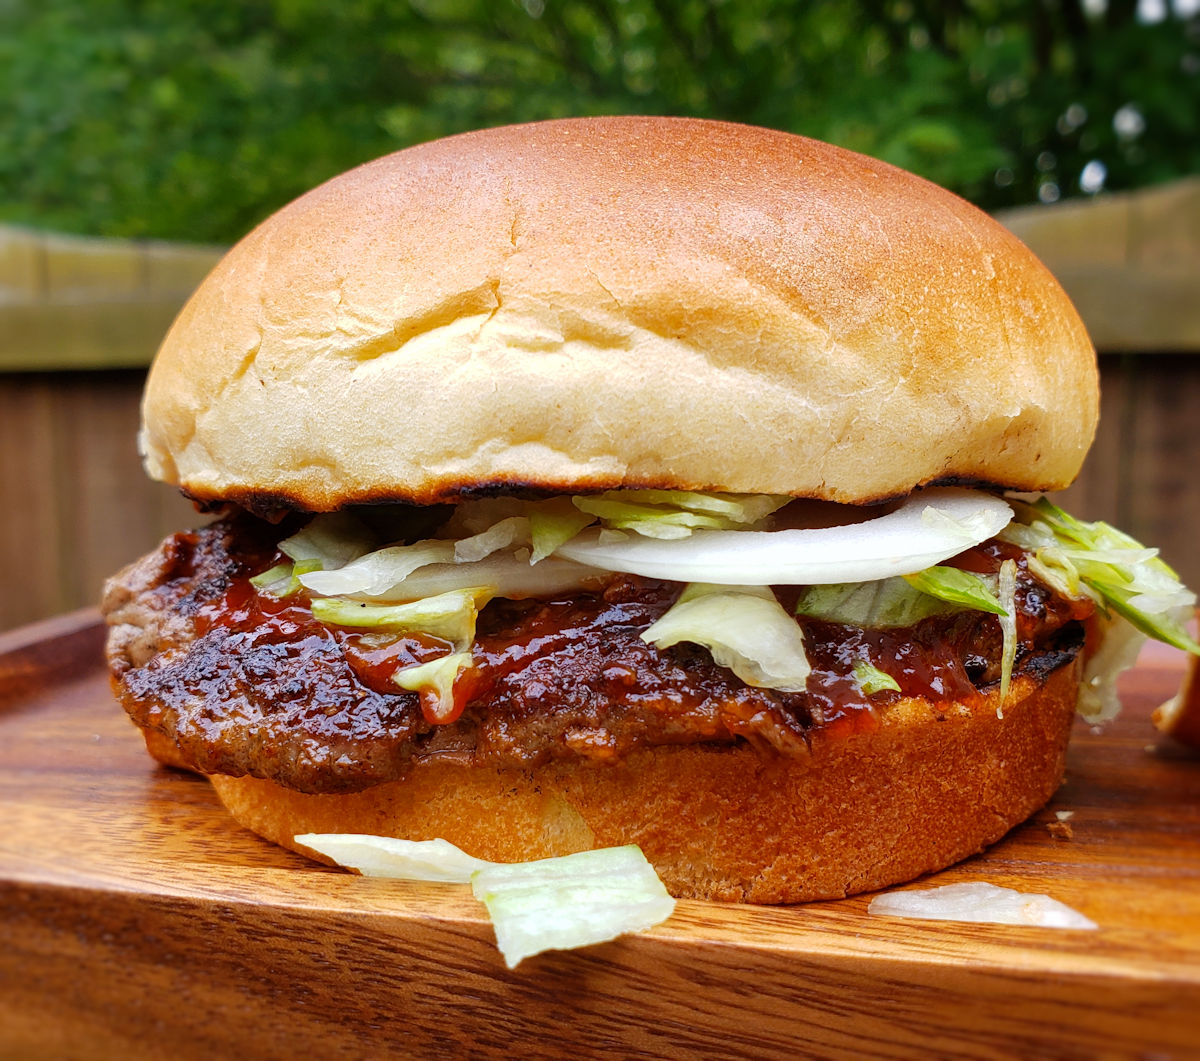
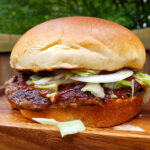
Oh me. This is why today was a happy day. A very happy day. I made smash burgers with zesty sauce. Nothing could make me happier. Perfectly cooked patties with that awesome smash burger crust. Lettuce. Onion. And then there’s the sauce. The amazing sauce. Everything good is in the sauce. Including soy sauce. That’s where this sauce went from fantastic to amazing.

Smash Burgers with Zesty Sauce

The Best Burger Sauce?

I can’t say enough how great these smash burgers with zesty sauce were. And they checked one of my required boxes for burgers: messy. The messier, the better. If it isn’t messy it doesn’t have enough ‘stuff’ on it. These burgers have stuff and then some.

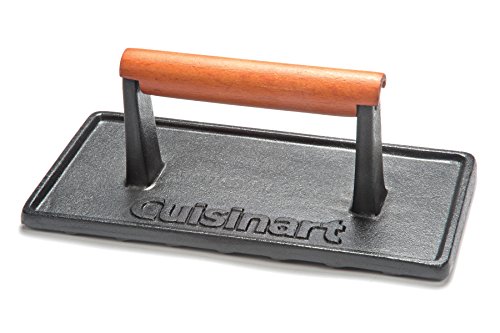
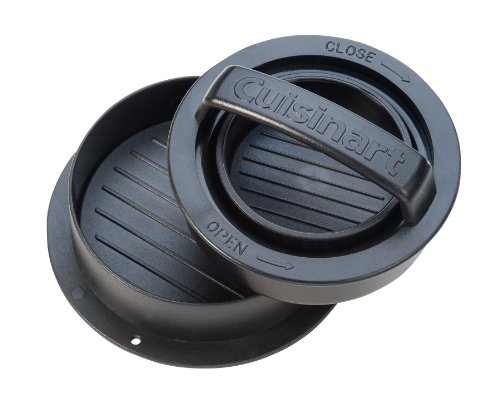
Making these burgers isn’t difficult. You don’t need a bunch of fancy equipment or a lot of time. Just a hot griddle and a burger press. Any griddle will do, whether it’s on a grill (I use my Weber), cooktop, stove or even a standalone outdoor flattop. Just get those patties nice and thin and use quality fresh toppings. And a great sauce.

Also try my steakhouse smash burgers.

Smash Burgers with Zesty Sauce
Print Pin
5 from 1 vote

Smash Burgers with Zesty Sauce

The perfect burgers with the perfect sauce.
Course Main
Cuisine American
Keyword smash burgers
Prep Time 15 minutes
Cook Time 20 minutes
Servings 4
Calories 721kcal

Ingredients

For the sauce (makes extra)

For the burgers

  • 1 pound ground beef formed into four 4-ounce patties
  • kosher salt to taste
  • ground black pepper to taste
  • 4 hamburger buns
  • 4 slices cheddar cheese or American cheese
  • 4 pieces iceberg lettuce torn or chopped
  • 4 slices tomato
  • 4 slices onion
  • 6 slices dill pickle

Instructions

For the sauce

  • Combine all ingredients. Refrigerate at least 30 minutes before serving.

For the burgers

  • Fire up your grill for direct medium-high heat cooking. You can also use an outdoor or indoor griddle or a large skillet on a stove.
  • Season the burger patties with salt and pepper on both sides. Don’t be shy with the seasoning.
  • Place the patties on grill. Smash down with a spatula or grill press.
  • Grill the burgers for 2-3 minutes per side.
  • Top the patties with cheese and grill until they’ve reached your desired doneness and the cheese is melted. Remove from the grill.
  • Toast the buns as desired.
  • Make the burgers by first spreading some of the sauce on the bun bottoms.
  • Add a burger patty.
  • Add onion, lettuce, tomato and pickle slices.
  • Slather the top bun with more of the sauce and serve.

Notes

Patties 4-5 ounces in weight work best.

Nutrition

Calories: 721kcal | Carbohydrates: 32g | Protein: 30g | Fat: 52g | Saturated Fat: 16g | Polyunsaturated Fat: 14g | Monounsaturated Fat: 16g | Trans Fat: 1g | Cholesterol: 109mg | Sodium: 2660mg | Potassium: 823mg | Fiber: 5g | Sugar: 10g | Vitamin A: 1348IU | Vitamin C: 13mg | Calcium: 349mg | Iron: 5mg

Nutritional values are approximate.

Herb Roasted Potatoes

I’m always up for a quick side dish that lacks in effort but does not lack in taste. These herb roasted potatoes are a great go-to recipe. The potatoes have a wonderful light herb flavor. They’re creamy buttery inside (you can also use fingerling potatoes for even more buttery creaminess!). And they have one of my favorite things: crunchy skin.

Herb Roasted Potatoes

Consistency Means Better

Make sure your potatoes are pretty much all equal in size when you make these herb roasted potatoes. You don’t want a bunch of big pieces mixed in with small ones or the cook times will vary. You’ll end up with big not-quite-done-potatoes and little over-done ones. You don’t want that. So if you have to, halve them or even quarter them to get them all the same sizes. You can also make this dish with either baby red potatoes or fingerlings.

Grab A Grill Basket

I also like to make these potatoes on my grills, either gas or charcoal or even electric. I use a grill basket like this one. It makes cooking them super easy, and I don’t have to worry about anything falling between the grill grates. Clean-up is also super easy. Grill baskets are a win and a must-have for grilling!

Also try my parmesan broccoli potatoes.

Herb Roasted Potatoes
Print Pin
5 from 1 vote

Herb Roasted Potatoes

I’m always up for a quick side dish that lacks in effort but not taste. These herb roasted potatoes are a great go-to recipe
Course Side
Cuisine American
Keyword roasted potatoes
Prep Time 15 minutes
Cook Time 30 minutes
Servings 6
Calories 92kcal

Ingredients

Instructions

  • Preheat oven to 450 F.
  • Rinse potatoes and pat dry.
  • In a medium bowl combine the remaining ingredients.
  • Add the potatoes and stir gently to coat.
  • Spray a baking sheet with non-stick spray or use a silpat.
  • Dump potatoes out onto the baking sheet and spread out evenly.
  • Bake for 30 minutes or until the potatoes are tender and have a nice golden lightly crispy skin.

Notes

Try to use potatoes that are roughly all the same size so they’ll cook at the same rate.

Nutrition

Calories: 92kcal | Carbohydrates: 20g | Protein: 2g | Fat: 1g | Saturated Fat: 1g | Sodium: 436mg | Potassium: 482mg | Fiber: 3g | Sugar: 1g | Vitamin A: 17IU | Vitamin C: 22mg | Calcium: 18mg | Iron: 1mg

Nutritional values are approximate.

Steakhouse Smash Burgers

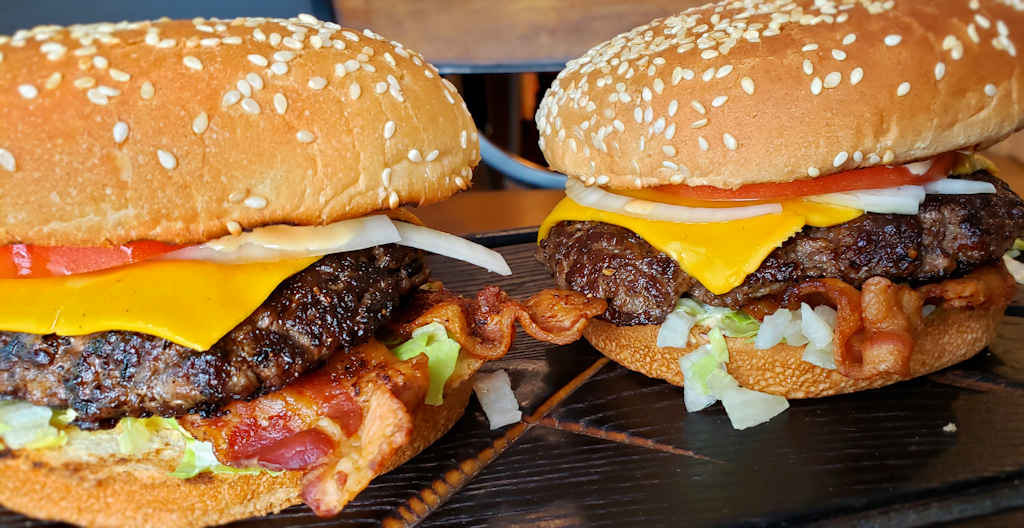
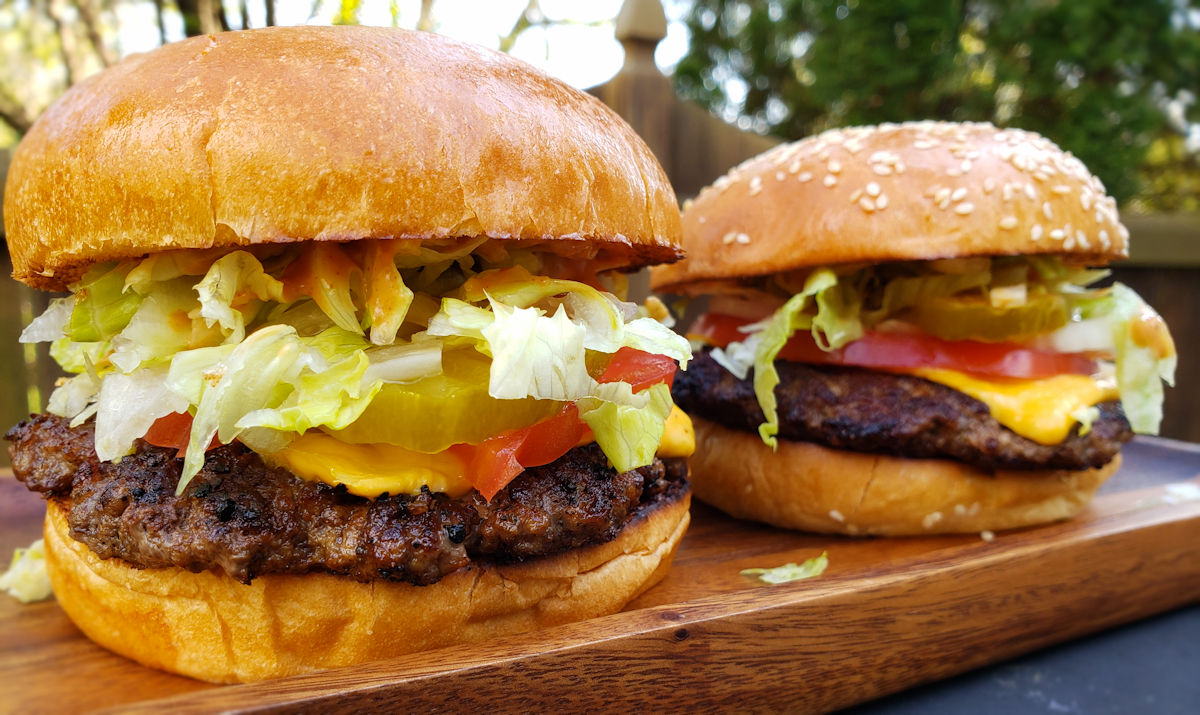
Oh man did these steakhouse smash burgers ever hit the spot. Juicy patties. Crisp fresh toppings. All with a wonderful creamy sauce that has a little tang that’s not so strong it hides all the great burger flavors. These burgers are proof that even the simplest sauce can make a ‘plain’ burger something special. I love smash burgers and this right here is exactly why. You can’t beat them, from ease-of-cooking to fantastic flavor, they’re always a winner.

Steakhouse Smash  Burgers

The Perfect Smash Burgers

Making steakhouse smash burgers isn’t difficult. You don’t need a bunch of fancy equipment or a lot of time. Just a hot griddle and a burger press. Any griddle will do, whether it’s on a grill (I use my Weber), cooktop, stove or even a standalone outdoor flattop. Just get those patties nice and thin and use quality fresh toppings. And a great sauce. Once you have the steps down you’ll be cranking out smash burgers all day long with ease.

Of course you can use any toppings you want. Sometimes I just go with cheese. These burgers don’t have to be all fancy fru-fru. They just have to be great (and they are!).

Also try my smash burgers with zesty sauce.
Steakhouse Smash Burgers
Print Pin
5 from 1 vote

Steakhouse Smash Burgers

Get those patties nice and thin and use quality fresh toppings.
Course Main
Cuisine American
Keyword smash burger
Prep Time 15 minutes
Cook Time 22 minutes
Servings 4
Calories 578kcal

Ingredients

For the sauce

For the burgers

  • 1 pound ground beef formed into four 4-ounce patties
  • kosher salt to taste
  • ground black pepper to taste
  • 4 burger buns
  • 4 slices cheddar cheese or American cheese
  • 4 slices onion
  • 4 pieces iceberg lettuce torn or chopped
  • 4 slices tomato
  • 6 slices dill pickle

Instructions

For the sauce

  • In a small bowl, whisk together the mayonnaise and steak sauce.
  • Refrigerate until ready to use.

For the burgers

  • Fire up your grill for direct medium-high heat cooking. You can also use an outdoor or indoor griddle or a large skillet on a stove.
  • Season the burger patties with salt and pepper on both sides. Don’t be shy with the seasoning.
  • Place the patties on grill. Smash down with a spatula or grill press.
  • Grill the burgers for 2-3 minutes per side.
  • Top the patties with cheese and grill until they’ve reached your desired doneness and the cheese is melted. Remove from the grill.
  • Toast the buns as desired.
  • Make the burgers by first spreading some of the sauce on the bun bottoms.
  • Add a burger patty.
  • Add onion, lettuce, tomato and pickle slices.
  • Slather the top bun with more of the sauce and serve.

Notes

Patties 4-5 ounces in weight work best.

Nutrition

Calories: 578kcal | Carbohydrates: 32g | Protein: 30g | Fat: 37g | Saturated Fat: 13g | Polyunsaturated Fat: 5g | Monounsaturated Fat: 13g | Trans Fat: 1g | Cholesterol: 100mg | Sodium: 2454mg | Potassium: 822mg | Fiber: 4g | Sugar: 9g | Vitamin A: 1134IU | Vitamin C: 12mg | Calcium: 346mg | Iron: 5mg

Nutritional values are approximate.

Quick Fix Barbecue Potato Chips

It’s happened to all of us. You buy a big ole bag of BBQ potato chips at the store. You open the bag and dive in and find… sadness. Half the chips aren’t seasoned. And the other half barely taste like BBQ. My quick fix barbecue potato chips solve this problem and will rid you of chip sadness in just 5 minutes. And it really can’t get any easier. Chips. Seasoning (which I picked up from Croix Valley Foods!) . Done. BBQ flavor on every chip. Not in hiding, either. Out front, up front and delicious!

Quick Fix Barbecue Potato Chips

The More Seasoning, The Better

Any time I make quick fix barbecue potato chips I have only one rule about the seasoning step: don’t be shy. Heck, we’re here for BBQ-flavor. Do it. And then add some more. Just be real gently tossing the chips because you don’t want to break them. And you don’t want to shake off the seasoning!

Not that I mean to over-stress it, but I will mention you don’t need any fancy fru-fru chips for this recipe. In fact, I’d stay away from them. You want wavy chips, preferably. Also, and frankly, you want chips that are a bit oily. Yep. Once heated, the chips will release that oil and that’s what you need to get the seasonings stuck on there good!

Also try my quick fix Parmesan garlic potato chips.

Quick Fix Barbecue Potato Chips
Print Pin
5 from 1 vote

Quick Fix Barbecue Potato Chips

You don't need to grab the expensive chips when you make quick fix barbecue potato chips.
Course Snack
Cuisine American
Keyword potato chips, quick fix
Prep Time 15 minutes
Cook Time 5 minutes
Servings 4
Calories 452kcal

Ingredients

Instructions

  • Preheat your oven to 275 F.
  • Spread chips out onto a baking sheet. Bake for 5 minutes. You should see that the oils in the chips have come to the surface.
  • Gently transfer chips to a large bowl and sprinkle with the seasoning. Use a spatula to carefully stir to coat.
  • Serve immediately.

Notes

Always be gentle stirring the chips.

Nutrition

Calories: 452kcal | Carbohydrates: 46g | Protein: 5g | Fat: 29g | Saturated Fat: 3g | Polyunsaturated Fat: 7g | Monounsaturated Fat: 16g | Trans Fat: 1g | Sodium: 448mg | Potassium: 1020mg | Fiber: 3g | Sugar: 1g | Vitamin C: 18mg | Calcium: 18mg | Iron: 1mg

Nutritional values are approximate.

Bacon and Cheese Stuffed Mushrooms on the Char-Broil Big Easy

These bacon and cheese stuffed mushrooms on the Char-Broil Big Easy are the perfect grilled appetizer. Tender mushrooms that still have a little ‘bite’ to them. The cheese mixture is fantastic. Three different cheeses and a little seasoning combine with bacon and bell pepper for bite after bite of deliciousness. I say ‘bite’, but if you use small mushrooms you can pop these little treats into your mouth like popcorn. Sure, I did.

Bacon and Cheese Stuffed Mushrooms on the Char-Broil Big Easy

Eat ‘Em Like Popcorn

These disposable Dutch oven pans are perfect for making these bacon and cheese stuffed mushrooms on the Char-Broil Big Easy. They’re the perfect size for this recipe and they’re the perfect size for the Big Easy basket or bunk bed basket. They’re sturdy so you don’t have to worry about them collapsing. I use them for a lot of my Big Easy dishes.

I highly recommend that you shred or grate your own cheese at home. Don’t buy the pre-shredded or pre-grated stuff. It has stuff added to it to keep it from sticking together. That ‘stuff’ affects how the cheese melts. Shred it yourself and use the good stuff.

You can pre-make these mushrooms by doing steps 1-8 then refrigerating the mushrooms for later. Then, when you’re ready to finish them, remove them from the fridge and let come to room temperature for 30 minutes before transferring to a pre-heated Big Easy to cook and heat thoroughly.

It’s always a good idea to keep a few spare grease trays on hand for your Char-Broil Big Easy.

You can also make these on a grill.

Bacon and Cheese Stuffed Mushrooms on the Char-Broil Big Easy
Print Pin
5 from 1 vote

Bacon and Cheese Stuffed Mushrooms on the Char-Broil Big Easy

These are the perfect easy appetizers.
Course Appetizer
Cuisine American
Keyword mushroom, stuffed
Prep Time 15 minutes
Cook Time 45 minutes
Servings 6
Calories 159kcal

Ingredients

  • 8 ounces mushrooms 12-16 small whole mushrooms
  • 4 tablespoons butter melted
  • kosher salt to taste
  • 4 ounces cream cheese softened
  • ½ cup Parmesan cheese shredded or grated
  • ¼ cup Mozzarella cheese shredded
  • 2 slices bacon (plus more for garnish if desired) cooked and finely chopped
  • ¼ green bell pepper (plus more for garnish if desired) very finely chopped
  • cayenne pepper to taste
  • paprika to taste
  • parsley chopped, for garnish, if desired

Instructions

  • Preheat your oven to 400 F. Spray a small disposable pan with non-stick spray.
  • Clean the mushrooms and remove the stems.
  • Dip the mushrooms cap-side down into the butter and place onto the baking dish cap-side up.
  • Pour the remaining butter into the baking dish.
  • Sprinkle the mushrooms with salt. Bake 10 minutes. The mushrooms should just be soft and most of the water in them should be cooked out.
  • In a medium bowl, combine the cream cheese, Parmesan, Mozzarella, bacon, bell pepper and a pinch or so of cayenne. Add salt to taste.
  • Using a small spoon, gently fill each mushroom with the cheese mixture. Mound it up high. Place in a small disposable pan that will fit onto the Big Easy or place directly on a Big Easy basket or Bunk Bed Basket.
  • Sprinkle tops of the mushrooms with paprika.
  • Fire up your Big Easy and let it get good and hot.
  • Transfer the basket and/or pan to a Big Easy basket and place into the cooker. Cook 15-20 minutes or until the stuffing is hot.
  • Garnish with more bacon, bell pepper and parsley if desired and serve.

Notes

Try to use mushrooms that are all about the same size so they are all done around the same time.

Nutrition

Calories: 159kcal | Carbohydrates: 3g | Protein: 8g | Fat: 13g | Saturated Fat: 7g | Polyunsaturated Fat: 1g | Monounsaturated Fat: 4g | Trans Fat: 0.01g | Cholesterol: 34mg | Sodium: 283mg | Potassium: 193mg | Fiber: 0.5g | Sugar: 2g | Vitamin A: 388IU | Vitamin C: 5mg | Calcium: 154mg | Iron: 0.3mg

Nutritional values are approximate.

Copycat Freddy’s Fry Seasoning

One of my favorite side dishes to make are crispy homemade French fries. The thin ones. The kind with crunch on the outside and fluffy yummy inside. I like to season my fries with something tasty, something a bit different than salt and pepper or adobo seasoning (actually a big favorite of mine). This copycat Freddy’s fry seasoning is perfect on hot-out-the-fryer fries. I mean like crazy good. The added sweetness and earthiness of the seasoning adds a totally different flavor than if I’d just used salt and pepper. I go heavy on this seasoning, it’s really flavorful!

Copycat Freddy's Fry Seasoning

Make A Batch. Keep It On Hand.

There’s only one thing I’d do differently next time I make this copycat Freddy’s fry seasoning: make a bunch more. It’s great on burgers. Baked potatoes. Cottage cheese. Just about anywhere that you think you should be using salt and pepper, use this instead.

I didn’t have turmeric on hand the first time I made this. A good substitute is dry mustard, which is what I went with. It’s a perfect replacement. You can also use cumin if you don’t have turmeric, but I’d use a bit less than the recipe calls for for the turmeric.

If I make a big batch of seasoning I like to keep it in these big spice bottles. I use blue painters tape to write the contents on the bottles. The tape comes off easily when if used up the seasoning!

Also try my copycat Freddy’s burger seasoning.

Copycat Freddy's Fry Seasoning
Print Pin
4.67 from 3 votes

Copycat Freddy’s Fry Seasoning

This fry seasoning is perfect on hot-out-the-fryer fries.
Course Seasoning
Cuisine American
Keyword French fry, seasoning
Prep Time 5 minutes
Cook Time 5 minutes
Servings 2
Calories 56kcal

Ingredients

Instructions

  • Combine all ingredients.
  • To serve, sprinkle on freshly-fried or baked fries and toss gently to season evenly.

Notes

Keep in an air-tight container until ready to use.

Nutrition

Calories: 56kcal | Carbohydrates: 14g | Protein: 1g | Fat: 0.4g | Saturated Fat: 0.1g | Polyunsaturated Fat: 0.2g | Monounsaturated Fat: 0.1g | Sodium: 5817mg | Potassium: 100mg | Fiber: 1g | Sugar: 10g | Vitamin A: 985IU | Vitamin C: 1mg | Calcium: 15mg | Iron: 1mg

Nutritional values are approximate.