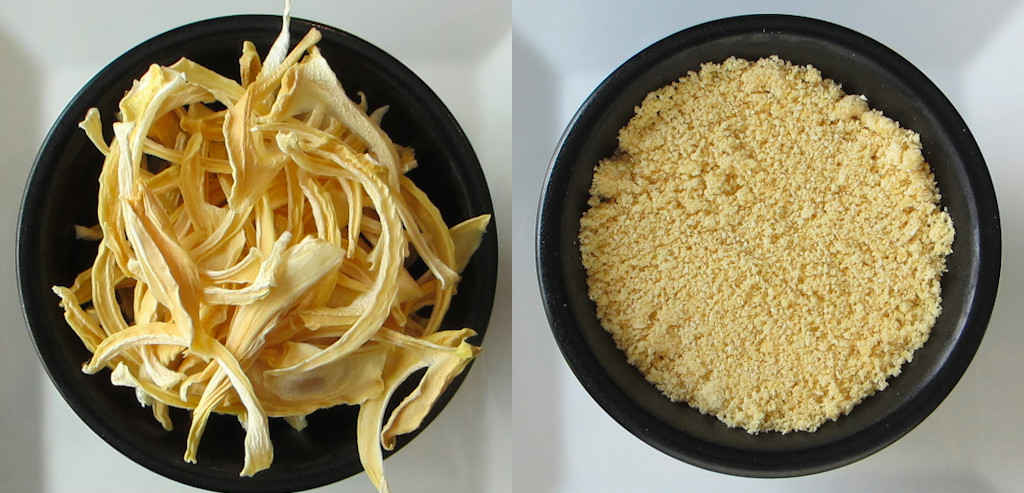
Onions were on sale here last week. I hate passing up on a deal, so I bought a few nice big onions, and proceeded to make homemade onion powder using my Nesco Snackmaster Pro. The end result has a slightly different texture than store-bought onion powder, but a much more onion-packed flavor.
My first use of my onion powder was in a rub for rotisserie-style chicken. You can definitely tell the difference between onion powder made on the Nesco Snackmaster Pro and the stuff in a jar. Wow!
Grinding Into Powder
After drying the onions for 24 hours I ground them using a blade coffee grinder (not the burr grinder). Not all of the onion pieces would go thru the grinder (they were still a bit moist) so I returned them to the dehydrator for just a bit.
Storing The Powder
The final product went into Mason jars with lids and then vacuum-sealed using a jar attachment for a vacuum sealer. You just have to remember that after you open the jar to remove some of the powder you’ll need to re-seal it. No big deal and well worth the effort.
I like to load up my dehydrator. To do that I picked up a handful of extra trays. They really add a whole lot more drying space! Since I have to rotate my trays, I write a number on each one on a piece of blue painter’s tape so I can keep track of them.
Onions were on sale here last week. I hate passing up on a deal, so bought a few nice big onions, and proceeded to make homemade onion powder using my Nesco Snackmaster Pro.
Onionssliced or chopped thin (try to make the pieces consistent in size)
Instructions
Place the onions into the dehydrator. Make sure they do not touch or overlap.
Dry at 165 F for 18-24 hours, or until the onions are crispy. Smaller pieces will take less time. I cut mine big, so they took the full 24 hours.
Let cool completely then grind using a blender or blade coffee grinder (not a burr grinder).
Notes
Keep in an air-right container. I place mine in a Mason jar, cover it, then use a vacuum-sealer attachment specifically for jars to remove all of the air.
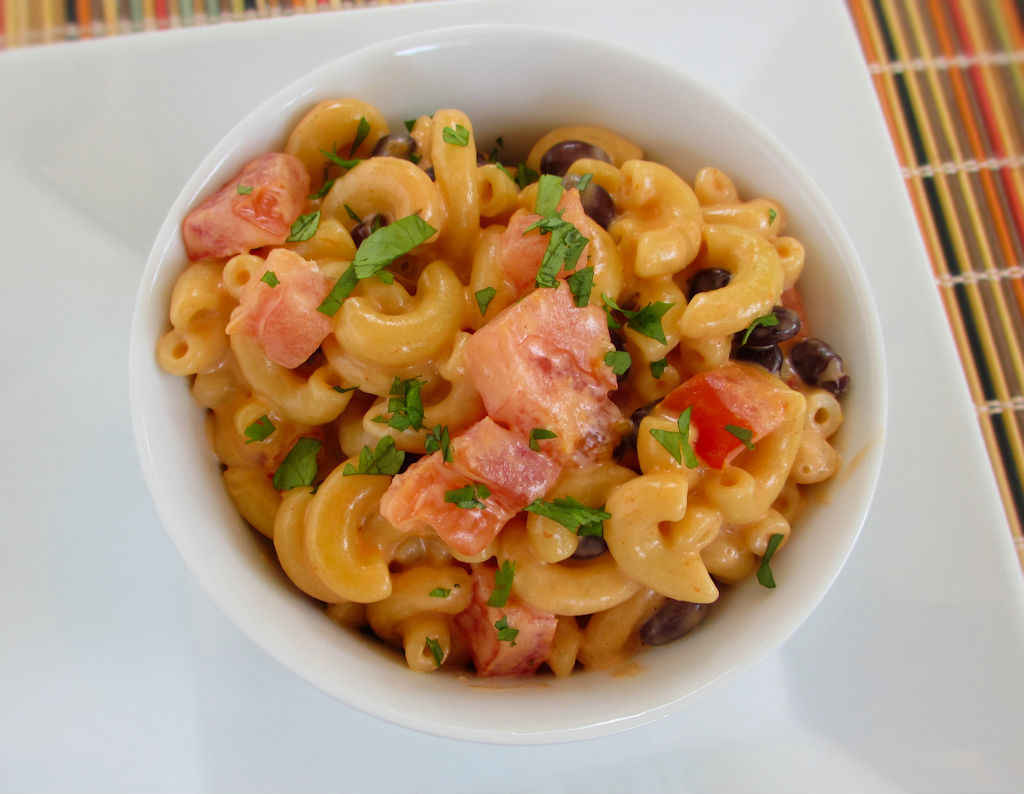
Does macaroni-and-cheese with tomatoes and black beans in it make it healthier? I’m not sure. Probably not. I am sure that this Southwestern macaroni-and-cheese was fantastic. You take your pretty favorite standard recipe and add a few things. That’s it. It’s something totally different than the usual. Still creamy and still cheesy, just different.
Just A Kiss Of Heat
I use Cholula hot sauce in recipes like this southwestern macaroni-and-cheese because I find it to be a great, fairly mellow, hot sauce. It’s not in-your-face hot and it has a great peppery flavor. It’s perfect on just about anything. Don’t worry about adding hot sauce to your mac-and-cheese. You don’t have to add much. But I recommend that you don’t leave it out. It’s that subtle taste that makes a big difference!
Does macaroni-and-cheese with tomatoes and black beans in it make it healthier? I’m not sure. Probably not. I am sure that this Southwestern macaroni-and-cheese was fantastic.
Course Side
Cuisine American
Keyword mac and cheese, macaroni and cheese, southwestern
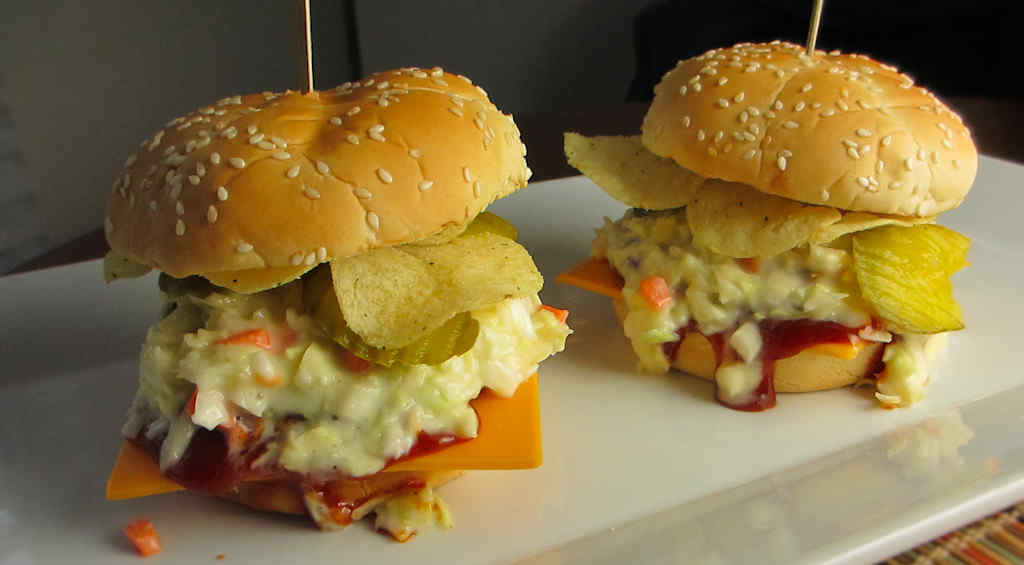
My rule for sandwiches also applies to burgers: The messier, the better. One glance at these unbelievably messy Dallas burgers and you know they are going to be crazy good. You know that all sorts of wonderful things are going to run down your forearm when you pick them up. You know you’ll be scraping yummy goodness off your plate with your fingers (ok, use potato chips for scraping if you wish).
Cheese On The Bottom?
Wondering why I put the cheese on the bun bottom instead of on top of the meat (and believe me, there’s some in there)? To keep the bun from getting so soggy you end up an open-faced burger, eating with a knife and fork. No, the cheese won’t get all melty gooey down there, but the trade-off is worth it to me. I used your pretty-much-standard deli slaw on these Dallas burgers, but a broccoli slaw or even a jalapeno slaw would be just as great. Or try my roasted poblano slaw.
I like to use a burger press when I make burgers. It, in combination with some patty papers, enables me to crank out a whole bunch of equally-sized burger patties in no time at all with little cleanup.
My rule for sandwiches also applies to burgers: The messier, the better. One glance at these unbelievably messy Dallas burgers and you know they are going to be crazy good.
Season beef patties with garlic salt and black pepper.
Cook burgers as desired and toast the buns if you wish.
Assemble burgers by placing cheese on bun bottom (I prefer the cheese underneath the patties to help keep the bun from getting soggy, but you’re certainly welcome to put the cheese on top!).
Add the pattie, BBQ sauce, a good spoonful of slaw, a few pickle slices and some chips.
Serve with lots of paper towels.
Shape your ground beef into 6 patties. Make in indention in the middle of each patty. This helps the patty to end up cooking nice and flat, rather than getting all puffy in the center.
Liberally season both sides of the patty with garlic salt and pepper. If the garlic salt scared you, just go with regular salt.
Grill the patties until fully cooked.
Add the slices of cheese to the patties and allow to melt.
Remove patties from the grill.
Assemble burgers on the buns and top with the remaining ingredients.
Note: This recipe was developed using the Char-Broil Big Easy Oil-Less Fryer. If you are cooking using the Char-Broil Smoker-Roaster Grill you should cook with the lid open and the temperature set to High. You might also need to adjust the cooking time.
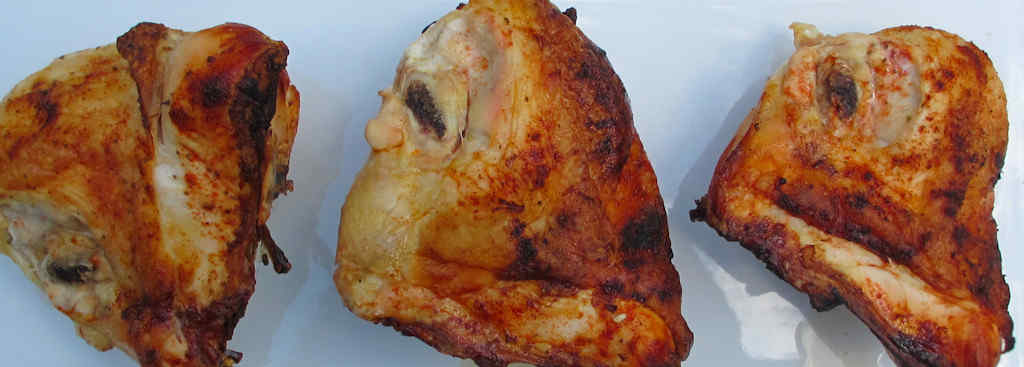
I sure do love making chicken on my Char-Broil Big Easy. It doesn’t get any easier or tastier. Any time I need chicken for a dish, or I just want to enjoy a nice piece of chicken, I fire up my Big Easy. I don’t normally brine my chicken, but this time I did. The end result is very flavorful and moist. And though this is a southwest-inspired chicken recipe, it’s not overly spicy at all. Southwest Chicken on the Char-Broil Big Easy has just a hint of citrus and a slight kick. I’d call it just right.
Flavor-Packed Perfect Chicken
The brining process can mean you won’t get super-crispy skin like you normally do with the Big Easy. That’s ok, because this southwest chicken on the Char-Broil Big Easy more than makes up for it with tremendous flavor and tenderness. You could remove the skin first, but I prefer to keep it on to help keep the chicken even more moist.
You can use this recipe on split chicken breasts, as I did, or whole chickens. Or legs. Anything. The Char-Broil Big Easy makes great poultry no matter what.
To make this chicken on the Char-Broil Big Easy I used a bunk bed basket. It lets me double or even triple the amount of cooking space I have.
I sure do love making chicken on my Char-Broil Big Easy. It doesn’t get any easier or tastier. Any time I need chicken for a dish, or I just want to enjoy a nice piece of chicken, I fire up my Big Easy. I don’t normally brine my chicken, but this time I did. The end result is very flavorful and moist. And though this is a southwest-inspired chicken recipe, it’s not overly spicy at all.
Course Main
Cuisine American
Keyword Big Easy, Char-Broil, chicken, southwestern
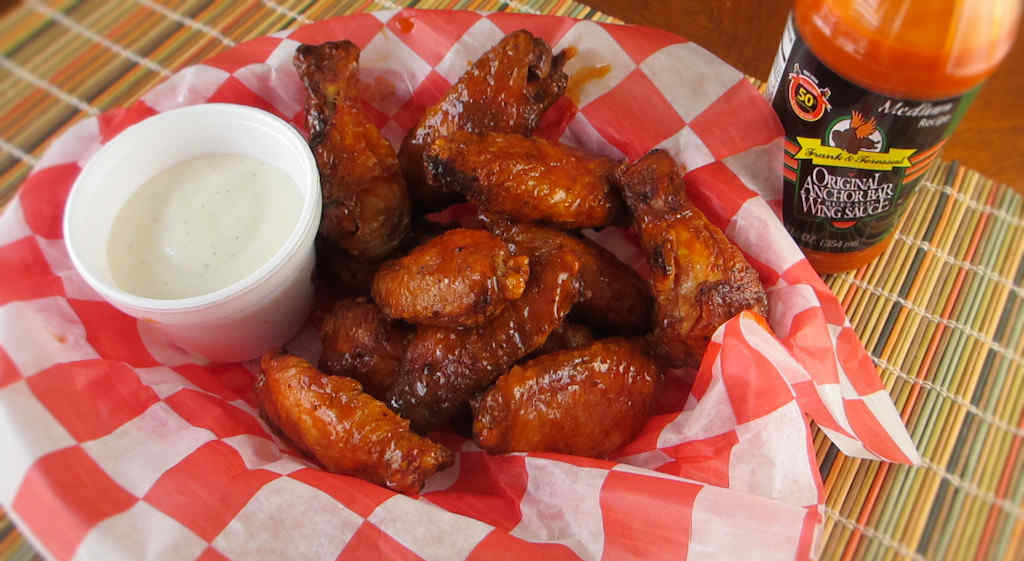
Visit my other site, For The Wing, for all things chicken-wing!
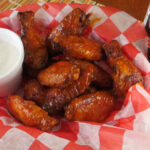
Eating wings at the Anchor Bar is on my bucket list, and not near the bottom of the list either. It would be somewhat of a pilgrimage for me. Until I can get there to devour some original Buffalo wings, I’ll have to ‘settle’ for my homemade wings tossed with the real-deal-authentic-wing-sauce. I don’t consider it settling at all, because these wings were fantastic. Just the right amount of heat and absolutely great seasoning. This is bottled magic right here. I could’ve definitely had more. And more.
A True Classic
I ordered Anchor bar wing sauces online. I found the prices to be quite reasonable as was shipping. They now have a number of different varieties available, from the mild to the hot. And even a delicious BBQ-inspired wing sauce! Don’t be shy, back up the truck and get as many sauces as you can fit into your pantry. They won’t last long.
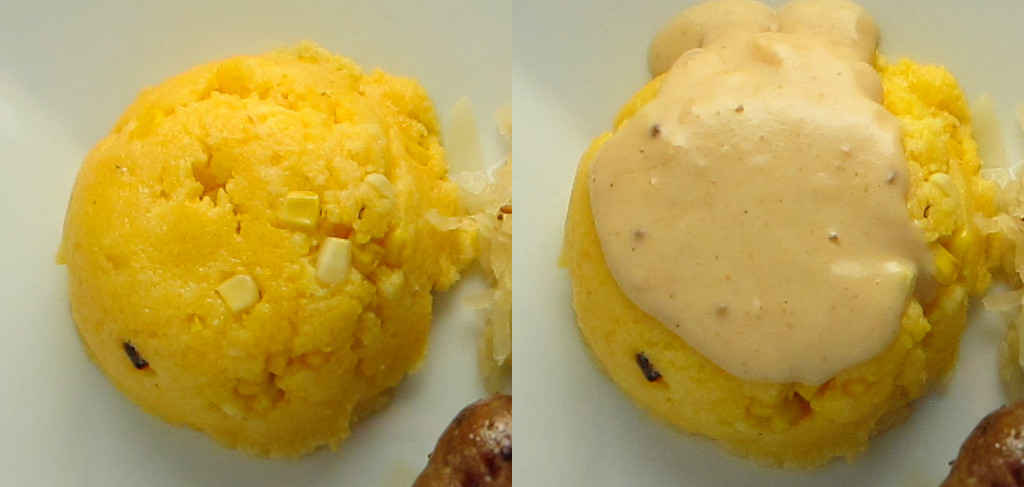
I don’t make grits often. Certainly not often enough. But the grits I made with some grilled cedar planked shrimp the other day really got me into grits-making mode. So much so that I was thinking about grits while I was shucking some fresh sweet corn. That’s when it hit me. I bet roasted sweet corn would be beyond awesome in grits. And you know, it is!
That Great Roasted Flavor
I threw a few shucks ears of corn onto the grill until they started to char. I cut off the kernels with a knife or use a corn peeler and added them to my go-to grits recipe. The corn kernels add a nice ‘pop’ texture to these roasted sweet corn grits. You don’t have to roast the corn, but the added smokiness is a nice change.
I threw a few shucks ears of corn onto the grill until they started to char. I cut off the kernels and added them to my go-to grits recipe. The corn kernels add a nice ‘pop’ texture to the grits.
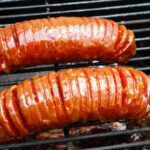
I picked up a few fancy salami the other day while at Jungle Jim’s market outside of Cincinnati, Ohio. I didn’t get them by accident. Someone on an online BBQ group had recommended cutting them Hasselback-style, smoking them and glazing with an apricot glaze. The thought had my mouth watering, so I proceeded to make awesome smoked glazed salami. A little sweet, a little smokiness, and flavor-packed cured meat. Perfect.
Pass The Crackers
These sliced smoked glazed salami treats are perfect on crackers with cheese. Or even on sandwiches. Or by themselves. If you like a little spiciness, you can substitute jalapeno jelly for the apricot preserves. The heat really works well with the flavor of the salami.
These sliced salami treats are perfect on crackers with cheese. Or even on sandwiches. Or by themselves. If you like a little spiciness, you can substitute jalapeno jelly for the apricot preserves. The heat really works well with the flavor of the salami.
Cut thin slits in the salamis, but do not cut all the way thru. Tip: I lay two wood spoons alongside the salami. Then, when I cut down thru the salami the round spoon handles keep me from cutting too far.
Fire up your smoker for cooking at 225 F. Use a light wood such as apple or peach.
Smoke the salami for 1 hour.
Combine the apricot preserves and Dijon and brush half over the tops of the salami.
Smoke another 30 minutes then brush with the remaining glaze and smoke another 30 minutes.
Remove from the smoker.
Serve as is, with a knife for slicing, as a great topping for crackers.
Notes
I also sliced the salami and served it on sandwiches.
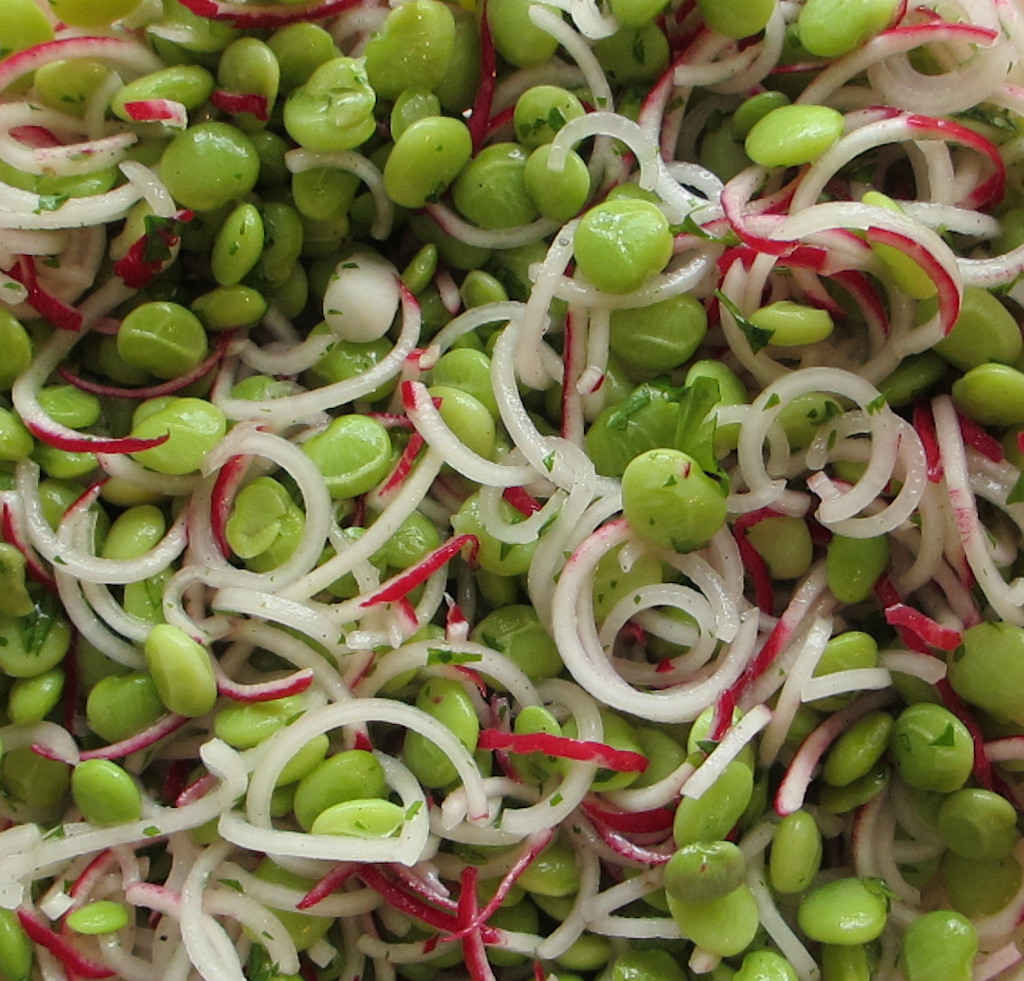
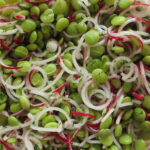
Sometimes you just come across a recipe that really hits you as something you absolutely must make immediately. This spiralized Churchill Downs butterbean and radish salad was just that for me. I had to make it immediately. But I had to change it up a bit and spiralize the radishes because, well, I love spiral radishes. A little crunch and a hint of citrus and you have a great tasty salad.
Take It On A Picnic
This spiralized Churchill Downs butterbean (er, lima bean) and radish salad also travels really well. It’s the perfect salad for a pitch-in, and it’s something different. I bet you haven’t seen too many butterbean salads. I haven’t seen any that’s for sure. Maybe it’s the pitch-ins I go to…. People will definitely perk up when they see a big ole bowl of this salad, that’s for sure.
I used to live in Lima, Peru. Which isn’t how we pronounce lima beans. I’ve always found that to be sooooo confusing. I mean, there’s Lima, Ohio, right? Why isn’t it pronounced like Lima, Peru? Lima beans came from Peru. Who’s in charge of fixing this?
Spiralized Churchill Downs Butterbean and Radish Salad
Sometimes you just come across a recipe that really hits you as something you absolutely must make immediately. This Churchill Downs butterbean and radish salad was just that for me. I had to make it immediately. But I had to change it up a bit and spiralize the radishes because, well, I love spiral radishes. A little crunch and a hint of citrus and you have a great tasty salad.
Note: This recipe was developed using the Char-Broil Big Easy Oil-Less Fryer. If you are cooking using the Char-Broil Smoker-Roaster Grill you should cook with the lid open and the temperature set to High. You might also need to adjust the cooking time.
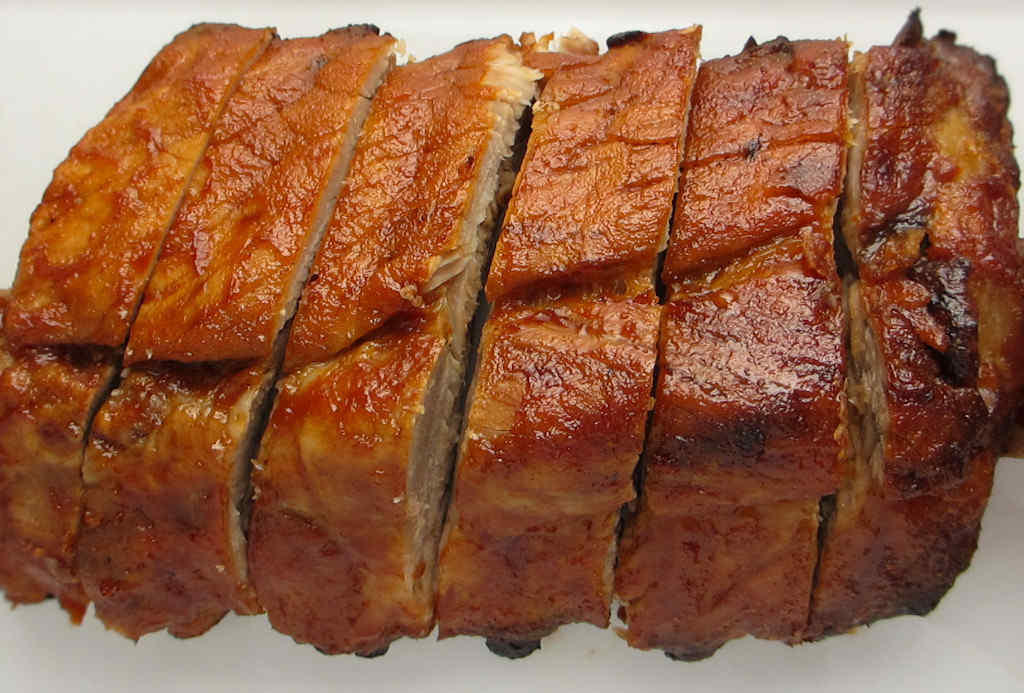
I’ve made baby back ribs on my Char-Broil Big Easy before and they’ve come out great. After watching a TV show segment on Tony Roma’s ribs I decided that I needed to try the same technique using my Big Easy. And boy, did they come out packed with flavor. Tender, almost-fall-off-the-bone meat. Perfectly tasty. And, a key in my book, not over-sauced. Just like they said on the TV show, you want to taste the meat. There are ribs there. Taste them!
Don’t Be Intimidated. They’re Easy.
The recipe steps may look like a lot of work, but these Tony Roma’s ribs are actually quite easy to make. Marinate overnight, cook for a while, brush with sauce, cook a bit longer to set the sauce, slice and serve. Done. If you prefer a more traditional ketchup-based BBQ sauce on your ribs try my copycat of Tony Roma’s Blue Ridge Smokies sauce.
I do not like for my rib meat to be completely fall-off-the-bone. I like a little ‘tug’ to it and that’s what I got after 90 minutes. If you prefer your ribs to be even more tender, leave them in for the full 2 hours.
The recipe steps may look like a lot of work, but these Tony Roma’s ribs are actually quite easy to make. Marinade overnight, cook for a while, brush with sauce, cook a bit longer to set the sauce, slice and serve. Done.
Cut the ribs in half if they are too long to fit into your Big Easy.
Place the ribs in resealable container or baggie.
Combine the rest of the ingredients in a medium saucepan.
Bring the sauce to a boil then reduce the heat to a simmer and let simmer until reduce by half and thickened, 15-20 minutes.
Remove the sauce from the heat and let cool.
Reserve 1/4 cup of the sauce and pour the remaining sauce over the ribs. Coat well, seal, and refrigerate overnight. Turn occasionally to let the marinade get on all sides of the ribs.
Fire up your Big Easy.
Cut a small slit in one end of the ribs and insert the rib hooks.
Place the ribs on a piece of foil. Pour any remaining marinade from the overnight marinate (NOT the marinade you reserved) over the ribs and seal TIGHTLY. You want the foil seam to be at the top, near the hooks and the bottom of the ribs sealed so the juices and marinade does not leak out.
Hang ribs in the Big Easy basket and lower into the cooker.
Cook for 90 minutes to 2 hours. After 90 minutes the ribs will be tender with a bit of a 'bite', meaning the meat will gently pull away from the bones. The meat will pull away from the bones about an inch on the ends. If you want your ribs to be completely fall-off-the-bone leave them in for the full 2 hours.
Remove the ribs from the Big Easy and remove them from the foil. Do not remove the rib hooks.
Brush the ribs with half of the reserved marinade and return to the Big Easy for 5 minutes.
Remove ribs from the cooker and let rest for 10 minutes before slicing.
Brush with last of the reserved marinade and serve.
Notes
You’ll need the Big Easy rib hooksor fashion your own from stainless hooks or wire.
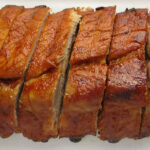
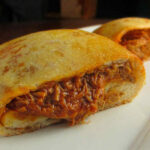
Looking for the best way (well, one of the best ways) to use leftover BBQ pulled pork? Make hot pockets! They’re crazy easy. Just about as easy as making a pulled pork sandwich. Light crispy dough. Hot oozing filling. You can even pick these pulled pork hot pockets up and devour them like little meat pies if you want.
Almost Any Dough Will Do
Just about any dough can be used, from homemade to pizza to even crescent roll dough (pinch two triangles of the dough together to form one ‘pocket’). These also freeze well, making them great for a quick lunch. Just pop them into the microwave until hot (beware of the hot filling!) and it’s time to eat! Of course you can substitute smoked brisket or chicken instead. Just shred fine and you’re good to go!
I highly recommend that you shred or grate your own cheese at home. Don’t buy the pre-shredded or pre-grated stuff. It has stuff added to it to keep it from sticking together. That ‘stuff’ affects how the cheese melts. Shred it yourself and use the good stuff.