Strawberry Chipotle BBQ Sauce

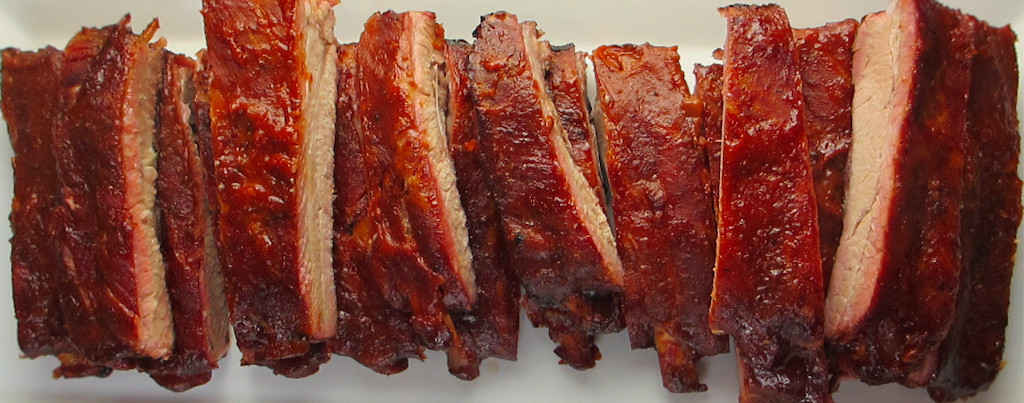
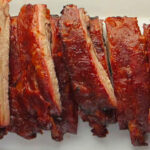
Three of my favorite things on one plate. First, smoked 3-2-1 St. Louis-style ribs. Sauced with a BBQ sauce that combines two of my other favorites: strawberries and chipotles. That great sweet berry flavor with a hint of smoky spiciness. Strawberries are in season here, and I just love using them in everything from a strawberry poppy seed salad dressing to this BBQ sauce. The strawberry flavor isn’t strong, it’s there enough for you to notice. Same goes for the chipotle. You get the smoky and you get the kick. But both are nicely balanced and not overwhelming.
Strawberry Chipotle BBQ Sauce

A Totally Different BBQ Sauce

I cannot wait to use this strawberry chipotle BBQ sauce on smoked pulled pork. Though I think the sauce would be great on anything smoked or grilled, I feel nothing can touch its greatness on pork. There’s something about strawberry and pork. Delicious! This is a really great twist on a traditional BBQ sauce!
La Costeña Chipotle Peppers in Adobo Sauce…
  • Bold Flavor in Every Bite — La Costeña chipotle…
  • Your Shortcut to Delicious Meals — Authentic…

Also try my southwestern BBQ sauce.
Strawberry Chipotle BBQ Sauce
Print Pin
5 from 1 vote

Strawberry Chipotle BBQ Sauce

The strawberry flavor isn’t strong, it’s there enough for you to notice. Same goes for the chipotle. You get the smoky, you get the kick, but it’s nice and not overwhelming.
Course Sauce
Cuisine American
Keyword barbecue, BBQ, sauce, smoky, spicy
Prep Time 30 minutes
1 hour
Total Time 1 hour 30 minutes
Servings 4 cups
Calories 281kcal

Ingredients

Instructions

  • In a large saucepan over medium-high heat, heat olive oil.
  • Add in onion and saute for about 5 minutes.
  • Add in garlic and saute for 60 seconds.
  • Stir in strawberries, chipotles, ketchup, brown sugar, Worcestershire sauce, ground mustard, salt, and pepper. Bring to a boil.
  • Reduce heat to medium-low and simmer for 5 minutes.
  • Use an immersion blender to puree the sauce or transfer to a blender. Puree until smooth.
  • Return to heat and simmer another 10 minutes.
  • Cool completely and store in an airtight container.

Notes

Refrigerate up to 5 days.
Stir before serving.

Nutrition

Calories: 281kcal | Carbohydrates: 67g | Protein: 2g | Fat: 1g | Saturated Fat: 1g | Sodium: 1099mg | Potassium: 499mg | Fiber: 4g | Sugar: 58g | Vitamin A: 901IU | Vitamin C: 50mg | Calcium: 81mg | Iron: 2mg

Nutritional values are approximate.

New Star Foodservice Condiment Squeeze Bottle Set…
  • 3-Pack Food-Safe Commercial-Grade Plastic: Made…
  • Versatile Use for Sauces, Oils, and Condiments…
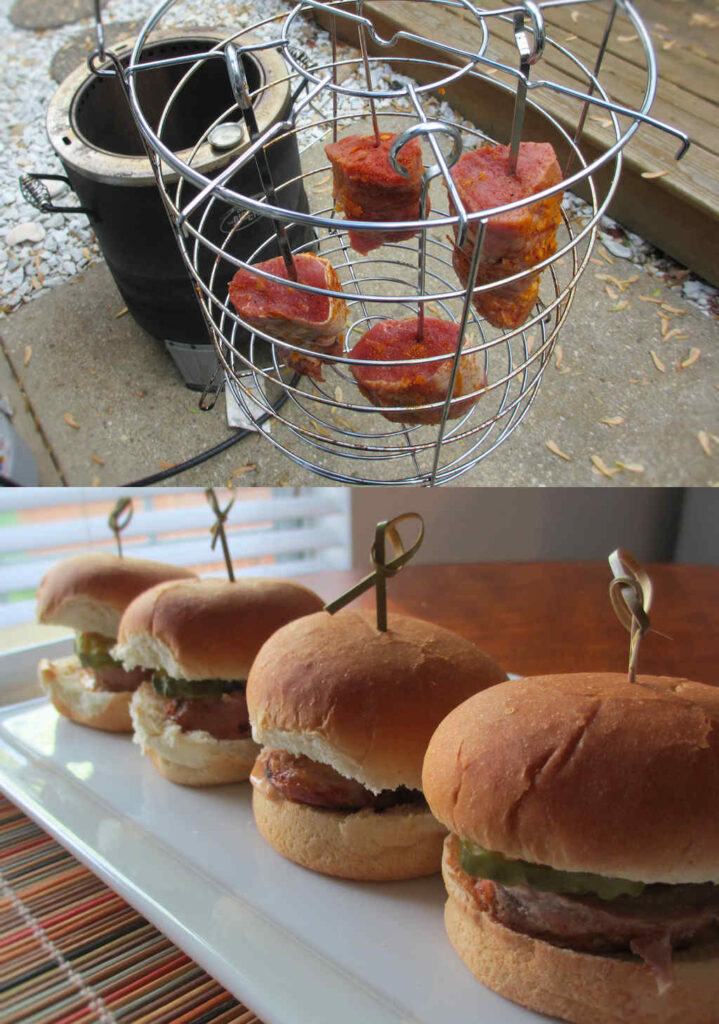
Cajun Pork Tenderloin on the Char-Broil Big Easy

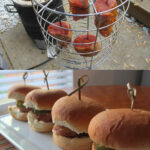
Well, heck yeah! If you follow this blog you know I’m a huge fan of the Char-Broil Big Easy. I’m not afraid to cook anything on it, from chicken to crab. But never pork tenderloin until now. And wow, what a great job my Big Easy did (again!)! I injected the pork tenderloin with a simple Cajun butter mixture (you could use store-bought), let it get happy in the fridge for a bit, then skewered it using one of the kabob add-ons (see my Char-Broil Big Easy Add-On page) and cooked it up. In no time (really) I had a perfectly cooked Cajun pork tenderloin, all ready for slicing and eating on sliders.

Note: This recipe was developed using the Char-Broil Big Easy Oil-Less Fryer. If you are cooking using the Char-Broil Smoker-Roaster Grill you should cook with the lid open and the temperature set to High. You might also need to adjust the cooking time.

Cajun Pork Tenderloin on the Char-Broil Big Easy

Go Tenderloin, Not Loin

I prefer pork tenderloin to pork loin 9 times out of 10. It’s more tender and flavorful. It’s the pork equivalent of a beef tenderloin, so you know it’s the best. Like most cuts of pork it needs a little flavor boost, but I don’t go crazy with it. This Cajun pork tenderloin on the Char-Broil Big Easy is flavored perfectly. If you think your oil-less cooker is just for poultry, this will prove that it can do a whole lot more!

Feed A Crowd

You’ll see that I had no problem fitting two 1 1/2 pound pork tenderloins into the Big Easy. I did have to cut them in half, but it was close… I probably could’ve made them fit without cutting. That means I could probably easily fit 4 (or maybe even 6) tenderloins on the Big Easy at once… enough for a crowd and then some! Note that you might want to trim the ends just a bit if they are much thinner than the rest of the tenderloin or they will be done cooking well before the rest of the meat.

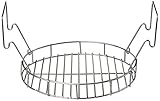
Charbroil The Big Easy Bunk Bed Basket…
  • Expands the cooking space of The Big Easy
  • Perfect for cooking two chickens at once

For a great side dish, roast up a few red potatoes in your Big Easy.

It’s always a good idea to keep a few spare grease trays on hand for your Char-Broil Big Easy.

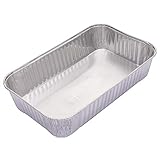
Char-Broil 2425514W12 Big Easy Grease Tray…
  • MATERIAL: Disposable aluminum liners made…
  • SIZE: Measures 6” x 10” across the top and…

Love your Big Easy as much I love mine? Check out my Big Easy Add-Ons page and all 3 of my huge free Big Easy eCookbooks!

Cajun Pork Tenderloin on the Char-Broil Big Easy
Print Pin
4 from 1 vote

Cajun Pork Tenderloin on the Char-Broil Big Easy

Well, heck yeah! If you follow this blog you know I’m a huge fan of the Char-Broil Big Easy. I’m not afraid to cook anything on it, from chicken to crab. But never pork tenderloin until now.
Course Main
Cuisine American
Keyword Big Easy, Cajun, Char-Broil, pork
Prep Time 4 hours
Cook Time 45 minutes
Total Time 4 hours 45 minutes
Servings 6
Calories 868kcal
Author Mike

Ingredients

  • 2 pork tenderloins about 3 pounds total

For the Cajun injection

Instructions

  • Remove tenderloins from packaging.
  • Cut tenderloins in half in the middle if necessary to get them to fit into the Big Easy.
  • Trim and thin ends as they will cook too quickly.
  • Inject with the Cajun injection and cover.
  • Place in the fridge for 4 hours.
  • Fire up your Big Easy.
  • Thread the tenderloins onto the Big Easy skewers.
  • Lower into the cooker and cook until the pork is medium, 155-160 F. Plan on 10-15 minutes per pound cook time.
  • Remove and let rest 10 minutes before slicing.

For the Cajun injection

  • Melt the butter in a small saucepan.
  • Add the Cajun seasoning and garlic powder. Stir and let simmer until the spices are completely dissolved.
  • Load into an injector with a large needle (I used the one for minced marinades).

Notes

Note: You’ll need a Big Easy kabob set to make these tenderloins.

Nutrition

Calories: 868kcal | Carbohydrates: 2g | Protein: 125g | Fat: 37g | Saturated Fat: 17g | Trans Fat: 1g | Cholesterol: 434mg | Sodium: 318mg | Potassium: 2423mg | Fiber: 1g | Sugar: 1g | Vitamin A: 1057IU | Vitamin C: 1mg | Calcium: 45mg | Iron: 6mg

Nutritional values are approximate.

Charbroil The Big Easy Bunk Bed Basket…
  • Expands the cooking space of The Big Easy
  • Perfect for cooking two chickens at once

Buffalo Wing Hummus

If you follow this blog you know that I’m a lover of all things Buffalo-wing-flavored. From wraps to pizza to cauliflower. And of course, chicken wings! I’m not picky as long as it has that great vinegary heat with a hint of butter. So why wouldn’t I make Buffalo wing hummus? Yep, smooth hummus with that sneak-up-on-you spicy classic flavor. Perfect and as an added bonus it was a big hit at our last family get-together. As much as I liked it, I can’t say I was expecting such high praise for it! It was a happy day for sure!

Buffalo Wing Hummus

A Different Tasting Hummus

There’s nothing wrong with dipping pita bread in this Buffalo wing hummus, but since there’s wing flavors in there, don’t forget to have some celery and carrot sticks around too. Just to keep it ‘classic’.

It’s up to you to decide how chunky or creamy you want your hummus to be. If this is your first time making it I suggest that you start out slow. Process it in your food processor just a bit and take a taste. Want it creamer? Keep going. Error on the side of caution, though. You can’t un-process it!

Sale
Cuisinart Food Processor 14-Cup Vegetable Chopper…
  • SUPERIOR FUNCTION: Cuisinart’s 720-watt motor…
  • MUST HAVE FEATURES: The 14-cup food processor has…

Also try my Buffalo chicken dip.

Buffalo Wing Hummus
Print Pin
5 from 1 vote

Buffalo Wing Hummus

Yep, smooth hummus with that sneak-up-on-you spicy flavor. Perfect and a big hit at our last family get-together.
Course Appetizer
Cuisine American
Keyword Buffalo, hummus
Prep Time 5 minutes
Cook Time 5 minutes
Total Time 10 minutes
Servings 4 cups
Calories 315kcal

Ingredients

Instructions

  • Place all ingredients plus 1/2 cup of the reserved chickpea liquid into a food processor.
  • Puree until very smooth. Add more reserved chickpea liquid as needed.
  • Serve with sliced carrots and celery and warmed pita chips.

Notes

I recommend using a BBQ sauce with no overwhelming flavors, such as hickory or fruits or one that is particularly spicy!

Nutrition

Calories: 315kcal | Carbohydrates: 43g | Protein: 14g | Fat: 11g | Saturated Fat: 1g | Sodium: 362mg | Potassium: 490mg | Fiber: 10g | Sugar: 9g | Vitamin A: 138IU | Vitamin C: 19mg | Calcium: 90mg | Iron: 4mg

Nutritional values are approximate.

Sale
Mueller Pro-Series All-in-One, 12 Blade Mandoline…
  • Meal Prep MVP – A practical and innovative way to…
  • 12 Diverse Blades – With nine interchangeable…
OXO Good Grips 4 Piece Stainless Steel Measuring…
  • Set includes: 1/4 cup, 1/3 cup, 1/2 cup and 1 cup
  • Magnetic handles keep Cups together for storage…

Spiralized Roasted Pickled Beets

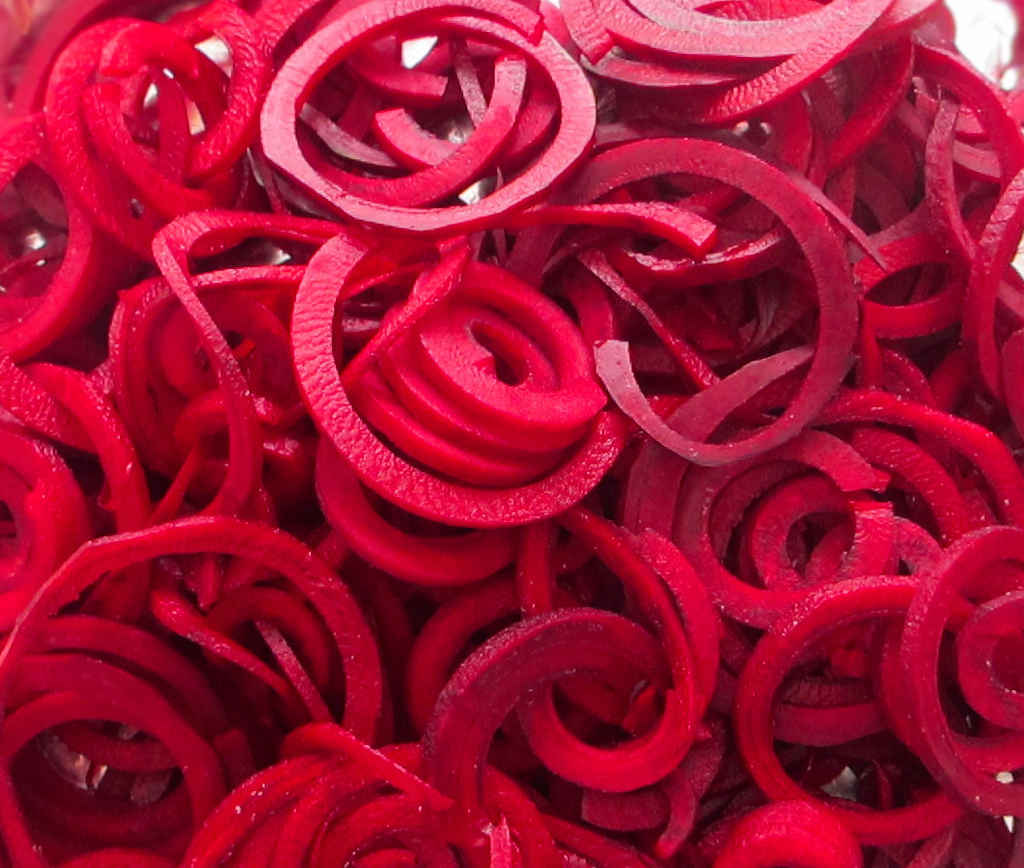
If you would’ve put beets in front of me when I was a kid I would’ve said “Ewwwww”. Then I would’ve pushed them away. And I’d make a face. Now, I find that I really like them, especially when roasted. Or pickled. Or even better, spiralized, roasted, and pickled! The aroma as the beets roast is fantastic. Spiralized roasted pickled beets are amazing. These are not the beets my mom tried to serve me when I was a kid. Sorry, Mom. These are way, way better!

Spiralized Roasted Pickled Beets

Different And Very Delicious

The shallots and rosemary combine with the beets for something really special. They then go into jars with a brine, but not a normal pickling brine. The addition of red onions and tarragon add so much to the beets. Even beet haters will love them!

Sale
Brieftons 5-Blade Countertop Vegetable Spiralizer…
  • MAKES ZUCCHINI NOODLES AND VEGGIE PASTA IN…
  • 5 LABELED JAPANESE 420-GRADE STAINLESS STEEL…

Make sure you wear kitchen gloves when handling the beets, and clean your spiralizer (and cutting board) immediately after using them. Roasted spiralized pickled beets can be messy.

I also learned quickly that you want to use beets with a little ‘give’ to them. You don’t want ones that are too hard. A few that I grabbed were hard to spiralize, and I ended up turning them by hand instead of using the crank. No worries, they still came out fantastic! Lesson learned!

Also try some of my long-time favorites, pineapple baby beets and roasted beet salad.

Spiralized Roasted Pickled Beets
Print Pin
5 from 1 vote

Spiralized Roasted Pickled Beets

If you would’ve put beets in front of me when I was a kid I would’ve said “Ewwwww” and pushed them away. Now, I find that I really like them, specially when roasted. Or pickled. Or even better, spiralized, roasted, and pickled! The aroma as the beets roast is fantastic. Spiralized roasted pickled beets are amazing.
Course Side
Cuisine American
Keyword beets, roasted
Prep Time 15 minutes
Cook Time 3 days 2 hours
Total Time 3 days 2 hours 15 minutes
Servings 1 quart
Calories 981kcal

Ingredients

For the roasted beets

  • 6 medium beets cleaned, peeled. Try to select beets that are slightly soft. Tougher beets will be difficult to spiralize.
  • 2 large shallots peeled, sliced thin
  • 2 sprigs rosemary or 1 teaspoon dried rosemary, crushed
  • 2 teaspoons olive oil

For the picking brine

Instructions

For the roasted beets

  • Preheat oven to 400 F.
  • Note: I like to cut a small slit down the sides of the beets. This produces a single half moon spiral.
  • Spiralize the beets. Tougher beets can be difficult to spiralize. Make sure you put the root side into the spiralizer first and have the stem side towards the crank.
  • Wash your spiralizer to keep it from staining.
  • Place beets onto a large piece of foil.
  • Top with the shallots, sprinkle with rosemary, and drizzle with oil.
  • Seal the foil tightly and place into the oven for 30-40 minutes or until tender but not mushy. Be careful opening the packet as the steam will be hot.
  • Let cool completely before pickling.

For the picking brine

  • Bring vinegar, tarragon, salt, sugar and water to a boil in a medium saucepan.
  • Stir until the sugar is dissolved.
  • Remove from heat and let cool completely.
  • Alternative beets and onions in jars.
  • Pour in the brine.
  • Add more water if necessary to completely cover the beets.
  • Seal and store in the refrigerator for at least 3 days before serving.

Notes

Serve cold.

Nutrition

Calories: 981kcal | Carbohydrates: 219g | Protein: 20g | Fat: 4g | Saturated Fat: 1g | Sodium: 4469mg | Potassium: 3805mg | Fiber: 33g | Sugar: 177g | Vitamin A: 593IU | Vitamin C: 65mg | Calcium: 296mg | Iron: 11mg

Nutritional values are approximate.

Sale
Fullstar Vegetable Spiralizer & Slicer, Veggie…
  • Compact 4-in-1 Design – The only zucchini…
  • Built-in Storage Container – Mess-free spiralizing…

Jalapeno Popper Cheesy Garlic Bread

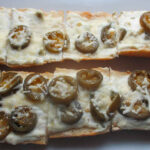
I love jalapeno poppers. Jalapenos stuffed with cream cheese are a great thing. The peppers mellow a bit. The creamy cheese cools the heat a bit. So, why not put those same great tastes together and make a jalapeno popper cheesy garlic bread? Yes, why not! Because we’re all tired of the standard garlic cheese bread. I mean hey, it’s good, but it needs some kick!

Jalapeno Popper Cheesy Garlic Bread

More Jalapenos. Or Less.

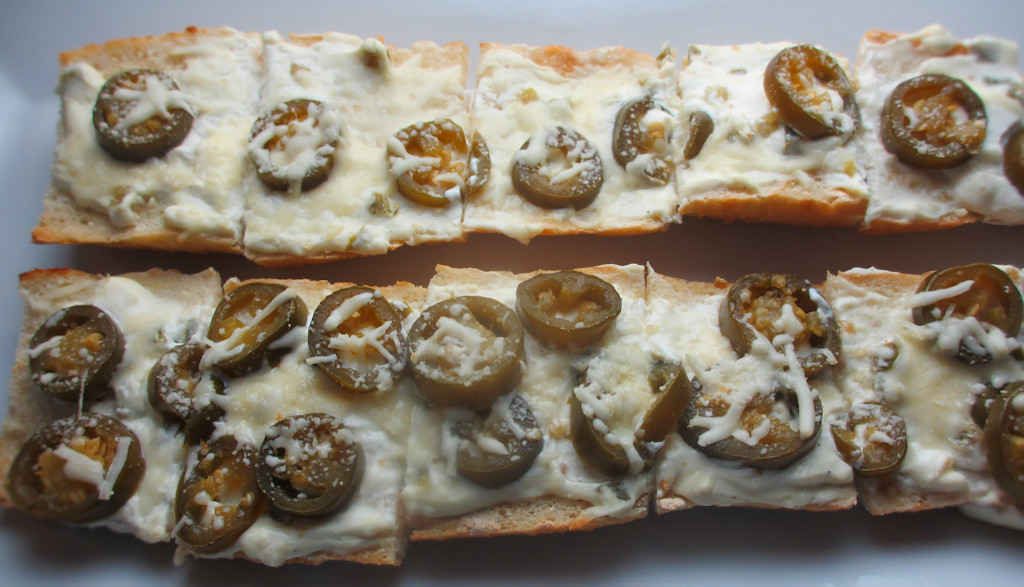
I made two ‘versions’ of this Jalapeno Popper Cheesy Garlic Bread. The top one was a little lighter on the jalapenos in case they would scare people off. The bottom one was loaded and loaded good. They were both fantastic and disappeared in no time at all.

Substitute Asiago or Swiss cheese for the mozzarella for a totally different taste. No matter what you use, you’re going to end up enjoying some great cheesy hot (and I do mean spicy hot) bread. This isn’t some fru-fru French restaurant bread.

I highly recommend that you shred or grate your own cheese at home. Don’t buy the pre-shredded or pre-grated stuff. It has stuff added to it to keep it from sticking together. That ‘stuff’ affects how the cheese melts. Shred it yourself and use the good stuff.

Geedel Rotary Cheese Grater, Kitchen Mandoline…
  • Makes Everything Simple : Just forget your bagged…
  • Premium Material : All parts of the rotary cheese…

Also try my olive cheese bread.

Jalapeno Popper Cheesy Garlic Bread
Print Pin
4 from 1 vote

Jalapeno Popper Cheesy Garlic Bread

I love jalapeno poppers. Jalapenos stuffed with cream cheese are a great thing. The peppers mellow a bit. The creamy cheese cools the heat. So, why not put those same great tastes together and make a jalapeno popper cheesy garlic bread? Yes, why not!
Course Bread
Cuisine American
Keyword cheesy, garlic bread, jalapeno popper, spicy
Prep Time 5 minutes
Cook Time 15 minutes
Total Time 20 minutes
Servings 8
Calories 561kcal

Ingredients

Instructions

  • Preheat your oven to 400 F.
  • Cut bread in half lengthwise.
  • Brush the insides with the melted butter and sprinkle with the garlic powder.
  • Bake for 5 minutes to get the bread a little crispy.
  • Meanwhile, combine the cream cheese, sour cream, chopped jalapenos, salt and pepper.
  • When the bread has cooked spread both sides with the cream cheese mixture.
  • Sprinkle with cheese and add the jalapeno slices.
  • Bake for another 4-5 minutes or until the cheese has melted.
  • Slice and serve.

Notes

You can substitute pepper jack for the mozzarella for even more spicy greatness!

Nutrition

Calories: 561kcal | Carbohydrates: 32g | Protein: 11g | Fat: 44g | Saturated Fat: 25g | Trans Fat: 1g | Cholesterol: 70mg | Sodium: 474mg | Potassium: 205mg | Fiber: 2g | Sugar: 19g | Vitamin A: 837IU | Vitamin C: 7mg | Calcium: 141mg | Iron: 1mg

Nutritional values are approximate.

Sale
Mueller Pro-Series All-in-One, 12 Blade Mandoline…
  • Meal Prep MVP – A practical and innovative way to…
  • 12 Diverse Blades – With nine interchangeable…
OXO Good Grips 4 Piece Stainless Steel Measuring…
  • Set includes: 1/4 cup, 1/3 cup, 1/2 cup and 1 cup
  • Magnetic handles keep Cups together for storage…

Hickory Ground Beef Jerky on the Nesco Snackmaster Pro

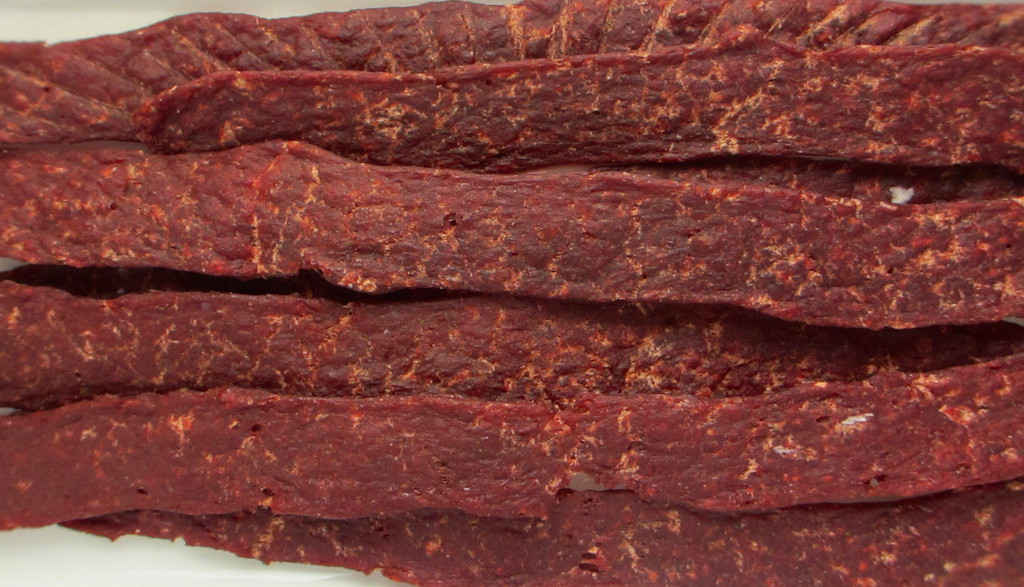
I love making jerky on my dehydrator. I’ve been using ground top round for my ground beef jerky, but any lean ground meat will work. This hickory ground beef jerky on the Nesco Snackmaster Pro has a nice mellow smoky hickory flavor that is definitely not overwhelming. The meat has the perfect ‘bite’, just a little tug.

Hickory Ground Beef Jerky on the Nesco Snackmaster Pro

Rotate Your Trays…

Make sure you rotate your trays every 2 hours or so when you make hickory ground beef jerky on the Nesco Snackmaster Pro. The bottom trays will not dry as quickly as those on top. Rotating the trays will give you nice, even drying and perfect jerky on every level.

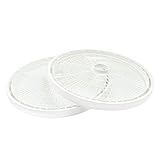
… And Have Extra Trays

I like to load up my dehydrator. To do that I picked up a handful of extra trays. They really add a whole lot more drying space! Since I have to rotate my trays, I write a number on each one on a piece of blue painter’s tape so I can keep track of them. Every hour (I set a timer) I move the top tray to the bottom. Seems easy enough but to make sure I have them numbered.

Nesco TR-2 White Plastic Round 15 1/2″ Add-A-Trays…
  • 15.5″ DIAMETER TRAYS: This Add-A-Tray 2-pack…
  • BPA FREE: Made of high-quality food grade plastic…
Nesco SLD-2-6 American Harvest 13.75″ Fruit Roll…
  • Compatible with 15½” diameter trays. This Fruit…
  • BPA FREE: Made of high-quality food grade plastic…
Sale
NESCO LM-2-6 Round Plastic Mesh…
  • IDEAL FOR SMALL AND STICKY FOODS: Removable mesh…
  • BPA FREE: Made of high-quality food grade plastic…

Paranoia Rules

I admit, I’m paranoid about my jerky. Even if I use pink curing salt. The sodium nitrites in the salt kill harmful bacteria as long as you’ve dried the meat properly and store it in air-tight containers away from sunlight. I keep mine in the fridge even though it’s not required. Even though I’ve made my share of jerky I still consider myself a newbie. And it’s not like I don’t have the room in the fridge. So in it goes!

Try these other great jerky flavors from Eastman Outdoors: spicy jalapeno, Cajun, whiskey pepper, mesquite and sweet habanero.

Check out my guide to using the Nesco Snackmaster Pro. You will be making fantastic jerky at home in no time at all!

Hickory Ground Beef Jerky on the Nesco Snackmaster Pro
Print Pin
5 from 1 vote

Hickory Ground Beef Jerky on the Nesco Snackmaster Pro

This hickory ground beef jerky has a nice mellow smoky hickory flavor that is definitely not overwhelming. The meat has the perfect ‘bite’, just a little tug.
Course Dehydrator
Cuisine Jerky
Keyword BBQ, beef, dehydrator, jerky, nesco snackmaster pro, sweet
Prep Time 8 hours
Cook Time 6 hours
Total Time 14 hours
Servings 1 pound
Calories 1243kcal
Author Mike

Ingredients

Instructions

  • NOTE: The package for the Eastman Outdoors jerky seasoning states that it makes up to 5 pounds of jerky. I personally feel that the flavor is too mellow, so I use just about an entire package for 1 pound of jerky. I end up with a little left over seasoning, which I store in a labelled air-tight container. I’ll eventually mix it with more seasoning. I think I can get 3 pounds of well-seasoning jerky out of two packages of Eastman Outdoors mix.
  • Place beef in a resealable bag or container.
  • In a small bowl whisk together the seasoning, curing salt and water.
  • Pour over the meat and seal.
  • Shake to coat.
  • Refrigerate the meat for up to 8 hours, shaking or massaging every hour or so to get the marinade distributed and absorbed evenly.
  • Remove meat from the marinade and add to a jerky gun.
  • Squeeze out onto Nesco trays. Do not overlap meat.
  • Add the dehydrator top, set to maximum temperature setting and dehydrate for 5 hours, rotating the trays (bottom to top) every 2 hours or so.
  • To test for doneness remove a piece and let cool slightly. Try to bend the meat. If it gives and starts to tear at the bend it is done. If it bends without tearing return to the dehydrator and let it run another 15 minutes and test again. If the meat is crunchy it is overdone but still good. It’s really personal preference as to how you like your jerky. Soft, chewy, crunchy. There’s no wrong here.
  • Let cool before storing in an airtight container.

Notes

This recipe is for starting with 1 pound of meat. You’ll end up with about 1/2 pound in the end. You can easily double/triple/etc this recipe for large quantities of meat, however 5-6 pounds is about all you can fit onto a Nesco Snackmaster Pro fitted with 12 trays (the unit comes with 5).

Nutrition

Calories: 1243kcal | Protein: 194g | Fat: 45g | Saturated Fat: 20g | Trans Fat: 3g | Cholesterol: 562mg | Sodium: 605mg | Potassium: 3139mg | Calcium: 85mg | Iron: 22mg

Nutritional values are approximate.

Nesco SLD-2-6 American Harvest 13.75″ Fruit Roll…
  • Compatible with 15½” diameter trays. This Fruit…
  • BPA FREE: Made of high-quality food grade plastic…

Jumbo Dogs on the Char-Broil Big Easy

Note: This recipe was developed using the Char-Broil Big Easy Oil-Less Fryer. If you are cooking using the Char-Broil Smoker-Roaster Grill you should cook with the lid open and the temperature set to High. You might also need to adjust the cooking time.

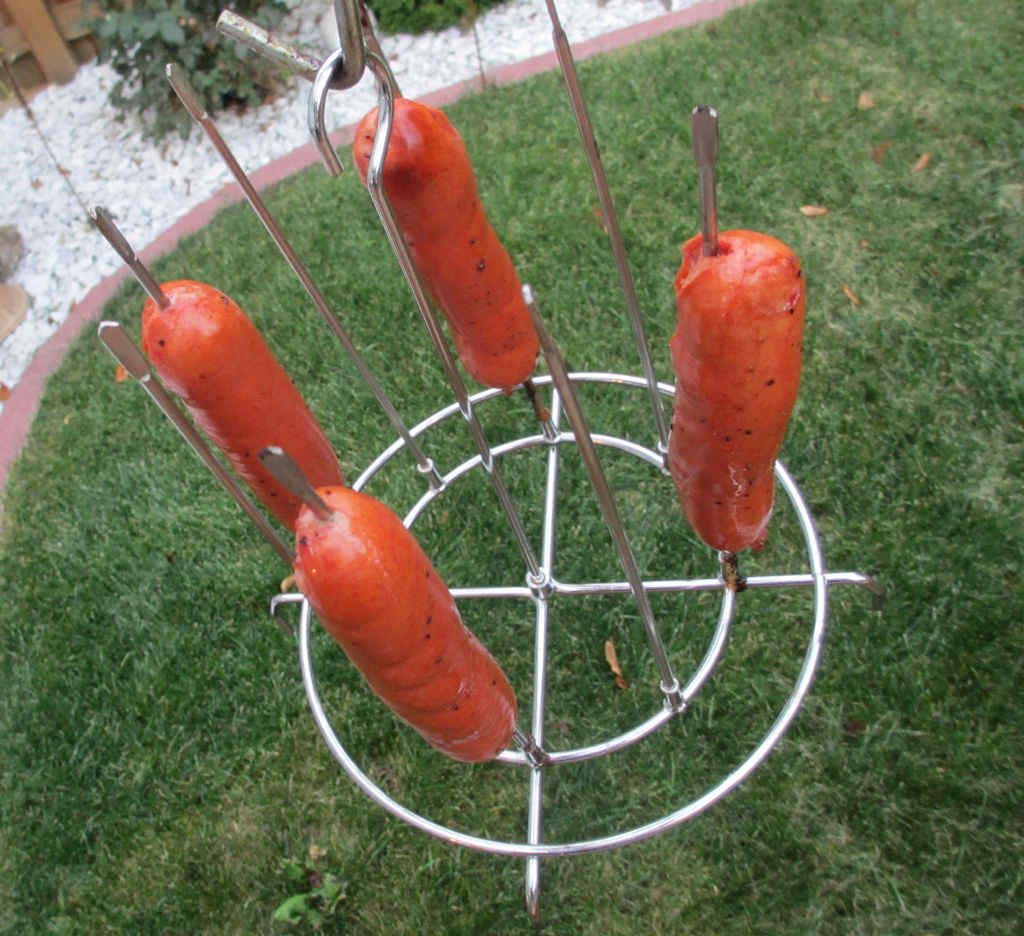
I love cooking on my Char-Broil Big Easy. So much that I even put together a free eCookbook containing some of my favorite Big Easy recipes. Like most people, I bought my Big Easy for cooking turkey at Thanksgiving. I quickly realized that I can cook just about anything in it. Even jumbo hot dogs! Yep! Jumbo dogs on the Char-Broil Big Easy are crazy easy, and crazy good. The dogs get a great crispy crunchy casing that just pops in your mouth. The meat is tasty, moist and perfect!

Jumbo Dogs on the Char-Broil Big Easy

Big Dogs For Big Flavor

Don’t be shy with your Jumbo Dogs on the Char-Broil Big Easy. Add some sweet onions and peppers along with the jumbo dogs and let them roast along with the dogs. Chop and add them to buns to make a great dog even better. You can also cook up a big batch of regular-sized hot dogs in your Big Easy, enough for a crowd!

Charbroil The Big Easy Bunk Bed Basket…
  • Expands the cooking space of The Big Easy
  • Perfect for cooking two chickens at once

It’s always a good idea to keep a few spare grease trays on hand for your Char-Broil Big Easy.

Char-Broil 2425514W12 Big Easy Grease Tray…
  • MATERIAL: Disposable aluminum liners made…
  • SIZE: Measures 6” x 10” across the top and…

Love your Big Easy as much I love mine? Check out my Big Easy Add-Ons page and all 3 of my huge free Big Easy eCookbooks!

Jumbo Dogs on the Char-Broil Big Easy
Print Pin
5 from 1 vote

Jumbo Dogs on the Char-Broil Big Easy

Jumbo dogs are crazy easy, and crazy good. The dogs get a great crispy crunchy casing that just pops in your mouth. The meat is tasty, moist and perfect!
Course Main
Cuisine American
Keyword Big Easy, Char-Broil, hot dogs
Prep Time 30 minutes
Cook Time 15 minutes
Total Time 45 minutes
Servings 4
Calories 445kcal
Author Mike

Ingredients

Instructions

  • Place the dogs into a baggie or resealable container.
  • Add the marinade and let marinate for 30 minutes.
  • Fire up the Char-Broil Big Easy.
  • Place dogs onto kabobs and lower into the cooker.
  • Cook for 10-15 minutes or until the dogs are nice and toasty hot!

Notes

You can also just lay the dogs horizontally in the basket.

Nutrition

Calories: 445kcal | Carbohydrates: 33g | Protein: 19g | Fat: 27g | Saturated Fat: 9g | Cholesterol: 81mg | Sodium: 1231mg | Potassium: 263mg | Vitamin C: 1mg | Calcium: 43mg | Iron: 4mg

Nutritional values are approximate.

Charbroil The Big Easy Bunk Bed Basket…
  • Expands the cooking space of The Big Easy
  • Perfect for cooking two chickens at once

Roasted Vegetable Stuffed Mushrooms

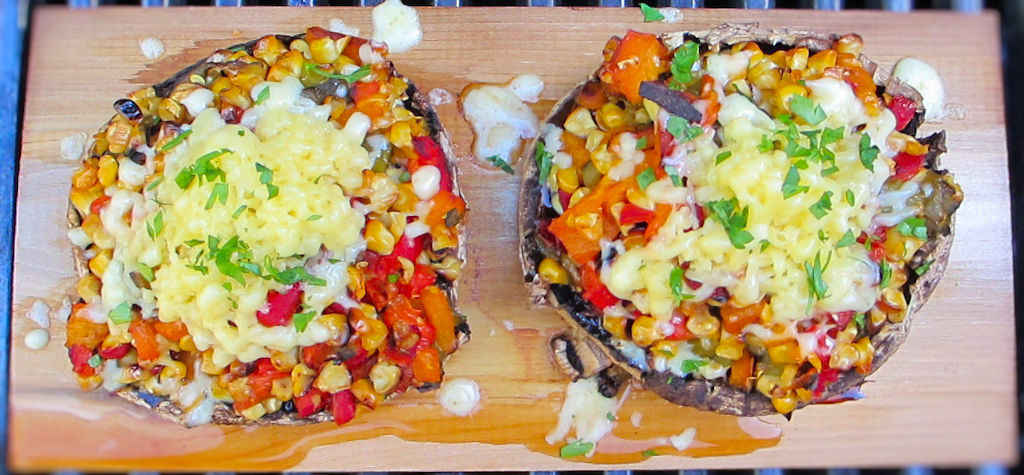
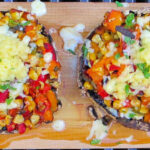
These roasted vegetable stuffed mushrooms may be one of my favorite summertime grilling ideas. It doesn’t really matter what vegetables you use, either. Just grab whatever vegetables are in season at the store, roast them on the grill, then spoon them into large mushroom caps. Add a bit of seasoning, a little cheese, place onto a cedar plank over a hot fire, and in no time at all you’ll have a great side dish.

Roasted Vegetable Stuffed Mushrooms

That Great Cedar Aroma

Grilling (I usually use my Weber grill) on cedar planks can be a sensitive subject. Some folks really don’t care for it, others, like me, love it. I like the light flavor the planks can add. Specially to dishes like these roasted vegetable stuffed mushrooms. And it looks cool. And it makes the deck area smell great.

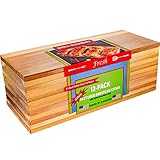
I have to admit that I’m cheap, so I re-use planks as much as I can. As long as you don’t burn them too much on one side, you can get a few uses from them. Don’t buy any el cheapo cedar planks for this or any other dish. Get the good stuff and you won’t ever look back. Cheap planks split, warm and have splinters. Good planks are thicker, stay flat and have smoother edges.

Cedar Grilling Planks – 12 Pack – Made In USA
  • Textured Grilling Planks for More Smoke and More…
  • 5.5″. x 11.00″ x 1/3″ – Upgraded Thickness!

Also try my roasted beet and dill cucumber salad.

Roasted Vegetable Stuffed Mushrooms
Print Pin
4 from 1 vote

Roasted Vegetable Stuffed Mushrooms

These roasted vegetable stuffed mushrooms may be one of my favorite summertime grilling ideas. It doesn’t really matter what vegetables you use, either. Just grab whatever vegetables are in season.
Course Side
Cuisine American
Keyword mushroom, roasted, stuffed, vegetable
Prep Time 5 minutes
Cook Time 1 hour 20 minutes
Total Time 1 hour 25 minutes
Servings 4
Calories 40kcal
Author Mike

Ingredients

Instructions

  • Soak the cedar plank in water, if using.
  • Fire up your grill for high-heat cooking.
  • Lightly brush the peppers (I used whole peppers and saved the rest for later use) and corn with oil.
  • Place over high heat and roast, turning often, until lightly charred and just tender.
  • Remove from heat, let cool slightly, then chop the peppers and cut kernels from the ear of corn.
  • Place vegetables into a bowl and season with oregano (if desired) and salt and pepper, to taste.
  • Add the cedar plank and let it get hot and smoky, about 20 minutes.
  • Reduce grill heat to medium.
  • Using a spoon, gently scrape out the gills from the mushrooms.
  • Lightly brush both sides of the mushrooms with oil.
  • Place mushrooms on grill cap side up and grill 3 minutes. The mushrooms will start to sweat, but do not overcook them.
  • Remove from heat and place onto the cedar plank.
  • Spoon the vegetable mix into the mushrooms and place onto the grill.
  • Grill for 20 minutes or until the mushroom is almost tender, watching to make sure the plank doesn’t catch on fire. If it does, spray it with water from a spray bottle.
  • Add cheese and cook another 3-4 minutes until melted.
  • Remove from heat, garnish with chopped cilantro, and serve.

Notes

Use pepper jack cheese instead for a little spiciness.

Nutrition

Calories: 40kcal | Carbohydrates: 8g | Protein: 2g | Fat: 1g | Saturated Fat: 1g | Trans Fat: 1g | Sodium: 5mg | Potassium: 264mg | Fiber: 2g | Sugar: 3g | Vitamin A: 990IU | Vitamin C: 39mg | Calcium: 4mg | Iron: 1mg

Nutritional values are approximate.

Cedar Grilling Planks – 12 Pack – Made In USA
  • Textured Grilling Planks for More Smoke and More…
  • 5.5″. x 11.00″ x 1/3″ – Upgraded Thickness!

Schlotsky’s The Original (Copycat Recipe)

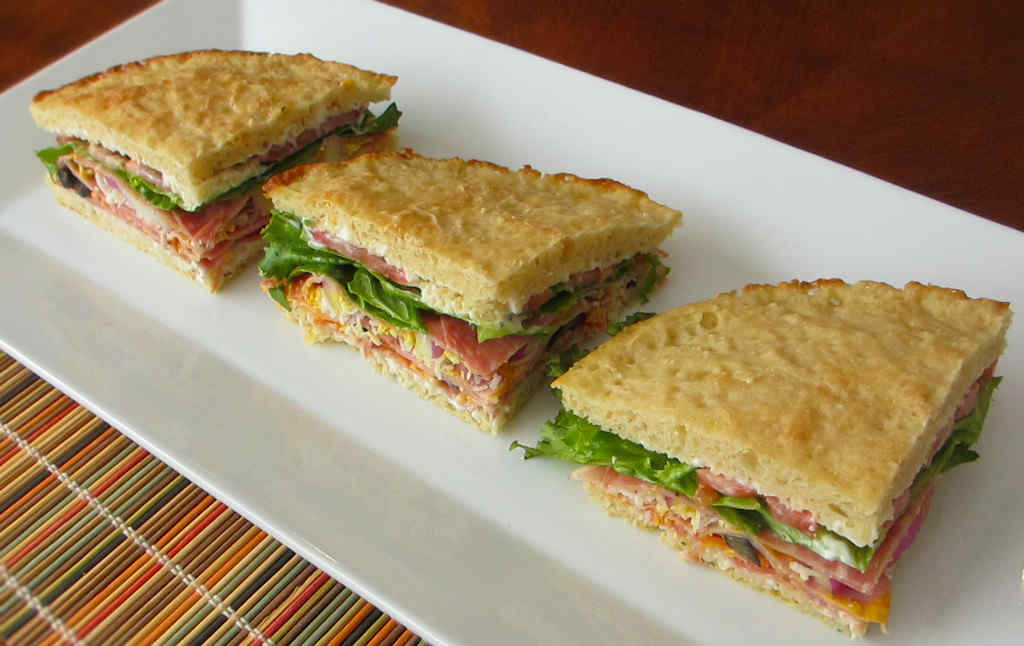
My wife and I were driving to Nashville, TN, when we passed a sign on the interstate for a Schlotsky’s. I instantly flashed back to the days when we had a Schlotsky’s near where I worked in Indianapolis. It was my favorite lunch spot. I so loved their bread, the meats, and the fresh toppings. Sadly, it was early in the morning so the Schlotsky’s was closed. At that moment I set out on a journey to recreate my favorite sandwich, Schlotsky’s The Original. This copycat recipe is a fantastic reproduction of the classic great sandwich, from the bread to the meats to the garlic dressing.

This sandwich requires a little effort to come together. Most of that time is spent getting the bread just right. You could use a different bread. A store-bought one. But no way would it be even close to the real thing then. The breads at Schlotsky’s were one of the things that really made their sandwiches different and so much better than all the other chain sub shops.

Schlotsky's The Original (Copycat Recipe)

You’ll Be Rewarded In The End

It may look like it takes a lot of work and ingredients to make this copycat recipe of the Schlotsky’s The Original, but it’s actually quite simple and the end result will more than reward your efforts. The key is the sourdough bread, which comes out light, airy, and full of air bubbles. It holds up perfectly to the ingredients, including my favorite, the garlic mayonnaise. I made a big squeeze bottle of the dressing and also find myself using it on burgers and wraps.

I almost always use Blue Plate mayonnaise in the dishes I make. I think it is the best around. If you can’t find it locally you can pick it up online for a fair price.

Blue Plate Regular Mayonnaise 30 Fl Oz (Pack of 1)
  • Real Mayonnaise Made Like Homemade: Time-honored…
  • A History of Delicious: Our simple…

Also try my copycat Denny’s Club Sandwich.

Copycat Schlotsky's The Original
Print Pin
5 from 2 votes

Schlotsky’s The Original (Copycat Recipe)

This copycat is a fantastic copycat of the classic great sandwich, from the bread to the meats to the garlic dressing.
Course Main
Cuisine American
Keyword copycat, sandwich
Prep Time 12 hours
Cook Time 30 minutes
Total Time 12 hours 30 minutes
Servings 8 slices
Calories 519kcal

Ingredients

For the sourdough bread starter

For the bread

For the creamy garlic dressing

For the sandwich

  • Parmesan cheese grated
  • 1 cup Mozzarella cheese shredded
  • 1 cup sharp cheddar cheese shredded
  • 8 Cotto salami thin slices
  • 8 Genoa salami thin slices
  • 8 ham sandwich meat thin slices
  • prepared yellow mustard
  • red onion sliced thin
  • tomatoes sliced thin
  • lettuce shredded or chopped
  • black olives sliced

Instructions

For the sourdough bread starter

  • Add the water to a medium bowl.
  • Stir in the yeast and sugar and let sit for 5 minutes until foamy.
  • Stir in the flour.
  • Cover loosely and place in a warm place 8-12 hours.

For the bread

  • Add the warmed milk to a large bowl. Stir in the starter.
  • Stir in the sugar, salt and baking soda until the dry ingredients are dissolved.
  • Add the flour 1/2 cup at a time, stirring to combine until smooth. The dough will end up sticky and thick.
  • Spray two 8″ (or three 6″) pie pans with non-stick spray.
  • Sprinkle the bottoms of the pans with the corn meal.
  • Divide the dough between the pans. Just plop into the centers of the pans. Don’t worry about it being pretty, it’ll spread out as it rises.
  • Lightly spray the tops of the dough with non-stick spray.
  • Loosely cover the pans and let rise for 1 hour in a warm spot. I recommend covering the dough with something that won’t stick to it, such as upside down pie pans.
  • After the dough has risen, preheat your oven to 375 F.
  • Spray the tops of the dough again with non-stick spray and bake for 20 minutes until golden brown. Remove to racks to cool.

For the creamy garlic dressing

  • Whisk together all ingredients. Store in a squirt bottle for easy dispensing.

For the sandwich

  • Cut the bread in half, horizontally.
  • Squirt the bread with the garlic dressing and yellow mustard.
  • Add the remaining sandwich ingredients.
  • Slice into quarters and serve.

Notes

I like to have my cheese melted a bit, so I wrap the assembled sandwiches in foil and insert them into a preheated 350 F oven for 5-10 minutes.

Nutrition

Calories: 519kcal | Carbohydrates: 38g | Protein: 15g | Fat: 33g | Saturated Fat: 10g | Trans Fat: 1g | Cholesterol: 47mg | Sodium: 894mg | Potassium: 155mg | Fiber: 1g | Sugar: 4g | Vitamin A: 379IU | Vitamin C: 1mg | Calcium: 213mg | Iron: 1mg

Nutritional values are approximate.

Grilled Rib Roast with Gravy

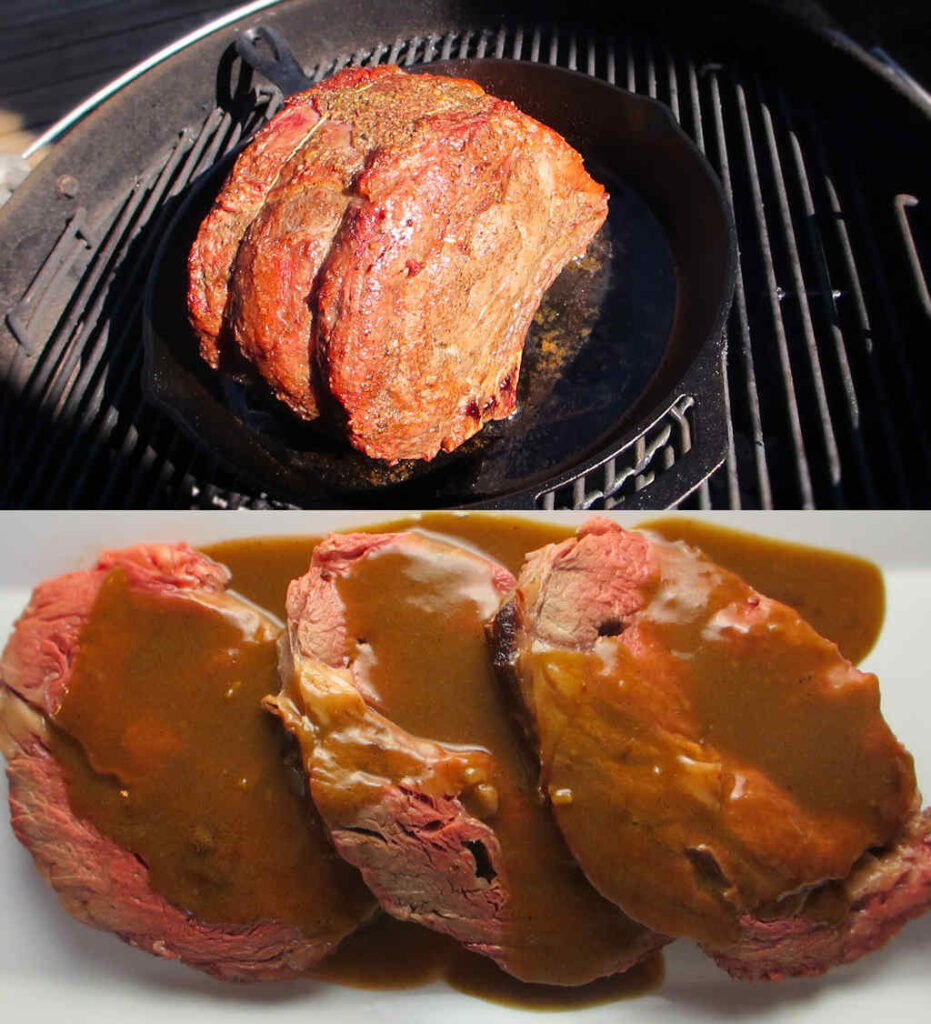
This grilled rib roast with gravy is exactly why you’re not supposed to say “This is the best thing I ever ate.” Not long ago I made a fire-eater reverse-sear prime rib on my grill, and “best thing I ever ate” is exactly what I was thinking. Then I made this grilled rib roast with gravy. The verdict? Both versions are crazy good. This rib roast has a great garlicky flavor. I loved cooking it in a cast iron skillet over charcoal. Not only did the meat take on the great charcoal flavor, I was able to make a crazy good gravy out of the drippings.

Grilled Rib Roast with Gravy

Crazy Good. A Total Win.

I could eat this grilled rib roast all day long. I had a few leftover slices. They were screaming ‘make me into a prime rib sandwich’. I will and boy, will it ever be good too!

Cooking in cast iron over charcoal is a wonderful thing. But it comes with its dangers, too. That last thing you want to do is to burn yourself grabbing a hot skillet handle. I turn it away from me so I don’t accidentally put my hand on it.

Lodge Seasoned Cast Iron 3 Skillet Bundle…
  • Durable Cast Iron Construction: Made from…
  • Set of 3 Skillets: Includes 12 inch and 10.25 inch…

For a spicier rib roast, try my fire-eater reverse seared prime rib.

Grilled Rib Roast with Gravy
Print Pin
5 from 1 vote

Grilled Rib Roast with Gravy

This rib roast has a great garlicky flavor. I loved cooking it in a cast iron skillet over charcoal. Not only did the meat take on the great charcoal flavor, I was able to make a crazy good gravy out of the drippings.
Course Main
Cuisine American
Keyword beef, gravy, grilled
Prep Time 15 minutes
Cook Time 2 hours
Total Time 2 hours 15 minutes
Servings 4 servings
Calories 930kcal

Equipment

Ingredients

For the rib roast

For the gravy

Instructions

For the rib roast

  • Fire up your charcoal grill. You’ll want it to be between 400-450 F to start out with.
  • Take a long thin sharp knife and cut holes into the roast ever inch or so.
  • Shove the garlic slivers down into the holes.
  • Rub the softened butter all over the roast.
  • Combine the salt, garlic and onion powders and pepper.
  • Rub the mixture over all sides of the roast.
  • Transfer the roast to a cast iron skillet.
  • Add 1 cup of beef broth or enough to be 1″ deep in the skillet.
  • Place skillet on the grill. Cover and grill for 15 minutes.
  • Reduce the grill to cook at 325 F (just partially close the air vents) and cook until the roast reaches 130 F internally. You will want to check it every 20-30 minutes to see if more beef broth needs to be added.
  • Remove the roast and cover it in foil and let it rest for 30 minutes.
  • Meanwhile, make the gravy with the drippings in the pan.
  • Serve roast sliced topped with gravy.

For the gravy

  • Add the butter to the skillet and melt.
  • Add 1 1/2 cups of broth.
  • Bring to a boil.
  • Dissolve the flour in a cup with 1 tablespoon of water.
  • Whisk into the gravy mixture.
  • Continue stirring until gravy is desired thickness.
  • If it's too thick add more broth.

Notes

You’ll need a cast iron skillet that is large enough to hold the rib roast. Throughout the cooking process make sure that you NEVER grab the skillet with your bare hands.

Nutrition

Calories: 930kcal | Carbohydrates: 5g | Protein: 129g | Fat: 40g | Saturated Fat: 17g | Trans Fat: 1g | Cholesterol: 382mg | Sodium: 6335mg | Potassium: 2103mg | Fiber: 1g | Sugar: 1g | Vitamin A: 356IU | Vitamin C: 1mg | Calcium: 141mg | Iron: 12mg

Nutritional values are approximate.

Sale
Weber® 3-Piece BBQ Tool Set, Stainless Steel…
  • Set of 3 includes Spatula, Locking Tongs, and Cold…
  • Durable, stainless-steel construction holds up to…
Weber® Grill Grate Scrubber, Grill Cleaning…
  • Designed for heavy-duty grill cleaning
  • Contoured handle offers a firm, comfortable grip
Weber® Outdoor Grill Spray Cleaner & Degreaser…
  • This 16 oz spray bottle of Weber Grill Grate…
  • Gentle on Your Grates: Grill cleaner spray is…