Grilled Spinach and Artichoke Cheese Sandwich

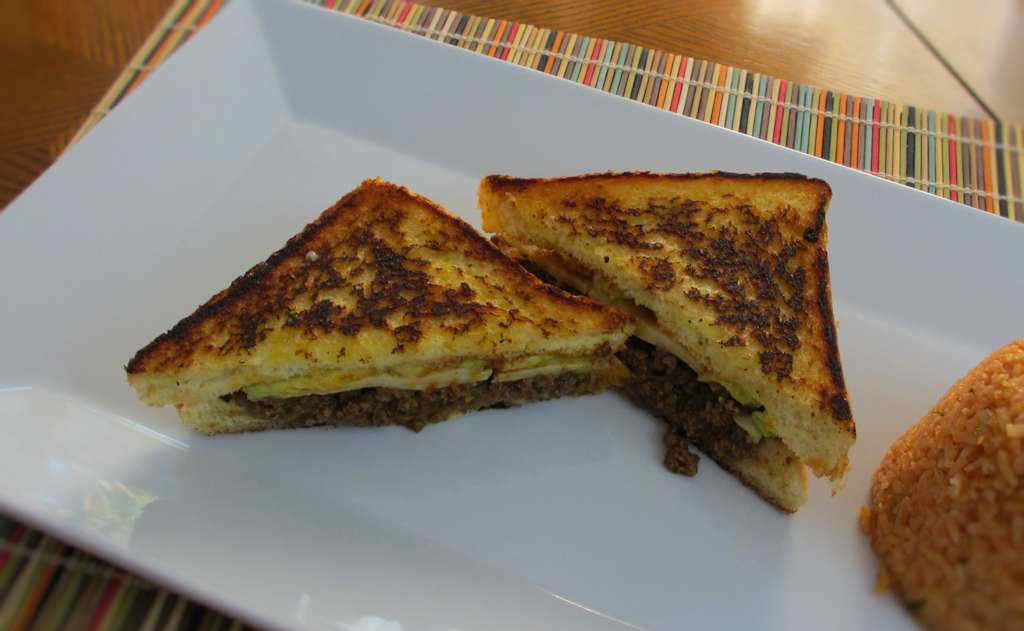
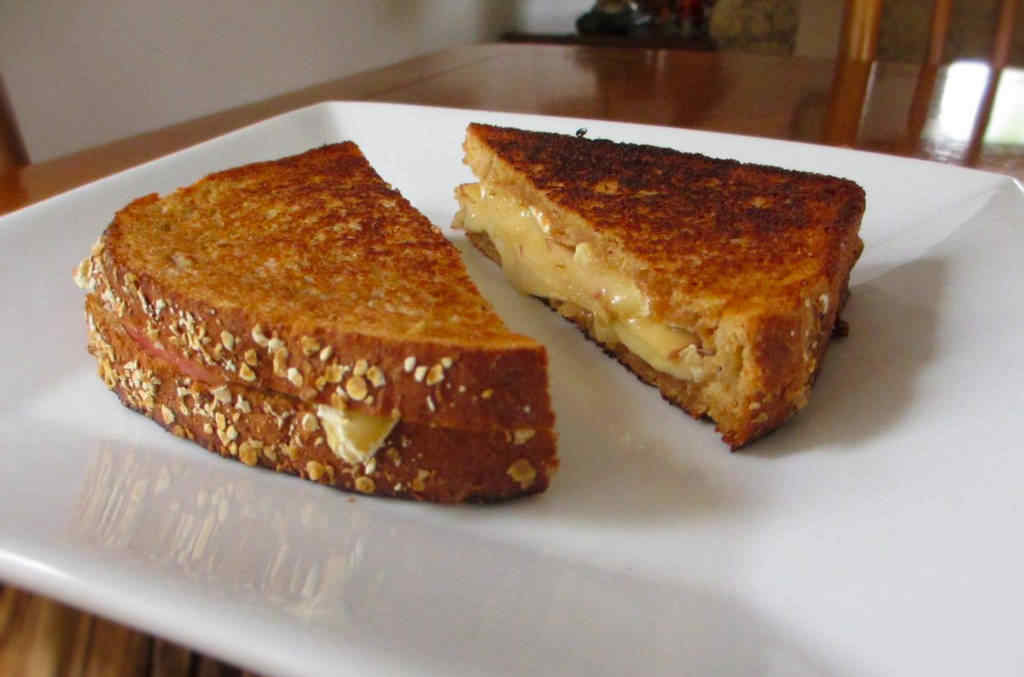
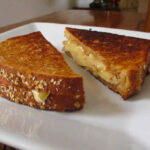
After hearing that one of the sandwiches that the Serendipity food truck (sadly, no longer around) serves is based on a spinach and artichoke dip, I took it as a challenge to take my spinach and artichoke dip and make it into a grilled cheese sandwich. And oh, what a happy day it was. This grilled spinach and artichoke cheese sandwich combines a great cheesy dip with grilled sourdough bread. The result is gooey and savory, a perfect change from the ole traditional grilled cheese sandwich. And oh, the bread! The perfect crunchiness to go with the creamy filling!

Grilled Spinach and Artichoke Cheese Sandwich

Wimpy Bread Need Not Apply

You’ll want to use a thick, hearty bread for these sandwiches. Thin wimpy white bread isn’t going to cut it. I bought a loaf of sourdough and cut it thick.

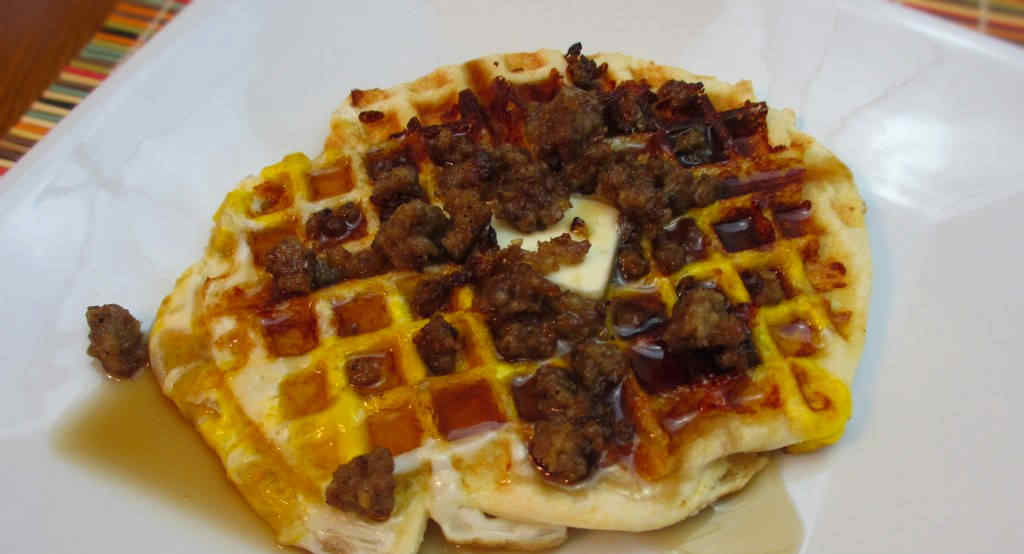
I used my Cuisinart Griddler to make these sandwiches. It is a sandwich cooking machine. I love it. I use it for whole bunch of other dishes, too. Like pancakes or waffles. And hamburgers. It’s really a versatile tool to have.

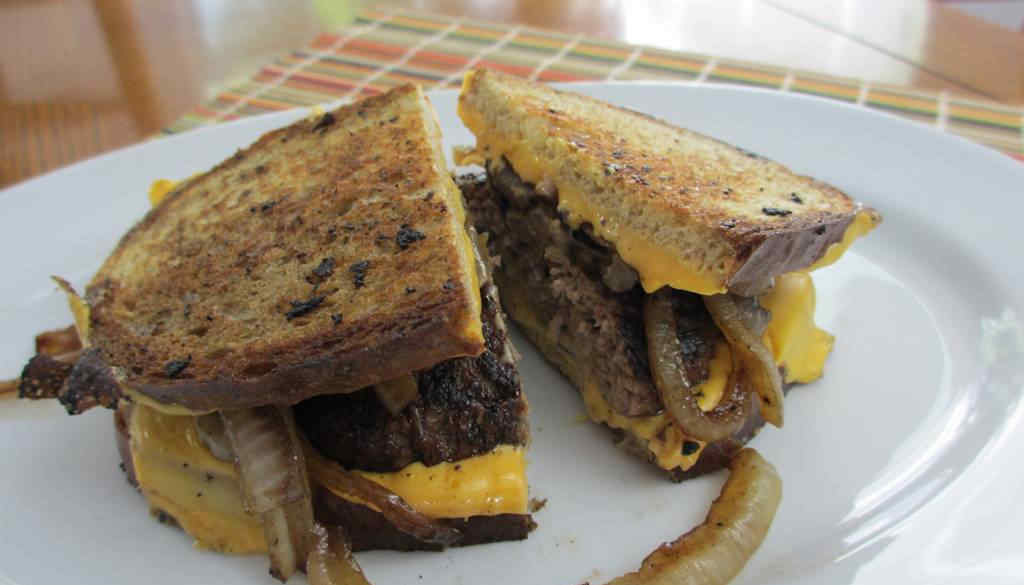
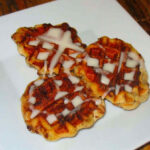
The Griddler is a champ at making grilled cheese sandwiches, like my muffuletta grilled cheese, grilled caramel apple cheese, and pepperoni pizza grilled cheese.

Also try my spinach artichoke stuffed hamburgers!

Grilled Spinach and Artichoke Cheese Sandwich
Print Pin
5 from 1 vote

Grilled Spinach and Artichoke Cheese Sandwich

This grilled spinach and artichoke cheese sandwich combines a great cheesy dip with grilled sourdough bread. The result is gooey and savory, a perfect change from the ole traditional grilled cheese sandwich.
Course Main
Cuisine American
Keyword grilled cheese, sandwich
Prep Time 5 minutes
Cook Time 15 minutes
Total Time 20 minutes
Servings 2
Calories 389kcal
Author Mike

Ingredients

Instructions

  • Spray a large non-stick skillet over medium-high heat.
  • Meanwhile, brush one side of the bread pieces with butter.
  • Place bread, butter side down, into skillet.
  • Spoon as much dip as you want onto one of the bread slices.
  • Cover skillet and cook until bread is browned and dip starts to melt.
  • Assemble sandwich and serve.

Notes

You can make these on any good thick-cut bread, even Texas toast!

Nutrition

Calories: 389kcal | Carbohydrates: 74g | Protein: 16g | Fat: 3g | Saturated Fat: 1g | Cholesterol: 3mg | Sodium: 688mg | Potassium: 204mg | Fiber: 3g | Sugar: 5g | Vitamin A: 50IU | Vitamin C: 1mg | Calcium: 91mg | Iron: 5mg

Nutritional values are approximate.

Taco Melt

My wife proclaimed this taco melt as “one of the best things I’ve ever made”. That made me pretty darned happy, since I kinda thought of the idea on my own. I’m sure I’m not the first one to think of making a patty melt-like sandwich using taco meat, but I’m glad I did. It all started with a loaf of Texas Toast. I think Texas Toast is horribly underused. It holds up to darned near anything. If you use wimpy bread you’re going to get wimpy results. Don’t do that.

Taco Melt

Taco Deliciousness

This taco melt is almost like having a Sloppy Joe sandwich. But without the sauce and the big mess. It’s packed with flavor. And the meat mixture could easily be used in a whole lot of other dishes. In fact, now that I think about that some more, I think I’ll go toss some taco meat on a hamburger bun and have lunch! It’d also be fantastic (like really fantastic) on hot dogs!

I usually use my Cuisinart Griddler for sandwiches like this melt.

Also try my ‘normal’ patty melt.

Taco Melt
Print Pin
4 from 1 vote

Taco Melt

I’m sure I’m not the first one to think of making a patty melt-like sandwich using taco meat, but I’m glad I did. It all started with a loaf of Texas Toast. I think Texas Toast is horribly underused. It holds up to darned near anything.
Course Main
Cuisine Southwestern
Keyword sandwich, taco
Prep Time 10 minutes
Cook Time 15 minutes
Total Time 25 minutes
Servings 4
Calories 830kcal
Author Mike

Equipment

Ingredients

Instructions

  • Brown beef in a large skillet. Drain excess fat.
  • Add onions and taco seasoning and cook 3-5 minutes.
  • Remove from heat.
  • Slather one side of each piece of Texas toast with butter.
  • Heat another large skillet over medium-high heat.
  • Add 4 slices of the bread, butter side down.
  • While the bread is browning, top with meat mixture and cheese.
  • Drizzle meat with 1 teaspoon of taco sauce on each slice.
  • Once the bread is nice and brown and the cheese is melted, remove to serving plates. Top with avocado.
  • Add remaining bread slices to the skillet, butter side down, and brown.
  • Remove and top sandwiches. Serve.

Notes

You’ll want to make these on nice, thick bread.

Nutrition

Calories: 830kcal | Carbohydrates: 49g | Protein: 33g | Fat: 58g | Saturated Fat: 19g | Trans Fat: 1g | Cholesterol: 99mg | Sodium: 1321mg | Potassium: 831mg | Fiber: 11g | Sugar: 7g | Vitamin A: 1129IU | Vitamin C: 15mg | Calcium: 192mg | Iron: 16mg

Nutritional values are approximate.

Cuban Burgers

Wow, these Cuban burgers were great. I put two things I love into one and I got … lots more love! This simple idea combines the great flavors of a burger with a Cuban sandwich. You’ll need a panini press to flatten these, but it’s ok if you don’t have one. Instead, place the burgers (wrapped in foil) into a large heated skillet then place another, smaller, skillet on top. Weigh it down with a few unopened cans you have on hand to press it down a bit. Voila! Instant panini press!

Cuban Burgers

Griddled To Perfection

The easiest way to cook these Cuban burgers is on a Cuisinart Griddler. It is an absolute beast at making pressed sandwiches. It gets nice and hot, giving you that perfect crusty bread. It gets the cheese nice and perfectly melty. That’s what you’re after! And it’s oh so easy to clean up too!

Also try my Dallas burgers.

This recipe is based on a recipe from Bobby Flay.

Cuban Burgers
Print Pin
5 from 1 vote

Cuban Burgers

Wow, these Cuban burgers were great. I love Cuban sandwiches, and I love burgers, so put two things I love into one and you get … lots more love! 
Course Main
Cuisine American
Keyword burgers, Cuban
Prep Time 10 minutes
Cook Time 20 minutes
Total Time 30 minutes
Servings 4
Calories 812kcal

Ingredients

Instructions

  • Form meat into patties. Season well and grill until just barely done.
  • Combine the mayonnaise, roasted garlic, and salt and pepper to taste in a bowl.
  • Slather bun sides with the mayonnaise mixture and add some Dijon.
  • Top buns with the cheese, burgers, more cheese, and some ham.
  • Add bun tops and place into preheated panini press.
  • Press down and cook until the cheese melts.
  • Serve hot.

Notes

Serve with dill pickle spears on the side.

Nutrition

Calories: 812kcal | Carbohydrates: 26g | Protein: 38g | Fat: 61g | Saturated Fat: 23g | Trans Fat: 1g | Cholesterol: 134mg | Sodium: 1251mg | Potassium: 512mg | Fiber: 2g | Sugar: 4g | Vitamin A: 372IU | Vitamin C: 2mg | Calcium: 396mg | Iron: 4mg

Nutritional values are approximate.

Patty Melt

I recently bought a Weber Cast Iron Griddle for my gas grill. I absolutely love cooking with it. It is just like cooking on a flat top grill. It gets amazingly hot, which is exactly what I need to cook a patty melt. I like a little crust on my patty melt burgers, but with tender juicy insides. And the bread has to be grilled just until it has a little crunch and can stand up to the patty and onions.

Patty Melt

Make Them Outside. Or Inside.

You can also make these on your stovetop. You’ll want to use a large skillet, preferably cast iron. Or better, use a Griddler from Cuisinart. I really like cooking them outside. As much as I do love burgers cooked over charcoal, I’m a huge fan of cooking them on a griddle too. They always come out fantastic. And the griddle makes it so easy to make a great patty melt like this one.

Also try my taco melt and my copycat of the yummy Frisco melt from Steak ‘n Shake.

Patty Melt
Print Pin
4 from 1 vote

Patty Melt

I like a little crust on my patty melt burgers, but with tender juicy insides. And the bread has to be grilled just until it has a little crunch and can stand up to the patty and onions.
Course Main
Cuisine American
Keyword burgers, sandwich
Prep Time 15 minutes
Cook Time 50 minutes
Total Time 1 hour 5 minutes
Servings 4
Calories 762kcal

Ingredients

Instructions

  • Melt 1 tablespoon of butter in a large skillet (or on a griddle) over medium heat.
  • Add onions and cook until the onions are soft and golden, stirring often, 20-30 minutes. Remove onions.
  • Place beef into a large bowl along with salt and pepper, to taste, and the Worcestershire sauce. Mix well.
  • Form meat into 4 4 ounce patties.
  • Melt 2 more tablespoons of butter in the skillet. Add the beef patties and cook on both sides until done. Remove meat and any scraps.
  • Melt 1 more tablespoon of butter in the skillet. Working in batches, brown the bread on one side, while melting cheese on the topside of each slice. Add more butter as needed.
  • Assemble patty melts by placing burgers on bread and top with onions and remaining bread slice.

Notes

Thicker bread holds up better to these messy delicious sandwiches.

Nutrition

Calories: 762kcal | Carbohydrates: 39g | Protein: 33g | Fat: 52g | Saturated Fat: 26g | Trans Fat: 2g | Cholesterol: 160mg | Sodium: 1180mg | Potassium: 577mg | Fiber: 4g | Sugar: 8g | Vitamin A: 840IU | Vitamin C: 4mg | Calcium: 528mg | Iron: 5mg

Nutritional values are approximate.

Waffle Iron Eggs and Biscuits

I found the original recipe for this great breakfast-for-dinner idea over at Amy’s Cooking Adventures. Putting an egg on top of batter in a waffle iron sounded like a pretty nifty approach to me, so I dove right in and made some waffle iron eggs and biscuits. This really is breakfast-in-a-bite. Everything you need. Everything you want. I thought these were a really fun idea. And they really hit the spot, too. I didn’t really need help loving waffles any more but these certainly made that happen.

Waffle Iron Eggs and Biscuits

Expect A Little Mess. It’s Worth It.

I have to warn you, you’re going to make a mess making these waffle iron eggs and biscuits. There’s really no way around it. No matter how gently you close the iron lid, somewhere along the line you’re going to pop a yolk and it’s going to run out. That’s ok, though. It’s worth the mess.

Guess what? You can also make chocolate chip ‘cookies’ using your waffle iron!

Waffle Iron Eggs and Biscuits
Print Pin
4 from 1 vote

Waffle Iron Eggs and Biscuits

Putting an egg on top of batter in a waffle iron sounded like a pretty nifty approach to me, so I dove right in and made some waffle iron eggs and biscuits.
Course Breakfast
Cuisine American
Keyword biscuits, breakfast, eggs, waffles
Prep Time 10 minutes
Cook Time 15 minutes
Total Time 25 minutes
Servings 4
Calories 923kcal

Ingredients

  • 2 ½ cups Bisquick plus a little more for dusting
  • â…” cup low fat milk
  • 4 slices bacon cooked, drained, crumbled
  • 1 cup cheese shredded (Swiss, cheddar, whichever you prefer)
  • 6 large eggs
  • 4 tablespoons unsalted butter cut into pats
  • ½ pound breakfast sausage cooked drained, crumbled
  • maple syrup

Instructions

  • Preheat your waffle iron as directed by the manufacturer and spray with non-stick spray as needed
  • Combine biscuit mix and milk until a dough forms.
  • Lightly dust a cutting board with more baking mix. Roll the dough out using a rolling pin until it is about 1/4″ thick. Cut into shapes slightly smaller than your waffle iron. (Our waffle iron is round. I found a saucer that was just smaller than the iron and used that as my template for cutting the dough).
  • Working in batches, place the dough pieces onto your waffle iron. Sprinkle with some bacon and cheese and top with a single egg each. (If you sprinkle the cheese in a circular pattern, creating a sort of ‘well’, the egg will not slide off as easily).
  • Very, very gently lower the top of the waffle iron and cook until done.
  • Serve topped with butter, sprinkled with the breakfast sausage crumbles, and drizzled with pure maple syrup.

Notes

The waffles can be frozen and reheated later.

Nutrition

Calories: 923kcal | Carbohydrates: 51g | Protein: 35g | Fat: 64g | Saturated Fat: 27g | Trans Fat: 1g | Cholesterol: 398mg | Sodium: 1764mg | Potassium: 500mg | Fiber: 2g | Sugar: 11g | Vitamin A: 1169IU | Vitamin C: 1mg | Calcium: 439mg | Iron: 4mg

Nutritional values are approximate.

Grilled Caramel Apple Cheese Sandwich

Jessica over at How Sweet It Is posts some fabulous food. Her idea for a grilled caramel apple cheese sandwich is just one of them. The combination of the crisp apple, sweet caramel and creamy cheese is to die for. This made for the perfect lunch.

Grilled Caramel Apple Cheese Sandwich

Good Caramel Makes A Difference

A good (read: expensive) caramel will take this sandwich over the top. You will still enjoy it with a less costly alternative. Just don’t use something overly sweet and candy-ish. This grilled caramel apple cheese sandwich is somewhere between dessert and lunch.

My Cuisinart Griddler was made for making sandwiches just like this one. Even though it can do a lot of things, it’s the star of the show when it comes to getting bread just the perfect crispiness. And getting cheese just the right meltiness. And for me at least, one that is sandwich-flipping-challenged, I find it much easier to handle sandwiches on this press. Heck, I don’t even have to flip them since it has hot griddles above and below the sandwiches! You can’t beat that!

The Griddler is a champ at making grilled cheese sandwiches, like my spicy grilled cheesemuffuletta grilled cheese, grilled spinach and artichoke cheese, and pepperoni pizza grilled cheese.

Grilled Caramel Apple Cheese Sandwich
Print Pin
4 from 1 vote

Grilled Caramel Apple Cheese Sandwich

The combination of the crisp apple, sweet caramel and creamy cheese is to die for.
Course Main Dish
Cuisine American
Keyword grilled cheese, sandwich
Prep Time 10 minutes
Cook Time 10 minutes
Total Time 20 minutes
Servings 2
Calories 460kcal

Ingredients

  • 4 slices multigrain bread
  • 2 tablespoons butter softened
  • 4 ounces brie cheese sliced thin (or more, depending on the size of your bread slices)
  • 1 honey crisp apple thinly sliced (a mandolin works best)
  • 3 tablespoons caramel sauce

Instructions

  • Heat a large skillet over medium-low heat.
  • Spread the butter on one side of two slices of the bread and place them, butter-side down, into the skillet.
  • As the bread cooks, drizzle each with a 1/2 tablespoon of caramel.
  • Divide half of the brie between the two bread slices, add another 1/2 tablespoon of caramel, the apple, the remaining caramel and finally the rest of the cheese.
  • Butter one side of the remaining bread slices and place on top.
  • Flip sandwich once the bottom slices are well browned.
  • Continue cooking until the bread is browned and crispy and the cheese has melted. You might find that the cheese melts better if you put a lid over the skillet while cooking.

Notes

If you want to cool the sandwiches a bit before serving, do so on a wire rack so that the bread doesn’t get soggy.

Nutrition

Calories: 460kcal | Carbohydrates: 56g | Protein: 20g | Fat: 18g | Saturated Fat: 11g | Cholesterol: 59mg | Sodium: 702mg | Potassium: 368mg | Fiber: 6g | Sugar: 14g | Vitamin A: 438IU | Vitamin C: 4mg | Calcium: 203mg | Iron: 2mg

Nutritional values are approximate.

Cinnamon Roll Waffles

This is the easiest breakfast you’ll ever make. And certainly one of the most addicting. Just fire up your waffle maker and add a few out-of-the-can cinnamon rolls. In minutes you’ll have a delicious plate of cinnamon roll waffles, nice and hot and slightly crispy. Topped with icing, syrup and butter. You’ll never eat those regular ole kinda-boring cinnamon rolls again. These are better. Why? Oh that crispy goodness! And the crannies for the icing and syrup and butter?!?? ! Oh my!

Cinnamon Roll Waffles

Tasty Fun

Add walnuts, pecans, fruit… Use whatever toppings you like to these cinnamon roll waffles. Or just pour some warmed real maple syrup on top and enjoy. I use my lil Cuisinart Classic Waffle Maker for making these. It works like a charm. I can make four mini waffles at a time. The first waffle usually gets ‘sacrificed’ in the name of ‘quality control’. That’s another word for ‘I can’t control myself so I have to eat one’.

Also try my Texas Toast French toast waffles!

This recipe is based on a recipe from A Hen’s Nest.

Cinnamon Roll Waffles
Print Pin
5 from 1 vote

Cinnamon Roll Waffles

This is the easiest breakfast you’ll ever make. And certainly one of the most addicting. Just fire up your waffle maker and add a few out-of-the-can cinnamon rolls.
Course Main
Cuisine American
Keyword cinnamon rolls, waffles
Prep Time 5 minutes
Cook Time 5 minutes
Total Time 5 minutes
Servings 4
Calories 320kcal

Equipment

Ingredients

  • 1 tube cinnamon rolls
  • maple syrup warmed, optional
  • butter softened, optional

Instructions

  • Heat your waffle iron.
  • Open the cinnamon rolls and separate them.
  • Stretch them out just a bit then toss them on your waffle iron (my little iron only holds two at a time).
  • Cook for 2-3 minutes or until starting to get crispy.
  • Microwave the icing per package instructions and pour over the waffles.
  • Serve with warmed syrup and softened butter, if desired.

Notes

Depending on your waffle maker, you may want to spray yours lightly with non-stick spray before adding the roll dough.

Nutrition

Calories: 320kcal | Carbohydrates: 46g | Protein: 4g | Fat: 14g | Saturated Fat: 6g | Trans Fat: 1g | Sodium: 660mg | Sugar: 20g | Iron: 1mg

Nutritional values are approximate.