This is my go-to, bring-the-heat Sriracha mustard sauce. Although it is spicy (hey, there’s Sriracha in it), and a bit mustardy, it also has a great smoky flavor thanks to the smoked jalapenos (chipotles). I keep several cans of chipotles in adobo sauce on hand at all times. It’s great mixed in not only with this sauce, but I have been known to also add it to mayonnaise and ketchup.
A Great All-Around Sauce
I keep a double batch of this Sriracha mustard sauce in the fridge in a big squeeze bottle. A few squirts on hot dogs, or burgers, or a sandwich, really brings the food to life. I love it as a dipping sauce for my smoked sausages, or squeezed over my cedar-planked Polish sausage sandwiches.
I keep a double batch of this Sriracha mustard sauce in the fridge in a big squeeze bottle. A few squirts on hot dogs, or burgers, or a sandwich, really brings the food to life.
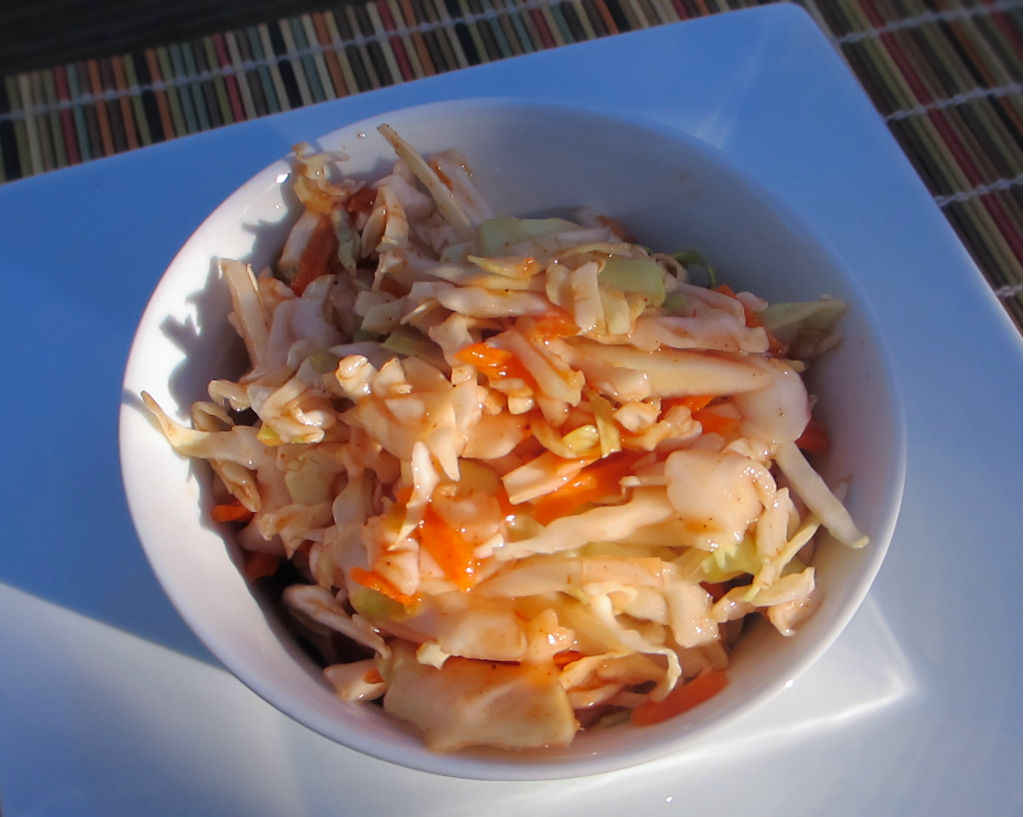
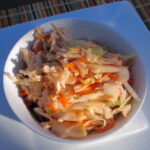
When I first read through this recipe for Lexington slaw (where I found it, I can’t recall) I thought someone had lost their mind. Ketchup? In a slaw? Huh? What? How’s that going to work? Who the heck puts ketchup of all things into a slaw? Well, shame on me for not trusting others for what they use in their salads. Because this slaw is not only different, it’s crazy good too!
Ketchup? Say WHAT?
Yep, adding ketchup does work, and it works very nicely in fact. The tomato flavor isn’t overwhelming and it’s really a great change from your normal vinegary slaw. The dressing is thin, so it’s not like a thick creamy mayonnaise-based sauce. The chili powder adds a good earthy southwestern kick, and the hot sauce finishes the deal with just a slight kick. I wouldn’t be afraid to add more hot sauce than the recipe calls for, but that’s me and I do like my food to be a bit more on the spicy side.
I make a lot of slaws. They can’t get much easier to make, and often I have most of the ingredients on hand. Lexington slaw is just another great example of a great slaw.
I make a lot of slaws. They can’t get much easier to make, and often I have most of the ingredients on hand. Lexington slaw is just another great example of a great slaw. With a twist.
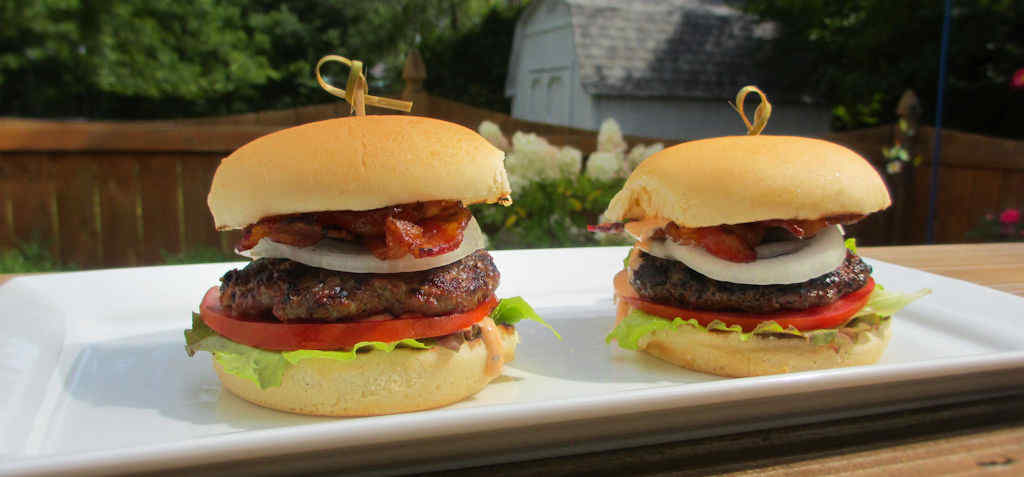
Sriracha hot sauce finds its way into a lot of our dishes. Not because we like super-hot foods, but because we like a little spice in them. This ultimate Sriracha burger is a great example. Great grilled (I used my Weber grill) burgers with Sriracha mixed in with every bite. A little Sriracha in the beef, and a little more in a cool, creamy Ranch sauce that tops the entire burger off. Cool tomatoes and crunchy onions, a little lettuce, and some smoky bacon top off what is one of best burgers you can make.
Nothing But Flavor In Every Bite
These ultimate Sriracha burgers were a huge hit. I expect to be making them often. They were certainly full of great spicy flavor. Just like my taco burgers, which you’ll also love.
I like to use a burger press when I make burgers. It, in combination with some patty papers, enables me to crank out a whole bunch of equally-sized burger patties in no time at all with little cleanup.
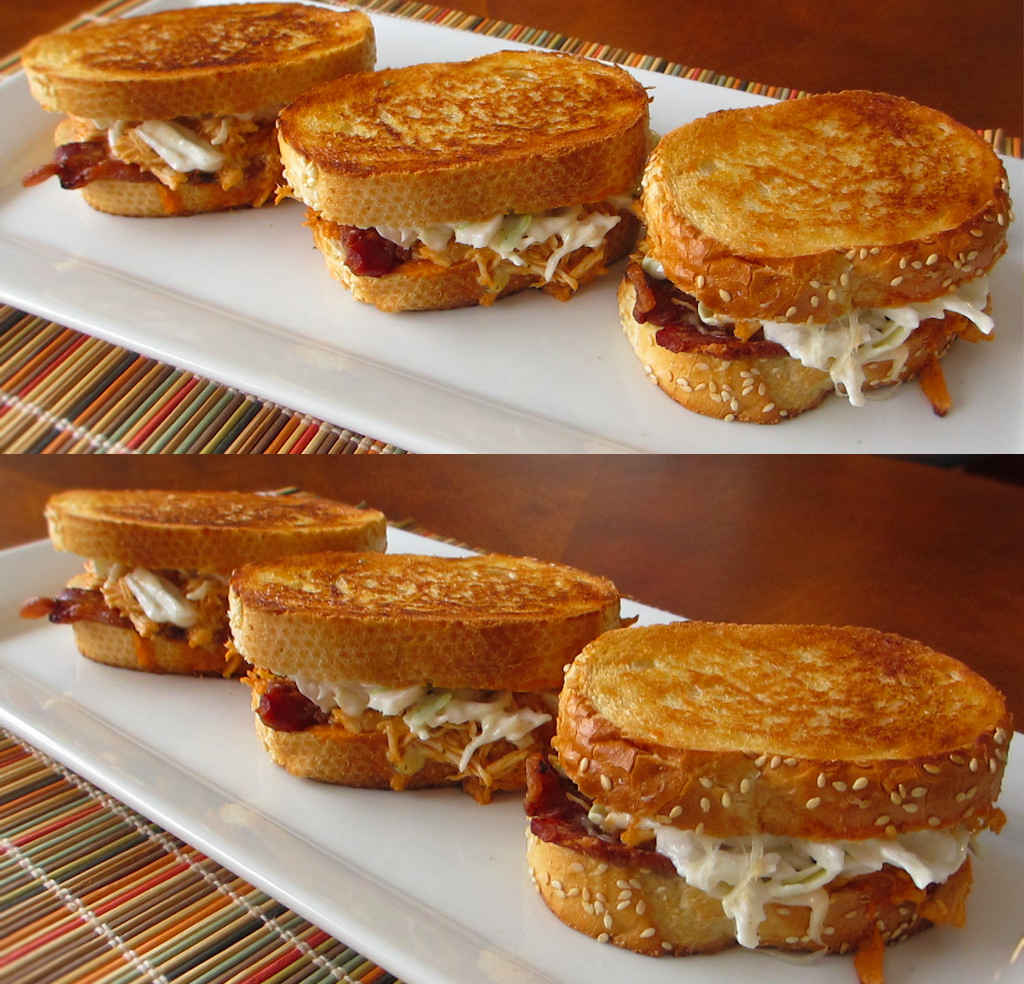
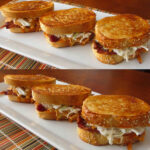
I made a nice big ole batch of slow cooker shredded Buffalo chicken the other day. One of my favorite things to make with it is Buffalo chicken panini. It takes only minutes to make yet it’s absolutely packed with flavor. Crunchy bread. Smoky bacon. Ooey gooey cheese. Tangy blue cheese (or gorgonzola if you prefer a little milder flavor). Kickin’ chicken. And cool, crunchy slaw.
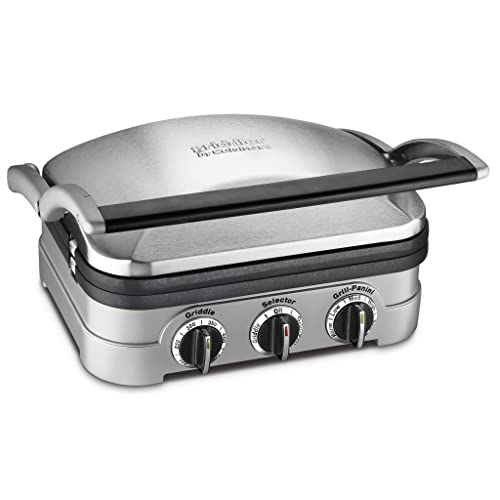
I Use My Griddler For Perfect Paninis
I could eat a Buffalo chicken panini all day long. My Cuisinart Griddler does a great job of crisping up the bread and melting the cheese. I use my Griddler for everything from breakfast to dinner. Check out my other recipes all made with the Griddler!
Place two slices butter-side down on the press or in the skillet.
Divide cheese and bacon between sandwiches.
Combine the chicken with the blue cheese and divide between the sandwiches.
Mix the slaw and Ranch dressing and divide between the sandwiches.
Add remaining bread slices butter-side up and close press.
Cook until the bread is toasted and golden. If using a skillet flip the sandwiches once the bottom is done and cook the other side until toasted and golden.
Notes
Drizzle the sandwiches with a little Ranch or serve it on the side for dipping.
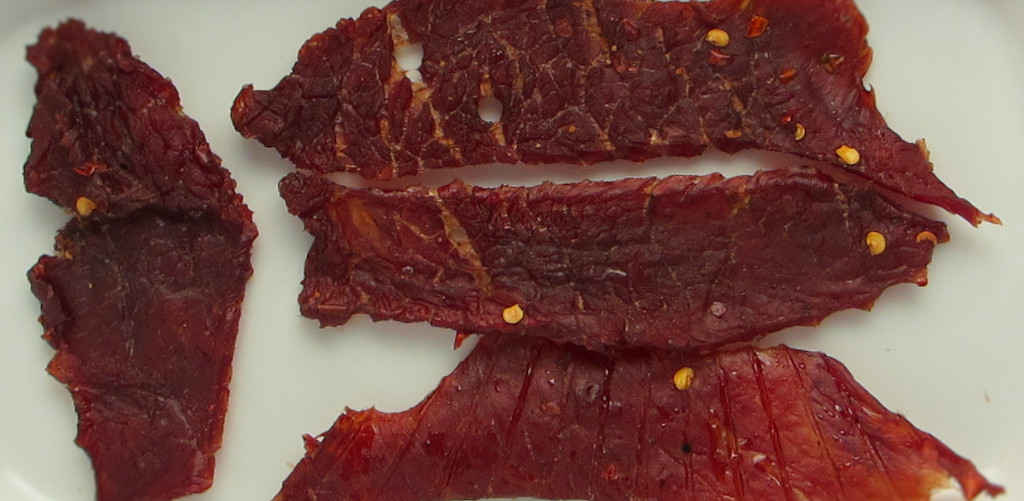
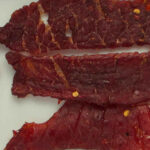
This peppered jerky was my second (very successful) attempt at making jerky on my newly-acquired Nesco Snackmaster Pro dehydrator. I (and my neighbors) were very pleased with the first batch which was Cajun-flavored. I followed the same simple process and in 14 hours we were all enjoying peppered jerky. The jerky had a nice light pepper flavor with just a bit of spicy kick. The pepper was not overwhelming at all, but it was there just enough to be very enjoyable. You can leave out the heat, but I always prefer a bit of kick to my jerky.
The Keys To Success
If this is your first time using your Snackmaster Pro to make jerky, here are a few things I’ve learned along the way so far. First, start with lean beef (I prefer top round). Place the beef into the freezer for about 90 minutes then slice it thin (1/4″ or slightly thinner) using a meat slicer.
Second, follow the recipe below. No shortcuts. The marinade may have a strong odor at first, but that’s normal. Last, don’t over-dry the meat. Check it after 5 hours, or sooner if you cut your meat thinner than 3/16″ thick. Bend the jerky in the middle. If it just starts to tear it’s done. If it just bends, you need to dry it longer. Once you do a batch you’ll have the process down to an art and you’ll be enjoying peppered jerky on the Nesco Snackmaster Pro in no time!
This jerky had a nice light pepper flavor with just a bit of spicy kick. The pepper was not overwhelming at all, but it was there just enough to be very enjoyable.
1teaspoon pink curing saltoptional if you’re going to refrigerate the finished product
¼cupwater
Instructions
Place beef in a resealable bag or container.
In a small bowl whisk together the seasoning, red pepper flake if using, curing salt and water.
Pour over the meat and seal. Shake to coat.
Refrigerate the meat for up to 8 hours, shaking or massaging every hour or so to get the marinade distributed and absorbed evenly.
Remove meat from the marinade and place flat onto Nesco trays. Do not overlap meat.
Add the dehydrator top, set to maximum temperature setting and dehydrate for 5 hours, rotating the trays from bottom to top every 2 hours or so.
To test for doneness remove a piece and let cool slightly. Try to bend the meat. If it gives and starts to tear at the bend it is done. If it bends without tearing return to the dehydrator and let it run another 15 minutes and test again. If the meat is crunchy it is overdone but still good.
Let cool before storing in an airtight container.
Notes
This recipe is for starting with 1 pound of meat. You’ll end up with about 1/2 pound in the end. You can easily double/triple/etc this recipe for large quantities of meat, however 5-6 pounds is about all you can fit onto a Nesco Snackmaster Pro fitted with 12 trays (the unit comes with 5).
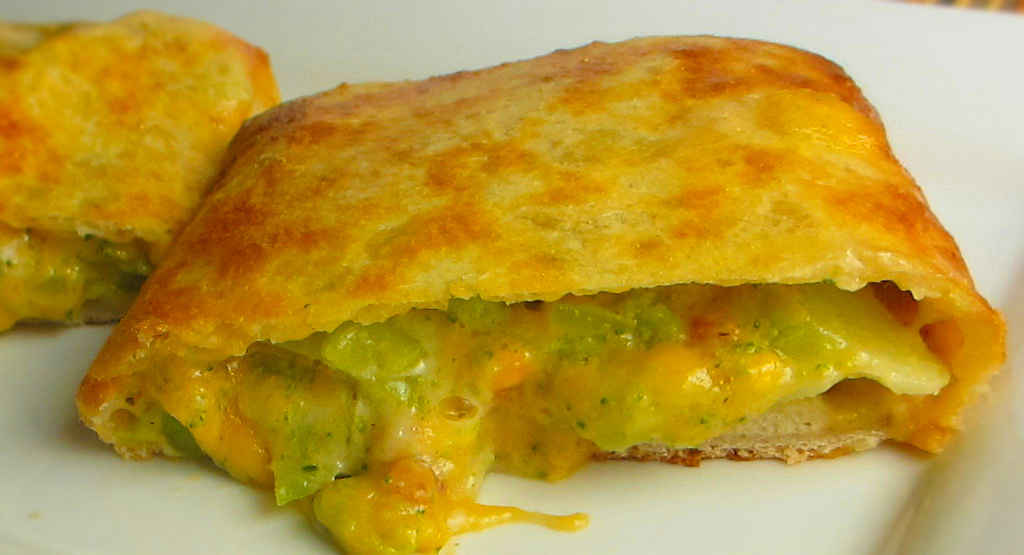
By golly, these broccoli cheddar pockets do taste just like the pockets you can get out of the freezer section in your grocery store! Actually, they taste even better. Quite a bit better! That might be because there’s extra ooey-gooey extra sharp cheddar cheese inside. Oh, yeah, there’s some healthy broccoli thrown in too. Plenty of it. And well, yes, I did add a bit of bacon. How could you not? All that good broccoli cancels out any ‘bad’ in the bacon, right? That’s my story at least.
Keep ‘Em In The Freezer For A Quick Lunch
You can make a big batch of these broccoli cheddar pockets then freeze them for later. Just pop them into the microwave or oven to reheat (until the cheese melts). Nice and easy!
I highly recommend that you shred or grate your own cheese at home. Don’t buy the pre-shredded or pre-grated stuff. It has stuff added to it to keep it from sticking together. That ‘stuff’ affects how the cheese melts. Shred it yourself and use the good stuff.
You can easily make copycats of the other pocket flavors you find in your grocery store’s freezer. Just fill with cooked (the dryer the better!) ingredients and seal! Try my pulled pork pockets too!
By golly, these broccoli cheddar pockets do taste just like the pockets you can get out of the freezer section in your grocery store! Actually, they taste even better.
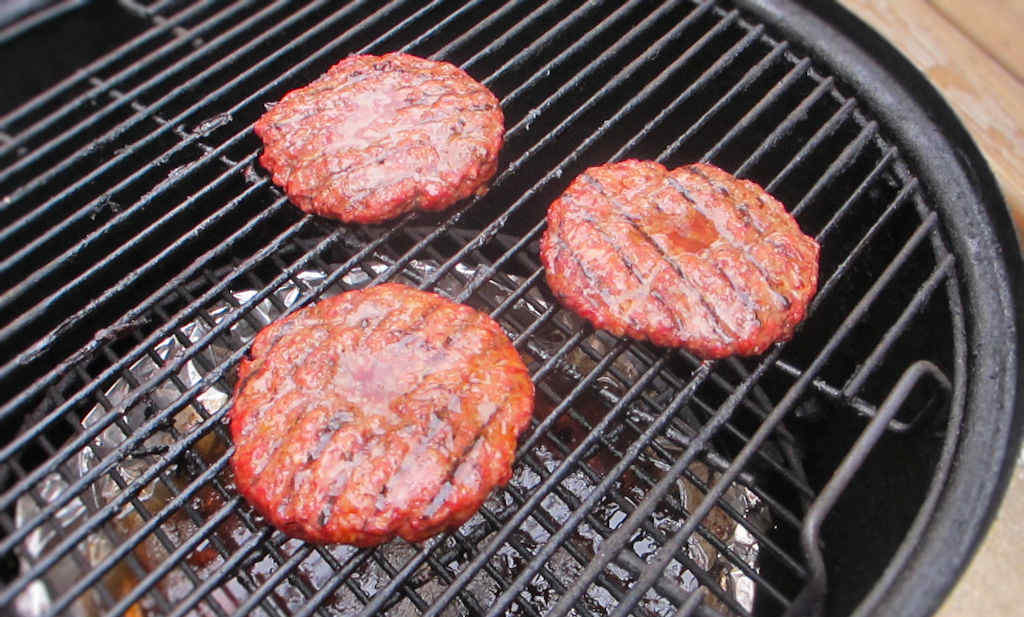
One of my favorite things to make on my Weber Smokey Mountain smoker is smoked hamburgers. After a long smoke session (some lasting through the night), there’s usually still a good bit of charcoal burning in the smoker. No point in wasting all that fuel. I toss a few burgers and a little more smoking wood into the cooker. I let the patties smoke a bit. Then I transfer them to a super hot grill to get a nice char on them. The end result are great, super moist, tasty burgers.
That Finishing Touch
You can skip the step of finishing the burgers on a grill, but I’d suggest that you don’t. Smoked hamburgers have a different texture than burgers that have been cooked over high heat for a short amount of time. It’s not a bad texture by any means. If your guests are expecting that great grill char, let the burgers spend a little time over high heat.
Smoked burgers also freeze well. If your smoker is already going, why not load it up with a bunch of patties? Then you’ll have plenty to enjoy later.
Smoked hamburgers have a different texture than burgers that have been cooked over high heat for a short amount of time. It’s not a bad texture by any means, but if you and your guests are expecting that great grill char, you’ll want to let them (the burgers) to spend a little time over high heat.
Fire up your smoker for cooking 225 F- 250 F. Use a light smoking wood, such as apple.
Form beef into patties and season well with salt and pepper.
Place burgers on smoker and cook 60-990 minutes or until beef reaches desired doneness (at least 150 F).
Notes
Burgers will not have a char on them like you get when cooked over high heat. To get that great char, remove the burgers from the smoker when they reach 120 F and transfer to a hot grill to finish cooking.
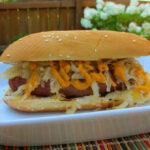
These French Connection hot dogs have quickly become a favorite in our household. We almost always have everything to make them on hand, so they make for a great quick lunch. We love the crunch from the fried onions, the creamy cheese, and the spicy BBQ sauce. These dogs disappear fast.
Any Good BBQ Sauce Is A Winner Here
Although a sweet or smoky BBQ sauce would work just fine on these French connection hot dogs, we prefer a spicier version. I used (and used liberally) some Bayou BBQ sauce from Frog Bone. It’s a nice thin sauce with great flavor and a little kick.
These French Connection hot dogs have quickly become a favorite in our household. We love the crunch from the fried onions, the creamy cheese, and the spicy BBQ sauce. These dogs disappear fast.
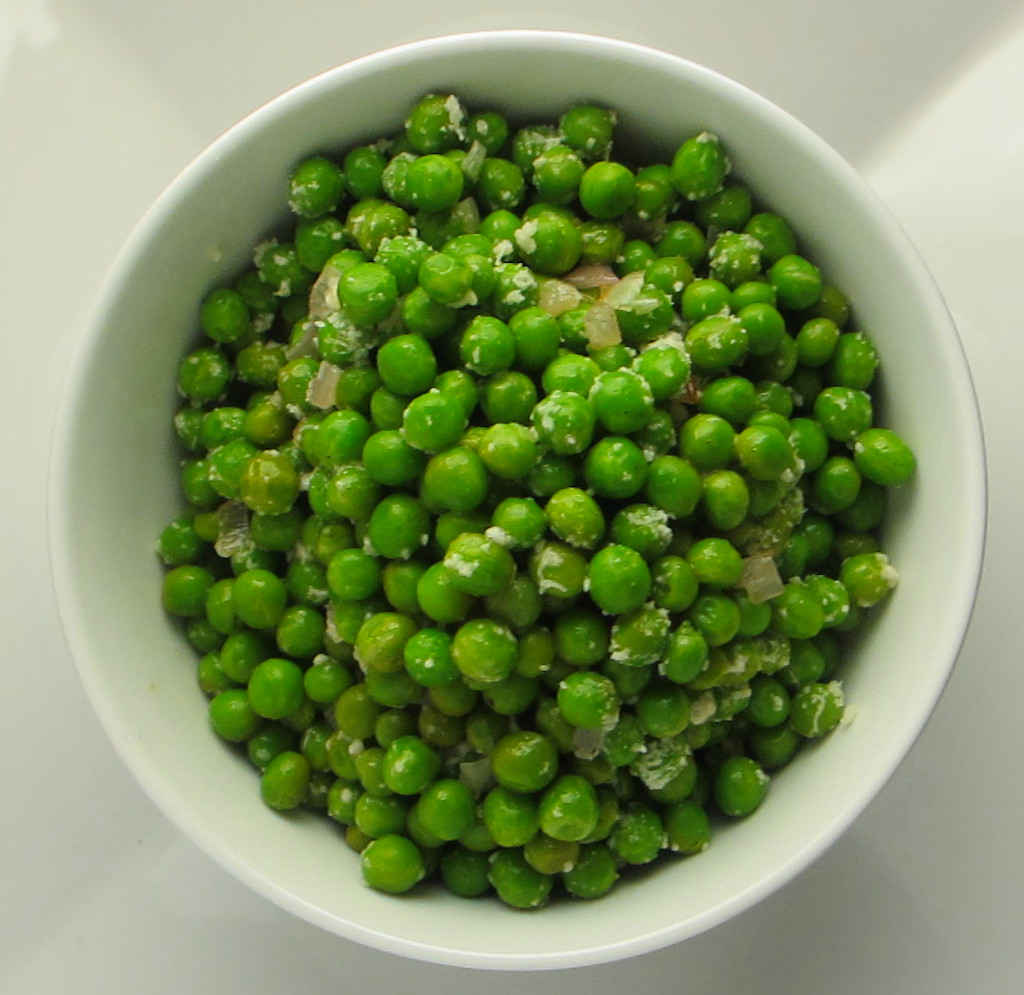
I’m on a never-ending quest to find recipes that jazz up canned or frozen vegetables. I stock up on them before winter hits because you just never know when you might get stuck in the house for a while because of a blizzard (at least here). Once winter has passed I then rush to use up all the cans and bags and boxes of veggies. These Parmesan peas are an outstandingly good way to use frozen peas. And once fresh peas are available again, I’ll make this recipe with fresh ones. But either way, frozen or fresh, these peas are great!
Ready In No Time
You really have to watch these Parmesan peas when you cook them. They’ll go from bright green to yellowish in a heartbeat. Once they are all bright green, get them off the heat! I was dangerously close to crossing the line when I made these. Not that they’ll taste bad if you do let them cook too far, not at all. But they do get a bit softer. If you’re not into soft peas, pay attention and don’t over-cook them!
I made these peas in my cast iron skillet. But, any good ole skillet will do!
These Parmesan peas are an outstandingly good way to use frozen peas. And once fresh peas are available again, I’ll make this recipe with fresh ones. But either way, frozen or fresh, these peas are great!
Add the shallots along with a pinch of salt. Cook until the shallots are soft and translucent.
Add the peas and another pinch of salt. Cook until peas are soft and bright green, 2-3 minutes at most. Do not overcook or the peas will change color and no longer be bright green.
Remove from heat and stir in the lemon juice.
Serve sprinkled with the cheese and a pinch or two of pepper.
Note: This recipe was developed using the Char-Broil Big Easy Oil-Less Fryer. If you are cooking using the Char-Broil Smoker-Roaster Grill you should cook with the lid open and the temperature set to High. You might also need to adjust the cooking time.
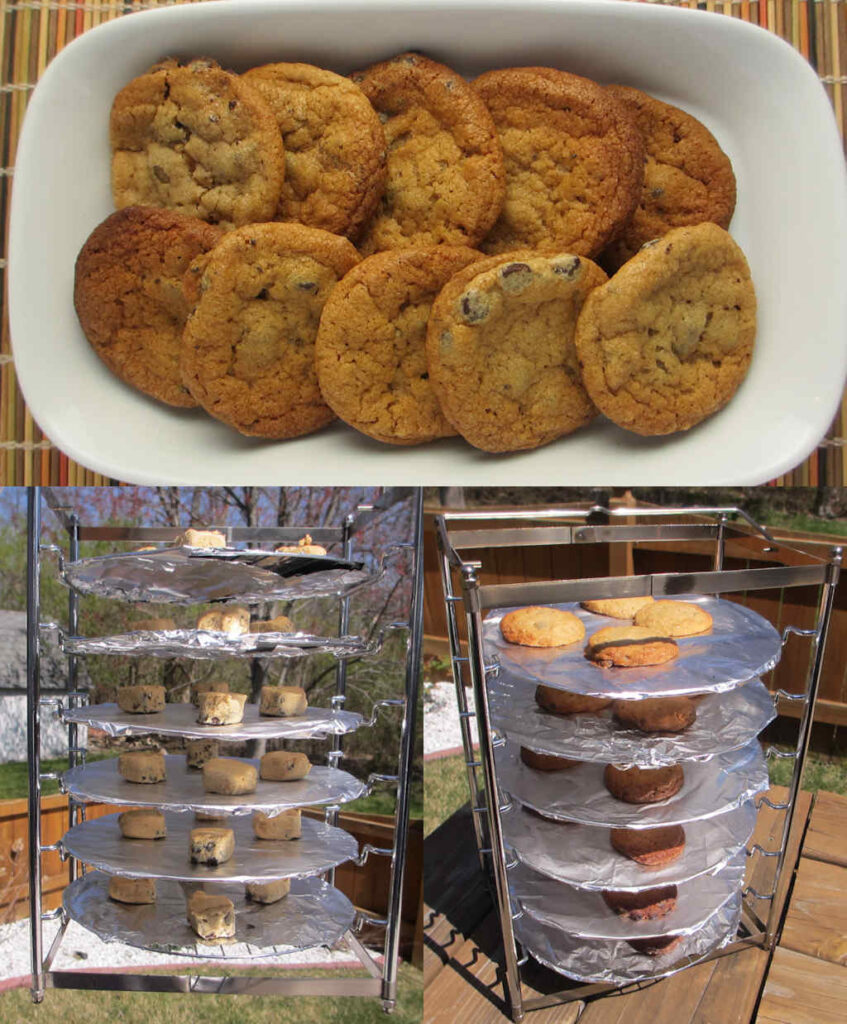
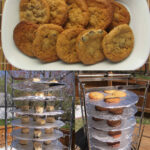
I recently picked up a Char-Broil Cooking Rack (sadly, no longer available) for my Big Easy. The rack lets me cook up to 6 small trays of food at once, sorta like my Wingin’ator 3000 modification. My knee-jerk reaction was “Oh yes! I gotta do some wings!” but I resisted and went simple so I can learn how the rack does in the cooker. How much simpler can you get than baking up a batch of Chocolate Chip Cookies on the Char-Broil Big Easy? In no time at all I was enjoying some ooey-gooey cookies hot off my Big Easy oil-less fryer.
Note: Since the cooking rack is no longer available, you’ll want a bunk bed basket instead. It lets you double or even triple the amount of cooking space you have.
Just As Easy And Indoors. And More Fun.
These Chocolate Chip Cookies on the Char-Broil Big Easy are the perfect dessert for an outdoor party after you’ve already cooked your wings, chicken, ribs, or whatever other great dishes. I used refrigerated pre-made cookie dough, but your homemade cookie version will work just as well. I found that the cook time matched what the package stated for indoor cooking. Easy.
The cookies on the bottom trays cooked a bit quicker than those on the top. I was cooking on a cool (45 degrees F) day, with a light breeze, and that probably didn’t help. I did keep the wire mesh top on the cooker the entire time.
How much simpler can you get than baking up a batch of chocolate chip cookies? In no time at all I was enjoying some ooey-gooey cookies hot off my Big Easy oil-less fryer.
Wrap the racks in foil and spray with non-stick spray.
Add 4 cookie squares to each rack as shown in the picture.
Cook for approximately 14 minutes. Start checking them after 10 minutes as the cook time will vary depending on weather conditions.
Remove and let cool completely before removing from the racks.
Notes
You’ll need a Big Easy Cooking Rack How much simpler can you get than baking up a batch of chocolate chip cookies? In no time at all I was enjoying some ooey-gooey cookies hot off my Big Easy oil-less fryer.which has 6 trays, to cook an entire batch of cookies at once.