Rotisserie Chicken-Seasoned Shake’N Bake Pork Chops

One of my favorite things to make is baked pork chops. As a kid, Shake’N Bake was often a go-to dinner and it still is for me to this day. But, I admit, I like to stir things up a bit by making my own mix. I like to make all sorts of different flavors. I was walking into the grocery store the other day and of course they make sure that I’m instantly surrounded by the aroma coming from the rotisserie chicken roasters. However, my first thought wasn’t to go snag a chicken. Instead, it was “Oh, I gotta make rotisserie chicken-seasoned Shake’N Bake pork chops”!

Rotisserie Chicken-Seasoned Shake'N Bake Pork Chops

Wonderfully Delicious

Indeed, these pork chops taste just like what you’d expect. Yes, you can use this mix on chicken. But me, I love baked pork chops even more so that’s what I made! These rotisserie chicken-seasoned Shake’N Bake pork chops really hit the spot. I made these three times in one week that’s how much I love this mix!

Also try my chipotle shake’n bake on pork chops. Or chicken.

Rotisserie Chicken-Seasoned Shake'N Bake Pork Chops
Print Pin
5 from 1 vote

Rotisserie Chicken-Seasoned Shake’N Bake Pork Chops

I was blown away by how much I loved this rotisserie chicken-seasoned Shake’n Bake mix on pork chops (I’m sure it’d rock big time on chicken too!).
Course Seasoning
Cuisine American
Keyword baked, pork chops
Prep Time 5 minutes
Total Time 5 minutes
Servings 4 cups
Calories 466kcal
Author Mike

Ingredients

Curry Shake’N Bake

Instructions

Curry Shake’N Bake

  • Combine the dry ingredients in a bowl.
  • Add the oil and stir until the lumps are all gone.

For pork chops

  • Preheat oven to 425 F.
  • Rinse chops and pat dry.
  • Working in batches, transfer chops to a resealable bag.
  • Add Shake'n Bake mix.
  • Seal and shake to coat chops.
  • Shake off excess coating and transfer chops to a foil-lined baking sheet.
  • Bake for 20-25 minutes or until done.

For chicken

  • Preheat oven to 400 F.
  • Working in batches, transfer chicken pieces to a resealable bag.
  • Add Shake'n Bake mix.
  • Seal and shake to coat chicken.
  • Shake off excess coating and transfer chicken to a foil-lined baking sheet.
  • Bake for 40-45 minutes for bone-in chicken or 20 minutes for boneless chicken until done.

Notes

Store the seasoning mix in an air-right container for up to 2 months until ready to use.

Nutrition

Calories: 466kcal | Carbohydrates: 65g | Protein: 12g | Fat: 18g | Saturated Fat: 12g | Sodium: 2340mg | Potassium: 261mg | Fiber: 5g | Sugar: 8g | Vitamin A: 258IU | Vitamin C: 6mg | Calcium: 177mg | Iron: 5mg

Nutritional values are approximate.

Cedar-Plank Spicy Nacho Cheese Doritos

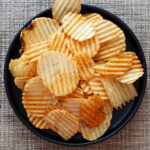
It’s great to be in control. It seems sometimes a rare thing in our lives. Well, when you make some cedar-plank spicy nacho cheese Doritos you’re in control. You decide how much of that cedar aroma you want. And how much flavor the cedar is going to bring. You even get to decide how roasted crunchy the chips end up. You’ll love the results of your efforts, believe me. Control never tasted or felt so good!

Cedar-Plank Spicy Nacho Cheese Doritos

Best Easiest Snack Ever

There’s nothing complicated going on here. You do have to be careful you don’t go crazy nuts and leave the chips on the grill too long. The process for making cedar-plank spicy nacho cheese Doritos is simple. These are great snacks for your next grill party. You can make a lot of them, and quick. Do like I do and make some cool ranch Doritos too. And some regular nacho cheese for sure!

Doritos Rock. So Do Other Chips.

I bet you’re thinking… Can I do this with other chips, too? Why sure! You can place any chip onto planks and grill them. But, watch out! Thinner chips, such as potato chips, will cook a lot faster! You might want to do a ‘test run’ with a few chips first to get a feel for the amount of time you want to grill them.

Also try some cedar-plank nacho cheese Doritos. Same great idea, but not spicy!

Cedar Planked Spicy Nacho Cheese Doritos
Print Pin
5 from 1 vote

Cedar-Plank Spicy Nacho Cheese Doritos

Nice and crispy, with a hint of cedar smoke.
Course Snack
Cuisine Main
Keyword cedar plank, tortilla chips
Prep Time 1 hour
Cook Time 5 minutes
Servings 4
Calories 147kcal

Ingredients

Instructions

  • Soak plank (or planks if you need more than one) in water for at least 1 hour.
  • Fire up your grill to medium-high heat, around 400 F.
  • Place the plank over indirect heat. Add the chips. Close the lid.
  • Let the chips grill for 2-5 minutes. Check them at least once. If they start to turn dark brown or char on the edges, remove them.
  • Let cool slightly before serving.

Notes

Note: If you prefer a stronger cedar flavor and aroma, place your soaked plank over direct heat for a few minutes first. Get a nice char on the plank. Then move it to indirect heat and add the chips.

Nutrition

Calories: 147kcal | Carbohydrates: 17g | Protein: 2g | Fat: 8g | Saturated Fat: 1g | Polyunsaturated Fat: 3g | Monounsaturated Fat: 3g | Trans Fat: 0.1g | Sodium: 196mg | Potassium: 63mg | Fiber: 1g | Sugar: 1g | Vitamin C: 0.1mg | Calcium: 39mg | Iron: 0.3mg

Nutritional values are approximate.

Crispy Cajun Wings on the Char-Broil Big Easy

Got a Char-Broil Big Easy? Think you can’t join the tailgating crowd with it? That it’s just for turkeys? Well, wrong! It’s time to fire up and make some fantastic crispy Cajun wings on the Char-Broil Big Easy! These great wings take just a little effort, just a little time, and they come out absolutely fantastic. And the sauce is nothing to sneeze at either! These are great tasting wings too!

Crispy Cajun Wings on the Char-Broil Big Easy

It’s Super Easy

There are just two simple steps to making crispy Cajun wings on the Char-Broil Big Easy. First, you need to air dry the wings coated in seasoned baking powder (not baking soda) overnight in a fridge on a wire rack. This helps dry out the skin, making it easier to get it crispy later. And second, when it comes time to cook the wings, make sure you don’t over-crowd your Big Easy. The high heat circulates around the wings, helping crisp up the skin.

Load Up

You can use a bunk bed basket (and you’ll want to) for more wings. And in fact, if you’re patient, you can fit two bunk bed baskets into the Big Easy at once. Or do like me and get more than one Big Easy and have a wing-cooking funfest!

Don’t Forget The Sauce

Sure, you can use any sauce you want on these wings. But you’ll want to keep that Cajun theme going and make a batch of the sauce below. It has a nice spicy kick to it with a great flavor that compliments the seasoned wings perfectly.

It’s always a good idea to keep a few spare grease trays on hand for your Char-Broil Big Easy.

Check out my favorite appetizer and desserts made on the Big Easy!

Crispy Cajun Wings on the Char-Broil Big Easy
Print Pin
5 from 1 vote

Crispy Cajun Wings on the Char-Broil Big Easy

Tasty, crispy wings!
Course Appetizer
Cuisine American
Keyword Big Easy, wings
Prep Time 12 hours
Cook Time 45 minutes
Servings 2
Calories 769kcal

Ingredients

For the wings

  • 2 pounds chicken wings flats and drumettes separated, tips saved to make stock
  • 1 tablespoon baking powder
  • 3 teaspoons Cajun seasoning or more, to taste

For the sauce

Instructions

For the wings

  • Place the wings in a large bowl or resealable container.
  • Combine the baking powder and Cajun seasoning.
  • Sprinkle half of the seasoning mix over the wings.
  • Using your hands, toss the wings to coat.
  • Add the remaining seasoning and repeat.
  • Transfer the wings to a wire rack over a baking sheet.
  • Place in the fridge 12 hours or overnight to dry out the skin.
  • Fire up your Big Easy.
  • Lightly spray the basket and the bunk bed basket with non-stick spray. Let the Big Easy preheat for 5-10 minutes.
  • Add the wings to the baskets and lower into the Big Easy. Do not let the wings touch or overlap. You can stand them on end if you want to fit more wings into the baskets. You can also use up to two bunk bed baskets at a time, adding more cooking area.
  • Cook until the wings are lightly browned and crispy, usually 30 minutes. While the wings are cooking make the wing sauce.
  • Transfer the wings to a large bowl. Pour as much sauce as desired over the wings and toss to coat. Serve hot.

For the sauce

  • Melt the butter in a small saucepan over medium heat.
  • Stir in the hot sauce and Worcestershire.
  • Reduce heat and keep warm until ready to use.

Notes

Wings towards the bottom of the cooker may cook faster so check them after 30 minutes.

Nutrition

Calories: 769kcal | Carbohydrates: 5g | Protein: 46g | Fat: 63g | Saturated Fat: 26g | Polyunsaturated Fat: 9g | Monounsaturated Fat: 22g | Trans Fat: 1g | Cholesterol: 250mg | Sodium: 1723mg | Potassium: 570mg | Fiber: 1g | Sugar: 2g | Vitamin A: 2602IU | Vitamin C: 25mg | Calcium: 407mg | Iron: 4mg

Nutritional values are approximate.

Make-Ahead Garlic Bread

I used to buy frozen garlic bread from the grocery store. Regularly. And on occasion I’d make it from scratch. I was looking for something better and easier. This make-ahead garlic bread makes sure I always have great garlic bread on hand and for a better price. And it tastes a whole lot better too! Oh, and even better, I can make it as buttery and as garlicky as I want!

Make-Ahead Garlic Bread

Perfect From The Freezer

I was afraid that all the buttery goodness in the topping would make this make-ahead garlic bread stick together. I feared I’d open the door to a huge block of bread stuck together. I’d be unable to even chisel a single piece away. But no! The pieces are frozen individually first, making sure they don’t stick. I keep them in a large one gallon freezer bag, always on hand for dinner!

Need more? Make my gotta-have-it garlic bread.

Make-Ahead Garlic Bread
Print Pin
5 from 1 vote

Make-Ahead Garlic Bread

Easy and great to have on hand. And so much tastier than the store-bought stuff!
Course Side
Cuisine American
Keyword garlic bread
Prep Time 30 minutes
Cook Time 15 minutes
Servings 6
Calories 1209kcal

Ingredients

Instructions

  • In a small bowl, combine the butter, garlic, olive oil, salt and parsley using a fork. You want the mixture to form a paste.
  • Cut the bread into 1" thick pieces.
  • Using a knife or spoon, place 1/2 tablespoon of the butter mixture onto each slice of bread.
  • Spread it out edge-to-edge, covering the bread completely.
  • Place the bread slices on a baking sheet and freeze for at least 15 minutes or until the butter isn't tacky.
  • Transfer the slices to freezer bags and freeze until ready to use.

Baking instructions

  • Preheat your oven to 400 F.
  • Place frozen bread slices on a baking sheet and bake 10-15 minutes or until nicely browned.

Notes

To get the bread extra crunchy, put under the broiler for 30 seconds.

Nutrition

Calories: 1209kcal | Carbohydrates: 219g | Protein: 49g | Fat: 16g | Saturated Fat: 5g | Polyunsaturated Fat: 4g | Monounsaturated Fat: 4g | Cholesterol: 13mg | Sodium: 3376mg | Potassium: 739mg | Fiber: 10g | Sugar: 25g | Vitamin A: 301IU | Vitamin C: 6mg | Calcium: 399mg | Iron: 16mg

Nutritional values are approximate.

Spaghetti and Meatball Nests

I’ve found spaghetti and meatballs to be a welcome go-to meal this fall. Usually that means making them in the slow cooker. My favorite recipe is absolutely delicious and uses ingredients I (luckily) always have on hand. As good as that is, I’ve made it enough times now that I might have been burning out on it. Time for something a bit different. Same great flavors, but more fanciful. These spaghetti and meatball nests are crazy easy to make and mighty fun to eat! And I love the little crust on the pasta!

Spaghetti and Meatball Nests

Not Complicated But Oh So Good

The original recipe for these spaghetti and meatball nests called for Italian sausage, which would also be fantastic. I happened to stock up on frozen pre-made meatballs just before access to the grocery store became more limited, so that’s what I used! Smoked sausage would be great too, or you can go meatless and use something like a good mushroom spaghetti sauce. Yum!

I highly recommend that you hand grate or shred your cheeses in anything you make. It really makes a huge difference in taste and texture. And the hand-done stuff melts better, too!

This recipe was based on a recipe from Johnsonville.

Spaghetti and Meatball Nests
Print Pin
5 from 1 vote

Spaghetti and Meatball Nests

The original recipe called for Italian sausage, which would also be fantastic. I happened to stock up on frozen pre-made meatballs just before access to the grocery store became more limited, so that’s what I used! 
Course Main
Cuisine American
Keyword meatballs, spaghetti
Prep Time 10 minutes
Cook Time 40 minutes
Servings 4
Calories 408kcal

Ingredients

  • 12 meatballs frozen prepared, thawed
  • 1 ¾ cup marinara sauce divided
  • ½ pound spaghetti broken in half
  • 1 egg
  • ¼ cup Parmesan cheese grated
  • ¼ cup Mozzarella cheese shredded
  • 1 teaspoon dried basil or Italian seasoning

Instructions

  • Place meatballs in a medium saucepan with 1 1/2 cups of the marinara sauce.
  • Bring to a boil then reduce to a simmer and continue simmering, stirring occasionally, while preparing the rest of the dish.
  • You want to heat the meatballs thoroughly.
  • Preheat oven to 400 F.
  • Spray a large muffin pan with non-stick spray.
  • Use a pan that holds 12 muffins. You can get by with a 9-muffin pan and enjoy the remaining meatballs on the side (or just heat 9!).
  • Cook the halved spaghetti according to the package directions.
  • Rinse and drain well.
  • In a bowl, stir together the egg, Parmesan cheese, mozzarella cheese, remaining 1/4 cup of the marinara sauce and spaghetti. Make sure the spaghetti is well coated.
  • Divide the spaghetti mixture into 12 of the muffin pan cups. Using your finger, make an indentation in the middle of each cup to create a nest.
  • Bake for 13-15 minutes or until the spaghetti is set. You don't want it to get crunchy, so check it after 13 or so minutes.
  • Transfer spaghetti nests to a platter. I used a spatula and tongs to both support the nests on the bottoms and sides. Be careful, some may want to fall apart on you. It won't be the end of the earth if they do!
  • Add a meatball to each nest then divide the sauce over the tops.
  • Sprinkle with additional Parmesan cheese and a little dried basil and Italian seasoning and serve.

Notes

Also great with Pecorino-Romano cheese.

Nutrition

Calories: 408kcal | Carbohydrates: 49g | Protein: 21g | Fat: 14g | Saturated Fat: 6g | Trans Fat: 1g | Cholesterol: 81mg | Sodium: 748mg | Potassium: 635mg | Fiber: 4g | Sugar: 6g | Vitamin A: 624IU | Vitamin C: 8mg | Calcium: 153mg | Iron: 3mg

Nutritional values are approximate.

The Best Slow Cooker Recipes

I’m a huge fan of my slow cooker. Nothing boring here, just great easy recipes!

Slow Cooker Gumbo Joes
1
Slow Cooker Shrimp Boil
I’ve eaten my share of shrimp boils. But honestly, there’s no such thing as having had too many shrimp boils.
Check out this recipe
2
Slow Cooker Salisbury Steak
This slow cooker Salisbury steak meat patties not only tasted fantastic they had the perfect texture.
Check out this recipe
3
Slow Cooker Hearty Sausage and Beans Soup
This soup is packed with flavor, despite how simple it is to make.
Check out this recipe
4
Slow Cooker Cubed Steaks with Gravy
Comfort food at its best!
Check out this recipe
5
Slow Cooker Kielbasa sauerkraut and Potato Soup
Slow Cooker Kielbasa Sauerkraut and Potato Soup
You can leave out the caraway seeds if they aren't your favorite.
Check out this recipe
6
Slow Cooker Ham and Bean Soup
Incredibly delicious comfort food!
Check out this recipe
7
Slow Cooker New England Clam Chowder
This slow cooker New England clam chowder was much. much better than I ever expected. 
Check out this recipe
8
Slow Cooker Down-Home Chili Dogs
Slow cooker down-home chili dogs are perfect for those lovers of sloppy, dripping, great dogs.
Check out this recipe
9
Slow Cooker Ranch Corn Chips
Packed with Ranch flavor, you can't beat this simple snack recipe.
Check out this recipe
10
Slow Cooker Kid's Sloppy Joe
Slow Cooker Kids’ Sloppy Joe
I like to keep these simple, like I remember as a kid.
Check out this recipe
11
Slow Cooker Meat Lovers Chili
Three meats to satisfy any carnivore’s desires. The perfect combination of spices and heat. This is the perfect chili for a cold day.
Check out this recipe
12
Slow Cooker French Onion Soup
Perfect on a cold day, this soup is packed with fantastic onion flavor.
Check out this recipe
13
Slow Cooker Beans 'n Wieners
Slow Cooker Beans ‘n Wieners
When I was a kid bean n’ wieners were one of my favorites. Here I am many years later and well, nothing much has changed because I still love them. 
Check out this recipe
14
Slow Cooker Spaghetti and Meatballs
Yummy meatballs in a flavorful sauce, with the pasta already mixed in. It really doesn’t get any easier.
Check out this recipe
15
Slow Cooker Holiday Green Bean Casserole
We’ve all had it. The traditional holiday green bean casserole. Well, scrap that and move on to this slow cooker holiday green bean casserole. Same idea, but oh, so much better.
Check out this recipe
16
Slow Cooker Party Shrimp
This is absolutely the easiest way to cook up a big batch of shrimp for a party.
Check out this recipe
17
Slow Cooker Stuffed Cabbage Rolls
It was a cold day. The kind of day that screams stick-to-your-ribs comfort food. These slow cooker stuffed cabbage rolls hit the spot and then some.
Check out this recipe
18
Slow Cooker Chopped Corned Beef Reuben
There’s nothing fancy about this Reuben. It’s your standard fare. Slow-cooked corned beef, tender, and then chopped. Mixed in with well-rinsed and drained kraut. Easy dressing, cheese, and rye. Done.
Check out this recipe
19
Slow Cooker Delta Sausage
Smoked sausage is great in this slow cooker Delta sausage dish, but if you find  Andouille sausage, use it instead. It’ll add even more flavor to an already delicious meal. 
Check out this recipe

Beef and Bean Burritos with Red Chile Chimayo

We were in Cincinnati for the weekend, visiting our favorite foodie destination, Jungle Jim’s, when we decided to stop at a Mexican restaurant for dinner. That meal got me thinking… boy, I haven’t made a decent Mexican dish at home in a long time. Time to remedy that! So as soon as we got home I made some beef and bean burritos with red chile chimayo. And boy, was I ever happy that I did because my Mexican-food-inspired desires were more than satisfied!

Beef and Bean Burritos with Red Chile Chimayo

The Sauce Is Incredible

The real start of the beef and bean burritos with red chile chimayo is the red chile chimayo. That’s the sauce that goes over the burritos after they have been lightly fried in oil.

I highly recommend that you shred or grate your cheese at home. Don’t buy the pre-shredded or pre-grated stuff. It has stuff added to it to keep it from sticking together. That ‘stuff’ affects how the cheese melts. Shred it yourself and use the good stuff. It’s a chili powder-infused sauce that has hints of garlic, cumin, onion and oregano. It has an amazing flavor that makes the burritos really something special. I would not hesitate to double the recipe for the chimayo. I would also be more than happy to use it in other dishes.

Also try my beef and bean burritos!

Beef and Bean Burritos with Red Chile Chimayo
Print Pin
5 from 1 vote

Beef and Bean Burritos with Red Chile Chimayo

Incredibly tasty and very easy to prepare, these burritos are amazing!
Course Main
Cuisine American
Keyword burrito
Prep Time 15 minutes
Cook Time 30 minutes
Servings 6
Calories 494kcal

Equipment

Ingredients

For the beef and bean burritos

For serving

  • cilantro chopped
  • Mexican cheese blend shredded
  • black olives sliced
  • sour cream
  • salsa
  • avocado seeded, skinned, sliced

For the red chile chimayo

Instructions

For the beef and bean burritos

  • Heat a large skillet over medium-high heat.
  • Crumble in the ground beef.
  • Stir in the taco seasoning.
  • Cook until the beef is nearly done.
  • Reduce meat to low and add the beans. Stir.
  • Place the tortillas on a microwave-safe plate.
  • Cover with a slightly damp paper towel.
  • Microwave for 30 seconds.
  • Divide the ground beef mixture between the tortillas. Add the rice and cheese to each.
  • Roll up the tortillas into burritos.
  • Wipe out the skillet you used to brown the beef.
  • Add the oil and return the heat to medium-high.
  • Working in batches of two, add the burritos to the oil and heat until brown. Turn the burritos often to brown on all sides.
  • Remove to plates for serving, topping with the chimayo and any desired toppings.

For the red chile chimayo

  • Add the chile powder to a medium bowl and whisk in 1 cup of the chicken broth. Whisk until there are no longer any lumps.
  • Heat the oil in a large skillet over medium-high heat.
  • Add the onion and cook for 5 minutes, stirring.
  • Add the garlic and saute for another 2 minutes.
  • Add the cumin, oregano, and cinnamon. Cook while stirring constantly for 2 minutes.
  • Add the chile powder and broth mixture to the skillet and stir.
  • Bring the mixture to a simmer but do not boil.
  • Season with the salt.
  • Reduce the heat to a slow simmer and let simmer for 20-30 minutes (or longer) until the sauce is the consistency you want.
  • Keep warm until ready to use.

Notes

Make extra sauce and use it on tacos!

Nutrition

Calories: 494kcal | Carbohydrates: 39g | Protein: 29g | Fat: 26g | Saturated Fat: 10g | Polyunsaturated Fat: 3g | Monounsaturated Fat: 9g | Trans Fat: 1g | Cholesterol: 73mg | Sodium: 2470mg | Potassium: 701mg | Fiber: 13g | Sugar: 7g | Vitamin A: 6632IU | Vitamin C: 4mg | Calcium: 487mg | Iron: 8mg

Nutritional values are approximate.

The Best Deep-Fryer Recipes

I love deep-fried food. Maybe a little too much! But that’s ok, I consider them a treat so I make sure to always use my deep-fryer for something special! These are my favorite deep-fryer dishes to make at home.

Honey Hot Fried Shrimp

Let’s get to the list!

1
Copycat Long John Silver's Fish-and-Chips
Copycat Long John Silver’s Fish-and-Chips
Now I can make my own copycat Long John Silver’s fish and chips. And if I want extra crunchies I just add a few drops of batter to the oil and in seconds… extra crunchies! 
Check out this recipe
2
Turkey and Stuffing Egg Rolls
When I came across this idea for making egg rolls packed with turkey and stuffing there was no way that I was going to wait until I had Thanksgiving leftovers to make them. 
Check out this recipe
3
Nashville Hot Chicken
There’s good and then there’s great. Nothing beats Nashville hot chicken when it comes to great fried chicken. The best, light, crunchy coating that you can imagine. Tender, moist chicken. And of course, heat. Plenty of heat. I could make and eat Nashville hot chicken any day of the week.
Check out this recipe
4
Homemade Onion Rings
I’m addicted to onion rings. And I’m picky about them. I’m picking about the coating. It has to be light and crunchy and it has to stick to every inch of the onion. And I’m picky about the onion. Each bite has to be ‘clean’.
Check out this recipe
5
Copycat Long John Silver's Chicken Planks
Copycat Long John Silver’s Chicken Planks
Fried in the same great crunchy batter as the fish planks, chicken planks were just as addicting as the fish. And oddly (for me as a kid), just as good with malt vinegar sprinkled on them.
Check out this recipe
6
Spicy Red Onion Rings
Oh, all those years spent eating (and enjoying!) onion rings made from white or sweet onions. Not wasted years, but years of missed opportunities of eating spicy red onion rings.
Check out this recipe
7
Copycat Long John Silver's Hush Puppies
Copycat Long John Silver’s Hush Puppies
 I made the fish. I made the fries. And I made the chicken planks. And now, I’ve made the hush puppies. They have the perfect texture and the perfect corn flavor. 
Check out this recipe
8
Spicy Texan Rings
Spicy Texan Onion Rings
Along came these spicy Texan onion rings and every last bit of self-control I might have had was gone in an instant. I seriously do not remember what else we had for dinner the night I made these. Could’ve been filet mignon. Doesn’t matter. The rings were the star.
Check out this recipe
9
Copycat Captain Ds Batter Dipped Fish
Copycat Captain D’s Batter Dipped Fish
I’m a big fan of battered fried fish. Add in some fries, a side of tartar sauce, and give me a bottle of malt vinegar and I’m one happy guy. This copycat of Captain D’s batter dipped fish checks all my boxes.
Check out this recipe
10
Copycat Culver’s Cheese Curds
Oh my goodness. There should be a big ‘danger’ sign next to these copycat Culver’s cheese curds. Danger because you’re going to want to eat them all.
Check out this recipe
11
Cajun Fried Shrimp
Cajun Fried Shrimp
I’ve never had wings or shrimp that I didn’t absolutely love. Like these Cajun fried shrimp. Lightly crunchy. Stick-to-the-shrimp batter. A little heat. Perfectly cooked.
Check out this recipe
12
Beer Battered Shrimp and Fries
“I’ll have the beer battered shrimp and fries and… a side salad.” No. No one has ever said that. This isn’t a salad-on-the-side kind of dish. It’s seriously battered, deep-fried decadence, from start to finish.
Check out this recipe
13
Bacon and Blue Cheese French Fries
There are few things as dangerous as a plate of bacon and blue cheese French fries.
Check out this recipe
14
Cajun Fried Chicken Sandwich
This Cajun fried chicken sandwich is absolutely packed with flavor. The chicken is oh-my tender, juicy and even has just a bit of a kick.
Check out this recipe
15
Garlic Parmesan Pizza Rolls
Delicious little bites that disappear in no time!
Check out this recipe
16
Copycat Outback Steakhouse Gold Coast Coconut Shrimp
The dipping sauce is addicting. You might want to double the amounts.
Check out this recipe
17
Hot Honey Fried Chicken Sandwiches
Forget those wimpy fast-food chicken sandwiches.
Check out this recipe
18
Honey Hot Fried Shrimp
Some of the best shrimp you'll ever have.
Check out this recipe

Pizza Smash Burgers

It’s gonna be messy. Juices are gonna run down your forearm. Pizza sauce too. Cheese is gonna drip onto your lap. All your favorite pizza flavors on a convenient grilled burger. No boring burger here. Pizza smash burgers are a wonderful way to change up your burger routine. The big thin patties are perfect for loading up the toppings so go big and enjoy!

Pizza Smash Burgers

You can go ‘loaded’ or ‘lightly loaded’ with these pizza smash burgers. I tried them both ways and both were great. More pepperoni. More pepperoncini. More cheese. Or not.

You can also add your other favorite pizza toppings, such as mushrooms or olives. Go crazy with it!

The equipment

Here’s the equipment I use. You can get by using two cast iron skillets. Use a larger skillet for cooking the burgers, and a smaller one to smash the burgers and keep them flat. Since I’m a cooking gadget collector, I prefer to use a few more tools.

The griddle

First, a griddle. You can buy griddles that sit on top of your grill grates or ones that replace them. Just about every grill I have has a griddle on it. I use them for a lot of things, not just smash burgers. You want one that can be placed over the hottest part of your grill so it gets screaming hot.

A burger press

Next, you need a burger press. You can use a heavy cast iron skillet, like I mentioned. Or get a burger press. For easy cleanup I wrap mine in foil first. When I’m done, just peel off the foil and toss. Super easy. Get a press that’s at least big enough to cover two burgers. You only smash one at a time, but if you want to keep them flat, you want to rest the press on top so bigger (and heavier) is better. Plus I’ve found that a bigger, heavier press tends to stay on the burgers whereas a smaller, lighter one is hard to keep centered on the burgers, specially if you have a bunch of them cooking at once.

A dome

Next up, a dome. While not 100% required, it does speed the time it takes to melt the cheese and it does it in a nice even fashion. In my opinion you don’t really need one if you’re using a super melty cheese, such as American, but for thicker slices like say a deli pepper jack, you want the cheese to melt before you over-cook the burger and that’s where a dome comes in handy.

Cleaning time!

Lastly, you need something to clean your griddle. I like to clean mine when I’m done cooking, but you can do it at the start instead. I use one of these pad holders with a griddle cleaning pad. Then I add a bit of water to my griddle then use the pad (connected to the holder) to scrub off any big chunks and get up some of the grease. I don’t go crazy with it, I always heat the heck out of my griddle before cooking, but I get the worst. The long arm on the pad holder makes it perfect for scrubbing a hot griddle, too.

Also try my taco smash burgers!

Pizza Smash Burgers
Print Pin
5 from 1 vote

Pizza Smash Burgers

All your favorite pizza flavors… on a burger!
Course Main
Cuisine American
Keyword pizza, smash burgers
Prep Time 15 minutes
Cook Time 15 minutes
Servings 4
Calories 500kcal

Ingredients

For the smash burgers

Instructions

For the smash burgers

  • Fire up your grill for high heat. Place a griddle or a large cast iron pan over the highest heat.
  • Season the ground beef with the salt and pepper, mix and form into four 4 ounce balls (not patties!).
  • Place the balls of beef on the griddle and let cook for one minute. Just let them cook, don't mess with them.
  • Take your press and flatten out the patties. I like to use the point of the press and work my way around the ball first, doing a little section at a time and then finally I press down on the entire patty to flatten it out. You can also just flatten out the ball all at once. At this point I also like to season the patties some more.
  • Let the patties cook until you start to notice a little char along the edges. Flip, season again if desired, and continue cooking another minute or so until the other side is charred. The burgers are thin so they will cook very quickly so watch out.
  • Top patties with pepperoni, cheese, sauce and pepperoncini.
  • Toast the buns. Remove, add the patties.
  • Devour immediately.

Notes

Serve with plenty of napkins!

Nutrition

Calories: 500kcal | Carbohydrates: 24g | Protein: 29g | Fat: 31g | Saturated Fat: 12g | Polyunsaturated Fat: 2g | Monounsaturated Fat: 13g | Trans Fat: 2g | Cholesterol: 99mg | Sodium: 1811mg | Potassium: 496mg | Fiber: 1g | Sugar: 4g | Vitamin A: 233IU | Vitamin C: 3mg | Calcium: 164mg | Iron: 4mg

Nutritional values are approximate.

Easy Irresistible Mozzarella Cheese Sticks

I was going to call these easy irresistible mozzarella cheese sticks just ‘easy mozzarella cheese sticks’. But no, that’s just not enough. It doesn’t tell you just how good they are. Eat two? Three. Yeah right. Not me at least. I’m not that strong. They have a power. The power of a crunchy, flavorful coating. Ooey gooey melty cheese. Perfect. Irresistible!

Easy Irresistible Mozzarella Cheese Sticks

The Keys To Cheese Stick Success

These easy irresistible mozzarella cheese sticks are easy. But there are two things to remember while you’re making them. First is get the cheese well coated in the flour. Don’t forget the ends, either. Our goal here is the perfect breading, everywhere. Every inch of the cheese stick.

Second, is to make sure you get the cheese stick nice and coated in the egg. Beating the eggs well will help with this. And again, make sure you get the ends too.

After that it’s a walk in the park. Just get the breadcrumbs all over. And yep, get the ends again. Then fry until golden brown. Oh and resist eating them hot out of the fryer. Trust me on that. Let them cool a bit regardless of how tempted you might be!

I get out my big deep fryer when it’s time to fry a large batch of food. It comes to temperature quickly and it maintains that temperature perfectly. It has a built-in oil filter and storage unit so I can re-use the oil several times.

Also try my fried mozzarella pepperoni sticks.

Easy Irresistible Mozzarella Cheese Sticks
Print Pin
5 from 1 vote

Easy Irresistible Mozzarella Cheese Sticks

Flavorful ooey gooey deliciousness!
Course Appetizer
Cuisine American
Keyword cheese, deep-fried
Prep Time 10 minutes
Cook Time 10 minutes
Servings 6
Calories 173kcal

Ingredients

Instructions

  • Cut the mozzarella cheese sticks in half in the middle to make 24 shorter pieces.
  • Heat 2-3" of oil to 350 F in a Dutch oven or deep fryer.
  • While the oil is heating, make the cheese sticks.
  • Place the breadcrumbs into a shallow bowl or small pie plate.
  • Stir in the Italian seasoning, garlic powder, paprika, salt, and pepper.
  • Dredge each mozzarella stick in flour.
  • Get each side of stick, including the ends, coated well.
  • Shake off any excess flour.
  • Beat the two eggs and place in a small bowl.
  • Dip the sticks into the eggs and coat well. Get the ends of the cheese sticks, too. All of it. Don't miss a spot!
  • Transfer the sticks to the breadcrumb mixture.
  • Roll them to coat, pressing down on them as you go. Also get the ends. Don't rush this. You want the breadcrumbs to coat them completely and evenly.
  • Working in batches if needed, fry the sticks for 3-4 minutes or until golden brown.
  • Remove to a wire rack over a baking sheet or a paper towel-lined plate.
  • Serve with warmed marinara for dipping.

Notes

Also great dipped in pizza sauce and Ranch dressing!

Nutrition

Calories: 173kcal | Carbohydrates: 29g | Protein: 7g | Fat: 3g | Saturated Fat: 1g | Polyunsaturated Fat: 1g | Monounsaturated Fat: 1g | Trans Fat: 0.01g | Cholesterol: 62mg | Sodium: 163mg | Potassium: 89mg | Fiber: 2g | Sugar: 1g | Vitamin A: 109IU | Vitamin C: 1mg | Calcium: 51mg | Iron: 2mg

Nutritional values are approximate.