Popcorn using an Outdoor Griddle

I started out down the road making popcorn using an outdoor griddle thinking it was… well, kinda gimmicky. One of those things you make once. You say to yourself “Well that was kinda neat”. Then you never do it again. Wrong! I made this popcorn 3 days in a row. I shared it with the neighbors. We all agree, it was awesome! The kernels popped up perfectly. The popcorn had a nice extra crunch to it. Fresh. Delicious. All I had to do was toss it with a little salt and serve!

Popcorn using an Outdoor Griddle

A Man And His Dome

Making popcorn using an outdoor griddle is pretty easy. You start out by heating a little oil for about 10 minutes. Then you add the kernels and cover them with a lid. Now here’s the first important thing. Once things get going, don’t lift the lid. Just don’t. You’ll hear popping. You’ll want to take a look. Don’t. Just don’t. Why? Because if you’re like me you have to do it once and when you do, you quickly learn your lesson. Yep. Popcorn everywhere. All over the griddle. On my deck. In the yard. Happiest day ever for the squirrels. Not so great a moment for me. So keep the lid down.

Popcorn using an Outdoor Griddle

Less Is More

Here’s a picture of me violating the rule of ‘don’t lift the lid’. I just wanted to show how easy this process is. Not a lot of kernels are needed. Ditto the oil. Don’t overload it. The popcorn only takes a few minutes once it gets going. It’s easier to make another batch than to try and handle one big batch.

Popcorn using an Outdoor Griddle

Once you hear the kernels pop, move the lid around on the griddle a bit. You don’t have to go nuts with it. You don’t have to shake it like Jiffy Pop popcorn. But move it a bit to keep any popped kernels from burning.

When you no longer hear popping move the lid over to a cooler part of the griddle and lift it up to scoop up the popcorn. I use two big spatulas to do it. It’s a bit of an art. The first time I dropped some popcorn. Second time I had it down and got them all.

Also try my baked Ranch sourdough pretzel bites.

Popcorn using a Griddle
Print Pin
5 from 1 vote

Popcorn using an Outdoor Griddle

Easy, delightfully-crunchy popcorn!
Course Appetizer, Snack
Cuisine American
Keyword griddle, popcorn
Prep Time 5 minutes
Cook Time 5 minutes
Servings 2
Calories 77kcal

Ingredients

Instructions

  • Heat up your griddle on medium heat for 10 minutes.
  • Drizzle the oil onto the center of your griddle.
  • Add the popcorn kernels.
  • Let the kernels warm up. Once you start to see the oil sizzle, turn the heat down to medium-low and cover the kernels with the dome.
  • Keep cooking until you hear the kernels start to pop. Using a grill mitt, grab the dome and slowly keep it moving in circles so that the popped kernels do not burn. Do not lift the dome while doing this.
  • Keep moving and cooking until the kernels go for 1-2 seconds without anything popping.
  • Slide the dome to a cooler area of the grill if possible. Remove the lid. Using a spatula, transfer the cooked popcorn to a medium bowl.
  • Sprinkle the popcorn with salt, toss, and serve.

Notes

Serve immediately for maximum flavor and crunchy!

Nutrition

Calories: 77kcal | Carbohydrates: 15g | Protein: 2g | Fat: 1g | Saturated Fat: 0.1g | Polyunsaturated Fat: 1g | Monounsaturated Fat: 0.2g | Sodium: 1mg | Potassium: 56mg | Fiber: 3g | Sugar: 0.2g | Calcium: 1mg | Iron: 1mg

Nutritional values are approximate.

Easy Orange Creamsicle Pie

I hardly ever make desserts. My track record with doing anything even remotely picture-worthy for dessert is really bad. Fortunately, though, this isn’t some high-falutin’ fancy food blog. So I can get by posting a pic of my easy orange creamsicle pie and still sleep just fine at night. Nope, it’s not really pretty. But boy, did it ever hit the spot. I loved this pie. I could eat this pie every day. It’s creamy smooth. And orange-y. And way, way easy. Which I need.

Easy Orange Creamsicle Pie

Sugar. Or Sugar-Free. Great Either Way.

I have to watch my carb intake, so I went the mostly sugar-free route when I made this easy orange creamsicle pie. For me that meant using sugar-free Jell-o and Cool Whip. Of course, there are still carbs in the crust and the mandarin orange slices. You can go with using fully loaded Jell-O and Cool Whip instead. Whichever you prefer.

Variations

My first thought when I bit into this was ‘yummy’. My second was ‘strawberry’. Yes, next time I’m making a strawberry version of this pie. Or blueberry. There are lots of great Jell-O flavors that would make for great creamsicle pies!

Easy Orange Creamsicle Pie

Also try my (easy) baked hot apple hand pies!

Easy Orange Creamsicle Pie
Print Pin
5 from 1 vote

Easy Orange Creamsicle Pie

One of the tastiest, easiest desserts I've made!
Course Dessert
Cuisine American
Keyword creamsicle, pie
Prep Time 15 minutes
Cook Time 4 hours 30 minutes
Servings 8
Calories 1147kcal

Ingredients

Instructions

  • Pour the gelatin in a large bowl.
  • Pour in the hot water. Whisk for 2 minutes or until the gelatin is completely dissolved.
  • Pour in the cold water. Whisk until frothy.
  • Using a spatula, slowly stir in the Cool Whip. Keep stirring until blended. The mixture will turn a consistent light orange in color.
  • Place the bowl in the fridge for 30 minutes. The mixture should thicken slightly.
  • Spoon the mixture into the crust. Smooth out the top with a spatula so it is nice and even.
  • Refrigerate for 4-12 (recommended) hours before serving.
  • Garnish pie with mandarin orange slices (if using), slice, and serve.

Nutrition

Calories: 1147kcal | Carbohydrates: 153g | Protein: 13g | Fat: 54g | Saturated Fat: 11g | Polyunsaturated Fat: 4g | Monounsaturated Fat: 36g | Cholesterol: 5mg | Sodium: 1073mg | Potassium: 271mg | Fiber: 4g | Sugar: 52g | Vitamin A: 52IU | Calcium: 94mg | Iron: 6mg

Nutritional values are approximate.

Baked Hot Apple Hand Pies

If we baked something sweet and it even remotely comes out looking good we’re happy. More than happy. Especially if it involves dough. Homemade dough. Packaged dough. Doesn’t matter. We’re dough cursed. That’s why we were doing the happy dance when these baked hot apple hand pies came out of the oven looking great. Well great to us, at least. And we’ll take that any day of the week! They smelled great too. And oh, were they ever tasty! Just sweet enough with a light crunchy dough crust. Yummy!

Baked Hot Apple Hand Pies

An Apple A Day

You can make these baked hot apple hand pies with fillings other than apple, too. Try a little blueberry. Cherry. Even raspberry or peach will work. Any pie filling you can find will work. As long as it’s not too runny. You don’t want to use anything that will keep the seams from sealing along the edges. If you do have a thinner filling, just drop it into a sieve for a few minutes to drain off some of the liquid.

And yes, these pies are very similar to the super-mega-hot ones you can get at McDonald’s!

It’s always okay to sneak in a treat here and there. I also love my glazed baked mini-donuts!

Baked Hot Apple Hand Pies
Print Pin
5 from 1 vote

Baked Hot Apple Hand Pies

Perfect served warm with ice cream!
Course Dessert
Cuisine American
Keyword apple pie
Prep Time 15 minutes
Cook Time 15 minutes
Servings 8
Calories 426kcal

Equipment

Ingredients

  • 2 tablespoons sugar you can use a sugar substitute
  • ½ teaspoon ground cinnamon
  • 2 puff pastry sheets thawed if frozen. Pepperidge Farm is best
  • 21 ounces apple pie filling you can use low sugar
  • 1 egg white
  • 1 tablespoon water

Instructions

  • Preheat oven to 400 F.
  • Combine the sugar and cinnamon in a small bowl.
  • Roll out the two puff pastry sheets into 12" x 12" squares.
  • Cut each sheet into 4 3" wide strips.
  • Cut each of the strips in half. You will now have 12 rectangles that are 3" x 6".
  • Divide the apple pie filling among 8 of the rectangles. Just mound it up a bit down the center but don't get it too close to the edges. You need to keep a little bit 'clean' so that the edges will seal.
  • Using a sharp knife, cut 4 diagonal slits in the remaining 8 rectangles. Don't get them too close to the edges as you don't want the dough to split.
  • Place the rectangles with the slits in them on top of the apple pie-topped ones.
  • Using a fork, press down along the seams to seal the pastries.
  • Combine the egg white and water in a small bowl or glass using a fork. Brush over the tops of the pastries.
  • Sprinkle the pastries with the cinnamon sugar mix.
  • Transfer to a baking sheet lined with parchment paper or with a silicone mat. I used a large spatula to move them. It can seem a bit daunting but if you're careful they'll make the trip just fine. You might have to nudge them around a bit to get them back to perfect looking rectangles.
  • Bake for 15-20 minutes or until golden brown.
  • Remove to a wire rack to cool slightly before serving.

Nutrition

Calories: 426kcal | Carbohydrates: 50g | Protein: 5g | Fat: 23g | Saturated Fat: 6g | Polyunsaturated Fat: 3g | Monounsaturated Fat: 13g | Sodium: 194mg | Potassium: 78mg | Fiber: 2g | Sugar: 14g | Vitamin A: 19IU | Vitamin C: 1mg | Calcium: 11mg | Iron: 2mg

Nutritional values are approximate.

Nashville Hot Chicken Cheesesteaks using an Outdoor Griddle

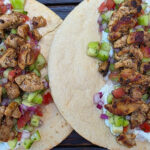
I need to start a new food category here on Life’s A Tomato. It’ll be called ‘so crazy good that I ate this 3 days in a row’. The first dish I’ll add to this new category will be this Nashville Hot Chicken cheesesteaks made using an outdoor griddle. This was good. Crazy good. A little spicy. Tender, juicy chicken that is packed with flavor. A little ooey-gooey cheese action. Crispy vegetables. And of course, a few pickles. This is one great sandwich!

Nashville Hot Chicken Cheesesteaks using an Outdoor Griddle

Easy Griddle Action

I haven’t had my large outdoor griddle for that long. I’ve used smaller griddles for burgers and the like for years. But the big one has made dishes like these Nashville Hot Chicken cheesesteaks a delight. There’s lots of room to cook up the onions and peppers then move them off to the side while my attention turns to the chicken. Room to toast the rolls, too.

Nashville Hot Chicken Cheesesteaks using an Outdoor Griddle

Spicy Like I Love It

These sandwiches have a nice kick to them. The seasoning and cheese bring it, but without being crazy spicy. I went a little heavy on both because I love a good spicy sandwich. If you’re into even more heat, add some jalapeno slices, either to the vegetables as they cook or the sandwich before serving. Or both!

These cheesesteaks are tasty and easy. Looking for something even easier, though? Try my garlic naan pizzas using an outdoor griddle.

Nashville Hot Chicken Cheesesteaks using an Outdoor Griddle
Print Pin
5 from 1 vote

Nashville Hot Chicken Cheesesteaks using an Outdoor Griddle

So good that you'll never miss the real things!
Course Main
Cuisine American
Keyword cheesesteak, chicken
Prep Time 15 minutes
Cook Time 15 minutes
Servings 6
Calories 527kcal

Ingredients

For the sauce

For the meat filling

  • 1 ½ pounds boneless skinless chicken thighs cut into bite-sized pieces
  • 1 tablespoon vegetable oil
  • 1 medium green bell pepper chopped
  • 1 medium yellow onion chopped
  • 6 slices pepper Jack cheese

For the sandwiches

Instructions

For the sauce

  • In a small bowl combine the mayonnaise, lemon juice, and 1 tablespoon of the hot chicken seasoning.
  • Cover and refrigerate until ready to use.

For the meat filling

  • Place the chicken pieces into a large bowl.
  • Drizzle with the oil and sprinkle with the remaining hot chicken seasoning. Mix until all of the chicken is coated evenly.
  • Cover and set aside until ready to serve. Toss chicken with oil and remaining 2 tablespoons
  • Preheat your outdoor griddle on high.
  • Add a splash or two of oil. Add the peppers and onions and cook, stirring often, until they are just starting to soften. Do not over cook them. You want a little bit of a crunch.
  • Move the pepper and onion mix to a cooler part of the grill to keep warm.
  • Add another splash or two of oil to the griddle and add the chicken.
  • Cook the chicken, stirring often, 5-7 minutes or until done.
  • Add the pepper and onion mixture and stir.
  • Spread the filling out evenly onto the griddle and top with the cheese slices.
  • As soon as the cheese starts to melt, assemble the sandwiches (below).

For the sandwiches

  • Slather the cut sides of the rolls with the sauce.
  • Use a long spatula to scoop up the chicken mixture and divide between the rolls.
  • Add a few pickle slices to each sandwich and serve.

Notes

For even spicier sandwiches, substitute pickled (or fresh) jalapeno slices for the pickles!

Nutrition

Calories: 527kcal | Carbohydrates: 36g | Protein: 33g | Fat: 27g | Saturated Fat: 7g | Polyunsaturated Fat: 10g | Monounsaturated Fat: 7g | Trans Fat: 0.1g | Cholesterol: 134mg | Sodium: 639mg | Potassium: 372mg | Fiber: 2g | Sugar: 6g | Vitamin A: 277IU | Vitamin C: 22mg | Calcium: 183mg | Iron: 12mg

Nutritional values are approximate.

Easy Cheesy Bacon Broccoli using an Outdoor Griddle

My outdoor griddle isn’t just for smash burgers, quesadillas and pizzas. I even use it for side dishes such as this easy cheesy bacon broccoli using an outdoor griddle. Now, this might not be the healthiest side dish I’ve ever made outside. But it sure was one of the tastiest! And it’s definitely one of the easiest! This is the perfect thing to serve alongside my griddled smash burger!

Easy Cheesy Bacon Broccoli using an Outdoor Griddle

Are Cheese and Bacon Ever Optional?

You could leave out the cheese sauce. And even the bacon. And just make easy broccoli using an outdoor griddle. A little salt and pepper. Serve it up. And it’d be good. But for me, to get to ‘great’ you gotta add the cheese sauce and bacon bits. Kraft makes this crazy easy crazy good Velveeta sauce that comes in a little foil packet. You just pour the sauce into a bowl and microwave it for 30 seconds and boom! Instant cheese sauce perfect for something like broccoli!

Steaming the broccoli on the griddle is easy. Just squirt it with a bit of water and let it cook a bit under a dome. It comes out perfectly every time!

This broccoli is an excellent served alongside my Oklahoma onion smash burgers!

Easy Cheesy Bacon Broccoli using a Griddle
Print Pin
5 from 1 vote

Easy Cheesy Bacon Broccoli using an Outdoor Griddle

You could leave out the cheese sauce. And even the bacon.
Course Side
Cuisine American
Keyword broccoli, griddle
Prep Time 5 minutes
Cook Time 15 minutes
Servings 4
Calories 92kcal

Equipment

Ingredients

Instructions

  • Pre-heat your griddle over medium heat.
  • Open the bag of broccoli and place on the griddle. Use your spatula to mound the broccoli in a small circle.
  • Give the broccoli a few good squirts of water and season well with salt and pepper.
  • Cover and let the broccoli cook for 5 minutes.
  • Take a quick peek inside. I like to give the lid a good shake first or you can stir the broccoli with the lid off. If the broccoli is drying out add more water. Feel free to add more salt and pepper too.
  • Keep cooking for up to 12 minutes total. Check it one more time after 10 minutes to make sure more water and/or seasoning isn't needed.
  • Remove the broccoli to a medium bowl.
  • Empty the contents of the cheese sauce packet into a microwavable bowl and heat per package instructions, 30 seconds. Stir.
  • Spoon the cheese sauce over the broccoli.
  • Add a few good pinches of bacon.
  • Stir to combine.
  • Serve immediately.

Notes

This recipe can be made using fresh broccoli instead. Bring a pot of lightly-salted water to a boil. Add the broccoli and boil for 3-4 minutes until bright green and just starting to soften. Remove to an ice bath to cool completely. Drain well before placing onto the hot griddle.

Nutrition

Calories: 92kcal | Carbohydrates: 9g | Protein: 8g | Fat: 3g | Saturated Fat: 2g | Polyunsaturated Fat: 0.1g | Monounsaturated Fat: 0.03g | Cholesterol: 12mg | Sodium: 478mg | Potassium: 367mg | Fiber: 2g | Sugar: 4g | Vitamin A: 808IU | Vitamin C: 76mg | Calcium: 203mg | Iron: 1mg

Nutritional values are approximate.

The Best Quick Fix Recipes

Nothing complicated. No long ingredient lists. The best quick fix recipes are just that. My favorite recipes that take minimal time and effort but still taste great.

1
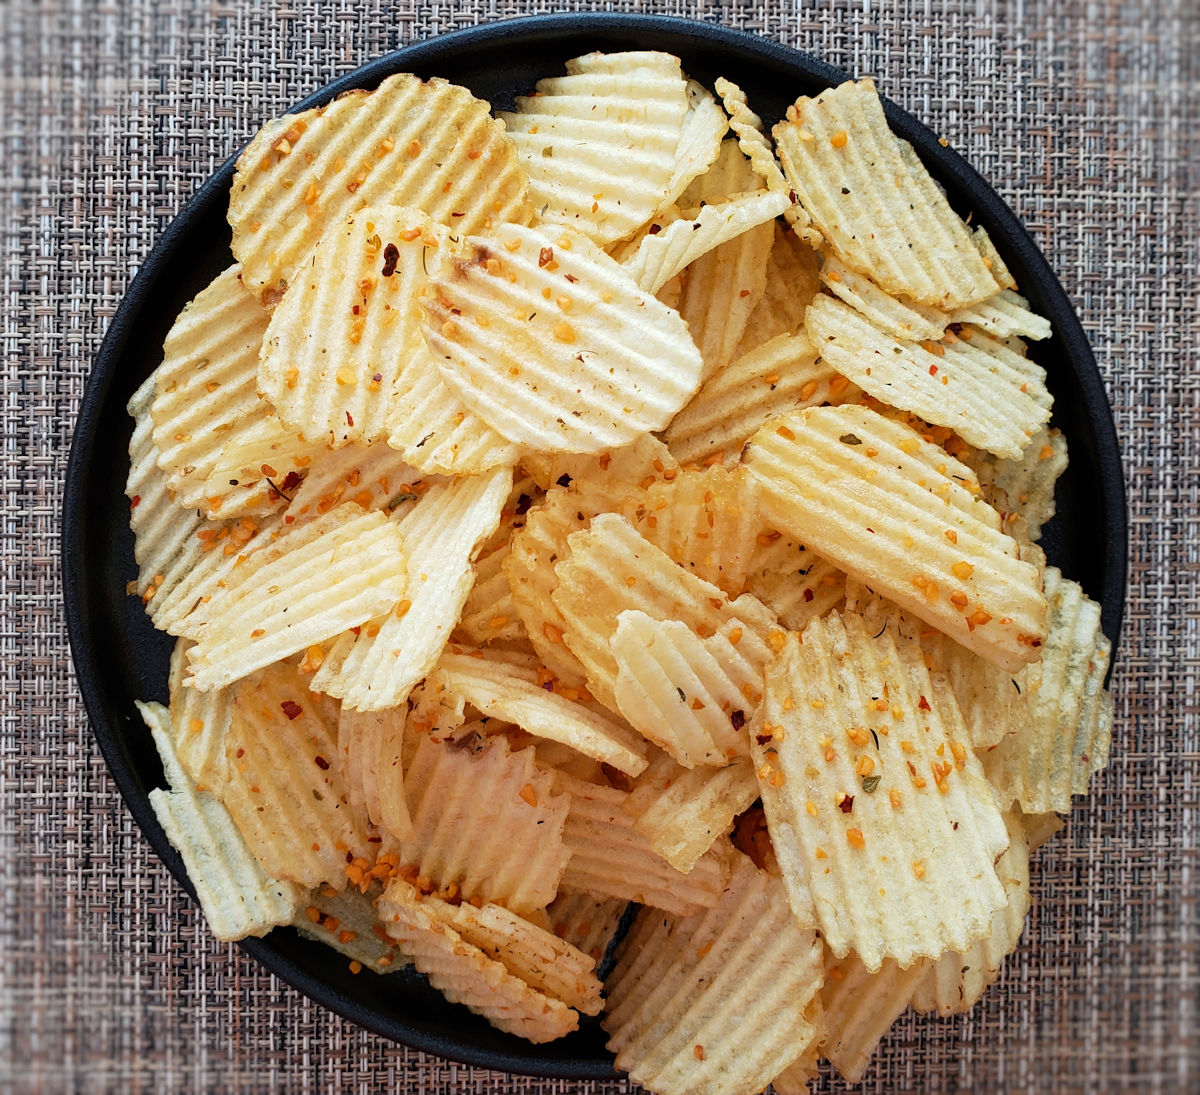
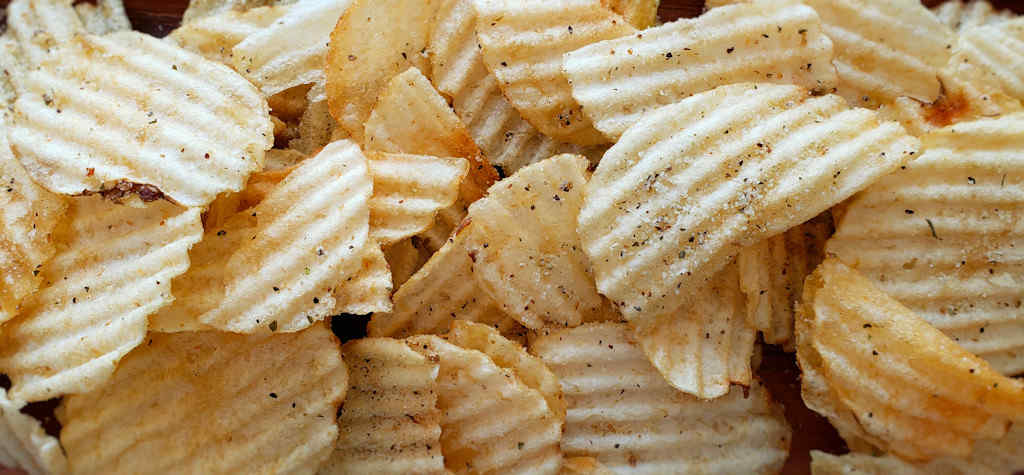
Quick Fix Roasted Garlic And Herb Potato Chips
The solution to boring potato chips.
Check out this recipe
2
Quick Fix Copycat McRib Sandwich
I actually prefer 2 patties per sandwich.
Check out this recipe
3
Quick Fix Pizza Tots
I created a ‘quick fix’ category here so I’d have a place to click on for my easiest recipes. A short list of ingredients and a short amount of time is the rule. Like these quick fix pizza tots
Check out this recipe
4
Quick Fix Turkey Reuben Sandwiches
Use thin- or thick-sliced turkey sandwich meat.
Check out this recipe
5
Quick Fix Turkey Manhattan
What leftover turkey was made for.
Check out this recipe
6
Quick Fix Franch Dressing
Franch dressing is more proof that sometimes easy is best.
Check out this recipe
7
Quick Fix Herbed Fries
Who doesn’t keep a bag or two (or more) of frozen fries on hand at all times? Yep, easiest side dish in the world, ready in no time. But no reason for them to be boring.
Check out this recipe
8
Quick Fix French Bread Pizza
I’ve been doing the best I can to keep our meals simple these days. These quick fix French bread pizzas have been a regular staple in our house since we’ve been keeping at home as much as possible.
Check out this recipe
9
Quick Fix Gumbo
Quick Fix Gumbo
All the flavors of a full-blown gumbo, but in a lot less time.
Check out this recipe
10
Quick Fix Broccoli and Cheese Baked Potatoes
I use Green Giant's frozen broccoli and cheese to top these quick fix baked potatoes,
Check out this recipe
11
Quick Fix Asian Fries
Since I was grilling up a few Asian pork burgers for dinner, I needed some fries to go with them. Something with a bit of Asian zing to it. 
Check out this recipe
12
Quick Fix Copycat McDonald's Chicken Sandwich
Quick Fix Copycat McDonald’s Chicken Sandwich
I love cooking meals from scratch. But sometimes reality hits and I have to throw something together that doesn’t require a lot of preparation. That’s where this quick fix copycat of McDonald’s chicken sandwich comes in. In less than 30 minutes I get to enjoy a rather tasty chicken sandwich.
Check out this recipe
13
Quick Fix Homemade Breakfast Sausage
I use a great seasoning mix from A.C. Legg’s that I picked up on Amazon. It has just the right blend of spices without having too much sage or black pepper.
Check out this recipe
14
Quick Fix Pickle Relish
For a spicy version of this quick fix pickle relish, just add a few good pinches of dried red pepper flake. You’ll want to let the relish ‘get happy’ in the fridge for a few hours before using it so that it gets good and spicy. 
Check out this recipe
15
Quick Fix Spicy Pickles
These quick fix spicy pickles absolutely hit the spot. I love dill pickles, and I love a little spiciness so it was easy to love these pickles. 
Check out this recipe
16
Quick Fix Tex-Mex Corn Chip Chili
This may well be my wife's favorite chili. I have to admit, it’s mighty good. This quick fix Tex-Mex corn chip chili is definitely quick fix. The only way you could make a chili any quicker is if the entire dish came out of a single can.
Check out this recipe
17
Quick Fix Spicy Salsa
Don't let the simplicity fool you. This salsa has great flavor.
Check out this recipe
18
Quick Fix Broccoli and Cheese Baked Potatoes
I use Green Giant's frozen broccoli and cheese to top these quick fix baked potatoes,
Check out this recipe
19
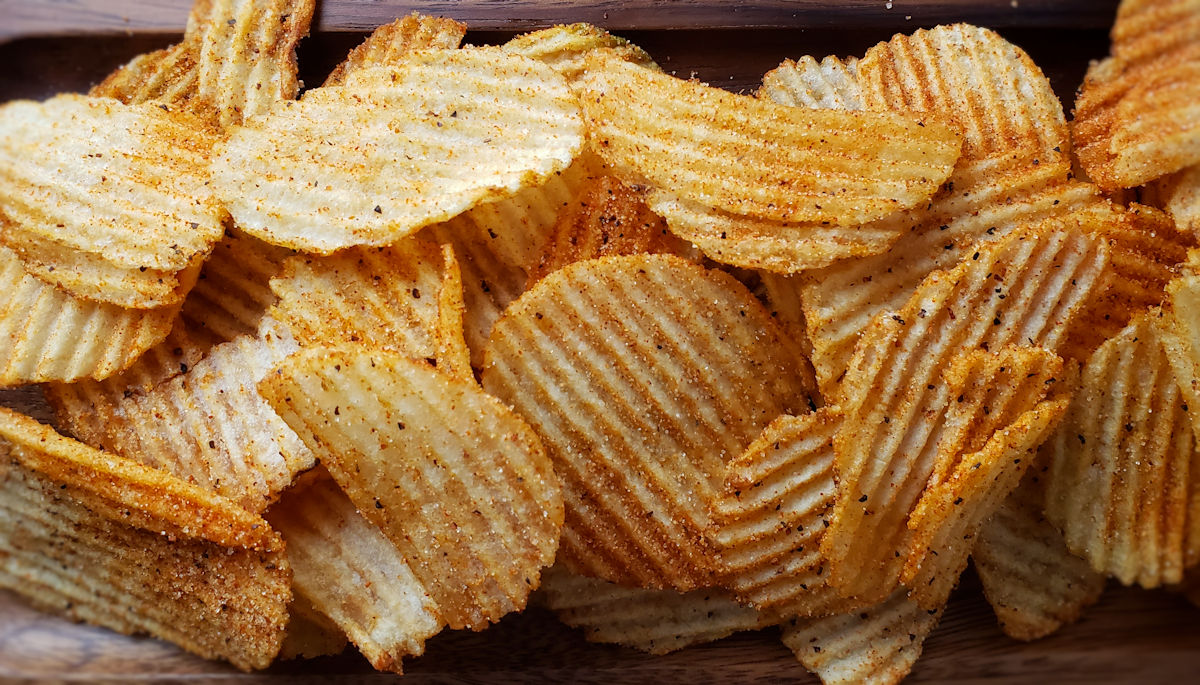
Quick Fix Frank's RedHot Original Seasoning Potato Chips
Quick Fix Frank’s RedHot Original Seasoning Potato Chips
You don't need to grab the expensive chips when you make quick fix Buffalo-flavored potato chips.
Check out this recipe

Copycat Wendy’s Baconator

These aren’t some highfalutin fancy bistro burgers that cost $19.95. There aren’t exotic meats involved. No cheese from Alpine goats is required. The buns aren’t baked in 2000 year old ovens attended to by monks. These are simple, delicious burgers. Pretty much like the ones you’d get at the fast food restaurant. Nope. These copycat Wendy’s Baconator burgers aren’t meant to be fancy. But oh are they good. And easy, too!

Copycat Wendy's Baconator

Square Patties

Yeah, to be like the restaurant version you’ll need to make square patties for your copycat Wendy’s Baconator burgers. It’s not that hard to do. And you know what? If you don’t make them square no one is going to tell on you. I was lucky and found a square Tuperware sandwich container that was perfect for making the patties. I lined it with wax paper. Then I added the meat and, using my fingers, formed it into a square. Well pretty much a square. Mine didn’t come up perfect. But they were kinda square and kinda fun.

A burger press

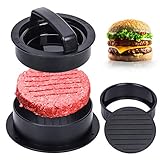
The thin square patties on these burgers like to ‘swell up’. You know what I mean. They get a little hill in the middle as they cook. Now, if you were cooking thick patties you could use your finger to put a little dimple in the middle of them before cooking to help prevent it. But these patties are thin. So the best way to combat ‘the rise’ is to use a burger press. Just place it on top of the meat as it cooks. It’s that simple.

For easy cleanup I like to wrap my press in a small piece of aluminum foil. When I’m doing cooking I just remove it and toss it into the trash.

Also try a copycat of McDonald’s Big Xtra burger at home!

Copycat Wendy's Baconator
Print Pin
5 from 1 vote

Copycat Wendy’s Baconator

Make it a double or triple!
Course Main
Cuisine American
Keyword burgers, copycat
Prep Time 15 minutes
Cook Time 20 minutes
Servings 4
Calories 1030kcal

Ingredients

  • 1 pound ground beef or up to 2 pounds if making doubles!
  • 12 slices bacon thin is best
  • 1 teaspoon kosher salt
  • 4 hamburger buns
  • 1 tablespoon butter melted
  • 12 slices American cheese
  • ¼ cup mayonnaise
  • ¼ cup ketchup

Instructions

  • Divide the ground beef into 4 ounce sections and form into squares. You want the patties to be thin and a little larger than your buns.
  • Cover and refrigerate the patties while you cook the bacon.
  • Cook the bacon until crisp. I prefer to do this in the oven at 425 F but you can also fry the bacon or cook it on an outdoor griddle. Microwaved pre-cooked bacon can also be substituted.
  • Fire up your grill or a griddle for medium-high heat cooking.
  • Season the patties well with salt and cook until done. If you have a hamburger press, put it on top of the burgers while they cook to help keep them flat.
  • While the patties are cooking, brush the insides of the buns with the butter and place on the grill to lightly toast. You can also place them under the oven broiler but keep an eye on them!
  • Remove the buns and add the cooked patties to the bun bottoms. Top with cheese.
  • Add the bacon.
  • Slather the top buns with mayonnaise and add ketchup.

Notes

I used a small sandwich-sized square food storage container lined with wax paper to help form the patties into squares but you can also do it by hand. Just make sure you get them thin.

Nutrition

Calories: 1030kcal | Carbohydrates: 29g | Protein: 44g | Fat: 81g | Saturated Fat: 31g | Polyunsaturated Fat: 13g | Monounsaturated Fat: 29g | Trans Fat: 2g | Cholesterol: 193mg | Sodium: 2588mg | Potassium: 623mg | Fiber: 1g | Sugar: 8g | Vitamin A: 712IU | Vitamin C: 1mg | Calcium: 752mg | Iron: 4mg

Nutritional values are approximate.

The Best Cheese Enchiladas

There wasn’t any arguing. No nitpicking. Nobody was on the fence. We both agreed, these are the best cheese enchiladas we’ve ever made. The mole-inspired but-easier-to-make-than-mole sauce was the real winner. Such amazing deep flavor. A little kick. The perfect pairing with creamy, melted cheese. Each and every bite was fantastic. These are the most flavor-packed enchiladas we’ve made, had, seen, or even dreamed of!

The Best Cheese Enchiladas

The Tortillas

We went the flour tortilla route when we made these. Sure, you can use corn tortillas for the best cheese enchiladas. That’d be more authentic if that’s what you’re going for. Us, we’re flour folk. Corn tortillas need to be lightly fried before stuffing and rolling. Flour ones don’t. We prefer the taste and texture of the flour tortillas. They may not be quite as authentic, but then we weren’t going to open a Mexican restaurant this week anyway!

Make sure you use hand-shredded or grated cheeses in this or any dish that calls for it. It makes a huge difference in the final recipe.

You’ll end up up with 10 enchiladas if you go with flour tortillas. That’ll feed a crowd. You’ll have 12 corn ones. They won’t last!

Also try my beef and bean burritos.

The Best Cheese Enchiladas
Print Pin
5 from 1 vote

The Best Cheese Enchiladas

We went the flour tortilla route when we made these. You can use corn ones instead if you prefer.
Course Main
Cuisine Mexican
Keyword cheese, enchiladas
Prep Time 15 minutes
Cook Time 20 minutes
Servings 10
Calories 218kcal

Ingredients

Instructions

  • Preheat oven to 375 F.
  • Heat the oil in a medium pot over medium heat.
  • Whisk in the flour until smooth.
  • Add the chile powders, cocoa, oregano, garlic powder and cumin. Whisk well and continue whisking until the sauce thickens and becomes aromatic. This will take 5-7 minutes.
  • While whisking, slowly pour in the chicken stock. Continue whisking until the sauce thickens, 3-5 minutes.
  • Stir in the apple cider vinegar.
  • Season with salt and pepper to taste. Stir and remove from heat.
  • Combine all of the cheeses in a large bowl.
  • Spoon 1/2 cup of the sauce mixture onto the bottom of a 9" x 14" baking dish. Spread out evenly using the back of the spoon or a spatula.
  • Working one-at-a-time, spoon a scant 2/3 cup of cheese onto a tortilla. Roll up tightly, folding in the edges. Place in the baking dish with the seam-side down. I was able to fit 8 in a row in the dish, with another 2 alongside.
  • Spoon the remaining sauce over the tortillas and spread out evenly.
  • Sprinkle with the remaining cheese.
  • Bake until the cheese is bubbling, 10 to 15 minutes.
  • Serve garnished with the pickled jalapenos and fresh cilantro.

Notes

You can substitute corn tortillas if you wish. If so, quickly fry (5 seconds per side) the tortillas in a skillet with 1/2 cup of vegetable oil.  Drain well then proceed to add cheese and roll.

Nutrition

Calories: 218kcal | Carbohydrates: 21g | Protein: 10g | Fat: 11g | Saturated Fat: 5g | Polyunsaturated Fat: 1g | Monounsaturated Fat: 3g | Cholesterol: 23mg | Sodium: 529mg | Potassium: 184mg | Fiber: 2g | Sugar: 2g | Vitamin A: 1008IU | Vitamin C: 1mg | Calcium: 228mg | Iron: 2mg

Nutritional values are approximate.

Oklahoma Onion Smash Burgers

I like my smash burgers tasty. Hot. Juicy. And darned messy. Nothing fancy. In fact, the less fancy, the better. These Oklahoma onion smash burgers are my favorite. By far. Just a few ingredients. But boy, do they check all of my boxes. I can (and have) eaten these several days in a row. And not once did I even remotely think I was getting bored with them. They’re delicious. Perfect.

Oklahoma Onion Smash Burgers

The Onions

The key to making delicious, juicy, tasty Oklahoma onion smash burgers is the onions. First, they have to be thin. I mean ‘read-a-newspaper-through-them’ thin. Crazy thin. Unless you’re a knife master and have the sharpest knife on the planet, I recommend using a mandolin to cut the onions. Put it on the thinnest possible setting. And of course, be careful.

You need plenty of onions. Lots of them. You cannot be shy with them. At all. When you think you’re putting too much on them, you’re wrong. Add more. I call for 2 big ones in the recipe. There’s nothing wrong with using 3. Or 4 medium-sized ones. Seems like a lot doesn’t it? It’s not. Trust me.

Crispy Edges

You gotta have that crunchy part when you make smash burgers. That little edge around them that sticks out from the bun and has the perfect crunch. You eat that first. All around the burger. Some people bite into it. Some pull it off with their fingers. Either way, it’s a true joy and a smash burger must!

Also try my super-messy deluxe nacho cheese smash burgers!

Oklahoma Onion Burgers
Print Pin
5 from 1 vote

Oklahoma Onion Smash Burgers

The perfect smash burger made on a griddle!
Course Main
Cuisine American
Keyword burgers, griddle
Prep Time 30 minutes
Cook Time 15 minutes
Servings 4
Calories 731kcal

Ingredients

For the burgers

For the burger sauce (you will have some leftover)

Instructions

For the burger sauce

  • Place all ingredients into a small bowl.
  • Whisk until combined and smooth.
  • Refrigerate until ready to use.

For the burgers

  • Divide the beef into 4 4 ounce pieces and form into balls. Do not pack them tightly, just handle them enough to form into balls. Cover and place into the fridge.
  • Slice the onions very thin. I recommend using a mandolin. Ideally, you want them so thin that you can read a newspaper through them! Thin is best!
  • Place the onions into a bowl and sprinkle with salt. Toss to coat well and let sit on the countertop for 20 minutes.
  • Preheat your griddle over high heat for 10 minutes. Add oil if needed.
  • Meanwhile, drain all of the water out of the bowl of onions. Then squeeze all of the water you can out of the onions. Squeeze and keep squeezing! Place the onions back into the dry bowl until ready to use.
  • Add the burger balls to the griddle, leaving plenty of room between them.
  • Lightly smash down the burgers and season well with salt and pepper.
  • Top each burger with onion and smash them down the rest of the way. You want the patties nice and thin.
  • Cook the burgers for 4 minutes (or a little longer if they are thicker). The steam from the meat will help cook the onion. Flip the patties so that they are onion-side down and season again. The patties and onions will start to get golden brown and crunchy along the edges.
  • After 2 more minutes add the cheese. Let it melt for for 2 minutes.
  • Place the bun tops over the burgers and top with the bun bottoms and cook another 2 minutes. If your griddle has a top, close the lid. You want to steam the buns.
  • Transfer the bun bottoms to a plate. Add the sauce and pickles.
  • Add a patty to each bun bottom along with a bun top and serve hot and juicy!

Notes

If you don’t have a griddle, you can use a large cast iron skillet on the grill instead. You might not have enough room to make all 4 burgers at once.

Nutrition

Calories: 731kcal | Carbohydrates: 35g | Protein: 29g | Fat: 52g | Saturated Fat: 16g | Polyunsaturated Fat: 14g | Monounsaturated Fat: 17g | Trans Fat: 2g | Cholesterol: 113mg | Sodium: 1761mg | Potassium: 560mg | Fiber: 3g | Sugar: 11g | Vitamin A: 361IU | Vitamin C: 10mg | Calcium: 331mg | Iron: 4mg

Nutritional values are approximate.

Sous Vide Bratwurst

I have grilled many a bratwurst. Usually, I make a ‘bath’ for them to soak and simmer in before putting them onto the grill. I’ve had great success with that technique. But there seemed to be a little something missing. The brats tasted more like the marinade than bratwurst. And sometimes they were a bit overcooked. So I took a shot at sous vide bratwurst. And I have to say, I won’t be going back to my old ways of cooking brats. This is the way to achieve super-tasty bratwurst with the perfect bite and char. These are great bratwurst. And they’re easy and pretty much foolproof too!

Sous Vide Bratwurst

That Pop

When I used to grill my marinaded brats I’d get that skin ‘pop’ when I bit into them. You know, the one where you get squirted with 500 F juices. You don’t get that with sous vide bratwurst. But you do get really good skin. It’s an easy bite. Nothing chewy. But not super-crunchy either. Some people really like that crunch and you can get it with these, but you’ll have to grill them longer to get it.

The meat is super-tender and juicy and flavorful. Way beyond anything I ever achieved before. I can’t imagine cooking bratwurst any other way. I thought about adding things to the bag as they sous vide. Maybe some herbs. Or beer. But no, I really think they’re best just ‘stewing’ in their own juices. For maximum flavor!

Also try my sous vide corned beef.

Sous Vide Bratwurst
Print Pin
5 from 1 vote

Sous Vide Bratwurst

The perfect bite with plenty of flavor!
Course Main
Cuisine American
Keyword bratwurst, sous vide
Prep Time 15 minutes
Cook Time 2 hours 15 minutes
Servings 4
Calories 220kcal

Ingredients

  • 4 bratwurst fresh
  • 4 bratwurst buns
  • your favorite bratwurst toppings grilled onions, peppers, kraut, mustard, whatever you like!

Instructions

  • Pre-heat your sous vide water to 157 F.
  • Place the bratwurst into a sealable or vacuum bag. Do not let them overlap each other.
  • Remove all of the air from the bag and close, or vacuum seal tight.
  • Transfer to the sous vide and cook for 2 hours.
  • Remove the bag from the water. Open and transfer the bratwurst to a plate or wire rack until ready to grill.
  • Heat your grill for direct cooking.
  • Transfer the bratwurst to the grill and sear on all sides. They're already cooked so you're looking to crisp up the skin and give the bratwurst some color. Plan on about 5 minutes depending on how charred you like your brats.
  • Toast the buns as desired.
  • Transfer the grilled brats to the buns and add your favorite toppings.
  • Serve hot.

Notes

You can make a big batch of these and grill them all the same day. They are excellent leftover. Just warm up in the oven, microwave or an air fryer.

Nutrition

Calories: 220kcal | Carbohydrates: 2g | Protein: 9g | Fat: 19g | Saturated Fat: 7g | Polyunsaturated Fat: 2g | Monounsaturated Fat: 10g | Cholesterol: 49mg | Sodium: 558mg | Potassium: 230mg | Vitamin A: 4IU | Calcium: 18mg | Iron: 0.3mg

Nutritional values are approximate.