Spicy Chex Mix using an Outdoor Griddle

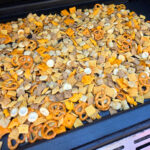
You bet I’ve made Chex Mix in the oven. Quite a few times. But, this was my first time making it on my outdoor griddle. And it was a fantastic treat. Chex Mix using an Outdoor griddle is a bit different. And that difference is the wonderful crunchy caramelization you get on each and every little tasty morsel. I found it to be noticeably better than the baked version! And hey, it’s fun cooking outside on a griddle too!

Spicy Chex Mix using an Outdoor Griddle

Big Fun on the Griddle

This recipe for Spicy Chex Mix using an Outdoor griddle makes a big batch. You’ll need a big griddle (30″ or more) to make the entire recipe at one time. If you have to, do it in batches. And as a note, if you go crazy stirring it (like I did) you might lose a few pieces over the side of the griddle don’t fret it. It happens.

You gotta move fast once you get this started on the hot griddle. You can’t be wandering off around the patio. Don’t be playing on your phone. Keep it moving. If you don’t, it’ll burn and quick, too.

You are the master of your Chex Mix. Add other things to it if you want. Take things out. Whatever you want to do. Just keep it moving.

It’s Not Picky

Don’t get hung up on the quantities in the recipe. Just get about 12 total cups of ‘whatever’. Want more Chex? Do it, just use less of something else. Ditto the Cheez-Its. Or whatever. Just get to that 12 cups magic number.

Weber® Griddle Essential Tool Set, 5‑Piece
  • Here’s your 5-piece set for griddle success…
  • Get creative with the right tools to make your own…

Also try my Everything Bagel Seasoning Chex Mix using an outdoor griddle.

Spicy Chex Mix using an Outdoor Griddle
Print Pin
5 from 1 vote

Spicy Chex Mix using an Outdoor Griddle

This recipe makes a big batch, plenty for a crowd!
Course Appetizer
Cuisine American
Keyword Chex mix, griddle
Prep Time 15 minutes
Cook Time 15 minutes
Servings 16
Calories 206kcal

Ingredients

For the wet mix

Instructions

  • Pre-heat your griddle over low heat. Make sure that it's clean. Depending on the size of your griddle, you might have to make the mix in batches. The easiest way to do that is to halve the mix and butter mixture first.
  • In a large bowl, combine all of the Chex Mix ingredients.
  • Melt the butter in a small bowl or pot. This can be done directly on the griddle.
  • Stir in the Worcestershire sauce and hot sauce.
  • Add seasoning salt to the butter mixture and stir to dissolve and combine.
  • Drizzle the butter mixture over the Chex mix and stir well to combine. Take your time, get it all well-coated.
  • Add the Chex Mix ingredients to the griddle. Immediately spread it out.
  • You want to toast the mixture for 2 minutes. Keep it moving constantly or it will brown. You want it to get a little color to it. A little char here and there is fine too.
  • Keep the mixture moving as you continue to toast it. You'll need 5-10 minutes to get it to the desired color and crispiness.
  • Immediately remove the mix to a large baking sheet (or two) and spread out to cool slightly.
  • Serve warm or cold.

Notes

Store leftovers in an air-tight container.

Nutrition

Calories: 206kcal | Carbohydrates: 33g | Protein: 4g | Fat: 7g | Saturated Fat: 3g | Polyunsaturated Fat: 1g | Monounsaturated Fat: 1g | Trans Fat: 0.2g | Cholesterol: 13mg | Sodium: 549mg | Potassium: 83mg | Fiber: 2g | Sugar: 3g | Vitamin A: 496IU | Vitamin C: 4mg | Calcium: 90mg | Iron: 7mg

Nutritional values are approximate.

Sale
Mueller Pro-Series All-in-One, 12 Blade Mandoline…
  • Meal Prep MVP – A practical and innovative way to…
  • 12 Diverse Blades – With nine interchangeable…
OXO Good Grips 4 Piece Stainless Steel Measuring…
  • Set includes: 1/4 cup, 1/3 cup, 1/2 cup and 1 cup
  • Magnetic handles keep Cups together for storage…

Easy Cheesy Cauliflower using an Outdoor Griddle

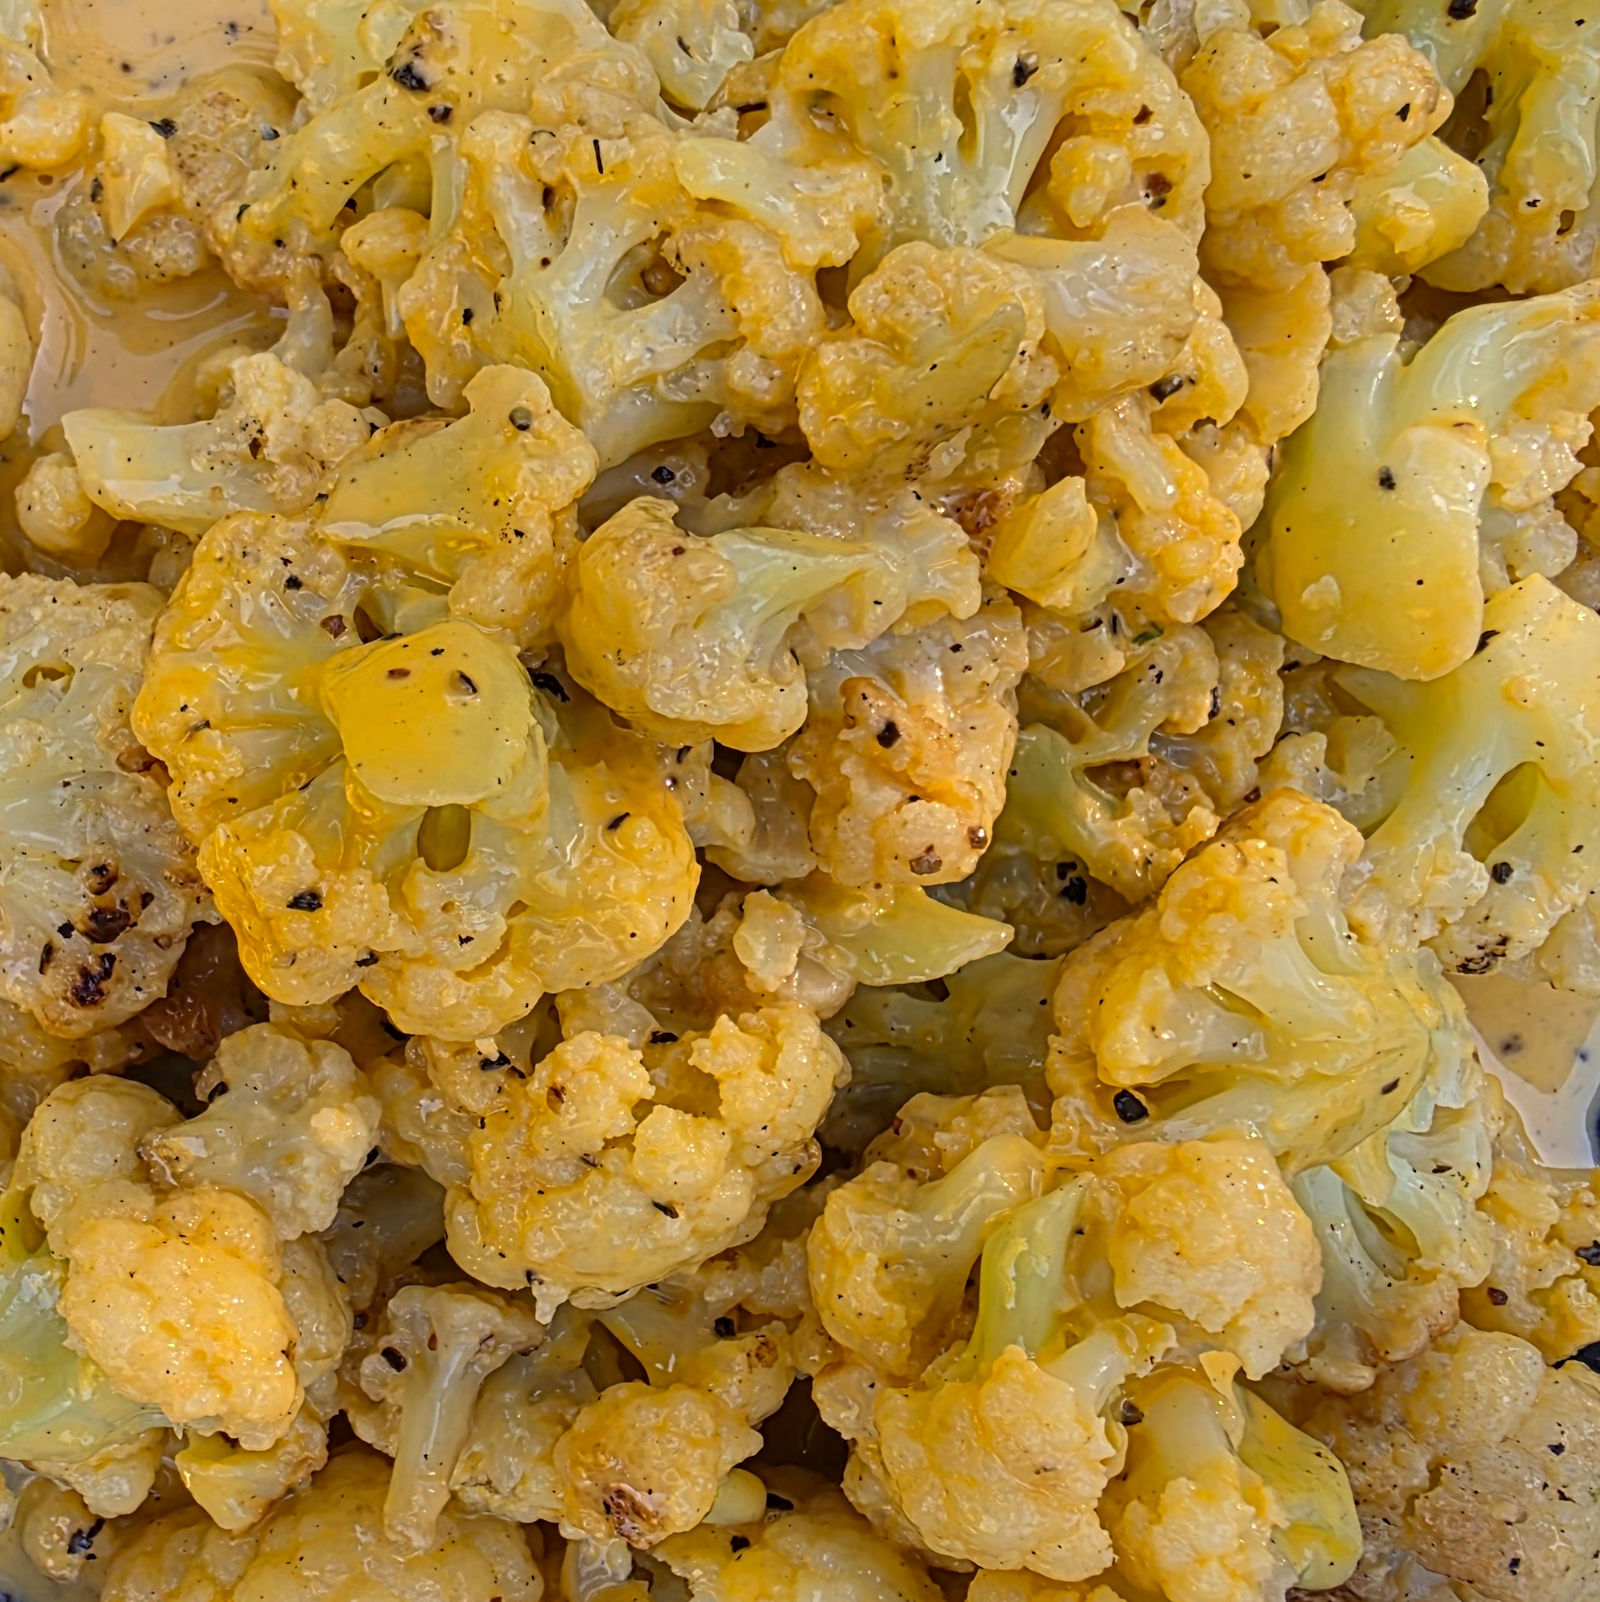
My outdoor griddle isn’t just for smash burgers, quesadillas and pizzas. I even use it for side dishes such as this easy cheesy cauliflower. Now, this might not be the healthiest side dish I’ve ever made outside. But it sure was one of the tastiest! And it’s definitely one of the easiest! This is the perfect thing to serve alongside my griddled smash burger!

Easy Cheesy Cauliflower using an Outdoor Griddle

Is Cheese Ever Optional?

You could leave out the cheese sauce. And just make easy cauliflower using an outdoor griddle. A little salt and pepper. Serve it up. And it’d be good. But for me, to get to ‘great’ you gotta add the cheese sauce. Kraft makes this crazy easy crazy good Velveeta sauce that comes in a little foil packet. You just pour the sauce into a bowl and microwave it for 30 seconds and boom! Instant cheese sauce perfect for something like cauliflower!

Easy Cheesy Cauliflower using an Outdoor Griddle
Weber® Griddle Essential Tool Set, 5‑Piece
  • Here’s your 5-piece set for griddle success…
  • Get creative with the right tools to make your own…

Also try my easy cheesy bacon broccoli made on the outdoor griddle!

Easy Cheesy Cauliflower using an Outdoor Griddle
Print Pin
5 from 1 vote

Easy Cheesy Cauliflower using an Outdoor Griddle

You could leave out the cheese sauce and still have a great cauliflower side dish.
Course Side
Cuisine American
Keyword broccoli, griddle
Prep Time 5 minutes
Cook Time 15 minutes
Servings 4
Calories 84kcal

Equipment

Ingredients

Instructions

  • Pre-heat your griddle over medium heat.
  • Open the bag of cauliflower and place on the griddle. Use your spatula to mound the cauliflower in a small circle.
  • Give the cauliflower a few good squirts of water and season well with salt and pepper.
  • Cover and let the cauliflower cook for 5 minutes.
  • Take a quick peek inside. I like to give the lid a good shake first or you can stir the broccoli with the lid off. If the cauliflower is drying out add more water. Feel free to add more salt and pepper too.
  • Keep cooking for up to 12 minutes total. Check it one more time after 10 minutes to make sure more water and/or seasoning isn't needed.
  • Remove the cauliflower to a medium bowl.
  • Empty the contents of the cheese sauce packet into a microwavable bowl and heat per package instructions, 30 seconds. Stir.
  • Spook the cheese sauce over the cauliflower .
  • Stir to combine.
  • Serve immediately.

Notes

This recipe can be made using fresh cauliflower instead. Bring a pot of lightly-salted water to a boil. Add the cauliflower and boil for 3-4 minutes until bright green and just starting to soften. Remove to an ice bath to cool completely. Drain well before placing onto the hot griddle.

Nutrition

Calories: 84kcal | Carbohydrates: 8g | Protein: 7g | Fat: 3g | Saturated Fat: 2g | Polyunsaturated Fat: 0.03g | Monounsaturated Fat: 0.03g | Cholesterol: 12mg | Sodium: 475mg | Potassium: 352mg | Fiber: 2g | Sugar: 4g | Vitamin A: 278IU | Vitamin C: 41mg | Calcium: 181mg | Iron: 0.4mg

Nutritional values are approximate.

Sale
Mueller Pro-Series All-in-One, 12 Blade Mandoline…
  • Meal Prep MVP – A practical and innovative way to…
  • 12 Diverse Blades – With nine interchangeable…
OXO Good Grips 4 Piece Stainless Steel Measuring…
  • Set includes: 1/4 cup, 1/3 cup, 1/2 cup and 1 cup
  • Magnetic handles keep Cups together for storage…

Ground Beef Nachos using an Outdoor Griddle

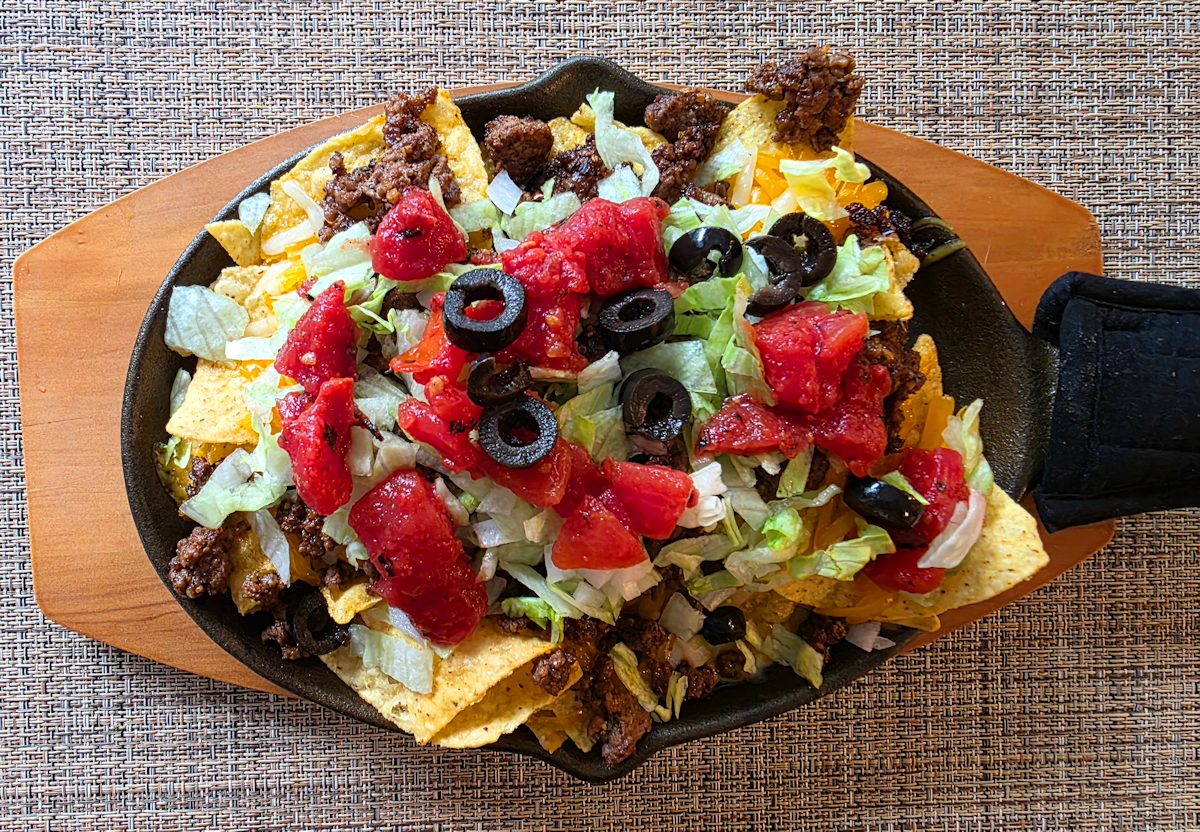
I love my outdoor griddle. It’s huge and cooks evenly, perfect for everything I want to make on it. Today I made ground beef nachos using an outdoor griddle. Now, usually, I’ll make this on the stovetop and in the oven. But, I love cooking outside so that’s where I went. I could’ve also made it on my indoor griddle, though it’s quite a bit smaller. No matter what griddle you use, this is a great easy way to have a delicious dish in really not much time at all.

Ground Beef Nachos using an Outdoor Griddle

That Crunch

A really well seasoned beef is key to these ground beef nachos using an outdoor griddle. And cooking it over high heat to get that great browned, slightly crunchy, texture. The beef smells amazing as it cooks. You know you’re in for something good as soon as it hits the griddle.

4 Sets Cast Iron Fajita Skillet Set Sizzling Plate…
  • Authentic Restaurant Experience: Enjoy…
  • Complete Safety System: The wooden base combined…

I use a few cast iron fajita skillets for serving my nachos. First, they’re kinda neat. Second, I can top them with the tortilla chips and place them over a low-heat area of my griddle to heat. If I’m cooking inside I just slide them into the oven over 225 F for 5-10 minutes. The chips get nice and crunchy and warm. Just remember, the skillets are hot. And that means the handles on them are hot. Don’t accidentally grab them with your bare hands, and always serve them with their little oven mitts covering the handles.

The Toppings

Beyond the delicious beef, chips, and cheese, everything is up to you. I like to have a combination of flavors and textures. I also like to have a few cold toppings, such as lettuce or sour cream. If I’m serving these with taco sauce I usually put it on the side because you never know how much you might want.

Weber® Griddle Essential Tool Set, 5‑Piece
  • Here’s your 5-piece set for griddle success…
  • Get creative with the right tools to make your own…

I love making smash burgers on my griddle, too! Check out my list of my favorite smash burger recipes.

Ground Beef Nachos using a Griddle
Print Pin
5 from 1 vote

Ground Beef Nachos using an Outdoor Griddle

Beyond the delicious beef, chips, and cheese, everything is up to you.
Course Main
Cuisine American
Keyword griddle, nachos
Prep Time 15 minutes
Cook Time 15 minutes
Servings 4
Calories 1575kcal

Equipment

Ingredients

For the nachos

  • 1 pound ground beef
  • 2 tablespoons taco seasoning from below, or your favorite
  • 8 cups tortilla chips more, or less
  • 4 ounces sharp cheddar cheese shredded
  • Your favorite nacho toppings salsa, shredded iceberg lettuce, jalapenos, black olives, etc

For the taco seasoning (store leftover in an air-tight container)

Instructions

For the nachos

  • Preheat your griddle over medium-high heat.
  • Crumble the ground beef onto the griddle and begin to brown. Break up the meat as it cooks using a spatula.
  • When the beef is about halfway cooked add the seasoning and stir. Continue cooking until done.
  • Meanwhile, divide the chips between the skillets and place them on a part of the griddle over low heat. Sprinkle with the cheese.
  • Once the meat is done and the cheese is melted, divide the ground beef between the skillets.
  • Using a pot holder, remove the skillets from the griddle and place into their heat-proof holders.
  • Add remaining desired nacho toppings and serve. Make sure you remind everyone that the skillet handles are hot!

For the taco seasoning (store leftover in an air-tight container)

  • Combine all ingredients in a bowl and mix well. I prefer to then transfer it to a spice grinder and give it a little grind so the resulting mix is a little finer.
  • To use, add 2-3 tablespoons to every 1 pound of ground beef.

Notes

Feel free to add onions or tomatoes to the beef as it cooks.

Nutrition

Calories: 1575kcal | Carbohydrates: 173g | Protein: 46g | Fat: 83g | Saturated Fat: 21g | Polyunsaturated Fat: 27g | Monounsaturated Fat: 26g | Trans Fat: 2g | Cholesterol: 109mg | Sodium: 3381mg | Potassium: 1195mg | Fiber: 19g | Sugar: 5g | Vitamin A: 5418IU | Vitamin C: 3mg | Calcium: 558mg | Iron: 10mg

Nutritional values are approximate.

Sale
Mueller Pro-Series All-in-One, 12 Blade Mandoline…
  • Meal Prep MVP – A practical and innovative way to…
  • 12 Diverse Blades – With nine interchangeable…
OXO Good Grips 4 Piece Stainless Steel Measuring…
  • Set includes: 1/4 cup, 1/3 cup, 1/2 cup and 1 cup
  • Magnetic handles keep Cups together for storage…

Quick Fix Habanero Pineapple Potato Chips

These quick fix habanero pineapple potato chips are different. Very different. If you’re tired of the same old 3 or 4 supermarket chip flavors, you’re gonna cure yourself with the first bite. Pineapple flavored chips are different for starters. A little sweet. Tropical. Then comes the heat. Habanero heat. ‘Not fooling around’ heat.

Quick Fix Habanero Pineapple Potato Chips

Cheap Chips. Great Results.

You don’t have to start out with expensive, name-brand chips when you make some quick fix salt pepper and garlic pineapple habanero chips. In fact, you’re gonna have great results with the cheapest chips you can find. Personally, I recommend wavy chips with ridges. Those ridges and waves help trap the seasonings and keep them on the chips. No big seasoning mounds in the bottom of the bowl here. You want that stuff to stick.

Go Light

I usually am pretty heavy handed with the seasoning when I flavor my chips. Not in this case, though. The seasoning is pretty forward. I recommend starting light and adding more after tasting, if needed.

Kinder’s Habanero Pineapple Seasoning, Adds Spicy…
  • FLAVOR YOUR WAY: Kinder’s Tequila Lime Seasoning…
  • NATURAL INGREDIENTS: Made with real lime juice and…

Also try some quick fix ginger teriyaki potato chips! They’re quite different too!

Quick Fix Habanero Pineapple Potato Chips
Print Pin
5 from 1 vote

Quick Fix Habanero Pineapple Potato Chips

The solution to boring potato chips.
Course Snack
Cuisine American
Keyword potato chips, quick fix
Prep Time 15 minutes
Cook Time 5 minutes
Servings 4
Calories 452kcal

Ingredients

Instructions

  • Preheat your oven to 275 F.
  • Spread chips out onto a baking sheet. Bake for 5 minutes. You should see that the oils in the chips have come to the surface.
  • Gently transfer chips to a large bowl and sprinkle with the seasoning. Use a spatula to carefully stir to coat.
  • Serve immediately.

Notes

Be gentle when stirring to avoid breaking the chips.

Nutrition

Calories: 452kcal | Carbohydrates: 46g | Protein: 5g | Fat: 29g | Saturated Fat: 3g | Polyunsaturated Fat: 7g | Monounsaturated Fat: 16g | Trans Fat: 1g | Sodium: 448mg | Potassium: 1020mg | Fiber: 3g | Sugar: 1g | Vitamin C: 18mg | Calcium: 18mg | Iron: 1mg

Nutritional values are approximate.

Sale
Mueller Pro-Series All-in-One, 12 Blade Mandoline…
  • Meal Prep MVP – A practical and innovative way to…
  • 12 Diverse Blades – With nine interchangeable…
OXO Good Grips 4 Piece Stainless Steel Measuring…
  • Set includes: 1/4 cup, 1/3 cup, 1/2 cup and 1 cup
  • Magnetic handles keep Cups together for storage…

Everything Bagel Seasoning Chex Mix using an Outdoor Griddle

This was my second time making a Chex Mix treat on my outdoor griddle. It has become my go-to snack when I’m outside grilling. Everything Bagel Seasoning Chex Mix using an outdoor griddle has a wonderful flavor. The seasoning really cranks up the taste from what is already a great treat. And the wonderful crunchy caramelization you get on each and every little tasty morsel, thanks to the griddle, is fantastic. Well, that and hey, it’s fun cooking outside on a griddle!

Everything Bagel Seasoning Chex Mix using an Outdoor Griddle

Make It Your Way

I admit it, I didn’t use the exact ingredients listed for this Everything Bagel seasoning Chex Mix using an outdoor griddle. Not the dry ones at least. The key is just get to around 13 or so cups of ‘stuff’. Chex cereal. Goldfish crackers. Whatever. It’s entirely up to you. Just keep the butter mix the way it is. Don’t mess with that. But go nuts with the snack part all you want. I’m a whatever-I-have-on-hand kind of guy so that’s what I used. Stuff I found in the pantry!

Sale
McCormick Culinary Everything Bagel Seasoning…
  • BURST OF FLAVOR: McCormick Culinary Everything…
  • SOURCED FOR CHEFS: Blended especially for chefs…

You can also make awesome popcorn on your griddle!

Everything Bagel Seasoning Chex Mix using a Griddle
Print Pin
5 from 1 vote

Everything Bagel Seasoning Chex Mix using an Outdoor Griddle

A super-tasty snack that feeds a small crowd!
Course Appetizer
Cuisine American
Keyword Chex mix, griddle
Prep Time 15 minutes
Cook Time 15 minutes
Servings 12
Calories 495kcal

Ingredients

For the dry

For the wet

Instructions

  • Pre-heat your griddle over low heat. Make sure that it’s clean. Depending on the size of your griddle, you might have to do make the mix in batches. The easiest way to do that is to halve the mix and butter mixture first.
  • In a large bowl, combine all of the dry ingredients.
  • Melt the butter in a small bowl or pot. Whisk in the remaining ingredients.
  • Add the butter mixture to the dry mixture and stir to coat and combine.
  • Add the Chex Mix ingredients to the griddle. Immediately spread it out.
  • You want to toast the mixture for 2 minutes. Keep it moving constantly or it will brown. You want it to get a little color to it. A little char here and there is fine too.
  • Keep the mixture moving as you continue to toast it. You’ll need 5-10 minutes to get it to the desired color and crispiness.
  • Immediately remove the mix to a large baking sheet (or two) and spread out to cool slightly.
  • Serve warm or cold. Store leftovers in an air-tight container.

Notes

The dry ingredients can be any of your favorites, just try to get to a total of 13 cups. 
Cover any leftover mix.

Nutrition

Calories: 495kcal | Carbohydrates: 64g | Protein: 12g | Fat: 25g | Saturated Fat: 8g | Polyunsaturated Fat: 5g | Monounsaturated Fat: 7g | Trans Fat: 0.5g | Cholesterol: 25mg | Sodium: 1496mg | Potassium: 316mg | Fiber: 8g | Sugar: 6g | Vitamin A: 735IU | Vitamin C: 6mg | Calcium: 131mg | Iron: 15mg

Nutritional values are approximate.

Weber® Griddle Essential Tool Set, 5‑Piece
  • Here’s your 5-piece set for griddle success…
  • Get creative with the right tools to make your own…

Air Fryer Smoked Sausage Sandwiches with Chimichurri Sauce

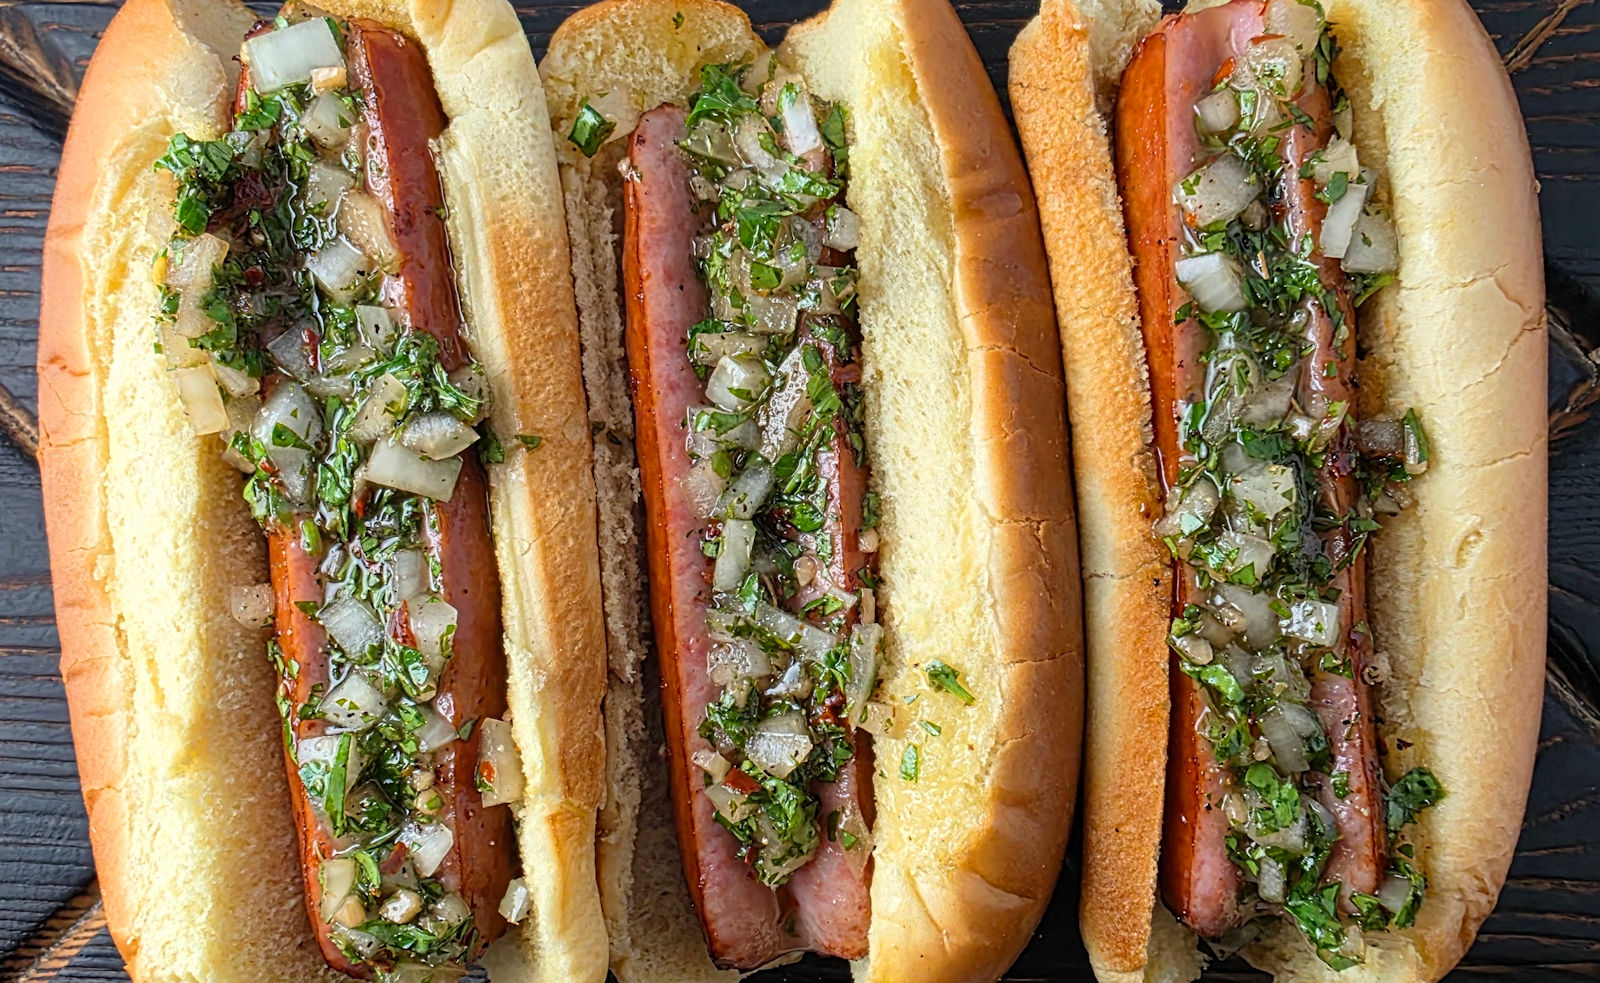
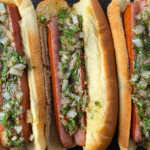
I really don’t know what happened to me. I made some of these air fryer smoked sausage sandwiches with chimichurri sauce and something ‘clicked’. Things changed in my world just like that. I could not get over how much I loved each and every bite. Maybe I just needed a change from my usual smoked sausage or hot dog dishes. What I was missing was chimichurri sauce. Boy, does it ever change up a boring sausage. Crunchy onions. Herbs. Oil and vinegar. It’s almost like having a salad dressing but oh, oh so much better.

Air Fryer Smoked Sausage Sandwiches with Chimichurri Sauce

Chimi-What

Don’t let the name fool you. The chimichurri sauce is easy to make. Usually it’s found on grilled beef or pork. I decided it needed to also be on my air fryer smoked sausage sandwiches. I actually doubled the sauce ingredients because I guessed that I was going to love it. And I did. I loaded up on it. I couldn’t get enough of it. Heck, I even dunked my smoked sausage in it. Now that’s true love right there!

PS: The sauce is also great on fried chicken or air fried chicken wings! Trust me! It’s not just for beef!

A Little Tip

I like to make a little cut lengthwise down my smoked sausages before I toss them into the air fryer. Not all the way through. I’d say halfway at most. As the sausages cook they open up a bit. Then, when I put them on the buns I put them cut-side up. That gives the toppings (such as the chimichurri sauce) a great place to settle in. And stay there. It’s so much better than taking a bit only to have the toppings squirt out the end.

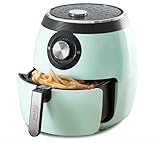
I use a pretty straight-forward air fryer, that doesn’t have a lot of bells (ok, it has a bell for when the timer goes off!) and whistles. It gets the job done.
Dash Deluxe Air Fryer – Adjustable Temperature…
  • Consistent Cooking Every Time: The Dash Deluxe Air…
  • Simple Operation, Tasty Results: This compact…

Also try my smoked sausage sandwiches with beer-braised onions.

Air Fryer Smoked Sausage Sandwiches with Chimichurri Sauce
Print Pin
5 from 2 votes

Air Fryer Smoked Sausage Sandwiches with Chimichurri Sauce

Wonderfully herby, flavorful sandwiches that are sure to impress!
Course Main
Cuisine American
Keyword air fryer, smoked sausage
Prep Time 15 minutes
Cook Time 15 minutes
Servings 4
Calories 353kcal

Ingredients

For the chimichurri sauce

For the smoked sausage sandwiches

  • 4 smoked sausage links or whatever links you prefer, such as hot dogs or andouille
  • 4 large hot dog buns split

Instructions

For the chimichurri sauce

  • Combine all ingredients and set aside until ready to use. Give the mixture another stir before using.

For the smoked sausage sandwiches

  • Preheat your air fryer to 390 F.
  • Add the buns and toast for 30 seconds. Remove.
  • Add the sausages and cook for 4-6 minutes until lightly charred, turning once.
  • Assemble sandwiches by placing links on buns and topping with plenty of the chimichurri sauce.

Notes

Store any leftover chimichurri in the fridge, covered. Let come to room temperature before stirring and serving.

Nutrition

Calories: 353kcal | Carbohydrates: 25g | Protein: 13g | Fat: 22g | Saturated Fat: 7g | Polyunsaturated Fat: 3g | Monounsaturated Fat: 10g | Cholesterol: 47mg | Sodium: 1621mg | Potassium: 242mg | Fiber: 2g | Sugar: 4g | Vitamin A: 438IU | Vitamin C: 6mg | Calcium: 101mg | Iron: 3mg

Nutritional values are approximate.

MFTEK XL Air Fryer Accessories-Air Fryer Rack Set…
  • FOOD GRADE HIGH QUALITY MATERIAL: MFTEK air fryer…
  • BEST AIRFRYER ACCESSORIES: Double layer rack for…

Quick Fix Cheesoning Potato Chips

I’m bored with store-bought flavored chips. Oh sure, companies keep trying to come up with new flavors to get us to buy them but usually they just don’t ‘wow’ me. That’s why, more and more, I season store-bought chips at home. The flavors are only limited by my imagination. Well, and my pantry! Today I made a batch of quick fix cheesoning potato chips. They came out great. They taste like parmesan chips, but they have an herby twist. Nice and savory. And gone quick too.

Quick Fix Cheesoning Potato Chips

Use Cheap Chips. Get Great Results.

You don’t have to start out with expensive, name-brand chips when you make some quick fix cheesoning potato chips. In fact, you’re gonna have great results with the cheapest chips you can find. Personally, I recommend wavy chips with those thick ridges. Ridges and waves help trap the seasonings and keep them on the chips. No big seasoning mounds in the bottom of the bowl here. You want that stuff to stick.

Be Heavy Handed

The Cheesoning seasoning from Dan-O’s is fairly mellow. So, it’s ok to be heavy handed with the seasoning. Big time. Load them up. If I wanted wimpy flavored chips I’d have bought the pre-made stuff. I want flavor. Everywhere. All over.

Dan-O’s Cheesoning Seasoning, 7.6 oz Bottle, All…
  • CHEESONING SEASONING: Providing a delicious taste…
  • IT’S DAN-GOOD: Dan-O’s Seasoning blends rich…

These chips go great with a cold cut sandwich.

Quick Fix Cheesoning Potato Chips
Print Pin
5 from 1 vote

Quick Fix Cheesoning Potato Chips

The solution to boring potato chips.
Course Snack
Cuisine American
Keyword potato chips, quick fix
Prep Time 15 minutes
Cook Time 5 minutes
Servings 4
Calories 452kcal

Ingredients

Instructions

  • Preheat your oven to 275 F.
  • Spread chips out onto a baking sheet. Bake for 5 minutes. You should see that the oils in the chips have come to the surface.
  • Gently transfer chips to a large bowl and sprinkle with the seasoning. Use a spatula to carefully stir to coat.
  • Serve immediately.

Notes

Be gentle when stirring to avoid breaking the chips.

Nutrition

Calories: 452kcal | Carbohydrates: 46g | Protein: 5g | Fat: 29g | Saturated Fat: 3g | Polyunsaturated Fat: 7g | Monounsaturated Fat: 16g | Trans Fat: 1g | Sodium: 448mg | Potassium: 1020mg | Fiber: 3g | Sugar: 1g | Vitamin C: 18mg | Calcium: 18mg | Iron: 1mg

Nutritional values are approximate.

Sale
Mueller Pro-Series All-in-One, 12 Blade Mandoline…
  • Meal Prep MVP – A practical and innovative way to…
  • 12 Diverse Blades – With nine interchangeable…
OXO Good Grips 4 Piece Stainless Steel Measuring…
  • Set includes: 1/4 cup, 1/3 cup, 1/2 cup and 1 cup
  • Magnetic handles keep Cups together for storage…

Quick Fix Seasoned Pizza Rolls

I’m not a complicated guy. My food doesn’t have to be all fancy fru-fru. I often find myself going back to the foods of my college bachelor days. Maybe with a twist or two here and there, but same kinda things. Like pizza rolls. I loved pizza rolls. Still do. And like everyone else, I’ve burned my tongue on them, popping them into my mouth long before they are cooled off. It happens. Today, I decided to heat up a few of my favorite flavor (supreme!) and add a bit of seasoning. Quick fix seasoned pizza rolls just have a little extra flavor. Not enough to be fru-fru, but definitely enough to be yummy!

Quick Fix Seasoned Pizza Rolls

Cheesoning Is The Reasoning

I’m a Dan-O’s Seasoning fan. So I grabbed some Cheesoning seasoning for my quick fix seasoned pizza rolls. It’s like a good grated Parmesan cheese, with some herbs and spices thrown in for good measure (and taste). It’s a great flavor that goes well with pizza rolls. Italian seasoning would be good too. Or pizza seasoning. No need to go crazy with it. Chances are that there’s something in your spice rack would be just great. We’re just taking regular good ole pizza rolls and making them a bit better.

Dan-O’s Cheesoning Seasoning, 7.6 oz Bottle, All…
  • CHEESONING SEASONING: Providing a delicious taste…
  • IT’S DAN-GOOD: Dan-O’s Seasoning blends rich…

My easy-to-make stromboli is delicious, too!

Seasoned Pizza Rolls
Print Pin
5 from 1 vote

Quick Fix Seasoned Pizza Rolls

Quick. Easy. And oh so yummy!
Course Appetizer
Cuisine American
Keyword pizza rolls
Prep Time 5 minutes
Cook Time 15 minutes
Servings 2
Calories 100kcal

Ingredients

  • 12 pizza rolls frozen. Use any flavor you want!
  • 1 tablespoon butter melted, optional
  • 1 tablespoon Dan-O's Cheesoning Seasoning to taste. Or use your favorite seasoning!
  • marinara sauce warmed, for serving

Instructions

  • Cook the pizza rolls according to the package instructions.
  • Transfer the rolls to a bowl.
  • If you are using the butter, drizzle the rolls with the butter and stir to coat.
  • Sprinkle the rolls with the seasoning.
  • Stir gently to coat.
  • Transfer to a plate along with some warmed marinara sauce and serve.

Nutrition

Calories: 100kcal | Carbohydrates: 15g | Protein: 3g | Fat: 4g | Saturated Fat: 2g | Cholesterol: 3mg | Sodium: 185mg | Potassium: 85mg | Sugar: 1g | Iron: 1mg

Nutritional values are approximate.

Sale
Mueller Pro-Series All-in-One, 12 Blade Mandoline…
  • Meal Prep MVP – A practical and innovative way to…
  • 12 Diverse Blades – With nine interchangeable…
OXO Good Grips 4 Piece Stainless Steel Measuring…
  • Set includes: 1/4 cup, 1/3 cup, 1/2 cup and 1 cup
  • Magnetic handles keep Cups together for storage…

Popcorn using an Outdoor Griddle

I started out down the road making popcorn using an outdoor griddle thinking it was… well, kinda gimmicky. One of those things you make once. You say to yourself “Well that was kinda neat”. Then you never do it again. Wrong! I made this popcorn 3 days in a row. I shared it with the neighbors. We all agree, it was awesome! The kernels popped up perfectly. The popcorn had a nice extra crunch to it. Fresh. Delicious. All I had to do was toss it with a little salt and serve!

Popcorn using an Outdoor Griddle

A Man And His Dome

Making popcorn using an outdoor griddle is pretty easy. You start out by heating a little oil for about 10 minutes. Then you add the kernels and cover them with a lid. Now here’s the first important thing. Once things get going, don’t lift the lid. Just don’t. You’ll hear popping. You’ll want to take a look. Don’t. Just don’t. Why? Because if you’re like me you have to do it once and when you do, you quickly learn your lesson. Yep. Popcorn everywhere. All over the griddle. On my deck. In the yard. Happiest day ever for the squirrels. Not so great a moment for me. So keep the lid down.

Popcorn using an Outdoor Griddle
Cuisinart CMD-108 Melting Dome, 9″,Stainless steel
  • EVEN MELTING: Traps heat under the dome to quickly…
  • ENHANCED FLAVOR: Griddle dome retains moisture to…
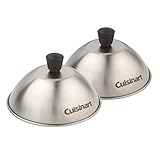
Cuisinart CMD-388 Melting Dome, 6″, 2-Pack
  • 2 Pack of 6″ diameter domes
  • Concentrates heat to cook evenly

Less Is More

Here’s a picture of me violating the rule of ‘don’t lift the lid’. I just wanted to show how easy this process is. Not a lot of kernels are needed. Ditto the oil. Don’t overload it. The popcorn only takes a few minutes once it gets going. It’s easier to make another batch than to try and handle one big batch.

Popcorn using an Outdoor Griddle

Once you hear the kernels pop, move the lid around on the griddle a bit. You don’t have to go nuts with it. You don’t have to shake it like Jiffy Pop popcorn. But move it a bit to keep any popped kernels from burning.

When you no longer hear popping move the lid over to a cooler part of the griddle and lift it up to scoop up the popcorn. I use two big spatulas to do it. It’s a bit of an art. The first time I dropped some popcorn. Second time I had it down and got them all.

Weber® Griddle Essential Tool Set, 5‑Piece
  • Here’s your 5-piece set for griddle success…
  • Get creative with the right tools to make your own…
Also try my baked Ranch sourdough pretzel bites.

Popcorn using a Griddle
Print Pin
5 from 1 vote

Popcorn using an Outdoor Griddle

Easy, delightfully-crunchy popcorn!
Course Appetizer, Snack
Cuisine American
Keyword griddle, popcorn
Prep Time 5 minutes
Cook Time 5 minutes
Servings 2
Calories 77kcal

Ingredients

Instructions

  • Heat up your griddle on medium heat for 10 minutes.
  • Drizzle the oil onto the center of your griddle.
  • Add the popcorn kernels.
  • Let the kernels warm up. Once you start to see the oil sizzle, turn the heat down to medium-low and cover the kernels with the dome.
  • Keep cooking until you hear the kernels start to pop. Using a grill mitt, grab the dome and slowly keep it moving in circles so that the popped kernels do not burn. Do not lift the dome while doing this.
  • Keep moving and cooking until the kernels go for 1-2 seconds without anything popping.
  • Slide the dome to a cooler area of the grill if possible. Remove the lid. Using a spatula, transfer the cooked popcorn to a medium bowl.
  • Sprinkle the popcorn with salt, toss, and serve.

Notes

Serve immediately for maximum flavor and crunchy!

Nutrition

Calories: 77kcal | Carbohydrates: 15g | Protein: 2g | Fat: 1g | Saturated Fat: 0.1g | Polyunsaturated Fat: 1g | Monounsaturated Fat: 0.2g | Sodium: 1mg | Potassium: 56mg | Fiber: 3g | Sugar: 0.2g | Calcium: 1mg | Iron: 1mg

Nutritional values are approximate.

Kernel Season’s Popcorn Seasoning Variety Pack…
  • Variety is the spice of life! Try out all Kernel…
  • With only 2 calories per serving Kernel Season’s…

Nashville Hot Chicken Cheesesteaks using an Outdoor Griddle

I need to start a new food category here on Life’s A Tomato. It’ll be called ‘so crazy good that I ate this 3 days in a row’. The first dish I’ll add to this new category will be this Nashville Hot Chicken cheesesteaks made using an outdoor griddle. This was good. Crazy good. A little spicy. Tender, juicy chicken that is packed with flavor. A little ooey-gooey cheese action. Crispy vegetables. And of course, a few pickles. This is one great sandwich!

Nashville Hot Chicken Cheesesteaks using an Outdoor Griddle

Easy Griddle Action

I haven’t had my large outdoor griddle for that long. I’ve used smaller griddles for burgers and the like for years. But the big one has made dishes like these Nashville Hot Chicken cheesesteaks a delight. There’s lots of room to cook up the onions and peppers then move them off to the side while my attention turns to the chicken. Room to toast the rolls, too.

Nashville Hot Chicken Cheesesteaks using an Outdoor Griddle

Spicy Like I Love It

These sandwiches have a nice kick to them. The seasoning and cheese bring it, but without being crazy spicy. I went a little heavy on both because I love a good spicy sandwich. If you’re into even more heat, add some jalapeno slices, either to the vegetables as they cook or the sandwich before serving. Or both!

McCormick Grill Mates Nashville Hot Chicken…
  • Sizzlin’ hot grilling seasoning blend of…
  • Inspired by the spicy-sweet flavor of…

These cheesesteaks are tasty and easy. Looking for something even easier, though? Try my garlic naan pizzas using an outdoor griddle.

Nashville Hot Chicken Cheesesteaks using an Outdoor Griddle
Print Pin
5 from 1 vote

Nashville Hot Chicken Cheesesteaks using an Outdoor Griddle

So good that you'll never miss the real things!
Course Main
Cuisine American
Keyword cheesesteak, chicken
Prep Time 15 minutes
Cook Time 15 minutes
Servings 6
Calories 527kcal

Ingredients

For the sauce

For the meat filling

  • 1 ½ pounds boneless skinless chicken thighs cut into bite-sized pieces
  • 1 tablespoon vegetable oil
  • 1 medium green bell pepper chopped
  • 1 medium yellow onion chopped
  • 6 slices pepper Jack cheese

For the sandwiches

Instructions

For the sauce

  • In a small bowl combine the mayonnaise, lemon juice, and 1 tablespoon of the hot chicken seasoning.
  • Cover and refrigerate until ready to use.

For the meat filling

  • Place the chicken pieces into a large bowl.
  • Drizzle with the oil and sprinkle with the remaining hot chicken seasoning. Mix until all of the chicken is coated evenly.
  • Cover and set aside until ready to serve. Toss chicken with oil and remaining 2 tablespoons
  • Preheat your outdoor griddle on high.
  • Add a splash or two of oil. Add the peppers and onions and cook, stirring often, until they are just starting to soften. Do not over cook them. You want a little bit of a crunch.
  • Move the pepper and onion mix to a cooler part of the grill to keep warm.
  • Add another splash or two of oil to the griddle and add the chicken.
  • Cook the chicken, stirring often, 5-7 minutes or until done.
  • Add the pepper and onion mixture and stir.
  • Spread the filling out evenly onto the griddle and top with the cheese slices.
  • As soon as the cheese starts to melt, assemble the sandwiches (below).

For the sandwiches

  • Slather the cut sides of the rolls with the sauce.
  • Use a long spatula to scoop up the chicken mixture and divide between the rolls.
  • Add a few pickle slices to each sandwich and serve.

Notes

For even spicier sandwiches, substitute pickled (or fresh) jalapeno slices for the pickles!

Nutrition

Calories: 527kcal | Carbohydrates: 36g | Protein: 33g | Fat: 27g | Saturated Fat: 7g | Polyunsaturated Fat: 10g | Monounsaturated Fat: 7g | Trans Fat: 0.1g | Cholesterol: 134mg | Sodium: 639mg | Potassium: 372mg | Fiber: 2g | Sugar: 6g | Vitamin A: 277IU | Vitamin C: 22mg | Calcium: 183mg | Iron: 12mg

Nutritional values are approximate.

Weber® Griddle Essential Tool Set, 5‑Piece
  • Here’s your 5-piece set for griddle success…
  • Get creative with the right tools to make your own…