Copycat Zax Sauce

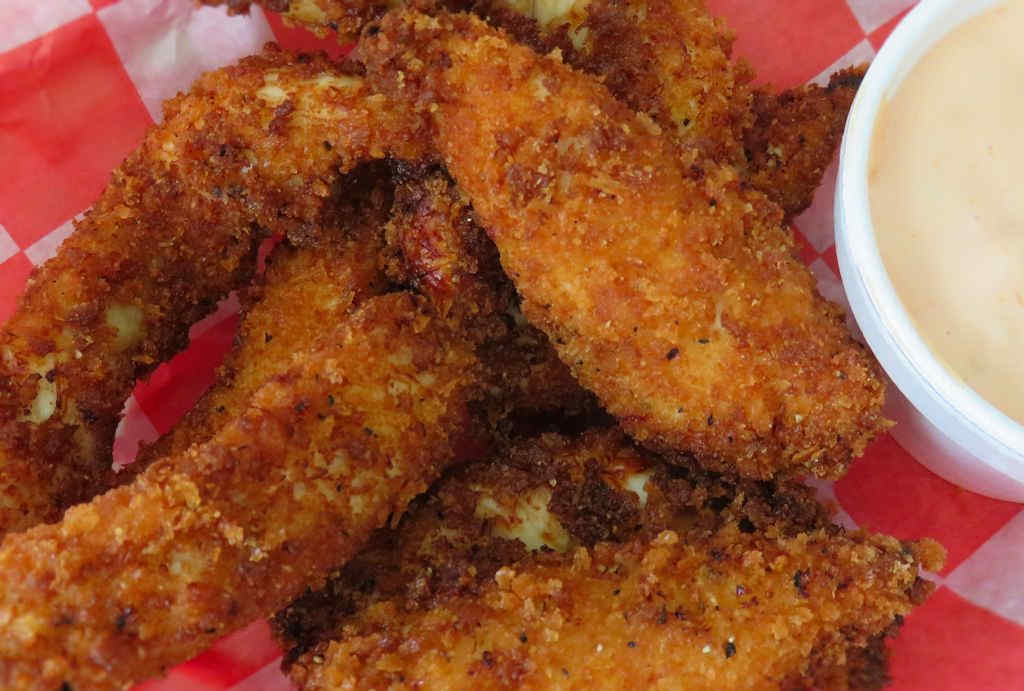
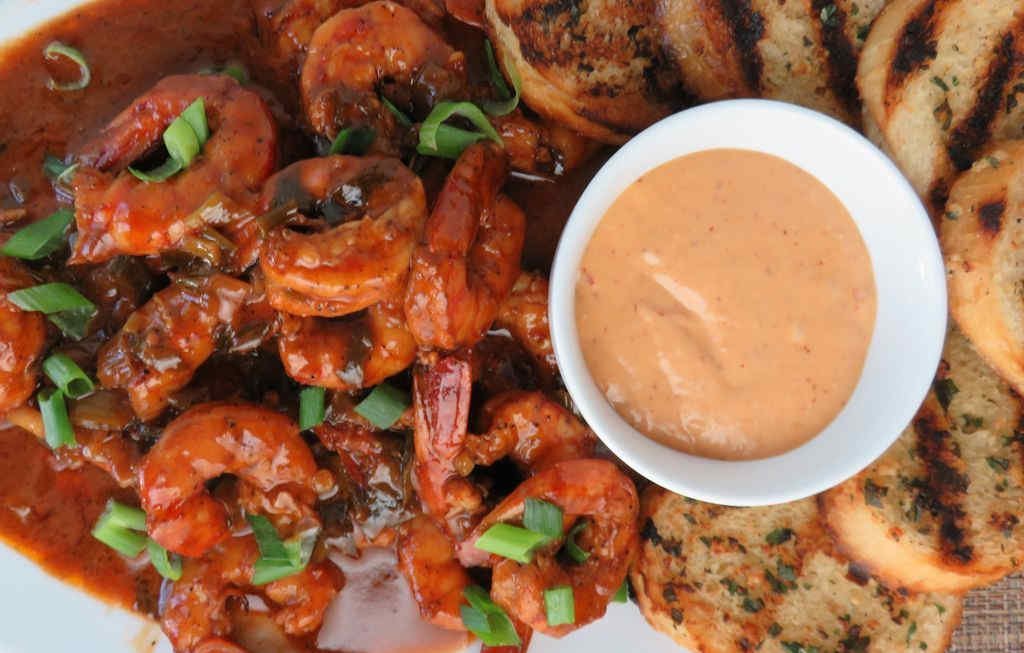
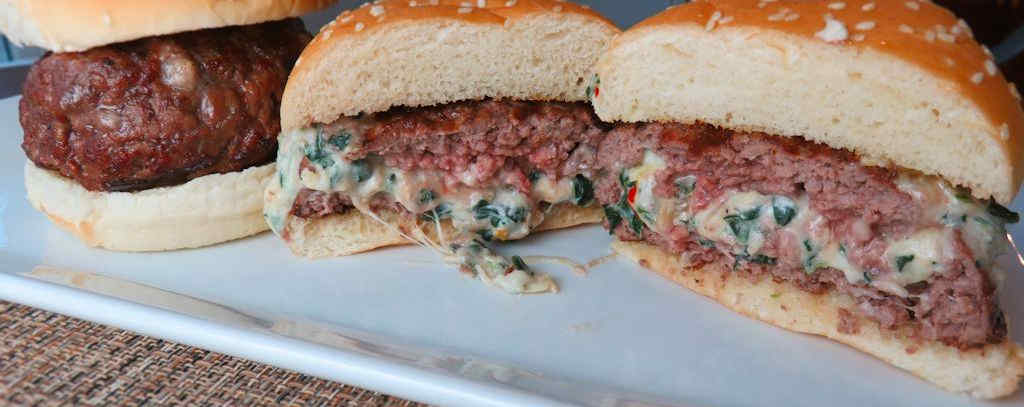
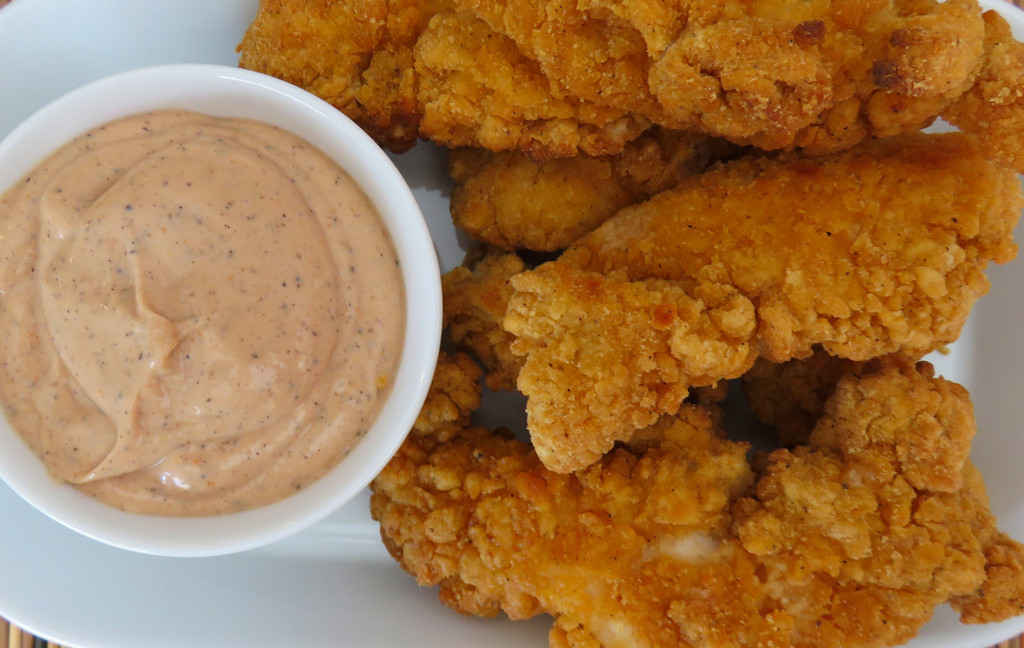
It was one of those days where I just needed a bit of a kick of inspiration. It was cold out and I just wanted to eat something out of a box. I didn’t want it to be blah though, so I made a batch of this copycat Zax sauce from Zaxby’s. Sure, I just dipped chicken fingers in it at first, but after that I used the sauce on sandwich wraps and hamburgers. It’s great no matter what you slather it on. Or dip in it.

Copycat Zax Sauce

Great Just As It Is

I was going to add some heat, some kick to this copycat Zax sauce, but I talked myself out of it. And I’m glad I did, too. It’s really quite good just as it is. And it does get better as it sits in the fridge so let it have that time.

Great For Fries, Too!

Oh did I mention you can dip French fries in this too? Why aren’t mayonnaise-based dipping sauces for fries aren’t more popular in the US? It’s such a welcome change from ketchup. We need a campaign here to show people how great creamy sauces are for dipping fries!

For dipping sauces, try my copycat of Chick-fil-A’s dipping sauce, firecracker dipping sauce or my chili dipping sauce. All are great for dipping my crazy-good chicken fingers.

Copycat Zax Sauce
Print Pin
5 from 1 vote

Copycat Zax Sauce

Sure, I just dipped chicken fingers in it at first, but after that I used the sauce on sandwich wraps and hamburgers. It’s great no matter what you slather it on. Or dip in it.
Course Sauce
Cuisine American
Keyword copycat, sauce
Cook Time 1 hour
Total Time 1 hour
Servings 1 cup
Calories 840kcal

Ingredients

Instructions

  • Whisk together all ingredients until smooth.
  • Refrigerate for at least 1 hour before using as a dip for chicken fingers, fries, or slathering on a burger or chicken sandwich.

Notes

Stir before serving.

Nutrition

Calories: 840kcal | Carbohydrates: 19g | Protein: 2g | Fat: 84g | Saturated Fat: 13g | Trans Fat: 1g | Cholesterol: 47mg | Sodium: 1271mg | Potassium: 268mg | Fiber: 1g | Sugar: 15g | Vitamin A: 393IU | Vitamin C: 3mg | Calcium: 30mg | Iron: 1mg

Nutritional values are approximate.

Smokehouse Beans

The Barbecue! Bible from Steven Raichlen is always a go-to book for me on all things barbecued. It is crammed full of so many fantastic recipes that I make time and time again. Like these smokehouse beans. They are so easy to make (with items I always have in my pantry or fridge) but come out just divine. Don’t waste your money on the canned version when you can make delicious BBQ beans on your smoker in less than 4 hours.

Smokehouse Beans

More Smoke. Or Less.

If you’re not a fan of liquid smoke, feel free to leave it out. But you’ll want to make up for it by making sure that your smoker is producing a good bit of smoke, so add a few extra chunks of wood if you do. Using double-smoked bacon will also add more fantastic smoke flavor.

Great On A Grill, Too.

You can also make smokehouse beans on a grill. Just use indirect heat. If you’re using a gas grill you might want to add a few chunks of wood to a wood box. If you don’t have one, that’s ok. The liquid smoke will still give you that smokehouse flavor.

Also try my peach BBQ beans.

Smokehouse Beans
Print Pin
5 from 1 vote

Smokehouse Beans

These smokehouse beans are so easy to make but come out just divine. Don't waste your money on canned barbecue beans. These are so much better.
Course Side Dish
Cuisine American
Keyword baked beans, smoked
Prep Time 15 minutes
Cook Time 3 hours
Total Time 3 hours 15 minutes
Servings 8 servings
Calories 396kcal

Ingredients

Instructions

  • Fire up your smoker for cooking at 225 F. I used plenty of hickory wood because I wanted a good amount of smoke flavor.
  • Cook the bacon pieces in a large pot or Dutch oven. Drain all but 2 tablespoons of the fat (optional).
  • Add the onion and garlic. Stir and cook until starting to soften, about 5 minutes.
  • Add the remaining ingredients. Transfer to a disposable pan and onto the smoker.
  • Smoke 2-3 hours, stirring occasionally. If the beans get too thick, stir in a bit more beer.

Notes

Don’t be afraid to add a few seeded, chopped jalapenos for a nice spicy edge.

Nutrition

Calories: 396kcal | Carbohydrates: 60g | Protein: 17g | Fat: 10g | Saturated Fat: 3g | Trans Fat: 1g | Cholesterol: 15mg | Sodium: 288mg | Potassium: 932mg | Fiber: 13g | Sugar: 20g | Vitamin A: 55IU | Vitamin C: 4mg | Calcium: 91mg | Iron: 5mg

Nutritional values are approximate.

Homemade Creamy Cheddar Soup

Four servings? Ok, maybe. You’ll think that before you taste this homemade creamy cheddar soup. After that first taste you’ll be thinking… only one serving! And all mine! So creamy. So rich. And just the right amount of cheesiness! Not so thick that it’s a dip, not so thin that it’s a… uh.. er.. something thin! It’s the perfect lunchtime soup too since it takes nearly no time at all to make!

Homemade Creamy Cheddar Soup

Warms You To The Bone

Now, this homemade creamy cheddar soup is perfect as it is. But I really like the little sprinkle of cayenne at the end. That little heat offsets the sweetness and creaminess of the soup just perfectly. You can leave it off. Or you can use paprika instead, adding a bit of color.

For the best results, use quality or even homemade chicken stock. I save my chicken trimmings in the freezer and make big batches of stock every few months. It’s worth the extra effort and time and it shows in the final result, like this soup.

I highly recommend that you hand-shred your cheese for this or any other dish. Don’t buy the pre-shredded or pre-grated stuff. It has stuff added to it to keep it from sticking together. That ‘stuff’ affects how the cheese melts. Get the real stuff.

Also try my celery and cheddar, creamy pimento cheese and my to-die-for creamy cheese and tomato soups.

Creamy Cheddar Soup
Print Pin
5 from 1 vote

Homemade Creamy Cheddar Soup

Four servings? Ok, maybe. You’ll think that before you taste this creamy cheddar soup. After that first taste you’ll be thinking… only one serving! And all mine! 
Course Main
Cuisine American
Keyword cheddar, creamy, soup
Prep Time 5 minutes
Cook Time 20 minutes
Total Time 25 minutes
Servings 4 servings
Calories 484kcal

Equipment

Ingredients

Instructions

  • Melt butter in a large saucepan over medium heat.
  • Add the onion and bell pepper and saute for 5-7 minutes or until just starting to soften.
  • Add the chicken stock and cream. Stir and cook until thickened.
  • Add the cheese and stir.
  • Add 1/4 cup of the green onions, salt and pepper to taste, and the cayenne if using. Stir.
  • Serve garnished with remaining green onions and a dash of cayenne if desired.

Notes

Try a mix of cheeses, such as Monterey jack or pepper jack.

Nutrition

Calories: 484kcal | Carbohydrates: 16g | Protein: 12g | Fat: 42g | Saturated Fat: 26g | Cholesterol: 149mg | Sodium: 353mg | Potassium: 358mg | Fiber: 1g | Sugar: 5g | Vitamin A: 2613IU | Vitamin C: 42mg | Calcium: 243mg | Iron: 1mg

Nutritional values are approximate.

State Fair Chicken on the Char-Broil Big Easy

Note: This recipe was developed using the Char-Broil Big Easy Oil-Less Fryer. If you are cooking using the Char-Broil Smoker-Roaster Grill you should cook with the lid open and the temperature set to High. You might also need to adjust the cooking time.

If you’ve ever marinated chicken in Italian salad dressing, then you can begin to have an idea of the flavors State Fair Chicken BBQ sauce will bring to your next chicken cooked in the Char-Broil Big Easy. I say ‘begin to’ because State Fair sauce is so much more. It’s vinegar-based, and all-natural. It adds tremendous flavor, and tenderness and juiciness to boot. As an added bonus it smells great while it’s cooking too!

State Fair Chicken on the Char-Broil Big Easy

Delicious Tender Chicken

I really enjoyed this State Fair Chicken on the Char-Broil Big Easy. Like Italian dressing, State Fair Chicken BBQ sauce is not only great as a chicken marinade, but it can also be used on salads just like a salad dressing. This stuff is good. Get you some!

I prefer to use skin-on, bone-in split chicken breasts when cooking poultry on my Big Easy.

Also try my Chik’N-Lik’N chicken and my Old Colony chicken, both made on the Char-Broil Big Easy.

It’s always a good idea to keep a few spare grease trays on hand for your Char-Broil Big Easy.

Love your Big Easy as much I love mine? Check out my Big Easy Add-Ons page and my free Big Easy eCookbook!

State Fair Chicken on the Char-Broil Big Easy
Print Pin
5 from 1 vote

State Fair Chicken on the Char-Broil Big Easy

If you’ve ever marinated chicken in Italian salad dressing, then you can begin to have an idea of the flavors this sauce will bring to your next chicken.
Course Main
Cuisine American
Keyword Big Easy, Char-Broil, chicken
Prep Time 4 hours
Cook Time 1 hour 20 minutes
Total Time 5 hours 20 minutes
Servings 4 servings
Calories 258kcal

Ingredients

Instructions

  • Place the chicken into a resealable bag or container.
  • Add marinade to taste. Toss to coat.
  • Seal and refrigerate for at least 4 hours, turning occasionally.
  • Fire up your Big Easy.
  • Transfer the chicken to the Big Easy basket.
  • Cook for approximately 20 minutes per pound or until it reaches 165 F as checked in several places.
  • Remove and let rest 10 minutes before serving.

Notes

Use whichever cuts or chicken you prefer.

Nutrition

Calories: 258kcal | Protein: 48g | Fat: 6g | Saturated Fat: 1g | Trans Fat: 1g | Cholesterol: 145mg | Sodium: 262mg | Potassium: 836mg | Vitamin A: 68IU | Vitamin C: 3mg | Calcium: 11mg | Iron: 1mg

Nutritional values are approximate.

Harvest Chex Mix

You want to talk about disappearing fast. This Harvest Chex Mix was gone in just minutes when my wife took it into the office to share with her co-workers. It’s a wonderful combination of sweet treats, mixed in with cereal, Bugles and pretzels. All coated in a delicious buttery brown sugar coating. You cannot just eat one handful, that’s for sure!

Harvest Chex Mix

Welcome To Fall!

You can pretty much add whatever your autumn favorites are into the Harvest Chex Mix. Just make sure that you let the baked mixture cool completely first. You don’t want a melty gooey mess!

I used rice Chex for this mix. You can use any of the other varieties instead.

You will need a very large bowl or container as this recipe does make a good-sized batch of mix.

Also try my Southwestern Chex Mix.

Harvest Chex Mix
Print Pin
5 from 1 vote

Harvest Chex Mix

You want to talk about disappearing fast. This Harvest Chex Mix was gone in just minutes when we took it into the office to share with co-workers.
Course Snack
Cuisine American
Keyword Chex mix
Prep Time 10 minutes
Cook Time 45 minutes
Cooling time 30 minutes
Servings 20 servings
Calories 149kcal

Ingredients

For the sauce

For the mix

Instructions

  • Preheat your oven to 275 F.
  • Line two large baking sheets with parchment paper.
  • Whisk the sauce ingredients in a bowl until the brown sugar is dissolved.
  • Place the Chex, pretzels and Bugles into a very large bowl.
  • Stir gently to mix.
  • Pour the sauce over the mixture and stir gently to coat evenly.
  • Divide the mixture between the two baking sheets and spread out evenly.
  • Bake for 45 minutes, stirring gently every 15 minutes.
  • Remove from the oven and let cool for 20-30 minutes.
  • Add mixture to a large bowl.
  • Add the candy corn, pumpkins and Reese's pieces.
  • Stir gently to combine.
  • Store in an airtight container.

Notes

Nutritional values for some of the candies are missing from the final totals.

Nutrition

Calories: 149kcal | Carbohydrates: 34g | Protein: 2g | Fat: 1g | Saturated Fat: 1g | Cholesterol: 1mg | Sodium: 192mg | Potassium: 61mg | Fiber: 1g | Sugar: 20g | Vitamin A: 335IU | Vitamin C: 4mg | Calcium: 86mg | Iron: 6mg

Nutritional values are approximate.

The Best Chicken Fingers

Oh my goodness. Give me a plate of these chicken fingers and some of the dipping sauce and stand back because I’m going in! Calling these the “best” is not only accurate it’s an understatement! The chicken is moist and tender. It isn’t dried out like some of the chicken finger recipes we’ve all made. The batter adheres perfectly and has just the right crunch. No batter loss here and no breading that’s so crunchy you’d swear you were biting into pebbles. This is spot-on great stuff here!

The Best Chicken Fingers

It’s Not Really Spicy

Although this recipe calls for adding a bit of hot sauce to the marinade I wouldn’t let that scare you off from making them for your We-don’t-like-spicy friends. The chicken is by no means spicy hot. The heat is very subtle. If you have to go without it substitute apple cider vinegar or white vinegar. Personally, I’d double the amount of hot sauce and add a bit of cayenne or chipotle powder to the breading next time!

If I’m cooking for a crowd, I’ll break out my big deep fryer. But, if it’s just the two of us, I’ll fire up my Fry Daddy fryer. It’s the perfect size for both of us. It fries everything perfectly. And as an added bonus, it doesn’t use a lot of oil, which saves me money.

I get out my big deep fryer when it’s time to fry a large batch of food. It comes to temperature quickly and it maintains that temperature perfectly. It has a built-in oil filter and storage unit so I can re-use the oil several times.

Dip your chicken fingers in my copycat Zax sauce!

The Best Chicken Fingers
Print Pin
5 from 1 vote

The Best Chicken Fingers

Oh my goodness. Give me a plate of these chicken fingers and some of the dipping sauce and stand back because I’m going in! Calling these the “best” is not only accurate it’s an understatement! 
Course Appetizer
Cuisine American
Keyword chicken fingers
Prep Time 45 minutes
Cook Time 20 minutes
Total Time 1 hour 5 minutes
Servings 6
Calories 313kcal
Author Inspired by Butter With A Side Of Bread

Ingredients

For the chicken

  • 2 boneless skinless chicken breasts or chicken tenderloins

For the marinade

For the breading

For the Chicken Finger Dipping Sauce

Instructions

For the chicken

  • Cut into strips or nuggets. Try to make the pieces as close to the same size as possible.
  • Whisk together the marinade ingredients. Add in the chicken pieces and coat well. Cover and refrigerate for 30 minutes.
  • Combine the breading ingredients in a pie plate or bowl.
  • Heat the oil in a deep fryer or Dutch oven until 365 F.
  • Working in batches, remove the chicken pieces from the marinade. Shake off excess and transfer to the fryer. Fry 2-4 minutes per side, flipping once. Remove to a paper-towel lined plate to drain.
  • Serve with the Chicken Finger Dipping Sauce.

For the Chicken Finger Dipping Sauce

  • Whisk together all ingredients.

Notes

Leftover chicken fingers can be frozen and reheated later.

Nutrition

Calories: 313kcal | Carbohydrates: 26g | Protein: 13g | Fat: 17g | Saturated Fat: 3g | Trans Fat: 1g | Cholesterol: 36mg | Sodium: 843mg | Potassium: 290mg | Fiber: 1g | Sugar: 6g | Vitamin A: 142IU | Vitamin C: 2mg | Calcium: 85mg | Iron: 2mg

Nutritional values are approximate.

Plank-Smoked Camembert

Disappeared. Like that. Plank-smoked Camembert is creamy, lightly smoky, and just incredibly delicious. Oh, and it has just a little kick. Don’t be afraid of it. That little heat offsets the sweetness perfectly. You won’t be able to get enough. I couldn’t. This is one of the best uses of a cedar plank ever!

Plank-Smoked Camembert

Try It Other Ways, Too

I could easily see making several variations on this plank-smoked Camembert for a party. You have to make this recipe as-is, for sure. Then maybe try a few different jellies. Try a few without jalapenos. Or try it with more jalapenos! Mix it up. They’re super easy to make, they look absolutely amazing, and they taste fantastic. You can put several on a single cedar plank, and make a cheese buffet!

Don’t buy any el cheapo cedar planks for this or any other dish. Get the good stuff and you won’t ever look back. Cheap planks split, warm and have splinters. Good planks are thicker, stay flat and have smoother edges.

You’ll also love plank-smoked Twinkies and my cedar-planked Bloomin’ Onions. Cedar planks add a little something to just about anything you would normally grill on a grates, so don’t be afraid to cook on them instead!

Plank-Smoked Camembert
Print Pin
5 from 1 vote

Plank-Smoked Camembert

Disappeared. Like that. Plank-smoked Camembert is creamy, lightly smoky, and just incredibly delicious. Oh, and it has just a little kick. Don’t be afraid of it. That little heat offsets the sweetness perfectly.
Course Appetizer
Cuisine American
Keyword cedar plank, cheese
Prep Time 10 minutes
Cook Time 30 minutes
Total Time 40 minutes
Servings 6 servings
Calories 114kcal

Ingredients

  • 8 ounces Camembert cheese
  • 3 tablespoons jalapeno pepper jelly
  • 1 large jalapeno pepper sliced thin
  • Crackers for serving

Instructions

  • Fire up your grill for direct and indirect cooking.
  • Place the cedar plank over direct heat and grill until it is singed.
  • Flip and singe the other side.
  • Remove and let cool slightly.
  • Unwrap the cheese and place in the center of the plank.
  • Top with the jelly, spreading it out over the top.
  • Add the jalapeno slices.
  • Return the plank to the grill, this time over indirect heat.
  • Grill until the cheese is starting to melt, 8-10 minutes.
  • Remove the plank from the grill.
  • Serve with crackers.

Notes

The jalapenos are optional but they add great flavor along with just a little heat.

Nutrition

Calories: 114kcal | Carbohydrates: 1g | Protein: 8g | Fat: 9g | Saturated Fat: 6g | Cholesterol: 27mg | Sodium: 318mg | Potassium: 76mg | Fiber: 1g | Sugar: 1g | Vitamin A: 335IU | Vitamin C: 3mg | Calcium: 147mg | Iron: 1mg

Nutritional values are approximate.

Dried Rosemary on the Nesco Snackmaster Pro

I tend to be a dry-herb kind of guy, but sometimes a recipe needs fresh instead. To keep from wasting any unused fresh herbs I just toss them onto my Nesco Snackmaster Pro dehydrator and let them dry for later use. I needed rosemary for a dish I was making (rosemary grilled potatoes, using the rosemary as a skewer!), and had a few sprigs left. I could’ve kept the rosemary intact, but I opted to remove it from the sprigs instead. You can do it either way, there’s no way to really screw up dried rosemary on the Nesco Snackmaster Pro.

Dried Rosemary on the Nesco Snackmaster Pro

Storage

I keep the dried rosemary made on the Nesco Snackmaster Pro in air-tight containers. So I remember what is what, I write the contents on a small piece of blue painter’s masking tape. The tape is great for marking items, dry or in the freezer or wherever. It peels off so easily, you never have to worry about fussing with it. I use the same tape to keep track of the trays in my dehydrator. Often you have to rotate them, and numbering them makes sure I do it correctly.

You can dry any fresh herbs in the Nesco Snackmaster Pro. Like cilantro, dill and basil.

Dried Rosemary on the Nesco Snackmaster Pro
Print Pin
5 from 1 vote

Dried Rosemary on the Nesco Snackmaster Pro

Course Dehydrator
Cuisine American
Keyword dehydrator, rosemary
Prep Time 5 minutes
Cook Time 8 hours
Total Time 8 hours 5 minutes
Author Mike

Ingredients

  • Fresh rosemary

Instructions

  • Rinse the rosemary to remove any foreign material.
  • Dry well with kitchen towels.
  • Optionally: remove the rosemary from the sprigs
  • Place onto the Nesco Snackmaster Pro trays. Do not let the sprigs overlap.
  • Dry at 95 F for 6-8 hours. Rotate the trays every hour or so.
  • If drying whole sprigs, remove the rosemary from them.
  • Store in an air-tight container.

Notes

You’ll definitely want some extra trays for your dehydrator so you can make plenty of dried rosemary.

Nutritional values are approximate.

NOLA Smoked Shrimp

I’m not going to lie. Saying that this recipe for NOLA smoked shrimp makes 4 servings is a bit of a stretch. At least for me. I am a total shrimp addict. These shrimp are so crazy good I could not stop eating them. The shrimp have a fantastic, slightly spicy flavor. Smoking them produces more flavor and a slightly different, softer, bite than if they were grilled. They’re different in a really good way. The sauce, well, the sauce is amazing. That’s why you need the bread (I recommend my copycat Red Lobster Cheddar Bay Biscuits). You need to do some serious sopping with this dish.

NOLA Smoked Shrimp

The Perfect Shrimp

I served NOLA smoked shrimp with some chilled Louisiana remoulade. I wanted (needed) something cooling for the shrimp, and the remoulade hit the spot perfectly. This is one seriously great dish, and one I’ll make again and again for sure. I’ll just have to double the recipe if anyone else wants any.

I used a grill basket when I cooked these shrimp.

Also try my pecan smoked shrimp.

NOLA Smoked Shrimp
Print Pin
5 from 1 vote

NOLA Smoked Shrimp

I’m not going to lie. Saying that this recipe for NOLA smoked shrimp makes 4 servings is a bit of a stretch. At least for me. 
Course Main
Cuisine American
Keyword shrimp, smoked
Prep Time 15 minutes
Cook Time 45 minutes
Servings 4 servings
Calories 562kcal

Ingredients

For the shrimp

For the barbecue sauce

Instructions

For the shrimp

  • Fire up your smoker for smoking at 250 F. Use any wood you like, but I went with a lighter wood, apple. Shrimp likes to absorb smoke so I didn't want to use a strongly flavored wood.
  • Place the shrimp in a large bowl and drizzle with the oil. Toss to coat.
  • Add the seasoning and toss to coat.
  • Transfer the shrimp to your smoker and smoke for 45 minutes or until golden brown and cooked through.
  • While the shrimp is smoking make the sauce.
  • When the shrimp is done add to the sauce and serve garnished with the remaining green onions.

For the barbecue sauce

  • Melt 3 tablespoons of the butter in a large skillet over medium-high heat.
  • Add 2 tablespoons of the green parts of the green onions and all of white parts.
  • Saute for 3 minutes.
  • Add the bourbon and beer and boil until reduced by half.
  • Add the barbecue sauce, Worcestershire, lemon juice and brown sugar. Boil for 1 minute.
  • Add the heavy cream, the remaining butter, and the hot sauce. Let boil until thickened, about 5 minutes.
  • Season with salt and pepper.

Notes

Serve with hot bread, for soppin’.

Nutrition

Calories: 562kcal | Carbohydrates: 12g | Protein: 48g | Fat: 32g | Saturated Fat: 16g | Trans Fat: 1g | Cholesterol: 644mg | Sodium: 1991mg | Potassium: 492mg | Fiber: 2g | Sugar: 7g | Vitamin A: 3537IU | Vitamin C: 17mg | Calcium: 386mg | Iron: 7mg

Nutritional values are approximate.

Spinach and Artichoke Stuffed Burgers

I was looking for something different. As much as I love grilling beef patties on a grill, simple and tasty, I wanted something bigger. Something new. These spinach and artichoke stuffed burgers were just flat-out crazy delicious. Every bite is full of perfectly seasoned beef and a wonderful cheesy mixture that has just a slight kick. This is one great burger!

Spinach and Artichoke Stuffed Burgers

Wow. Just Wow.

The recipe below for spinach and artichoke stuffed burgers makes 8 good-sized burgers. You want to pack them full of the cheese mixture, but not over-pack them or they will certainly burst open on the grill. You might end up with leftover cheese mix, which is great because it’s also awesome as a dip!

Flip With Care

Don’t go crazy flipping your spinach and artichoke burgers on the grill (I love my Weber grills!). One time, that’s it. And carefully. Treat them as if you’re cooking raw eggs and don’t over-work them.

I use this nifty little ole burger press to make these burgers. It’s the best thing ever for stuffing burgers with just about anything you can think of!

Also try my spinach and artichoke grilled cheese sandwiches.

Spinach and Artichoke Stuffed Burgers
Print Pin
5 from 1 vote

Spinach and Artichoke Stuffed Burgers

These spinach and artichoke stuffed burgers were just flat-out crazy delicious. Every bite is full or perfectly seasoned beef and a wonderful cheesy mixture that has just a slight kick.
Course Main
Cuisine American
Keyword artichokes, burgers, spinach
Prep Time 15 minutes
Cook Time 15 minutes
Servings 8
Calories 780kcal

Equipment

Ingredients

Instructions

  • Add the cream cheese, mozzarella, Parmesan, spinach, chopped artichoke hearts, garlic and red pepper flakes to a large bowl. Stir to combine.
  • Add salt and pepper to taste.
  • Divide the beef into 16 equally sized balls and flatten into thin patties.
  • Place 2 tablespoons of the cheese mixture into the middle of 8 of the patties.
  • Add another patty on top and pinch the seams to seal.
  • Season the burgers with salt and pepper on both sides.
  • Fire up your grill for medium-high direct cooking.
  • Lightly brush the patties on both sides with vegetable oil and add to the grill.
  • Cook 4-5 minutes per side or until they reach the desired doneness.
  • Lightly toast the buns and and top with the cooked burgers.

Notes

You can substitute ground chicken, turkey or pork for the beef.

Nutrition

Calories: 780kcal | Carbohydrates: 27g | Protein: 45g | Fat: 53g | Saturated Fat: 24g | Trans Fat: 2g | Cholesterol: 178mg | Sodium: 958mg | Potassium: 655mg | Fiber: 3g | Sugar: 5g | Vitamin A: 2980IU | Vitamin C: 2mg | Calcium: 376mg | Iron: 5mg

Nutritional values are approximate.